


Configuration for SNMPv1 & SNMPv2c
Introduction
Simple Network Management Protocol (SNMP) is a widely used network management protocol that runs on Transmission Control Protocol and Internet Protocol networks. You use SNMP to manage network devices from a central location and clearly see how each device operates. In addition, SNMP helps you detect problems early and respond quickly, which helps you keep the network stable and reliable.
An SNMP system includes four main elements: an SNMP manager, an SNMP agent, a Management Information Base (MIB), and the communication between them. The SNMP manager usually runs on a network management system, and you use it to send management requests to devices. The SNMP agent runs directly on a managed device, such as a switch or router, and it processes requests from the manager and sends back responses.
The Management Information Base, commonly called the MIB, stores device management data in a clear, hierarchical structure. You can view the MIB as a tree in which each node represents a specific device attribute, such as interface status or system uptime. Each attribute has a unique object identifier, which allows you to locate and access information easily.
In daily operations, you use the SNMP manager to read or change values in the MIB so you can monitor performance or adjust device settings. At the same time, the SNMP agent sends notifications when important events occur, which helps you stay aware of network changes. As a result, you gain better visibility into your network and manage it more efficiently.
Requirements
- Omada Controller (Software Controller / Hardware Controller / Cloud-Based Controller, v6.0 and above)
Configuration
The following section describes how to configure SNMP functions in controller mode. Some features of SNMPv3 are available only in versions later than 6.2.10.
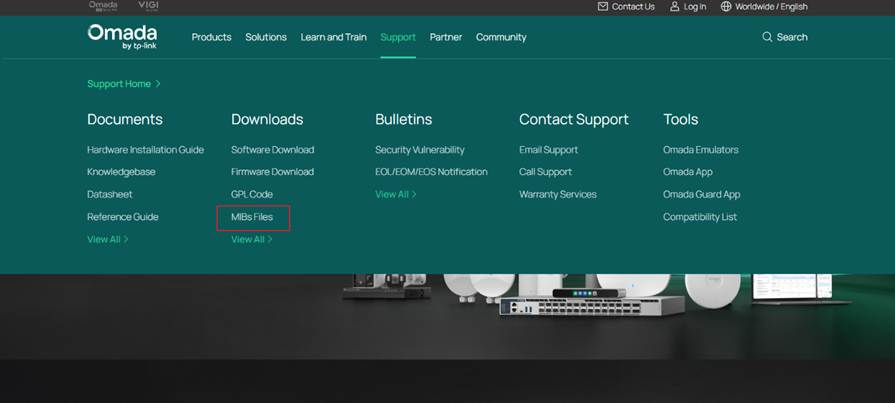
For the MIB nodes required by the SNMP feature, you can find TP-Link private nodes on the TP-Link official website. You can also click MIBs Files Download to access them directly.
Configuration for SNMPv1 & SNMPv2c
The following section introduces the SNMP configuration parameters.
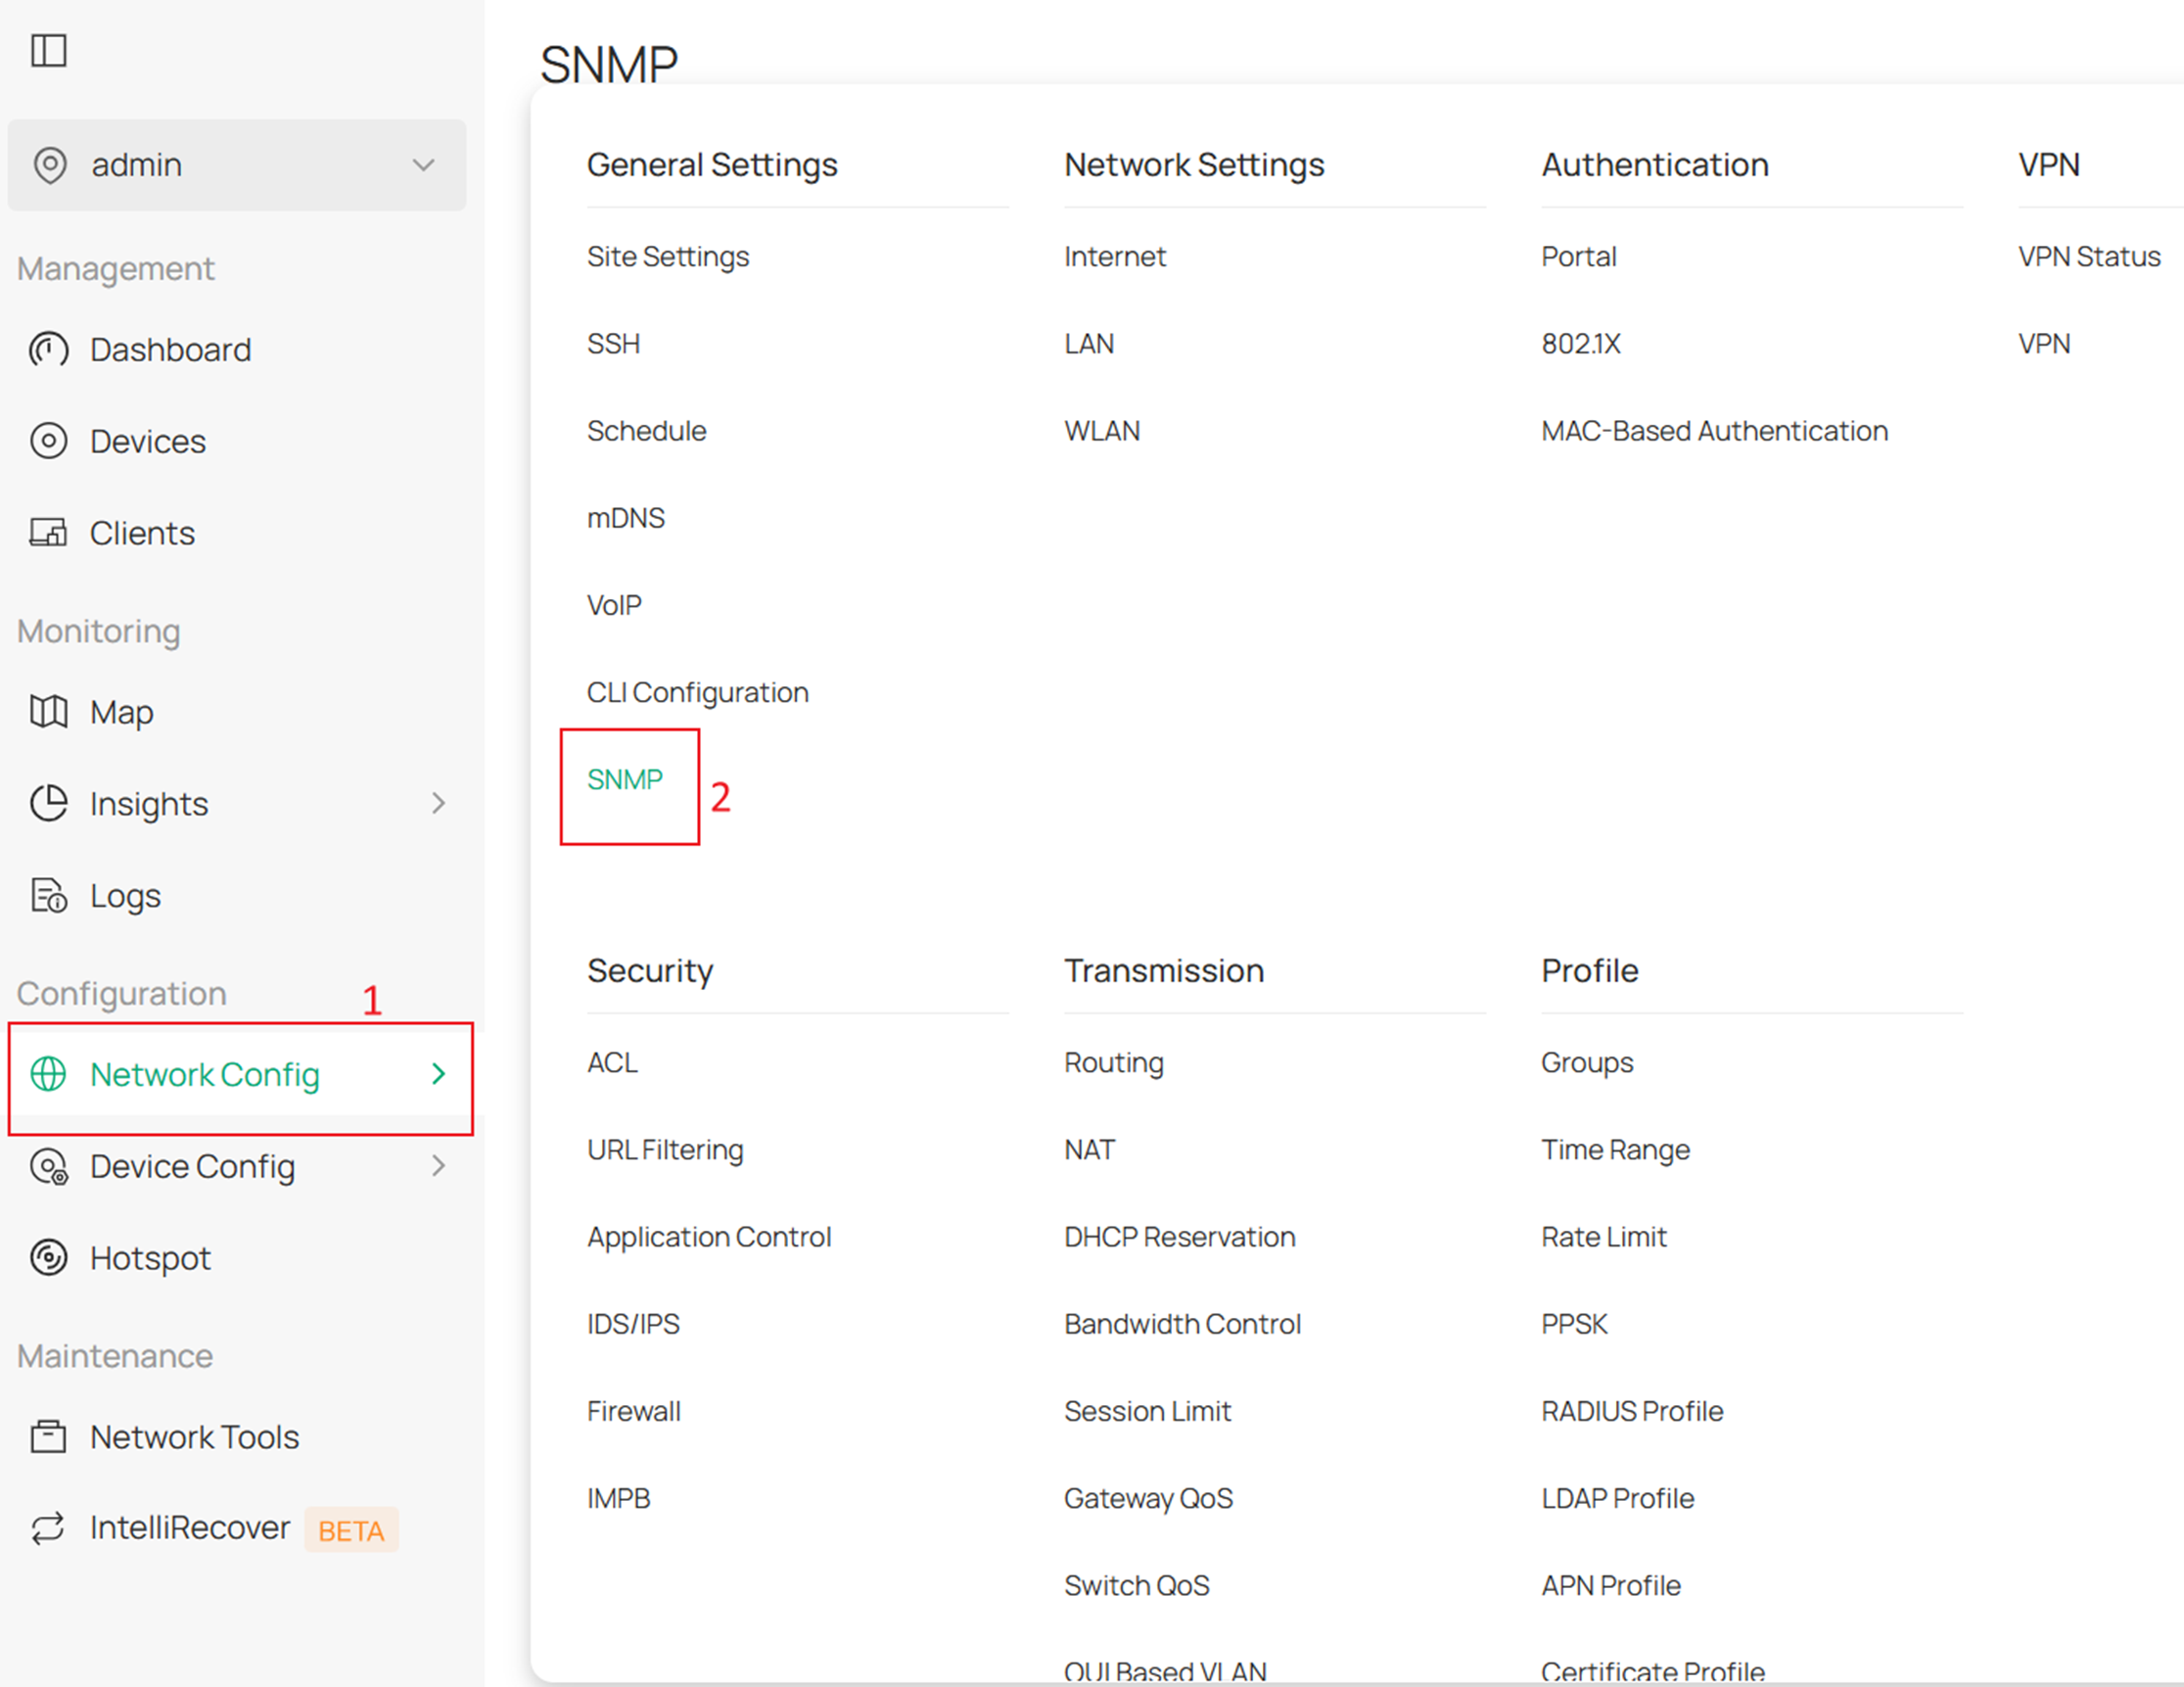
Step 1. On the Site page of the controller, you can go to Network Config > SNMP to enter the configuration page.
Step 2. Enable or disable SNMPv1 and SNMPv2c for the entire system. Community String: When SNMPv1 and SNMPv2c are enabled, specify the community string. This string acts as a password that allows your Network Management System to access the SNMP agent. You must configure the same community string on your Network Management System. Finally, click Apply to deploy the configuration. 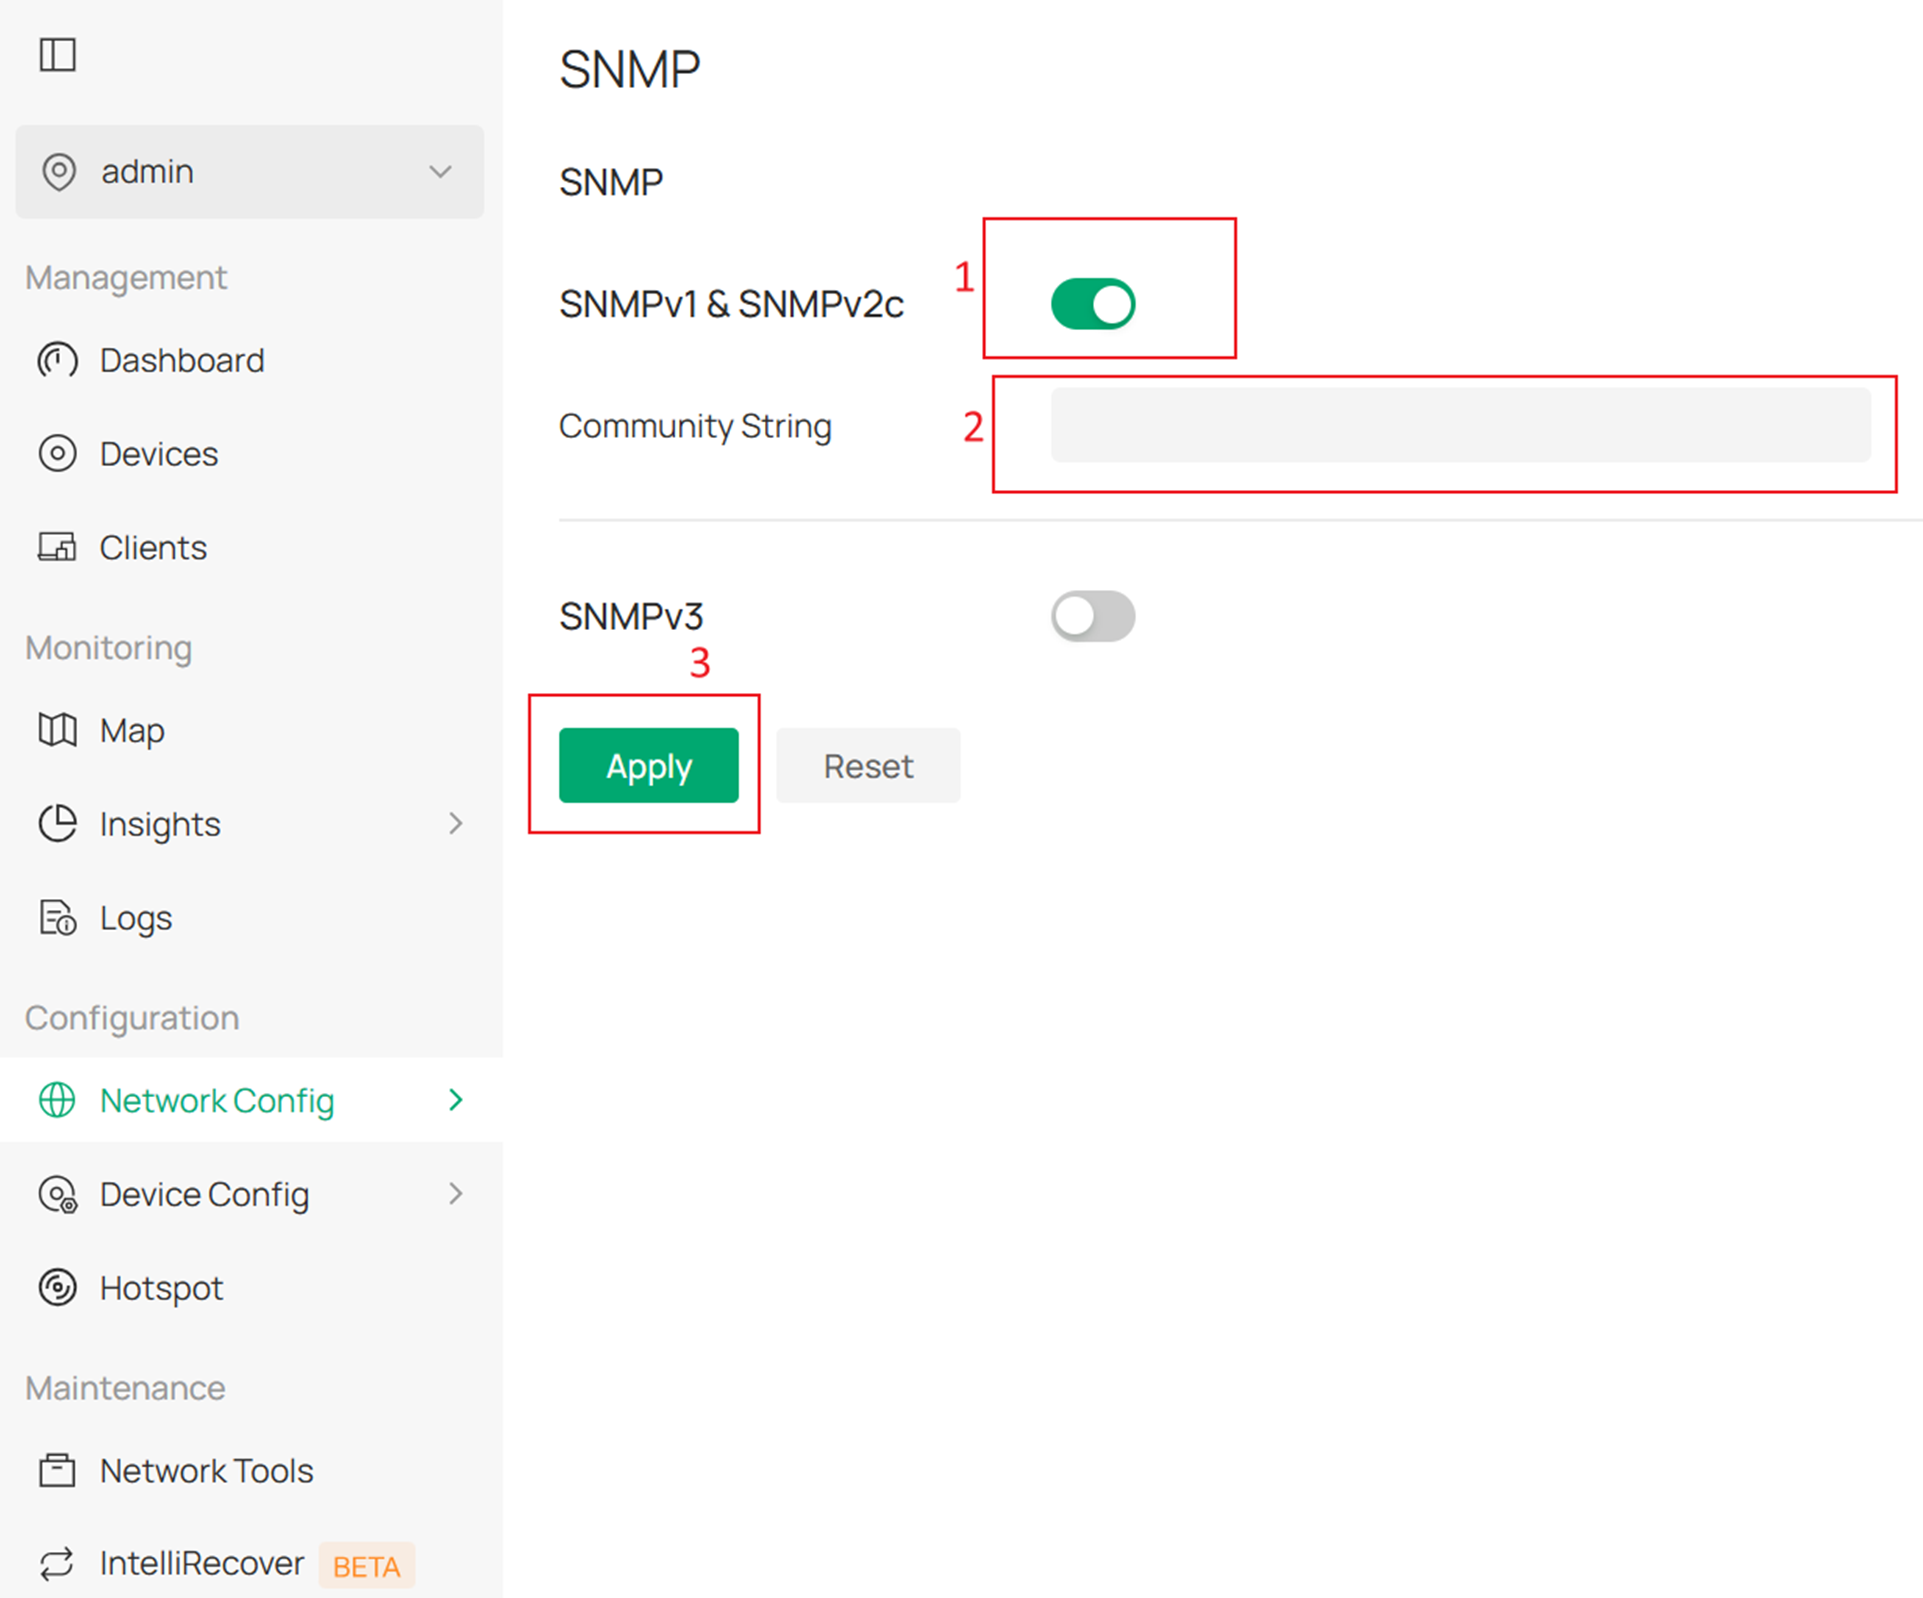
Configuration for SNMPv3
The following section describes how to configure SNMPv3. In versions earlier than 6.2.10, only the configuration in Method 1 is supported.
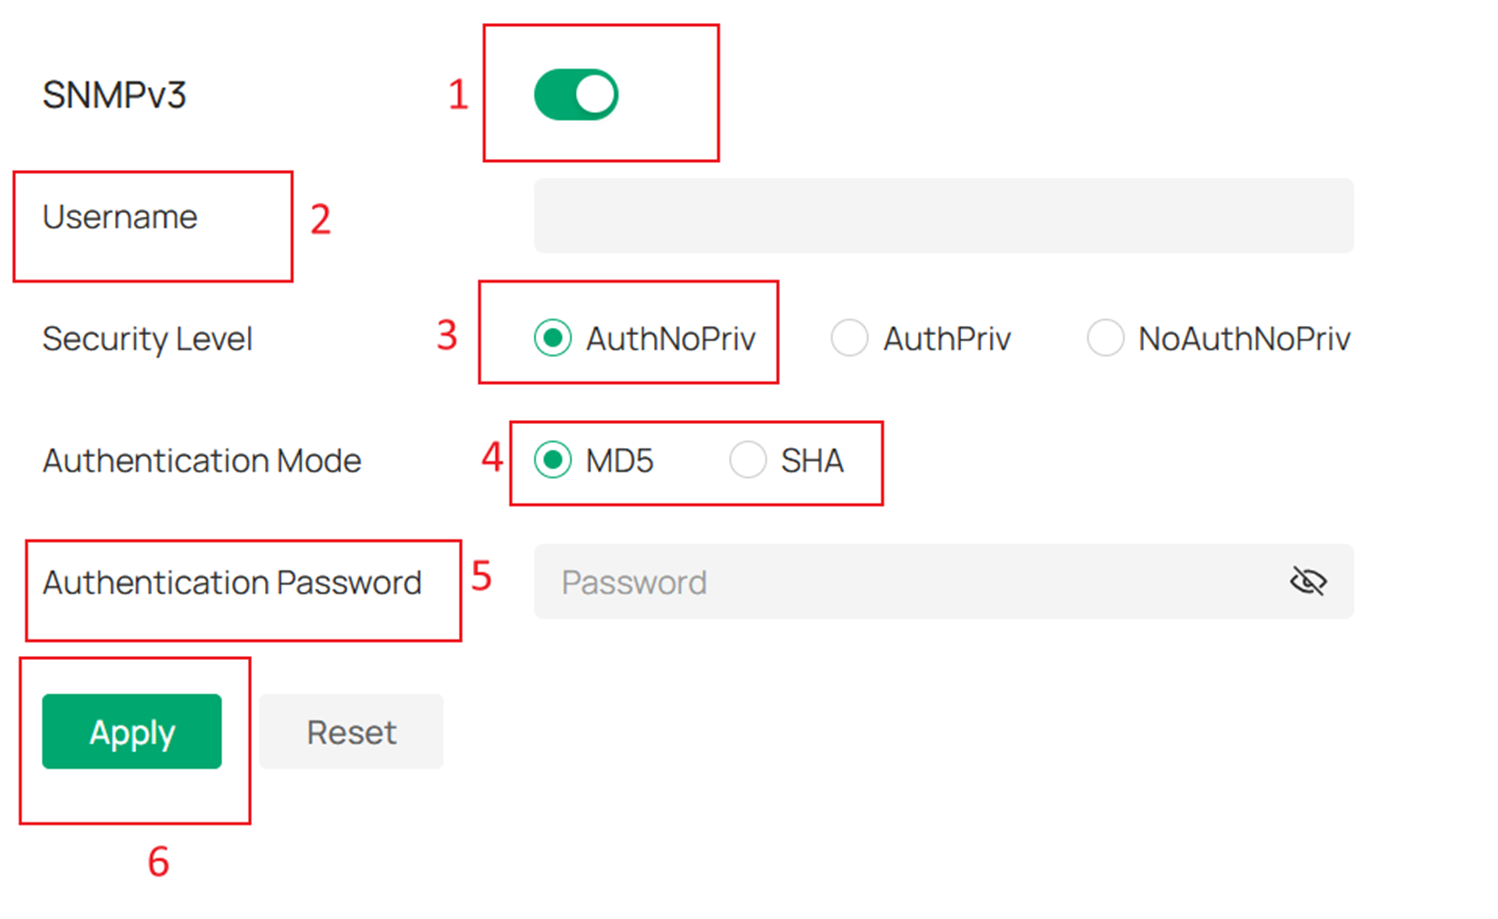
Method 1. In SNMPv3, the device uses AuthNoPriv with MD5 authentication by default. You can refer to the figure below for the required parameters. Likewise, you should configure the same username and authentication password on your Network Management System.
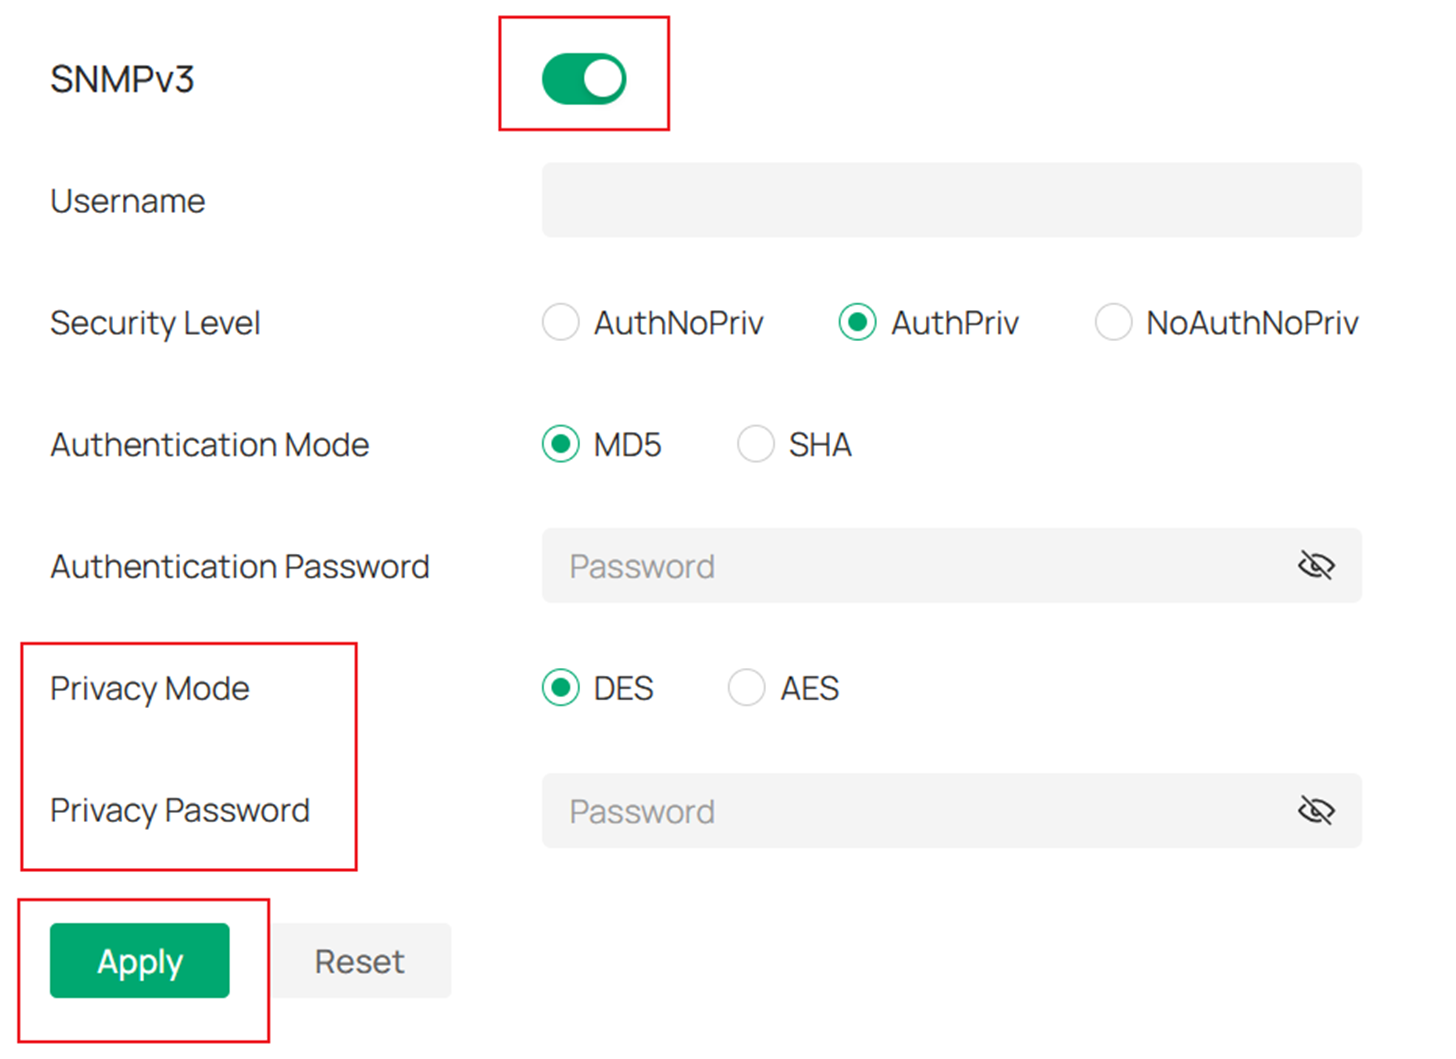
Method 2. When you select AuthPriv mode, in addition to the parameters in Method 1, you also need to configure the privacy mode and privacy password. The available privacy modes are DES and AES. This mode is the most recommended option and provides the highest level of security.
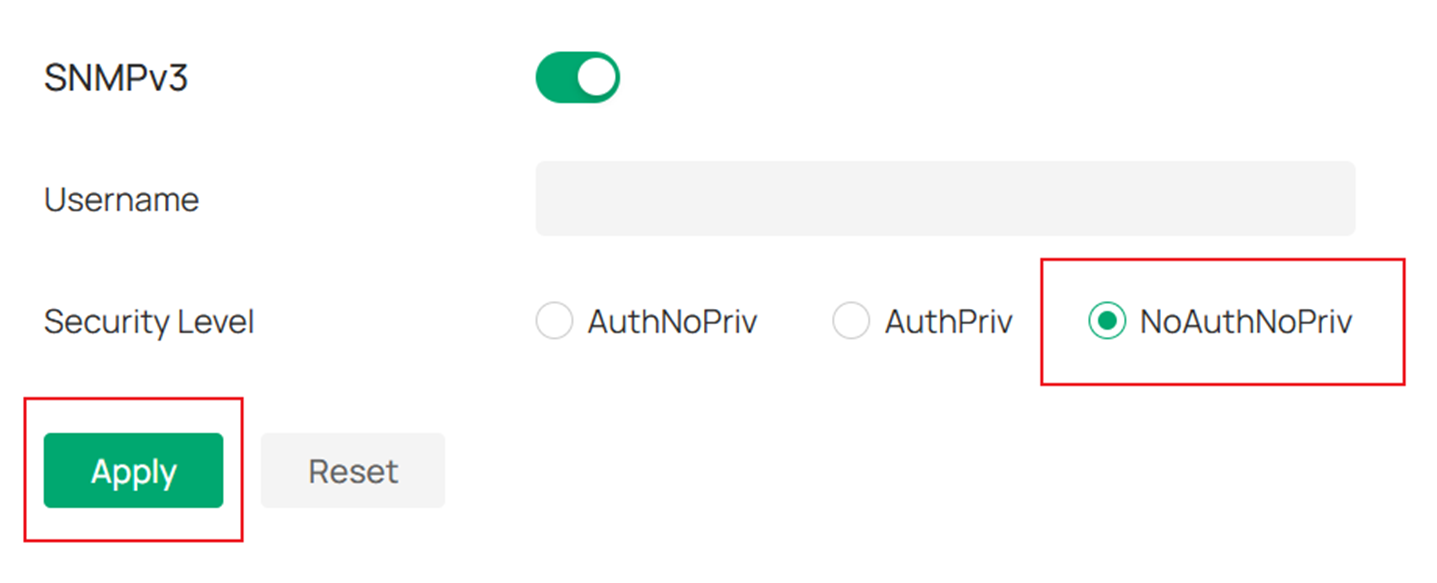
Method 3. You can also choose NoAuthNoPriv mode. This mode provides a relatively low level of security, so please select it with caution.
After you submit the configuration, if the site includes devices whose current firmware does not support the new SNMPv3 version, the system displays a pop-up window. This window shows a list of the unsupported devices and the default configuration that will be pushed to them.
You must confirm this information before the SNMPv3 configuration can be successfully applied. Support for additional device firmware versions will be added gradually through future updates.

Conclusion
Through this article, you have successfully configured the SNMP feature.
Get to know more details of each function and configuration please go to Download Center to download the manual of your product.
