


Contents
RADIUS configuration on Omada Controller
RADIUS configuration in device standalone mode
Introduction
RADIUS authentication is essential for secure, centralized user management within an Omada network. However, authentication failures can occur due to configuration mismatches, such as inconsistent shared keys or mismatched port settings.
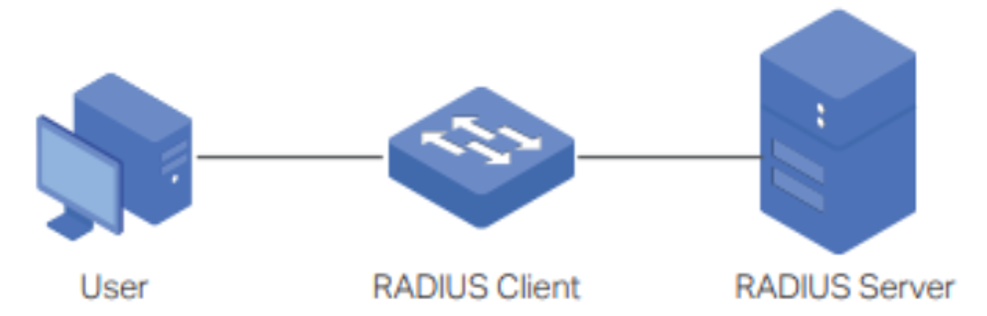
The following is the typical topology of RADIUS authentication. The Omada device (Gateway/Switch/EAP/Controller) as the RADIUS Client, collects user information and transfers it to the RADIUS server for authentication.
This article provides a structured troubleshooting guide to help network administrators isolate, diagnose, and resolve RADIUS authentication issues across Omada Controllers, Access Points (EAPs), Switches, and Gateways.
Requirements
- RADIUS Server
- Omada Controller (Software Controller / Hardware Controller / Cloud-Based Controller, v5.9 and above)
- Omada devices including Omada EAPs, Omada L2+ and L3 series Switches, Omada Gateways
Configuration
This section introduces the RADIUS configuration on different Omada products (Gateway/Switch/EAP/Controller).
RADIUS configuration on Omada Controller
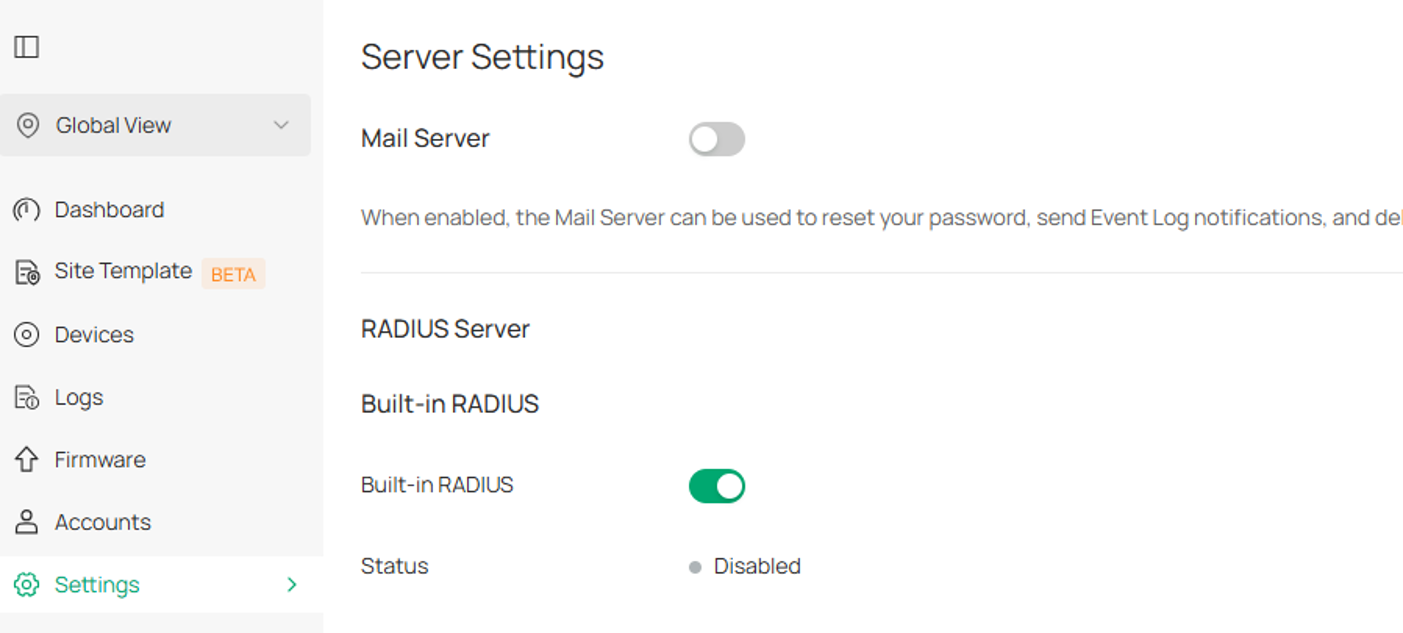
Built-in RADIUS on Omada Controller:
You can enable it in Global View>Settings>Server Settings.
Note: except for Cloud-Based Controller, ER7212PC, and OC200 V1/V2, which do not support the Built-in RADIUS server, all other Controllers support this feature, such as the OC300, OC400 and Software Controller.
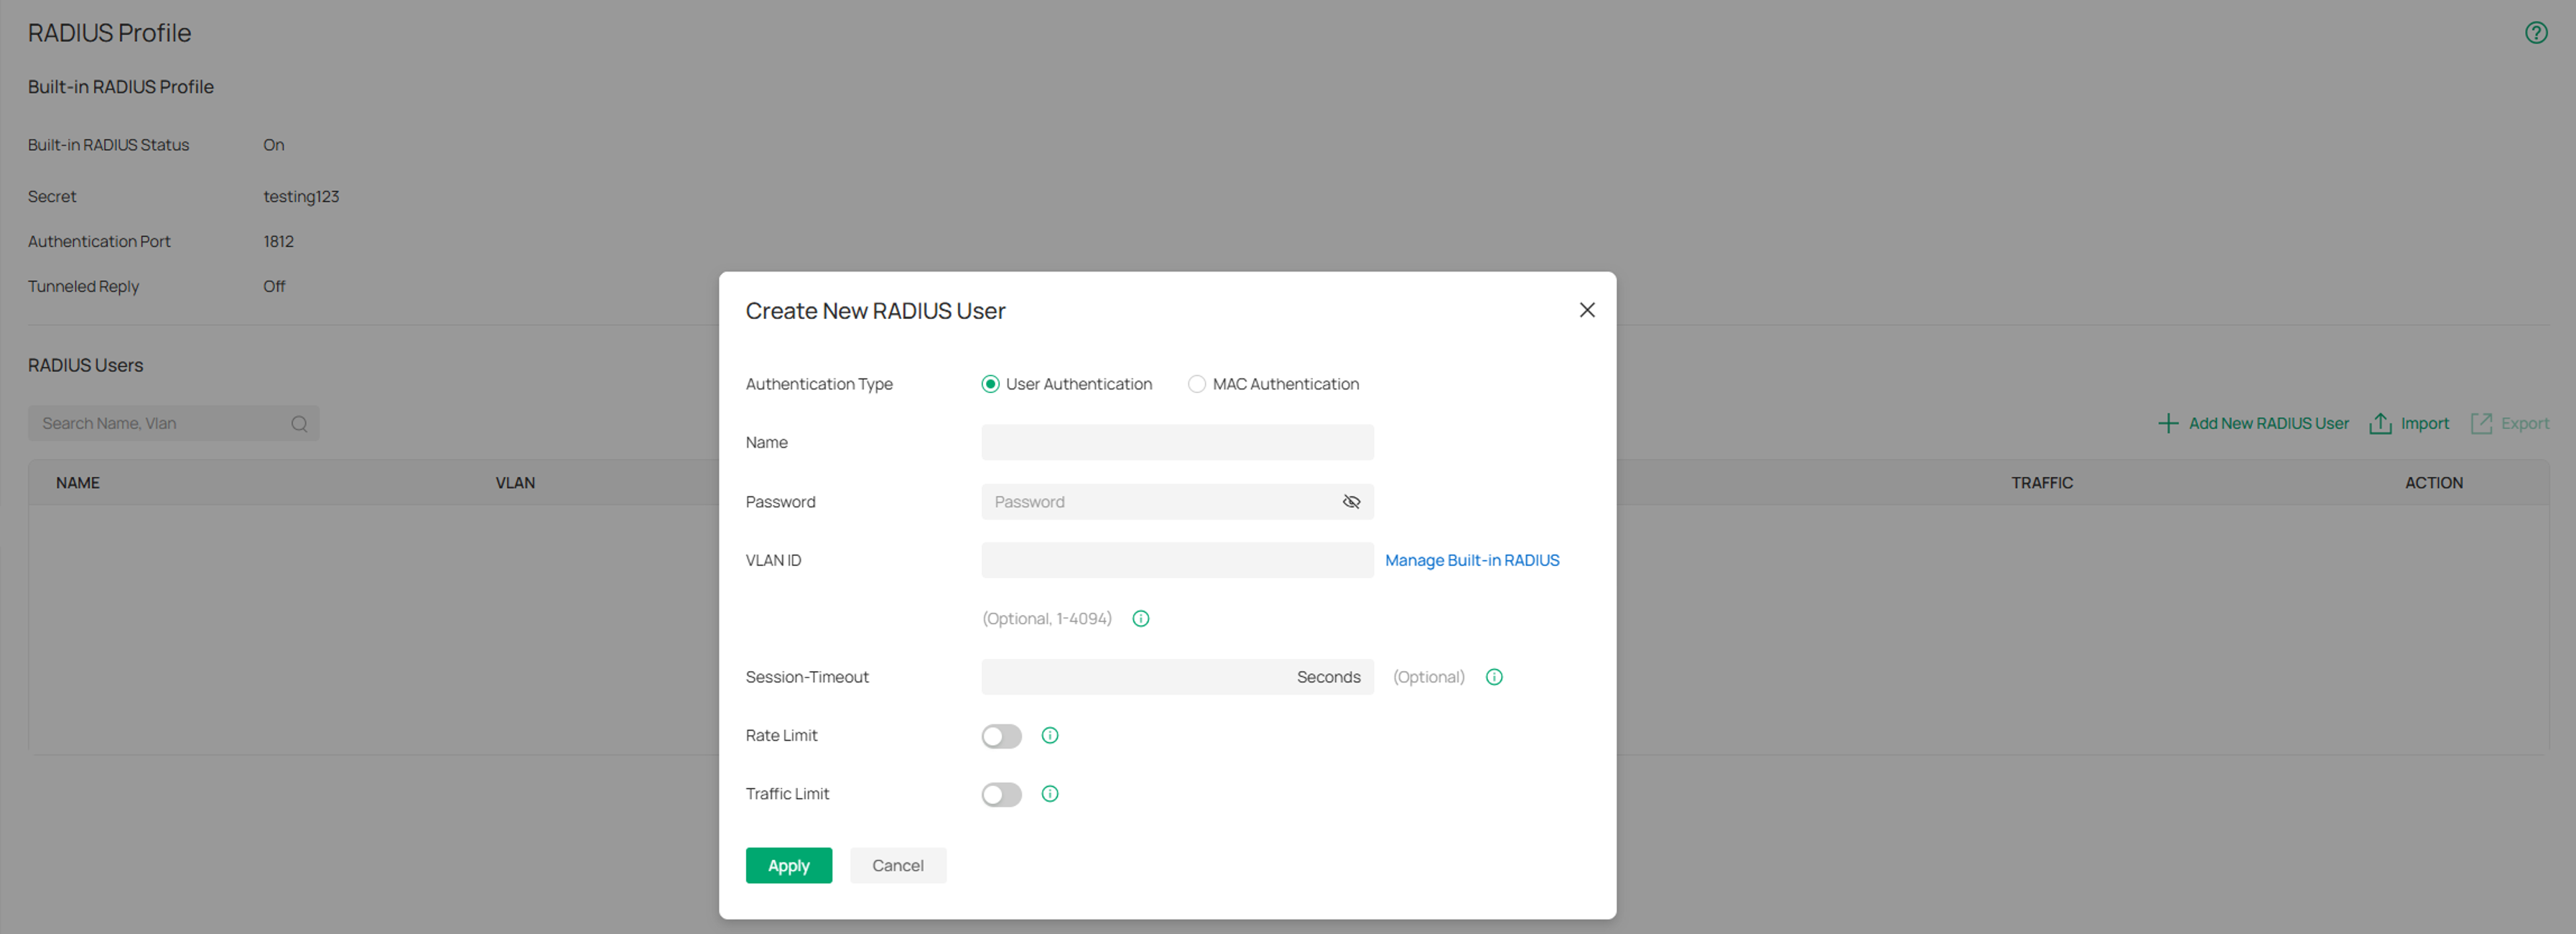
Once the Built-in RADIUS is enabled, you can select the Built-in RADIUS Profile in the Network Config>Profile>RADIUS Profile section to edit or add users.
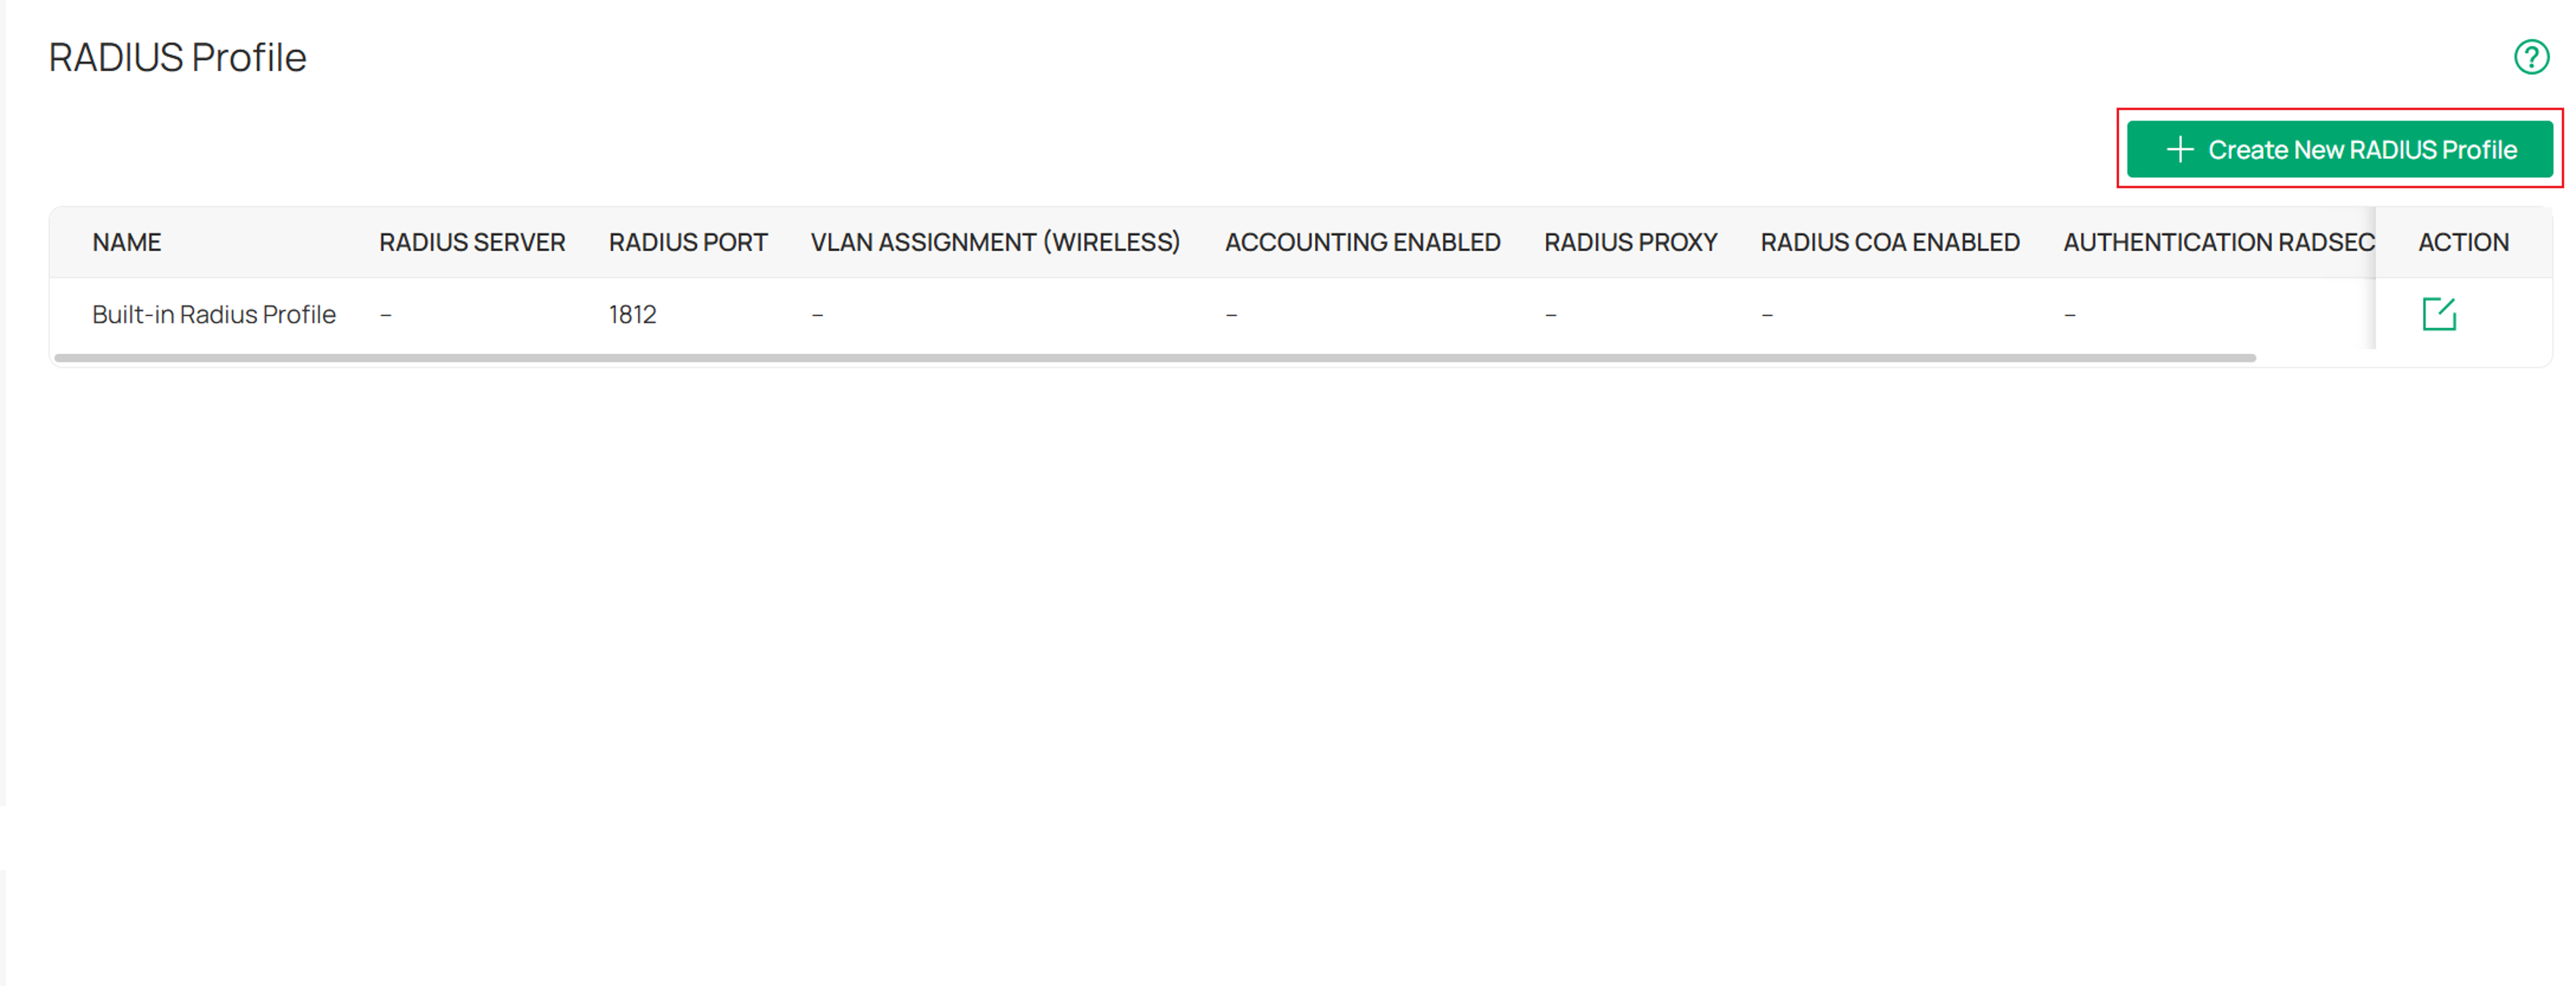
Create RADIUS Profile on Omada Controller:
If you want to use an external RADIUS server (e.g., FreeRADIUS), you can create a RADIUS profile and configure the server-related information.
RADIUS configuration in device Standalone mode
Omada EAP:
You can configure a Portal using an external RADIUS server under Wireless > Portal.
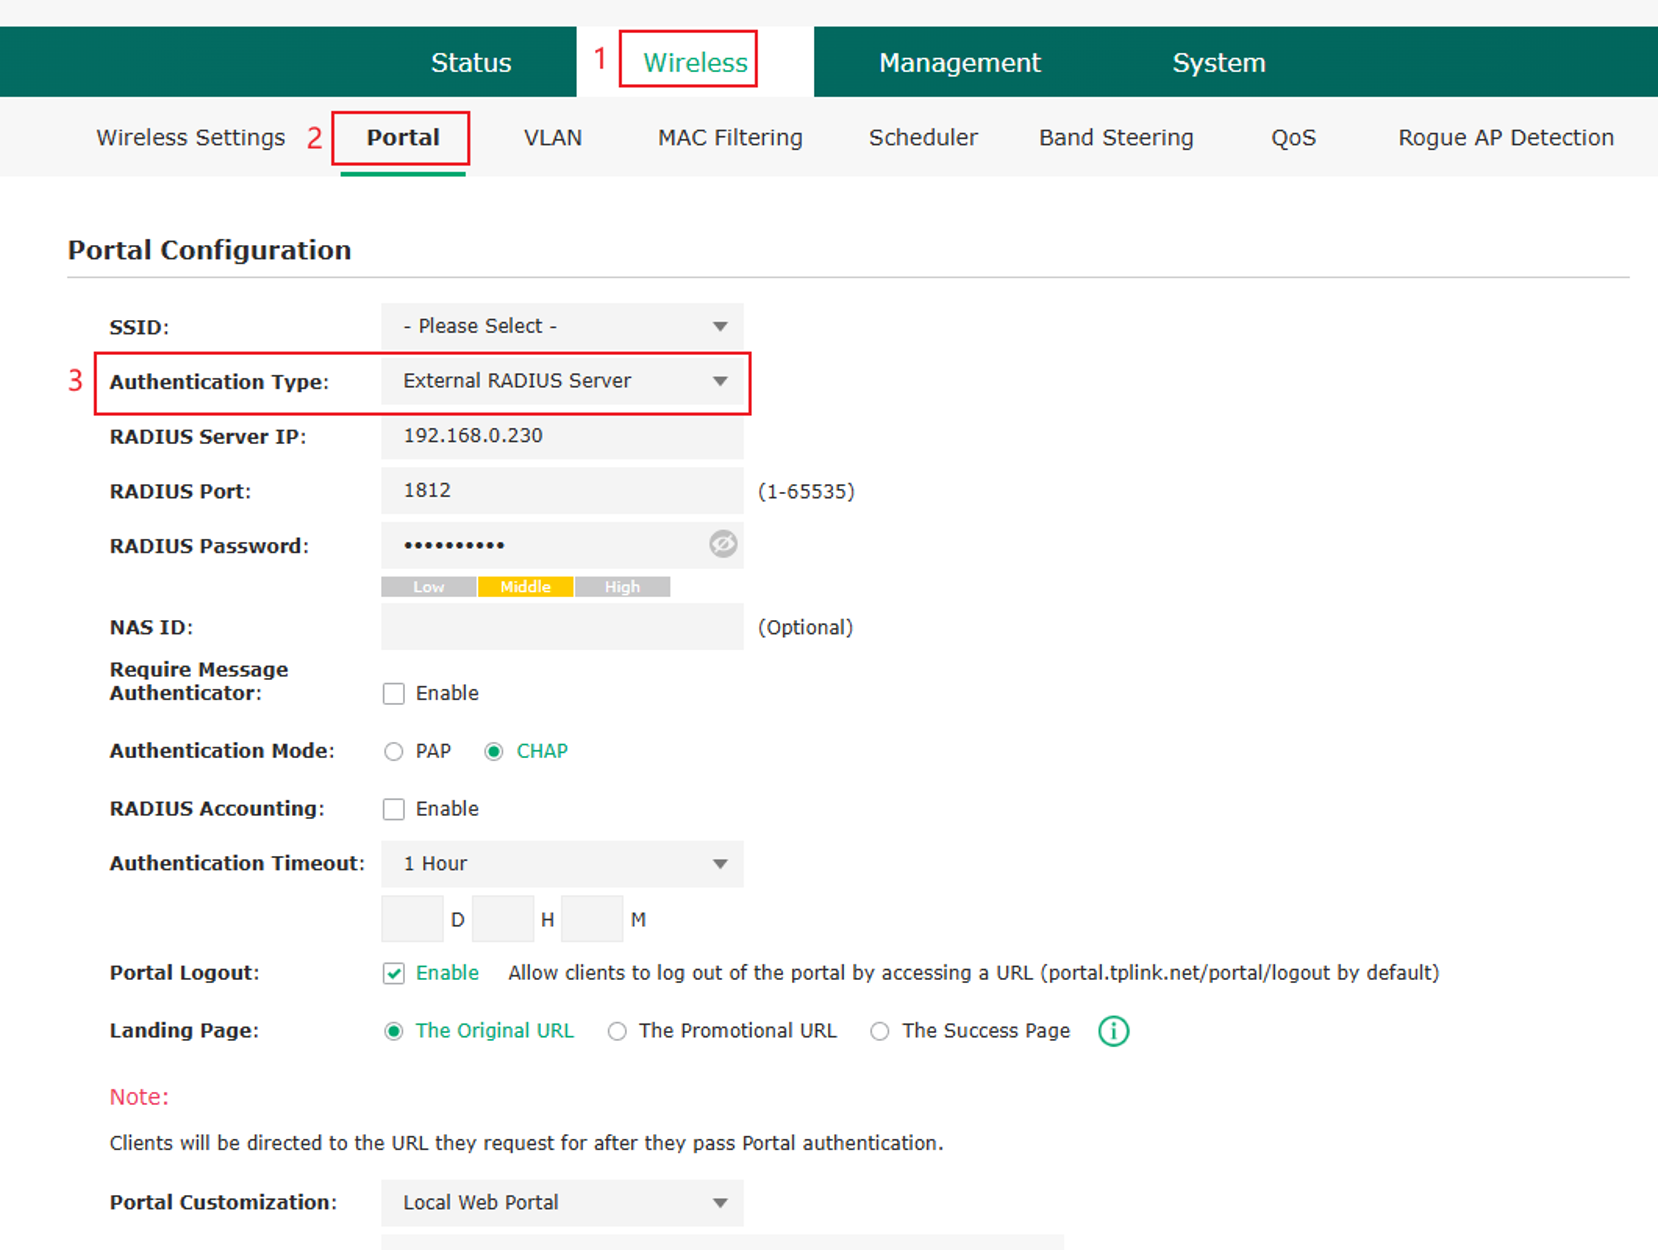
An External RADIUS Server Portal authentication method allows user credentials to be verified by a third‑party RADIUS server instead of the local device. When users connect to Wi‑Fi and access the portal page, they enter their login information, which is then sent to the external RADIUS server for authentication. Once validated, the network grants access. This method is commonly used for centralized user management, enhanced security, and integration with existing authentication systems.
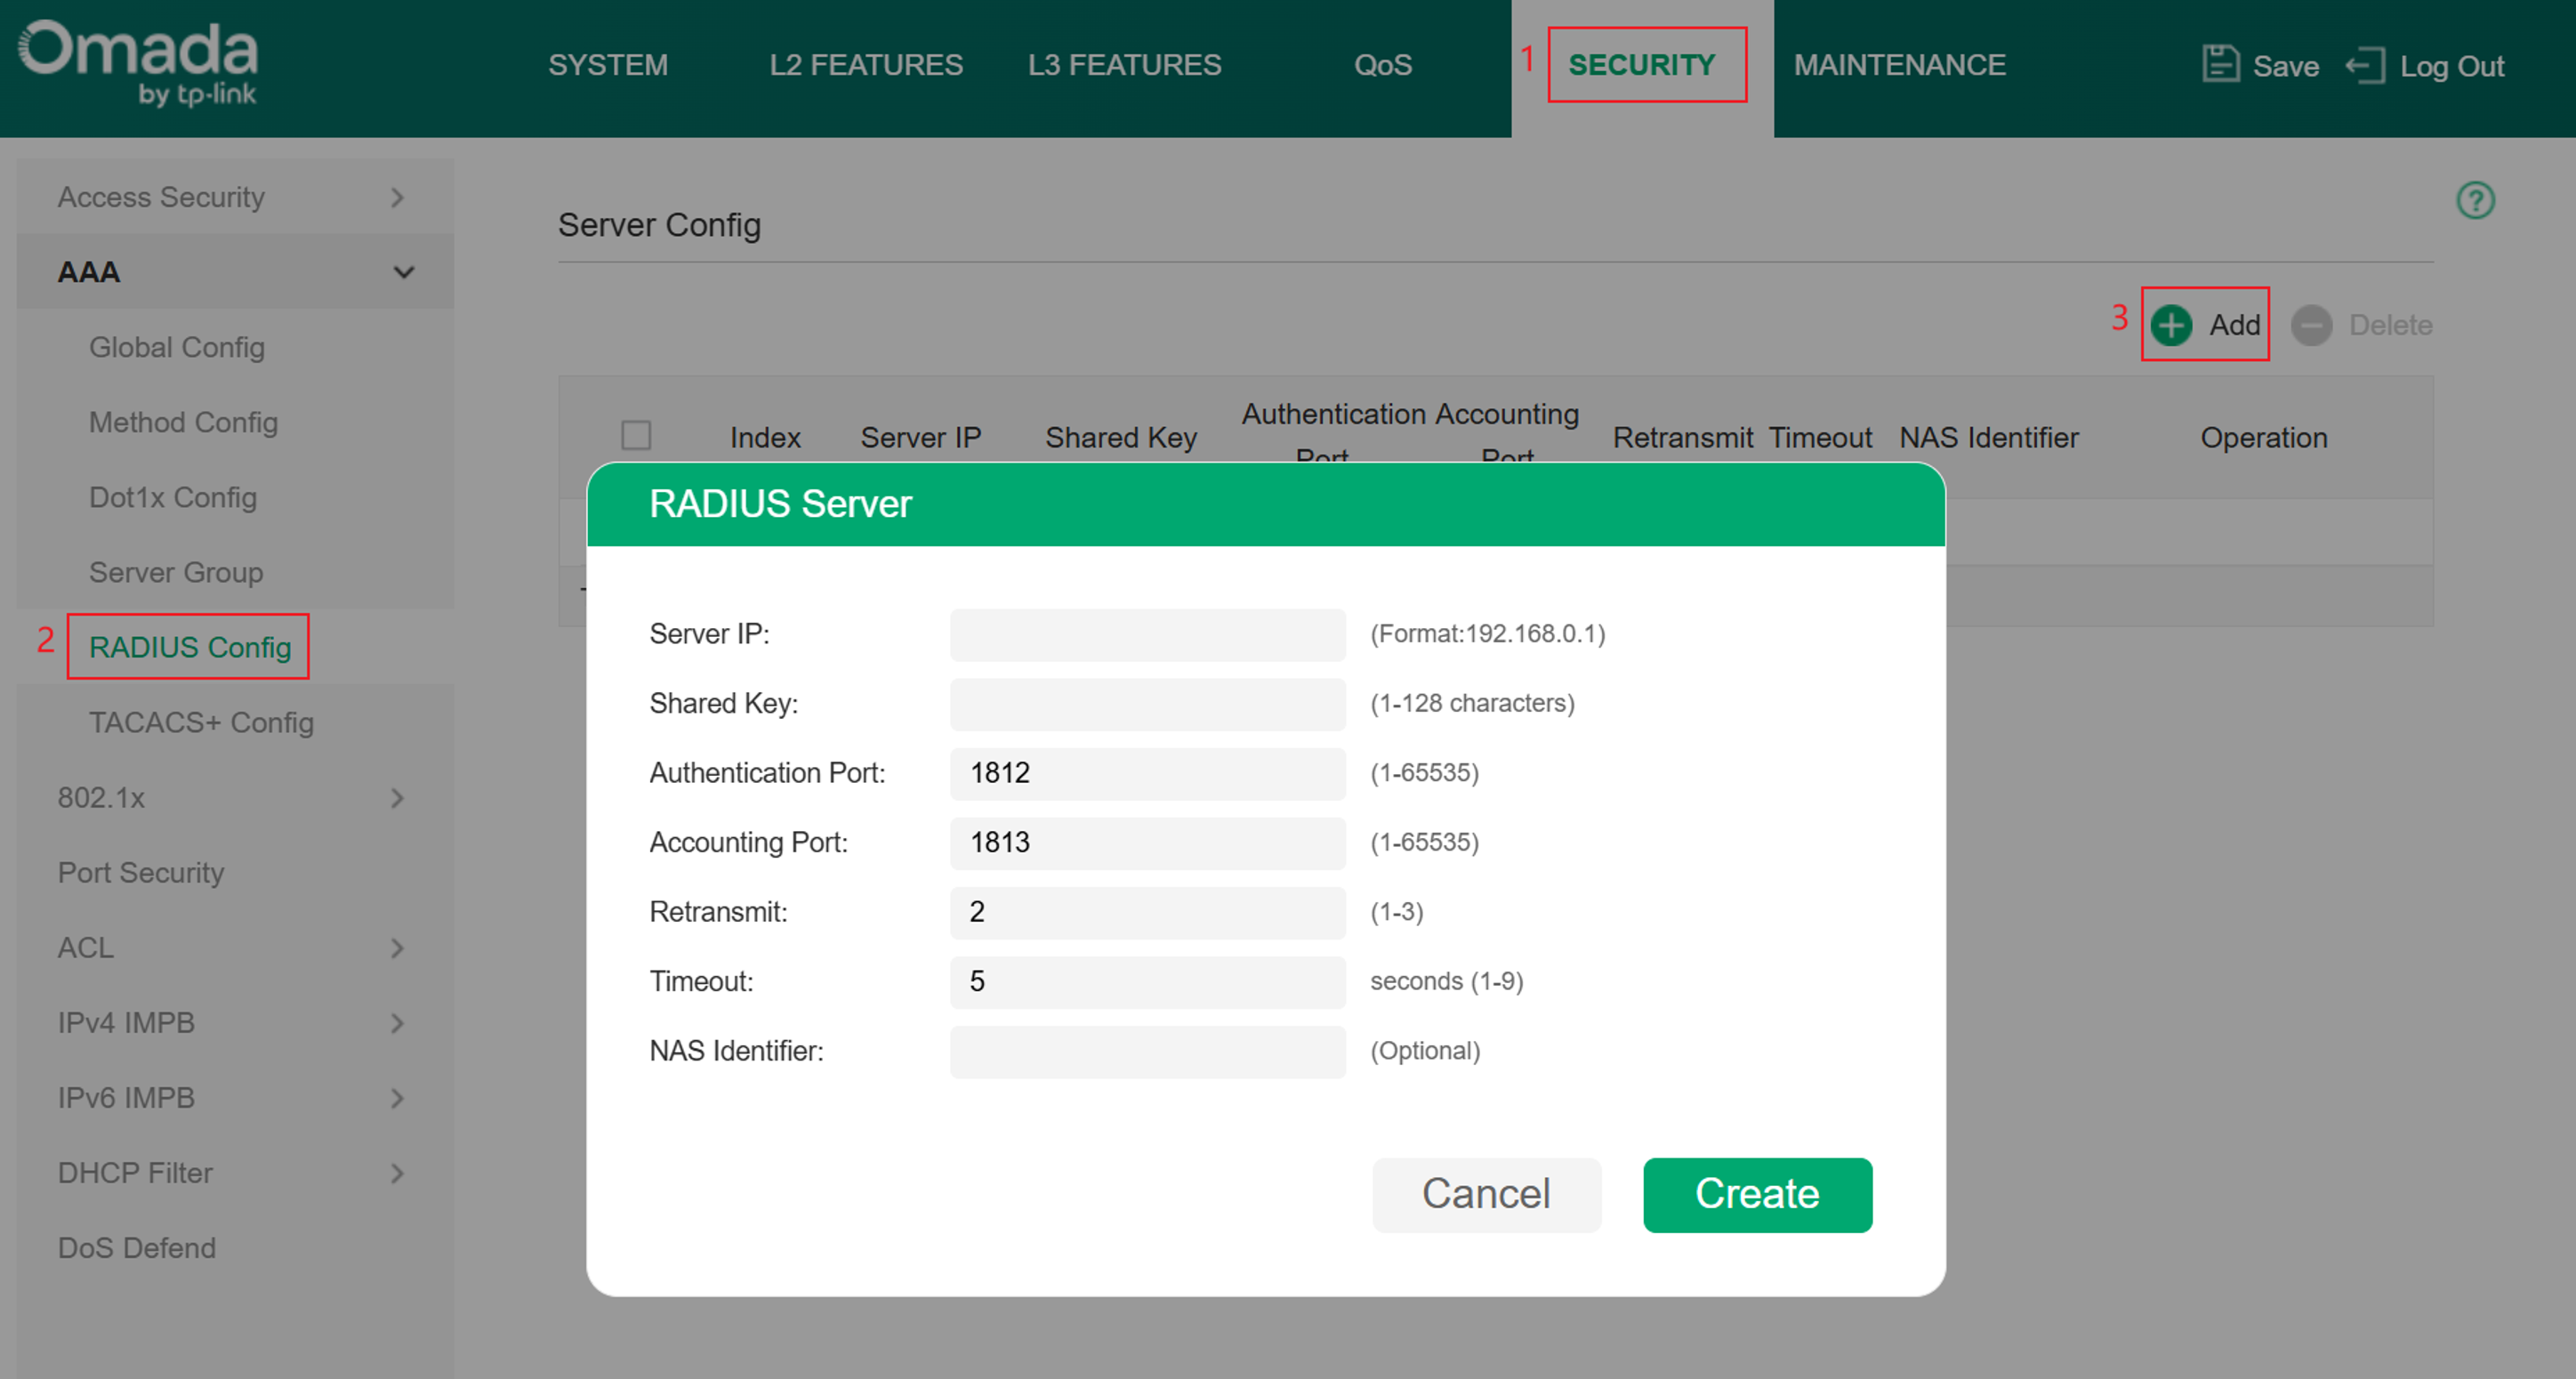
Omada Switch:
For Omada Smart, L2+, and L3 series switches, you can configure the RADIUS server under Security > AAA>RADIUS Config, which can be used for client authentication.
Omada Gateway:
For Omada Gateways, you can configure the RADIUS server under SSL VPN>Authentication>RADIUS Server. In the SSL VPN feature, a RADIUS server can be used to authenticate VPN users.

Troubleshooting Steps
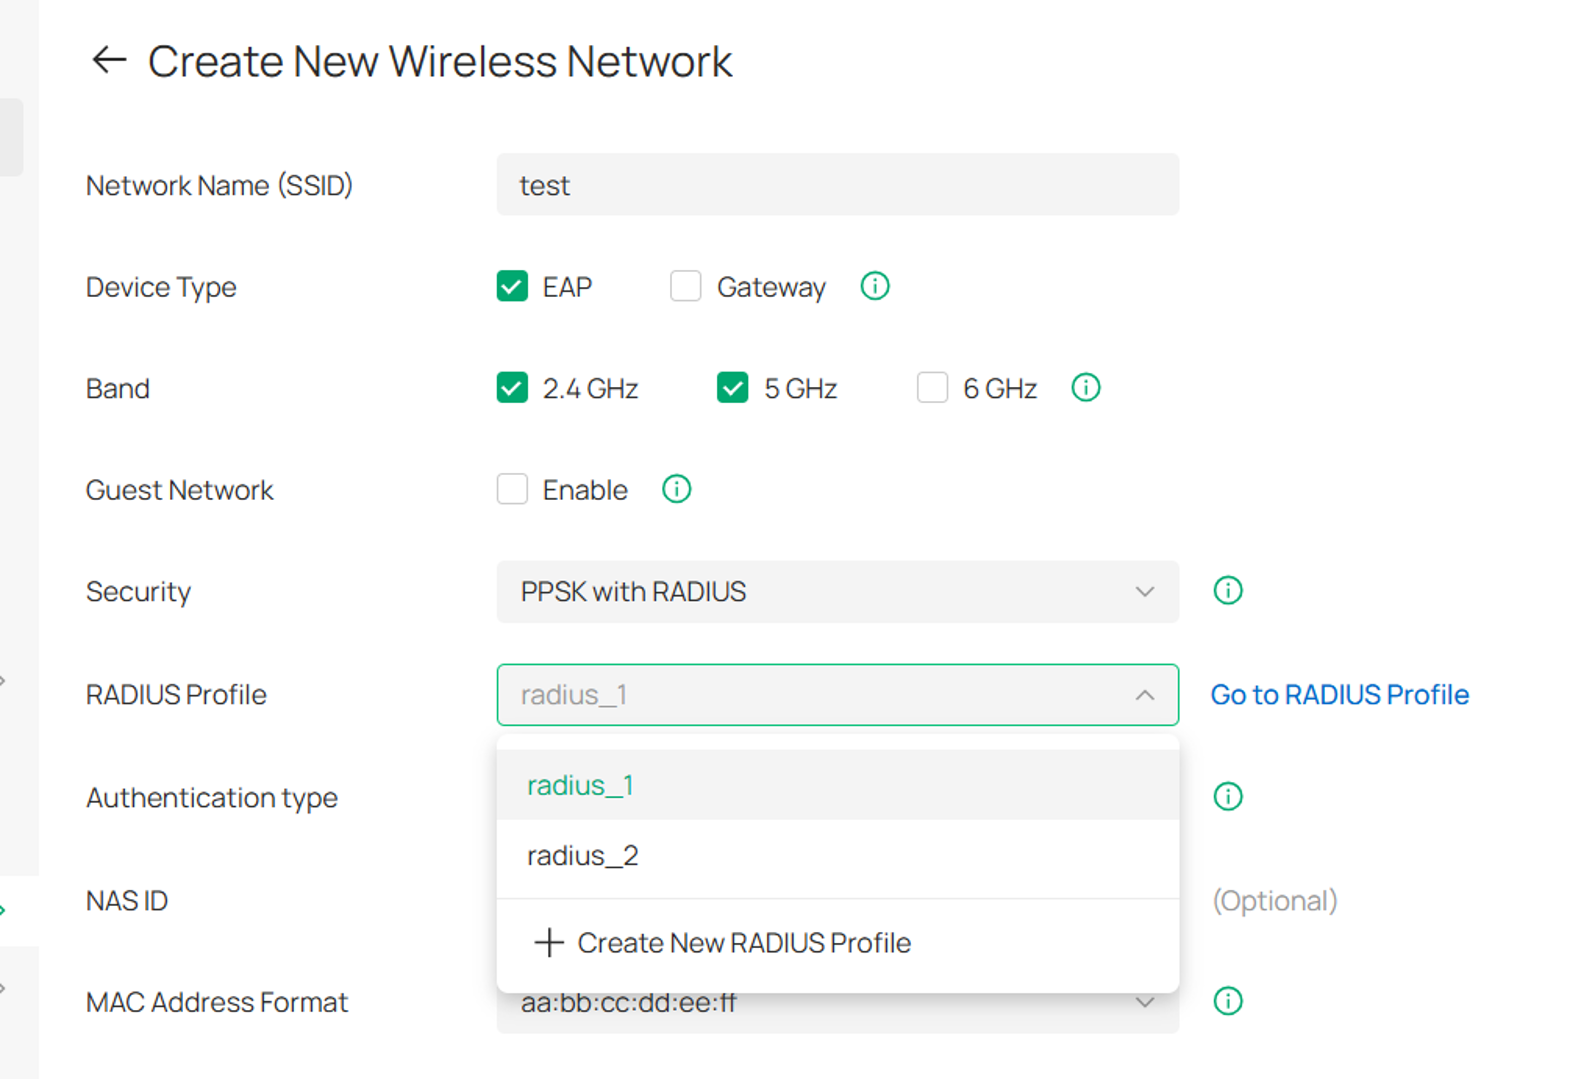
Step 1. First, make sure that the correct RADIUS profile has been selected. For example, as shown in the figure below, "radius_2" is the correct file, but the incorrect "radius_1" was chosen instead. This can be avoided by optimizing the naming of the profile, for example, "radius_for_ppsk".
Step 2. Check whether the basic RADIUS configurations on Omada Controller are correct.
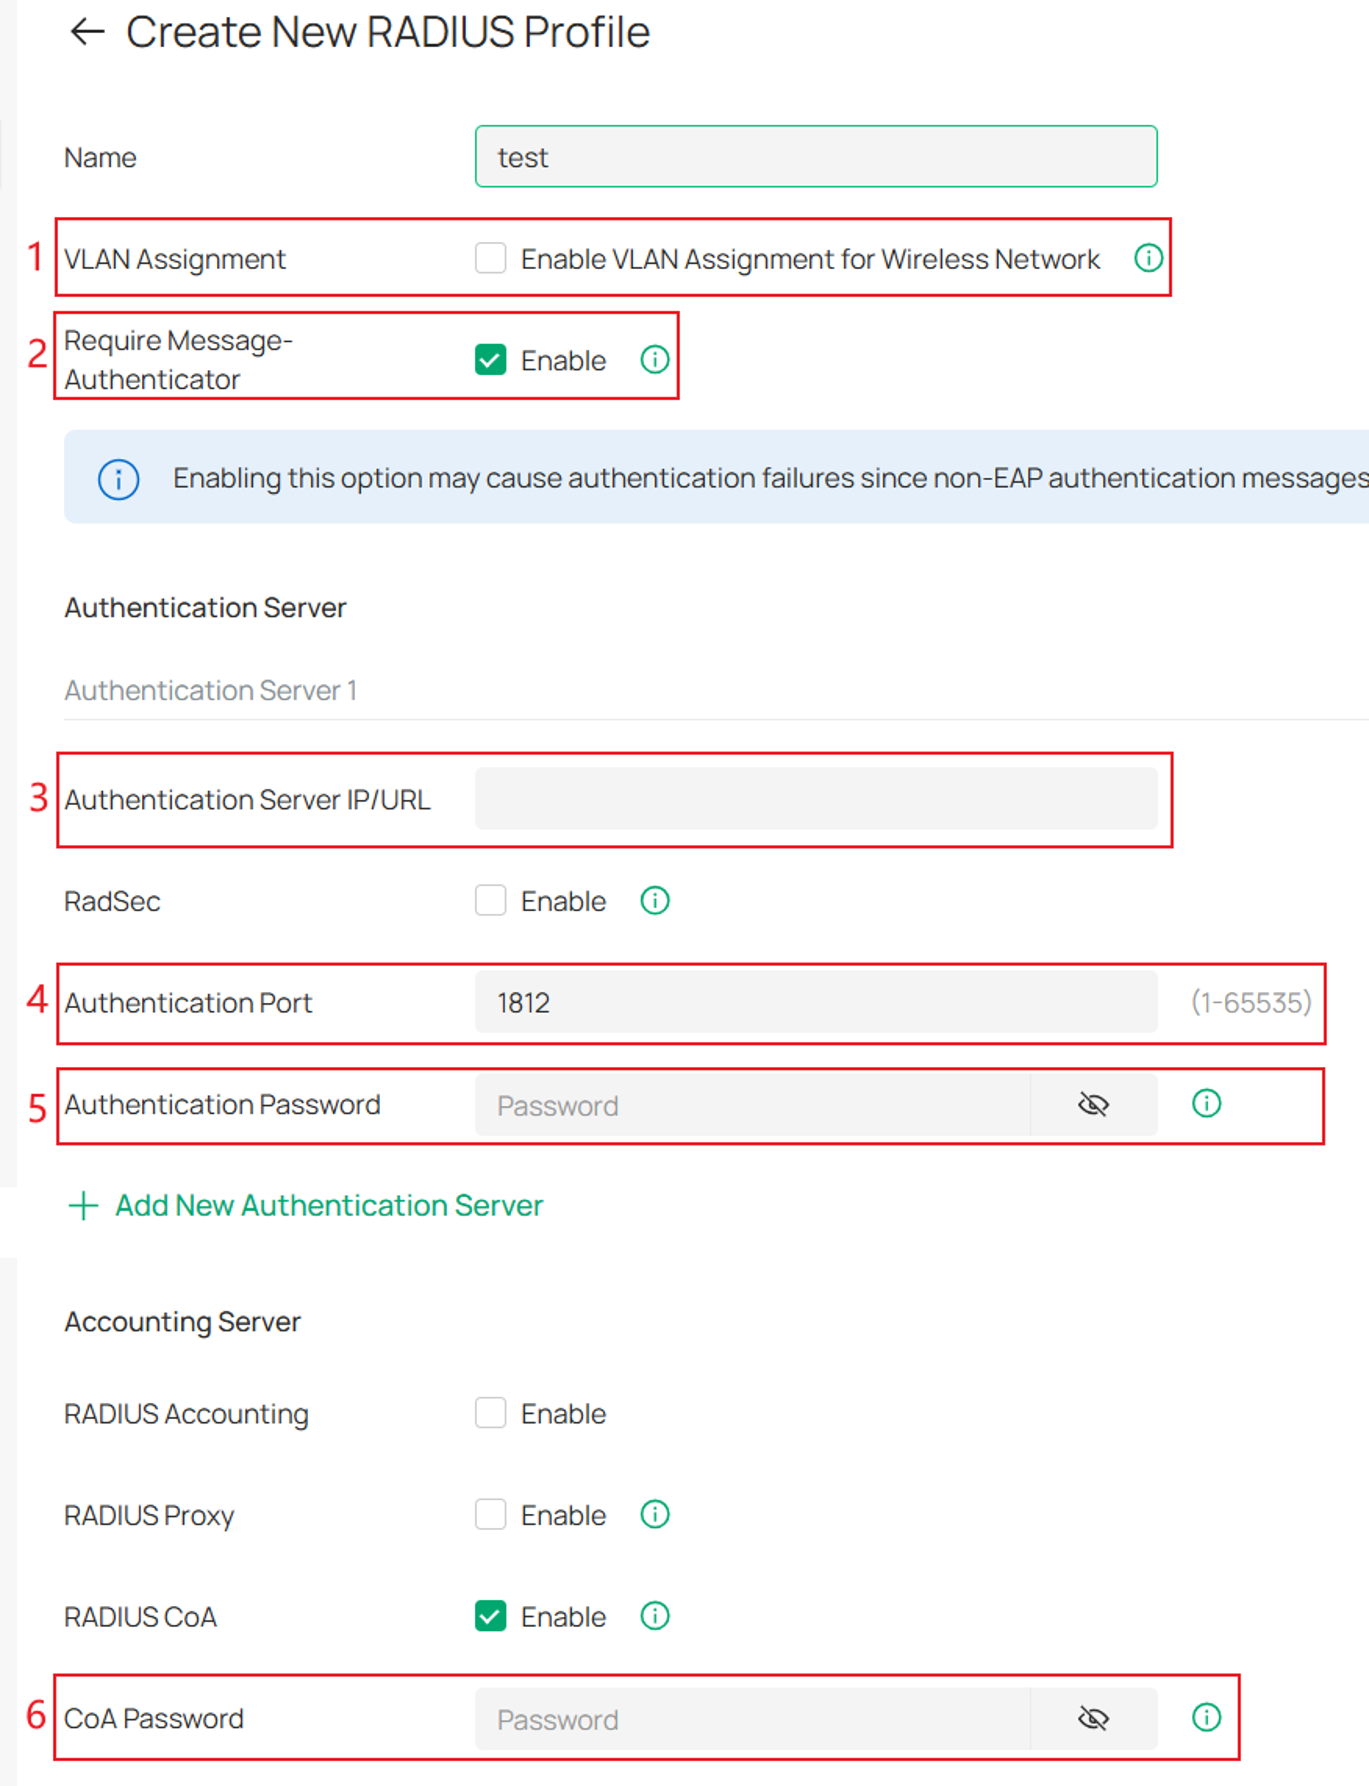
The key inspection items are as follows:
|
Index |
Check Item |
Description |
|
1 |
VLAN Assignment |
VLAN Assignment is applicable only when the device supports the feature. To make this feature work properly, it is recommended to upgrade your devices to the latest firmware version. VLAN Assignment is not currently supported when a client is authenticated by Portal with RADIUS Server or RADIUS Hotspot. If the dynamic VLAN is the same as the VLAN of the Default Network, network abnormalities may occur. Please do not configure this on the external RADIUS server. |
|
2 |
Require Message-Authenticator |
This option applies only when the device supports this feature. When enabled, the device requires RADIUS response messages to include a valid Message-Authenticator attribute. Enabling this option may cause authentication failures since non-EAP authentication messages (such as PAP and CHAP) typically do not include the Message-Authenticator attribute. |
|
3 |
Authentication Server IP/URL |
Tell the Controller/device "Where is the authentication server?". Check whether the IP address is correctly configured and whether the Controller/device can access this IP address. |
|
4 |
Authentication Port |
It’s used for authentication requests. The default is 1812 for authentication. |
|
5 |
Authentication Password |
It is used to encrypt the communication between the Controller/device and the RADIUS server. Please verify that the case is consistent and that no extra spaces are included. |
|
6 |
RADIUS CoA |
If enabled, TP-Link devices will act as a RADIUS Dynamic Authorization Server and will respond to RADIUS Change-of-Authorization and Disconnect messages sent by the RADIUS servers. This option is only supported by EAP PPSK, EAP MAC-Based Authentication, EAP WPA-Enterprise, and 802.1X. The question mark (?), double quote ("), percent sign (%), and backslash (\) may cause the RADIUS function to fail and are not recommended. |
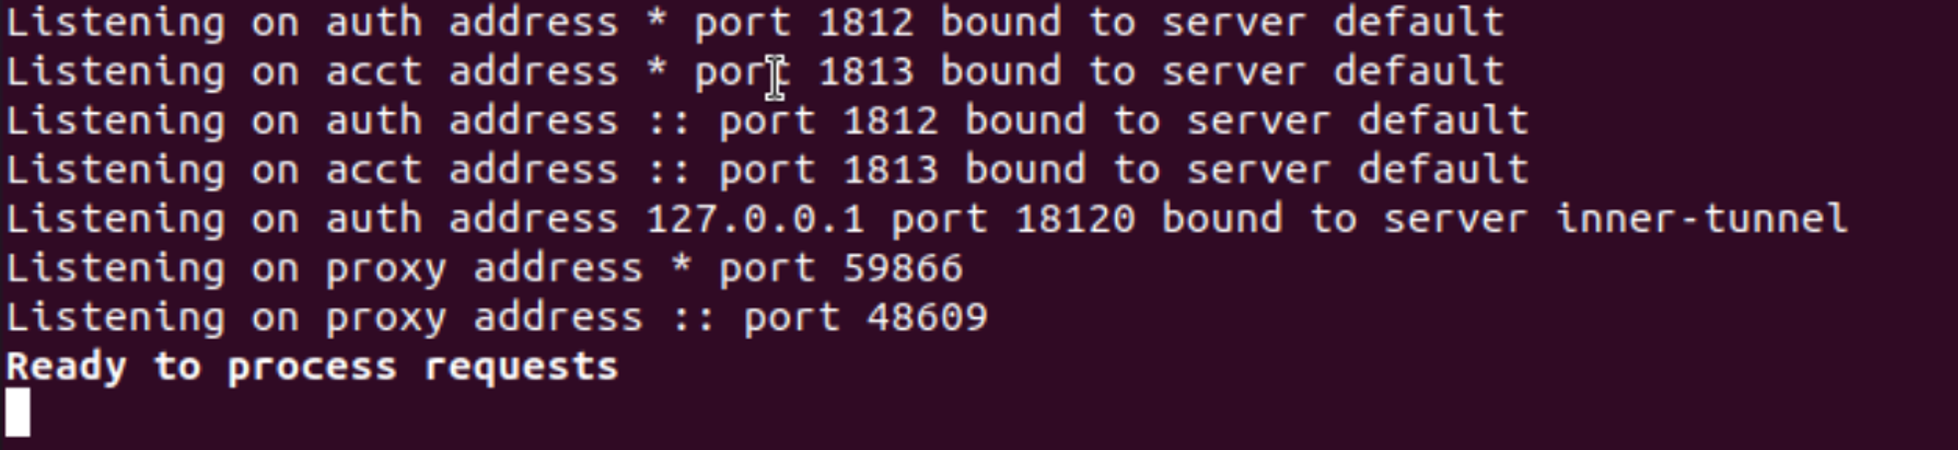
Step 3. Check whether the RADIUS server works properly. Here takes the common FreeRADIUS server as an example. You can start the server in debug mode (root user privileges are required) and see if the RADIUS service program runs properly. You can check whether FreeRADIUS starts properly by using the following command:
radiusd –X
When you enter the command, "Ready to process requests" appears, indicating that your FreeRADIUS server is running properly.
And there is another command:
radtest <username> <password> <server-IP> <NAS-Port> <Secret>
radtest is a command-line tool used to simulate authentication requests to a RADIUS server, allowing you to quickly verify whether the server is reachable and correctly processing authentication. It helps isolate RADIUS-related issues from other network components such as APs or Controllers.
Access-Accept indicates that the server, user credentials, and shared secret are all correct;
Access-Reject means the server is working but the credentials or policy are incorrect;
No reply from server usually indicates connectivity, firewall, or server availability issues.

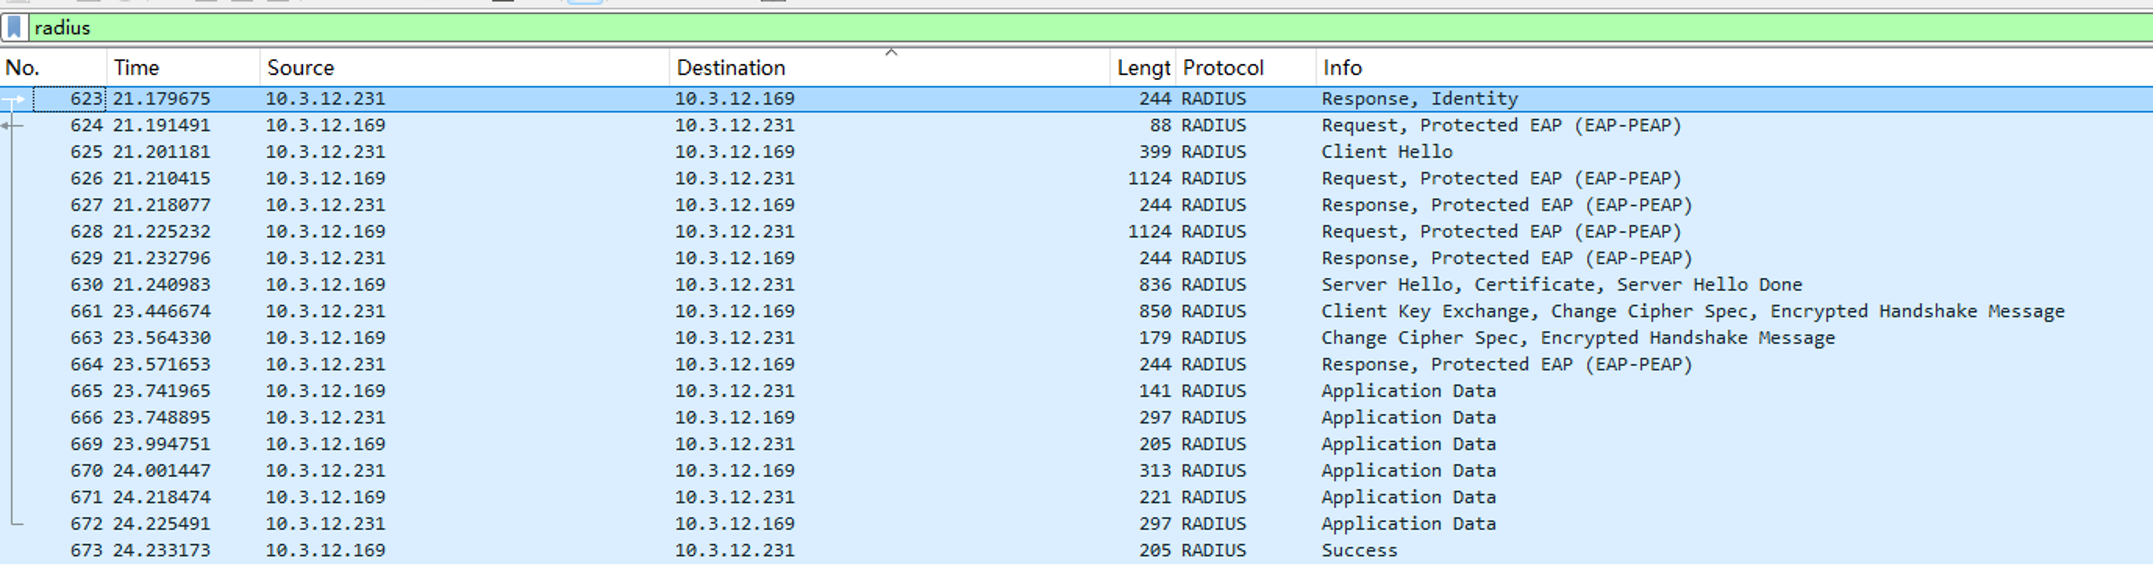
For Built-in RADIUS Server, you can run Wireshark on the PC where the Software Controller is installed to capture packets. This allows you to analyze the interaction between the Built-in RADIUS Server and the Omada devices, and determine whether the RADIUS server is functioning properly.
In Wireshark, you can enter "radius" in the filter bar to display only RADIUS-related packets.
The image below shows an example of RADIUS packet exchanges during the WPA3-Enterprise authentication process.
Step 4. Check whether the network connection is normal and the client can access the RADIUS server. The following provides two methods.
PING:
You can run the ping command on the client to check whether the RADIUS Server can be pinged through. In some network cases, clients cannot access the RADIUS server due to network isolation or firewalls.
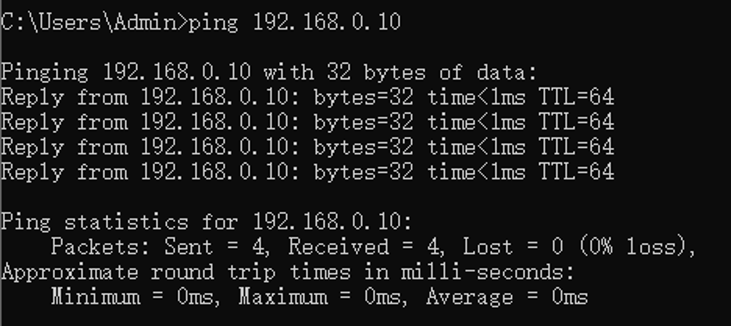
Note: If the network uses 802.1X port access control, clients must first be authenticated before they can access network resources. In this case, the unauthenticated client cannot obtain the IP address and cannot ping through the RADIUS server.
PortQry:
In addition to being able to ping through, UDP ports 1812/1813 may be blocked by the firewall. It is necessary to check the port connectivity.
Taking Windows as an example, you first need to download the PortQry tool, and then open a terminal in the directory where the program is located. Then enter the following command:
portqry -n <server-IP> -p udp -e 1812 (for Windows)
nc -u -zv <server-IP> 1812 (for Linux)

There are the three PortQry states:
LISTENING: The target port is open and responding, indicating that the service is running and reachable.
NOT LISTENING: The target port is closed, meaning no service is listening on that port.
LISTENING or FILTERED: The status of the port cannot be determined because the traffic is being blocked or dropped by a firewall or network device.
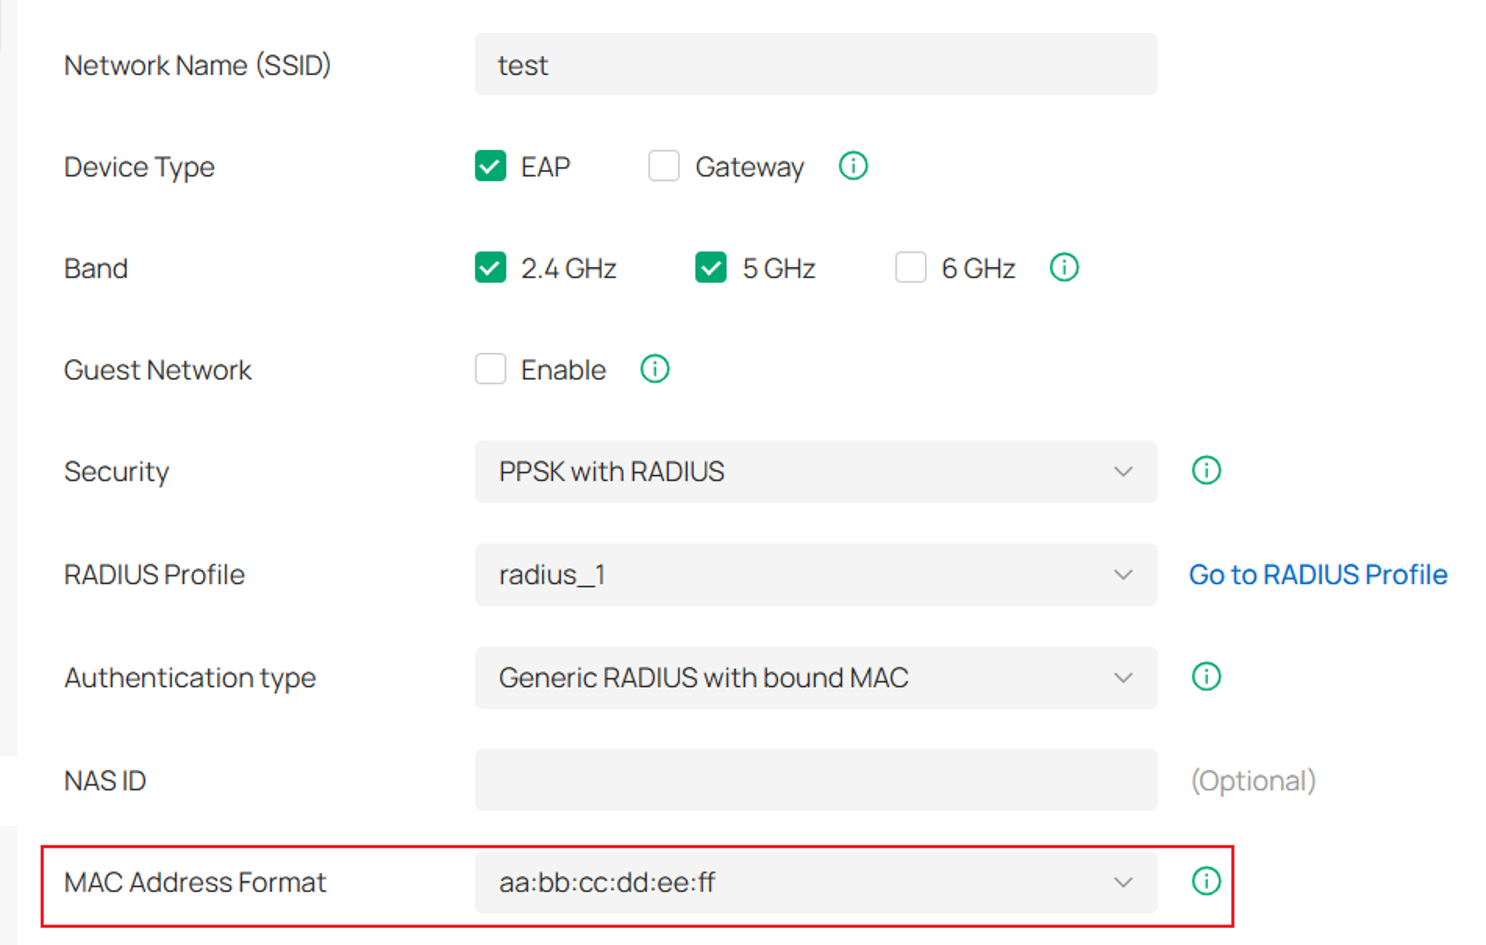
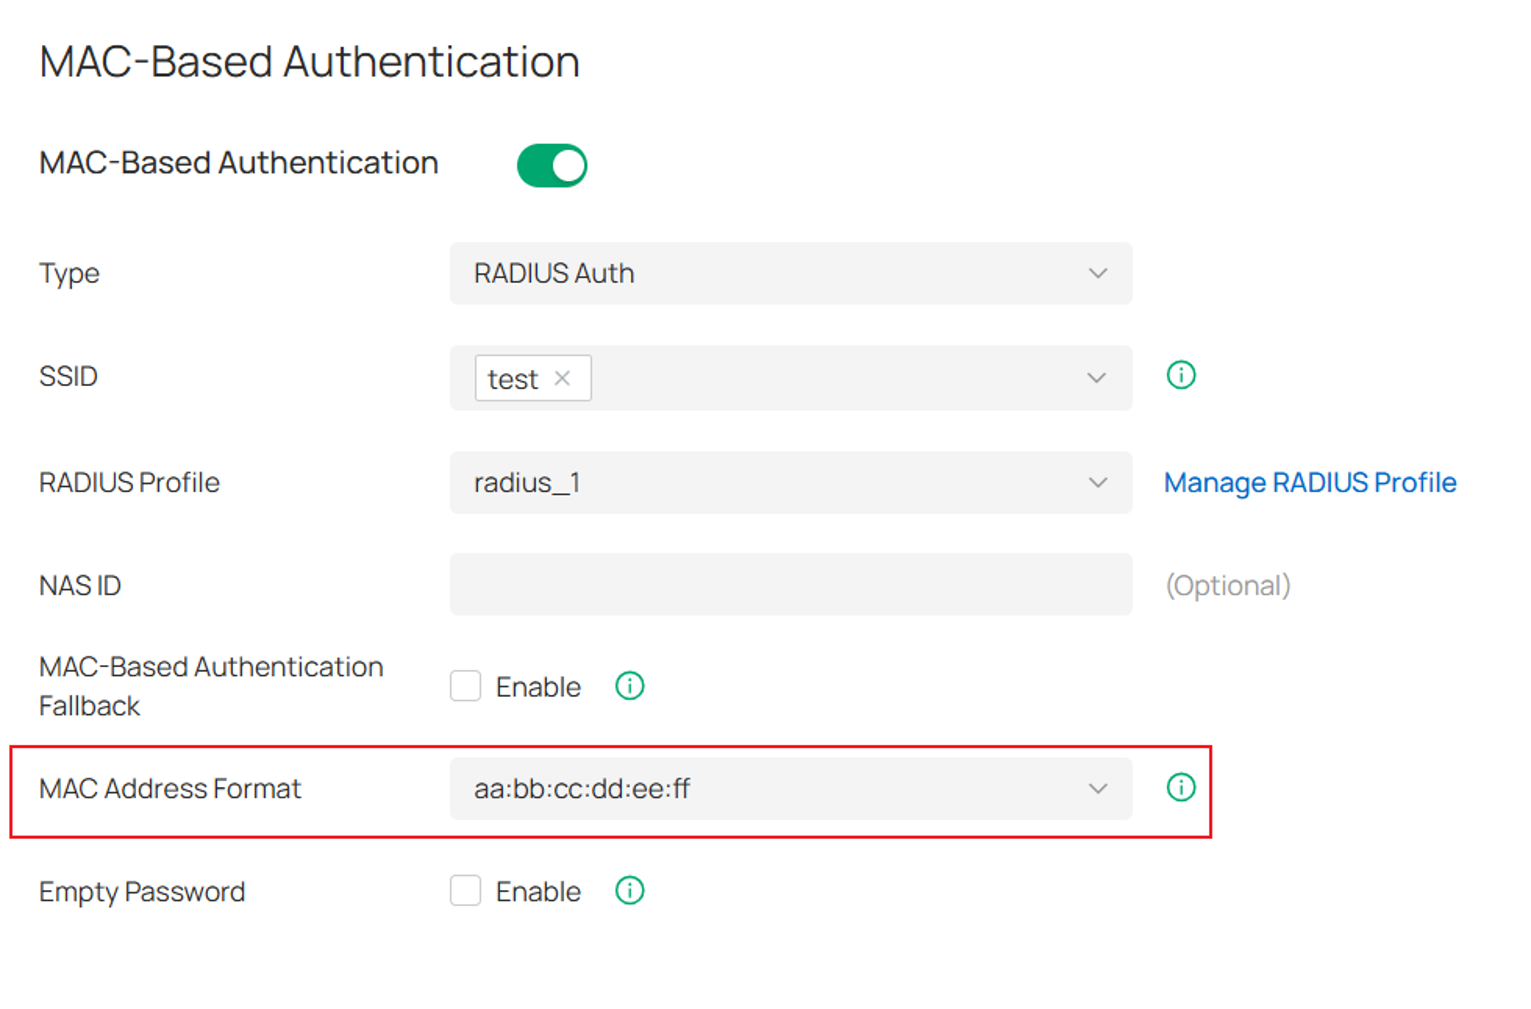
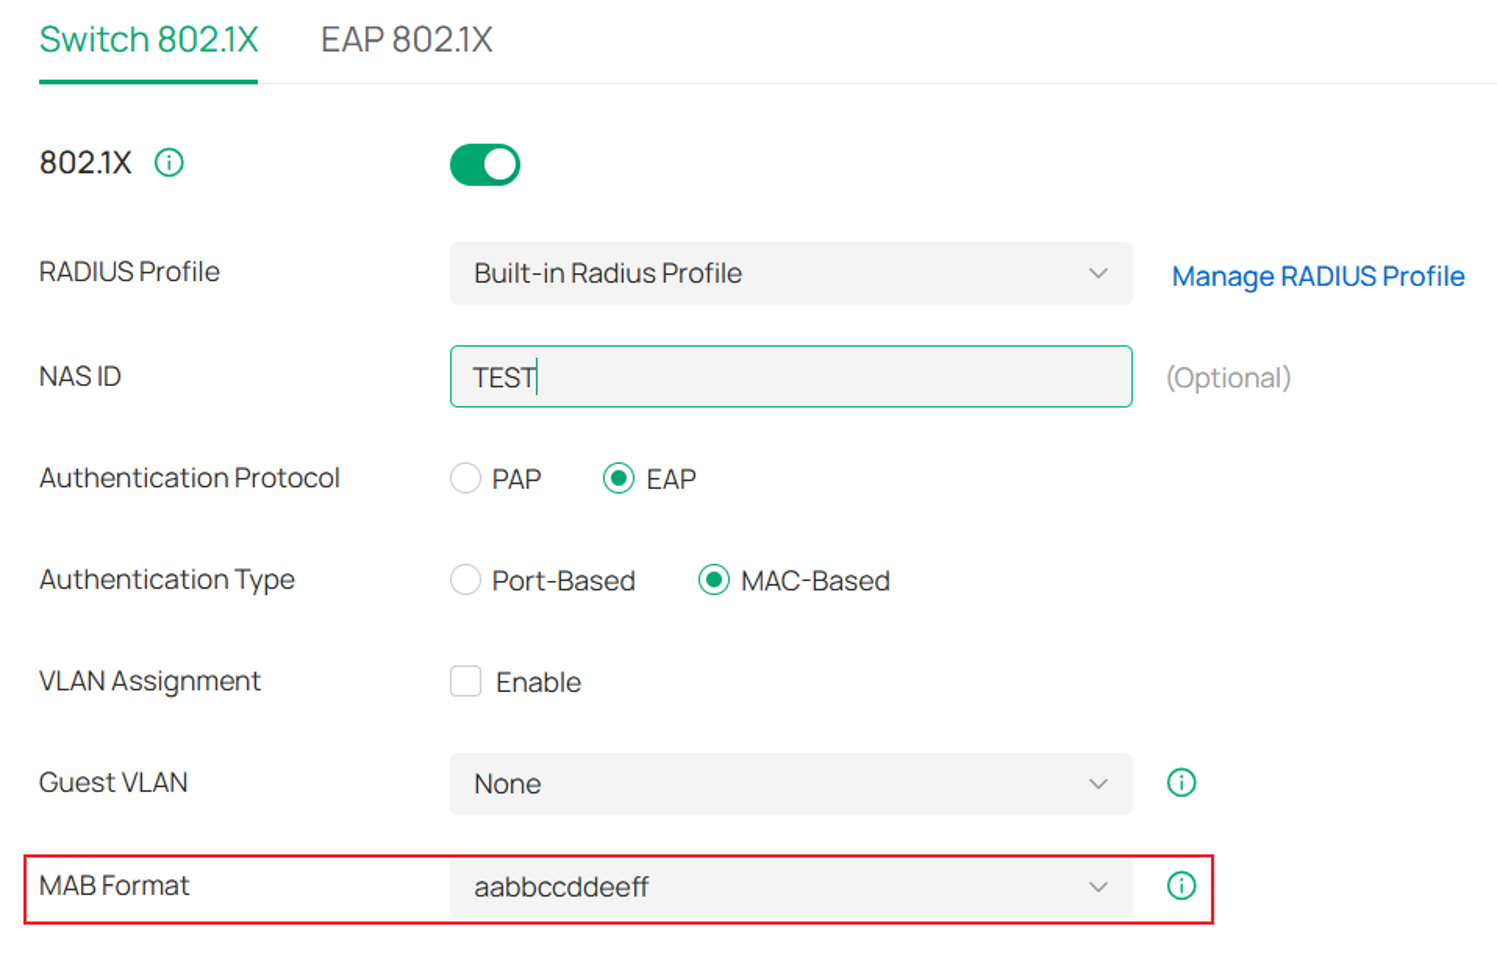
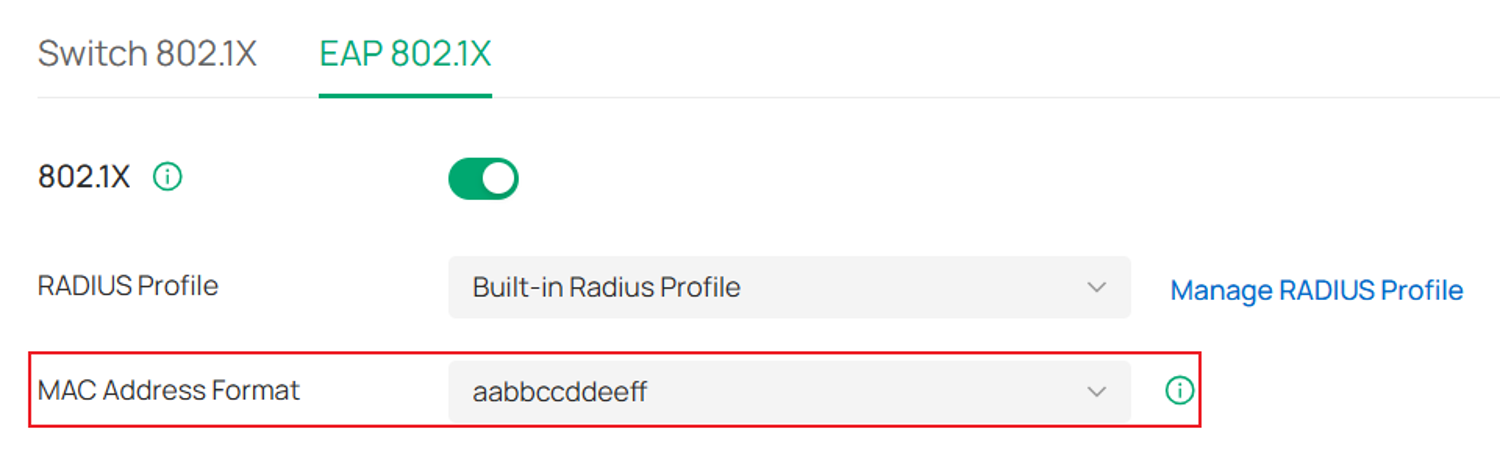
Step 5. Check other configurations. If MAC-related authentication has been configured, it is also necessary to confirm whether the configuration of MAC Address Format is consistent with the format used by the RADIUS server. The relevant functions are as follows:
PPSK with RADIUS with bound MAC in SSID configuration:
MAC-Based Authentication:
802.1X Authentication:
Conclusion
You can troubleshoot RADIUS authentication failures by following the above steps. If the preceding steps fail to resolve the problem, collect network topology information, Controller configuration information, and RADIUS server log information to Technical Support for help.
To learn more about each function and configuration, please visit Support Home to download or check the manual for your product.
