


Contents
Objective
This article introduces how to configure the port VLAN feature on Omada Gateway via Omada Controller.
Requirements
- Omada Controller (Software Controller / Hardware Controller / CBC, v6.0 and above)
- Omada Gateway
Introduction
Port VLAN configuration consists of ingress rules, PVID, and egress rules. PVID is used to add VLAN tags to the untagged packets received by the port. The egress rule determines whether to retain or remove the tags of packets forwarded by the port based on the tag/untag configuration.
In this document, VLAN configuration on the Omada gateway is implemented using the Native VLAN option.
When Native VLAN is configured, this port’s ingress rule is consistent with PVID, meaning that VLAN tags are added to untagged packets received by the port. Meanwhile, the egress rule is that packets belonging to the Native VLAN are sent out without VLAN tags, while packets of other VLANs retain their VLAN tags when being forwarded.
Configuration
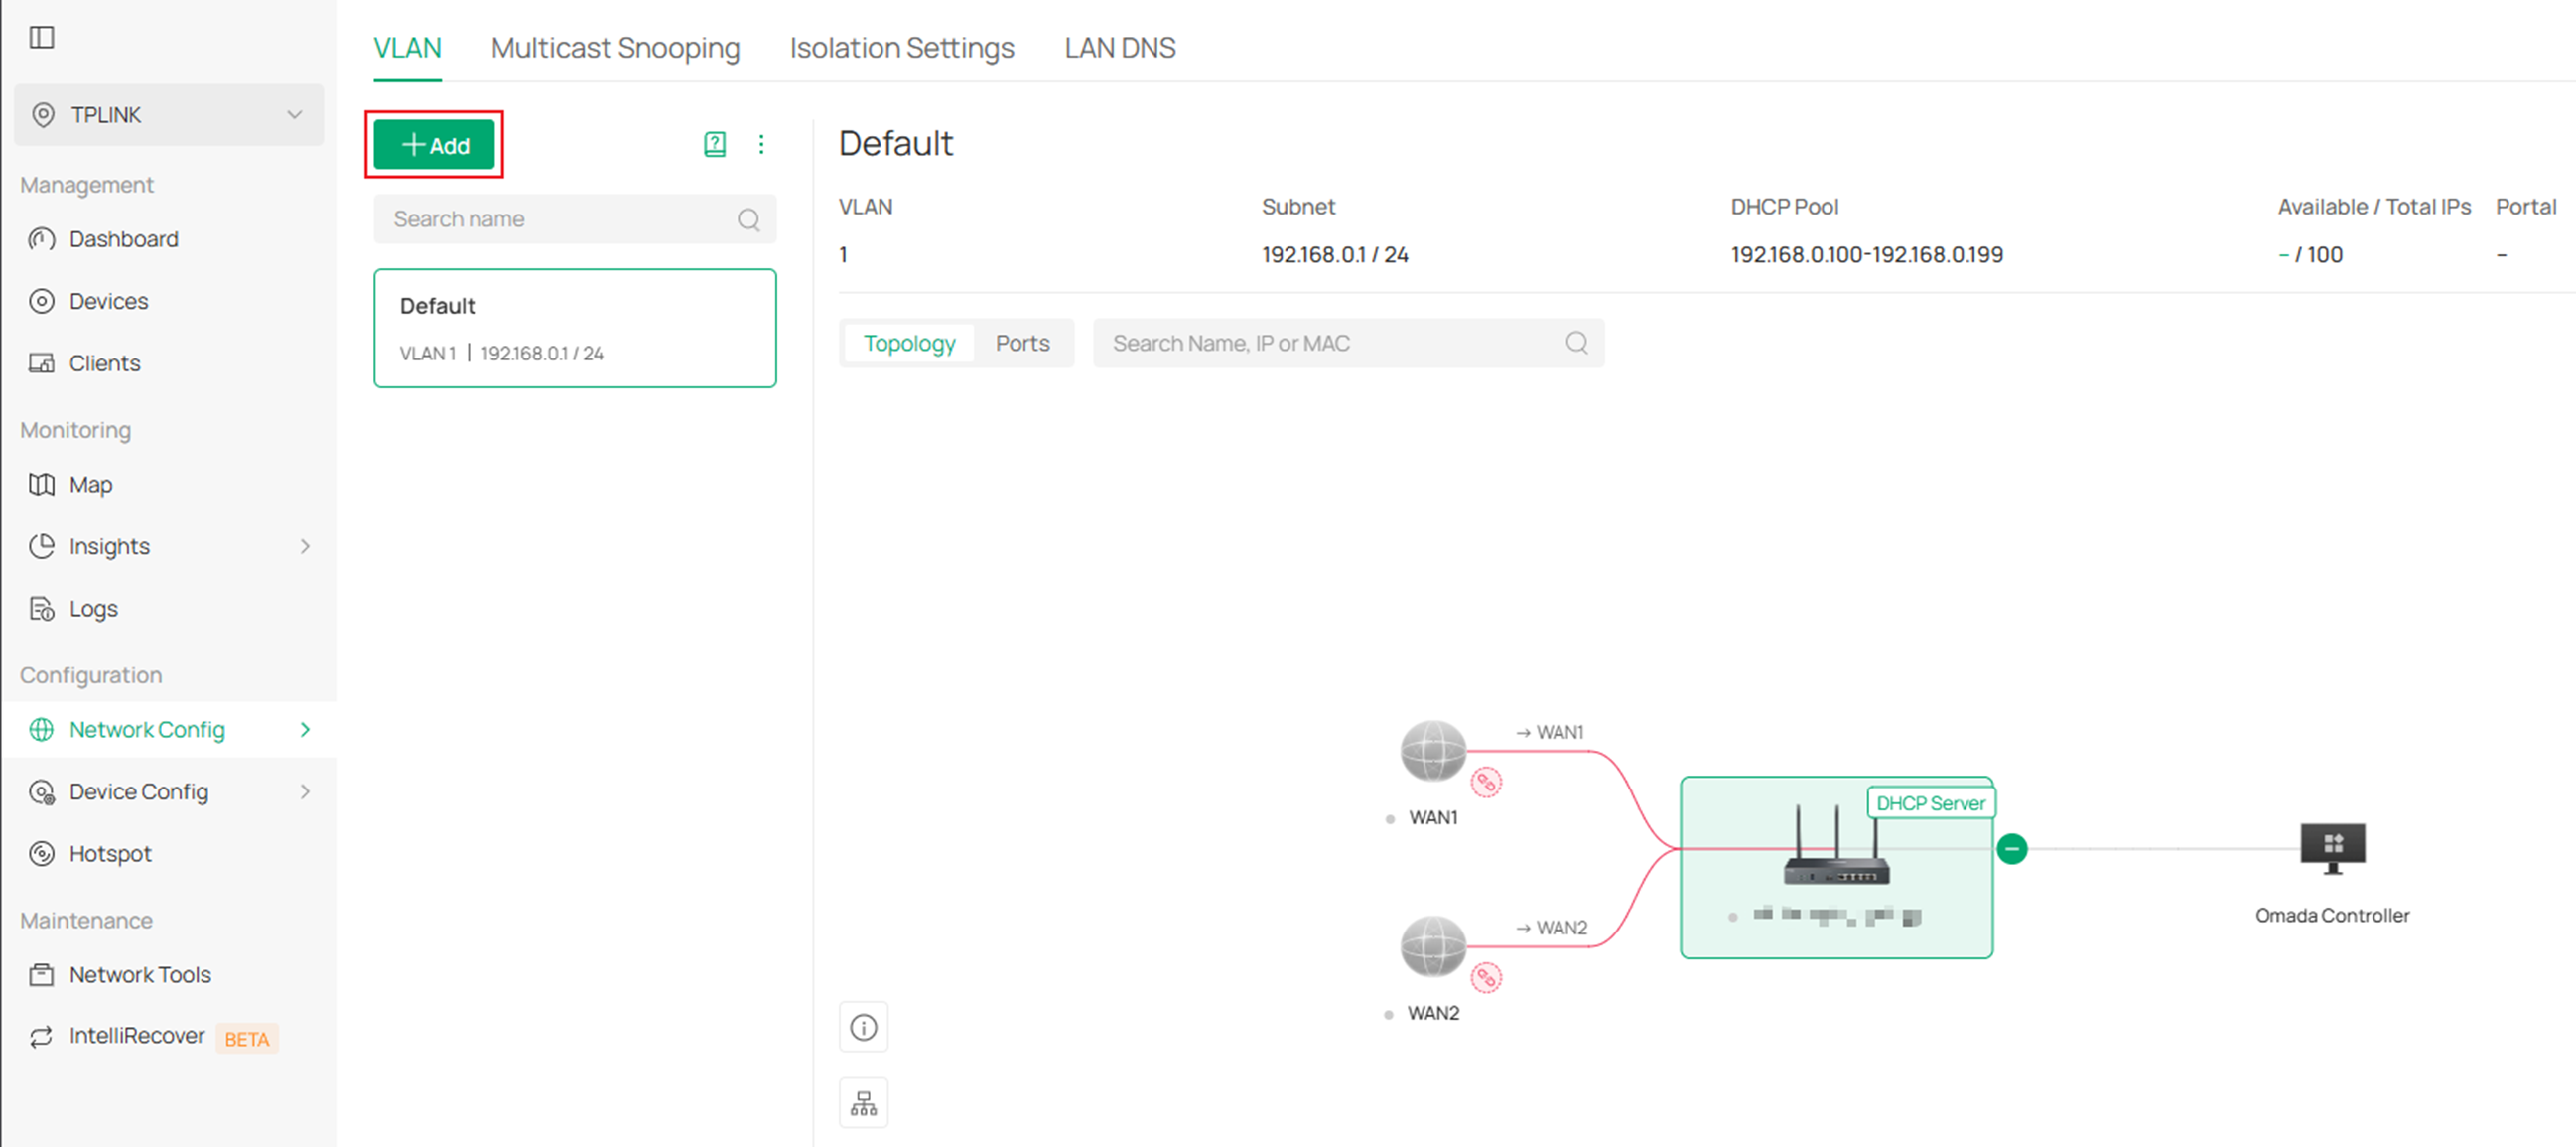
Step 1. Log in to Controller, create a site . In the site go to Network Config > Network Setting > LAN > Add to create VLAN.

Step 2. Configure the Purpose parameter.
- When a new LAN is created, a Layer 3 interface will be generated for this VLAN, and you will need to select all the ports included in the VLAN.
- If the VLAN Type is "Single" and the DHCP Server Device Type is "Gateway", a single network containing multiple VLAN IDs will be created.
If the VLAN Type is "Multiple" and the DHCP Server Device Type is "External Device" or "None", multiple networks will be created, each corresponding to one VLAN.
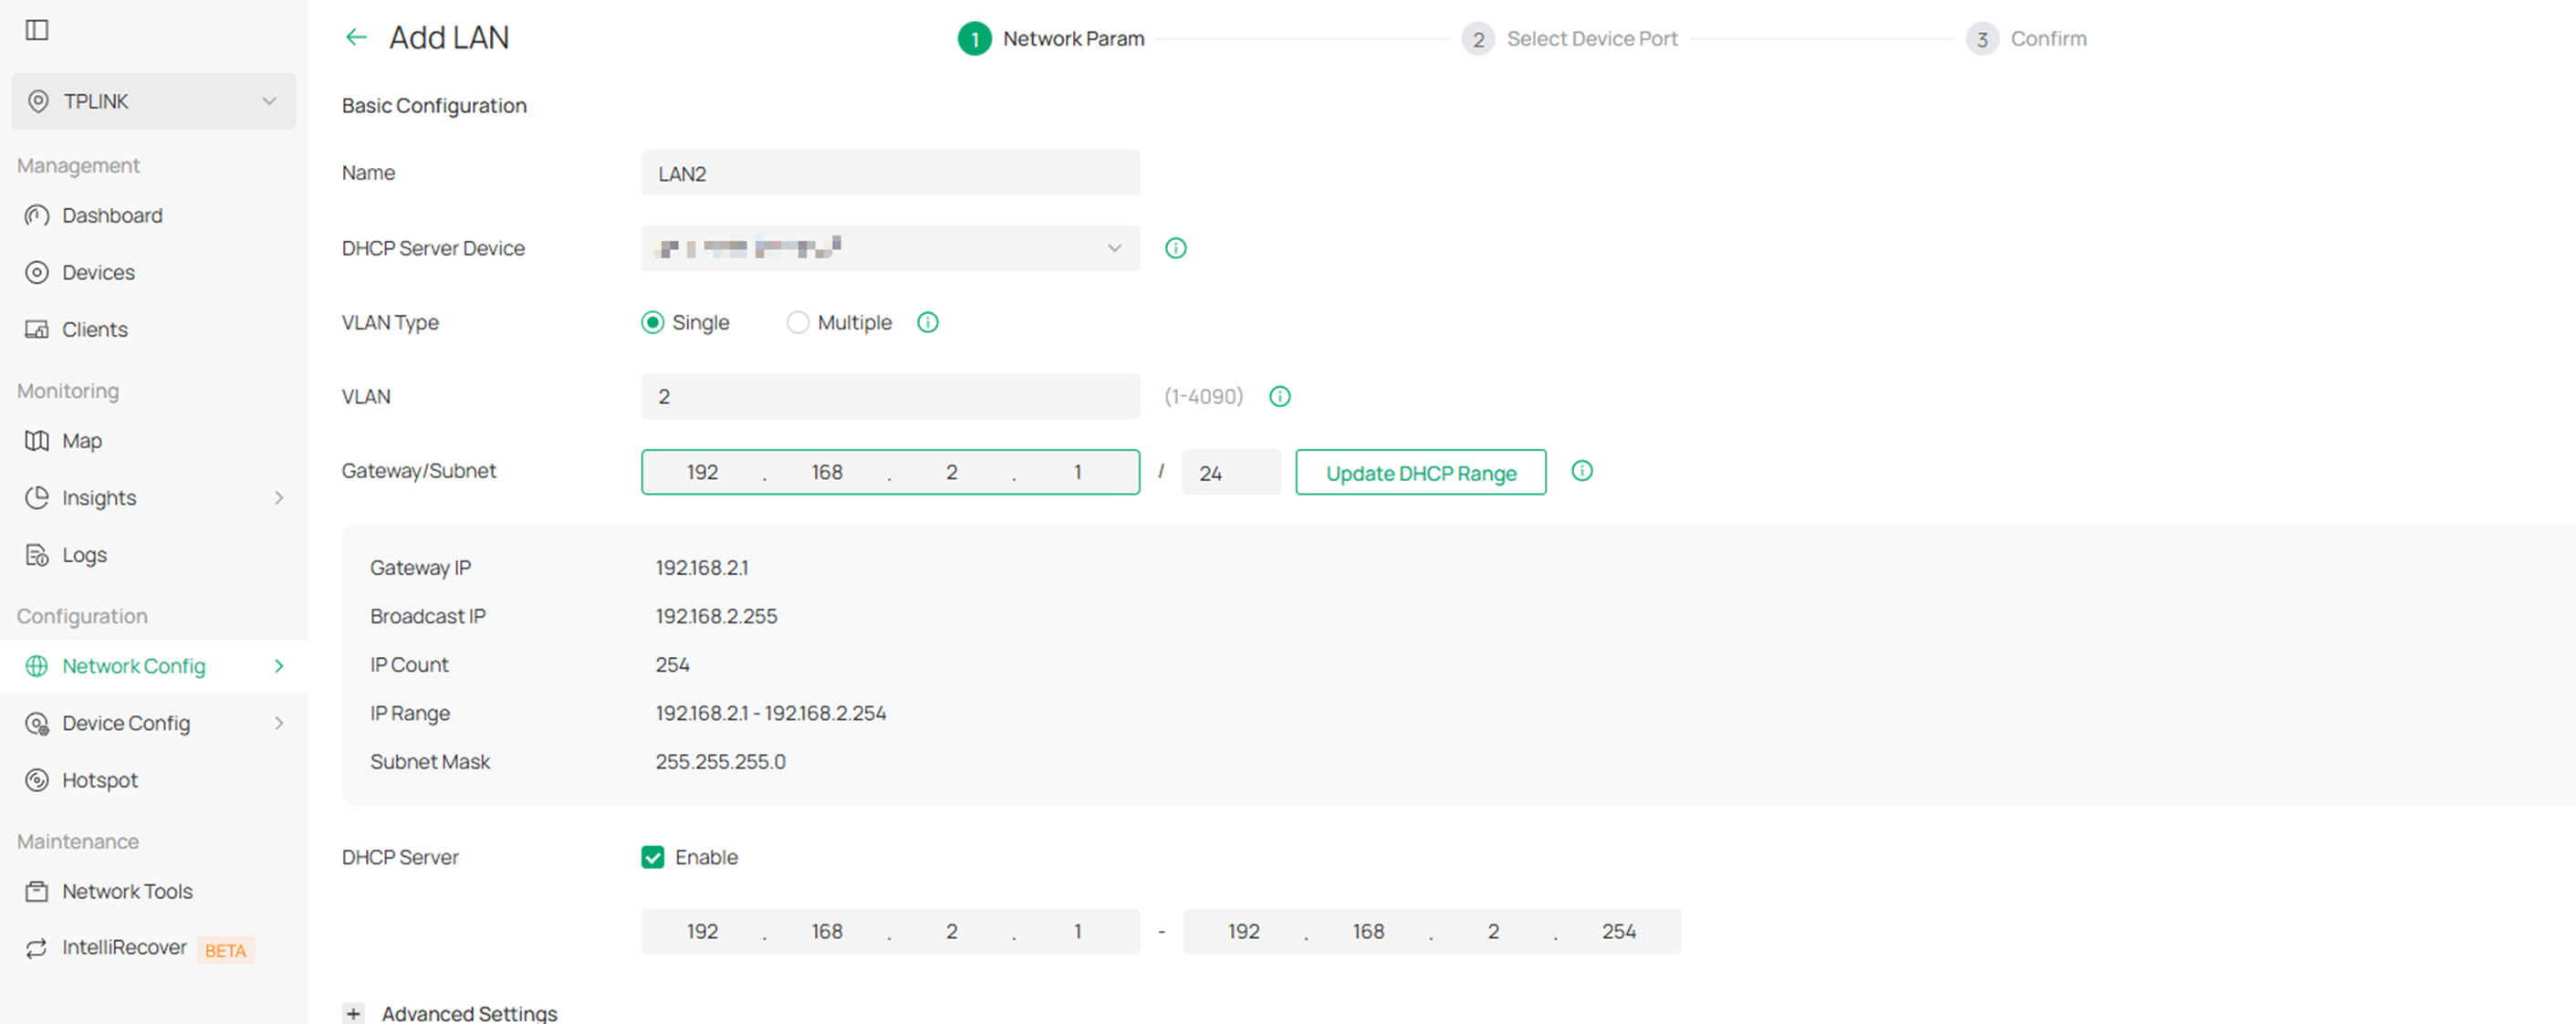
Here, let’s continue with following steps as an example.
- The default Native VLAN for Omada Gateway ports is 1.
- Add the SFP WAN/LAN3 – WAN/LAN6 ports to VLAN2 in Native VLAN;
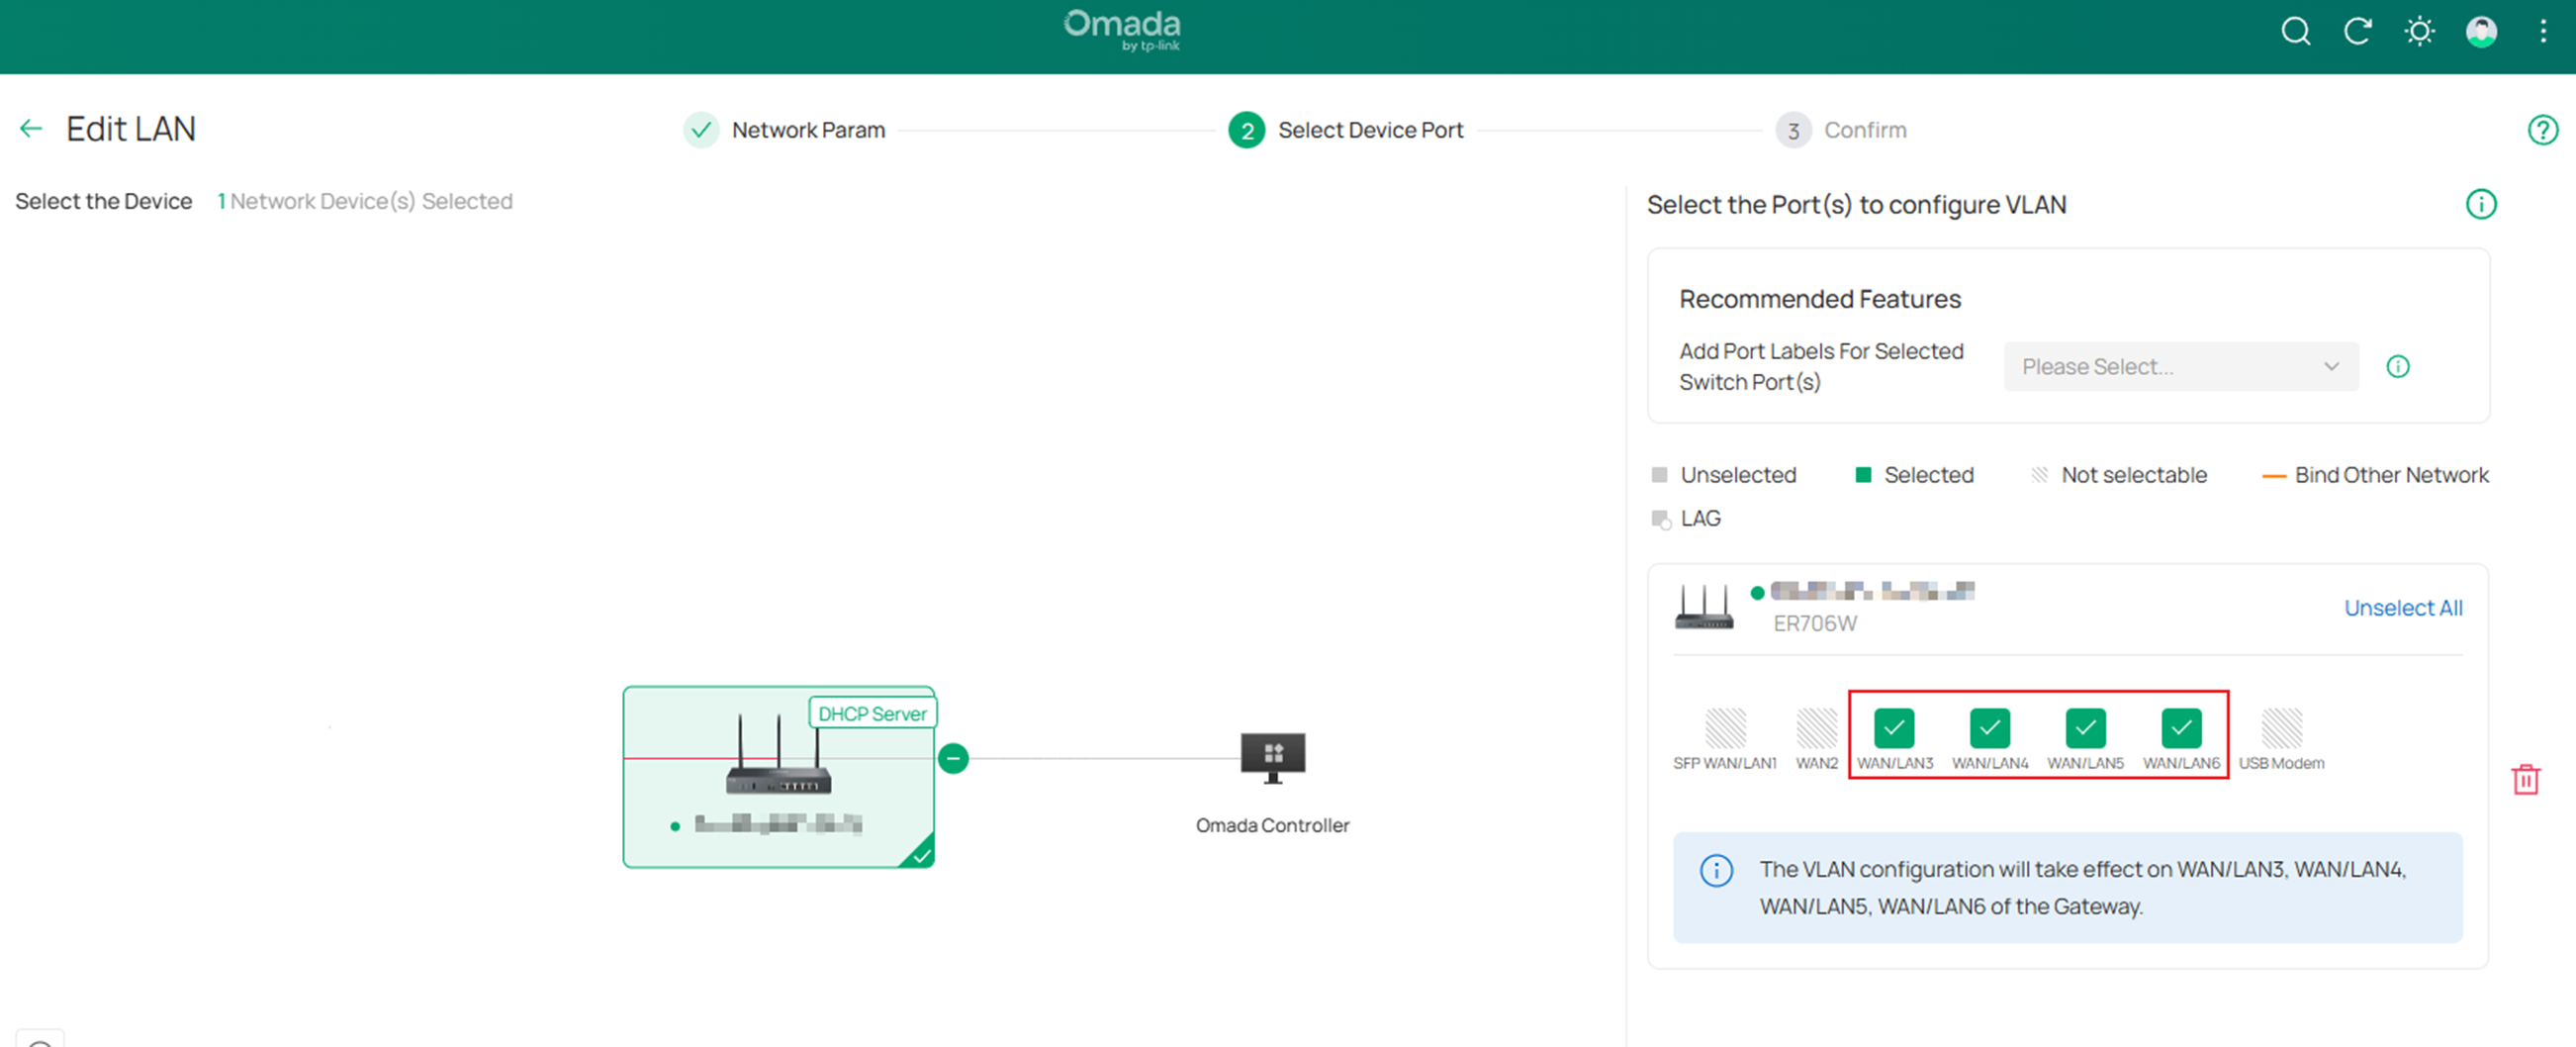
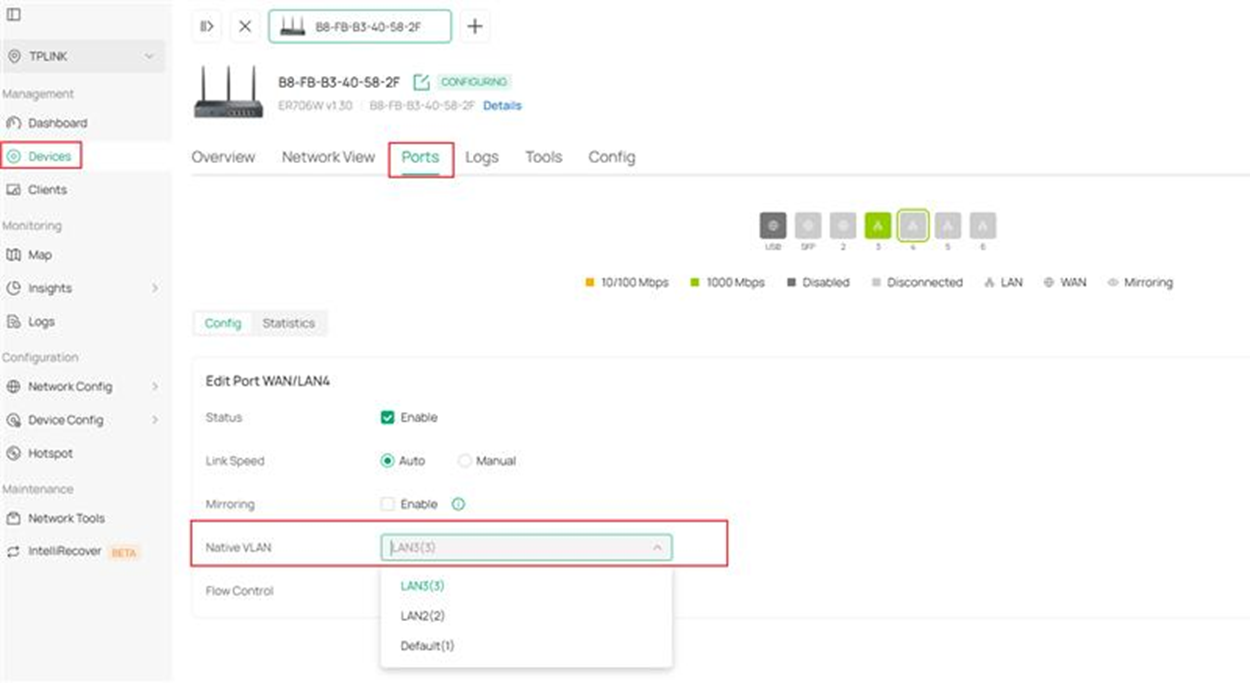
Step 3. To change the Native VLAN of ports, just click Next button in the add LAN setting page, or you can go to Devices > corresponding Gateway > Ports > corresponding Port and click the Edit icon. Note that when the port Native VLAN is changed to 2, it will be automatically configured to VLAN 2 in untag mode.
Conclusion
After following the steps above, you have configured VLAN on the Omada Gateway in Controller mode.
Get to know more details of each function and configuration please go to Download Center to download the manual of your product.
