


Configuration in Standalone mode
Configuration in Controller mode
Introduction
Band Steering is a feature designed to optimize wireless performance by intelligently distributing clients across different frequency bands, including 2.4 GHz, 5 GHz, and 6 GHz. By guiding dual-band or tri-band clients to more suitable bands, it helps reduce congestion and improve overall network efficiency.
When Band Steering is enabled, compatible clients are encouraged to connect to the 5 GHz or 6 GHz bands, which offer more non-overlapping channels, higher throughput, and lower interference compared to the 2.4 GHz band. This also helps reserve the 2.4 GHz band for legacy or single-band devices, such as many IoT devices, ensuring they can connect reliably without being affected by congestion from dual-band clients. As a result, the overall wireless experience is improved, especially in high-density environments.
Requirements
- Omada EAP
- Omada Software Controller/Hardware Controller/Cloud-Based Controller
Configuration
This section describes the configuration steps in both standalone and controller mode.
Configuration in Standalone mode
Step 1. Log in to the web management page of EAP. Here is an introduction on how to log in to the EAP web management page: How do I login to the web management page of the EAP Series products (Standalone mode)?
Step 2. Go to Wireless > Band Steering, then click the dropdown to select the Band Steering mode. Then click Save to apply the settings.
Disable: The AP will not steer clients.
Prefer 5GHz/6GHz: The AP will steer clients to the 5GHz and 6GHz in priority.
Balance: The AP will balance client connections among different bands.
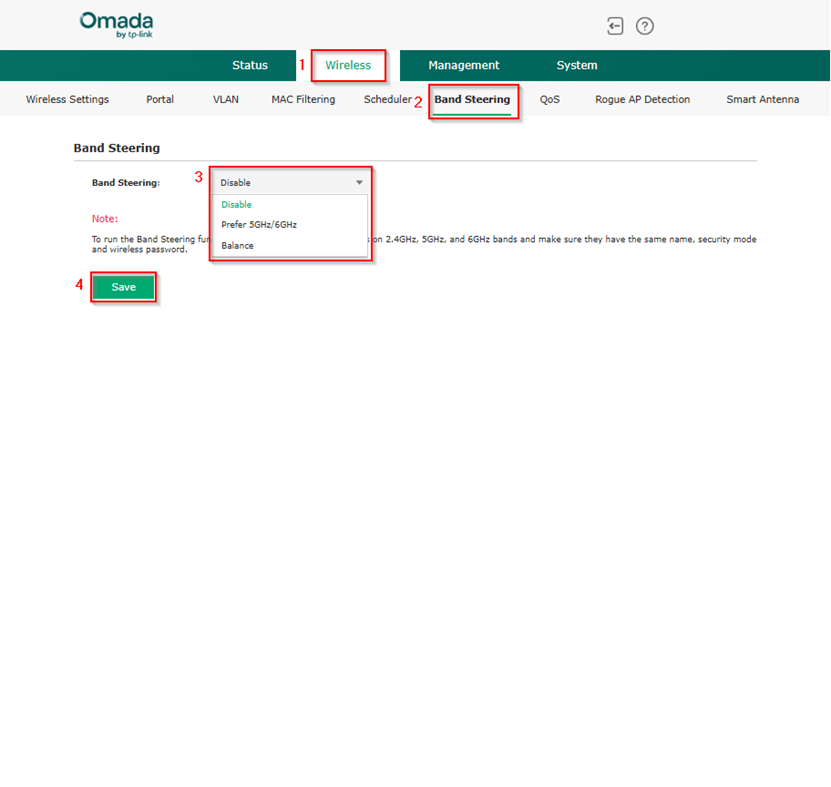
Note: To run the Band Steering function on an SSID, please create SSIDs on 2.4GHz, 5GHz, and 6GHz bands and make sure they have the same name, security mode and wireless password.
Configuration in Controller mode
Step 1. Log in to the controller.
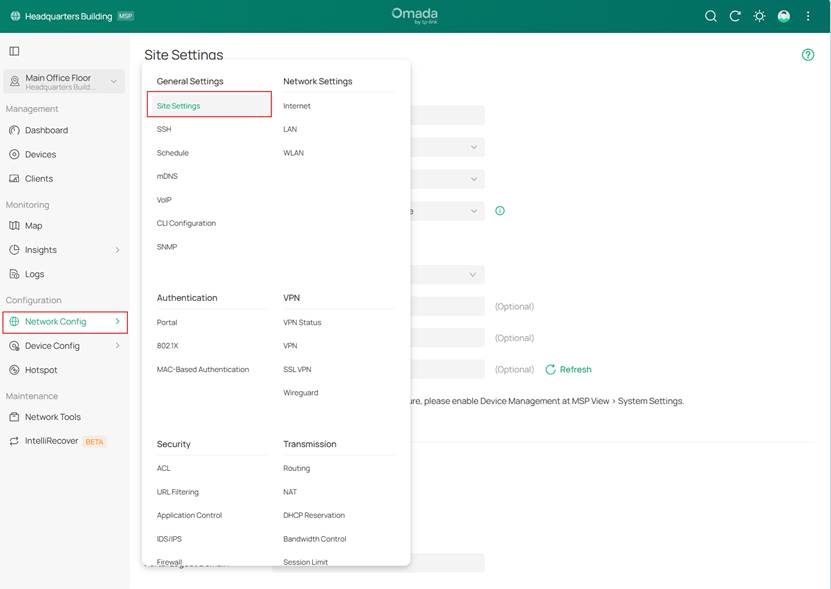
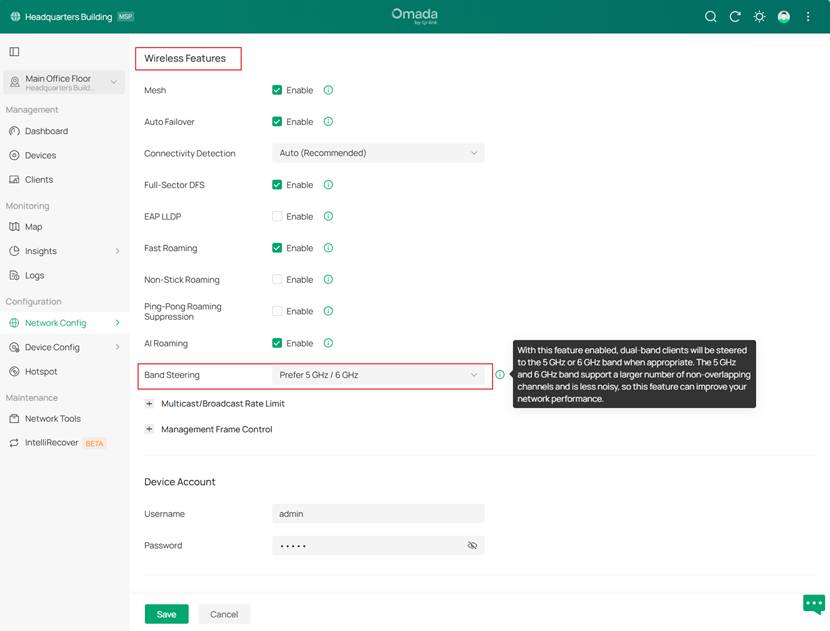
Step 2. In site view, go to Network Config > Site Settings > Wireless Features, then click the dropdown to select the Band Steering mode. Then click Save to apply the settings.
Disable: The AP will not steer clients.
Prefer 5GHz/6GHz: The AP will steer clients to the 5GHz and 6GHz in priority.
Balance: The AP will balance client connections among different bands.
Note: Configurations at the site level are pushed to all access points and all SSIDs.
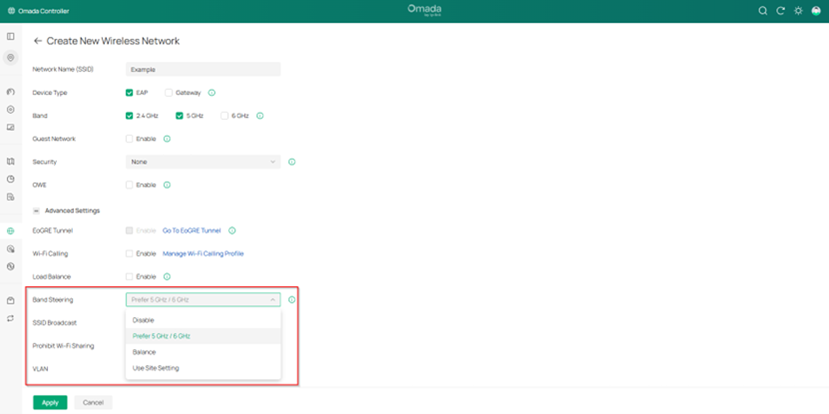
Note: Starting from Omada Controller version 6.2.10, Band Steering can also be configured per SSID. To configure it at the SSID level, navigate to Network Config > WLAN, then create a new wireless network or edit an existing one. Under Advanced Settings, locate the Band Steering option and select the desired mode.
By default, the settings follow the site configuration. However, if a specific mode is selected for the SSID, the SSID configuration takes precedence over the site configuration, and the SSID configuration will be used.
The EAP firmware must also be compatible with Controller 6.2.
Conclusion
Band steering can adjust the number of clients in 2.4 GHz, 5 GHz and 6 GHz bands to provide better wireless experience. When enabled, dual-band clients will be steered to the 5 GHz and 6 GHz bands according to the configured parameters. This function can improve the network performance because the 5 GHz and 6 GHz band supports a larger number of non-overlapping channels and is less noisy.
Get to know more details of each function and configuration please go to Download Center to download the manual of your product.
