


How to assign a static IP address to the EAP using Omada APP


Contents
Objective
This guide aims to help you set a static IP address for your EAP within the Omada APP to ensure consistent network configuration and management.
Requirements
- Omada EAP
- Omada Controller
- Omada APP
Introduction
Assigning a static IP address to your EAP device can improve network stability and simplify device management. This process requires accessing the EAP managed in controller mode via the Omada APP and configuring the required static IP address.
Configuration
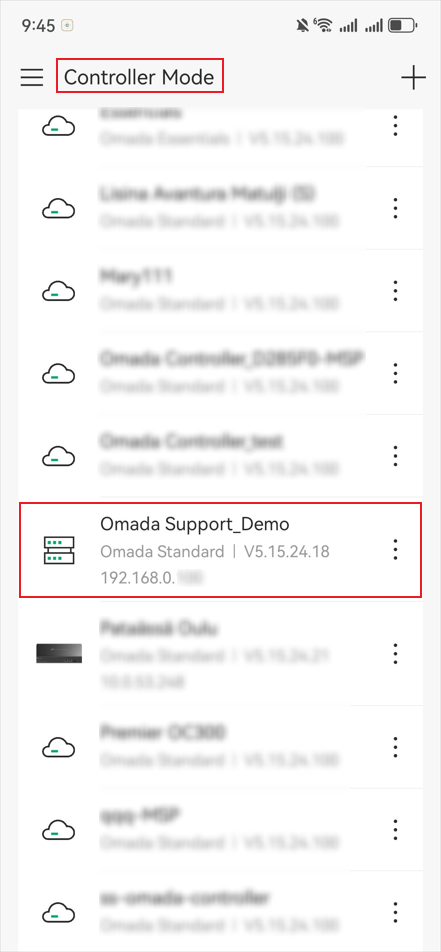
Step 1. Launch the Omada APP and log in with your TP-Link ID. On the Controller Mode page, click and log in to your controller.
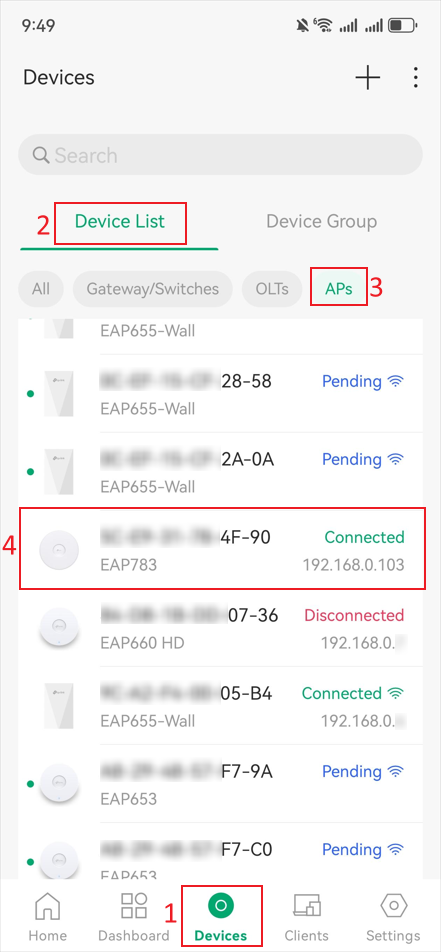
Step 2. Tap the Devices icon at the bottom of the screen. On the Device List page, select APs to view all EAPs under the controller. Then click the EAP you need to configure.
Note: Only when the EAP displays “Connected” on the controller can it be managed.
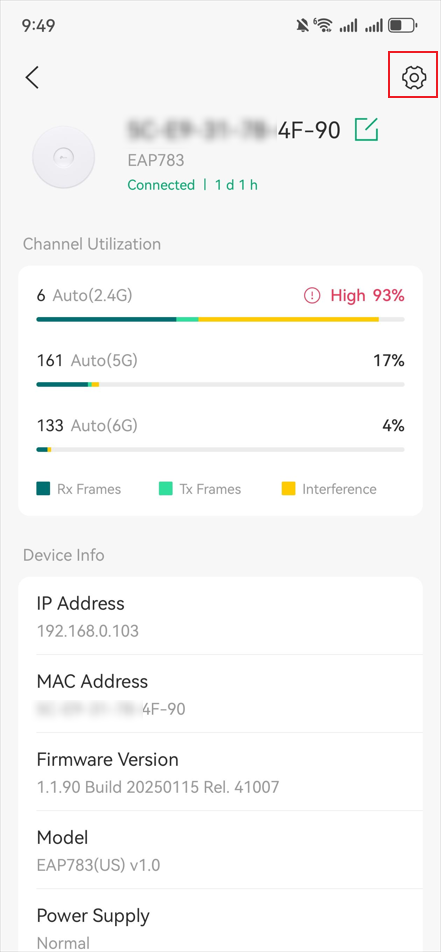
Step 3. Click the Settings icon in the top-right corner of the page.
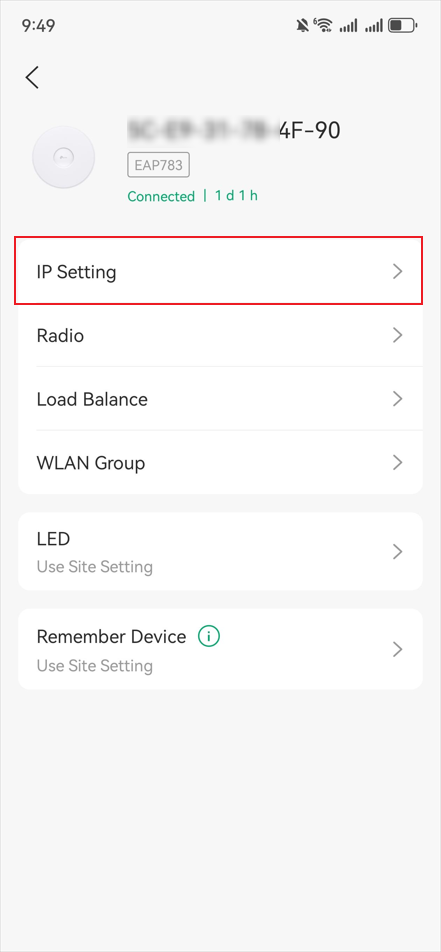
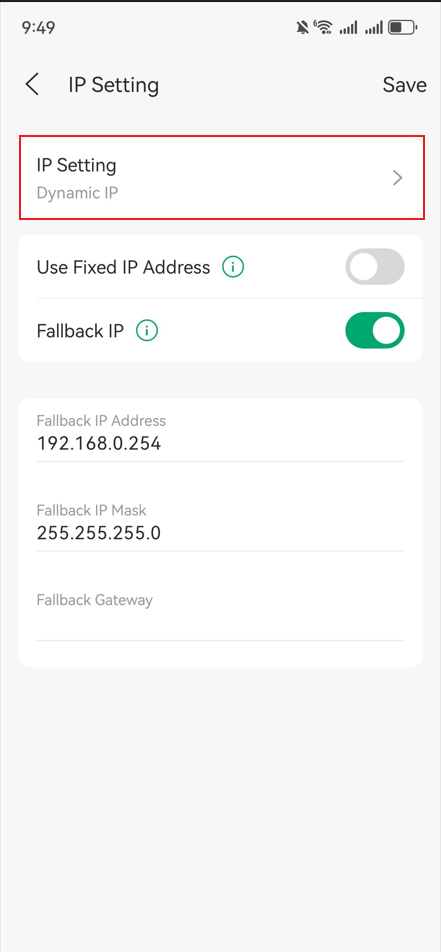
Step 4. Go to the IP Settings page.
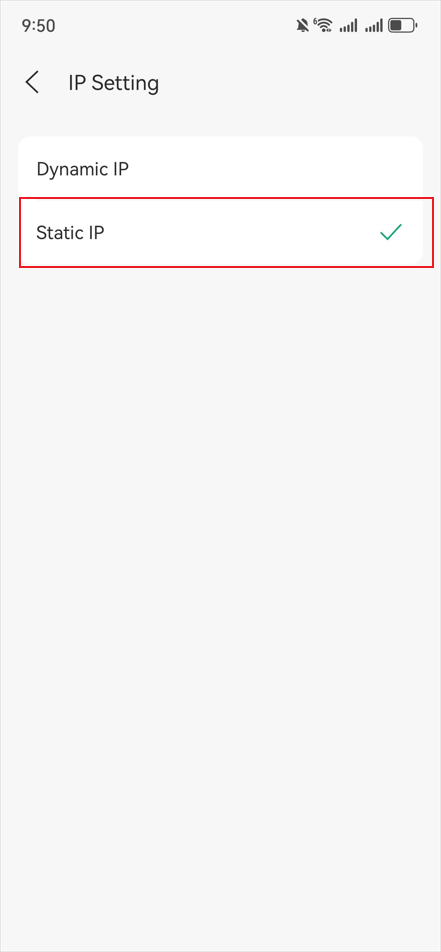
Step 5. Click on IP Settings to select Static IP. Then return to the previous page, where you can configure a static IP address for the EAP. After that, please click the Save button at the top-right corner of the page to save your settings.

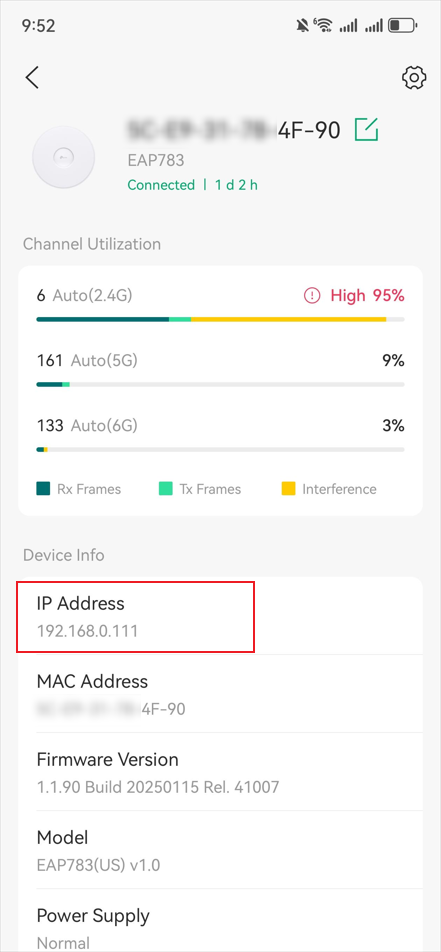
Step 6. Done! You can return to the EAP main interface and check your settings again.
Conclusion
Now you have learned how to set a static IP for EAP in the Omada APP. Always ensure that the static IP is within the correct subnet and not conflicting with other devices to avoid connection issues.
Get to know more details of each function and configuration please go to Download Center to download the manual of your product.
