


Contents
Introduction
Wireless connection is susceptible to environment interference and it may cause the unstable connection. In this case, we need to do optimization to make Omada EAPs work in less interference and clearer channel or adjust transmission power and bandwidth to get better performance. RRM is a function which can intelligently optimize WLAN performance based on real-time interference detection. In this article, we will introduce how to configure RRM.
Requirements
- Omada SDN Controller v6.1 or above
- Omada EAP devices that support RRM
Configuration
After completing the SSID configuration, go to Controller > Network Config > Network Settings > WLAN > WLAN Optimization > Auto WLAN Optimization, select Adaptive, and click Apply.

Firmware Updates
To enable your Omada EAP to support RRM, you need to upgrade the firmware of Omada EAP to the version that supports RRM. For details, please refer to the release notes on the Omada website.
For updating your Omada EAP firmware, please refer to How to upgrade EAP firmware in different management modes.
Optimization History
Click Optimization History at the top, you can see all optimization records here, you can see details of successful records, and choose to delete all records.
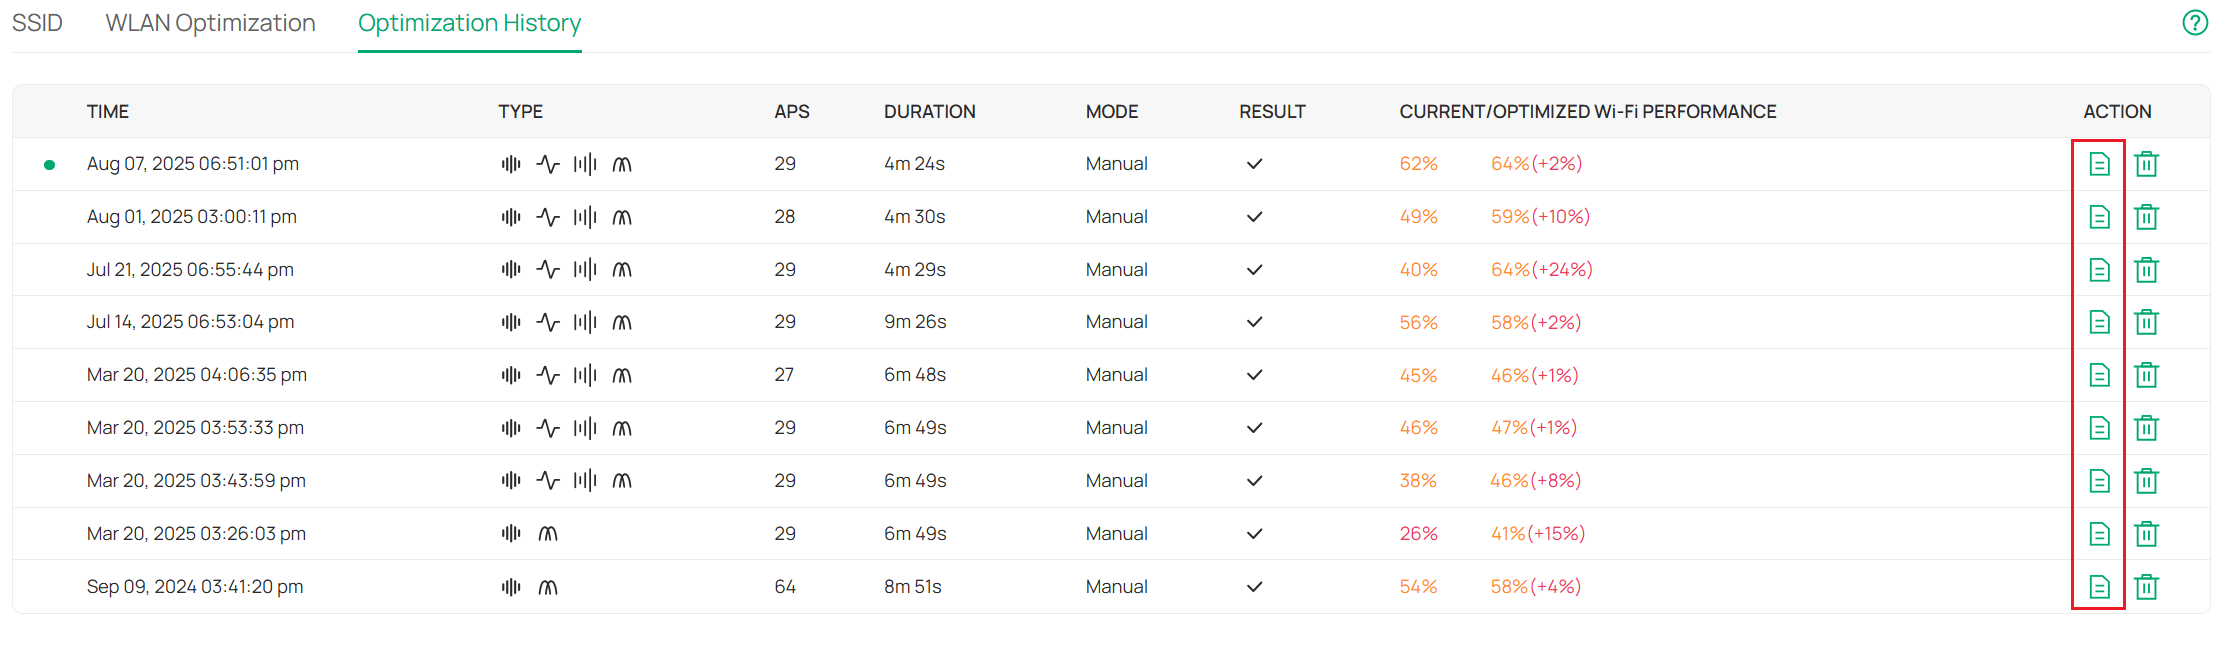
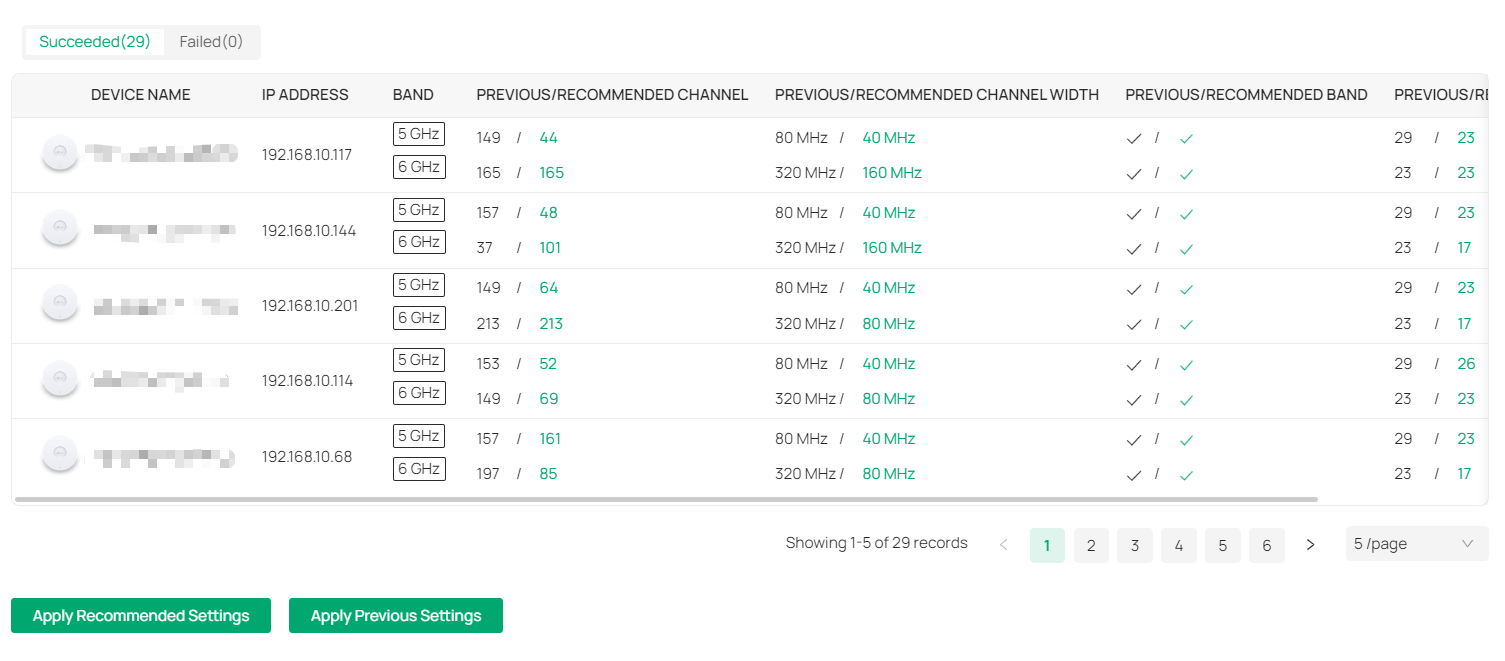
Click the 'Detail' button on the right, and you'll see what operations are taken to make your network work better.
Verification
Once you complete the configuration of RRM, an optimization will be executed immediately. Waiting for the optimization done, check the Optimization History and you will find a new record, then you have successfully configured RRM.
Conclusion
Configuring RRM, it will optimize WLAN performance based on real-time interference detection.
Get to know more details of each function and configuration please go to Download Center to download the manual of your product.

