


Configuration for Email Notification
Configuration for Remote Logging
Introduction
This guide provides a step-by-step overview of how to configure an email (SMTP) server or log (Syslog) server within the Omada Controller. By implementing these services, administrators can receive real-time alerts, monitor network events, and maintain detailed logs for troubleshooting and auditing purposes.
Requirements
- Omada Cloud-Based Standard Controller/Software Controller/Hardware Controller
Configuration
Configuration for Email Notification
Step 1. Log in to your Omada Controller.
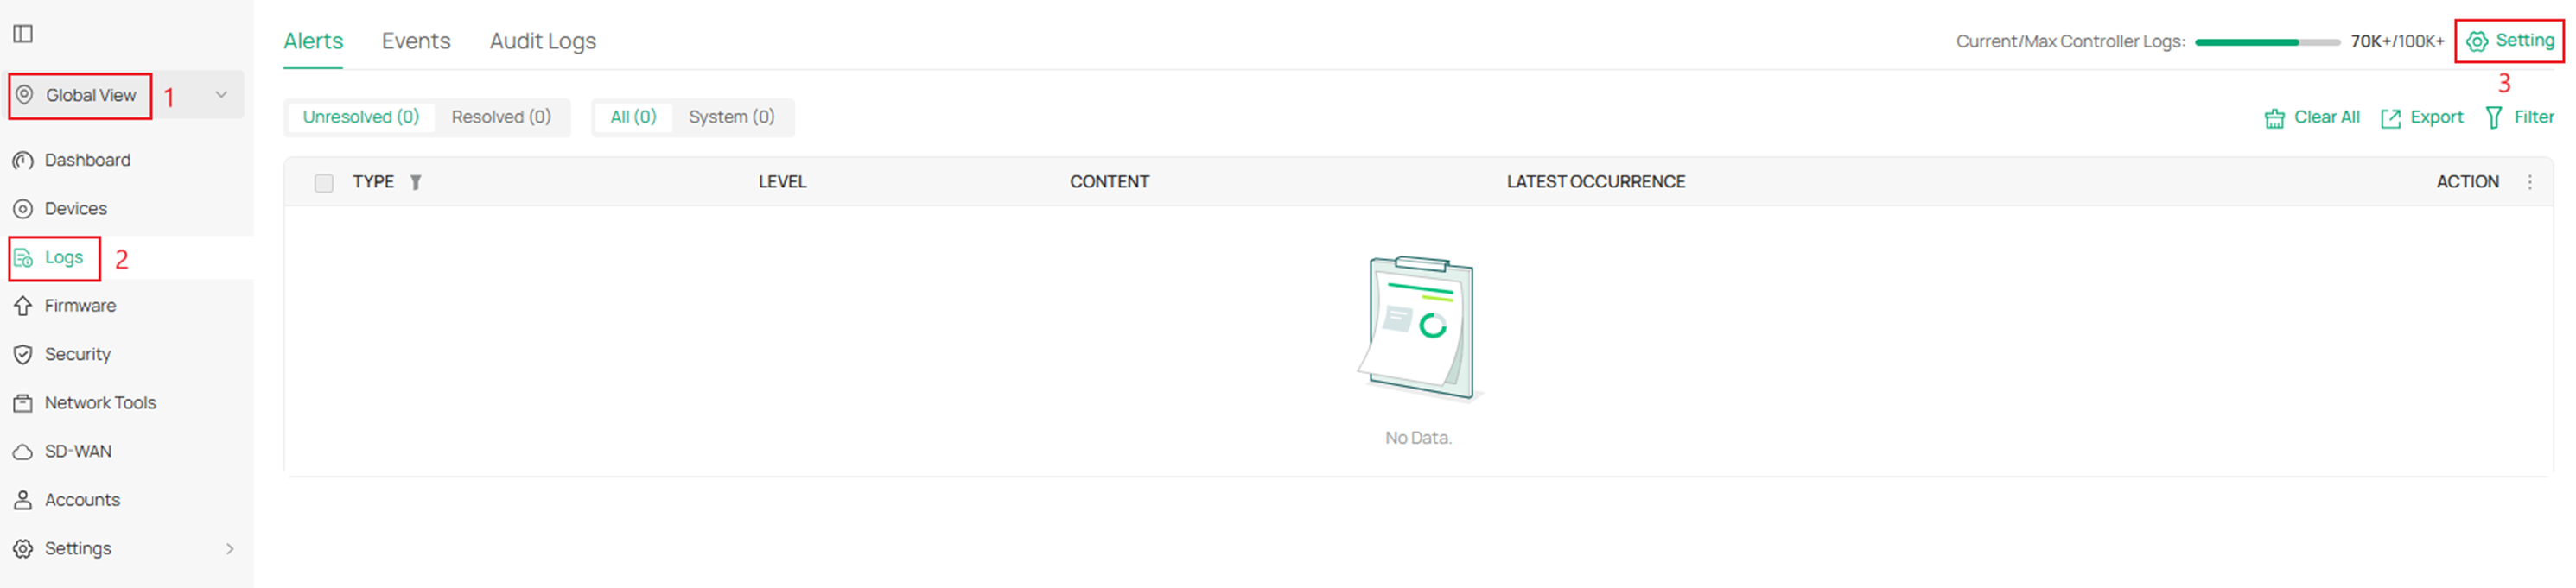
Step 2. In the Global View navigate to Settings > Server Settings.
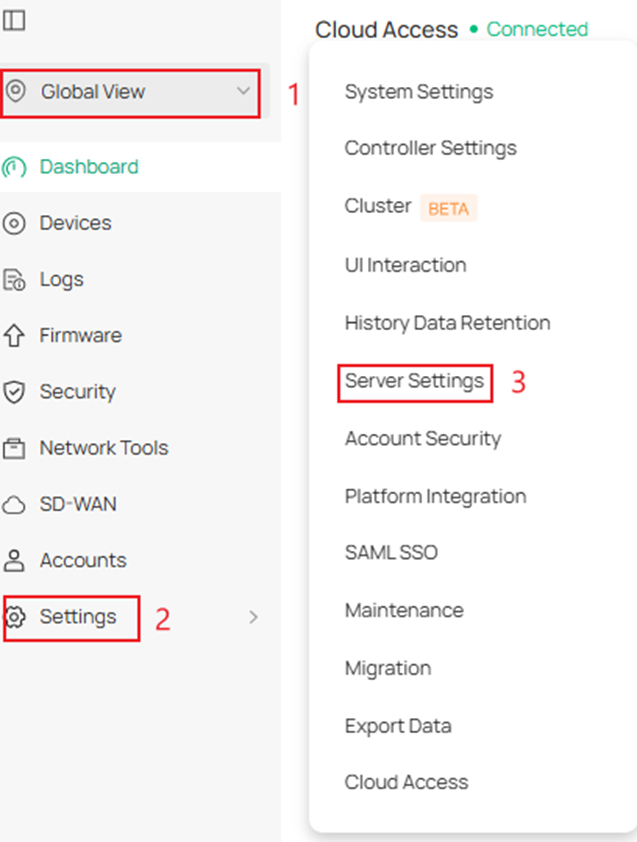
Step 3. Enable Mail Server and fill in the parameters.
In this example, it uses Gmail as the SMTP server; different mailboxes may have different ways to support third-party access. You need to configure this function based on your mailbox.
You can send a test email to one of your other mailboxes. If you set the mail server successfully, sent a Test Email, you will receive a “succeeded” notification just like the screenshot below. Otherwise, a failure message will appear.
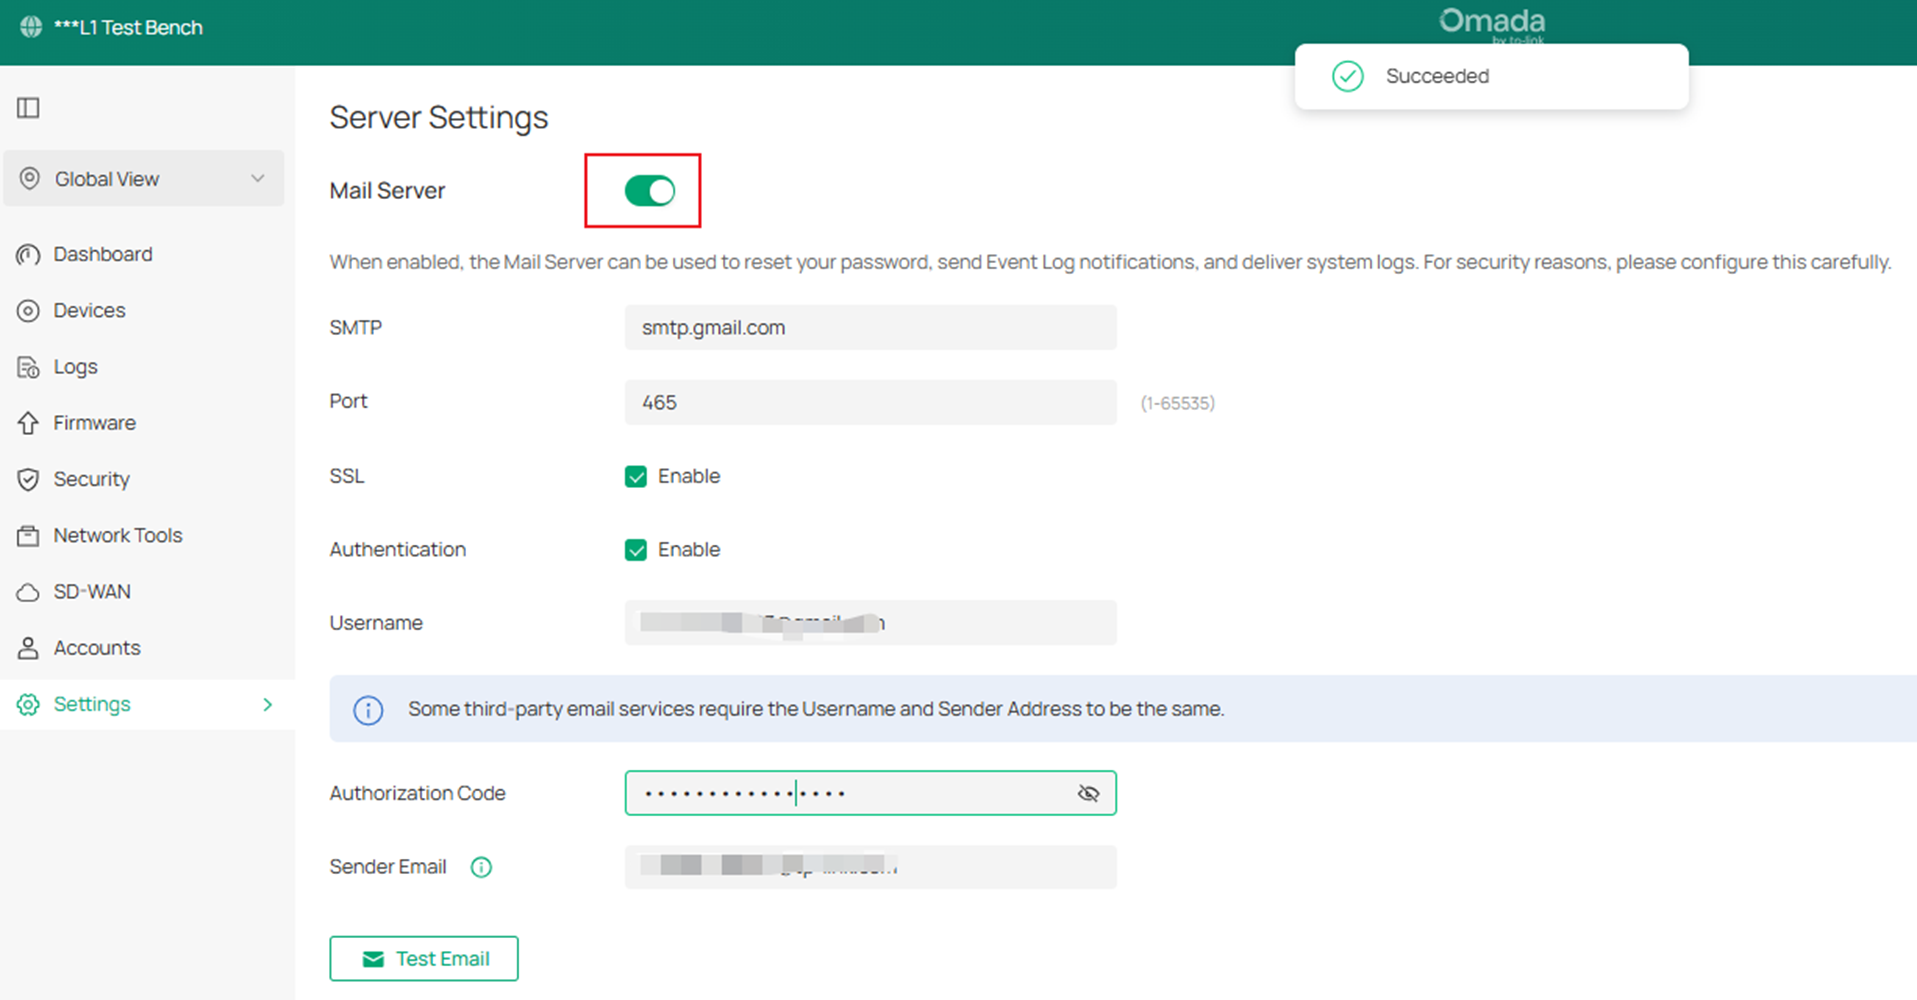
SMTP: Enter the URL or IP address of the SMTP server according to the instructions of your email service provider.
Port: Enter the port used by the SMTP server according to the instructions of your email service provider.
SSL: Enable or disable SSL according to the instructions of your email service provider. SSL (Secure Sockets Layer) is used to create an encrypted link between the controller and the SMTP server
Authentication: Enable or disable Authentication according to the instructions of your email service provider. If Authentication is enabled, the SMTP server requires the username and password for authentication.
Username: When Authentication is enabled, enter your email address as the username.
Authorization Code: When Authentication is enabled, enter the authentication code as the password, which is provided by the email service provider when you enable the SMTP service.
Sender Email: Specify the sender address of the email. If you leave it blank, the controller will use your email address as the sender address.
Test Email: Specify an email address to send a test email to check the mail server configuration.
If you need to configure the SMTP server with a different encryption protocol please refer to this link: How to use encrypted SMTP Server on Omada Controller | Omada Network Support
Note: To set up the mail server successfully, we need to make sure the third-party mail server already enables SMTP service and allows us to log in.
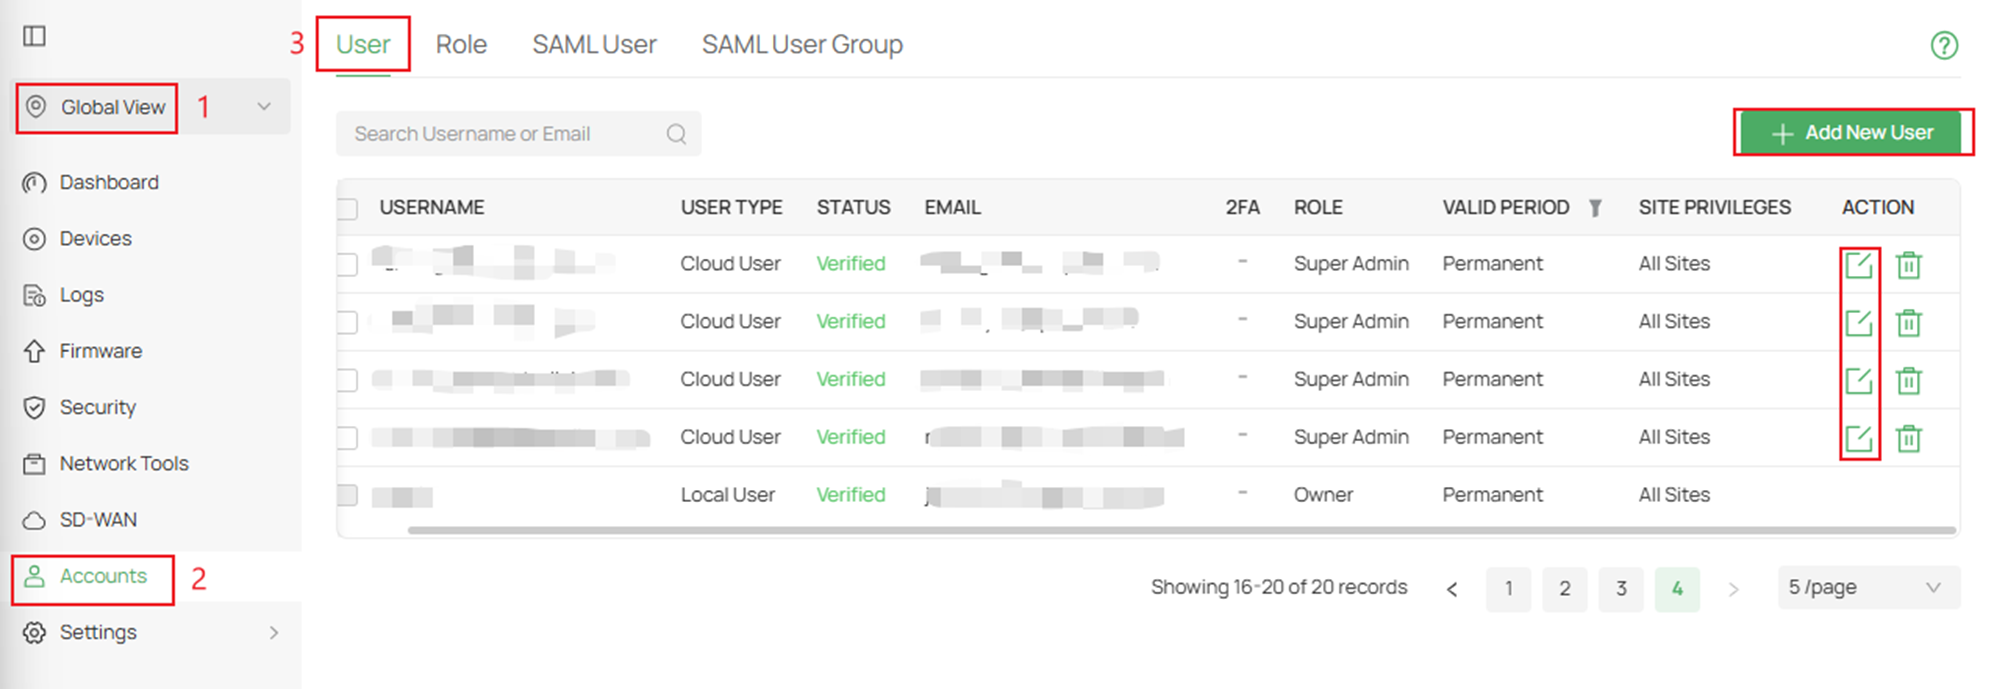
Step 4. Next is to add a user who wants to receive email alerts.
If the account that wants to receive alert emails has been added as a user, navigate to Global View > Accounts > User and edit the account you wish to receive alert emails from.
If you need to add a user, click Add a New User on the top right of your screen.
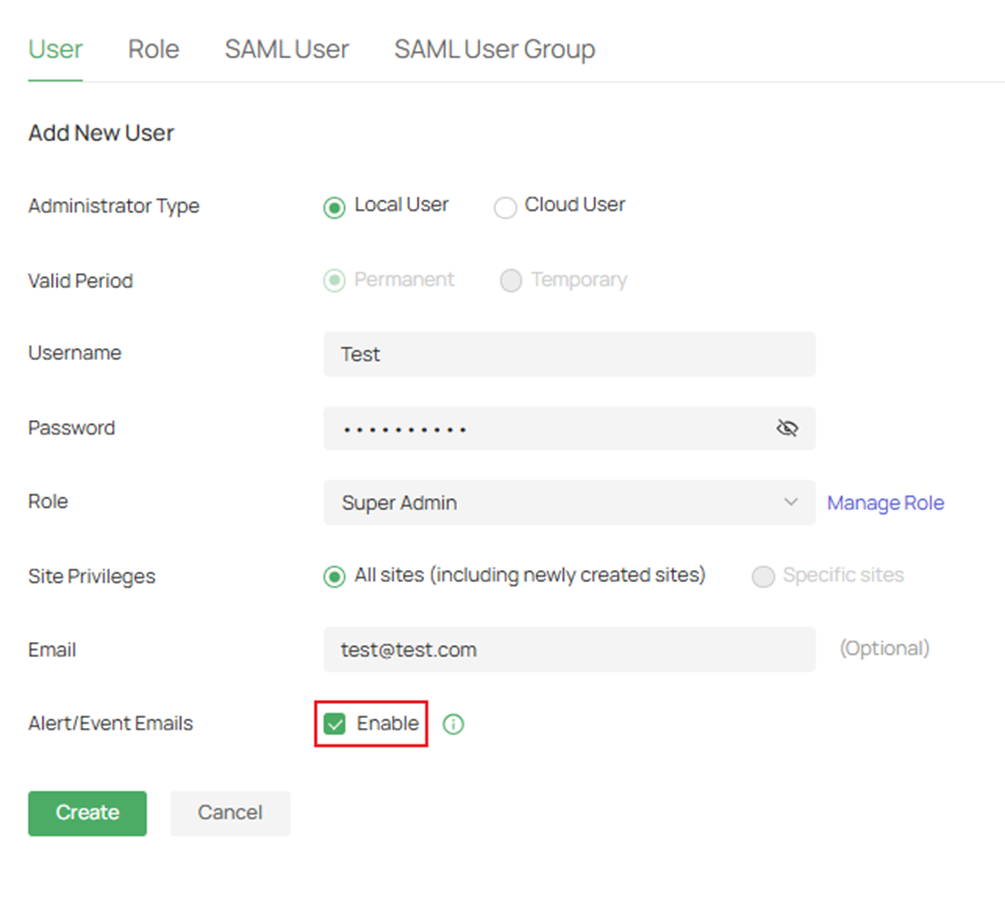
Step 5. Here is an example of the account creating portion. Fill in the parameters and enable Alert/Event Emails and click Save.
If you only had to edit the account just enable Alert/Event Emails and click Save.
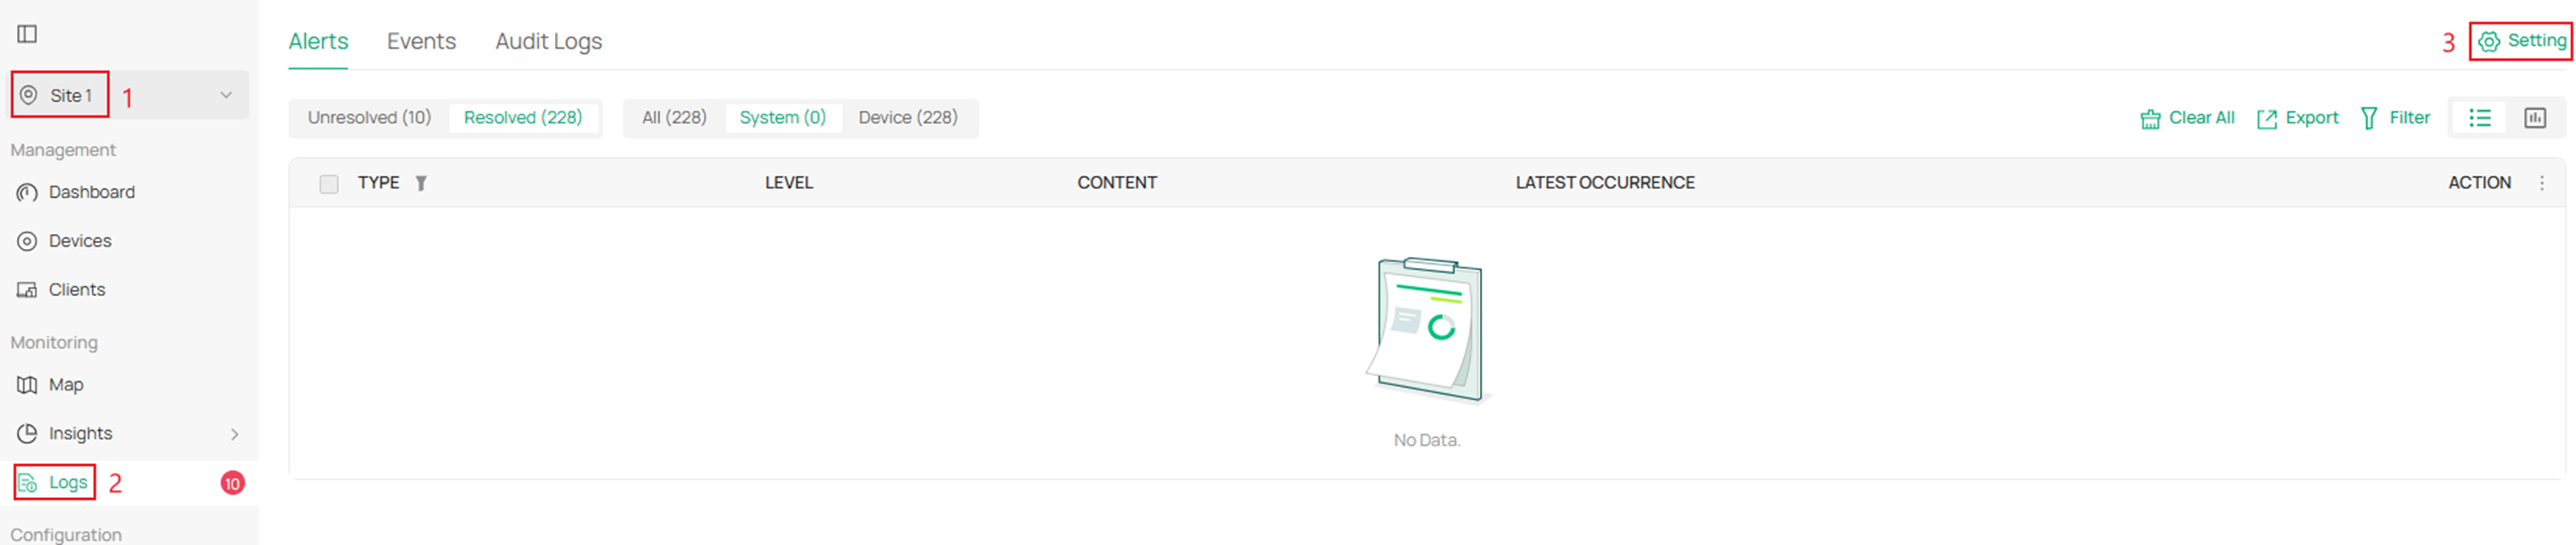
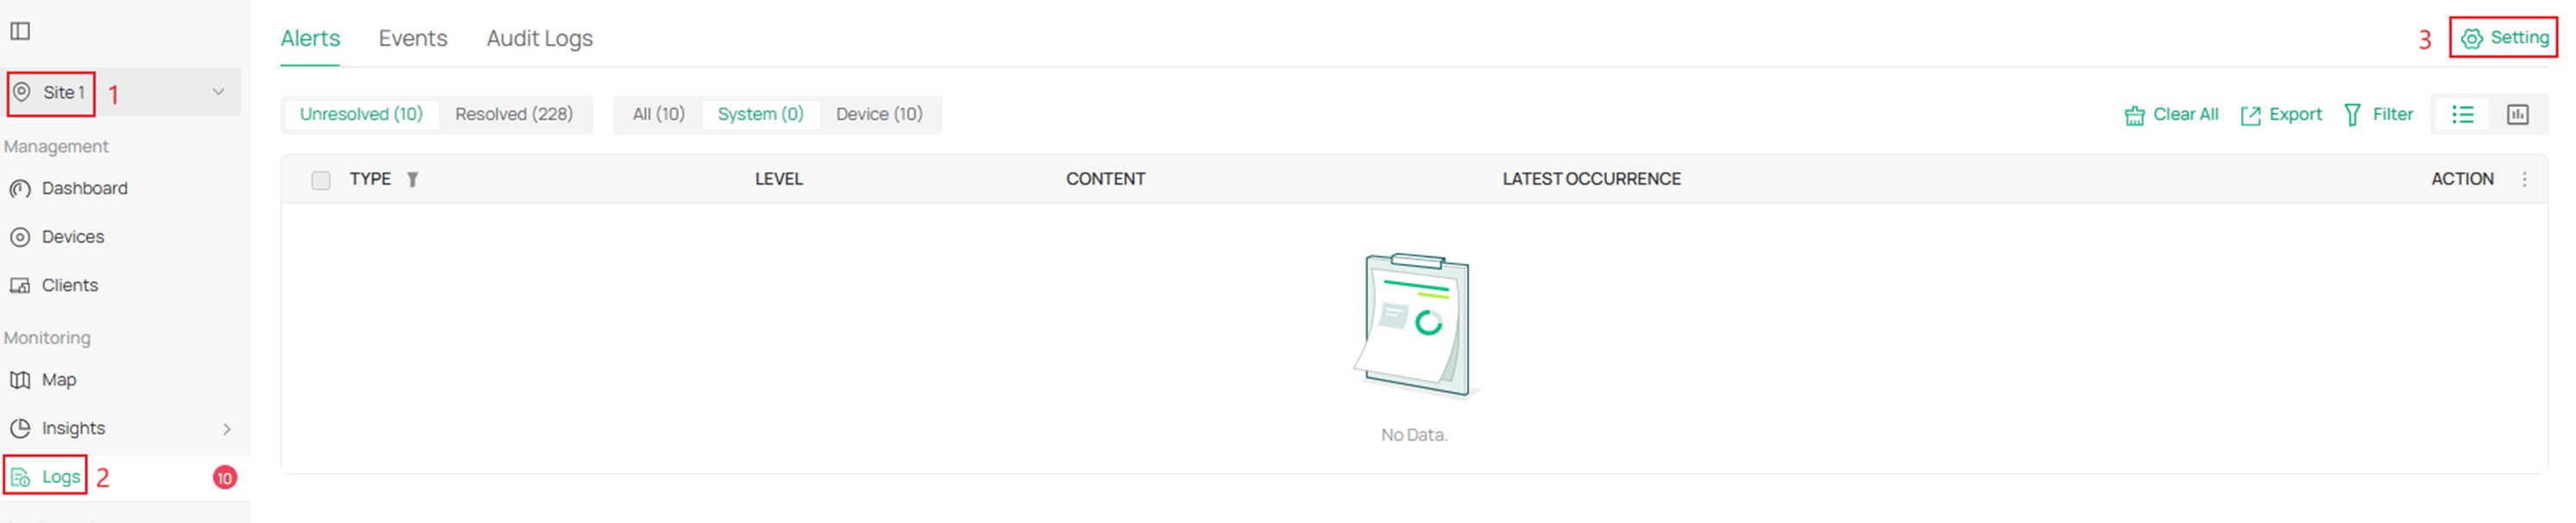
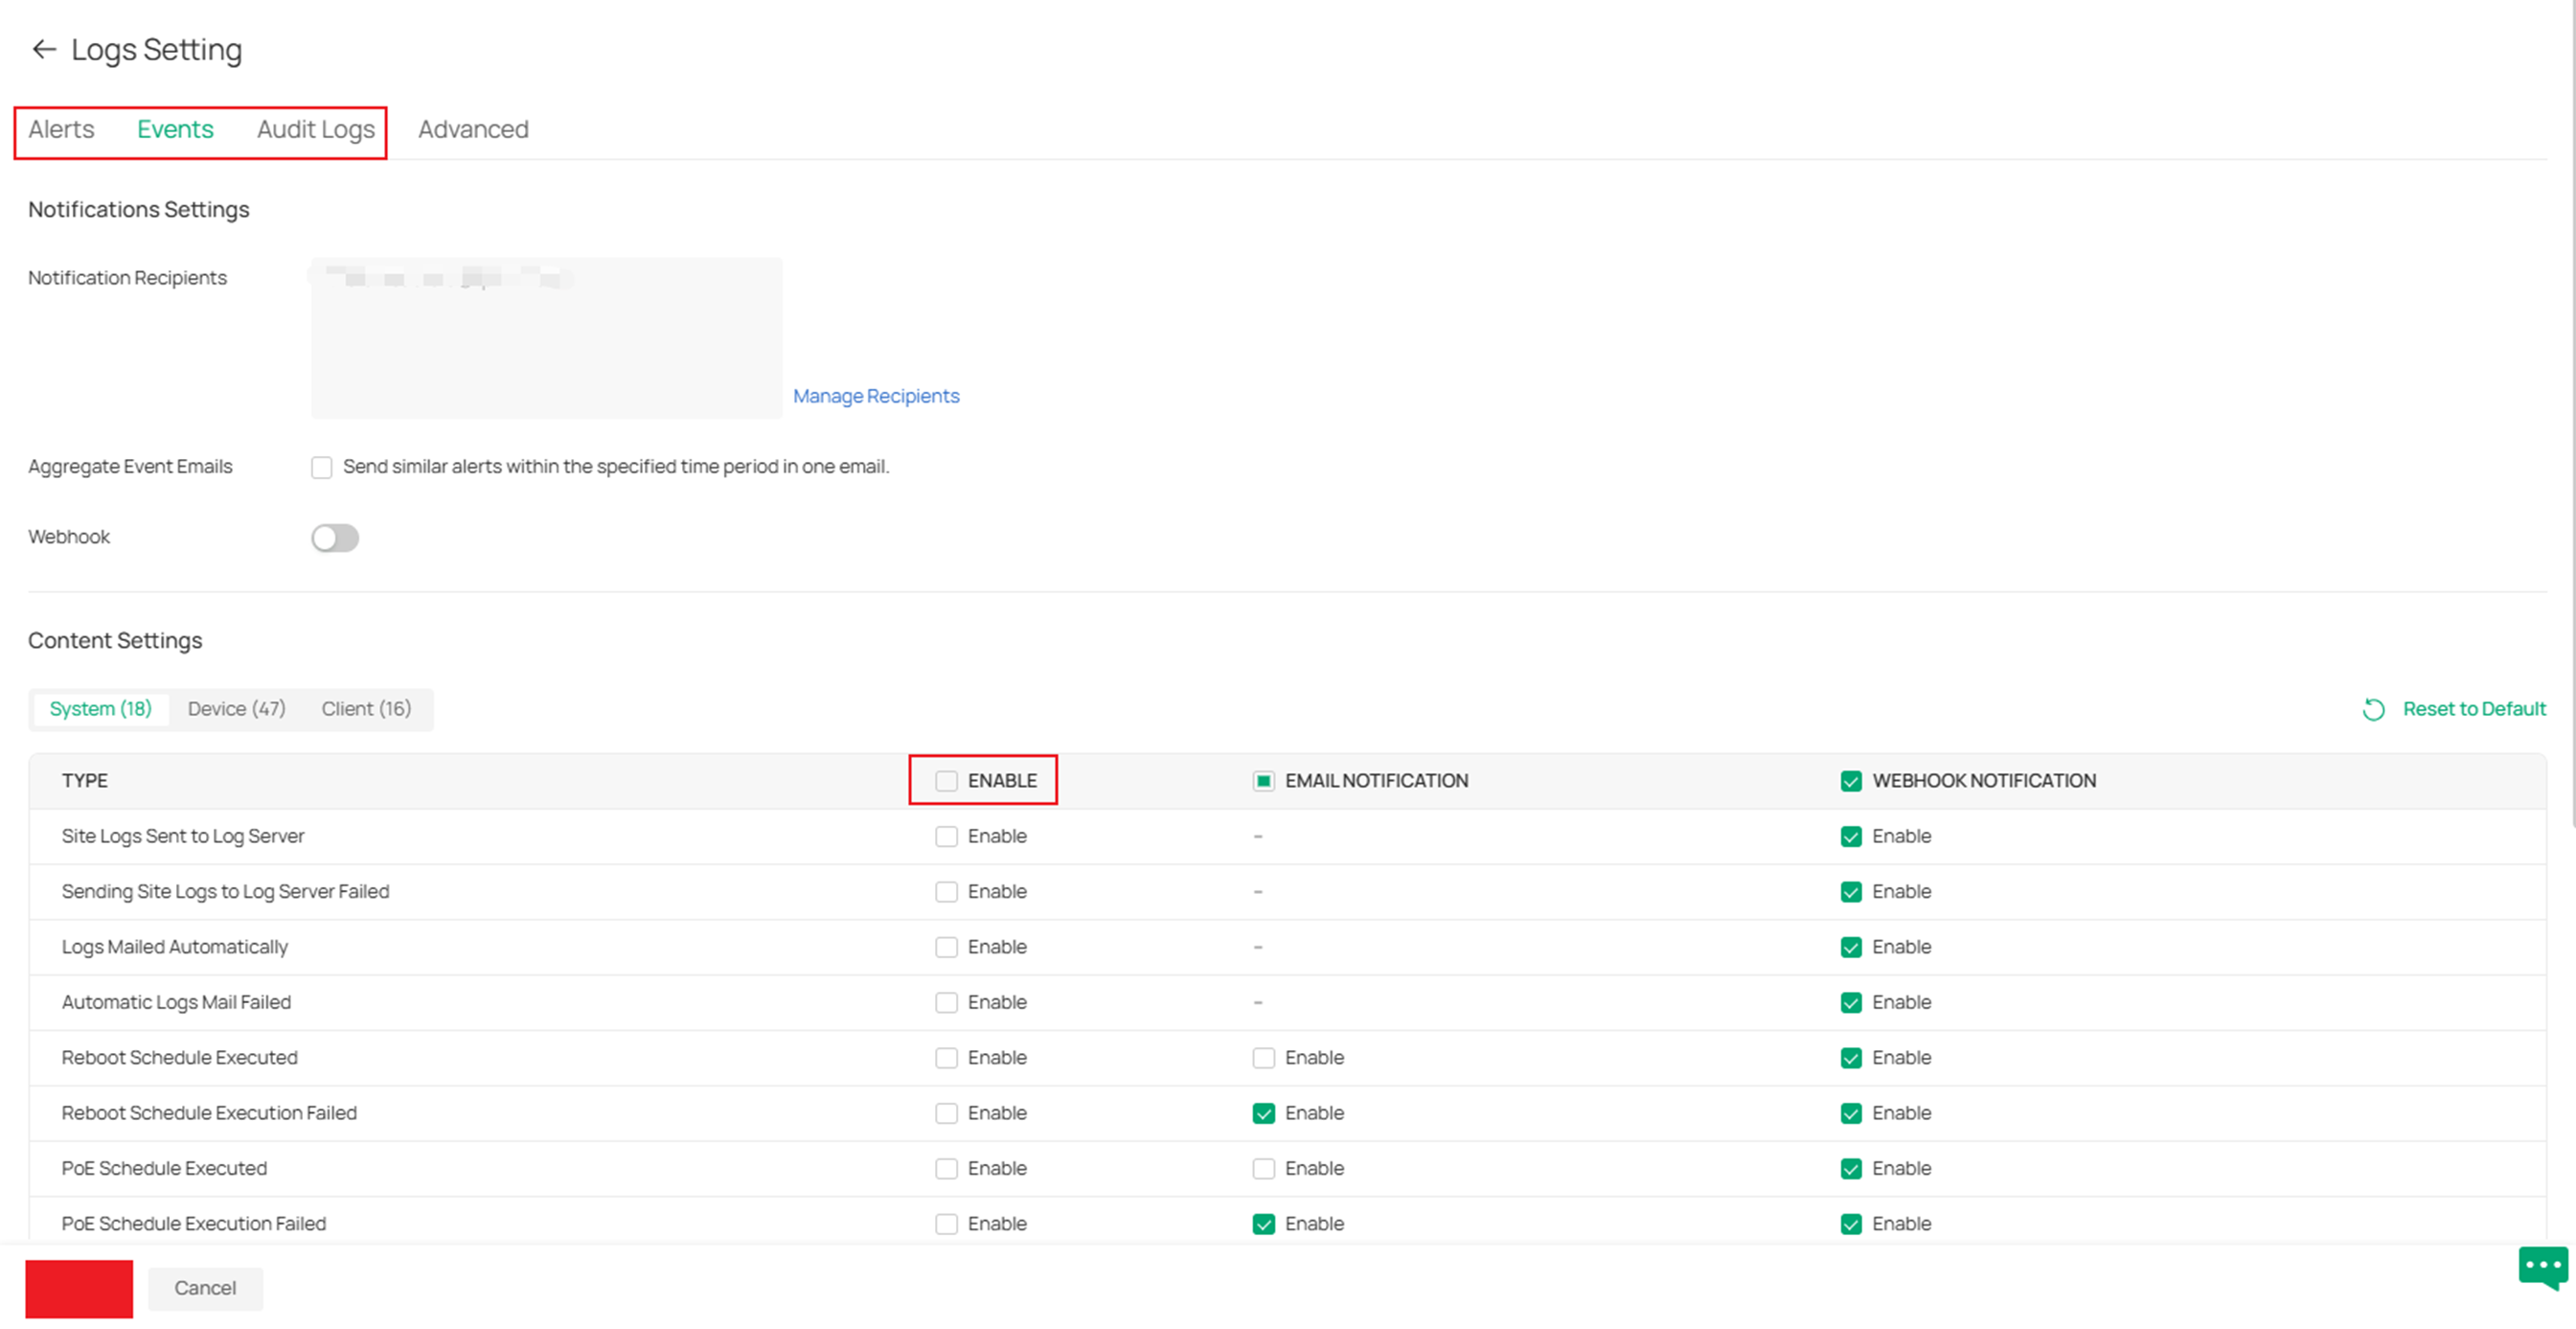
Step 6. To set up global logs for the controller, navigate to Global View > Logs > Setting.

Alt text: Navigate to log settings
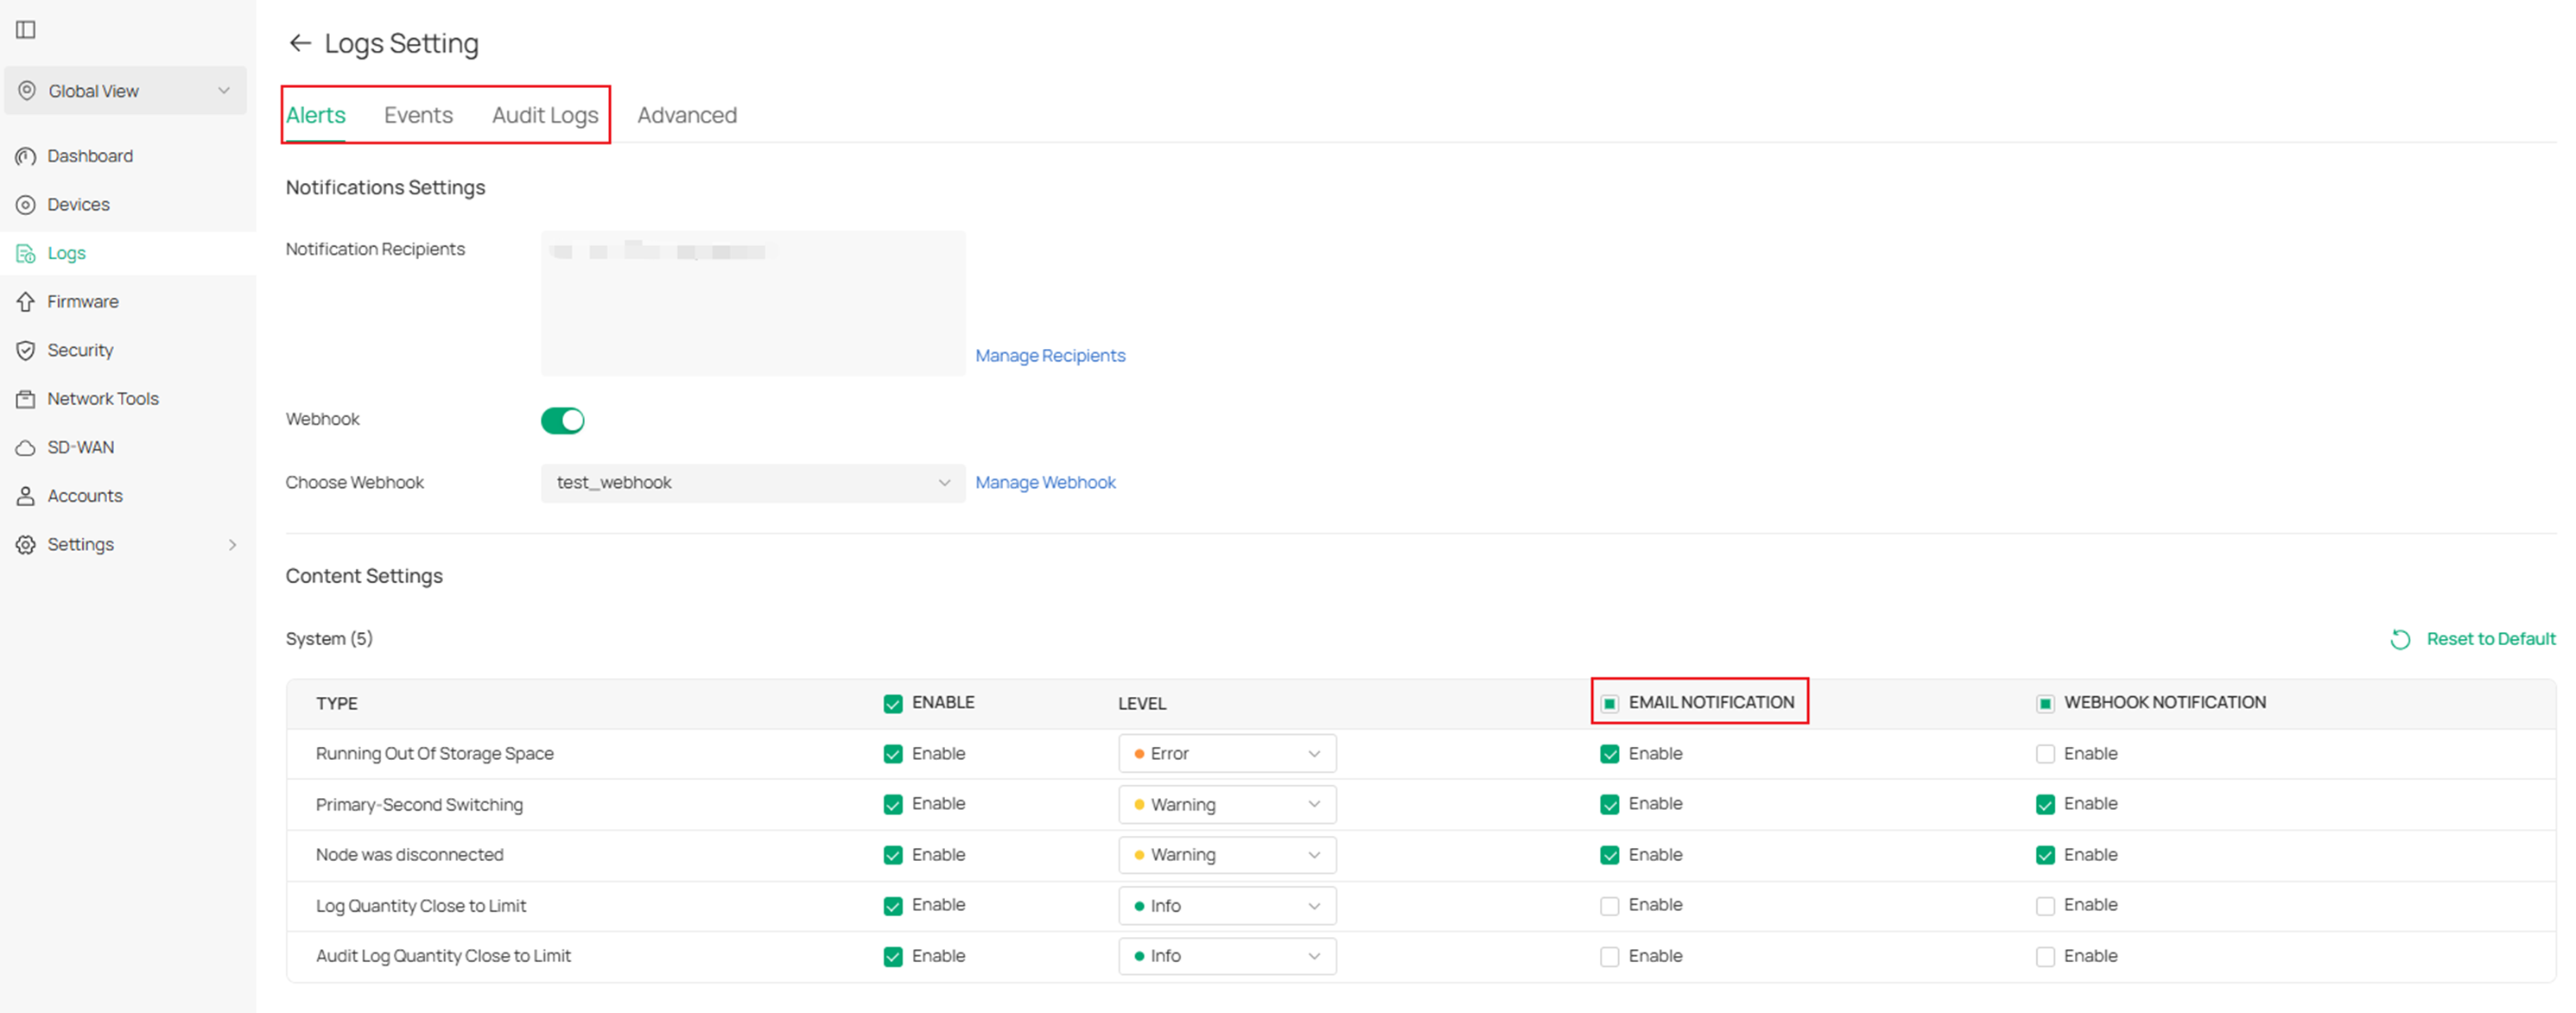
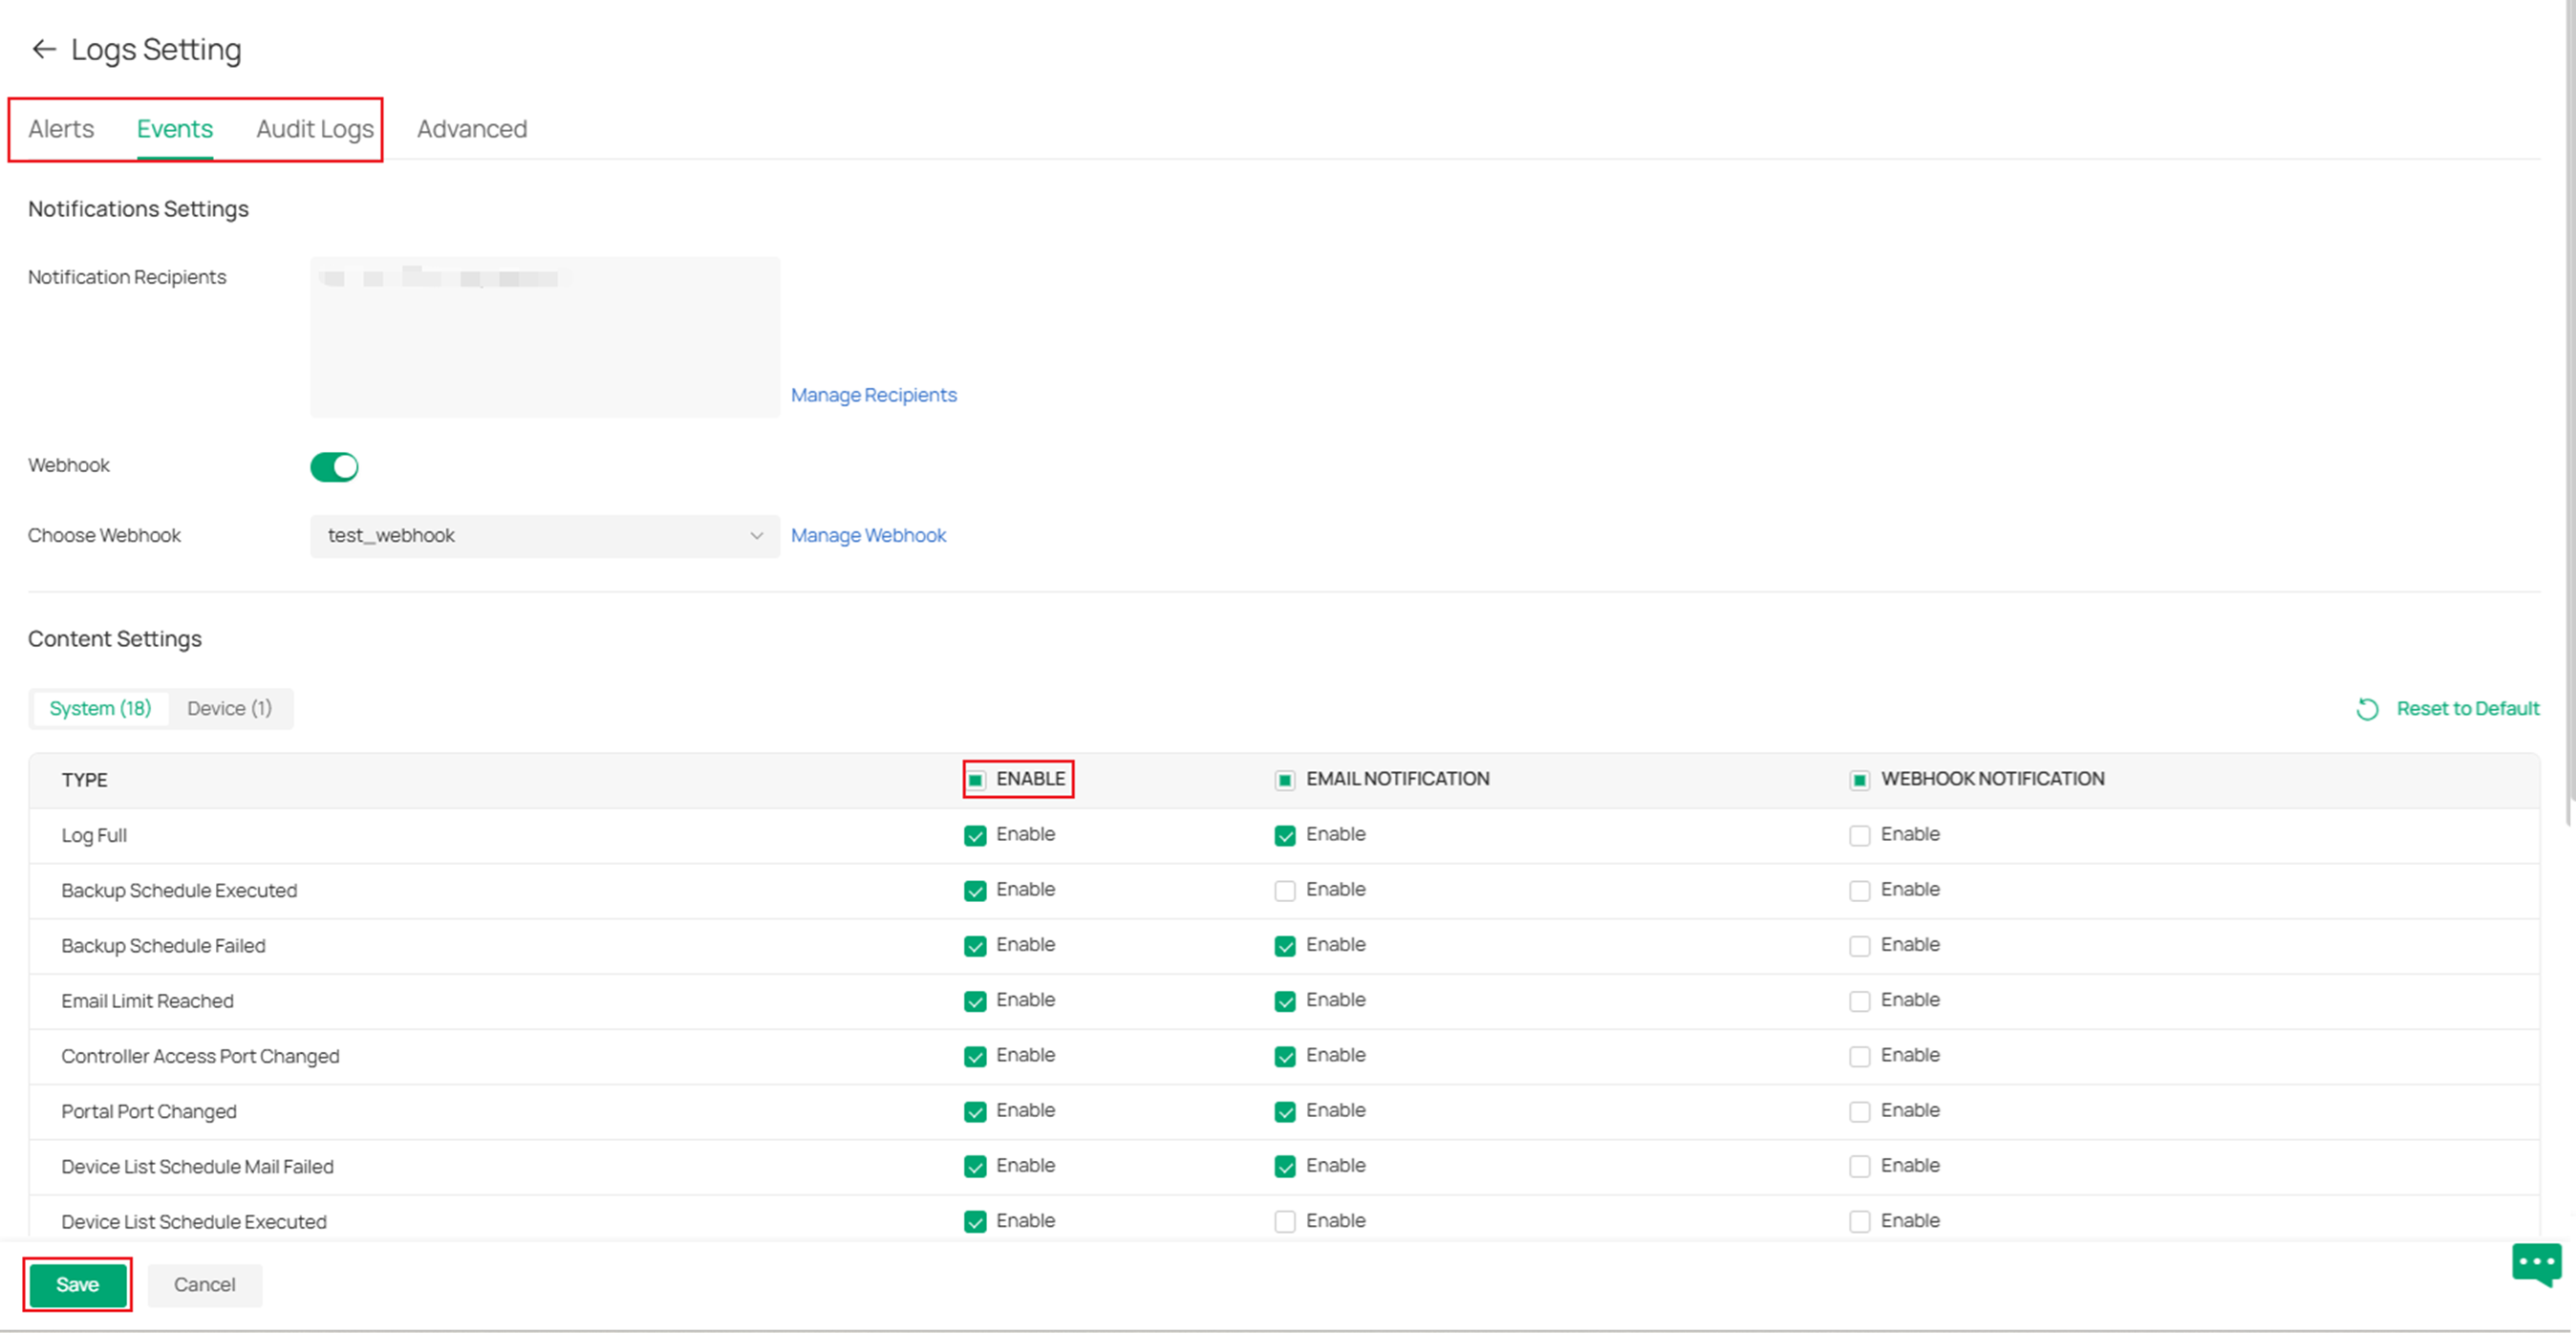
Step 7. Here, you can enable Email Notification for different types of notifications.
Step 8. To set up site logs please navigate your site and go to Logs > Setting.
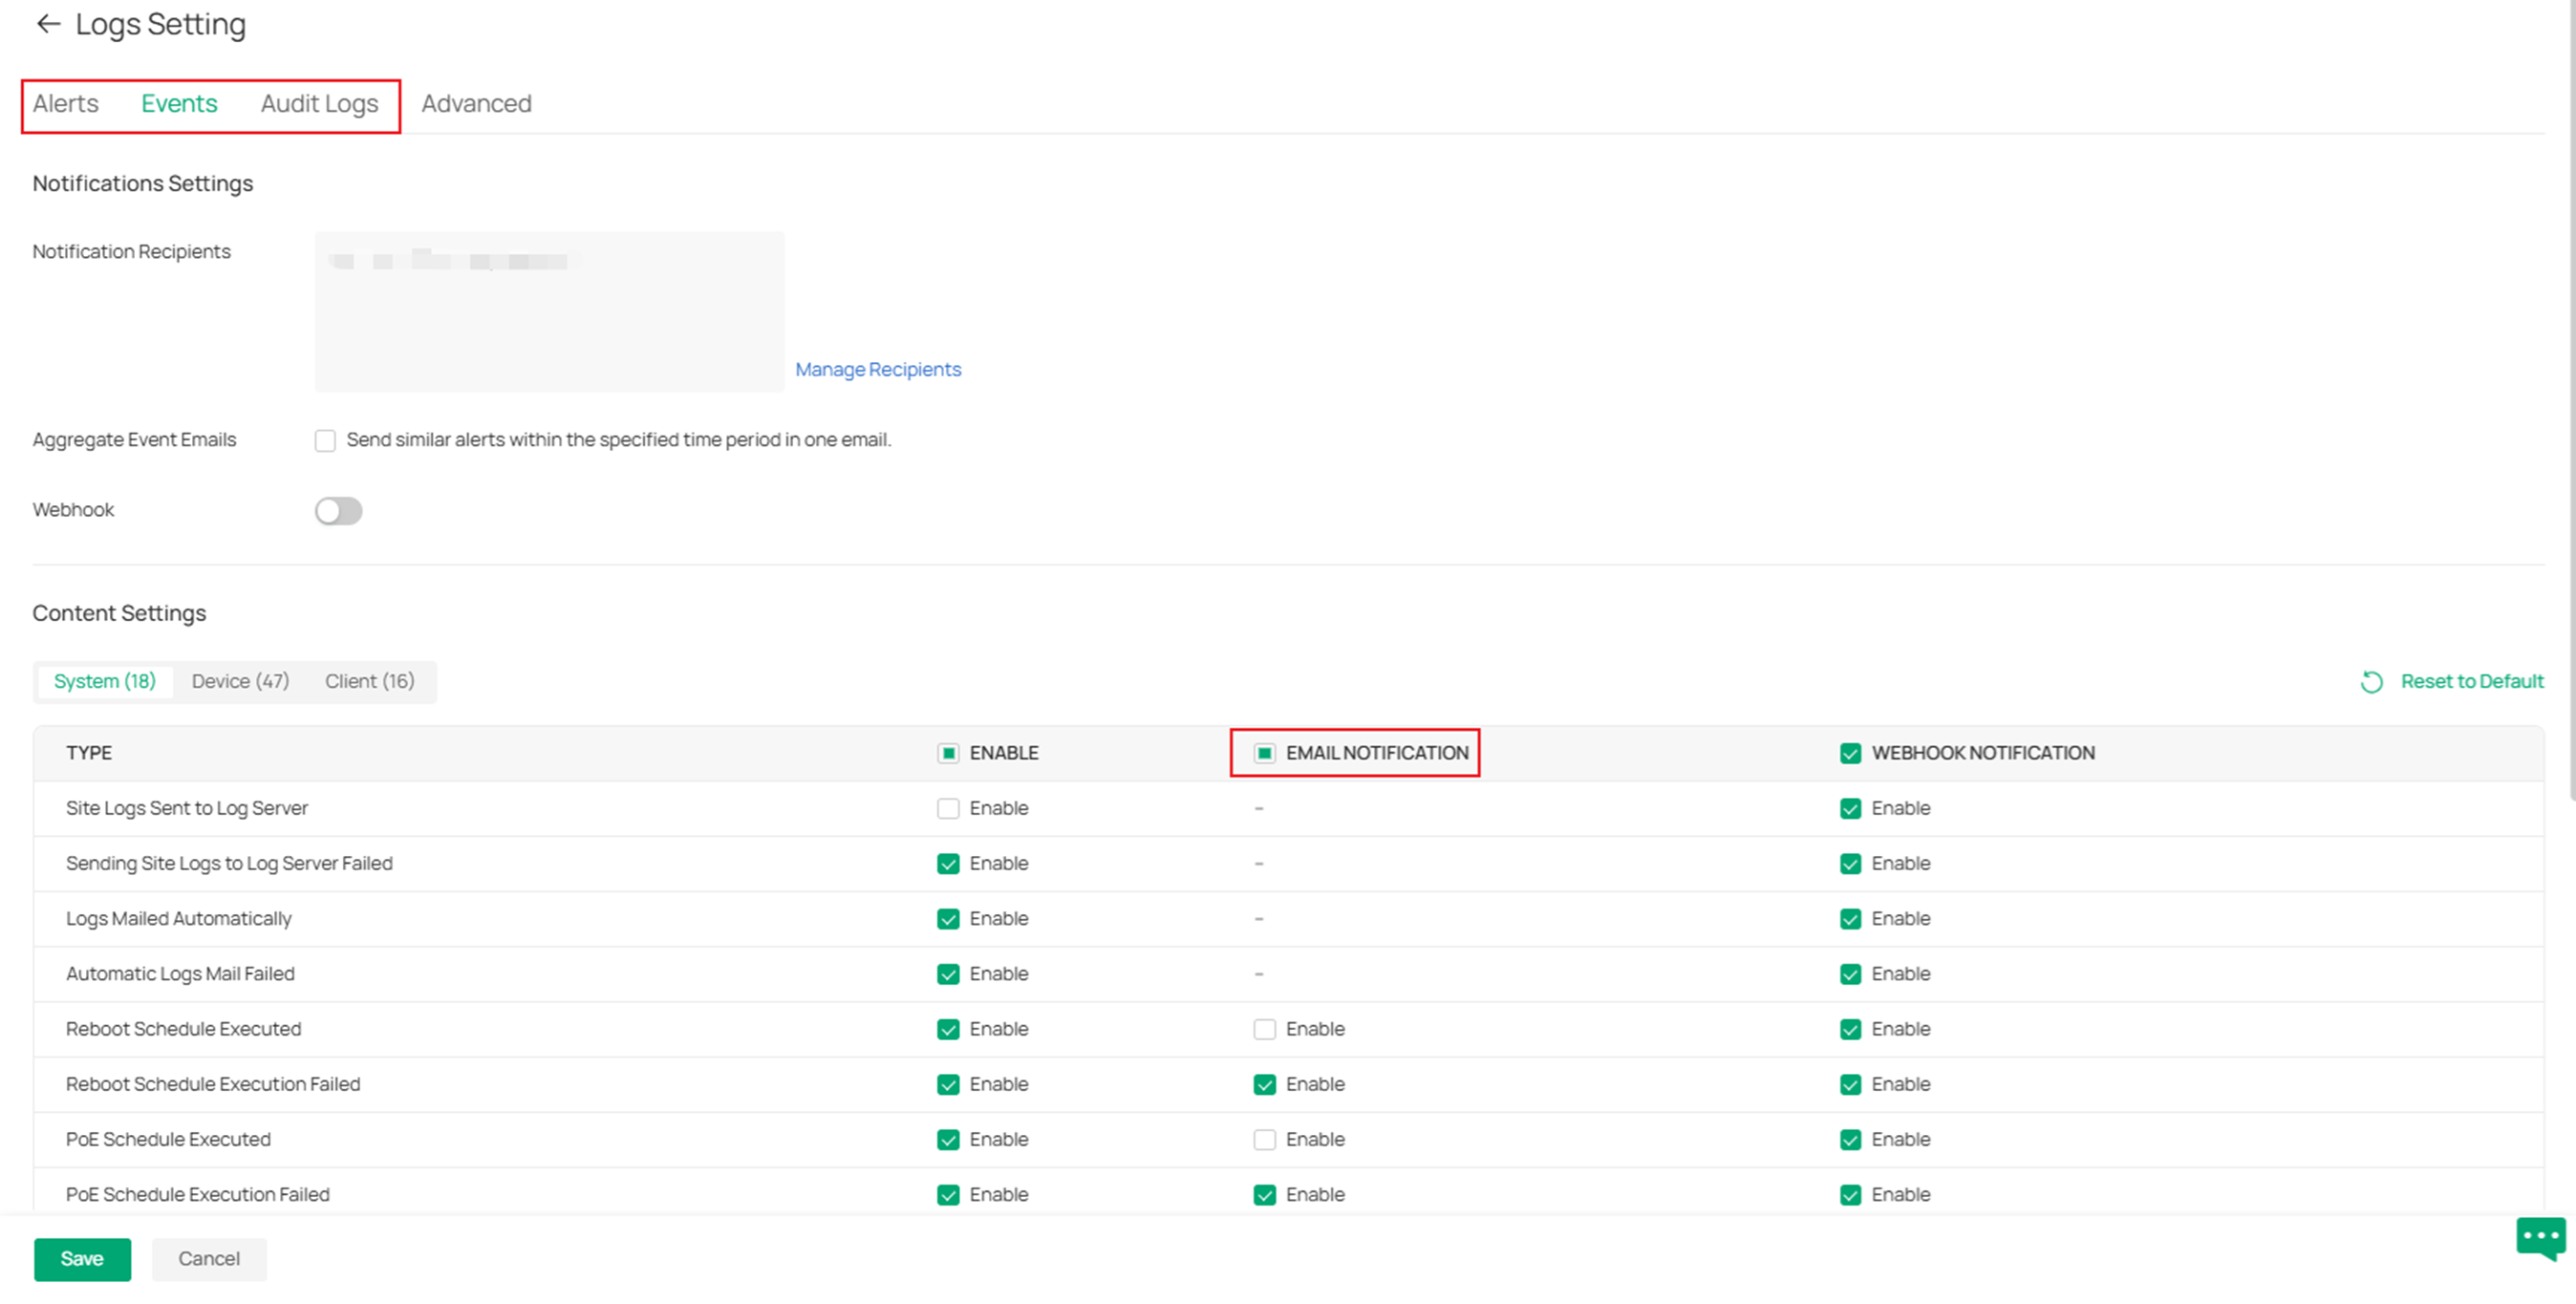
Step 9. Here, you can enable Email Notification for different types of notifications.
Configuration for Remote Logging
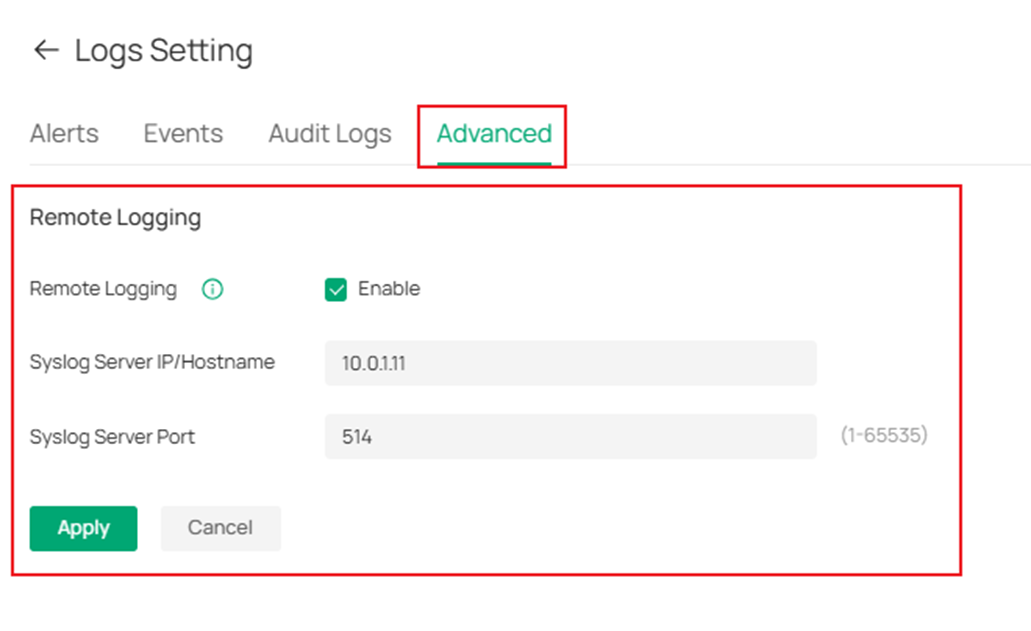
Step 1. To enable a log server to capture your global related alerts and events please navigate to Logs > Setting.
Step 2. Navigate to Advanced, fill in the parameters, and click Apply.
Step 3. After configuring the log server navigate to Alerts, Events, and Audit Logs to enable what logs the controller will send to the server. Click Save upon completion.
Step 4. To enable a log server to capture your site related alerts and events please navigate to your site and go to Logs > Setting.
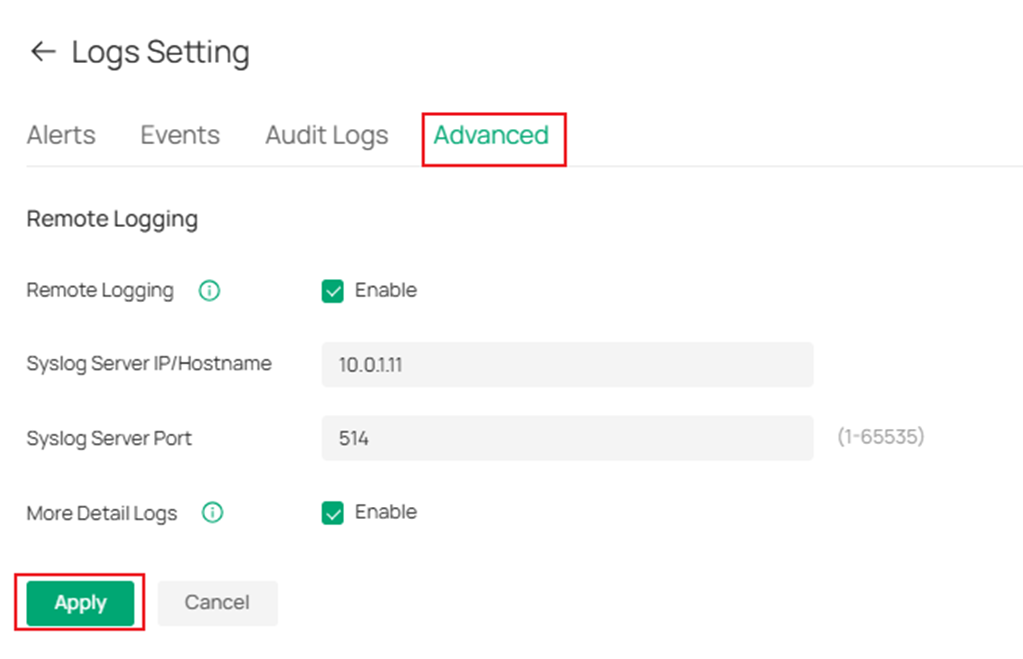
Step 5. Go to Advanced and fill in the parameters. After completion, click Apply.
Step 6. After configuring the log server, navigate to Alerts, Events, and Audit Logs to enable which logs the controller will send to the server. Click Save upon completion.
Verification
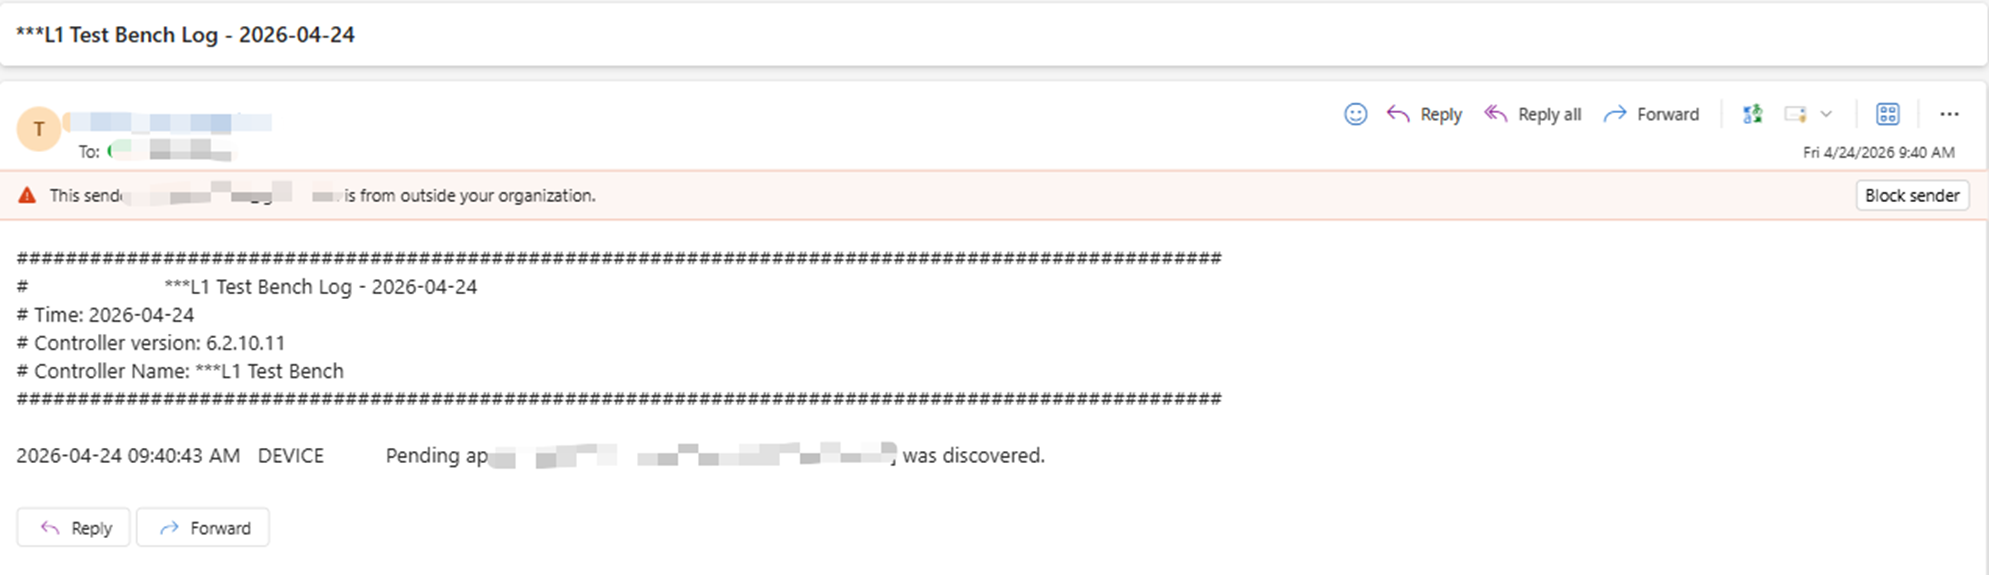
Email Notification verification:
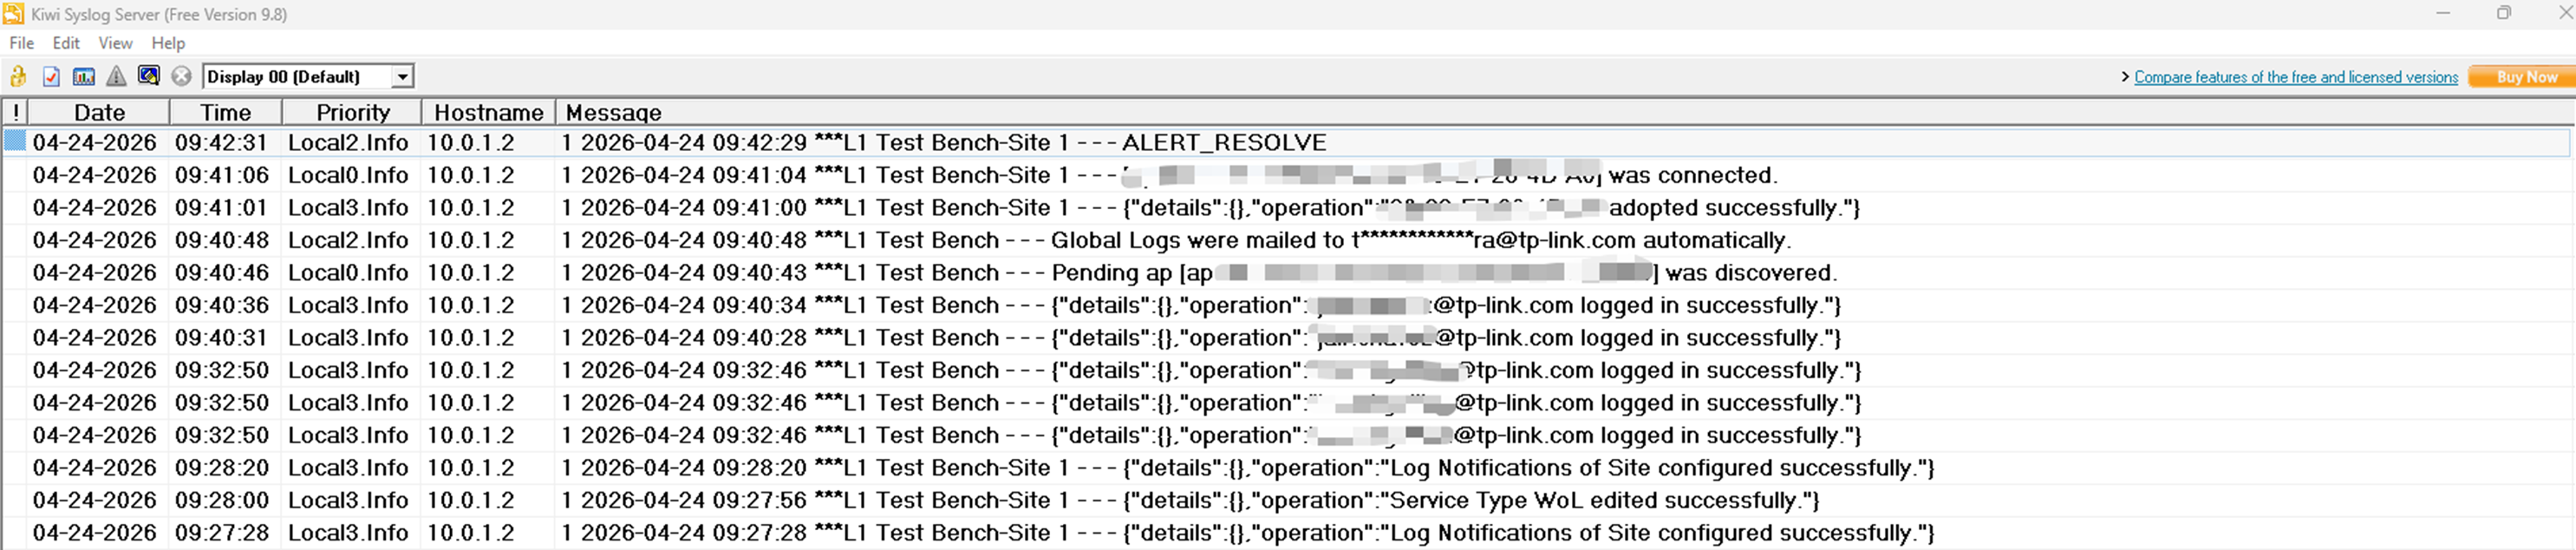
Log Server verification:
Conclusion
Configuring an SMTP or Syslog server on the Omada Controller enables real-time alerts and centralized logging, improving network monitoring and troubleshooting. By following the setup steps, administrators can ensure reliable notifications and maintain detailed logs for better visibility and management.
Get to know more details of each function and configuration please go to Download Center to download the manual of your product.
QA
Q1: What should I do if my log server isn’t receiving logs?
A1: Check whether the log server's IP address is reachable from the controller, and ensure you configure the correct port.
