


Contents
Scenario 1: NVR with a private IP address (Behind a Router)
Scenario 2: NVR with a public IP address
Introduction
DDNS (Dynamic Domain Name System) is a service that allows the dynamic public IP addresses to bind them to a fixed domain name. Its primary function is to associate the frequently changing public IP address of a user’s device with a consistent domain name in real time. So, DDNS allows devices maintain a fixed access point, enabling remote access via the public internet.
TP-LINK DDNS supports domain creation, login, domain list viewing, and logout functions. Currently, only second-level domain creation is supported; the top-level domain tplinkdns.com is fixed and cannot be modified. You can create a new domain by customizing the second-level domain, which supports 1 to 63 characters consisting of letters, numbers, or hyphens (“-”).
This article introduces how to configure TP-Link DDNS on Omada NVR. It covers application scenarios, classical topological structure and configuration steps.
Requirements
- Omada Network Video Recorders (NVRs)
- Router with Public IP address
Configuration
Scenario 1: NVR with a private IP address (Behind a Router)
The NVR is assigned a private IP address and is connected to a router with a public IP address. To enable remote access over the Internet, the router must map the NVR's service ports to the public network using UPnP or port forwarding. A typical network topology is shown below.

Step 1. Configure UPnP on the Router
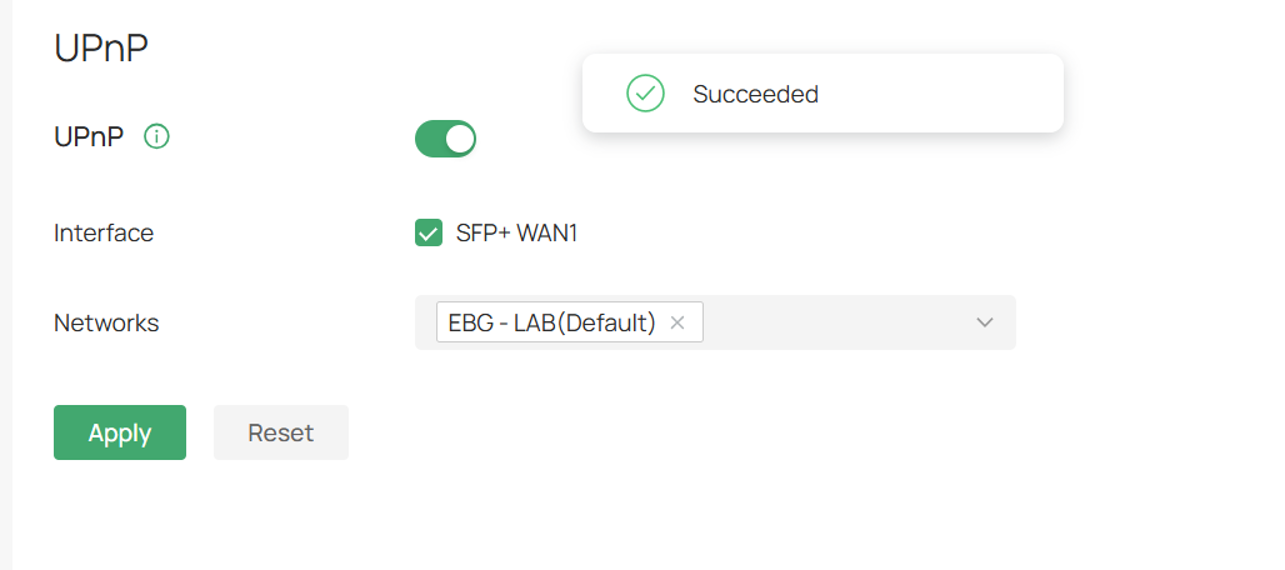
Enable the UPnP feature on the router. The example below uses an ER8411 gateway managed by Omada Controller.
Go to Site View > Device Config > Gateway > UPnP to open the UPnP settings page.
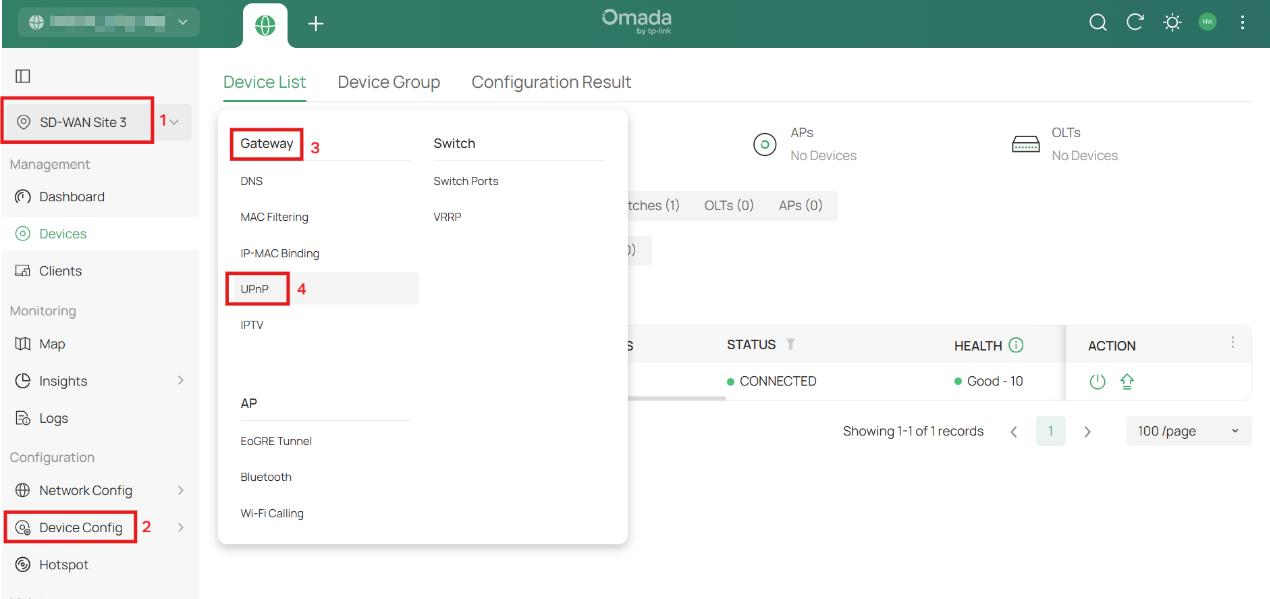
Enable UPnP and click Apply to save the settings.
Step 2. Bind the NVR to a TP-Link ID
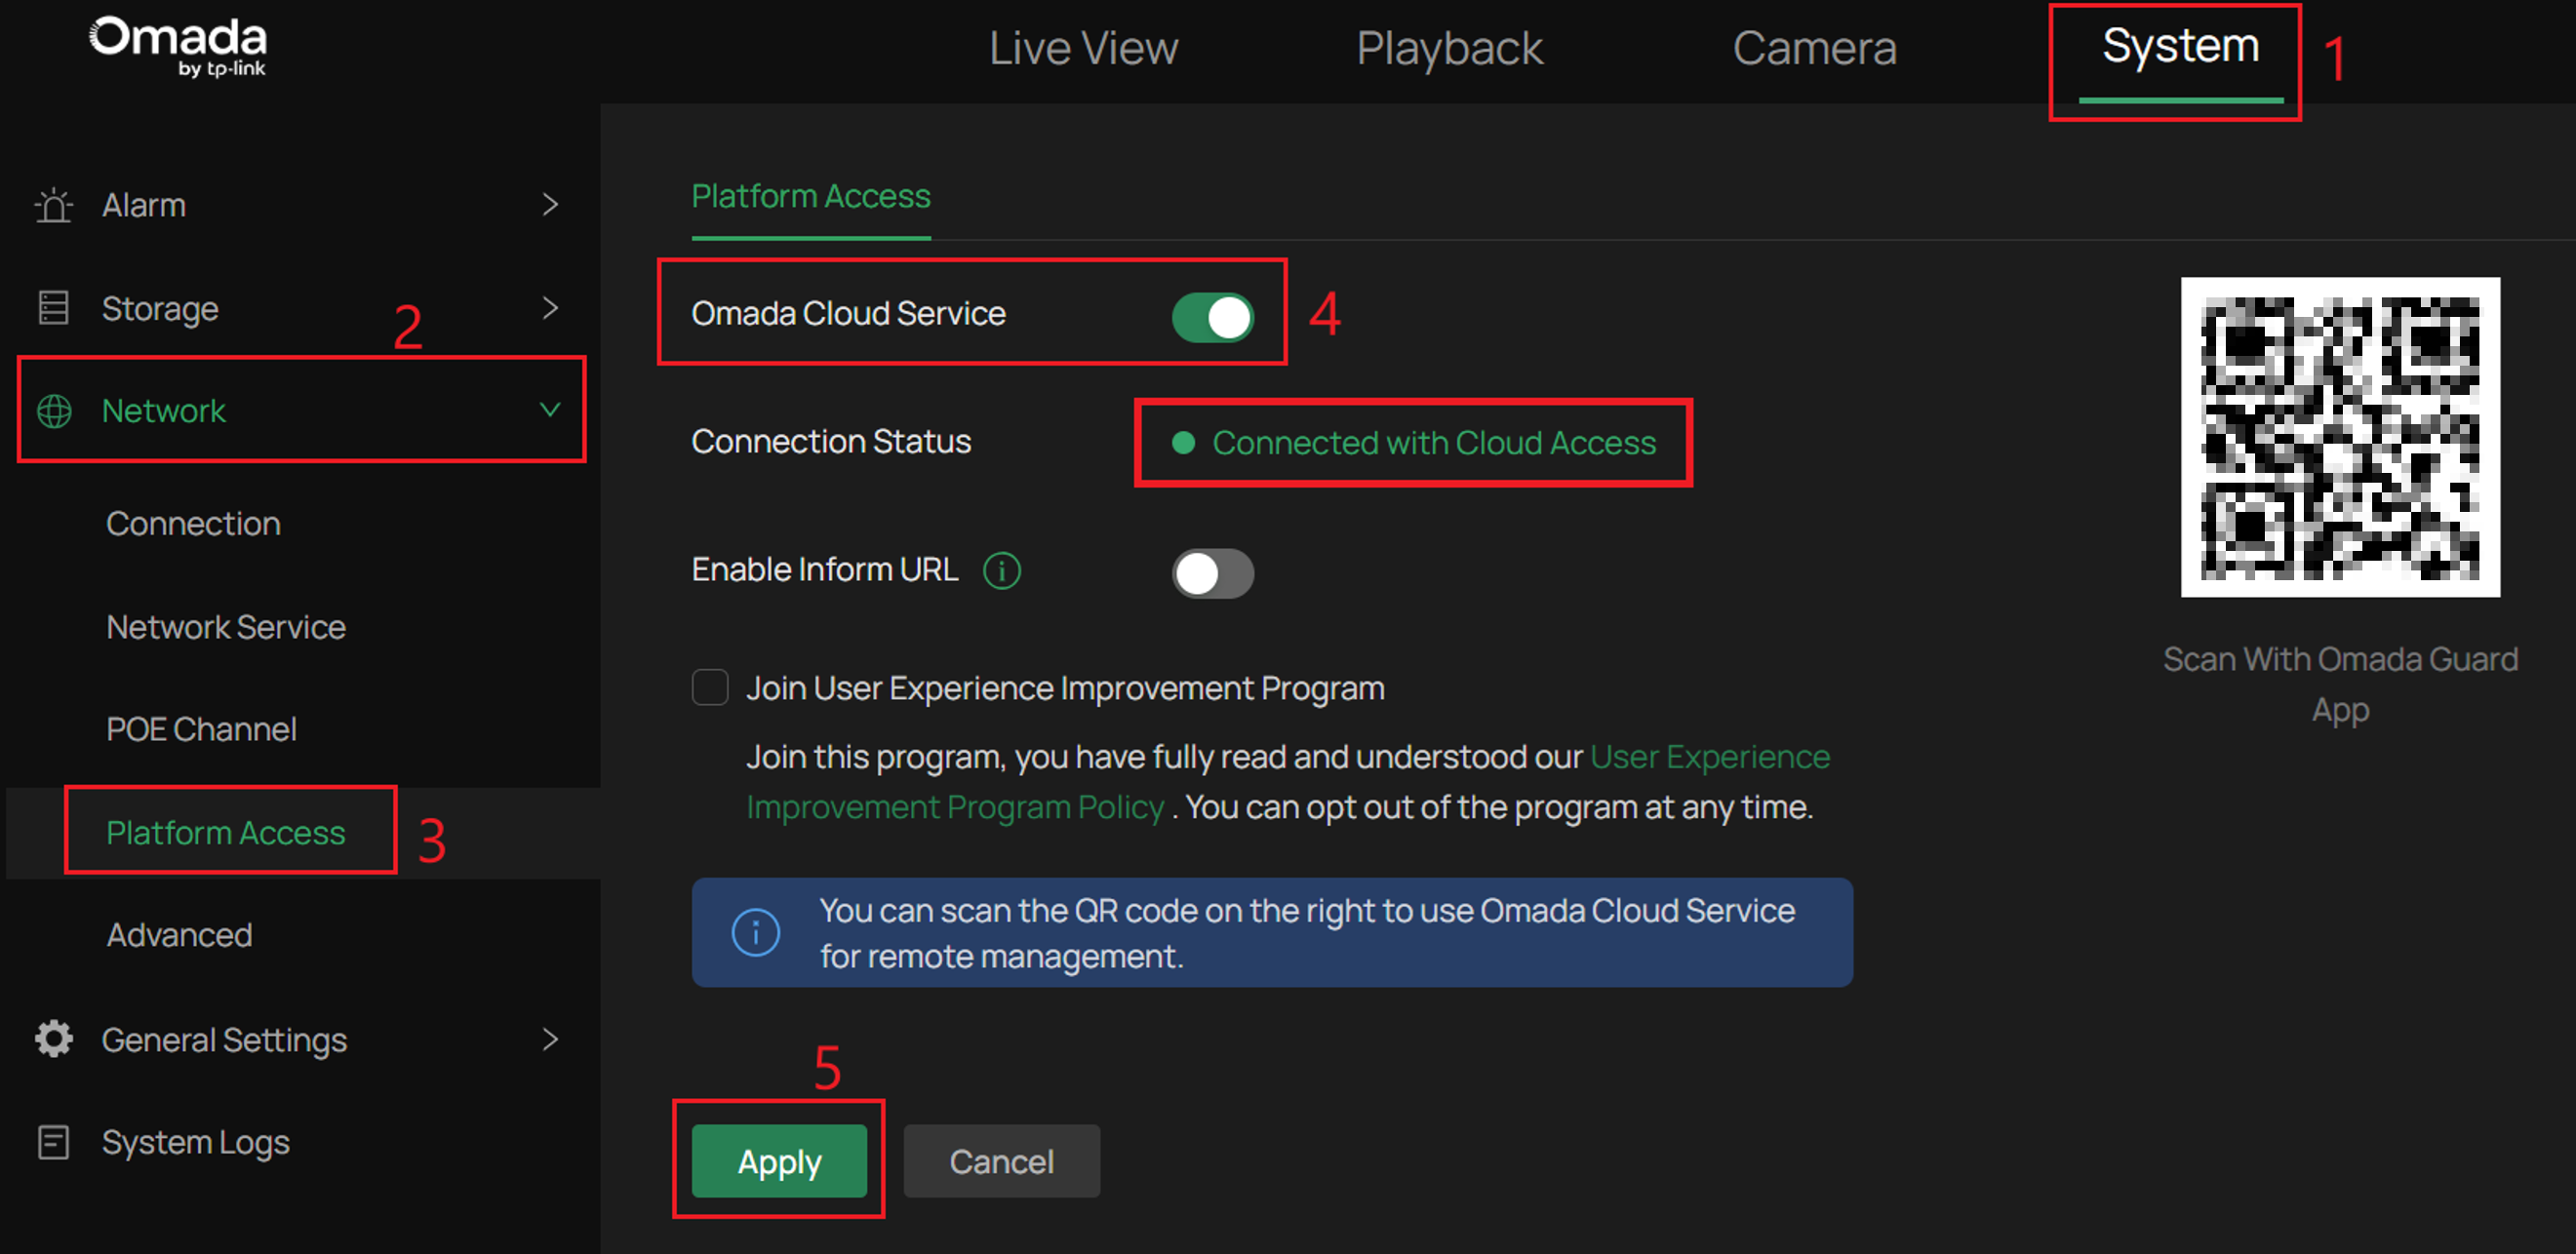
Go to System > Network > Platform Access > Omada Cloud Service, enable Omada Cloud Service, and scan the QR code using the Omada Guard App to bind a TP-Link ID to the NVR. Then the Connection Status will change from ‘Connected without Cloud Access’ to ‘Connected with Cloud Access’, which means the Omada NVR has been bound to a TP-Link ID.
Note: A TP-Link ID must be bound to the NVR before the TP-Link DDNS feature can be used.
Step 3. Configure TP-Link DDNS
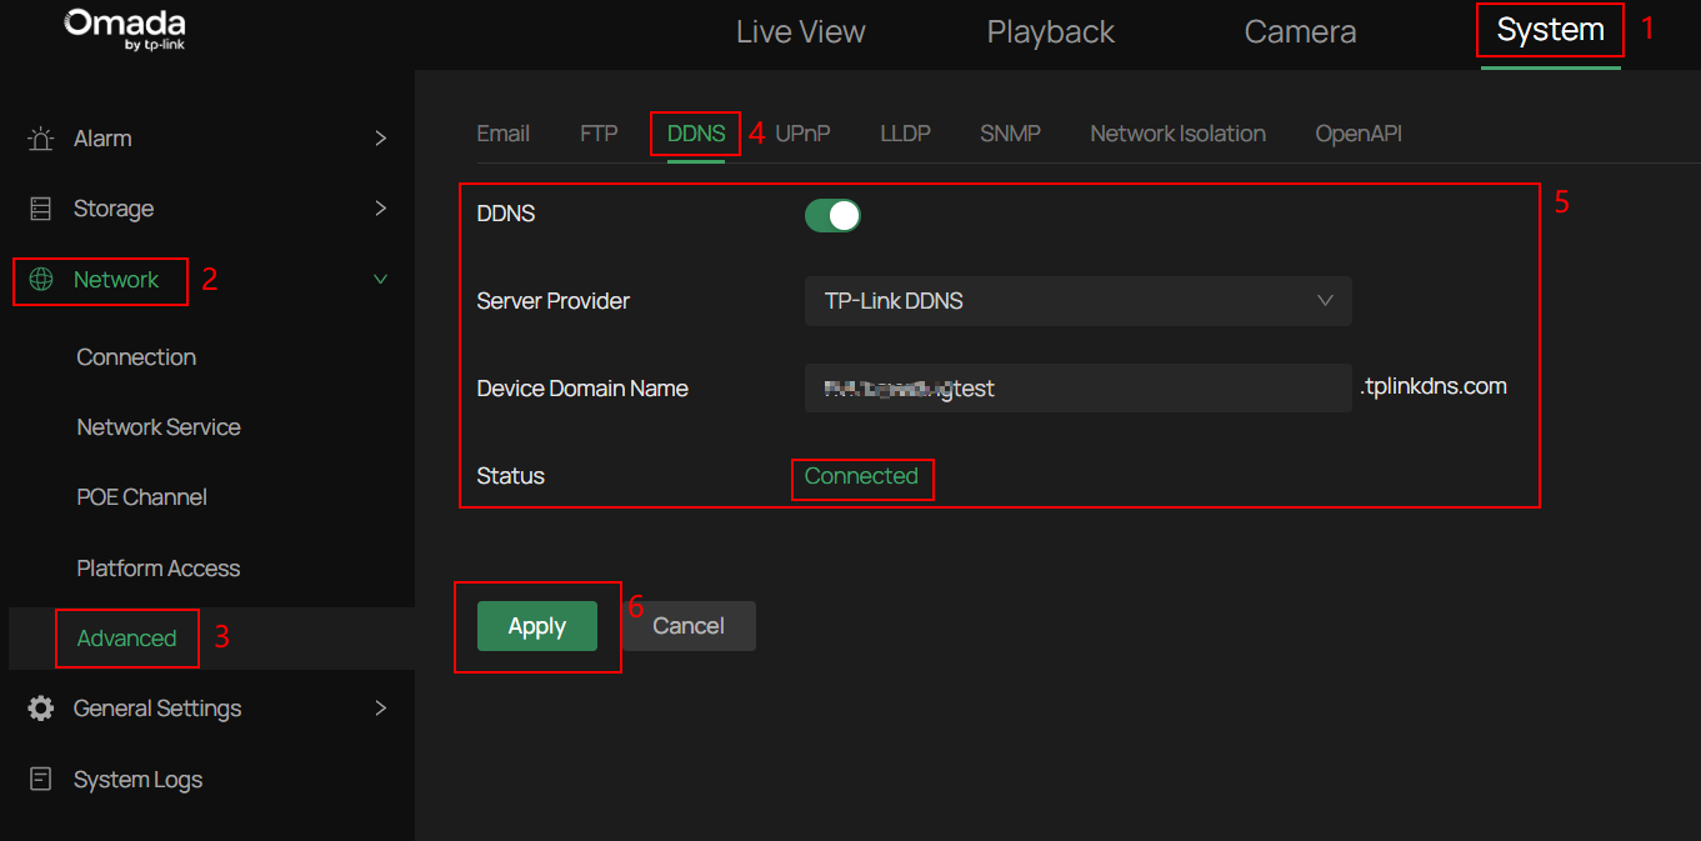
Go to System > Network > Advanced > DDNS, enable DDNS, select TP-Link DDNS as the service provider, enter a Device Domain Name, and click Apply. After the configuration is completed successfully, the Status will display Connected.
Note: The second-level domain name supports 1 to 63 characters and can contain letters, numbers, and hyphens ("-").
Step 4. Configure UPnP on the NVR
Go to System > Network > Advanced > UPnP, enable UPnP, and map the NVR's internal ports to external ports on the public network. The mapping type can be set to Auto or Manual.
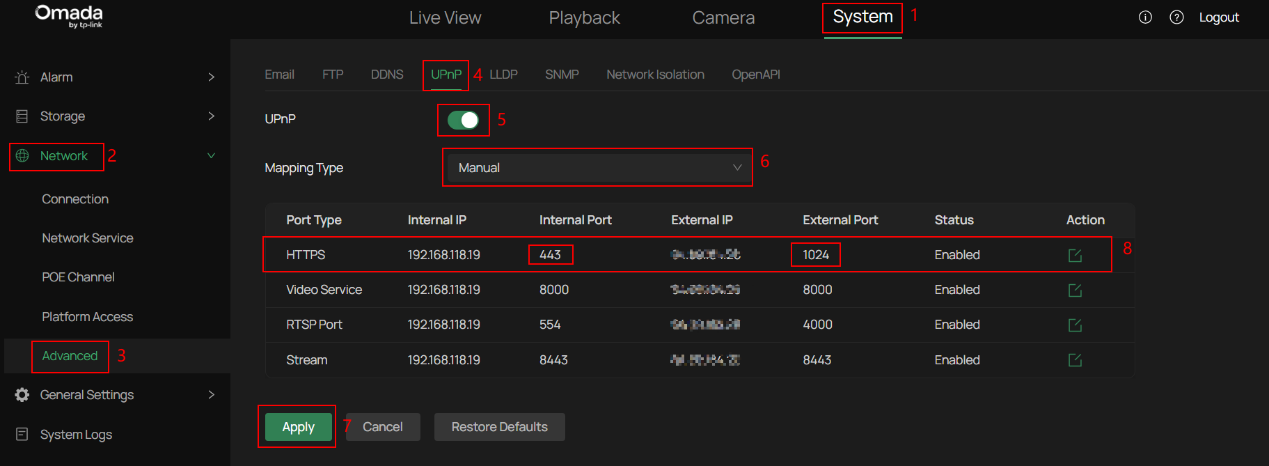
Note:
- Auto: External ports may change automatically. If the external port changes, the URL must be updated with the new port number when accessing the NVR remotely.
- Manual: Uses fixed external ports, helping maintain more stable remote access connections.
Step 5. Access the NVR Remotely via DDNS
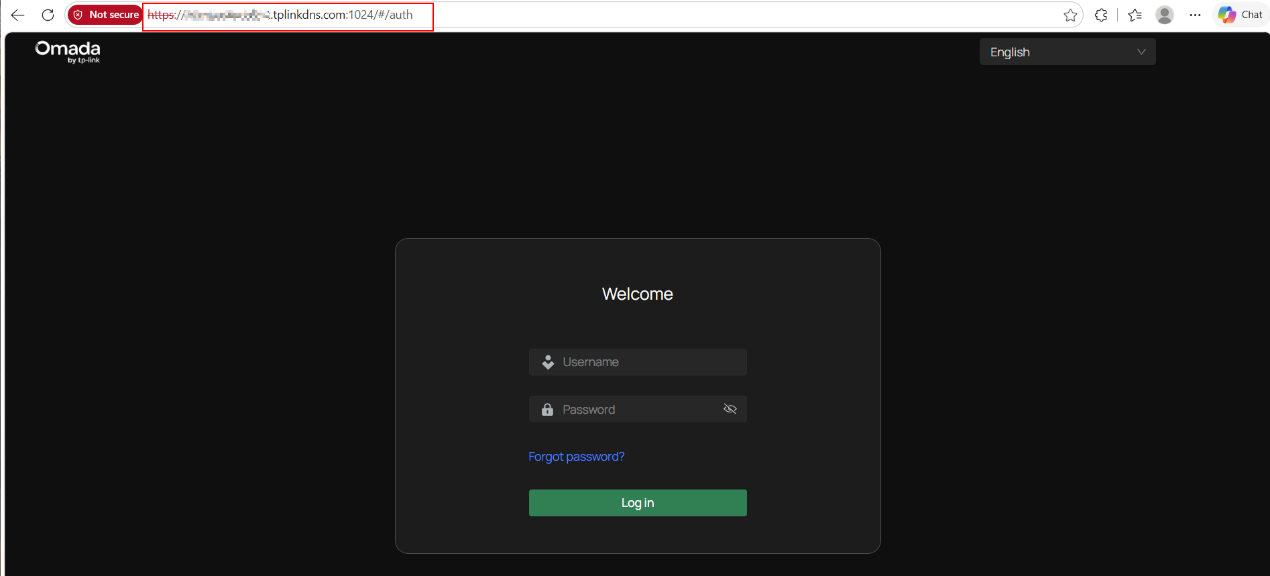
Enter the DDNS domain name and external port in a web browser. For example:
https://xxxx.tplinkdns.com:1024
After successful login, the NVR web interface can be accessed remotely for device management, live view, and playback.
Scenario 2: NVR with a public IP address
In this scenario, the NVR is assigned a public IP address directly. A typical network topology is shown below.
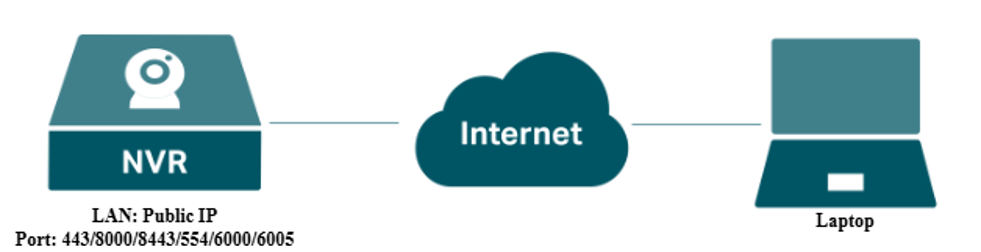
The configuration procedure is similar to that described in Scenario 1, except that Step 1 (Configure UPnP on the Router) and Step 4 (Configure UPnP on the NVR) are not required because port mapping is unnecessary when the NVR is directly assigned a public IP address.
Step 1. Bind the NVR to a TP-Link ID
Go to System > Network > Platform Access > Omada Cloud Service, enable Omada Cloud Service, and scan the QR code using the Omada Guard App to bind a TP-Link ID to the NVR.
Step 2. Configure TP-Link DDNS
Go to System > Network > Advanced > DDNS, enable DDNS, select TP-Link DDNS as the service provider, enter the desired Device Domain Name, and click Apply. The Status should display Connected after the configuration is completed successfully.
Step 3. Access the NVR remotely using the DDNS domain name
Enter the DDNS domain name in a web browser using the HTTPS format, for example:
https://xxxx.tplinkdns.com:443
The NVR web interface can then be accessed remotely for device management, live view, and playback.
Conclusion
With the steps above, you have successfully configured TP-Link DDNS on Omada NVR and managed the Omada NVR remotely.
To learn more about each function and configuration, please visit Support Home to download or check the manual for your product.
