


Content
Modify the Power Line Frequency
Modify the Exposure Gain and Shutter
Introduction
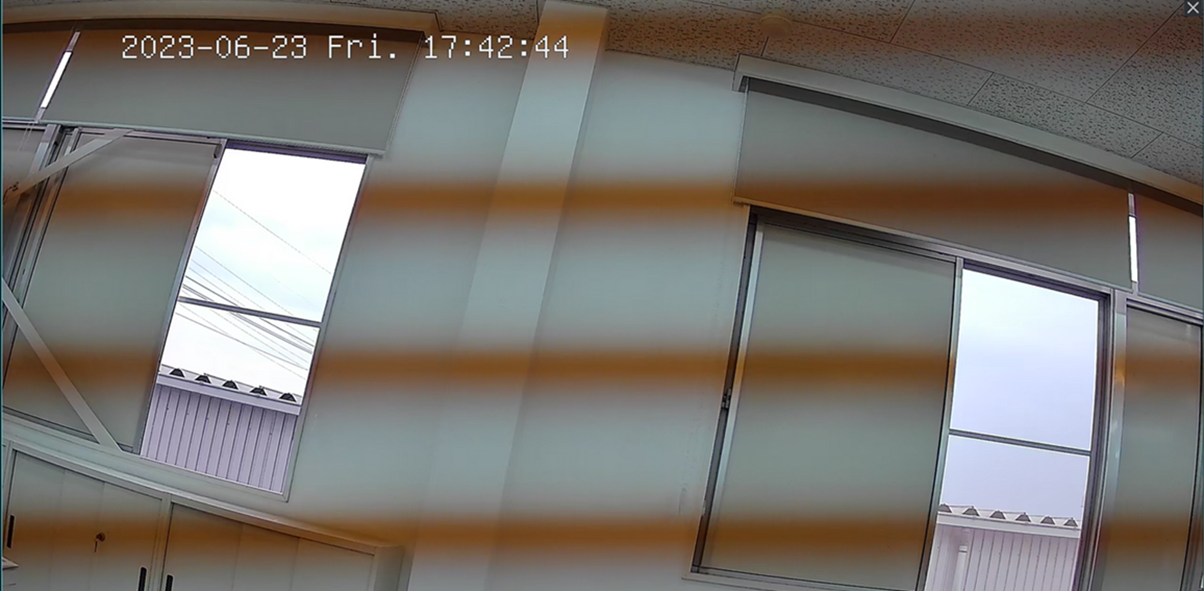
If your Omada Camera live view displays flickering, rolling bands, or a water ripple effect, this guide will help you troubleshoot and resolve the issue. These artifacts are typically caused by a mismatch between the camera's shutter speed and the flicker frequency (50 Hz or 60 Hz) of artificial lighting, such as LED or fluorescent lamps. By adjusting the Power Line Frequency and Exposure settings. you can synchronize the camera with the lighting and eliminate flickering or banding.
Requirements
- Omada Camera
Troubleshooting
To eliminate flickering or banding, adjust the Power Line Frequency, Exposure, Gain, and Shutter settings in Omada IPC web GUI by following the steps below.
Modify the Power Line Frequency
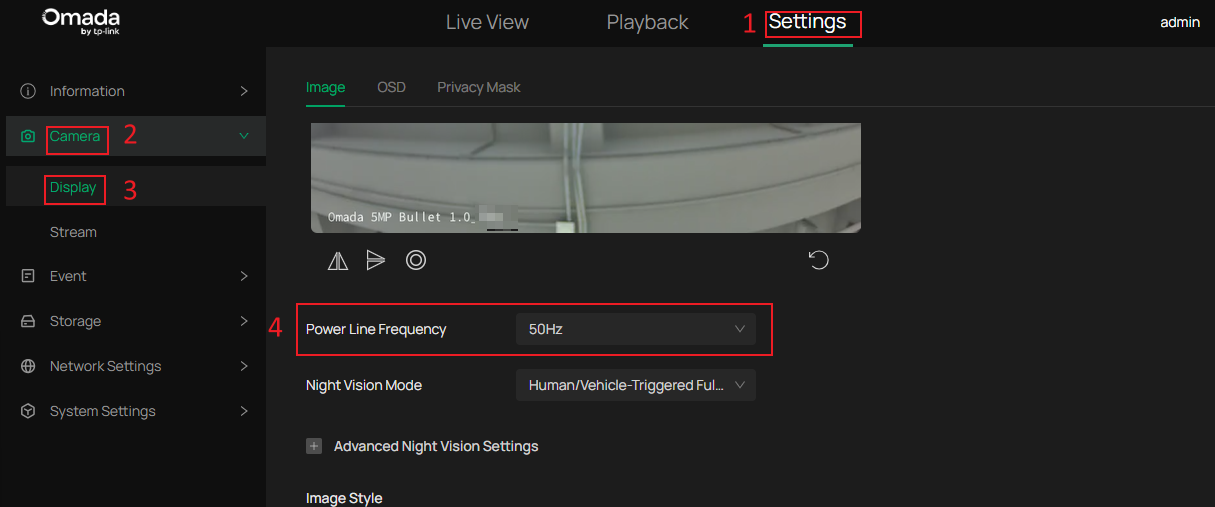
Step 1. After login into the user interface of web GUI , navigate to Settings > Camera>Display.
In the image settings, you'll find an option called "Power Line Frequency". Choose the correct frequency based on the frequency of the municipal power supply. If the frequency is not selected correctly for the flashing light source, the video flashing will also appear when highlighted.
Modify the Exposure Gain and Shutter
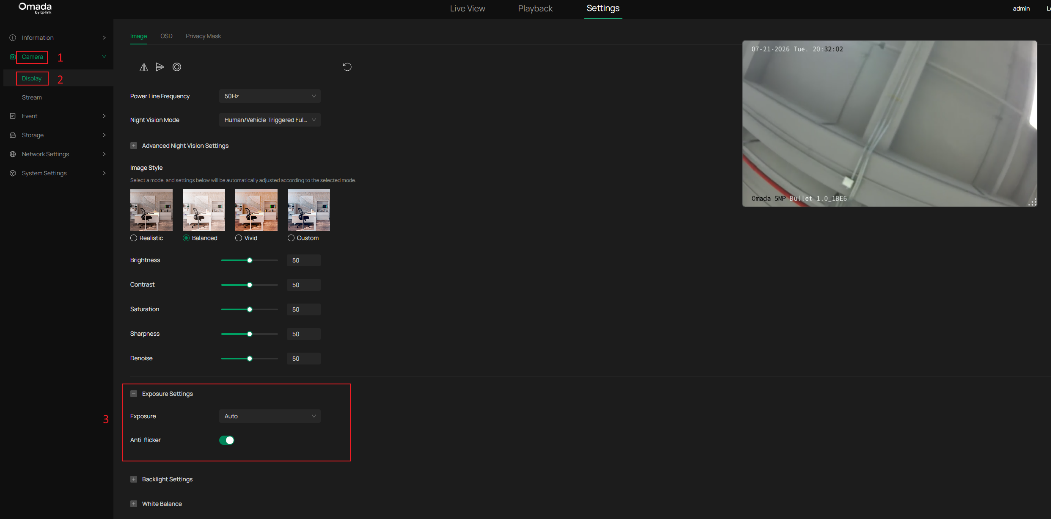
If you see banding or water ripple effects on your camera image, make sure the Exposure setting is in “Auto” mode and enable the Anti-flicker function. This usually synchronizes the shutter speed with the light source frequency and eliminates banding.
Step 1. In the user interface of IPC, navigate to Display > Image.
Step 2. Enable Anti-flicker by clicking the toggle.
Note:
Enabling Anti-flicker may cause the image to become overexposed, especially if the initial banding was severe.
If enabling the Anti-flicker feature causes the image to become overexposed, switch the Exposure mode to Manual for finer control. Although Anti-flicker is unavailable in Manual mode, you can reduce banding and optimize image brightness by adjusting the Shutter Speed and Gain settings.
Step 1. In the user interface of IPC, navigate to Display > Image.
Step 2. In the Exposure Settings, change the Exposure to Manual Mode and adjust Shutter speed and Gain accordingly.
• Shutter: Gradually decrease the shutter speed until the rolling bands or flickering are minimized or eliminated. This occurs when the shutter speed is synchronized with the lighting frequency. Be aware that a slower shutter speed may result in a brighter or overexposed image.
• Gain: After minimizing the banding, gradually reduce the gain to compensate for overexposure and achieve the desired image brightness. Adjusting the gain affects image brightness only and does not reduce banding
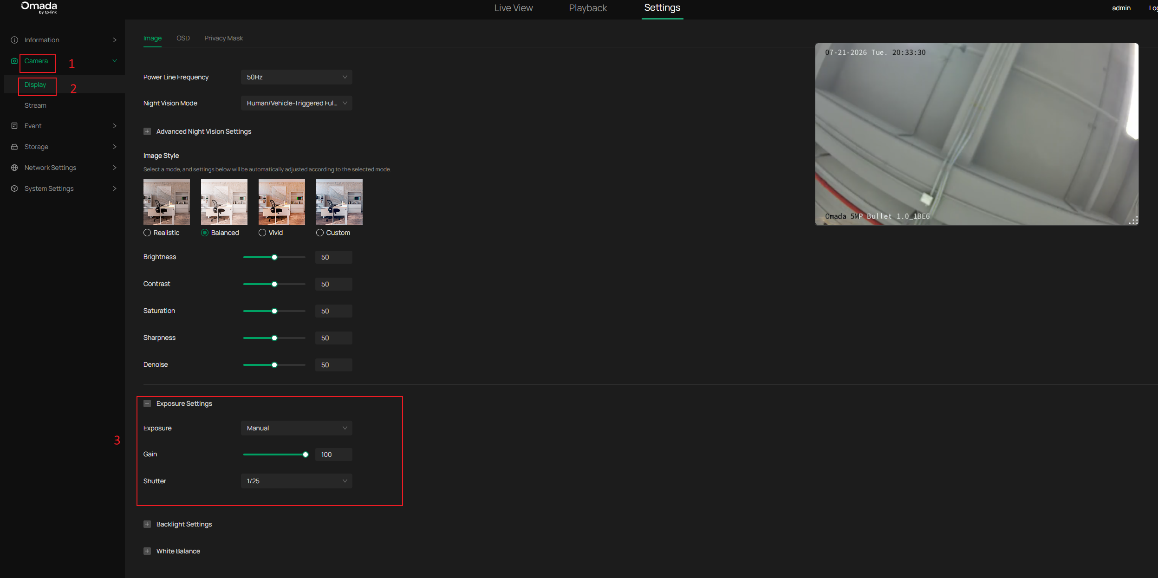
By adjusting shutter speed and gain in Manual mode, you can find an optimal balance between banding and overexposure for your environment.
Conclusion
Flickering or rolling bands in the Omada Camera live view are typically caused by a mismatch between the camera settings and the lighting frequency. Adjusting the Power Line Frequency and Exposure settings can usually eliminate the issue and improve image quality.
To learn more about each function and configuration, please visit Support Home to download or check the manual for your product.
