


How to login to the web management page of the Omada Device (Standalone mode)


Contents
Objective
This article presents the concept of login into the web management page of Omada Series products in standalone mode. It details two deployment methods. One where there is DHCP server in the same network if applicable to the product, while the other if there is no DHCP server in the same network.
Introduction
Omada Series products can operate independently (standalone mode) without an Omada Controller. In standalone mode, you can access the device’s built-in web management page to configure settings and view status
Requirements
Before you begin, make sure the following prerequisites are met:
- The device is in standalone mode (not adopted by an Omada Controller).
- Your computer is connected to the same network or directly to the device.
- Your web browser is up to date.
Configuration
This section describes the configuration steps.
Gateway
Step 1. Connect your computer to the gateway’s LAN port.
Step 2. Open a web browser and enter the default IP address 192.168.0.1. If you have changed the default address, navigate to your correct IP address.
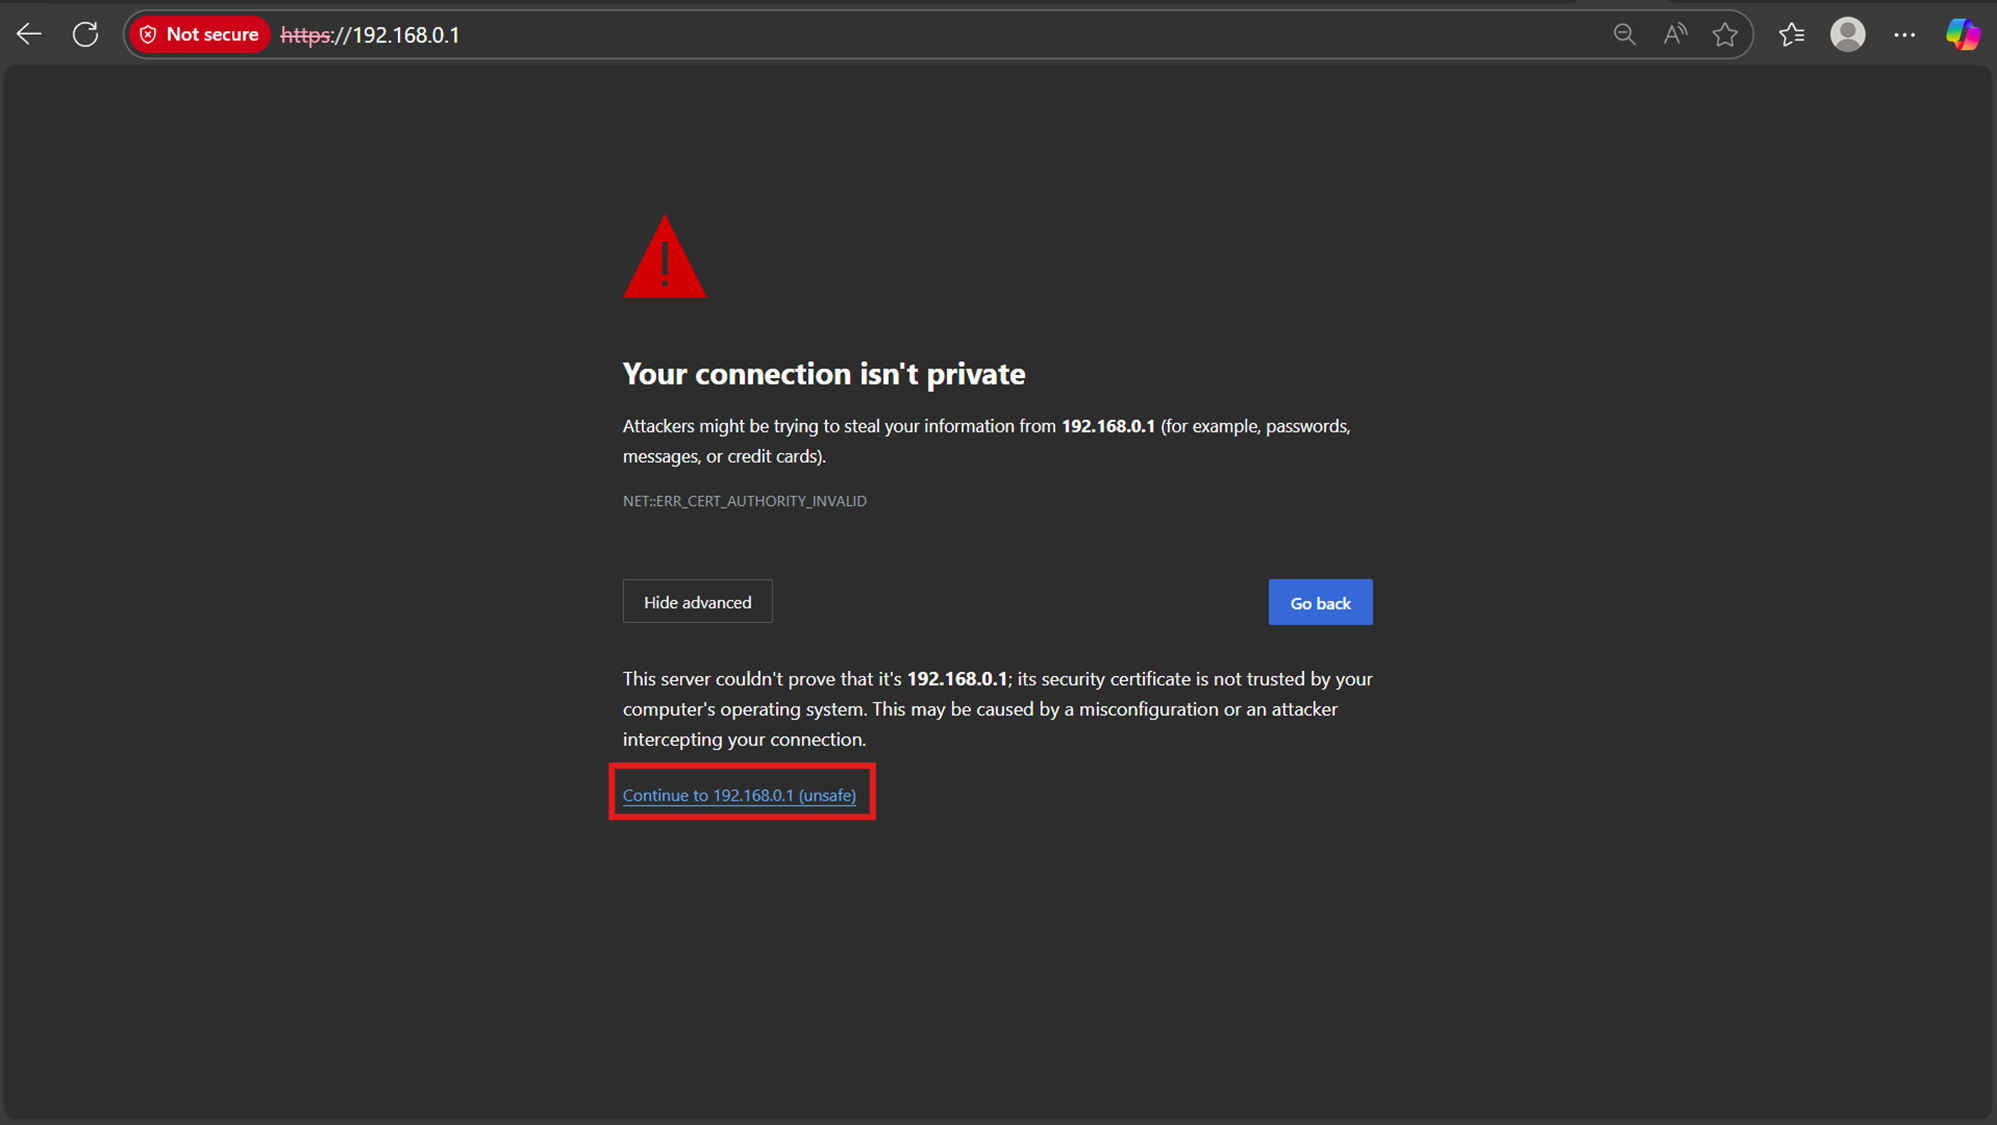
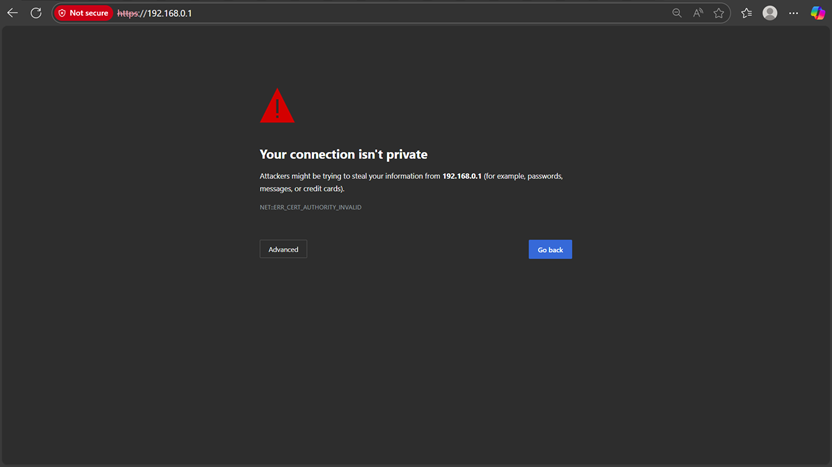
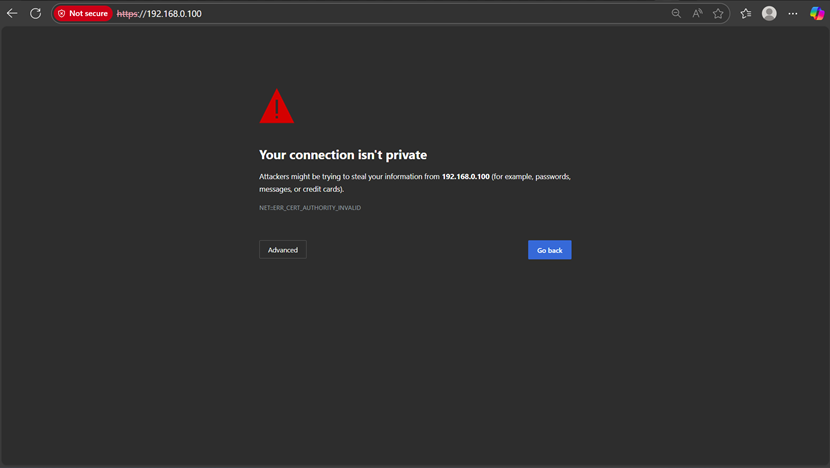
Step 3. You may see a browser warning: “Your connection is not private” or “Not Trusted Page”.
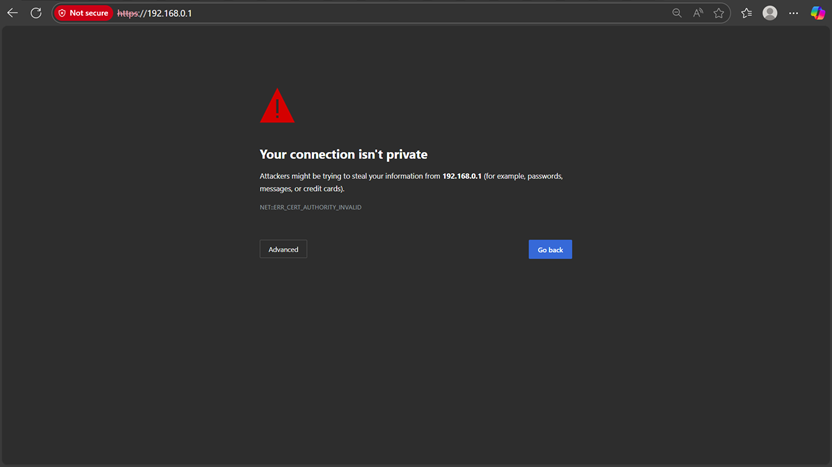
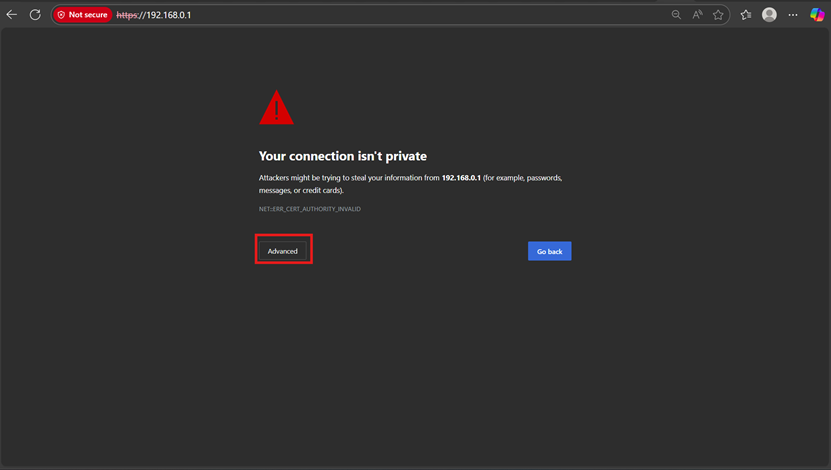
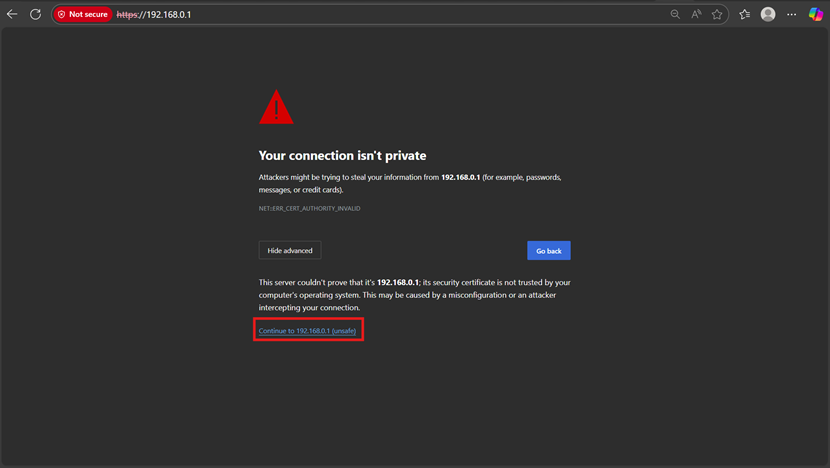
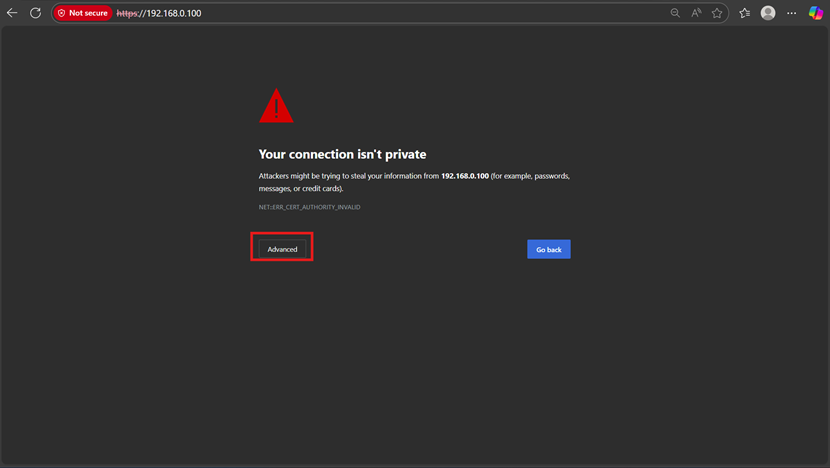
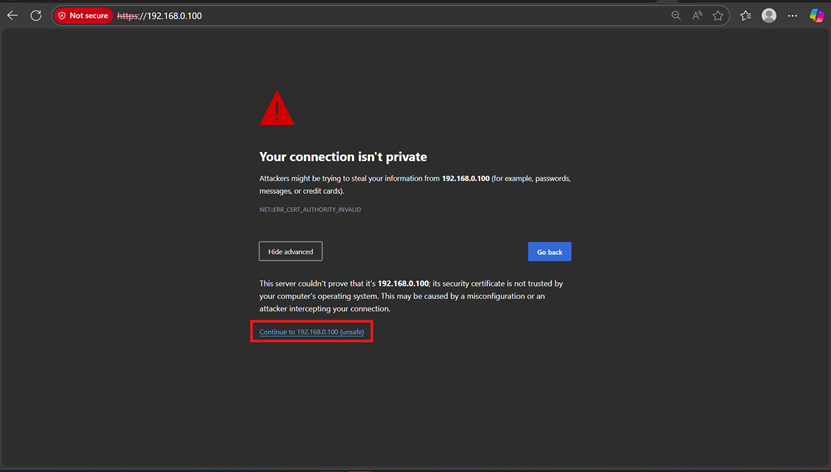
Step 4. Click Advance > Continue to 192.168.0.1 (or your corresponding IP address)

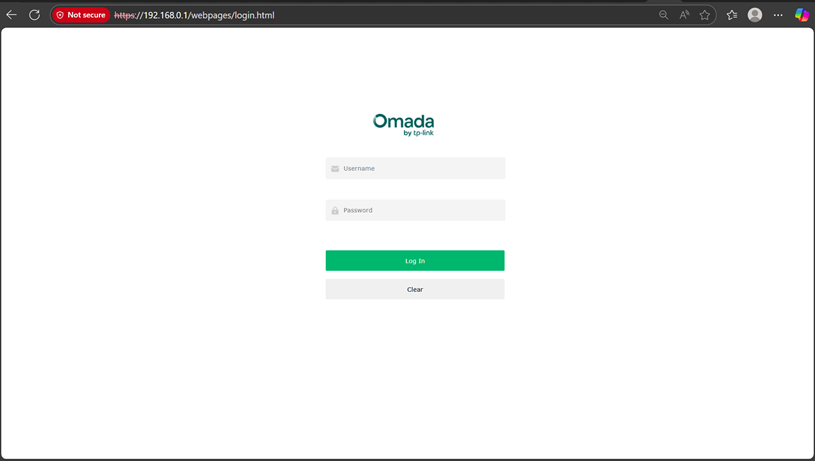
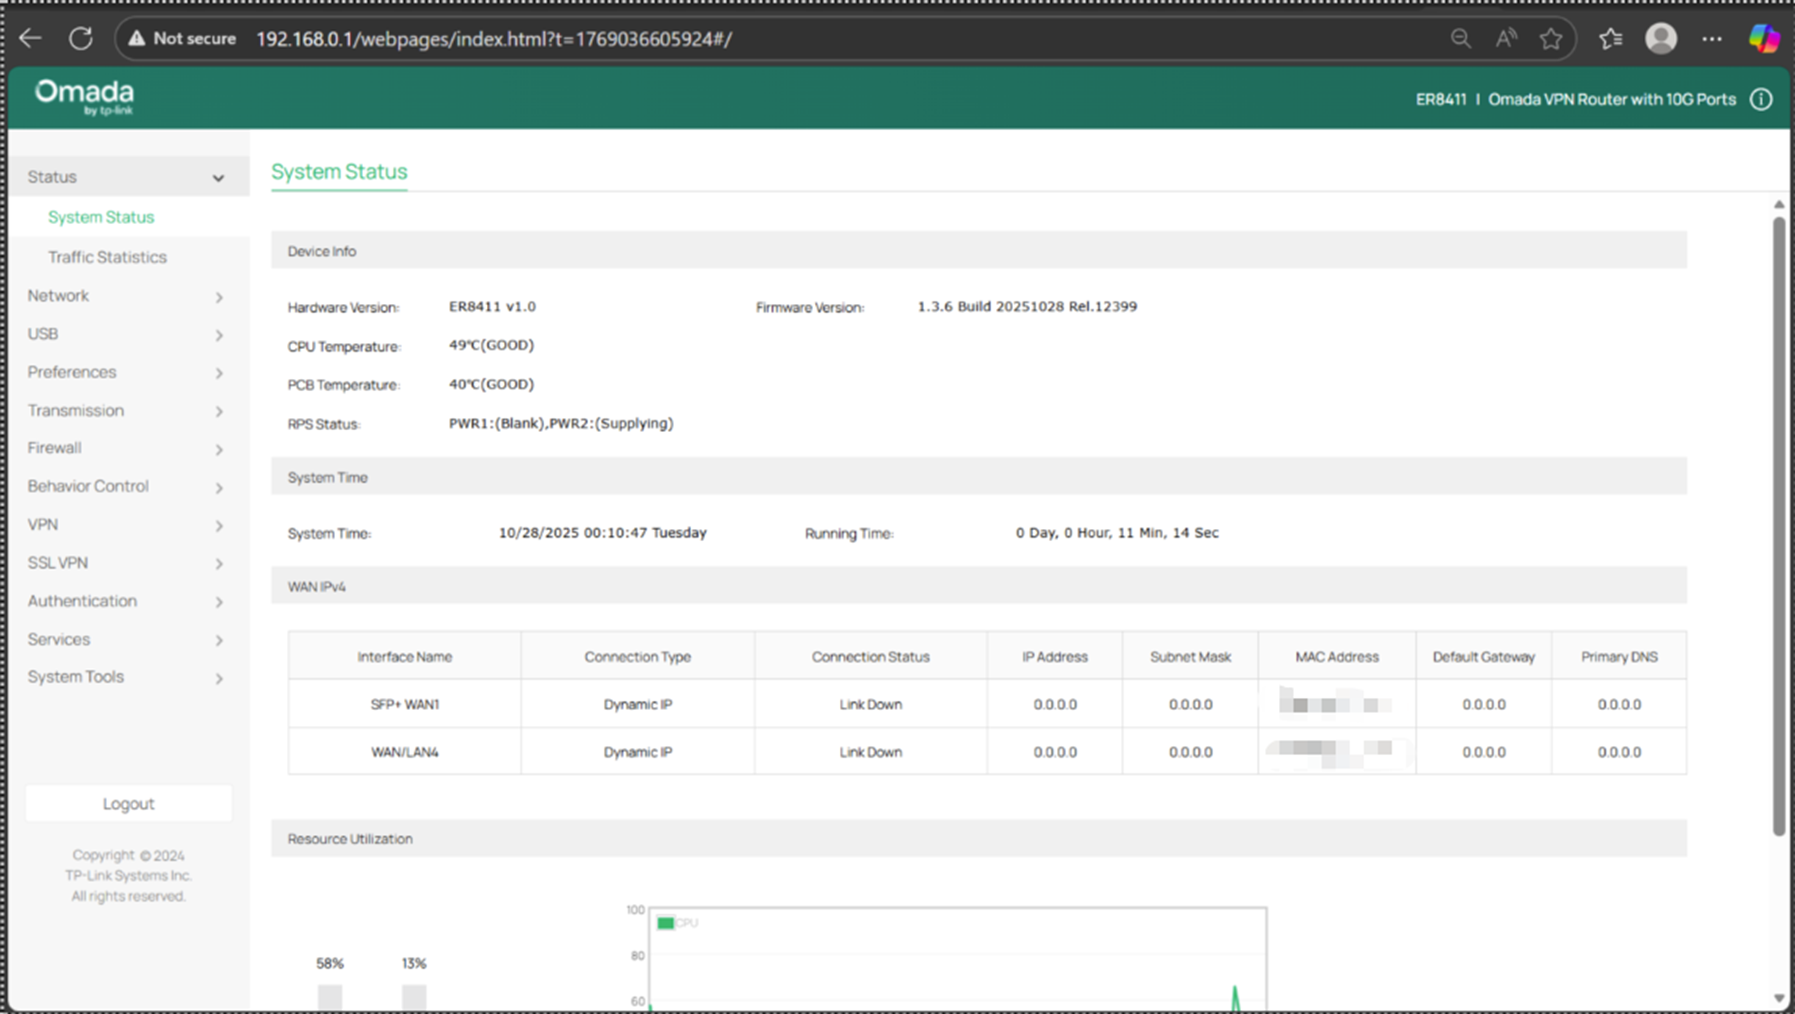
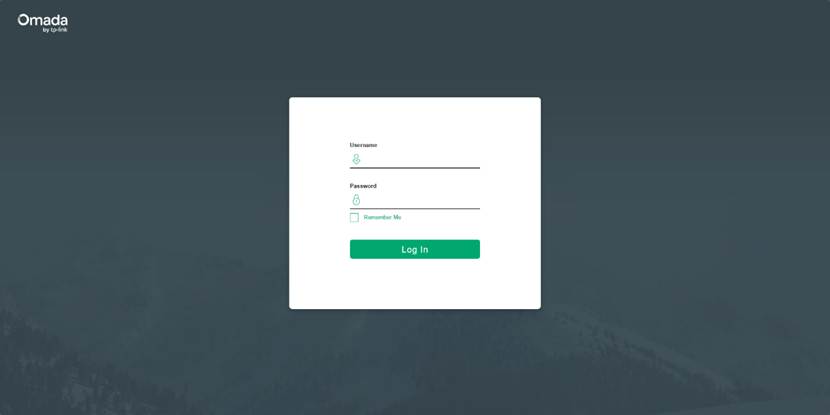
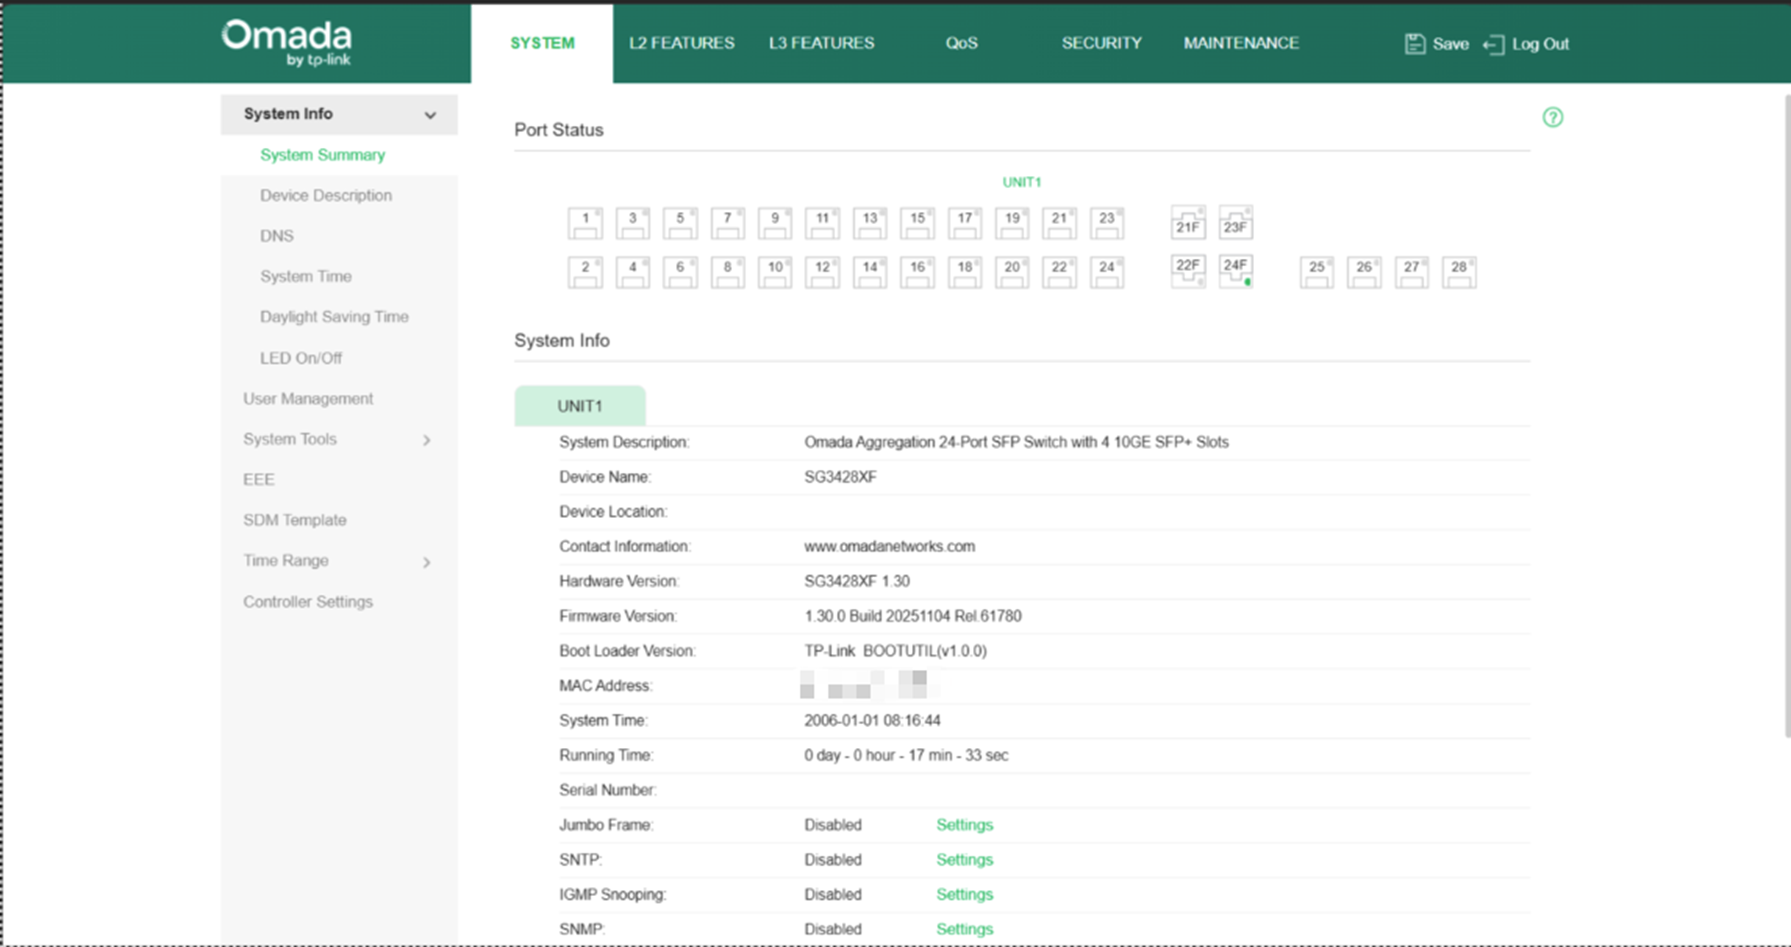
Step 5. You’ll be redirected to the management page of the gateway, here you can enter your login credentials.
Case 1: The login password has already been set.
Case 2: Out of the box setup
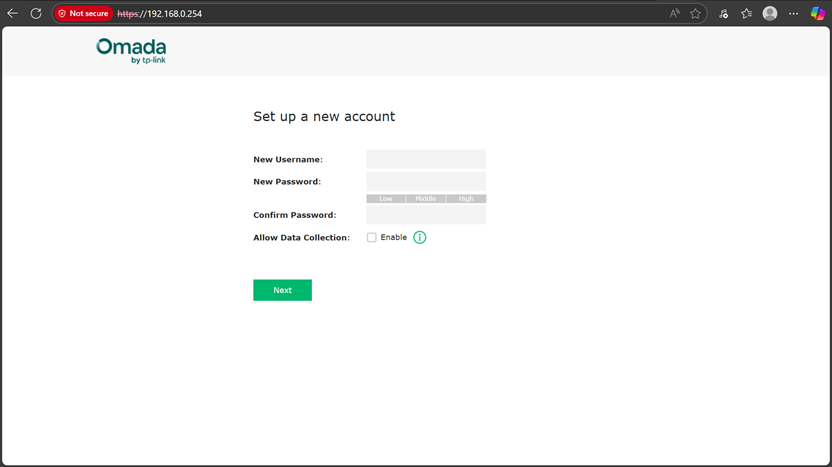
1. If you are setting a new unit up, you will instead be redirected to the Setup Wizard.
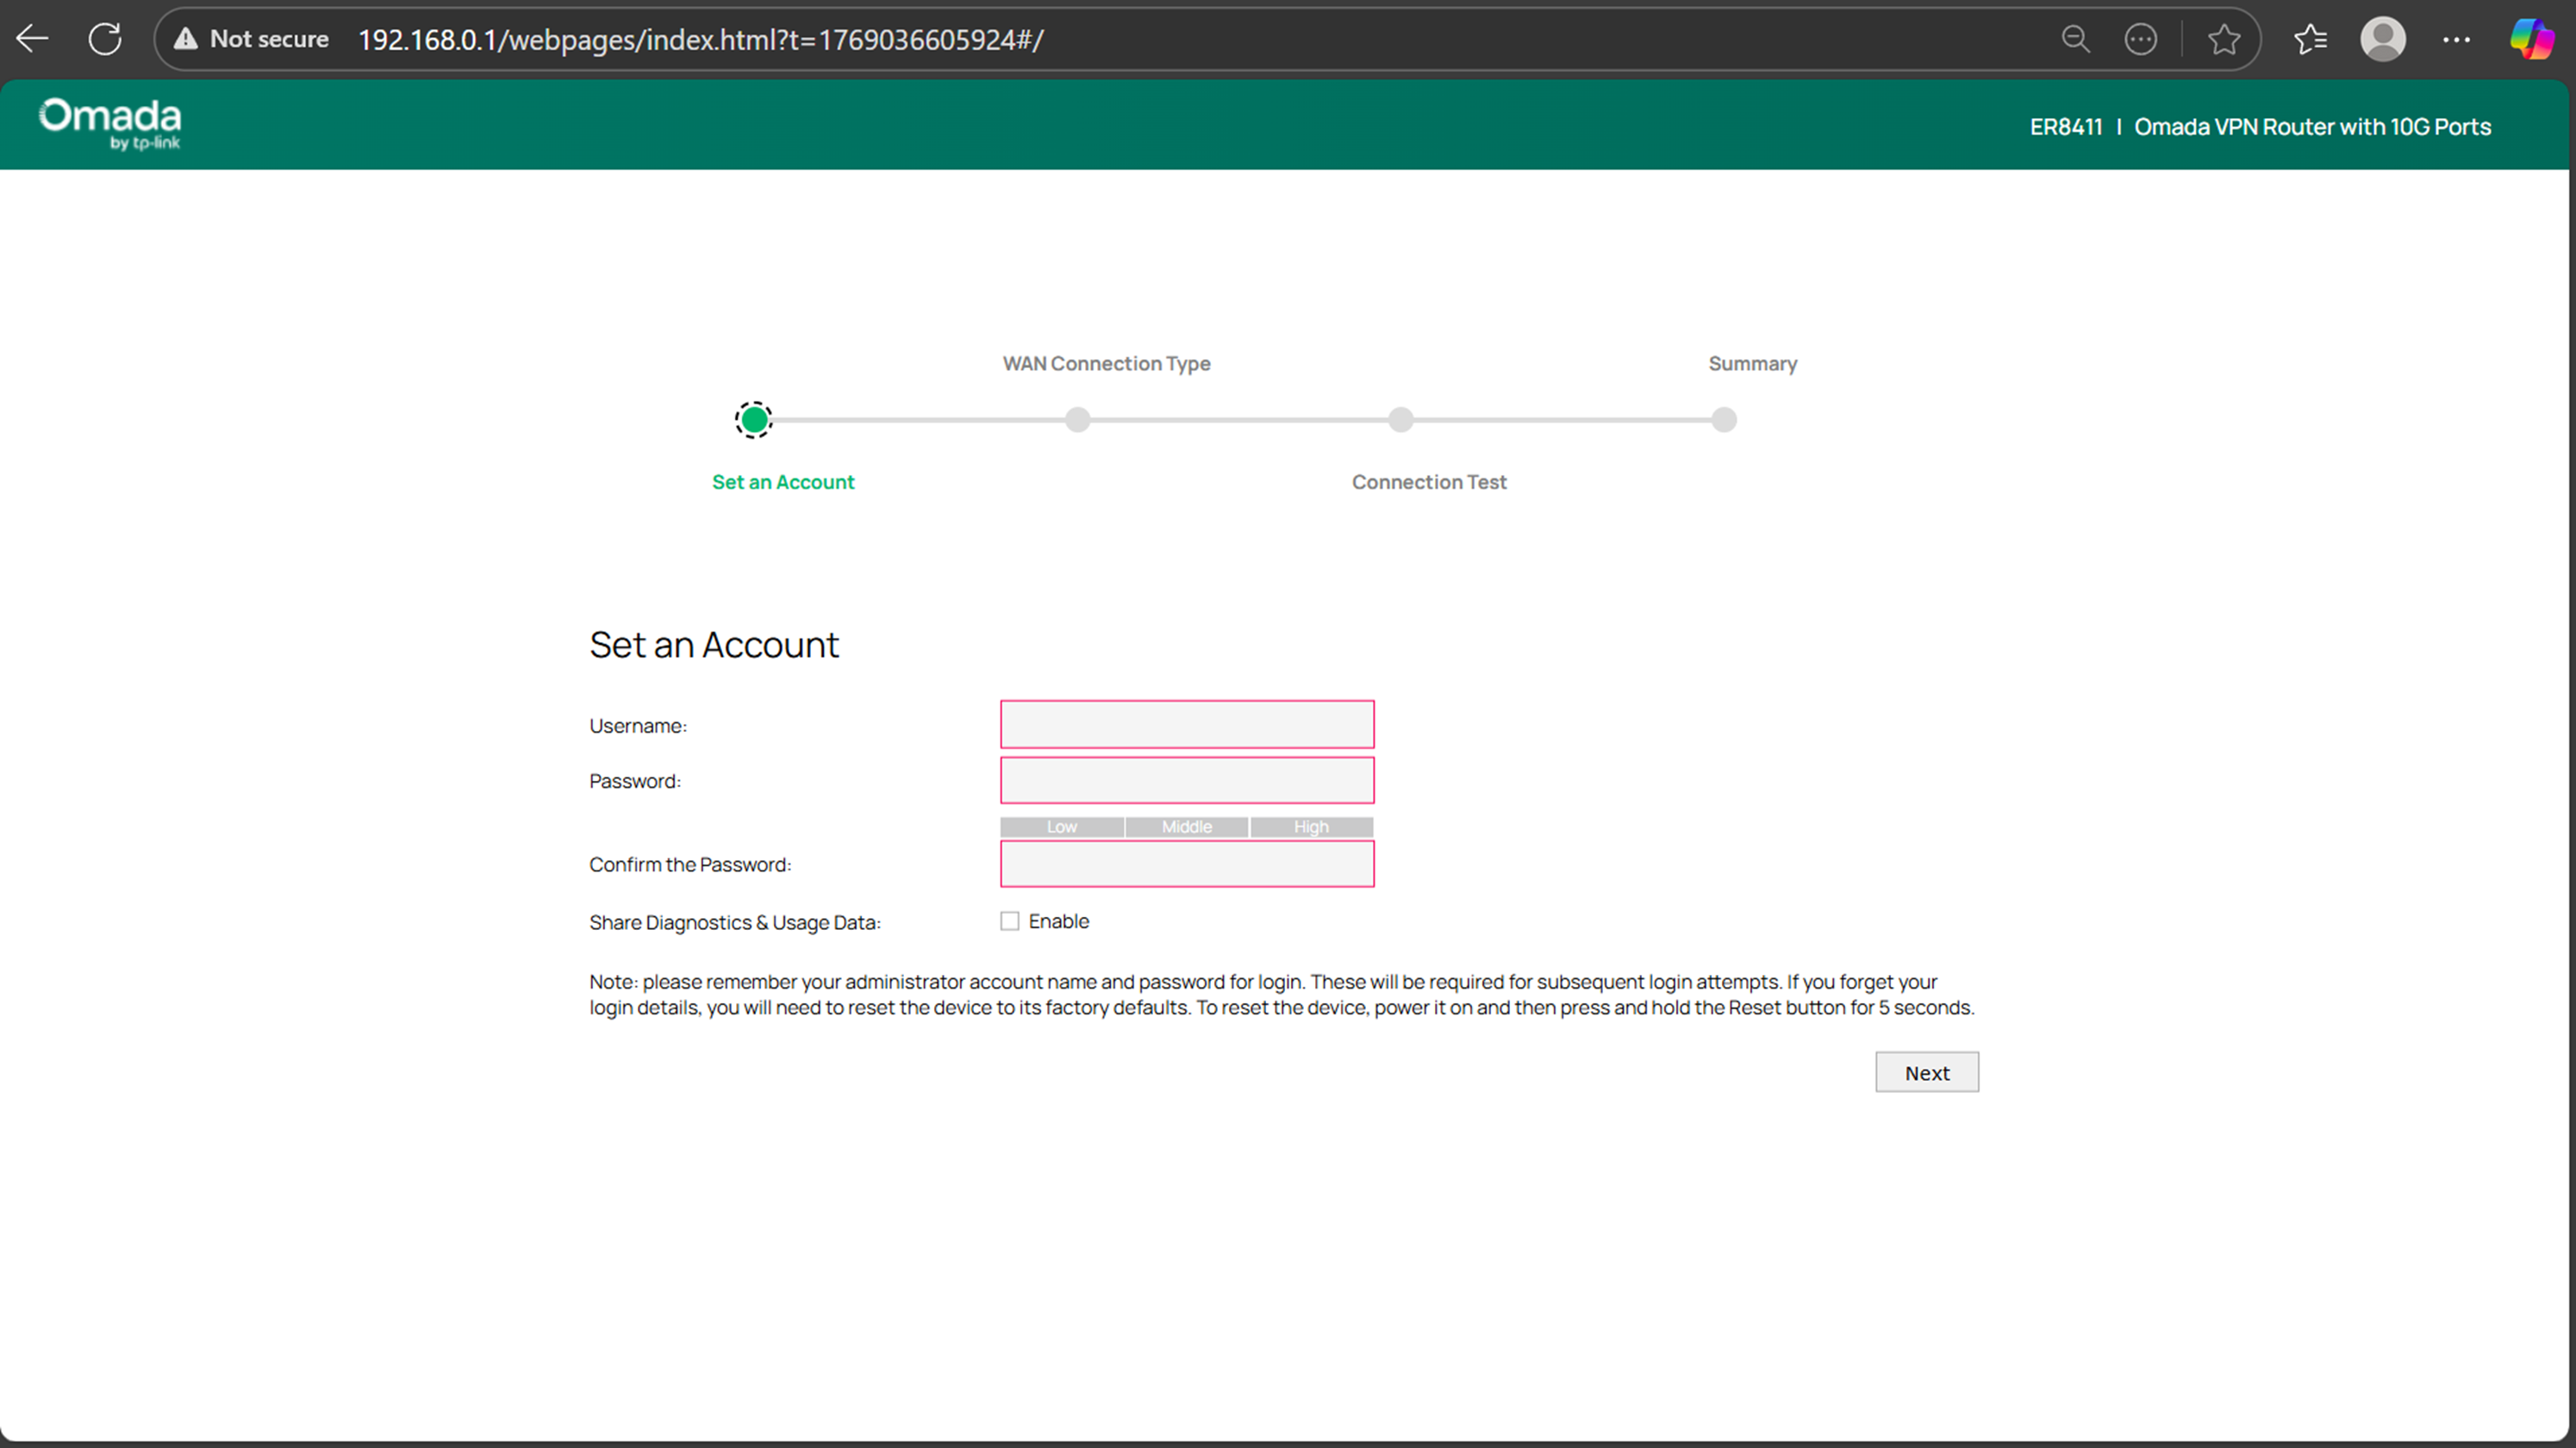
2. Proceed through the Setup Wizard’s steps.
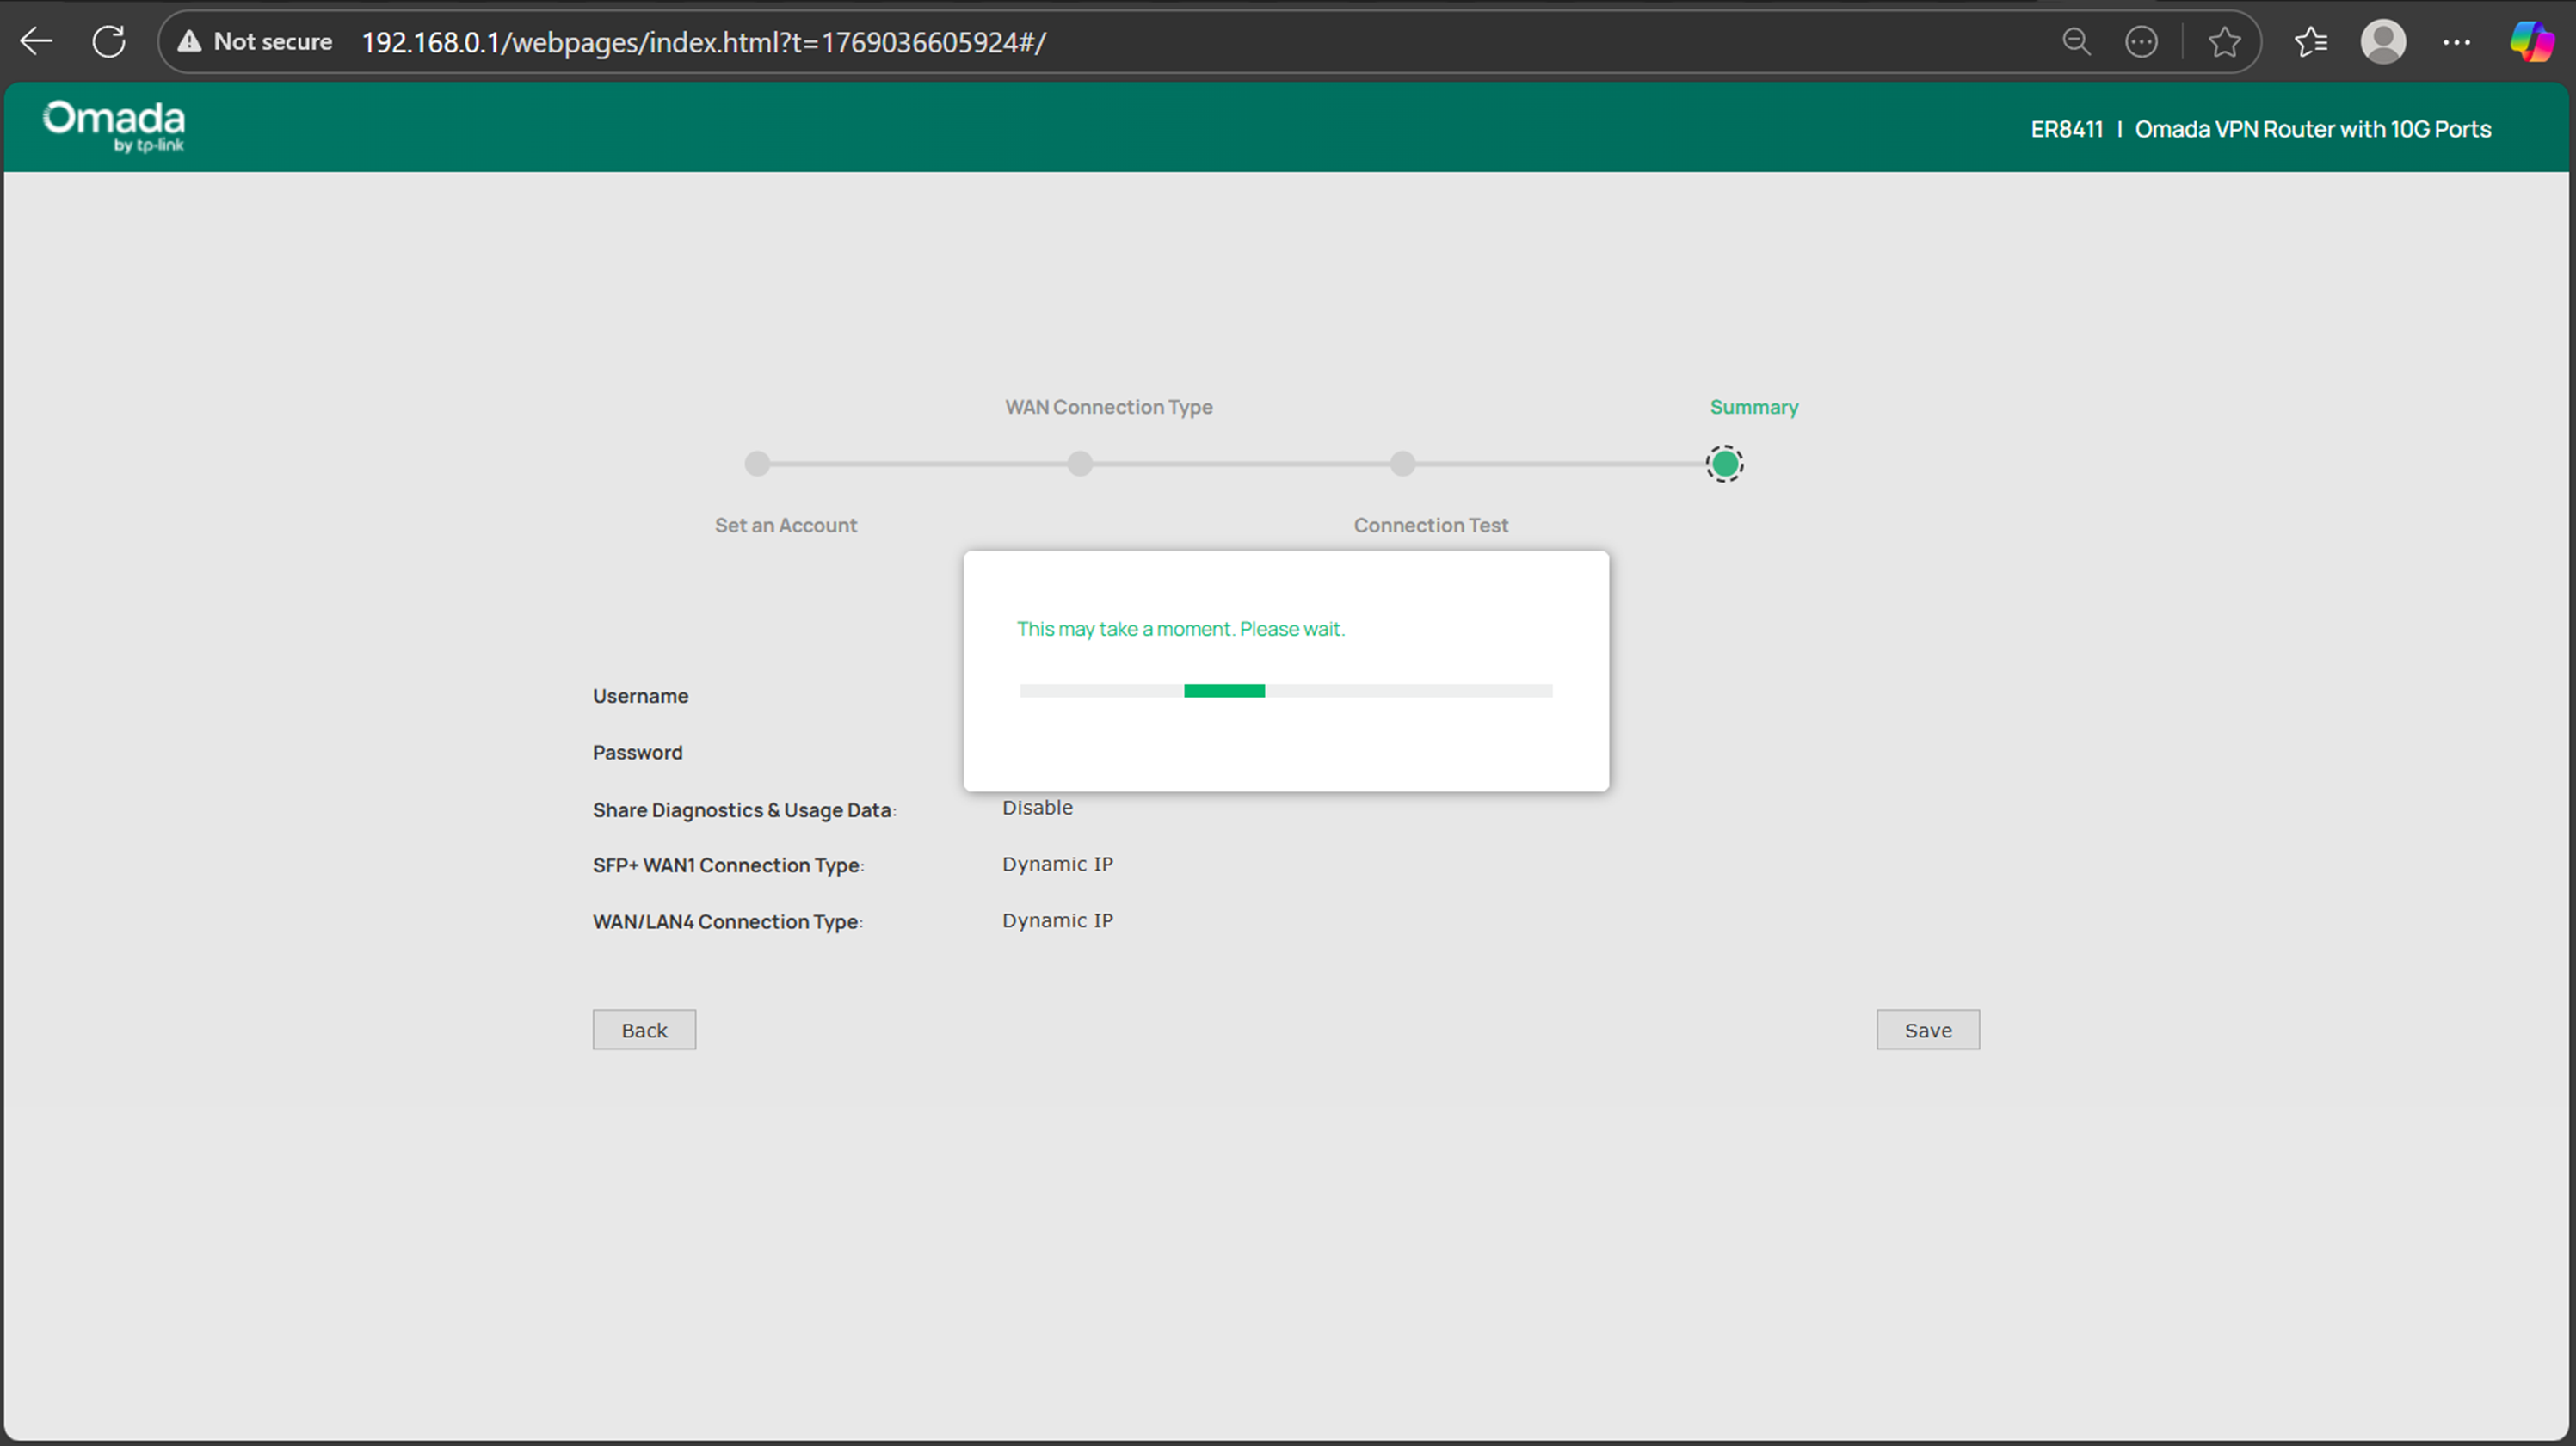
3. Once you are done, you will be redirected to the main configuration page.
EAP
Case 1: No DHCP Server:
Step 1. Make sure your EAP is powered on, and connect your computer to the EAP with an Ethernet cable.
Step 2. Change your computer’s current IP settings and manually assign a static IP address of 192.168.0.100 for your computer. For how to assign a static IP address for your computer, please refer to this FAQ: How to configure static IP on the computer | TP-Link
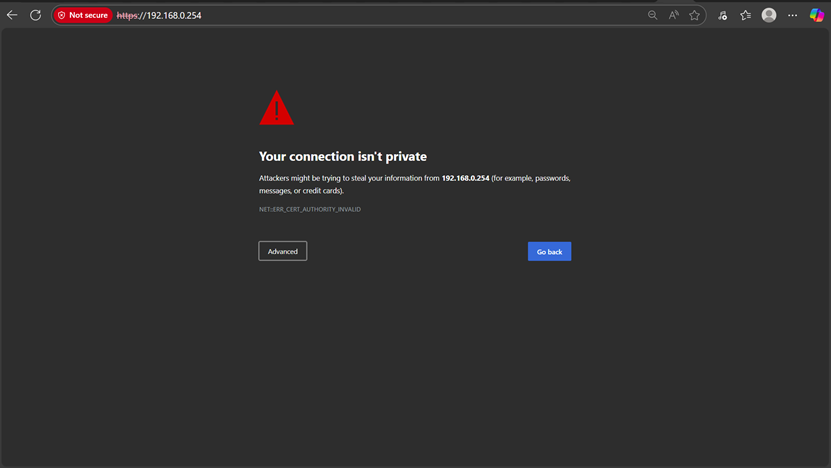
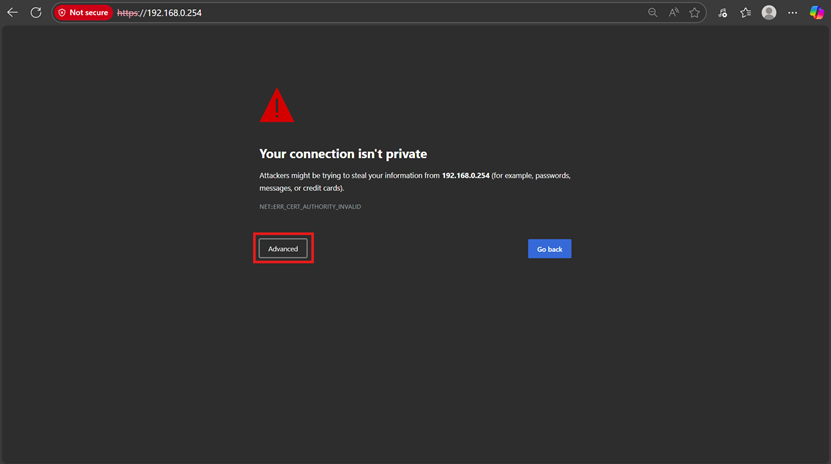
Step 3. Navigate to 192.168.0.254, you may see a browser warning: “Your connection is not private” or “Not Trusted Page”.
Step 4. Click Advance > Continue to 192.168.0.254 (or your corresponding IP address)

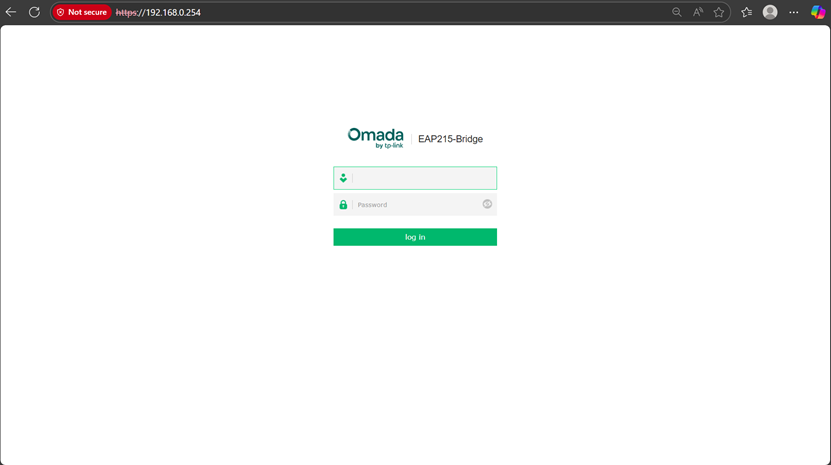
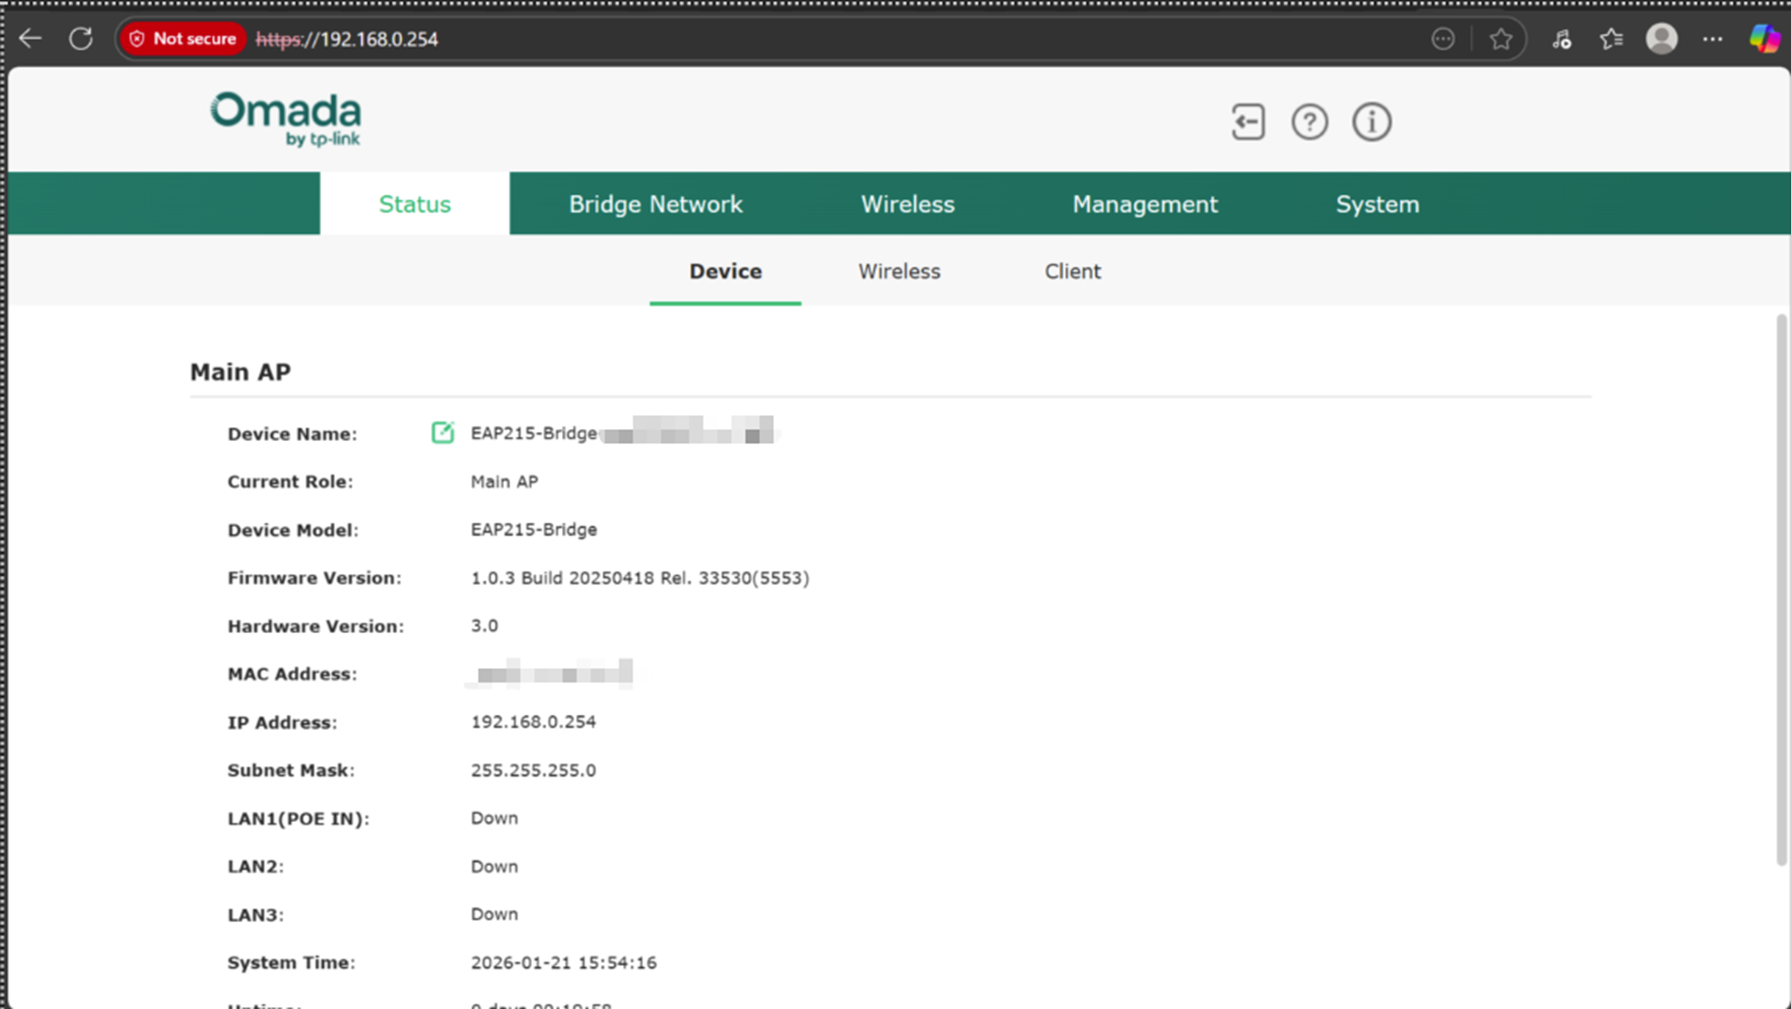
Step 5. You’ll be redirected to the management page of the EAP, here you can enter your login credentials.
Case 2: DHCP Server:
Step 1. Make sure the computer you are using is set to obtain an IP address automatically (DHCP).
Step 2. Connect the EAP to the router via an Ethernet cable and connect your computer to the same network.
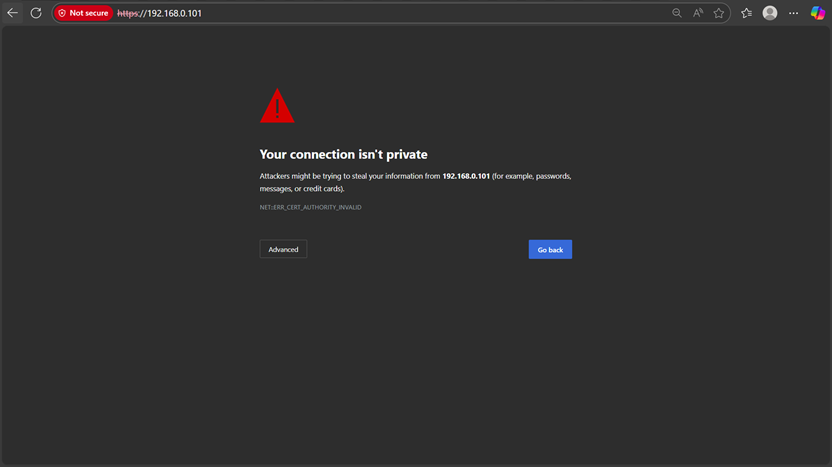
Step 3. Find the IP address that the DHCP server assigned to the access point and enter it into a web browser, in this example, that IP address is 192.168.0.101
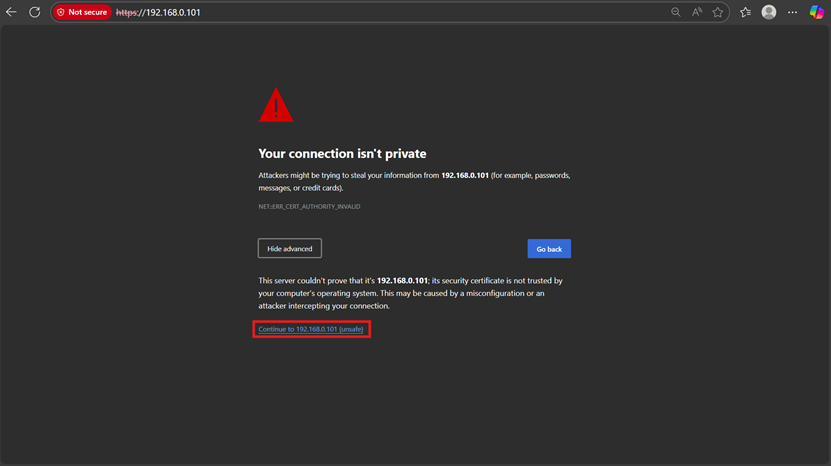
Step 4. You may see a browser warning: “Your connection is not private” or “Not Trusted Page”.
Step 5. Click Advance > Continue to 192.168.0.101 (or your corresponding IP address)

Step 6. You’ll be redirected to the management page of the EAP, here you can enter your login credentials.

Case 3: Out of the box setup
Step 1. If you are setting a new unit up, you will instead be redirected to the Setup Wizard
Step 2. Proceed through the Setup Wizard’s steps

Step 3. Once you are done, you will be redirected to the main configuration page.
Switch
Case 1: No DHCP Server:
Step 1. Make sure your Switch is powered on, connect your computer to the Switch with an ethernet cable.
Step 2. Change your computer's current IP settings and manually assign a static IP address of 192.168.0.100 for your computer. For how to assign a static IP address for your computer, please refer to this FAQ: How to configure static IP on the computer | TP-Link
Step 3. Navigate to 192.168.0.1, you may see a browser warning: “Your connection is not private” or “Not Trusted Page”.
Step 4. Click Advance > Continue to 192.168.0.1
Step 4. You’ll be redirected to the management page of the Switch, here you can enter your login credentials.
Case 2: DHCP Server:
Step 1. Make sure the computer you are using is set to obtain an IP address automatically (DHCP).
Step 2. Connect the Switch to the router via an Ethernet cable, and connect your computer to the same router or to the switch.
Step 3. Find the IP address that the DHCP server assigned to the switch and enter it into a web browser. In this example, that IP address is 192.168.0.100
Step 4. You may see a browser warning: “Your connection is not private” or “Not Trusted Page”.
Step 4. Click Advance > Continue to 192.168.0.100 (or your corresponding IP address)
Step 5. You’ll be redirected to the management page of the Switch, here you can enter your login credentials.

Case 3: Out of the box setup
Step 1. If you are setting a new unit up, you will instead be redirected to the Setup Wizard
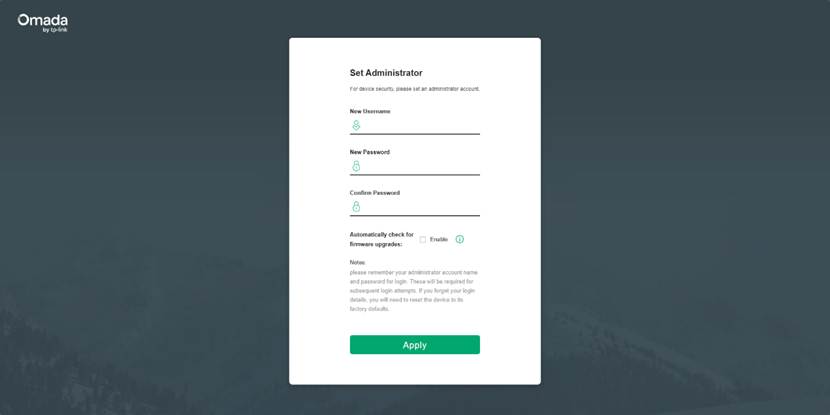
Step 2. Proceed through the Setup Wizard’s steps.
Step 3. Once you are done, you will be redirected to the main configuration page.
Conclusion
By following the steps above, you can successfully access the web management page of Omada Series gateways, EAPs, and switches in standalone mode, whether a DHCP server is present or not. Once logged in, you can configure device settings, monitor status, and mange basic functions directly through the built-in web interface without using an Omada Controller.
QA
Q1: What should I do if fail to connect to the EAP or Switch with no DHCP Server.
A1: Check to make sure you computer has a statically assigned IP address.
