


How to configure OpenVPN on Omada Gateway via Omada Controller


Configuration for OpenVPN Server
Configuration for OpenVPN Client
Introduction
OpenVPN is open-source virtual private network (VPN) software that utilizes SSL/TLS protocols for encrypted communication. It provides secure remote access and site-to-site connections and is widely used to protect network communication and access control.
Requirements
- Omada Gateway Series
- Omada Software Controller, Hardware Controller, or Cloud-Based Controller
Configuration
Configuration for OpenVPN Server
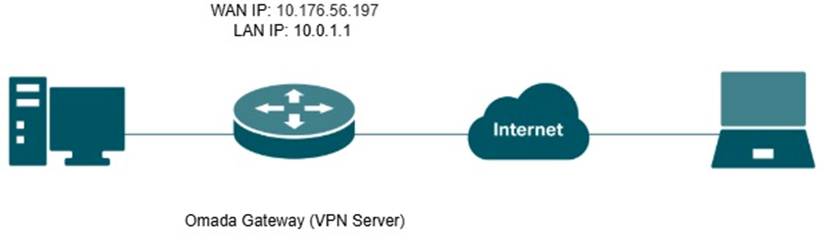
OpenVPN Server
Omada Gateway acts as an OpenVPN server, enabling clients to securely access the intranet or the internet.
Step 1. Log in to the Controller via web browser, go to Network Config > VPN > VPN Server > and click Create New VPN Server.
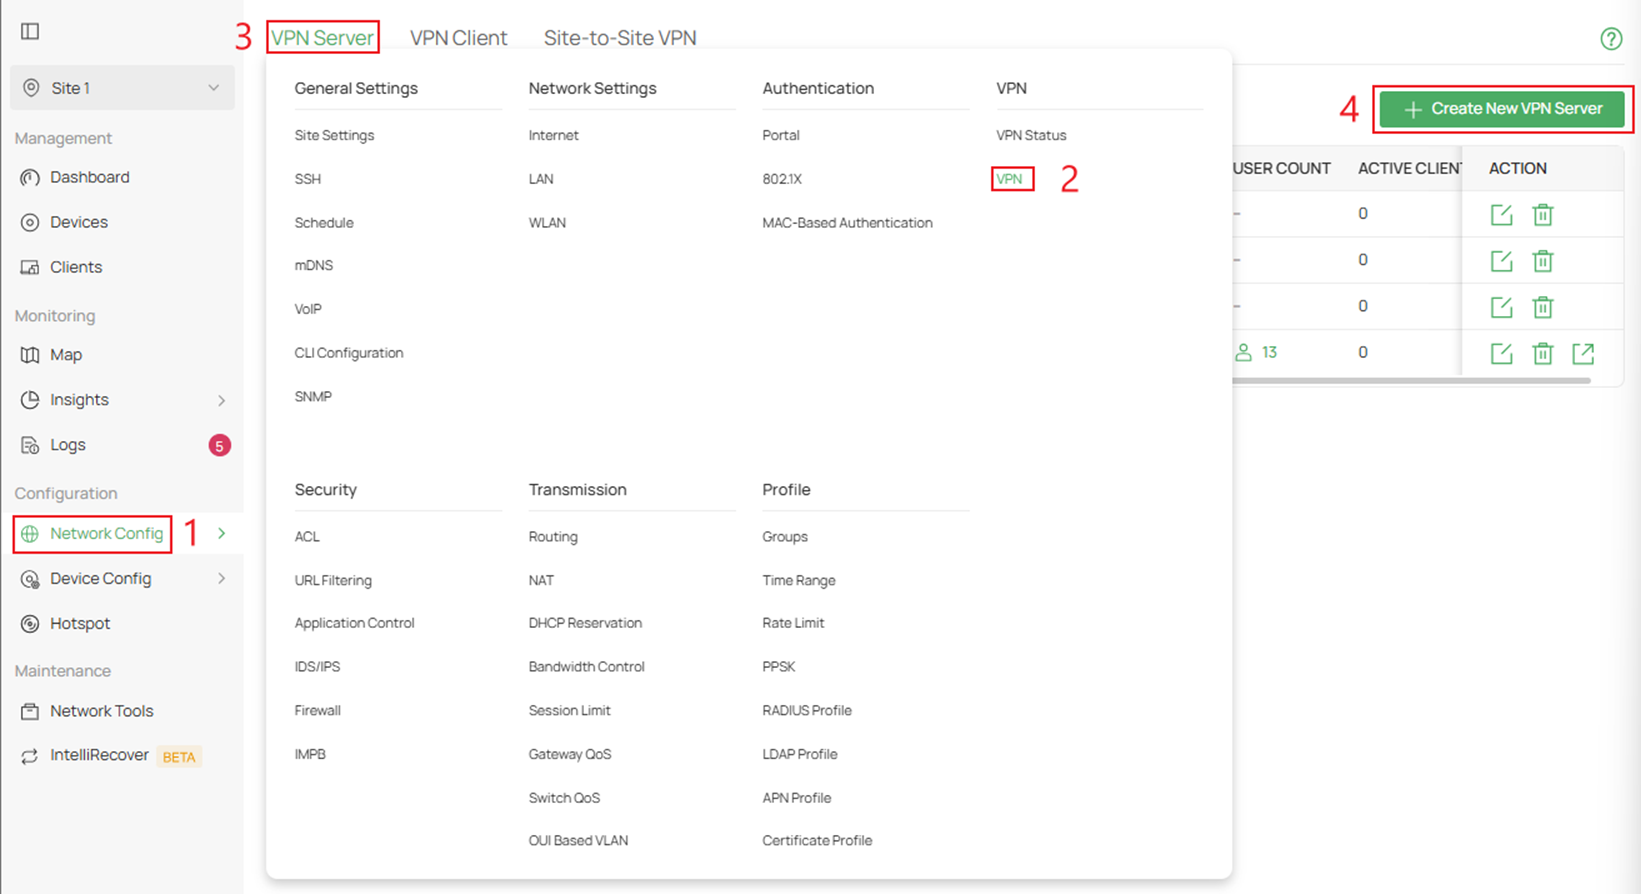
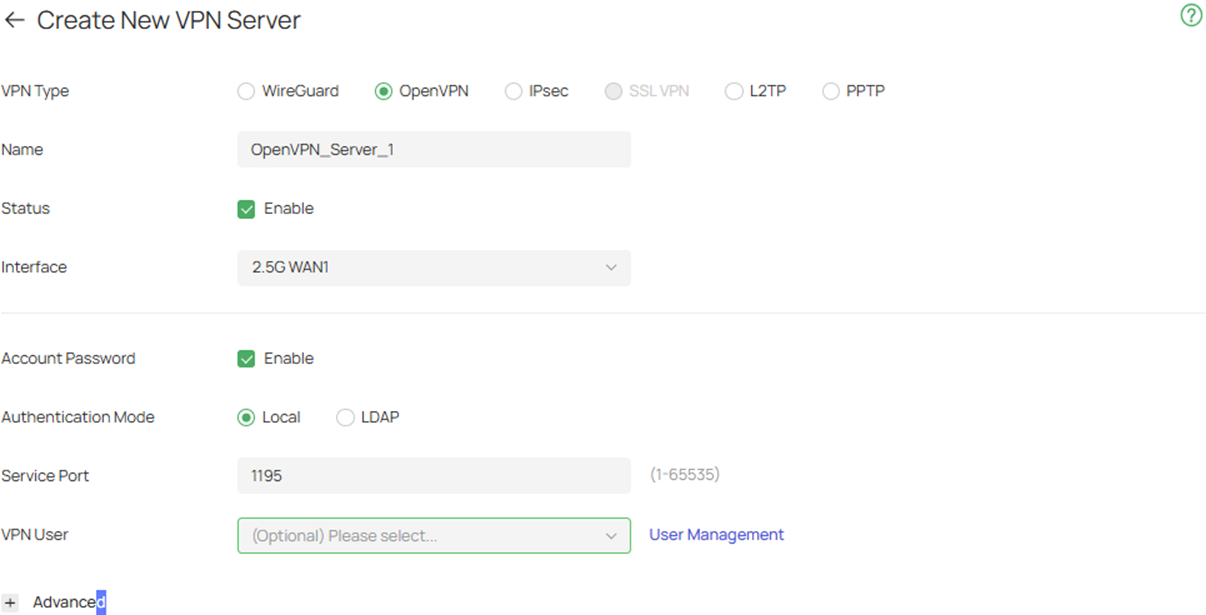
Step 2. Click on OpenVPN at the top and fill in the necessary parameters.
Interface: Select the WAN port on which the VPN tunnel is established. Each WAN port supports only one OpenVPN tunnel when the gateway works as an OpenVPN server.
Account Password: When enabled, OpenVPN will use username/password to authenticate users.
Authentication Mode: Specify the authentication method used by the OpenVPN server.
Local: Use a built-in authentication server to authenticate when the tunnel is created. If you don’t have an additional external server, you can choose local authentication.
LDAP: Use an external LDAP server to authenticate when the tunnel is created.
LDAP Profile: Specify an LDAP entry that you have configured in Profiles > LDAP Profile.
Service Port: Enter a VPN service port to which a VPN device connects. The default port is 1194.
Local Network Type: Select the type to set the local network for VPN Policy, there are two types: Network and Custom IP.
Local Networks: Select the local networks to apply the VPN Policy. The VPN Policy will only apply to the selected or filled local network.
VPN User: Select a user associated to the VPN server. Click Add User to add a new user.
Step 3. If you enabled Account Password and want to use local authentication, you can create the account by clicking on Local in Authentication Mode > VPN User > Add New User >
If there is no authentication needed skip to Step 5.
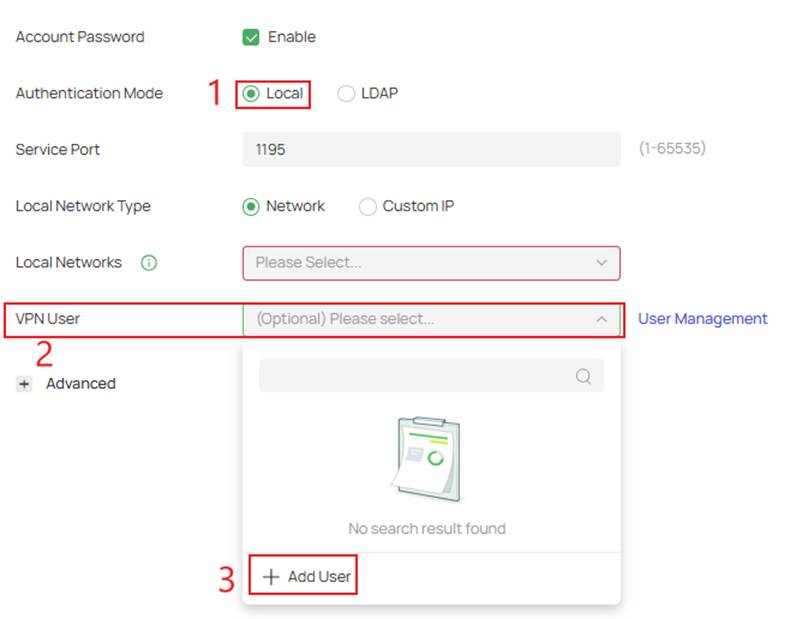
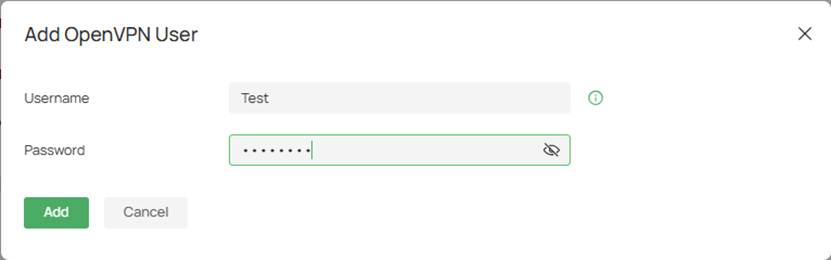
Step 4. Fill in the Username and Password
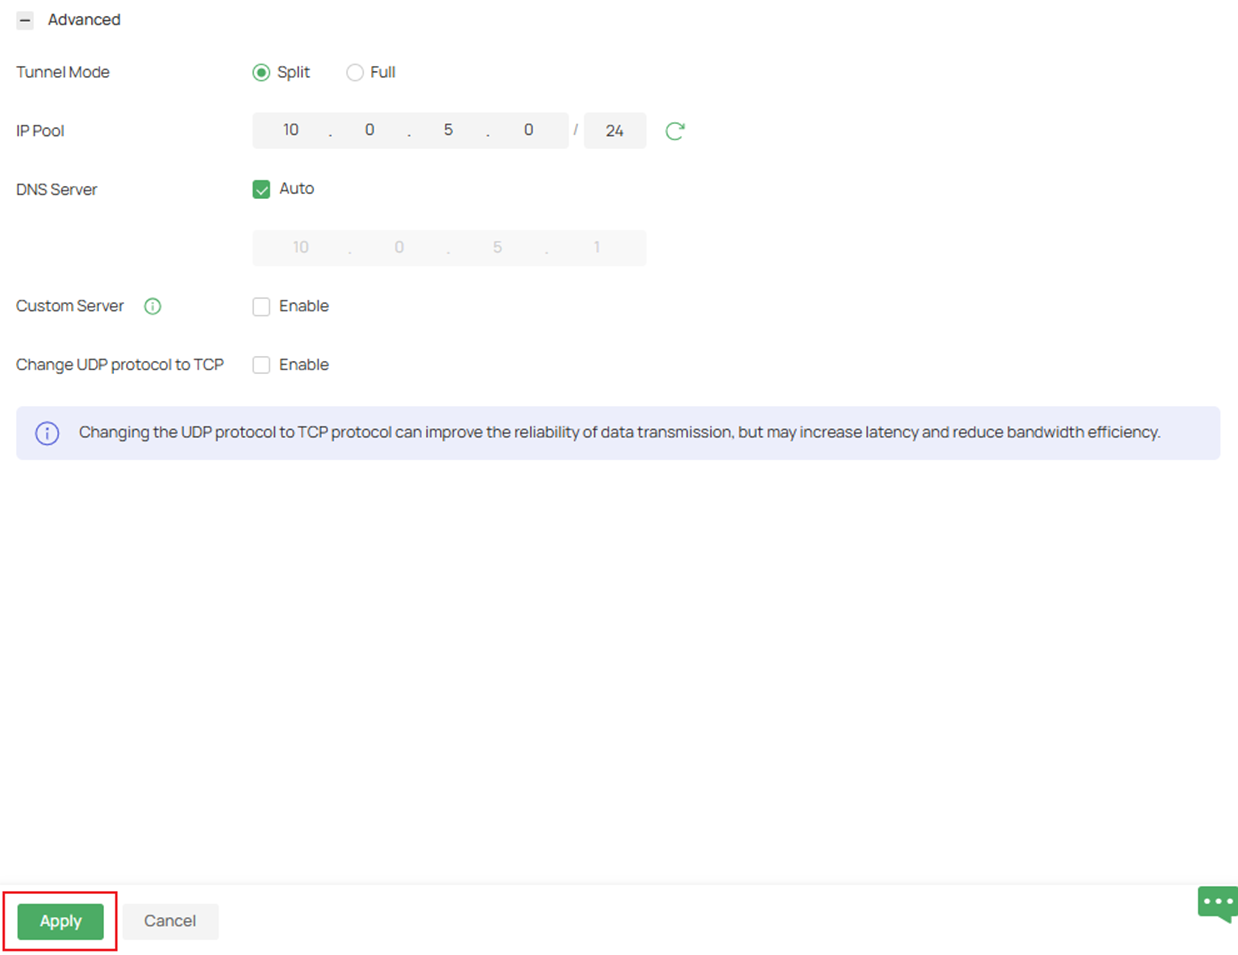
Step 5. Fill in the Advanced settings if necessary, then click Apply after the parameters have been filled in.
Tunnel Mode: Specify the working mode of the tunnel.
Split: Only the traffic of the specified local network can pass through the tunnel.
Full: Allow all client traffic to pass through the tunnel.
IP Pool: If you select IP Address/Mask type, enter the IP Address and subnet Mask to decide the range of VPN IP pool. If you select IP Address Range type, enter the start and end IP addresses of the VPN IP pool.
DNS Server: When enabled, the system will automatically generate the DNS server information and send it to the client. By default, the device's default LAN gateway (IPsec, L2TP, PPTP) or the virtual IP assigned to the current server by IP Pool (OpenVPN, SSL VPN, WireGuard) will be used as the DNS address.
Primary/Secondary DNS Server: Specify the DNS address to be assigned to the VPN client (eg 8.8.8.8). You can enter the router's LAN IP.
Custom Server: When enabled, the customized server address (IP address or domain name) can be written into the certificate for the client to identify and connect to the OpenVPN server.
Change UDP protocol to TCP: When enabled, the OpenVPN server’s communication protocol will change from UDP to TCP.
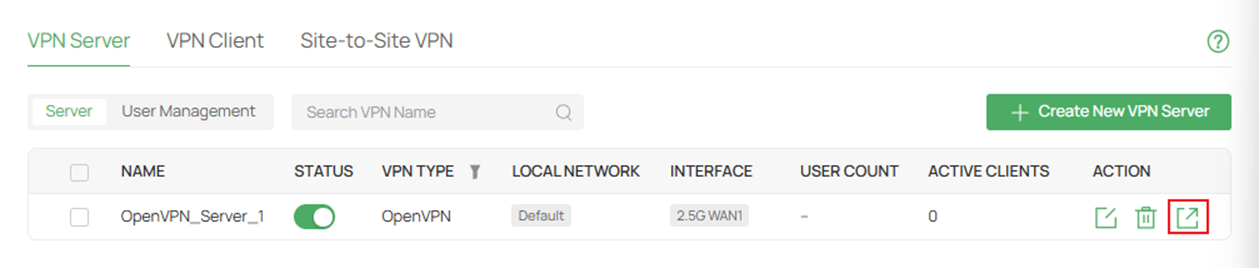
Step 6. On the VPN Server page, export the new OpenVPN server's config file.
Step 7. Import the OpenVPN file to the remote device. For different remote devices/operating systems, please refer to: How to Set Up an OpenVPN Connection with Omada Gateways on Client Devices with Different Operating Systems
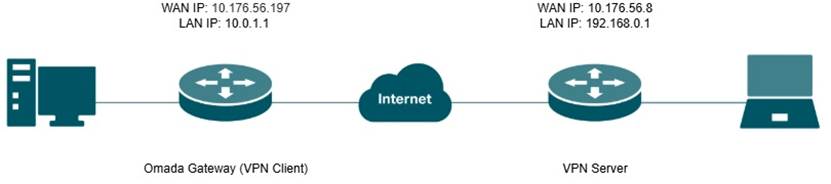
Configuration for OpenVPN Client
OpenVPN Client
Omada Gateway acts as an OpenVPN client, enabling clients on a LAN to securely access remote sites or the internet.
Step 1. Export the OpenVPN file from the server that you are establishing a tunnel with.
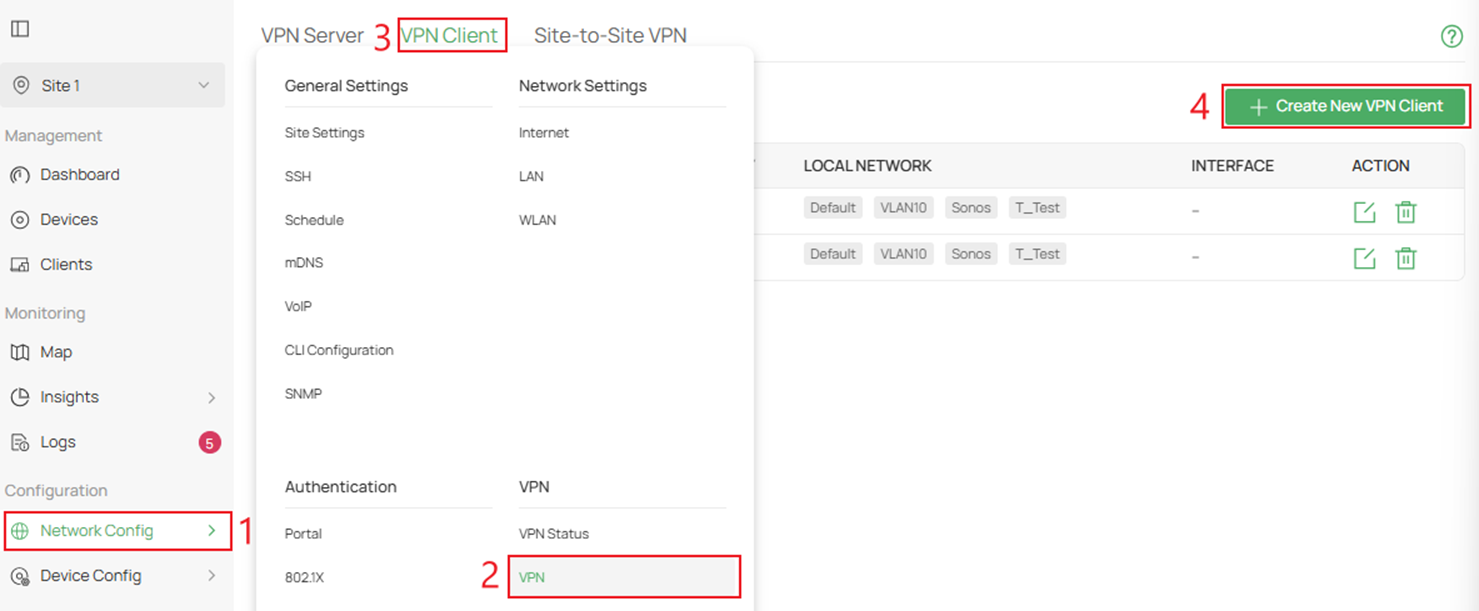
Step 2. Navigate to Network Config > VPN > VPN Client > and click Create New VPN Client.
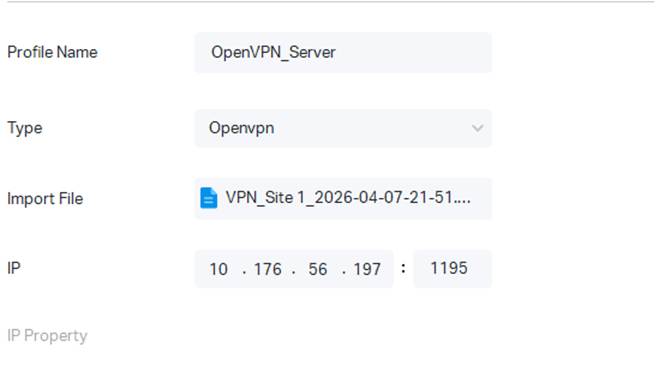
Step 3. Click on OpenVPN to create a new client and Import upload OVPN config file.

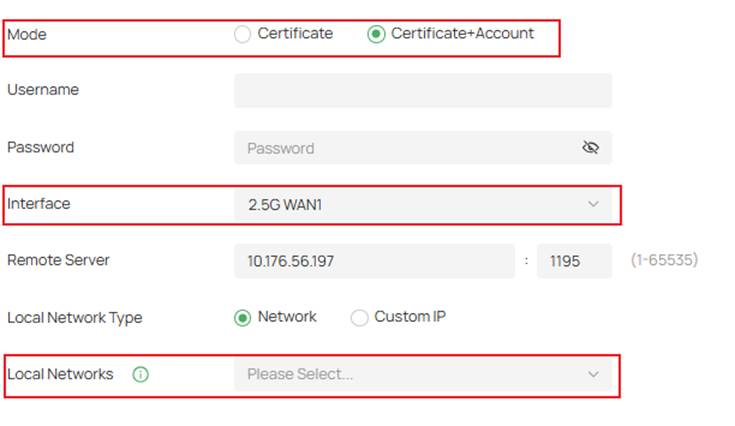
Step 4. After importing the OpenVPN file, choose your Interface and Local Networks you want to be able to pass through that tunnel.
If you need to enter local credentials, click Certificate+Account.
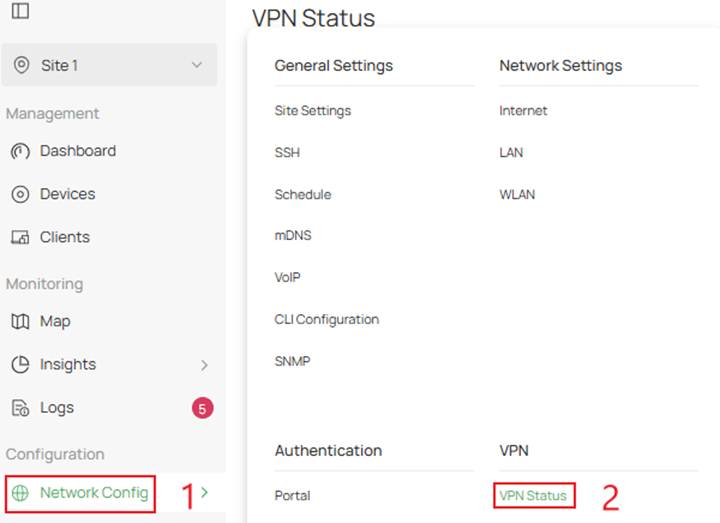
Verification
Step 1. To verify the VPN tunnel for both the server and client, navigate to Network Config > VPN Status.
Step 2. To check on the status of the OpenVPN server, click VPN Server > OpenVPN.

Step 3. To check on the status of the OpenVPN client, click VPN Client > OpenVPN.

Conclusion
In this guide, we demonstrated how to successfully configure both an OpenVPN server and client within the Omada ecosystem using the Omada Controller v6.2. By following these steps, administrators can securely extend network access to remote users or connect multiple sites through encrypted tunnels.
Get to know more details of each function and configuration please go to Download Center to download the manual of your product.
QA
Q1: Why is my remote device not establishing a tunnel to my OpenVPN server hosted on my Omada Gateway?
A1: Check whether the gateway is using a public IP or a private IP on its WAN interface. If there is a private IP address, please set up port forwarding on your main router first. And make sure the settings on both the client and server sites are correct and matchable.
