


Table of Contents
Images are for demonstration only, and may differ from your actual product.
Package Contents
Note: Accessories may vary by region and model.
1 Installation

Ceiling Mounting
Wall Mounting
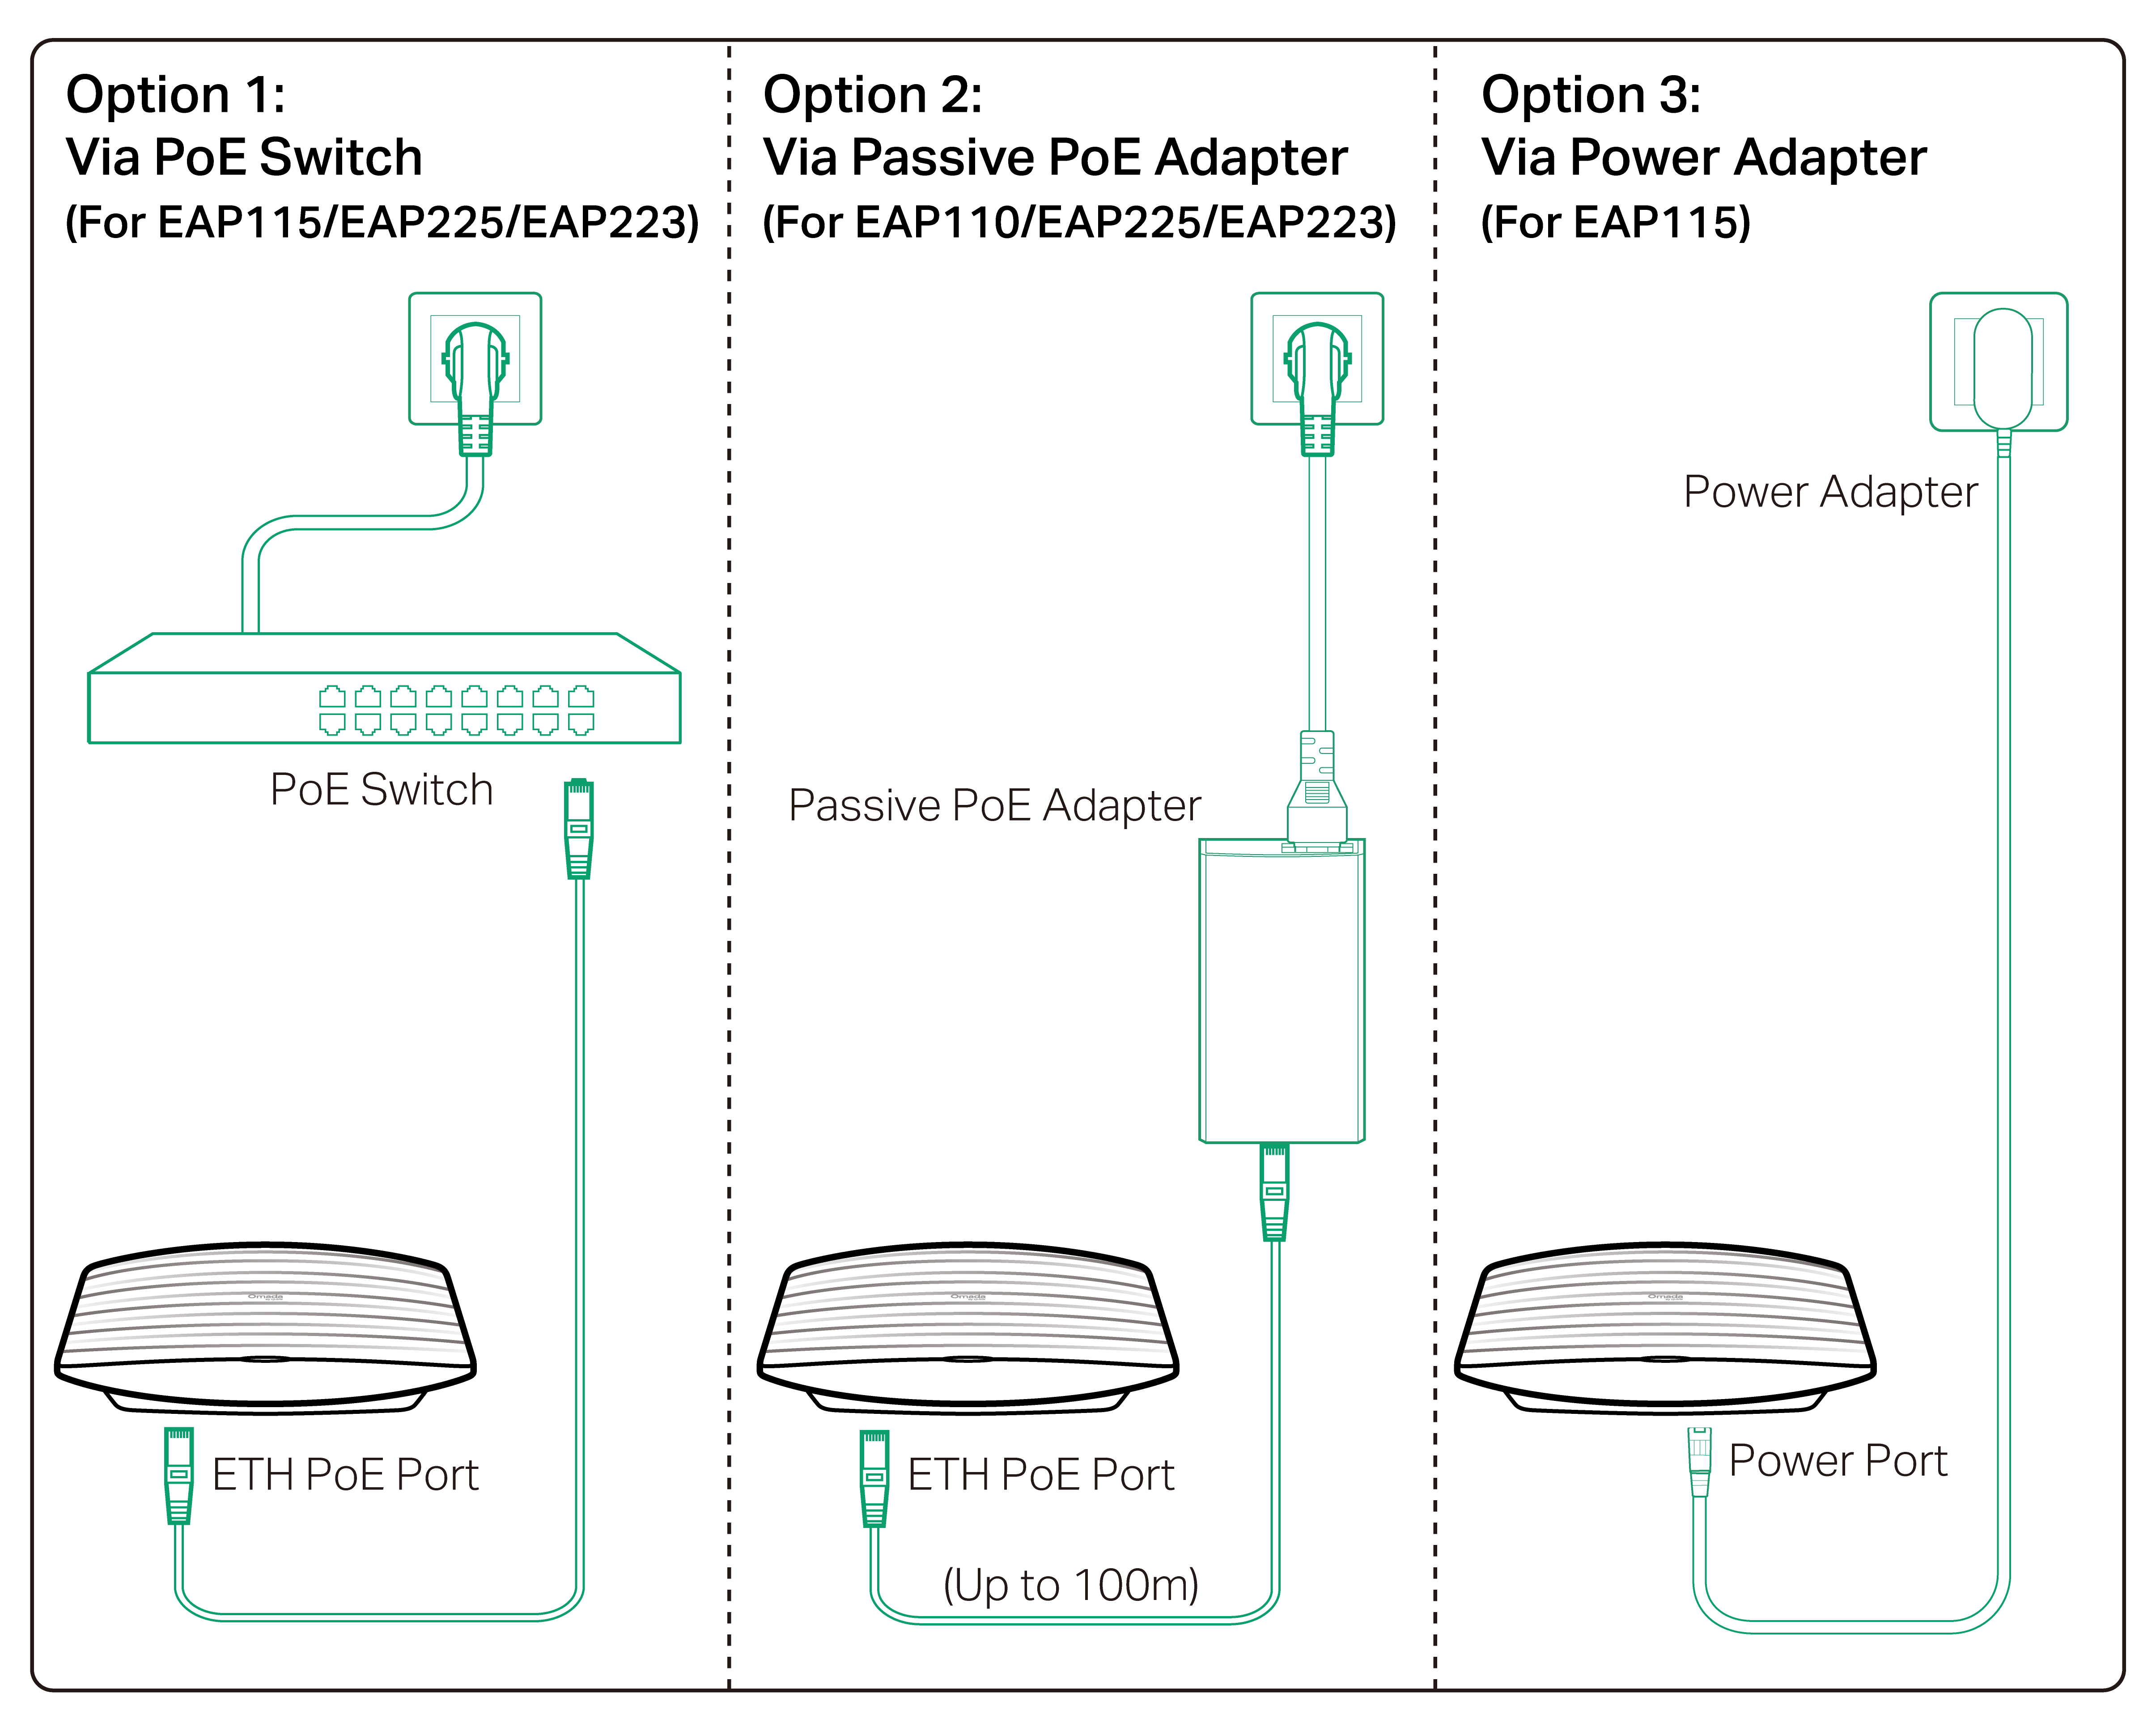
2 Power On
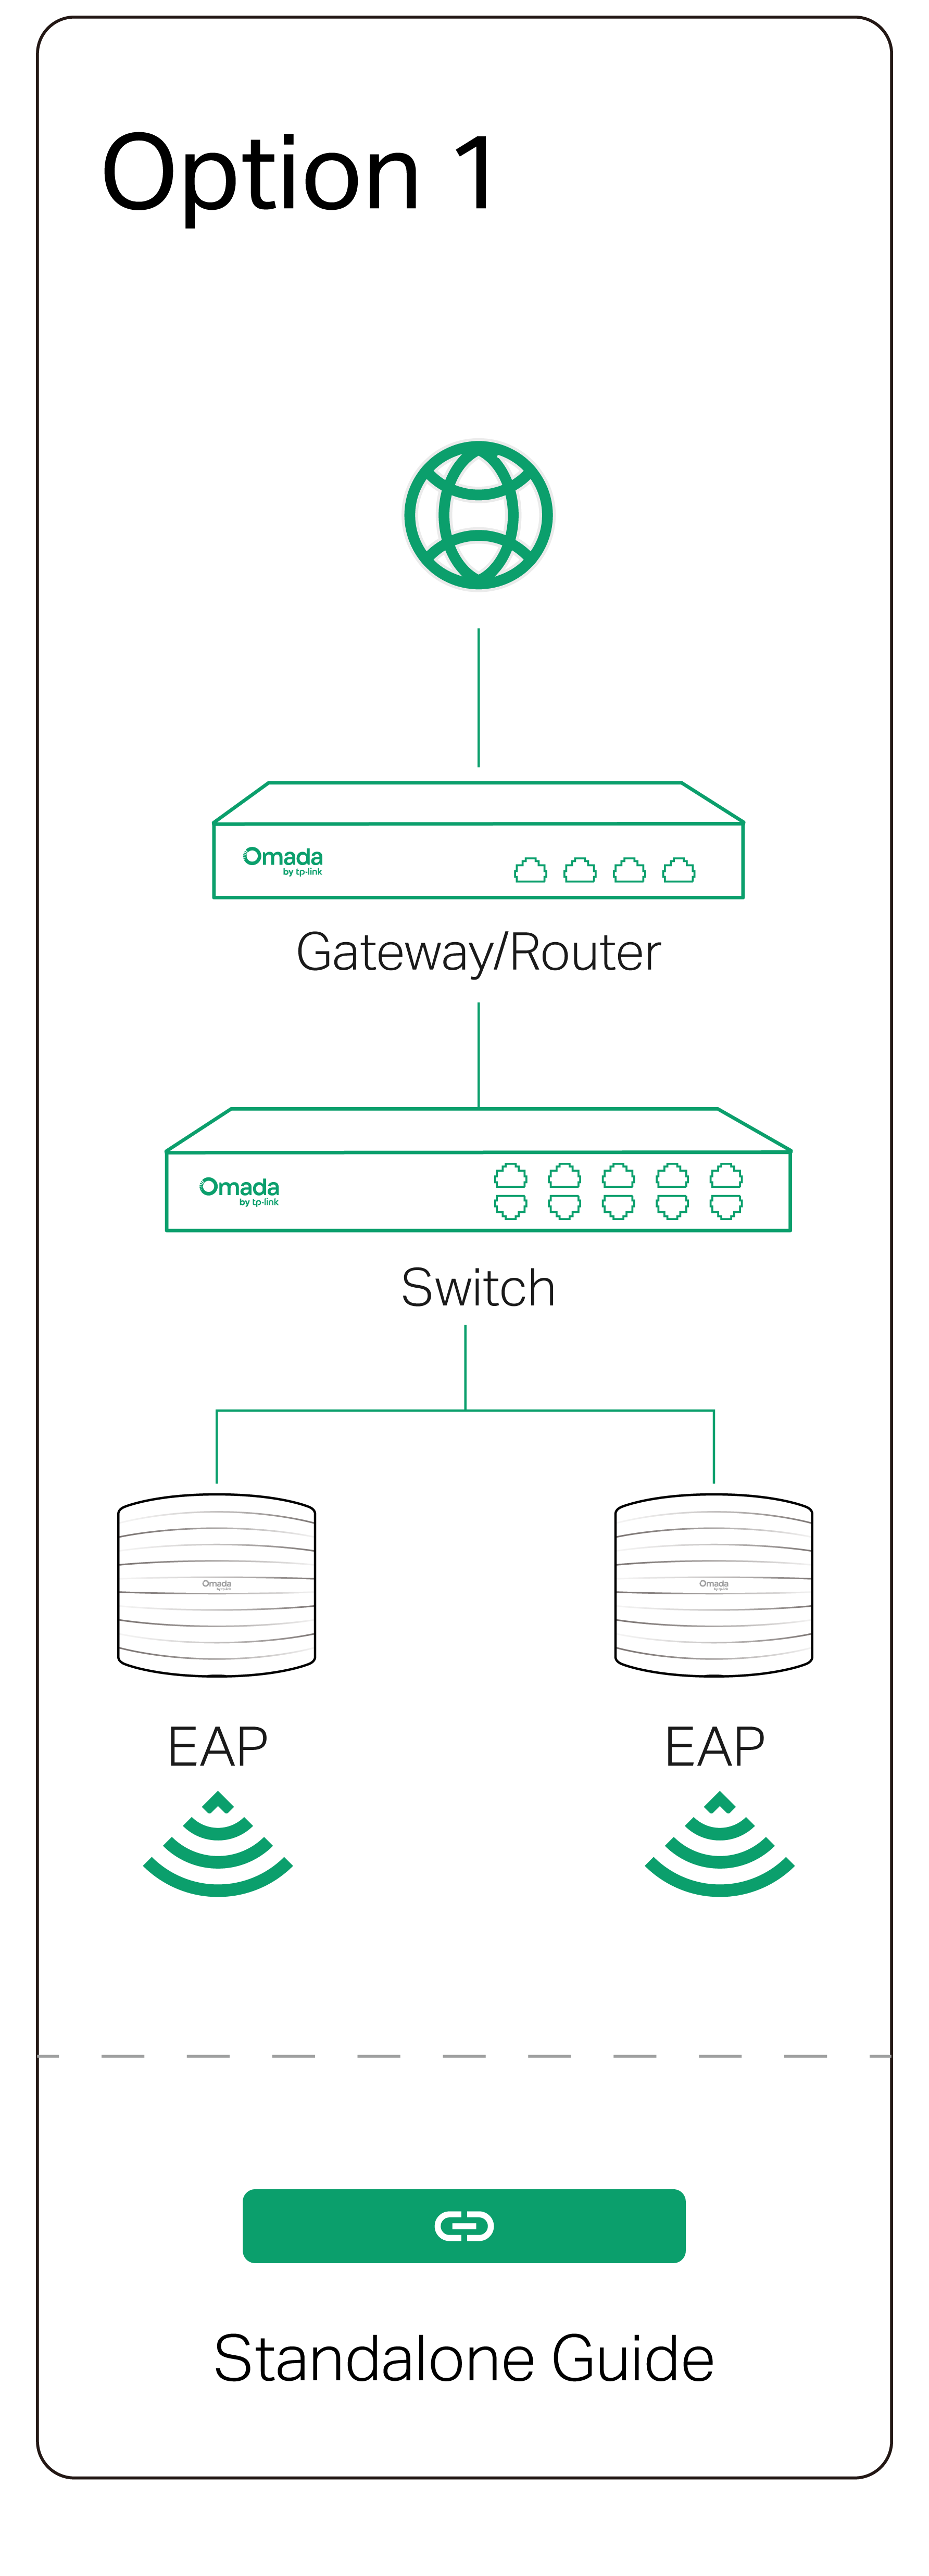
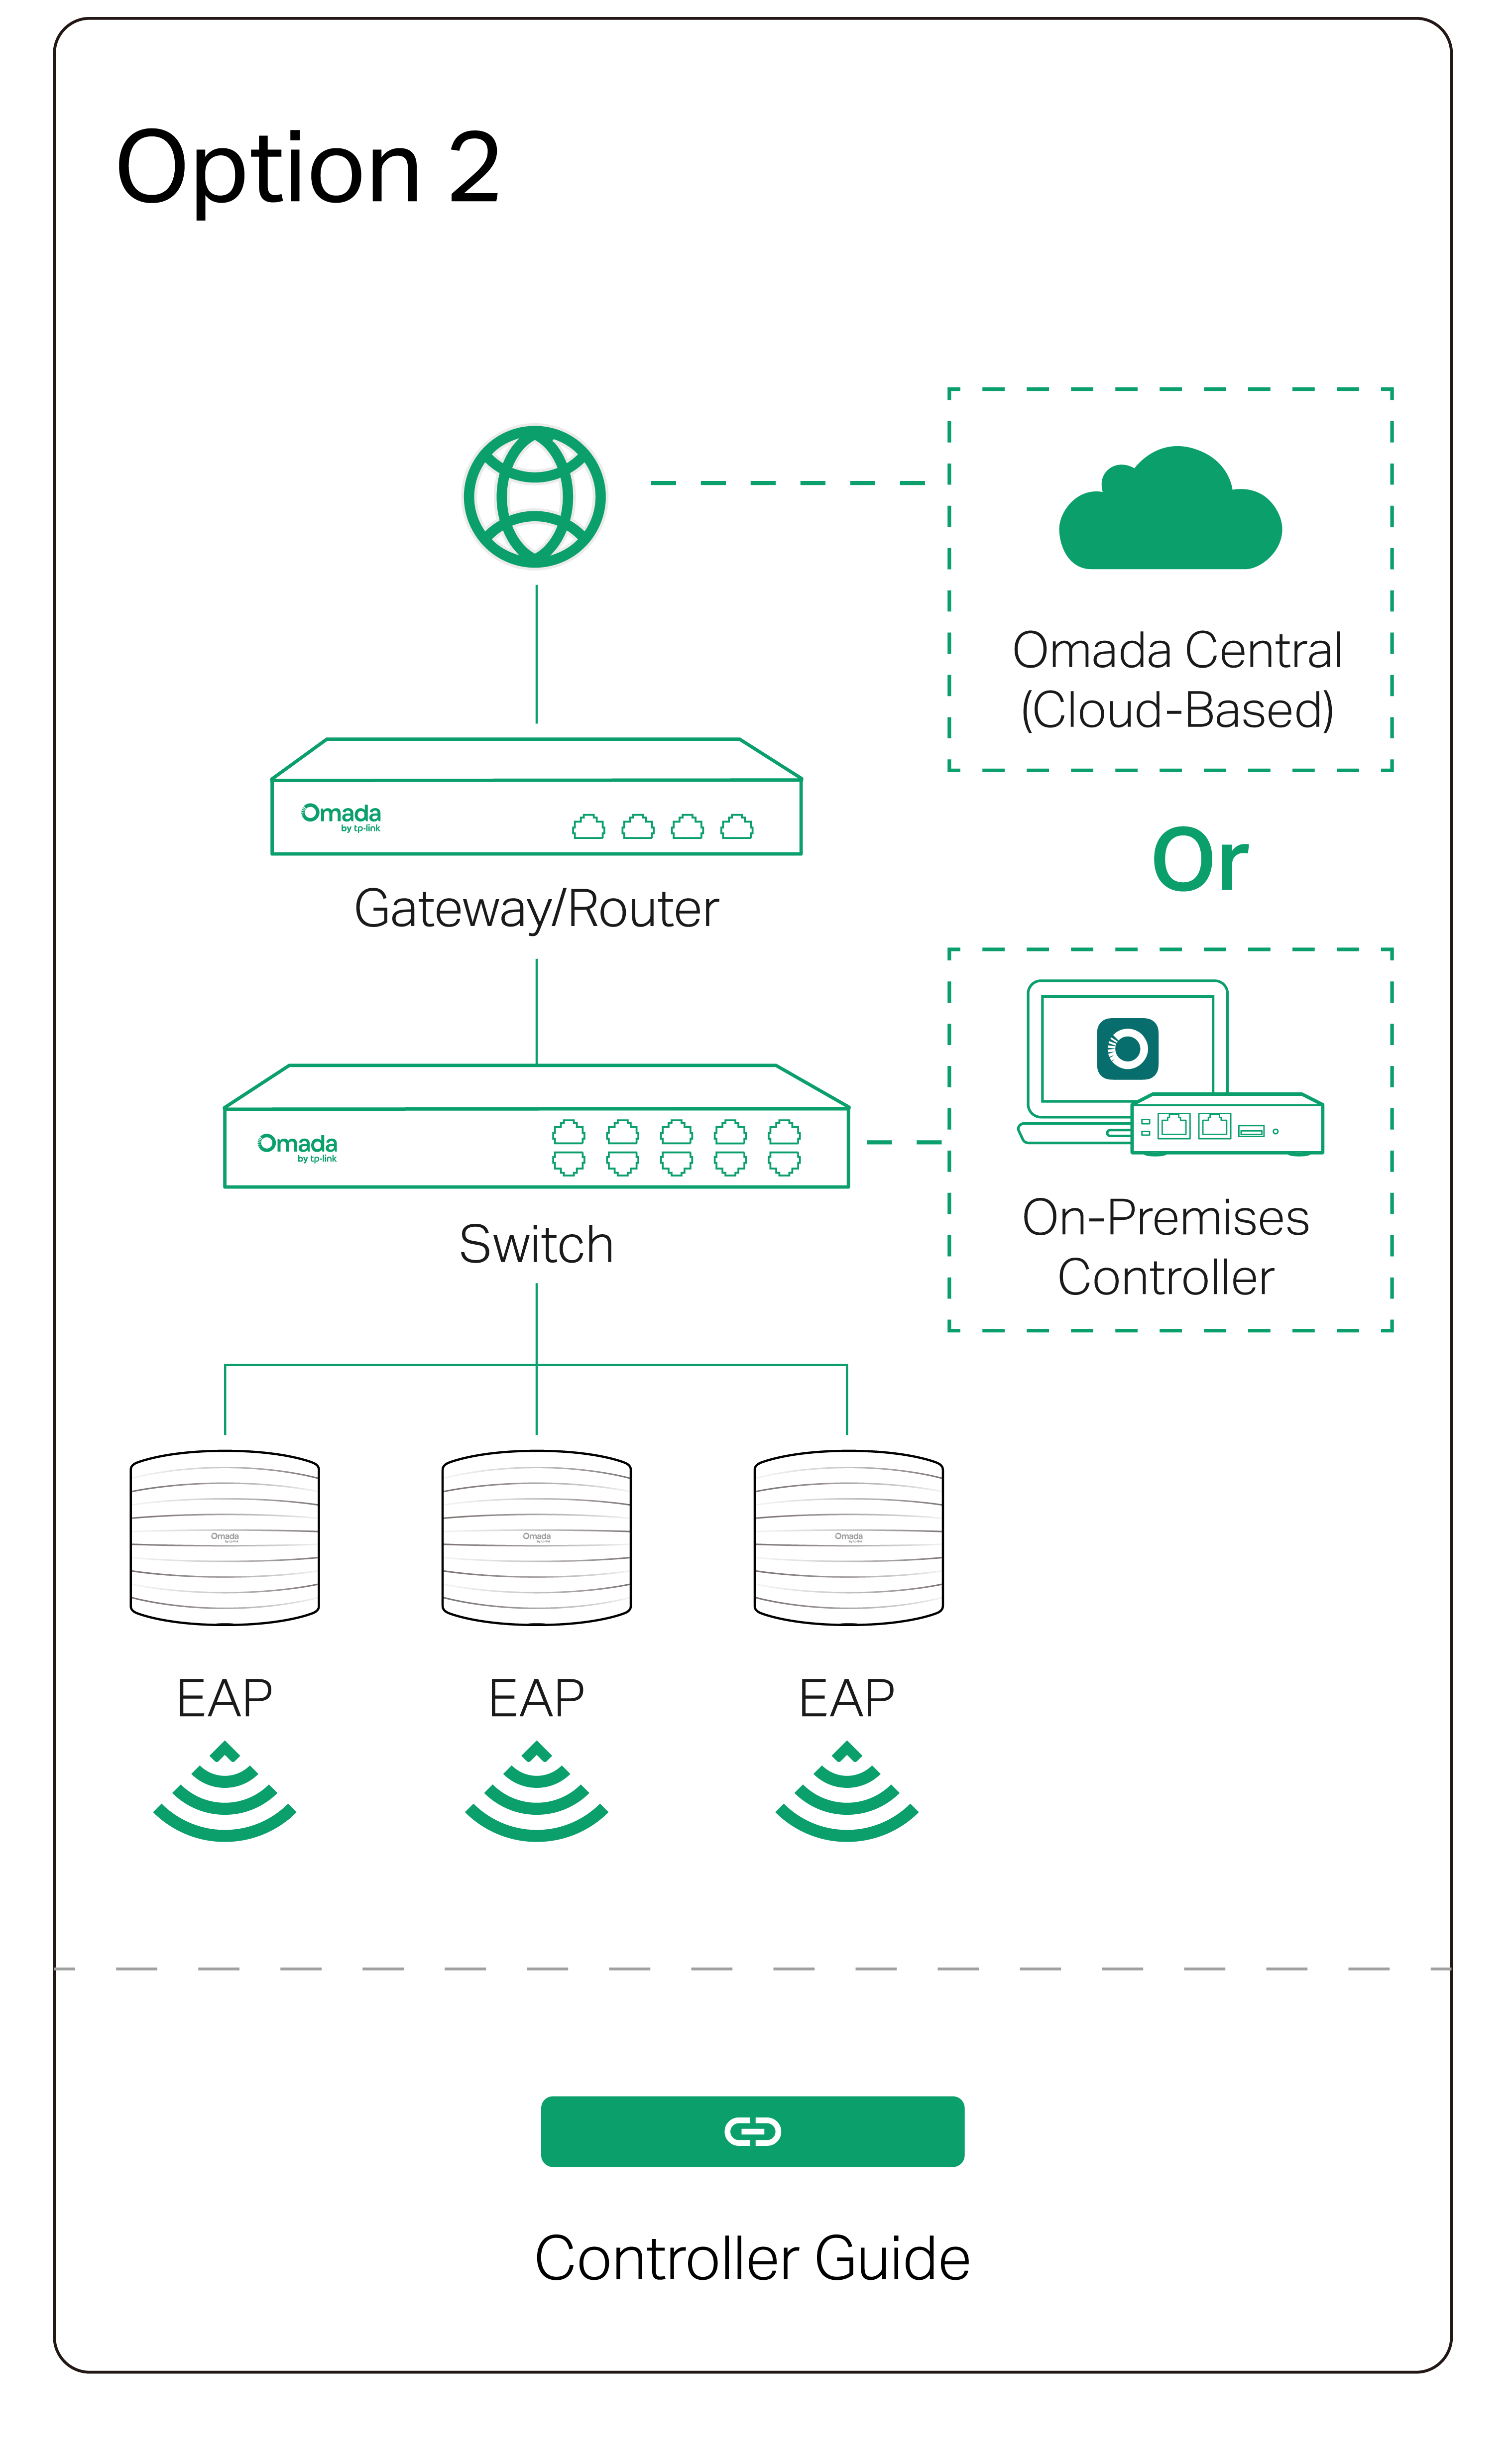
3 Configuration
Omada App


Remove the EAP
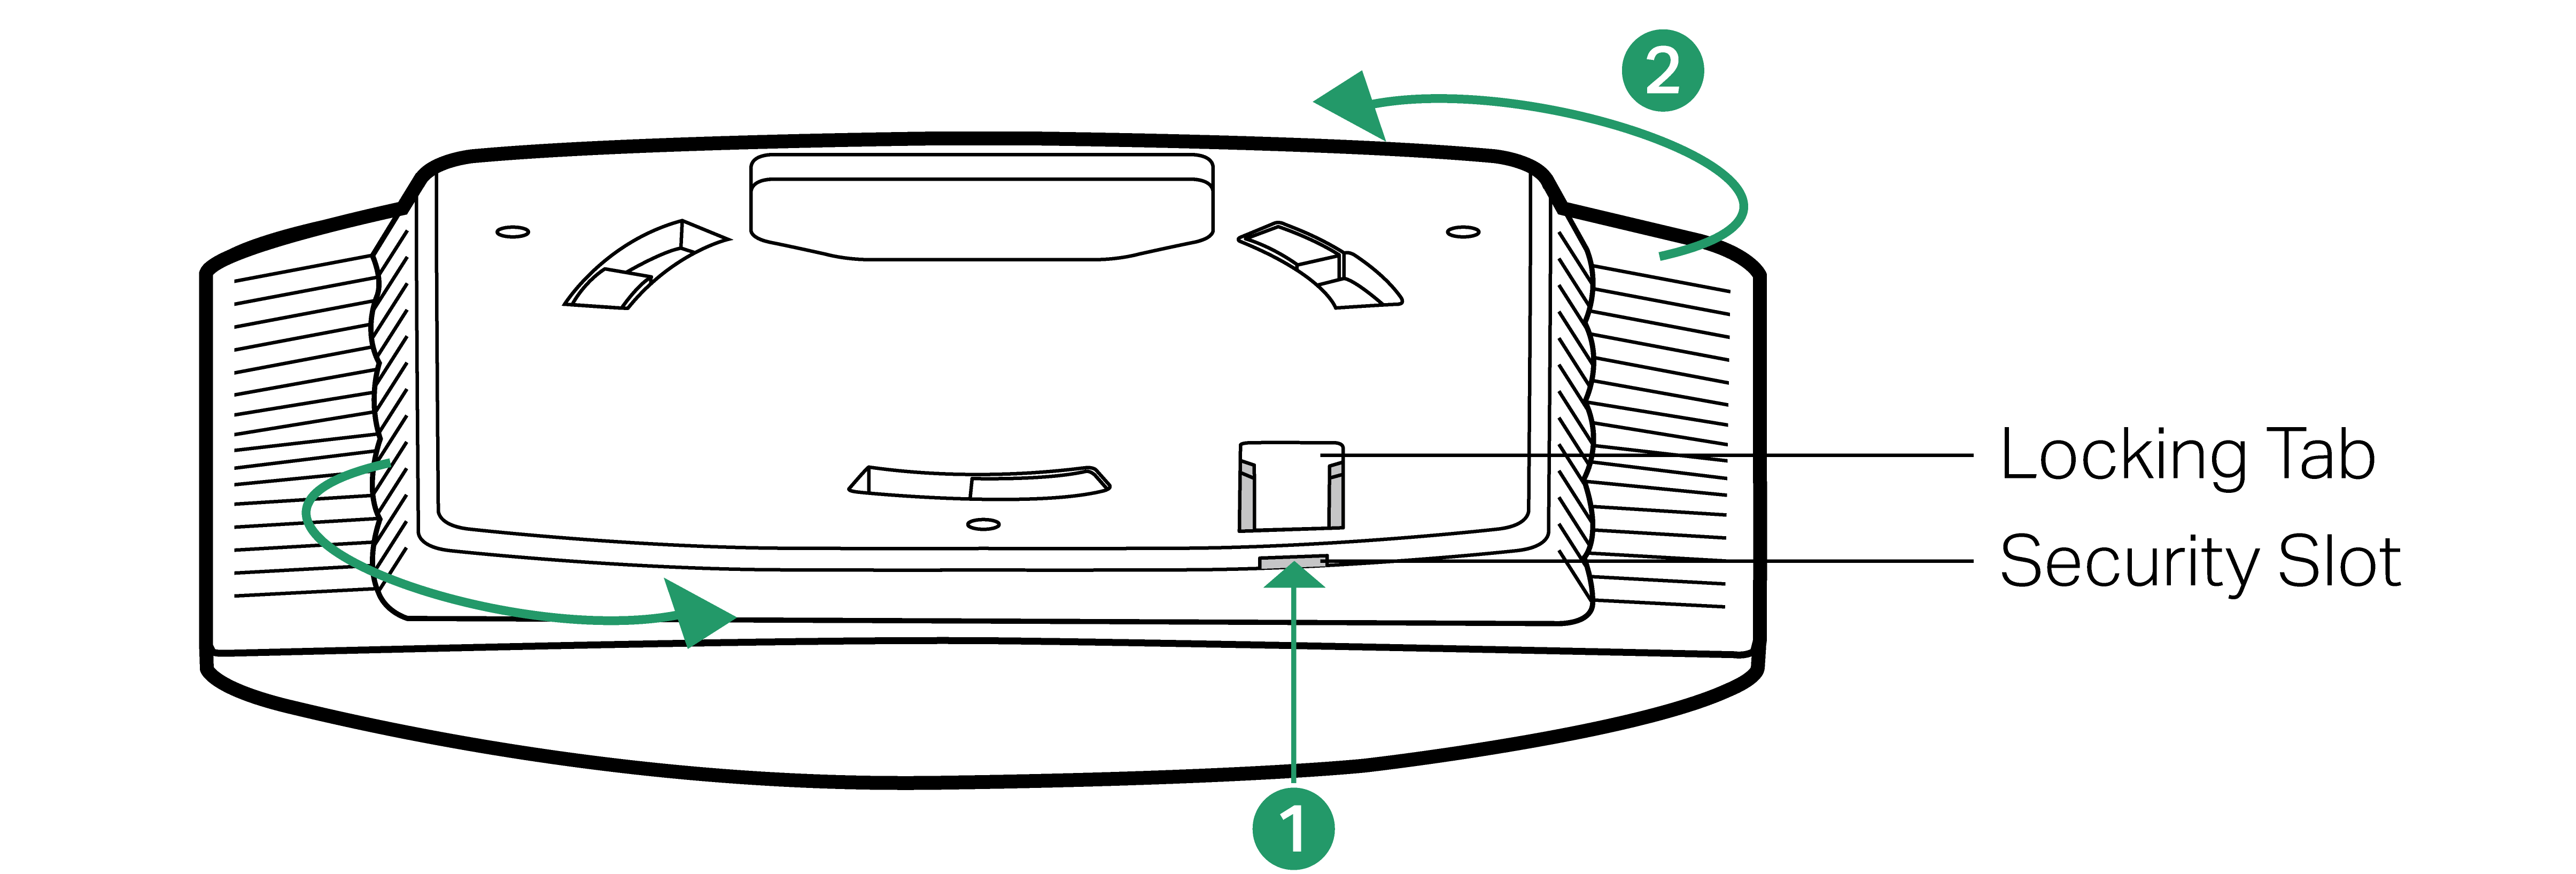
To remove the EAP from the mounting bracket, insert a paper clip in the Security Slot to release the Locking Tab and rotate the EAP until it is detached from the mounting bracket, as shown below.
Please Rate this Document
