


Contents
Introduction
In the latest Controller v6.2.10, we have made partial changes to the switch port configuration logic. This article primarily introduces how to correctly configure switch ports when using the Controller v6.2.10 and provides explanations on key points.
Requirements
- Omada Switch
- Omada Network v6.2.10
Configuration
The key points related to the current switch port configuration will be explained step by step as follows.
Step 1. Changes in switch port configuration location
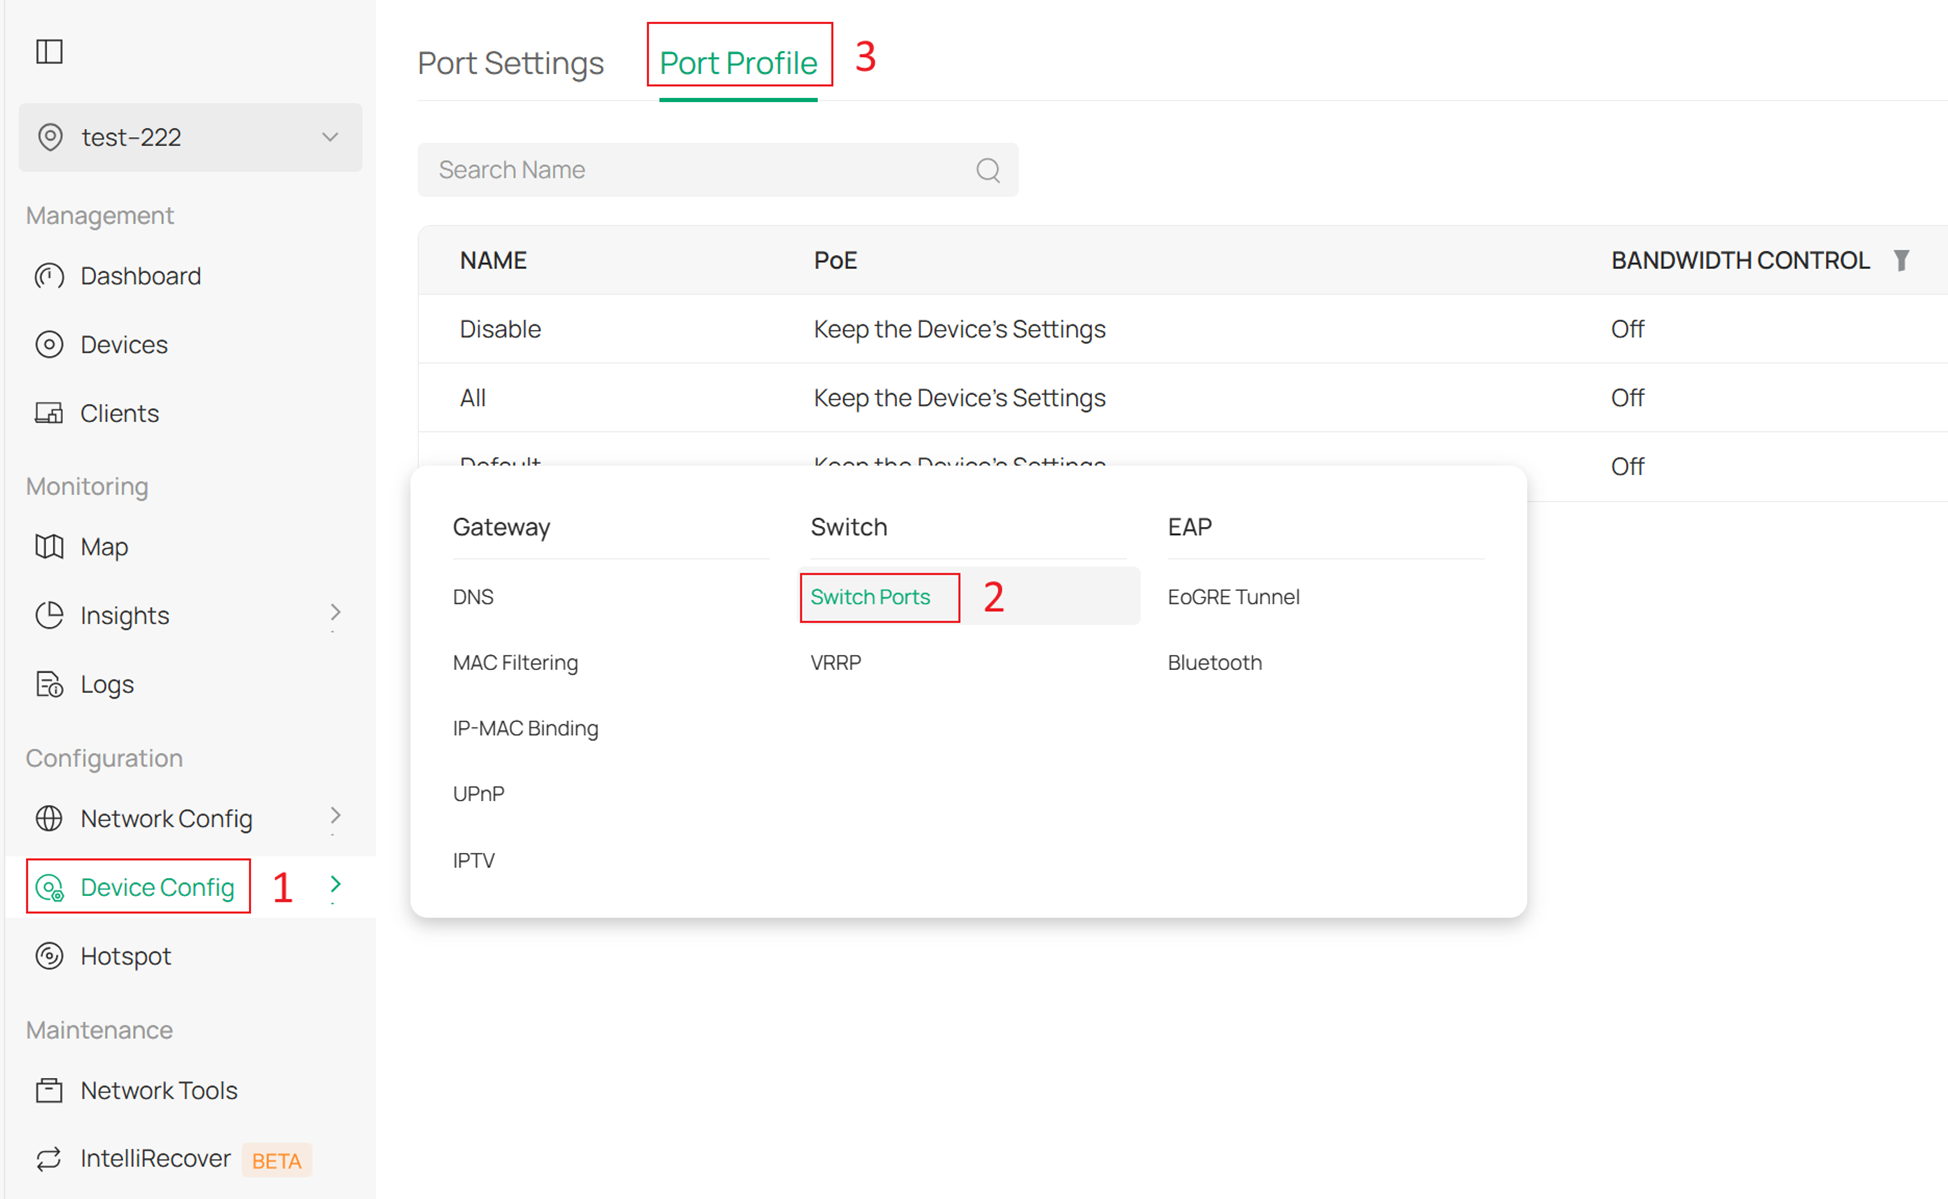
In the Controller v6.2.10, we have removed the previous Switch Profile configuration item under Wired & Wireless Networks > LAN and relocated the relevant settings to the Port Profile configuration. Currently, there are two ways to navigate to Port Profile.
The first method is to navigate sequentially in the site view to Device Config > Switch > Switch Ports > Port Profile:
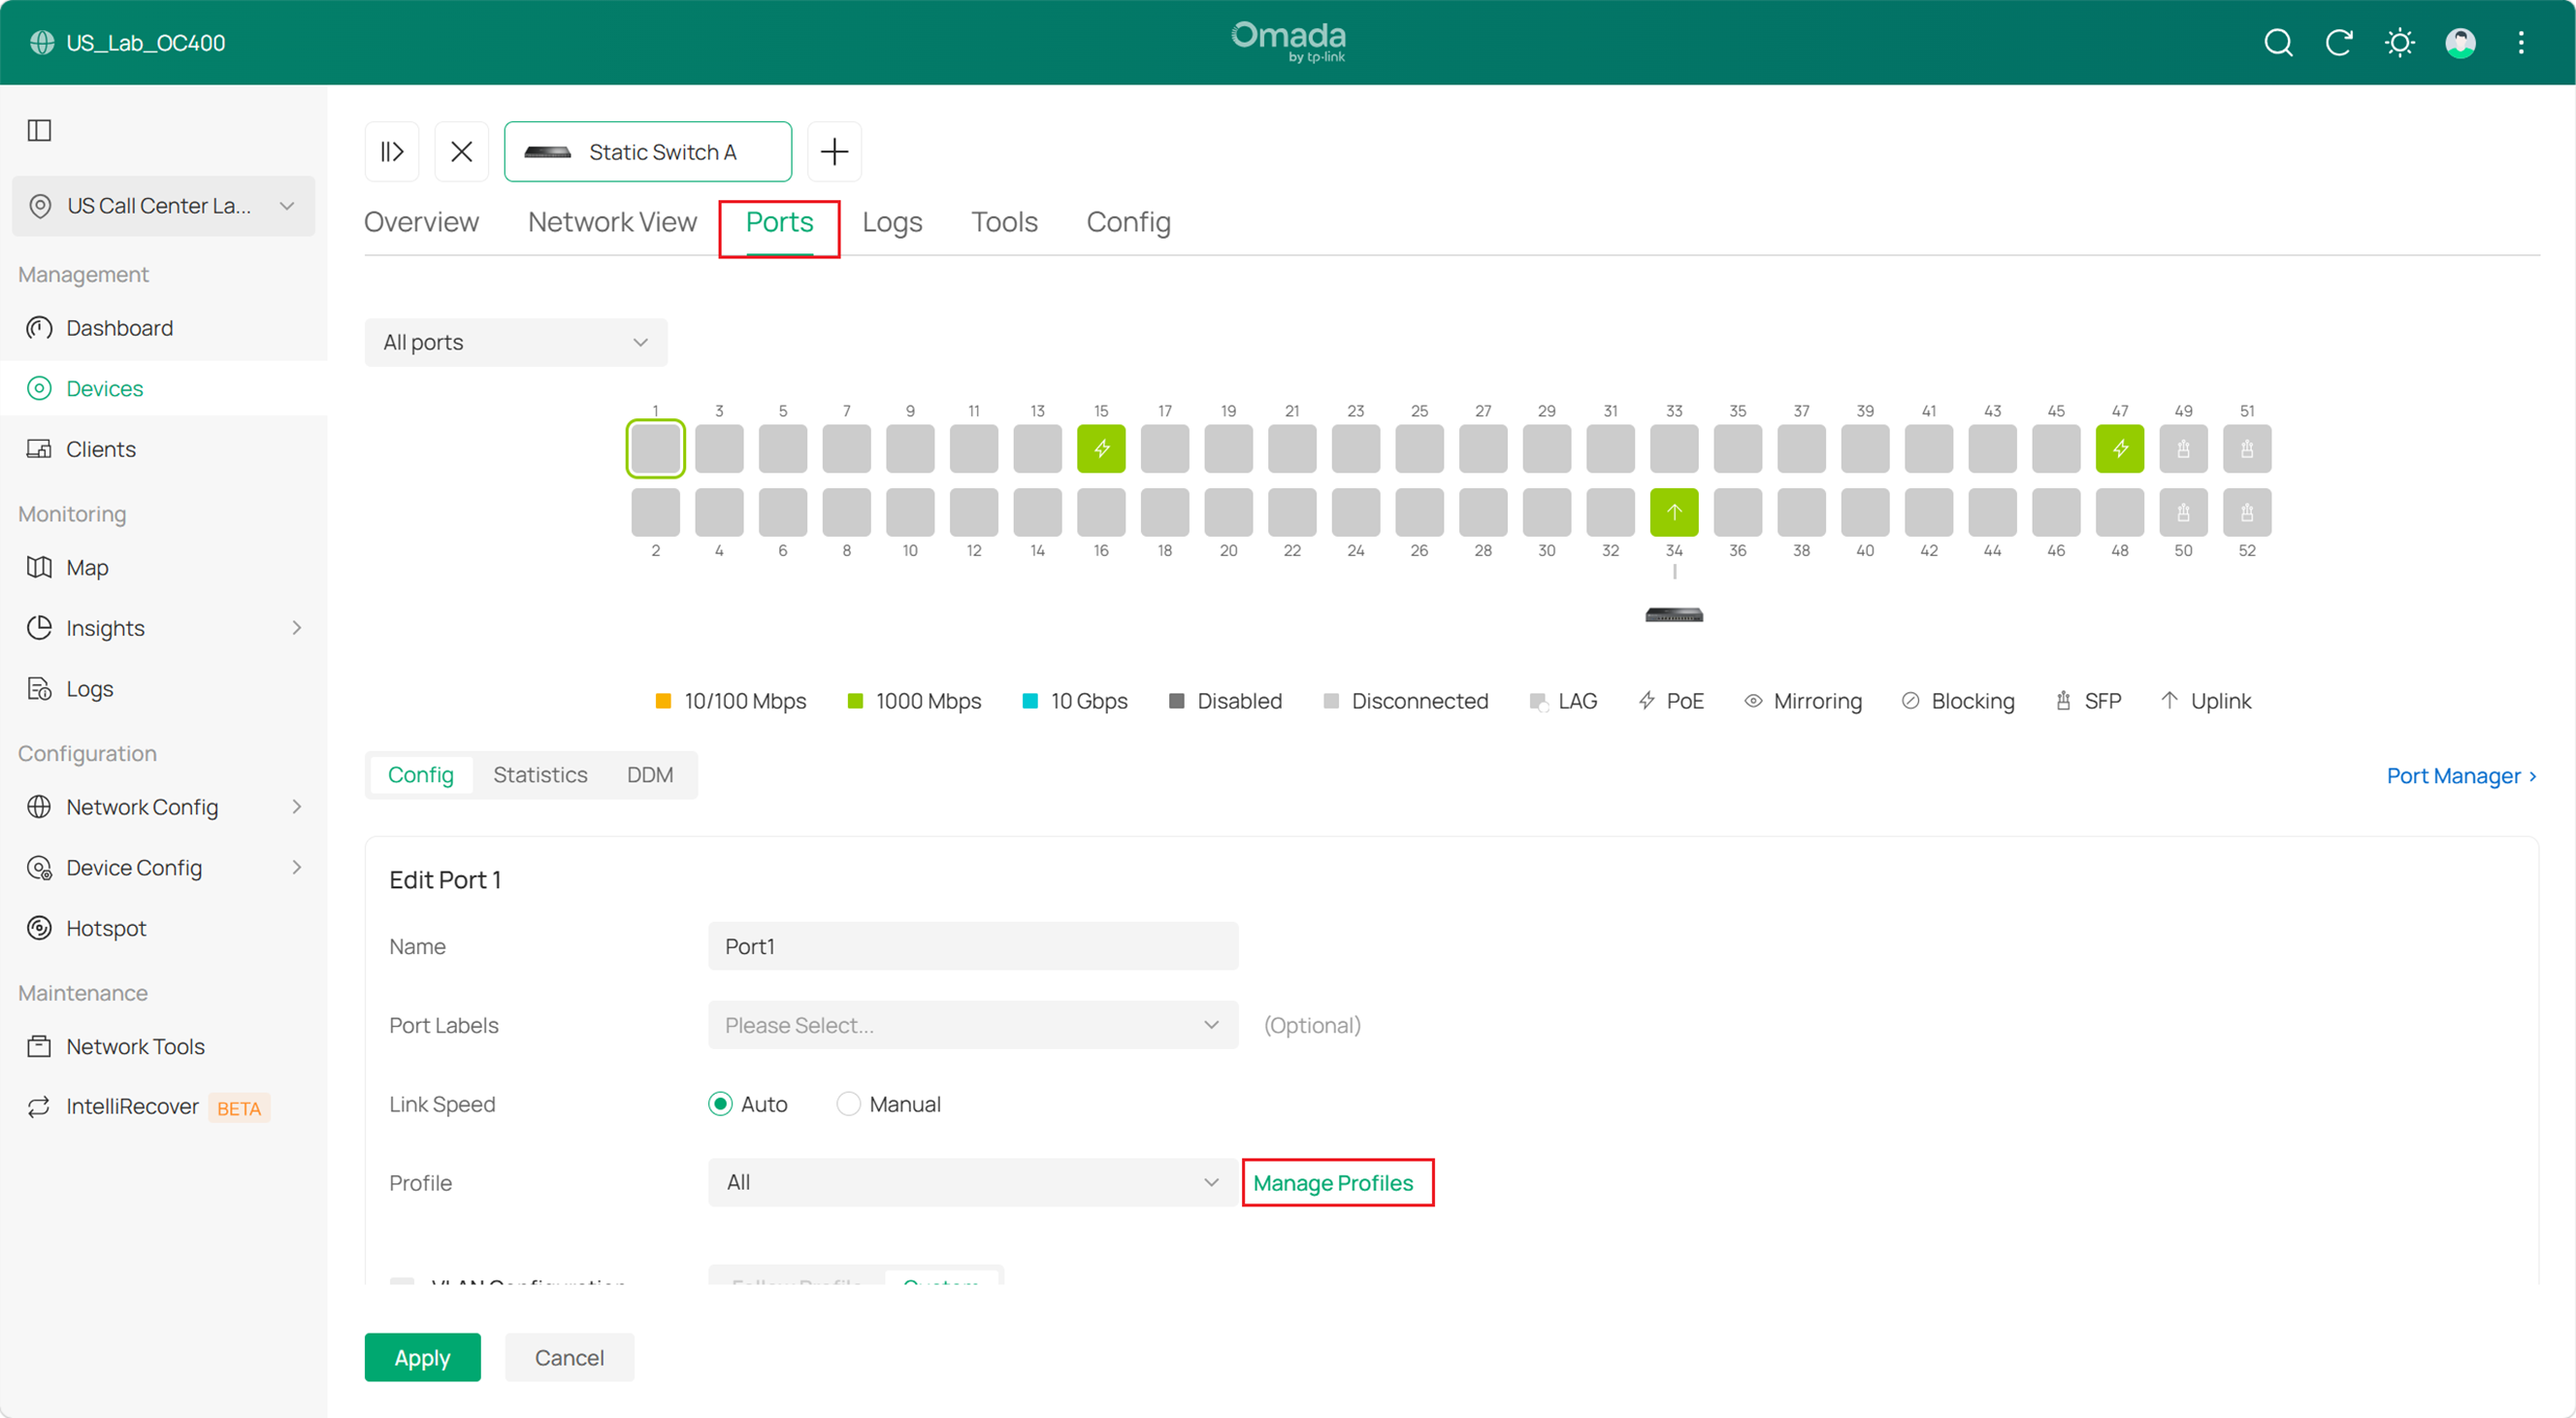
The second method is to locate the Ports configuration in the device's private interface after adopting the switch device and navigate to the Port Profile.
Go to Ports under device details. Select a certain port to port details and click manage profile to enter Port Profile page.
Step 2. Introduction to Configuration Items in Port Profile.
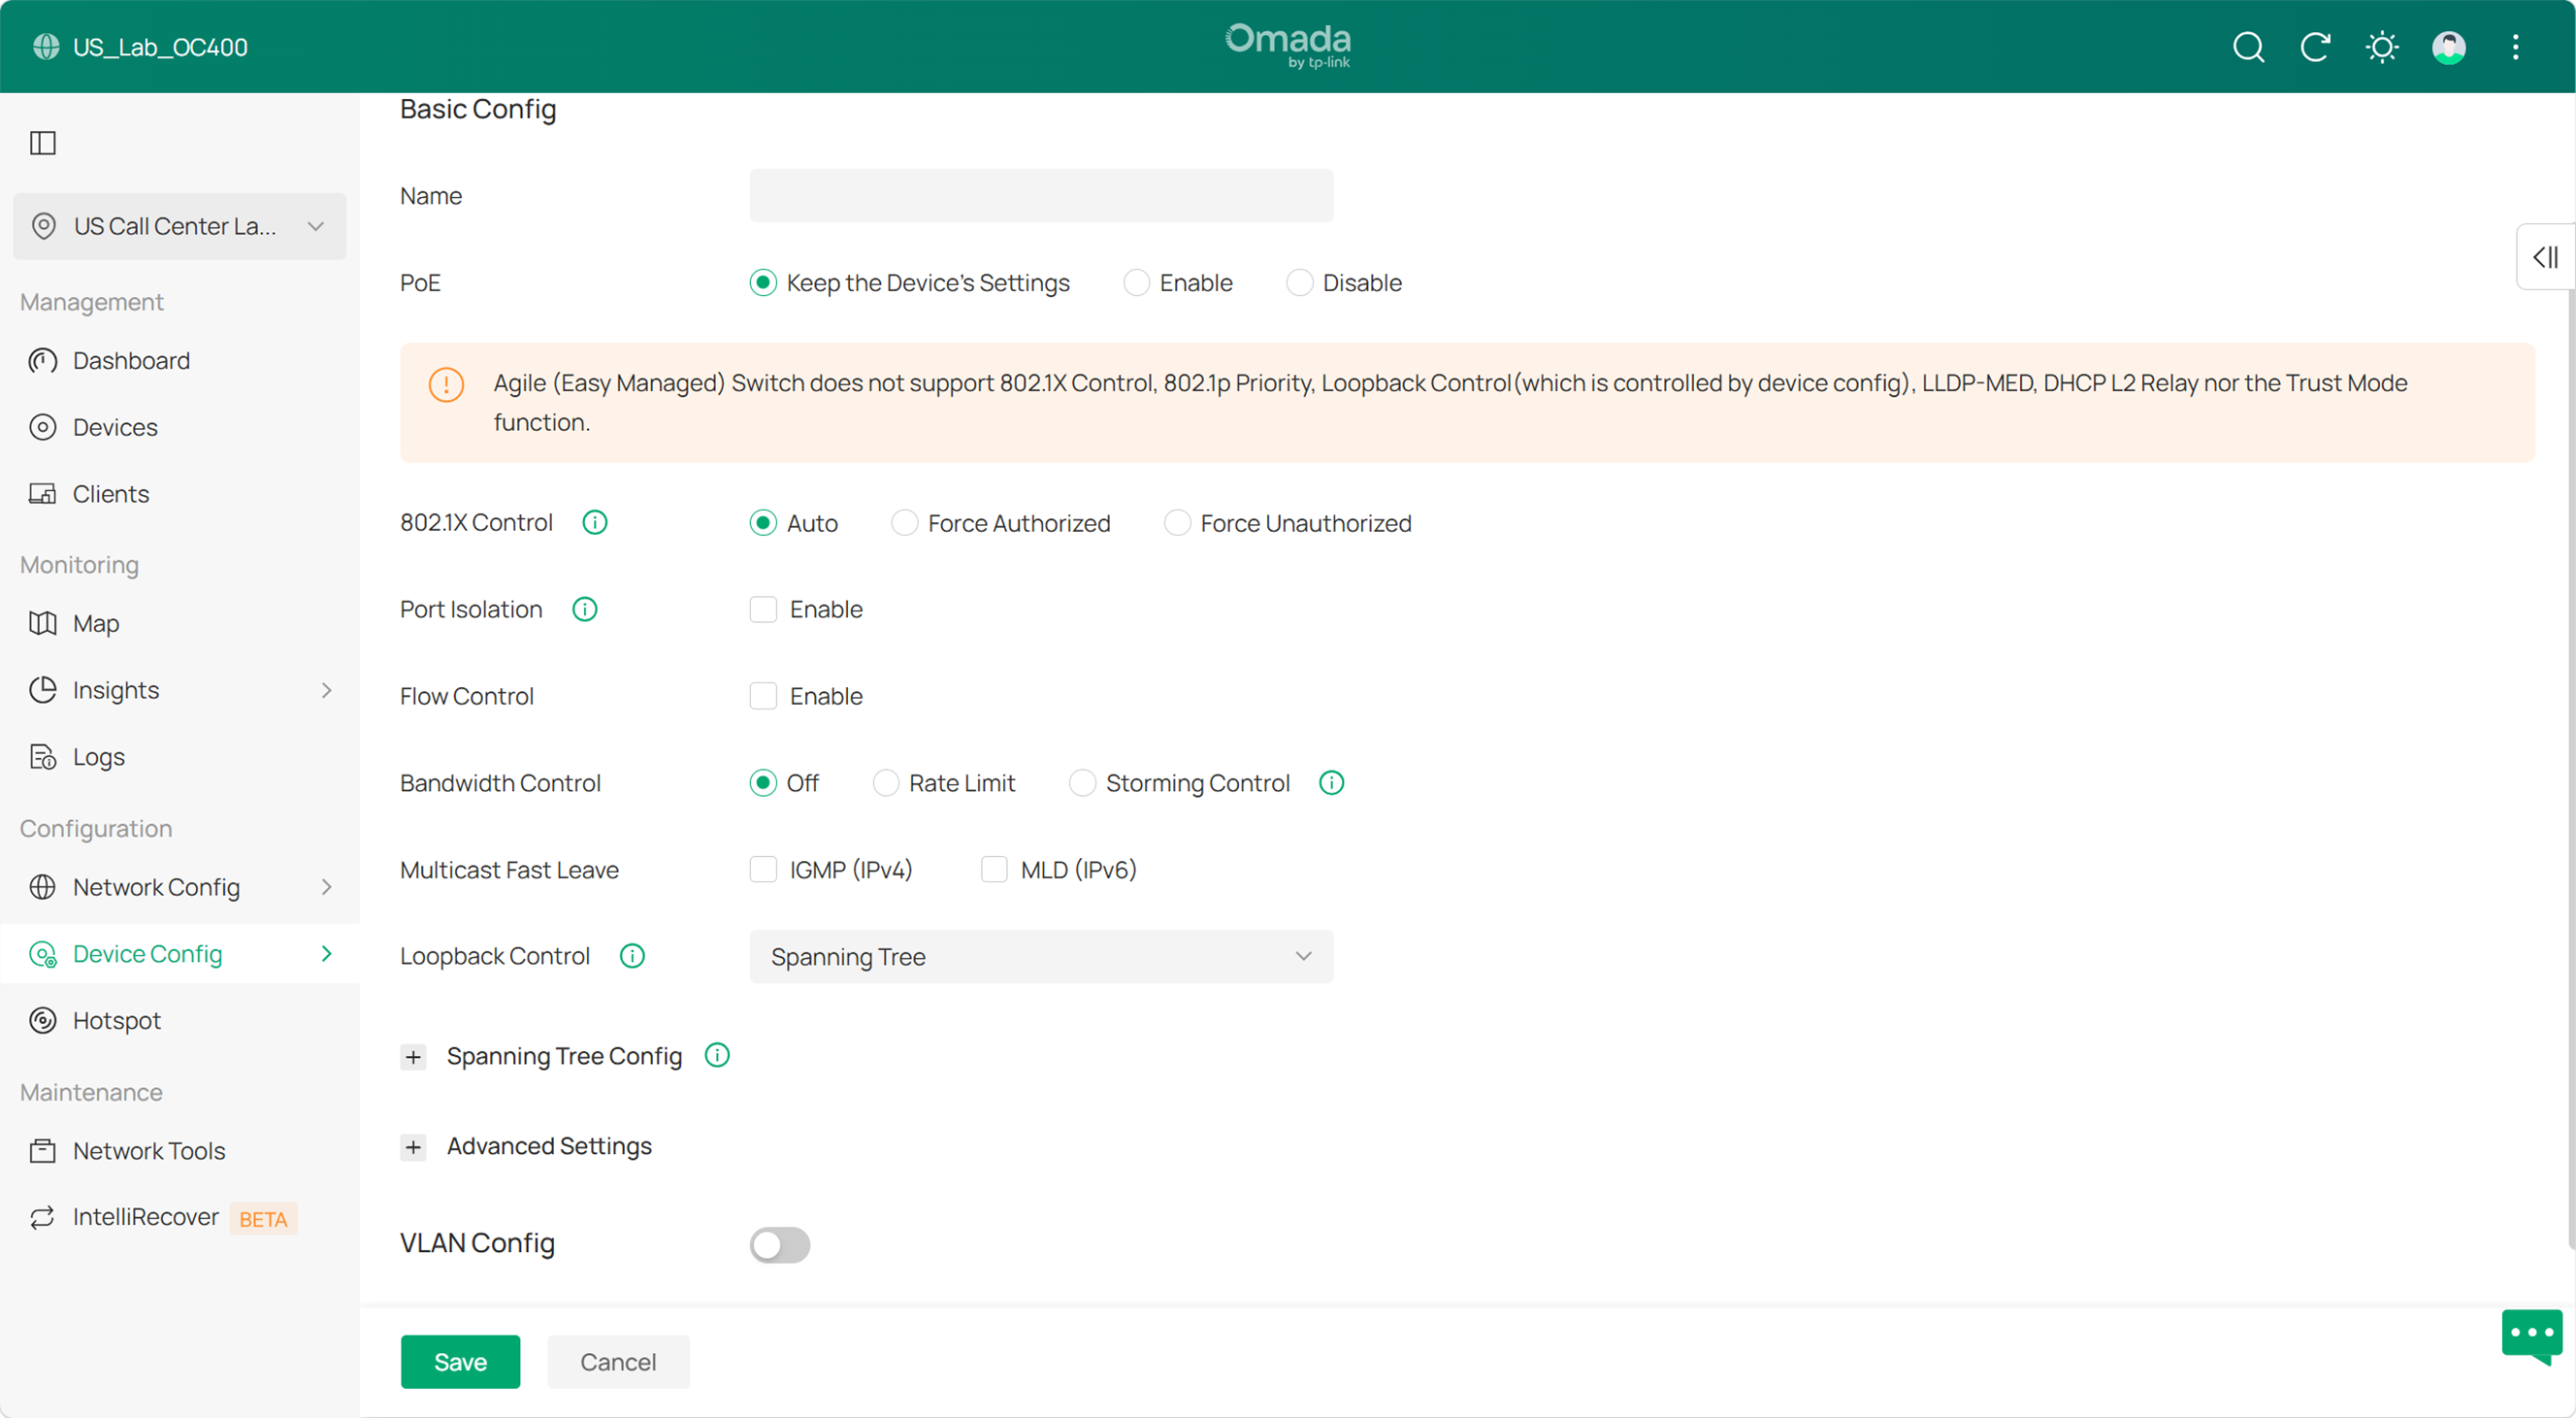
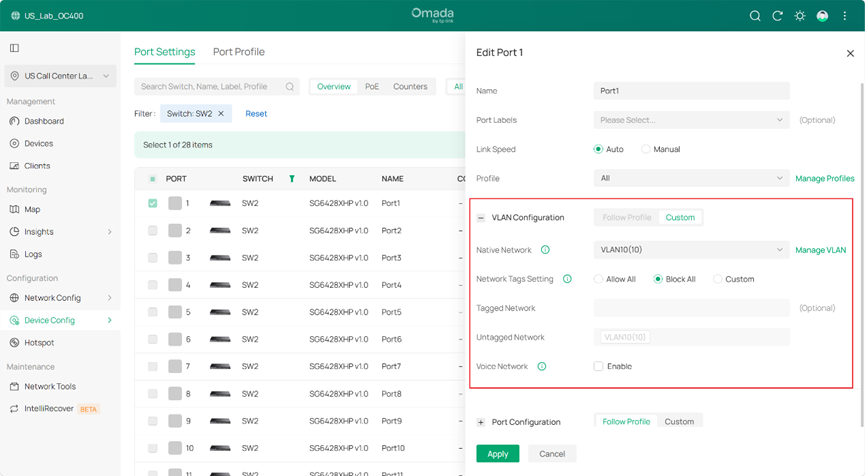
Most configurations from the Switch Profile in the v6 Controller have been retained. The most significant change is that VLAN realted configurations, including native networks, network tag settings, tagged network, untagged network, have been moved back to Port Profile. Additionally, when upgrading from an older version of the Controller to Omada Network v6.2.10, the previously applied Switch Port Profiles will be preserved.
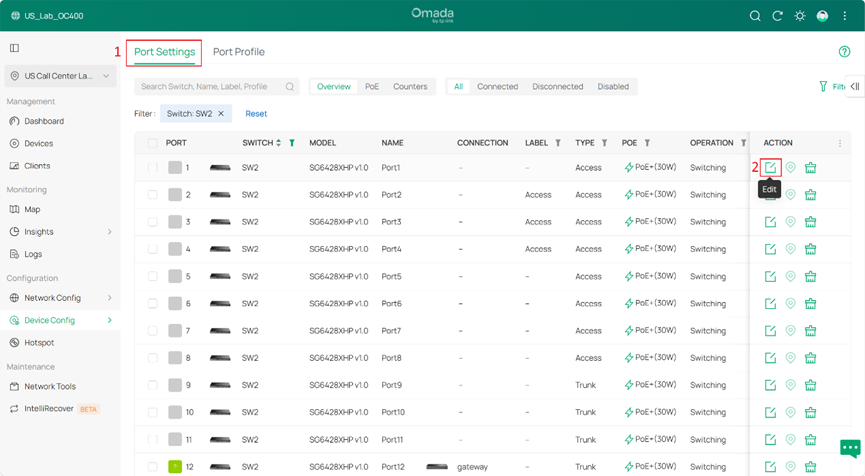
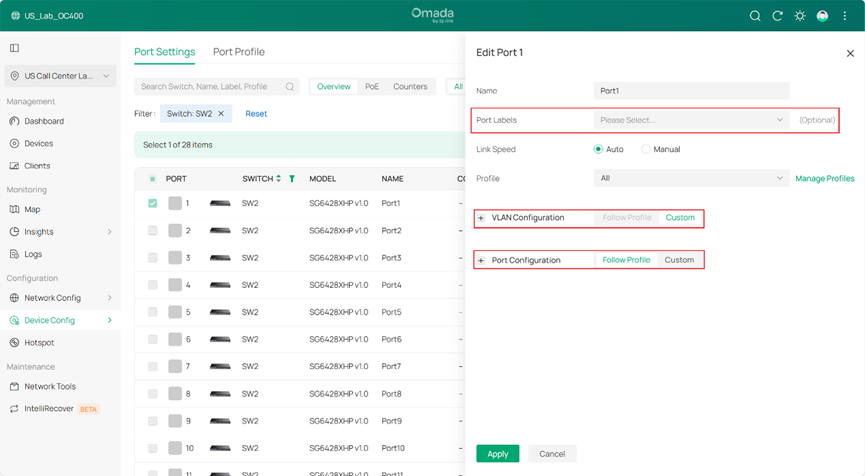
Step 3. Edit port configuration in Port Settings.
In the Omada Network v6.2.10, a Port Settings view has been added, allowing users to overview all switch ports. It supports search, sorting, and advanced filtering functions. The following section will first introduce the editing operations for ports.
Notice:
- Added the Port Labels feature in Controller V6. You can label each port to indicate its usage scenario (e.g., uplink, security device, or PC connection) and quickly filter ports for batch configuration (see Step 4 for filtering steps).
- VLAN configuration focuses on VLAN settings, including three types: Allow All, where the Untagged VLAN contains only the Native Network (PVID) and all other VLANs (for ES models, the first 31 VLANs except PVID) are automatically added to Tagged VLAN and cannot be removed; Block All, where the Untagged VLAN contains only the PVID and the Tagged VLAN list is empty and cannot be modified; and Custom, where the PVID must be Untagged and cannot be changed, while other VLANs can be customized as Untagged or Tagged. Since controller 6.2.10, there is an additional follow profile option in VLAN configurations, after enabling it in port profile and finishing subsequent settings, you may choose it for ports to follow profile for easy management.
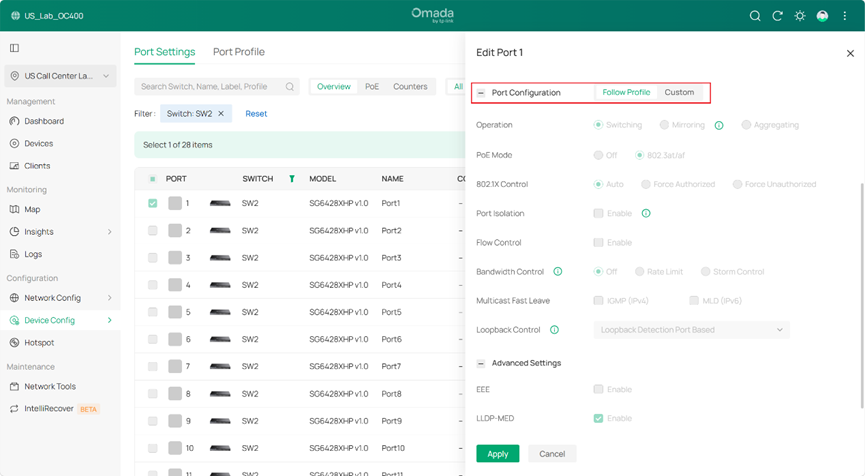
- Since controller v6.2.10, Port Configuration is the new name of the original Profile Overrides. Normally, a port follows the selected profile, but you can switch to Custom to apply custom settings to a specific port.
When a switch port only allows the PVID to pass (in which case the VLAN must be untagged), the port will be displayed as an Access type. In all other cases, the Controller will show it as a Trunk type.
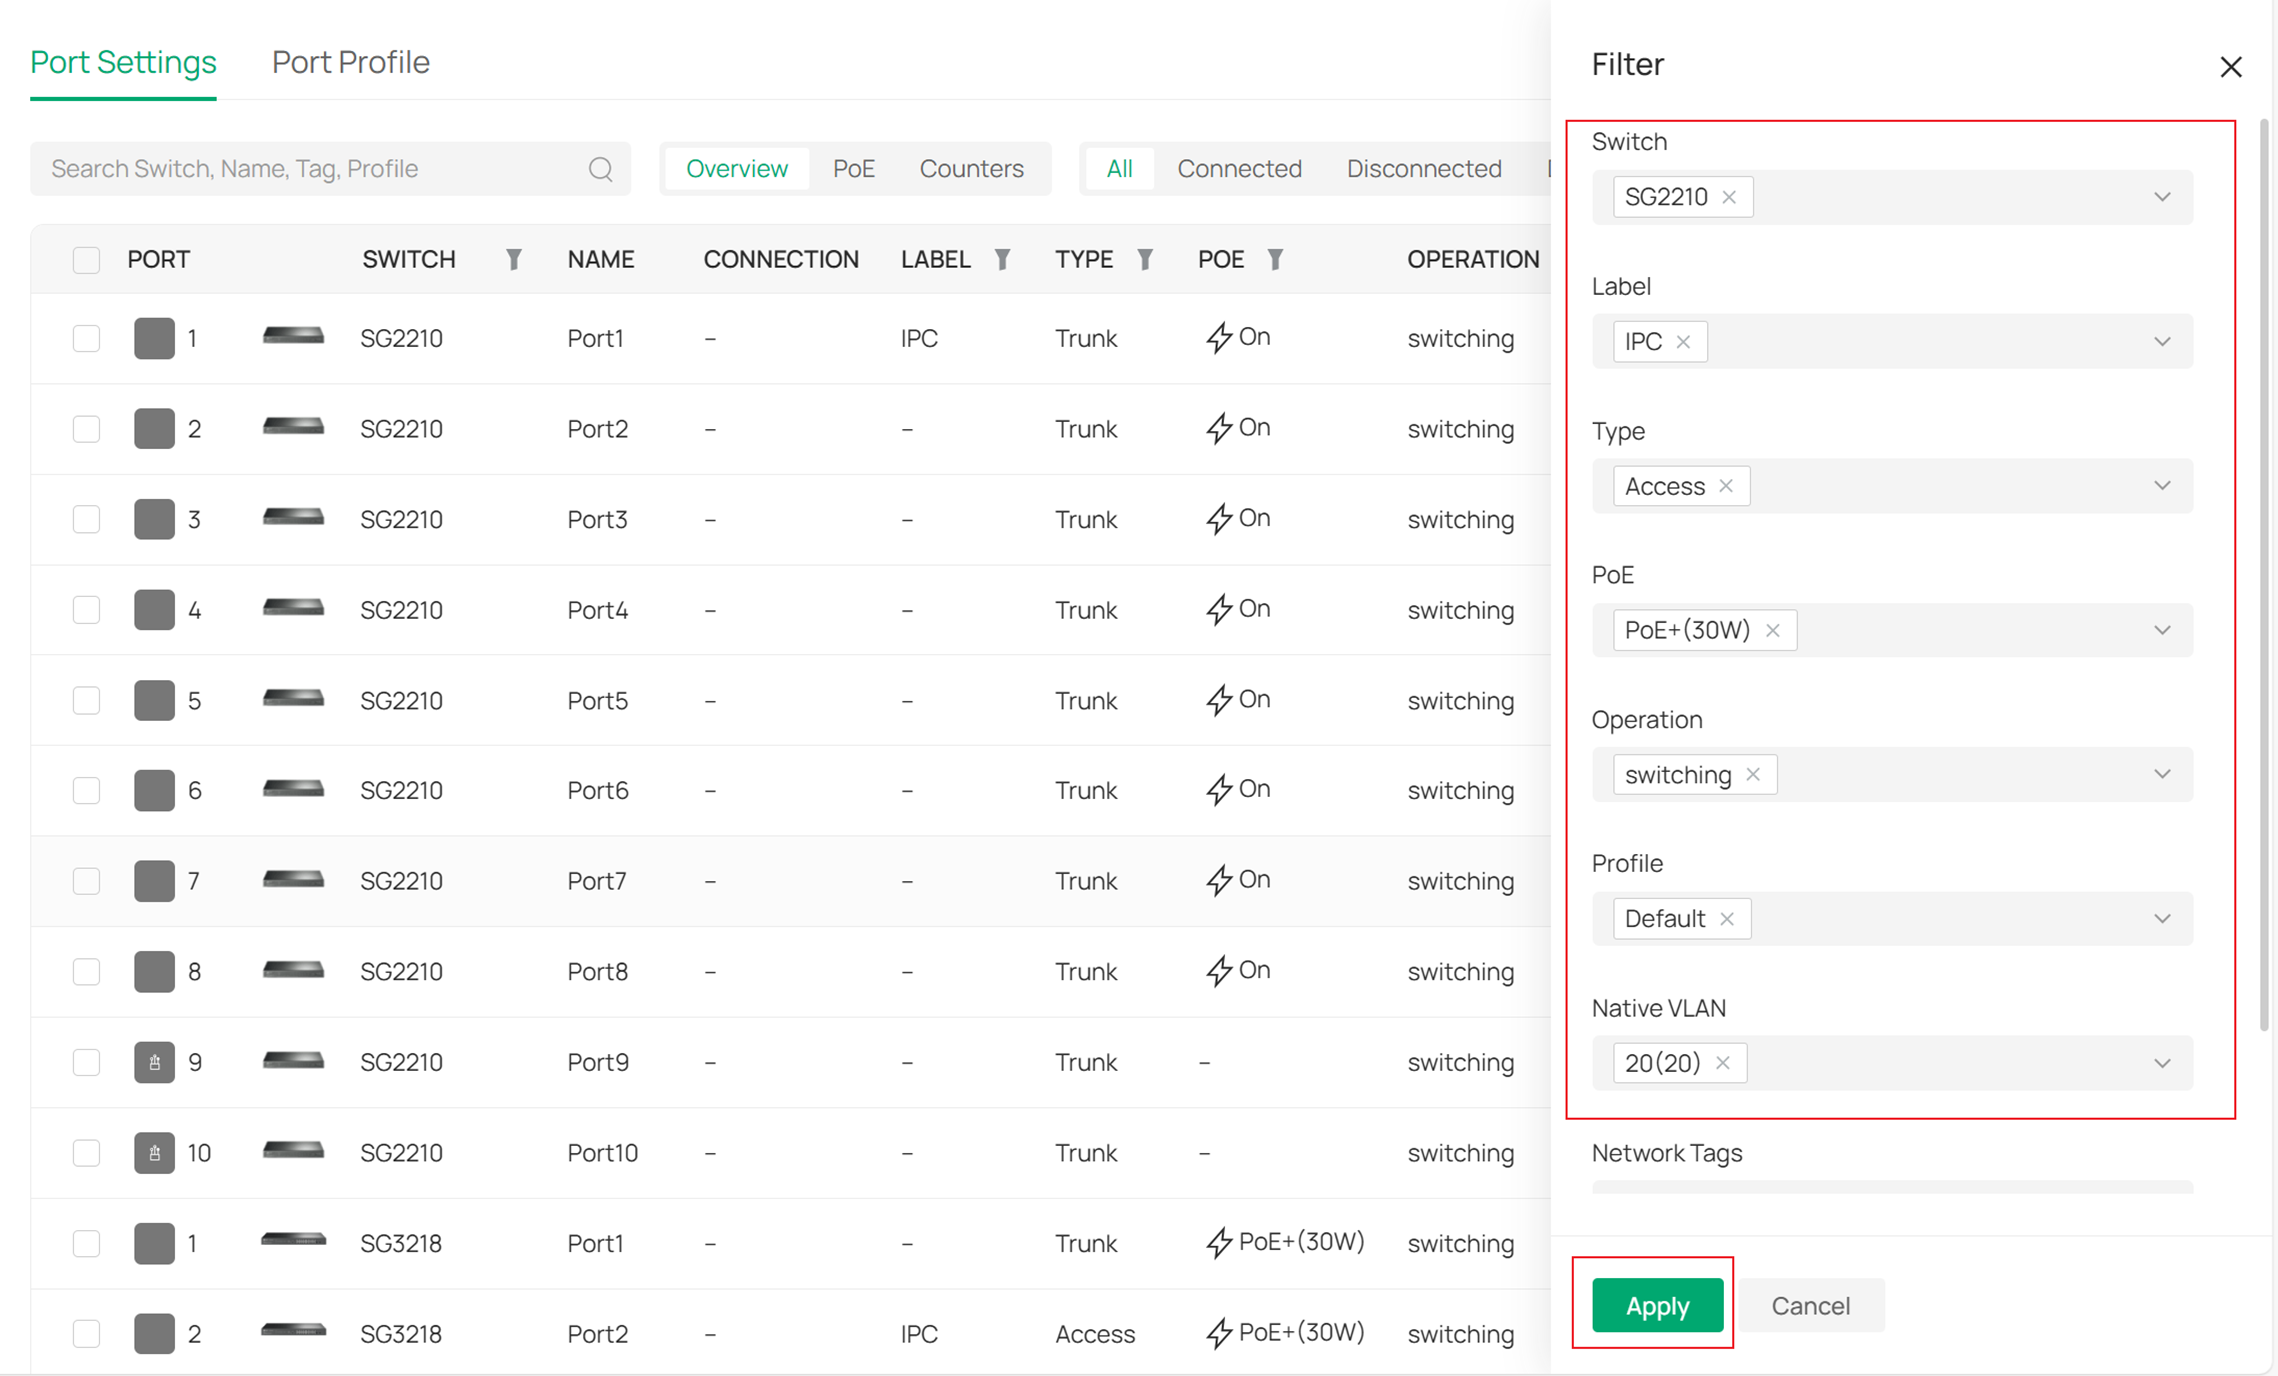
Step 4. Use the Filter in Port Settings
In Port Settings, you can quickly search for specific ports you wish to view or display them based on their status. For example, you can filter ports with a Connected status to narrow down your search results.
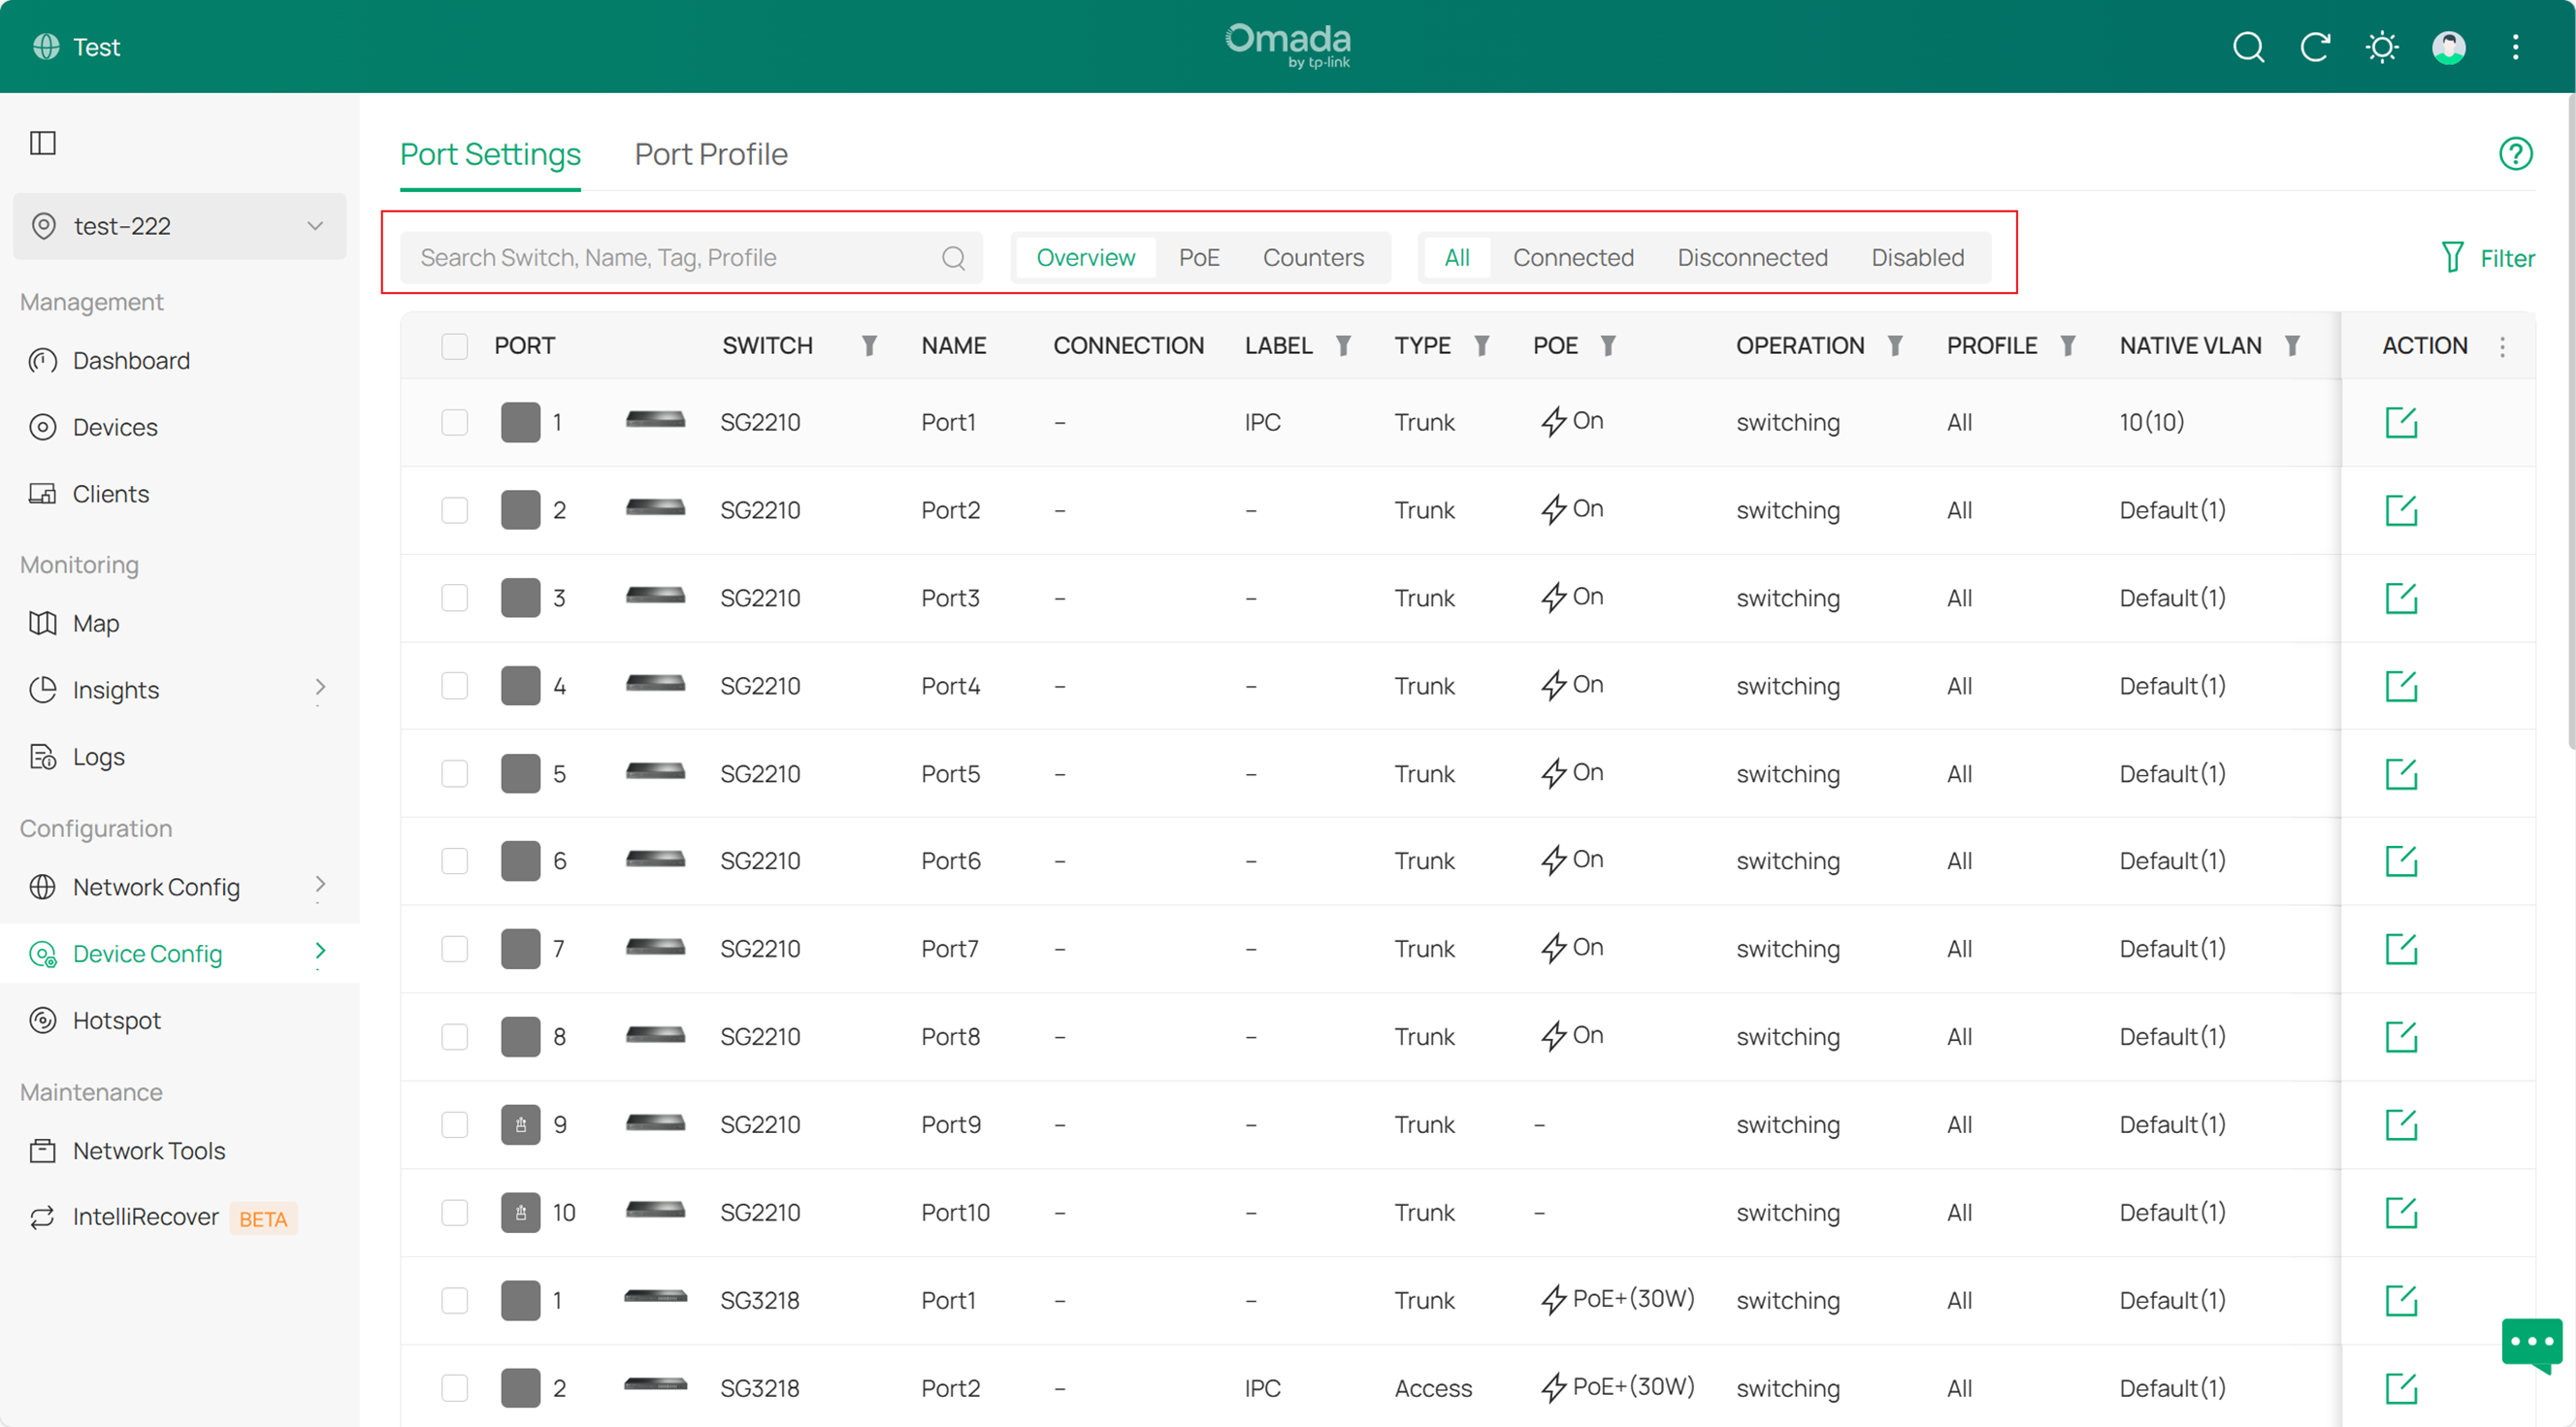
The Port Settings now supports advanced filtering, allowing you to quickly select specific switch ports for viewing or editing. You can either set filter criteria by clicking the Filter icon or add multiple filter rules at once by clicking the Filter button on the right.

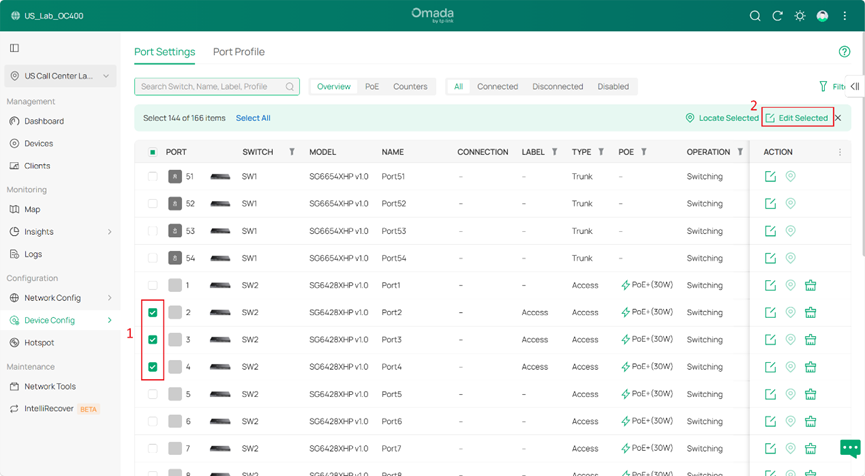
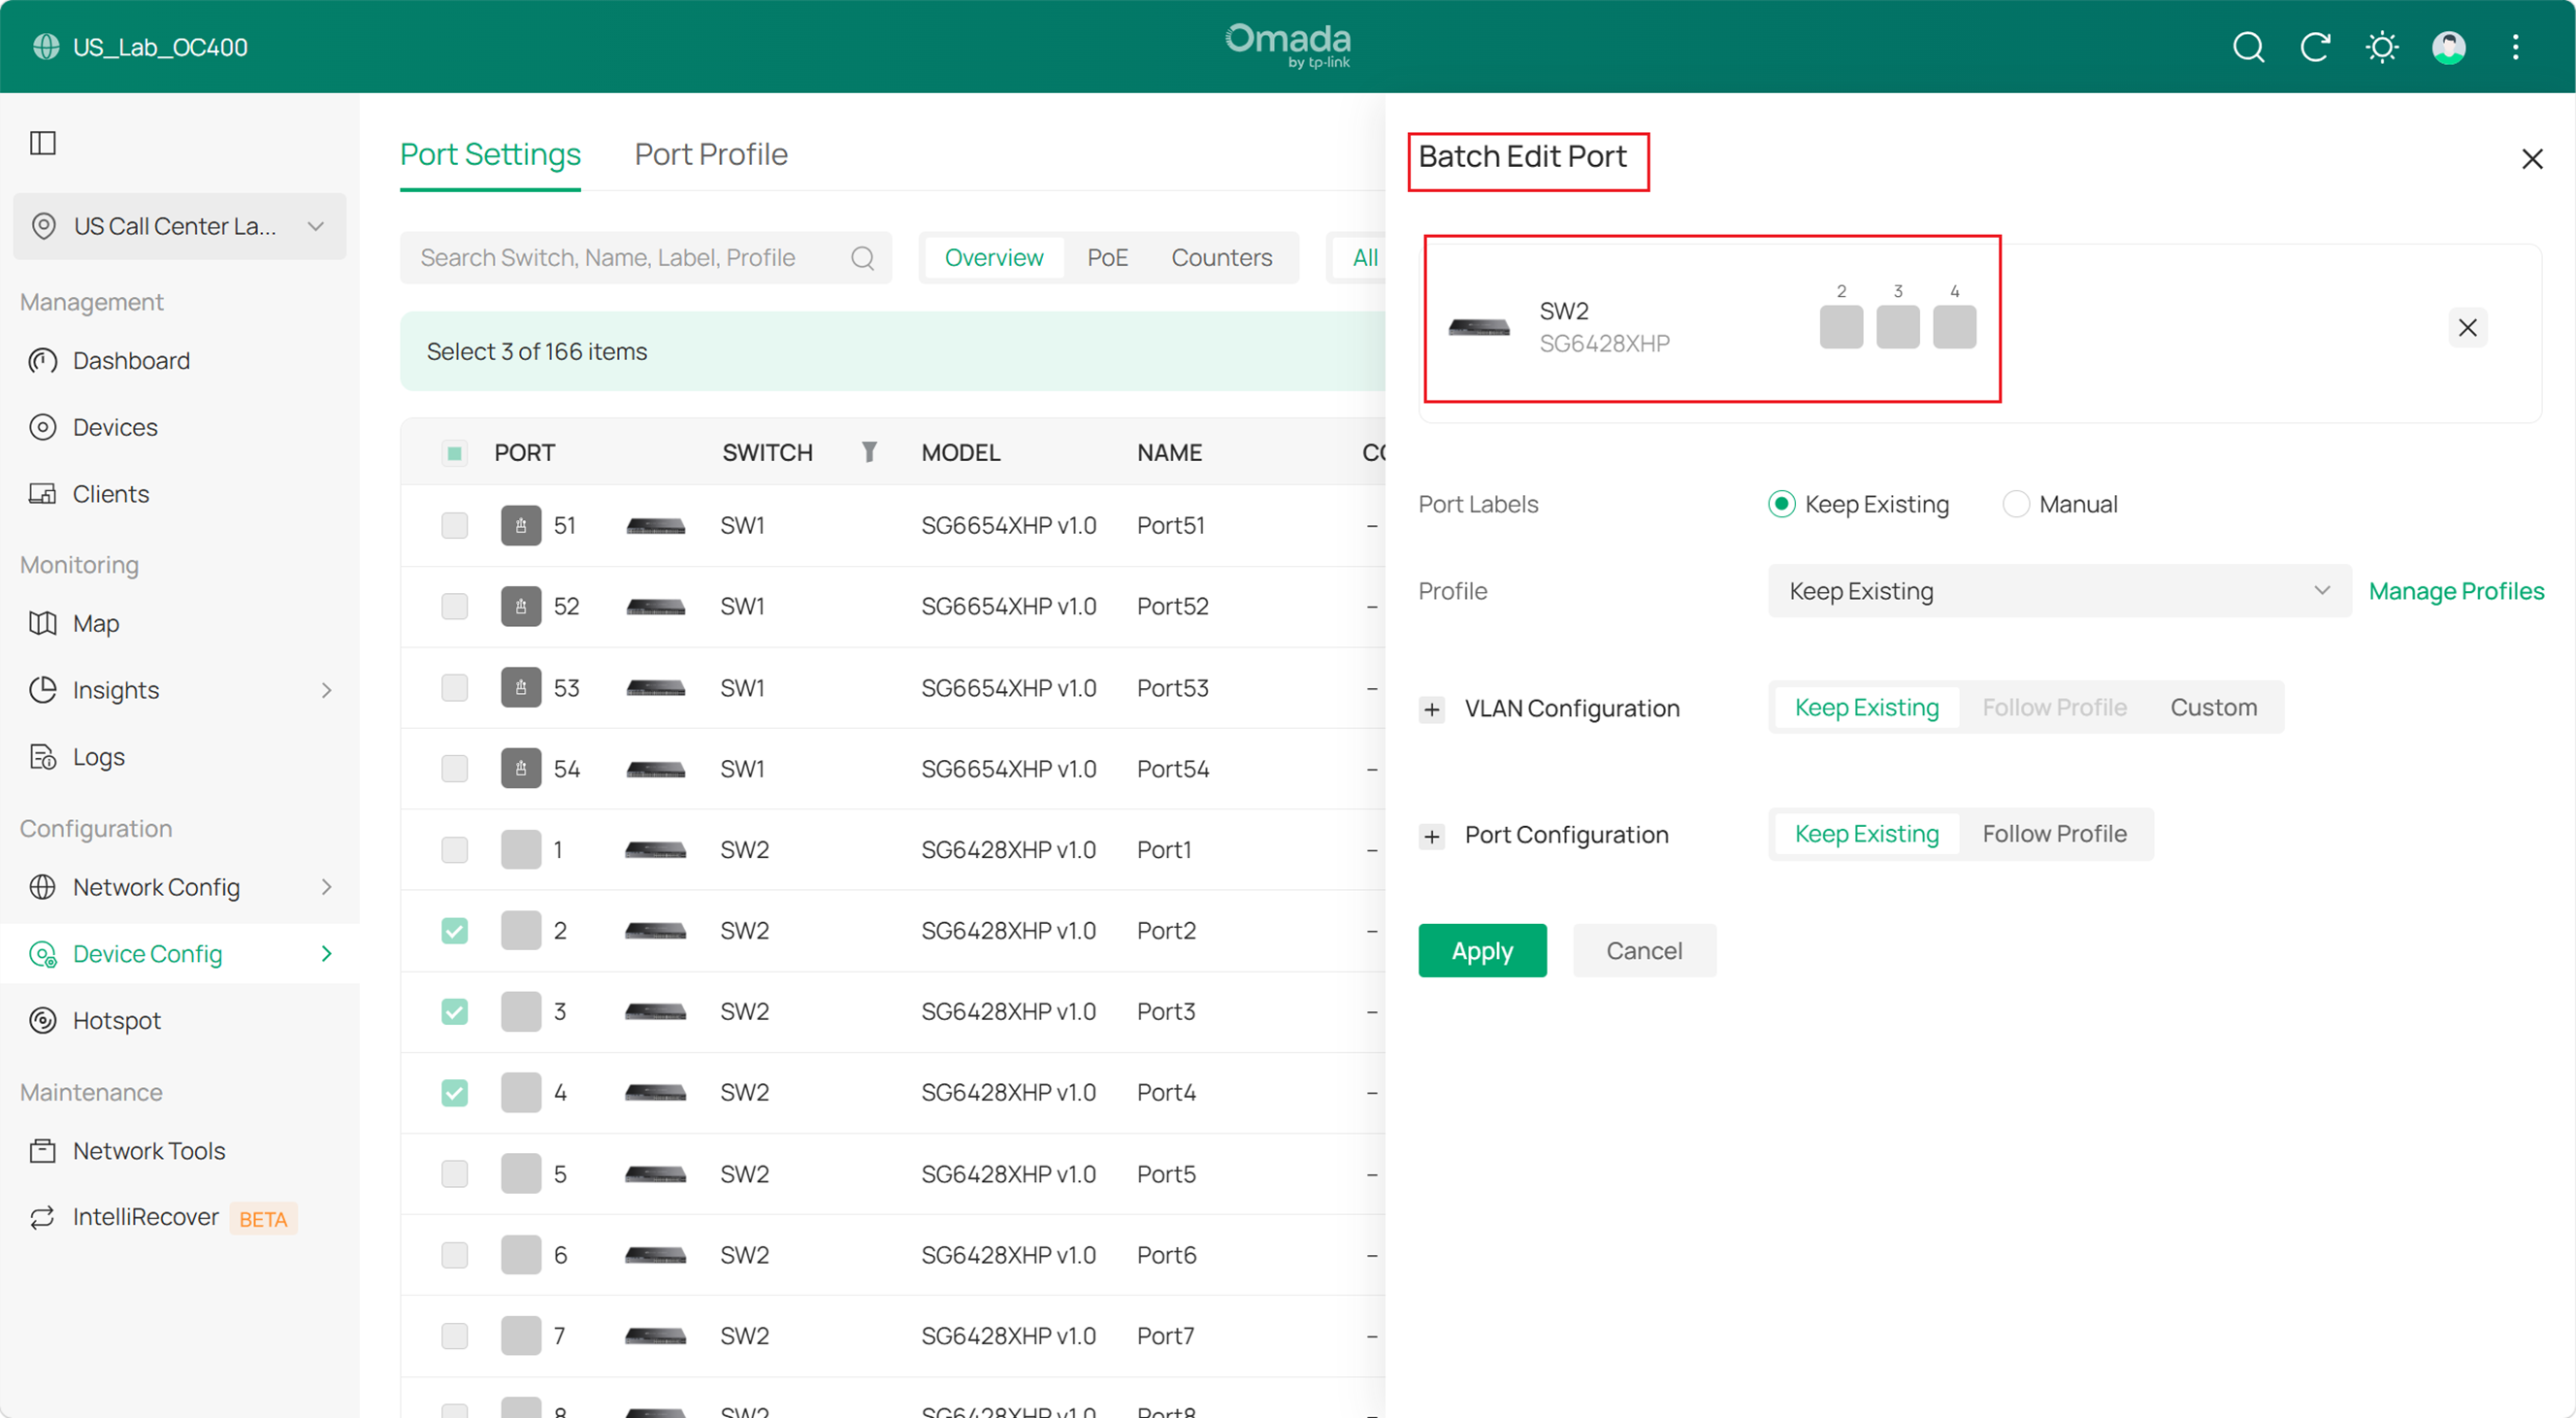
Step 5. Batch edit port configurations for different switches
The Controller v6.2.10 supports batch editing of general configurations for ports selected from different switches. This feature can be used in conjunction with the filtering function described in Step 4: first narrow down the search scope or select the desired ports using filters, then choose specific ports for simultaneous configuration.
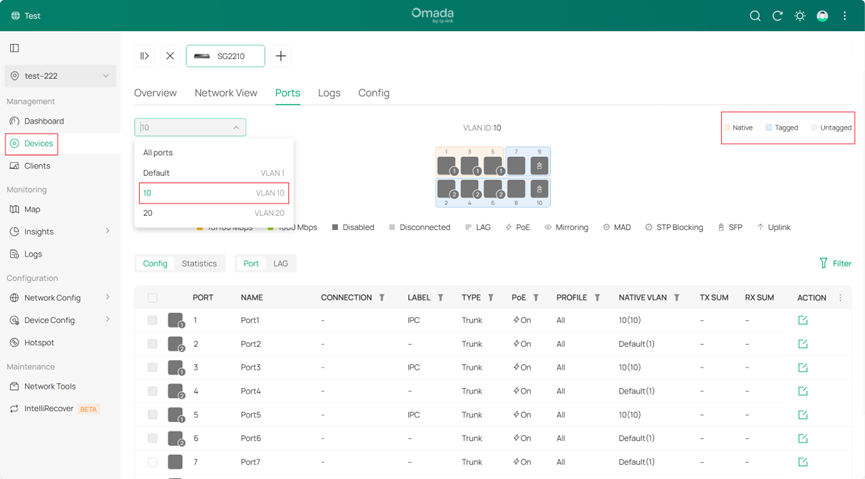
Step 6. Switch details page display optimization
In the Ports option of the device details page, the Controller v6.2.10 has optimized the display of ports on the switch, making it more intuitive. This interface also supports sorting and filtering of ports or LAGs using the method described in Step 4.
Additionally, you can select a specific VLAN, and the interface will differentiate whether a port/LAG is Native, Tagged, or Untagged for that VLAN using distinct colors.
In the Ports option of the device details page, you can click to select multiple ports for simultaneous editing, or drag the mouse to select multiple ports for simultaneous editing.

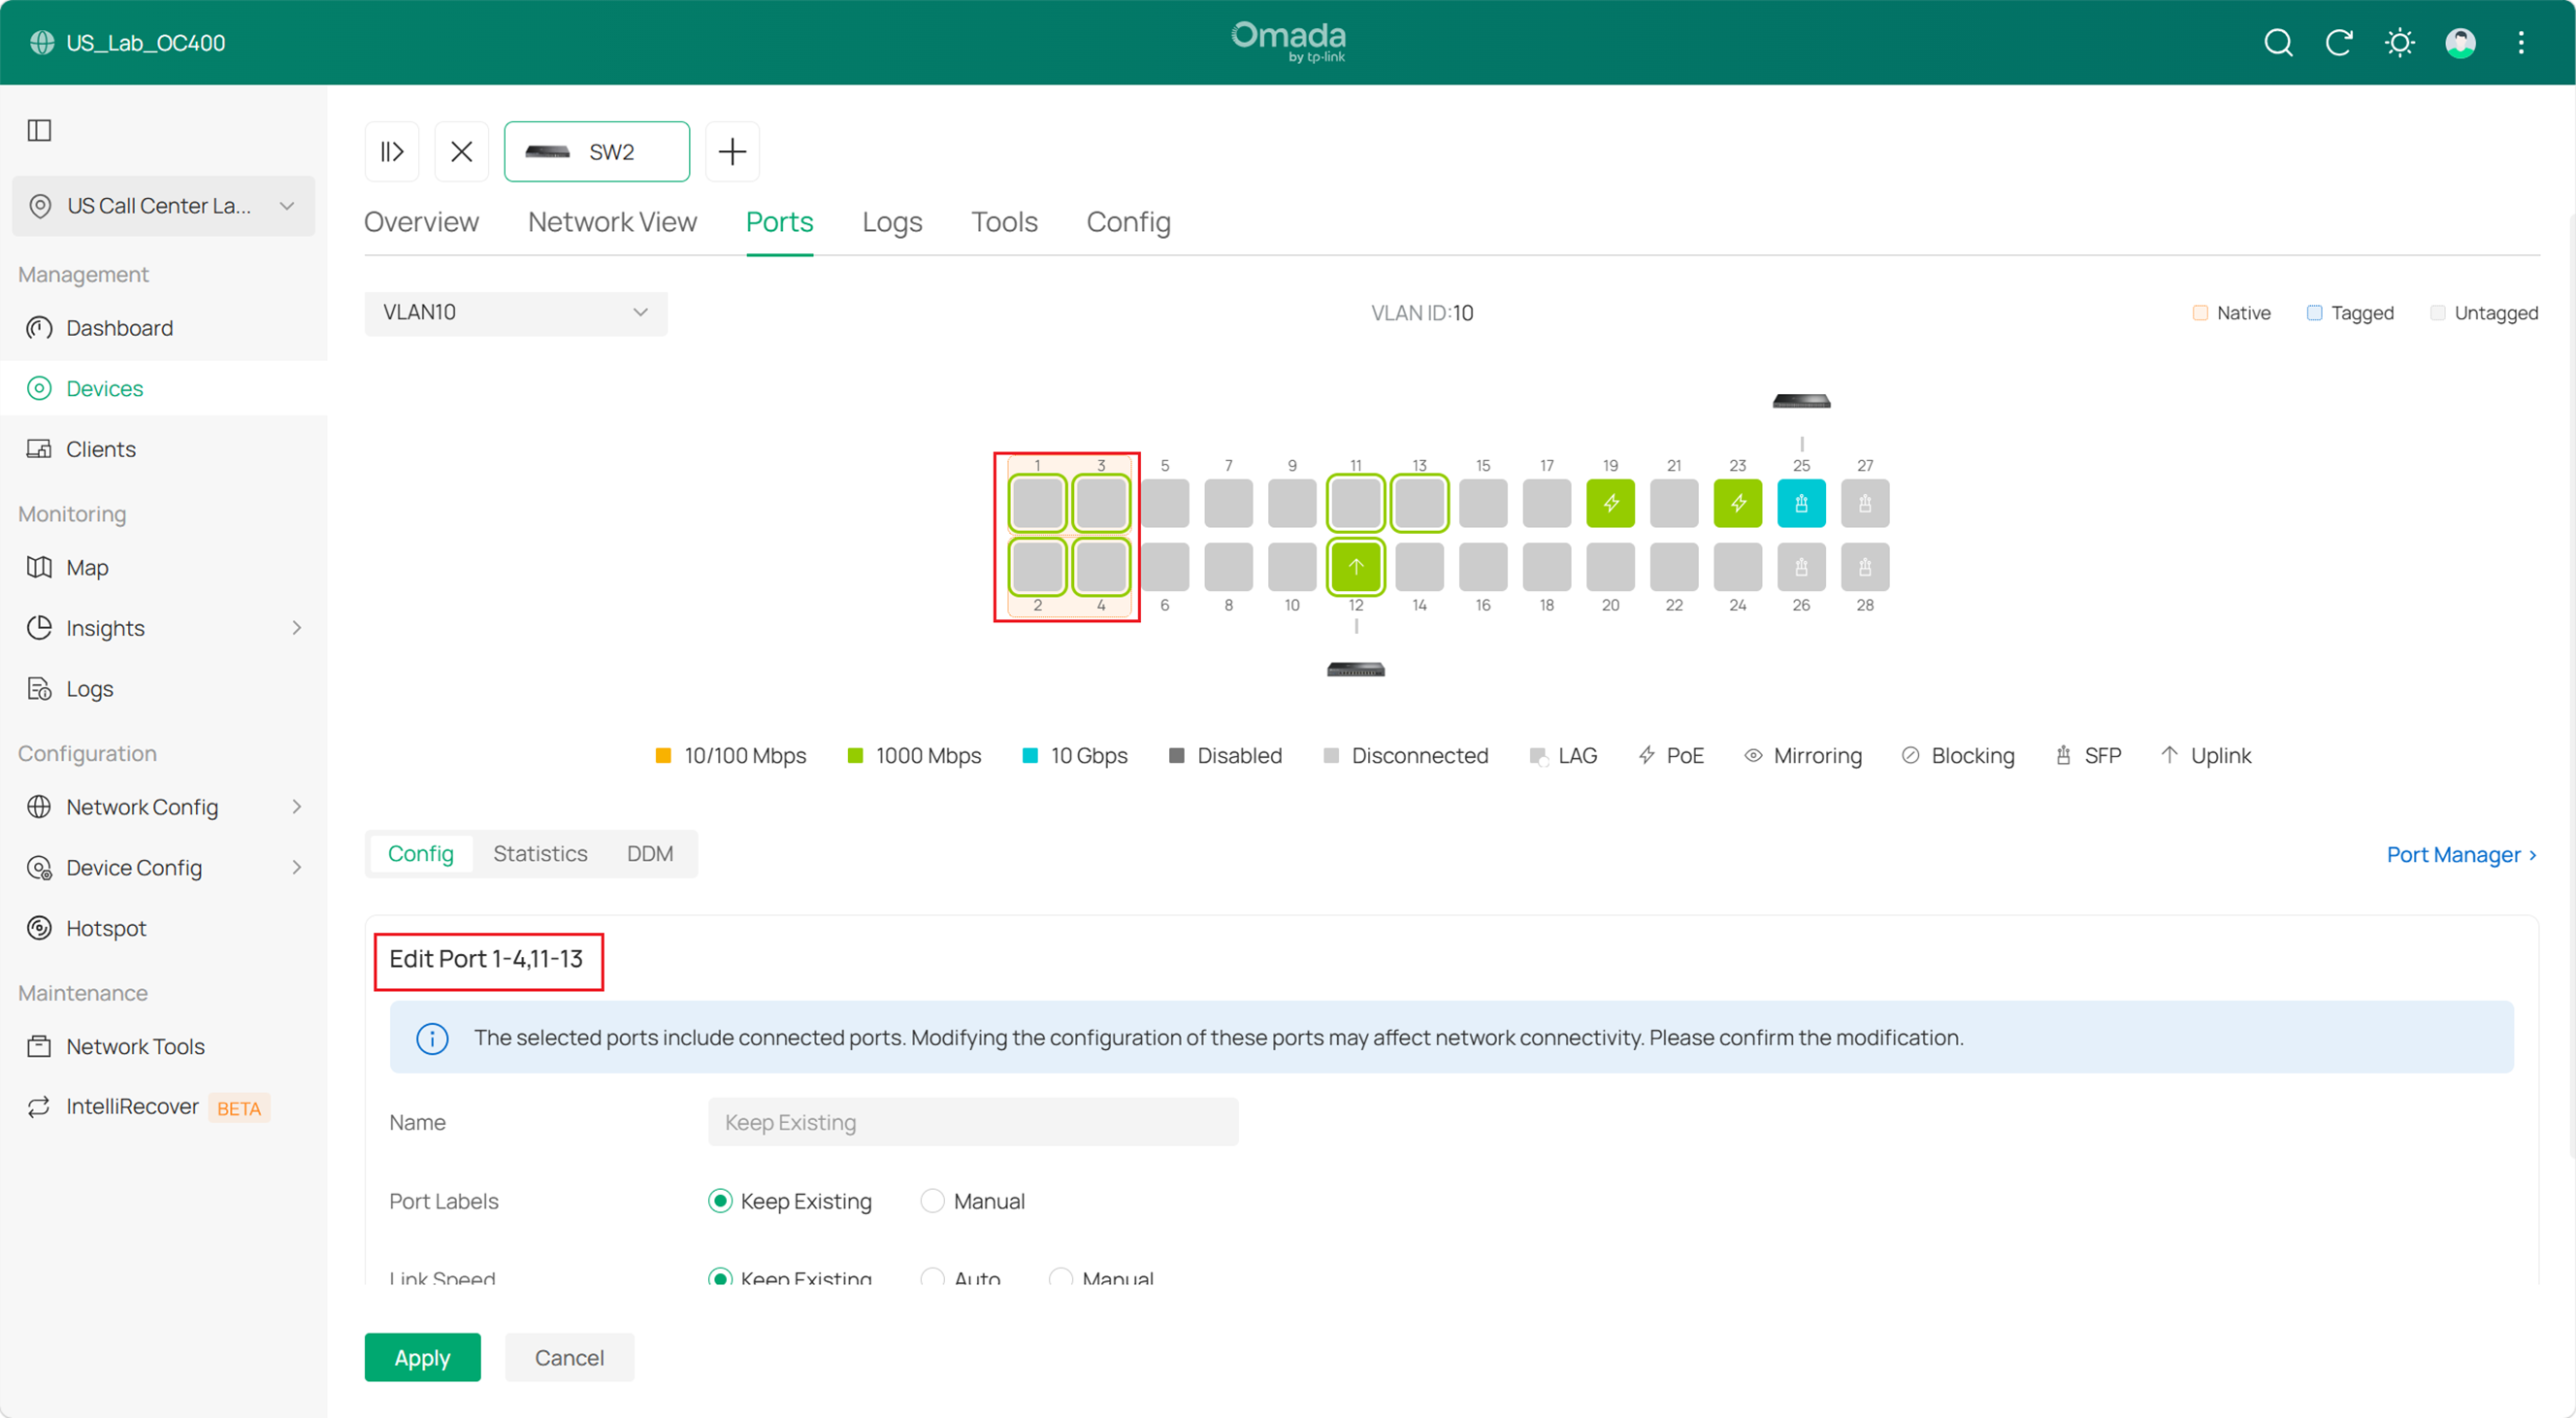
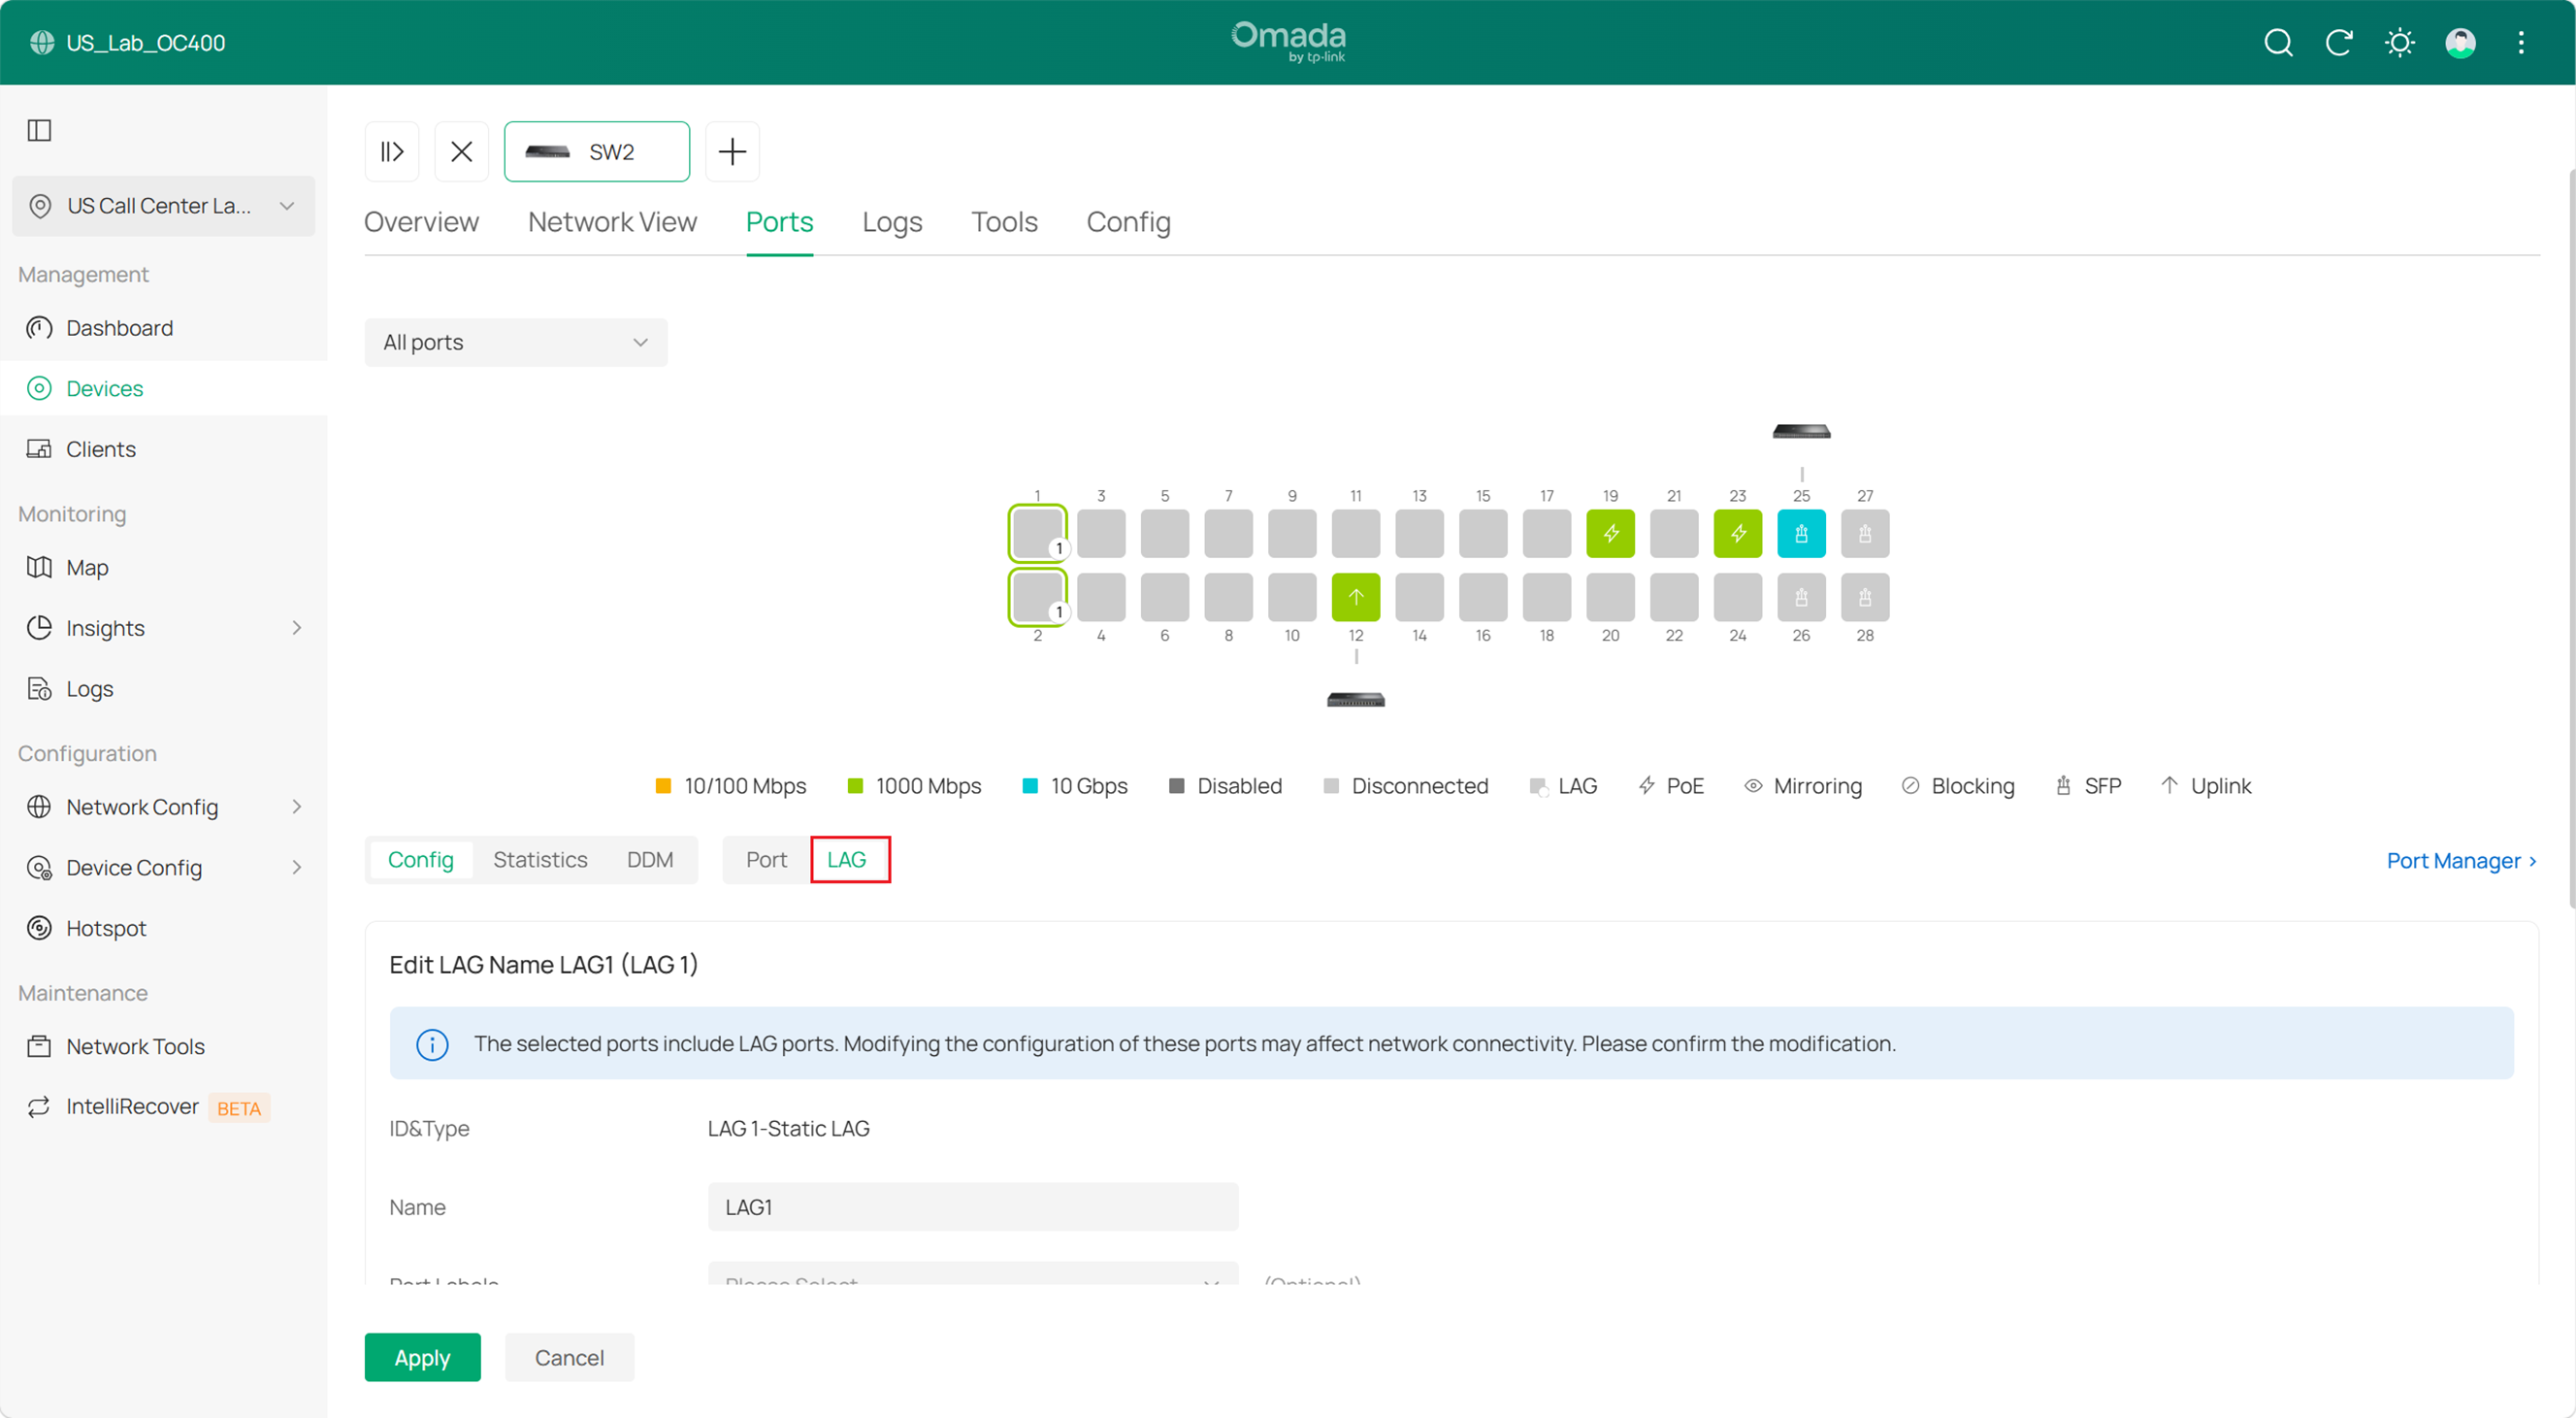
When selecting a LAG or a member port of a LAG, you will be directed to the configuration page of this aggregating group, member ports of such a group can only be edited individually after the group is deleted.
Conclusion
This article explains the switch port configuration logic in the Controller v6.2.10 and demonstrates the usage of common features.
Get to know more details of each function and configuration please go to Download Center to download the manual of your product.
