


Contents
Introduction
Omada switches that support DHCP Server functionality can be configured to automatically assign IP addresses, subnet masks, default gateways, and DNS information to clients within a VLAN. This is commonly used when the switch serves as the gateway for the VLAN or when a dedicated DHCP server is unavailable. This guide demonstrates how to configure an Omada switch as a DHCP Server in Controller Mode.
Requirements
- Omada Controller
- Omada Access, Access Plus, Access Pro, Access Max, Aggregation, and Campus Switches
Configuration
This section describes the configuration steps.
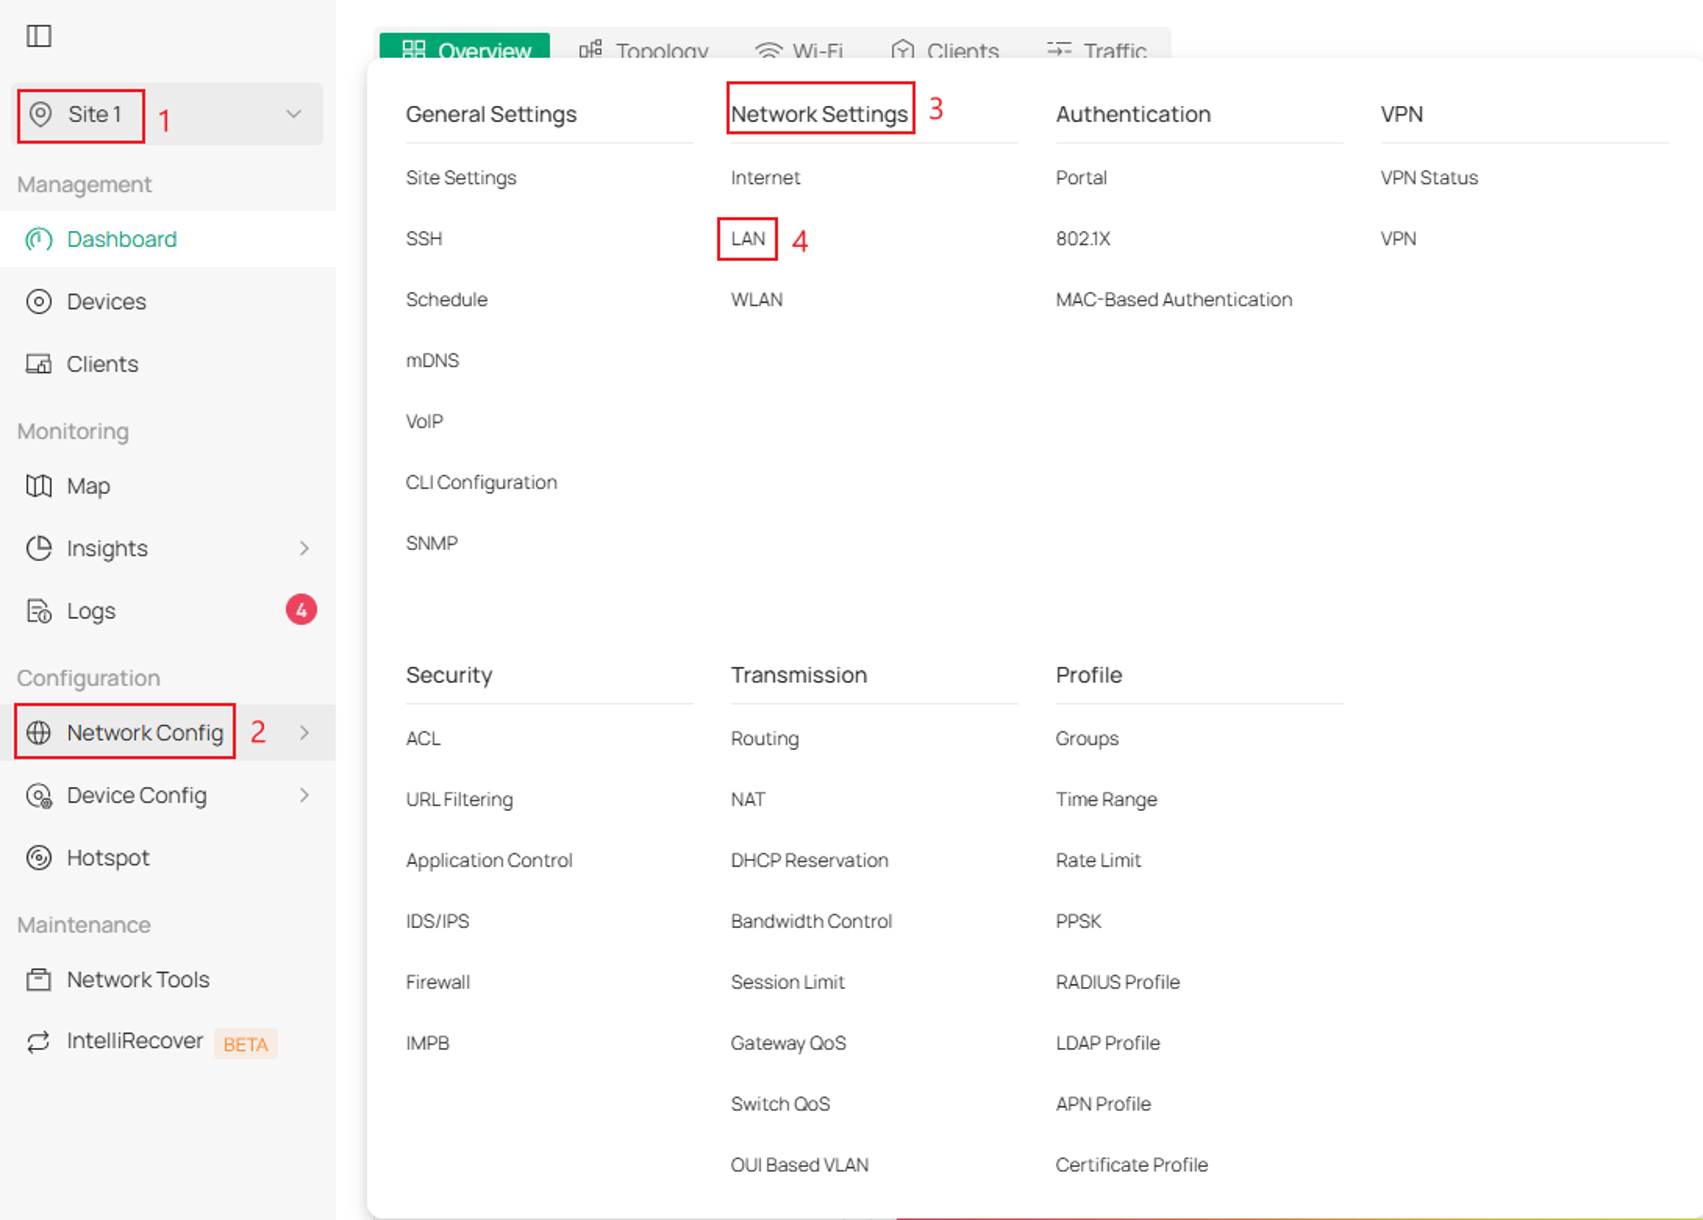
Step 1. Log into the controller and navigate to the Site > Network Config > Network Settings > LAN.
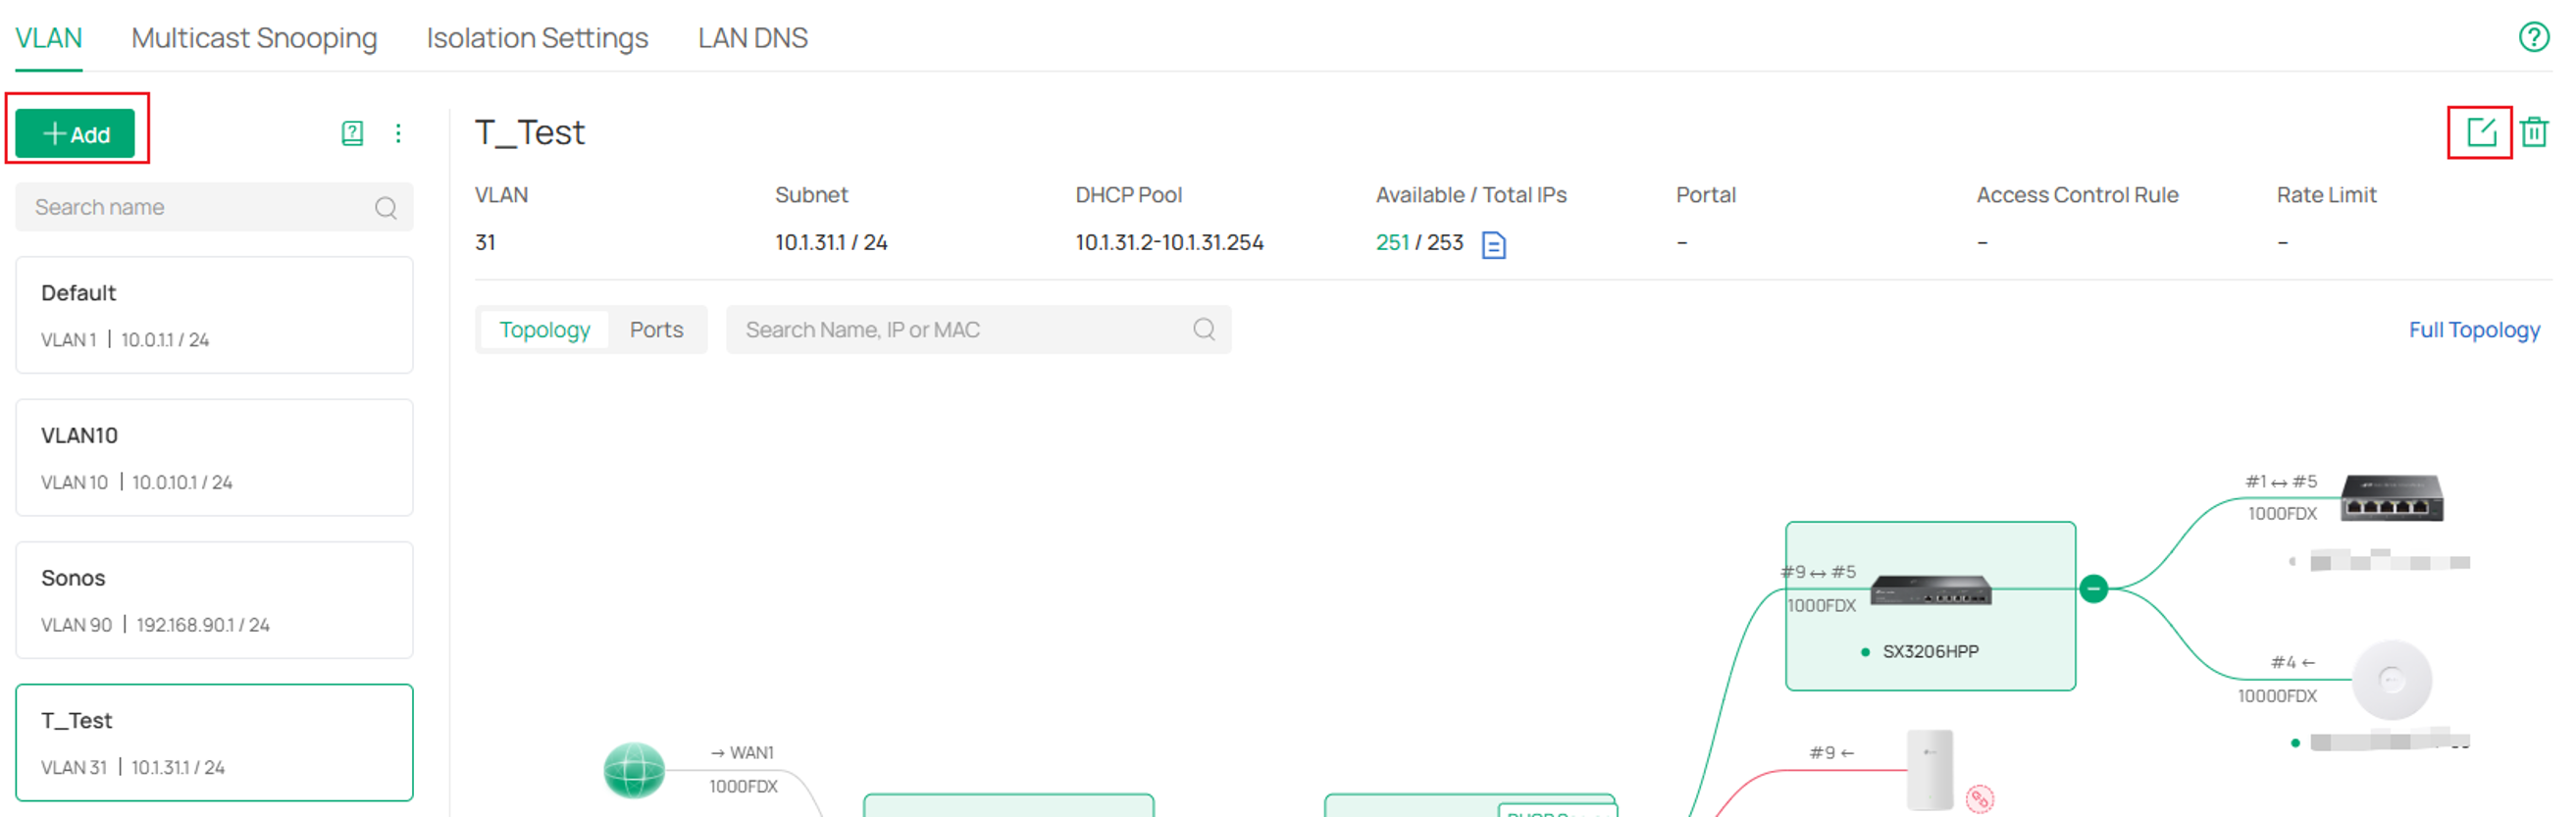
Step 2. Either create a new LAN by clicking Add, or select an existing LAN and click Edit.
In this example a specific LAN is being edited.
Step 3. Select the desired switch as the DHCP Server Device and configure the required parameters.
Click Next when complete.
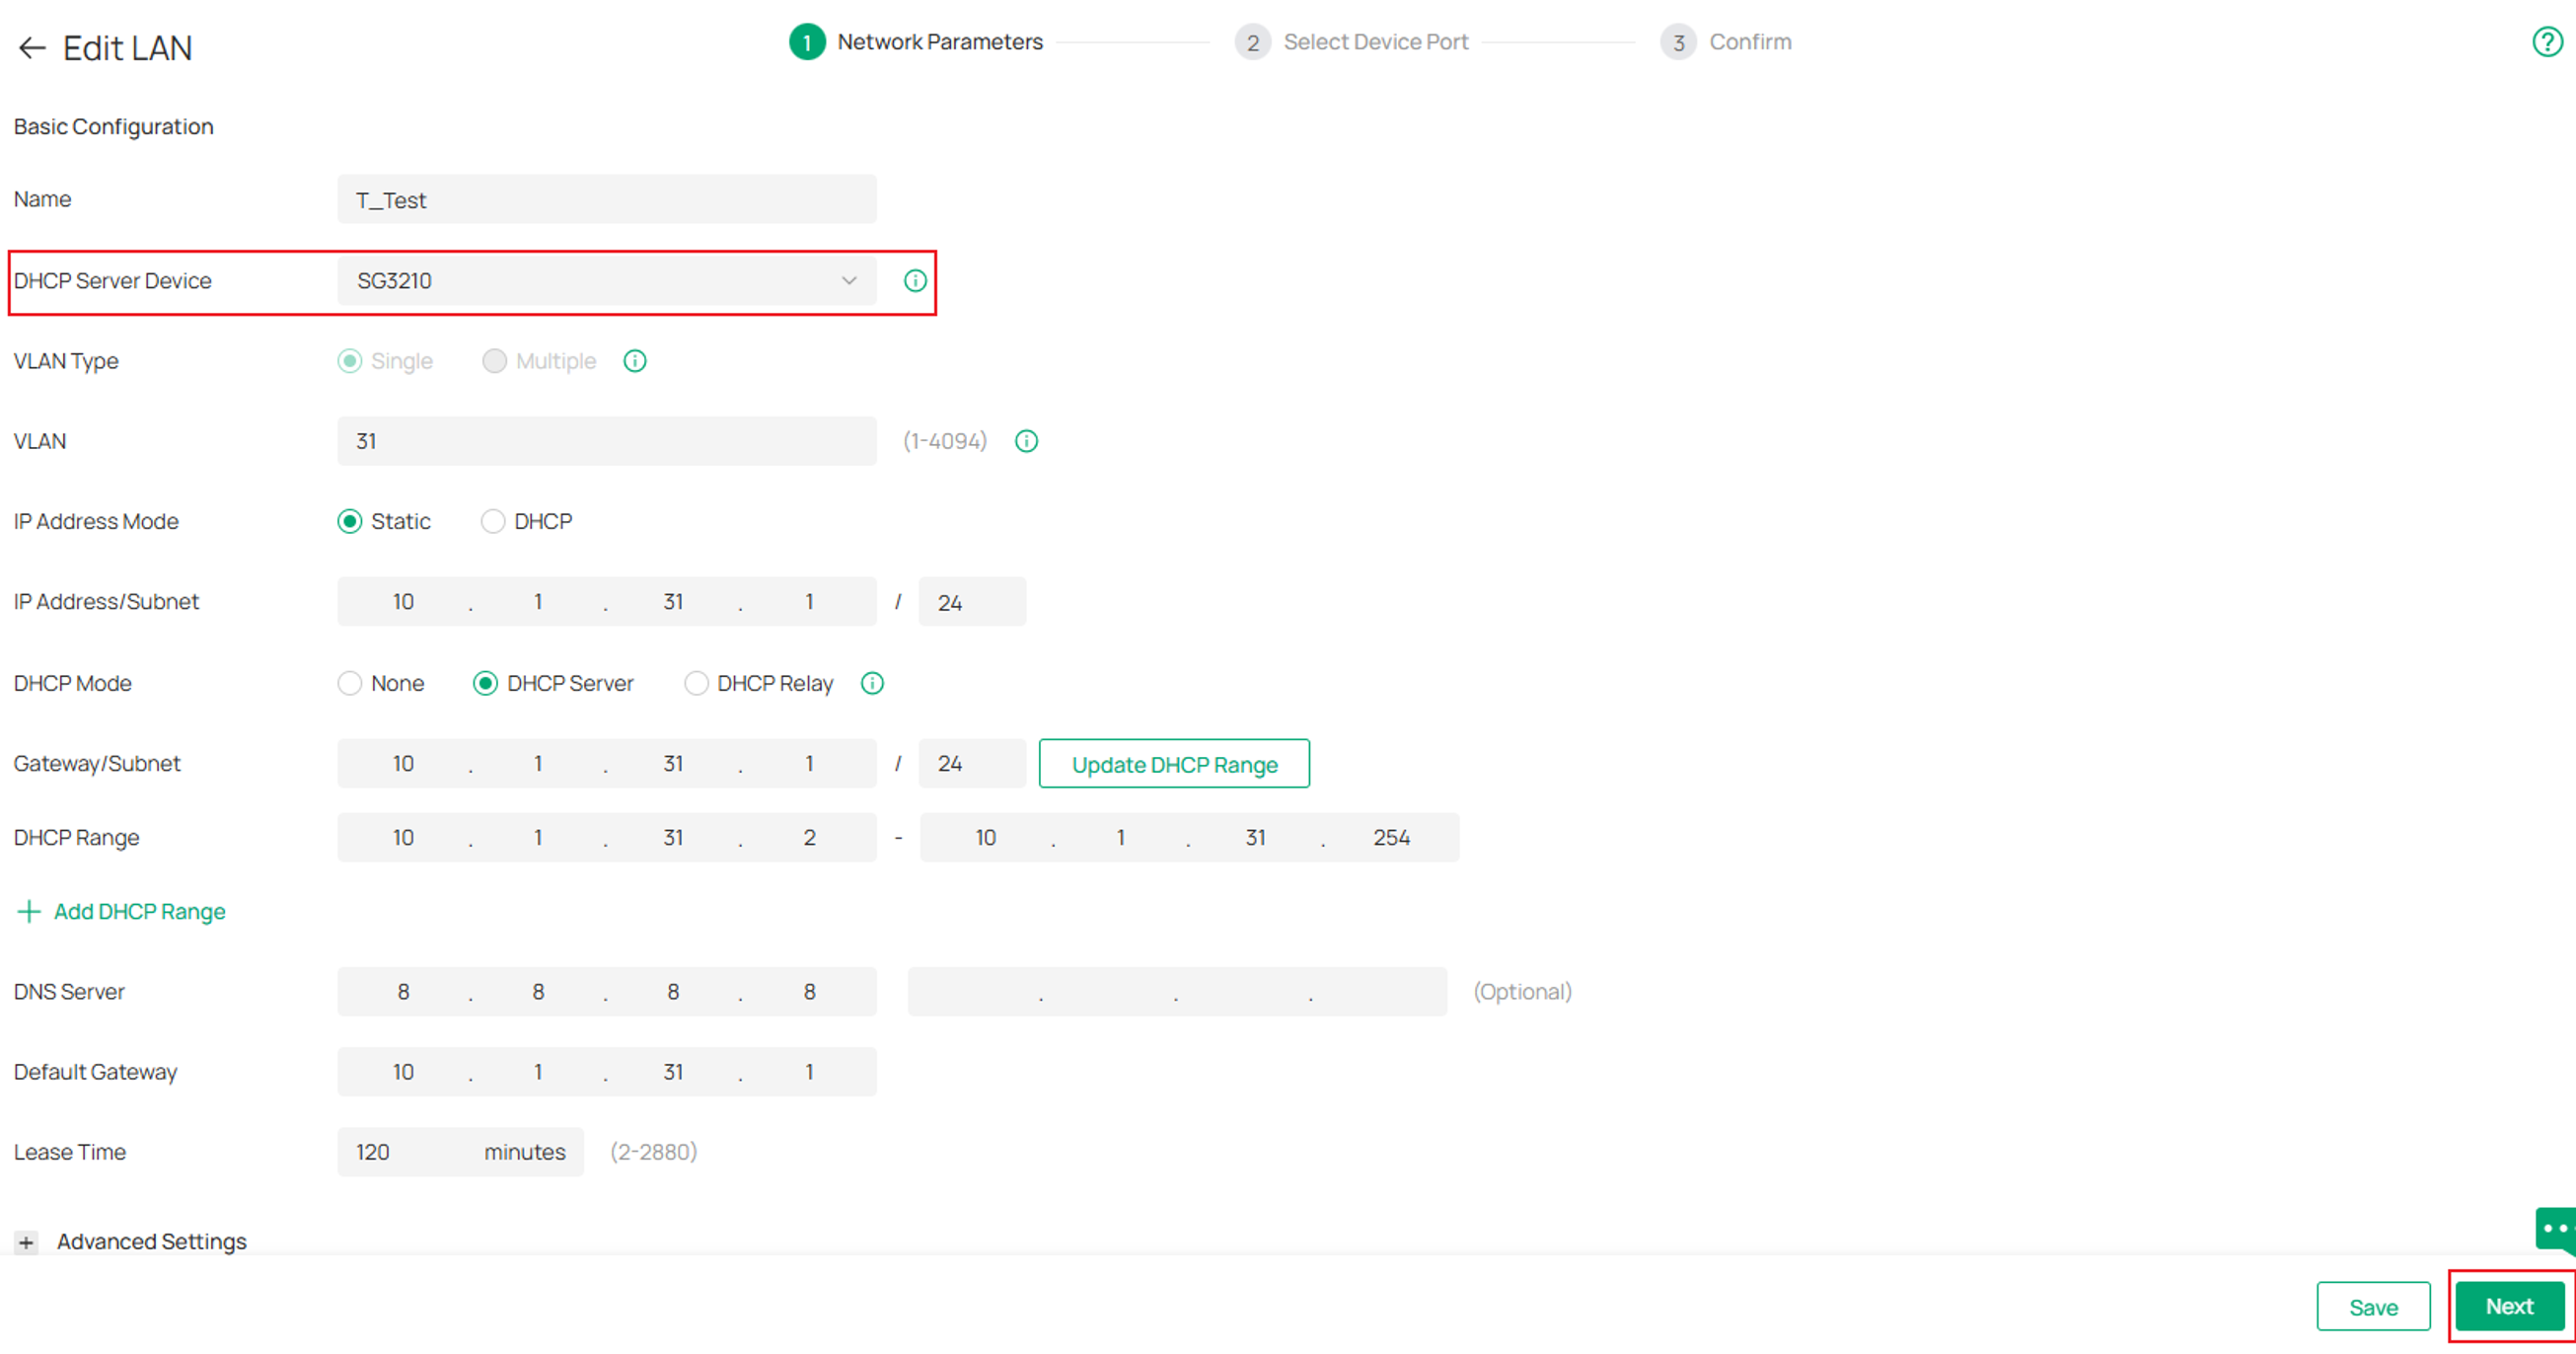
VLAN Type: Specify whether to use a single VLAN or multiple VLANs. When Multiple is selected, you can configure multiple VLANs for devices to access the LAN network.
VLAN: Enter a VLAN ID with the values between 1 and 4094. Each VLAN can be uniquely identified by VLAN ID, which is transmitted and received as IEEE 802.1Q tag in an Ethernet frame. It is recommended not to configure more than 256 VLANs. Otherwise, the device may malfunction due to insufficient memory.
Gateway/Subnet: Enter the IP address and subnet mask in the CIDR format. The CIDR Notation here includes the IP address and subnet mask of the default gateway.The summary of the information that you entered will show up below in realtime.
DHCP Server: Select a method to set DHCP mode.
DHCP Range: Enter the starting and ending IP addresses of the DHCP address pool in the fields provided. For quick operation, click the Update DHCP Range beside the Gateway/Subnet entry to get the IP address range populated automatically, and edit the range according to your needs.
DNS Server: Select a method to configure the DNS server for the network.
Default Gateway: Enter the IP address of the default gateway.
Lease Time: Specify how long a client can use the IP address assigned from this address pool.
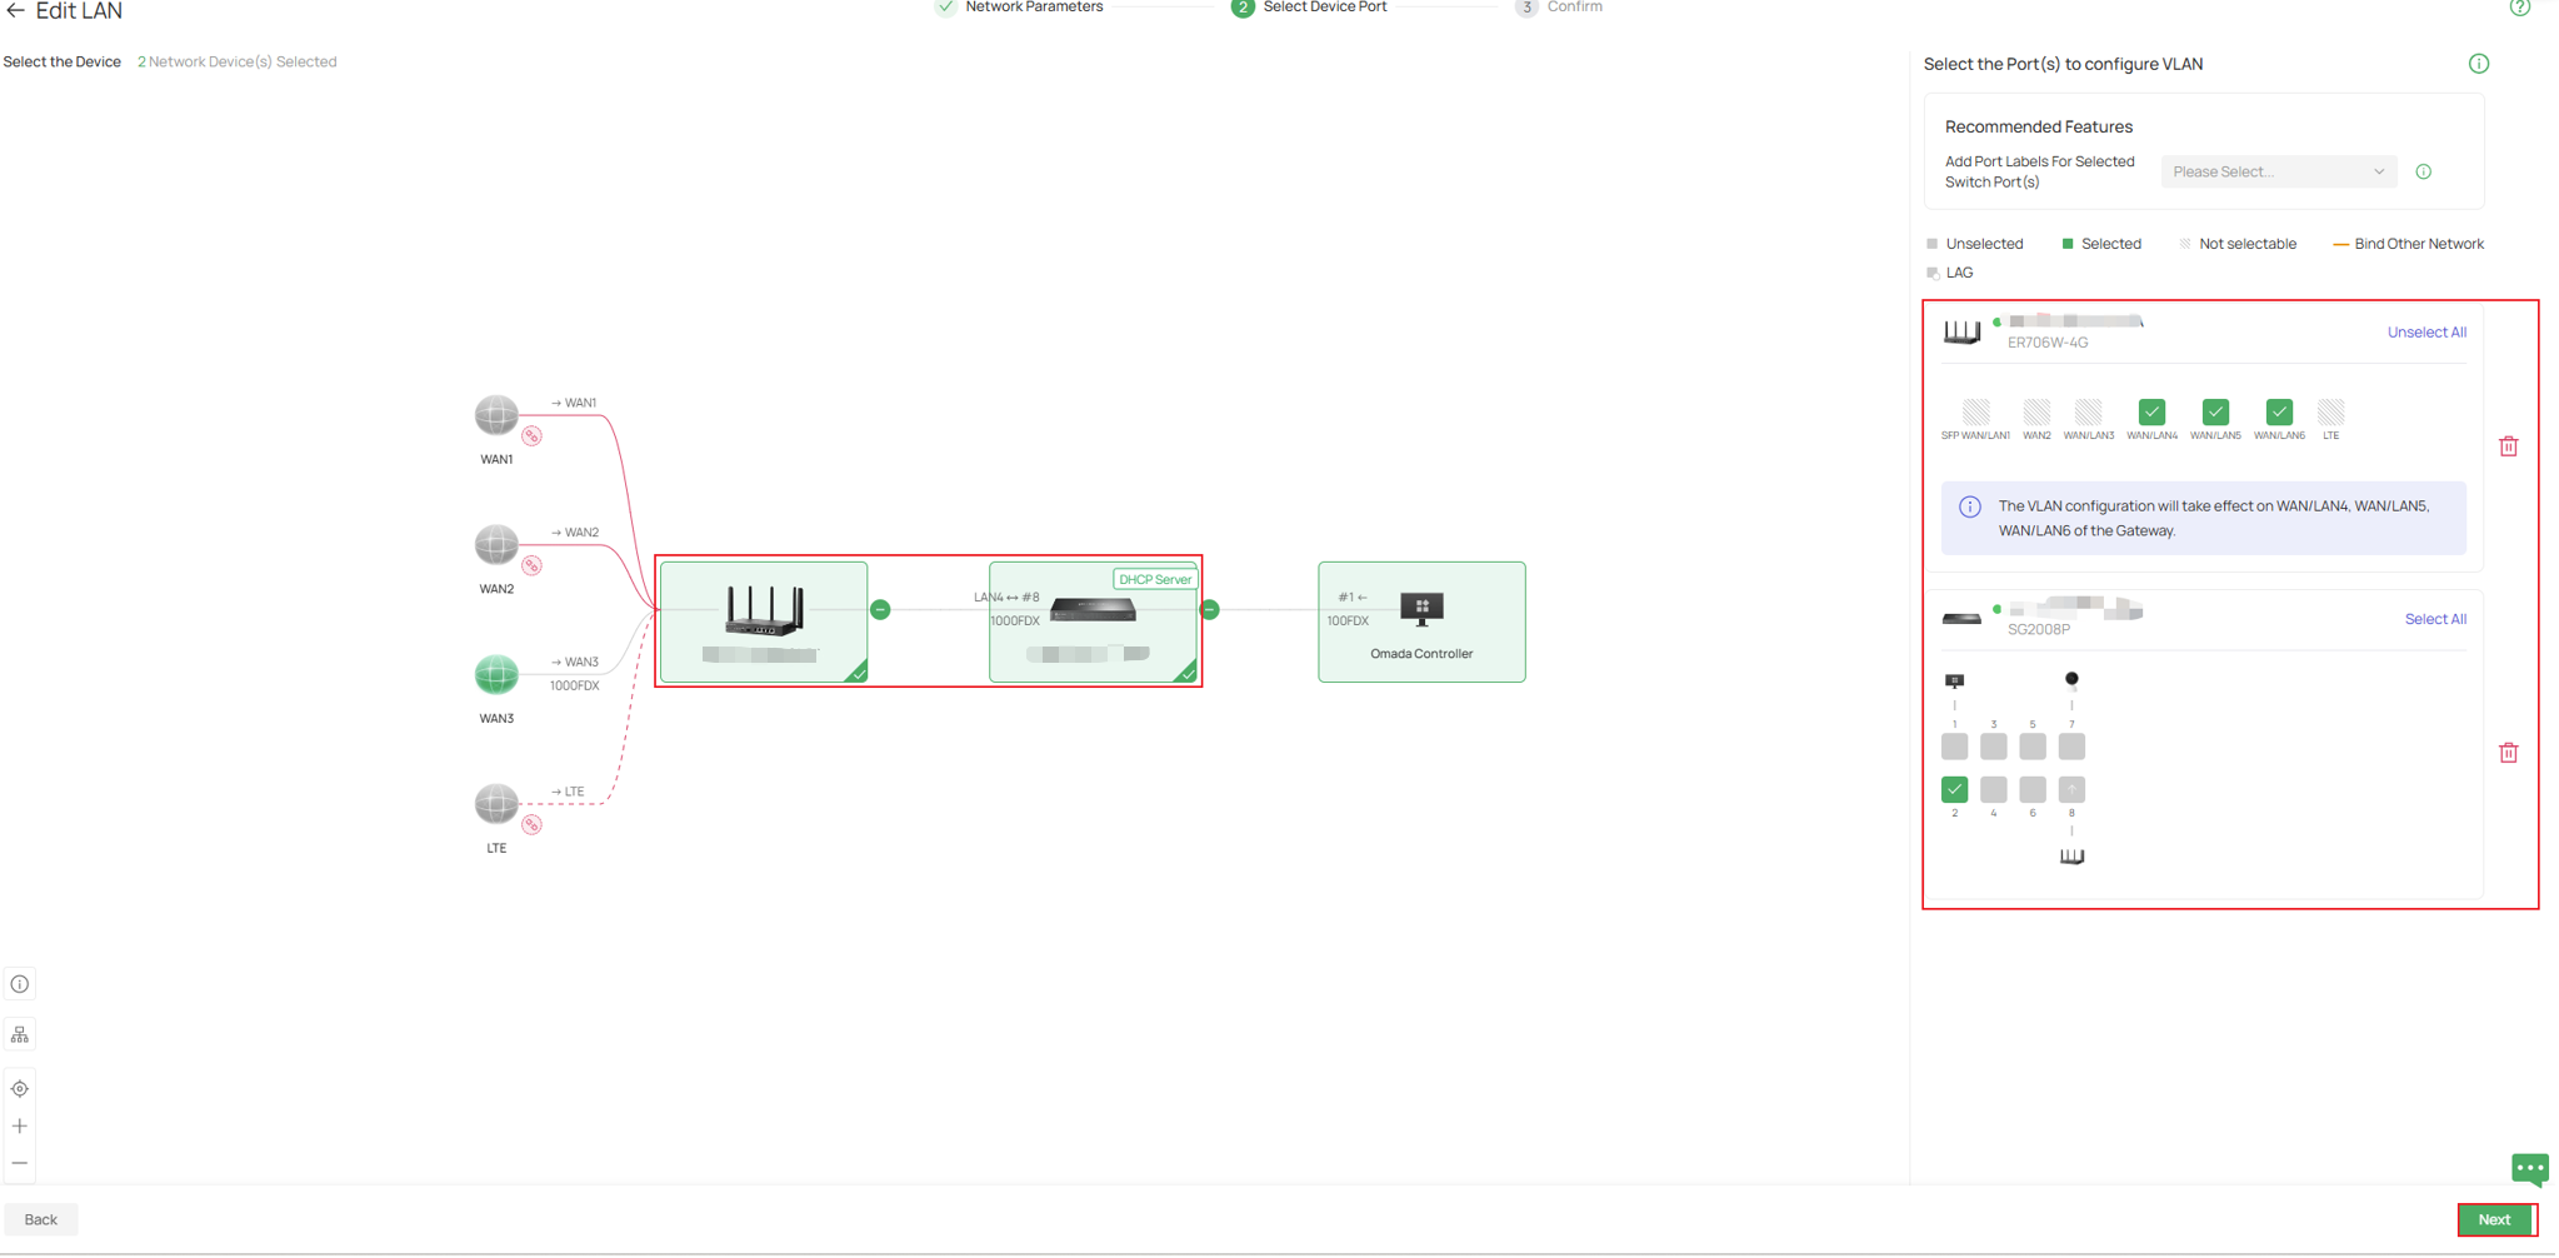
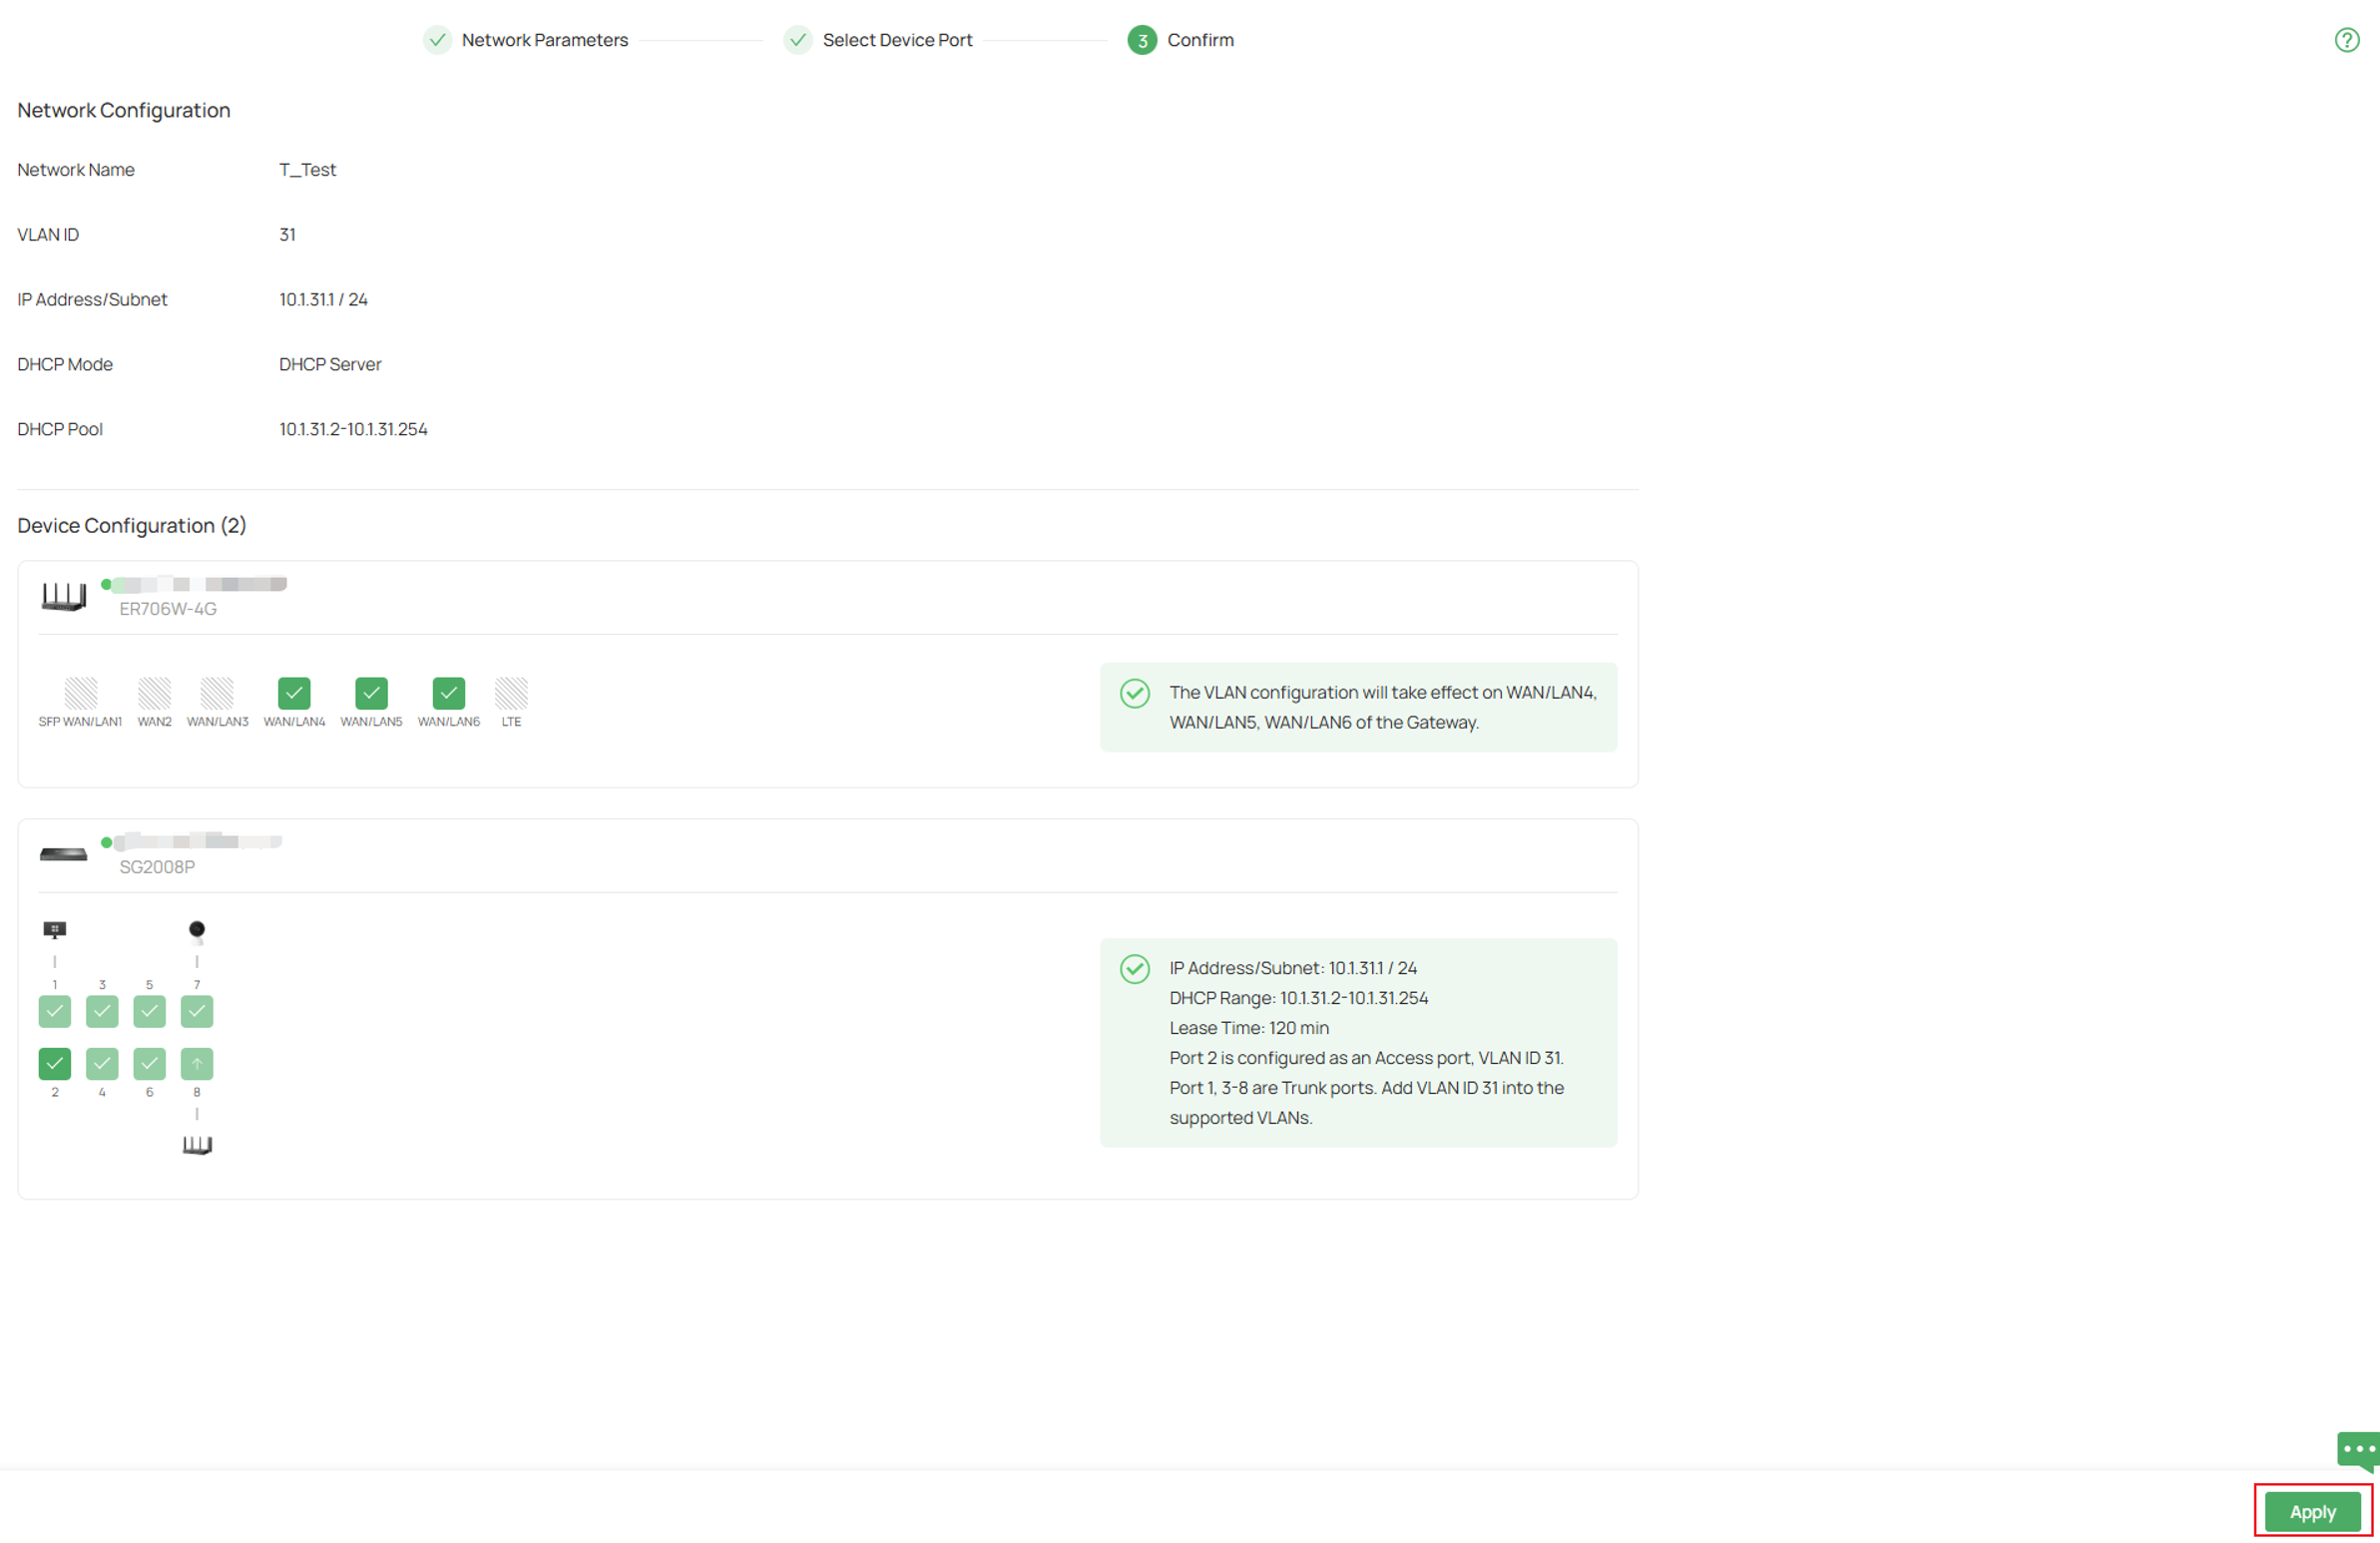
Step 4. Select the ports that should be members of the VLAN and configure the appropriate tagging settings.
Click Next when complete. Review the LAN configuration and click Apply.
Step 5. Next, create a static route for that subnet from the router to the switch.
Note: If an Omada Gateway or third-party router provides internet access for this VLAN, configure a static route on the gateway that points to the switch. Otherwise, clients may receive IP addresses successfully but will not be able to access external networks.
In this example, there is a router adopted to this controller.
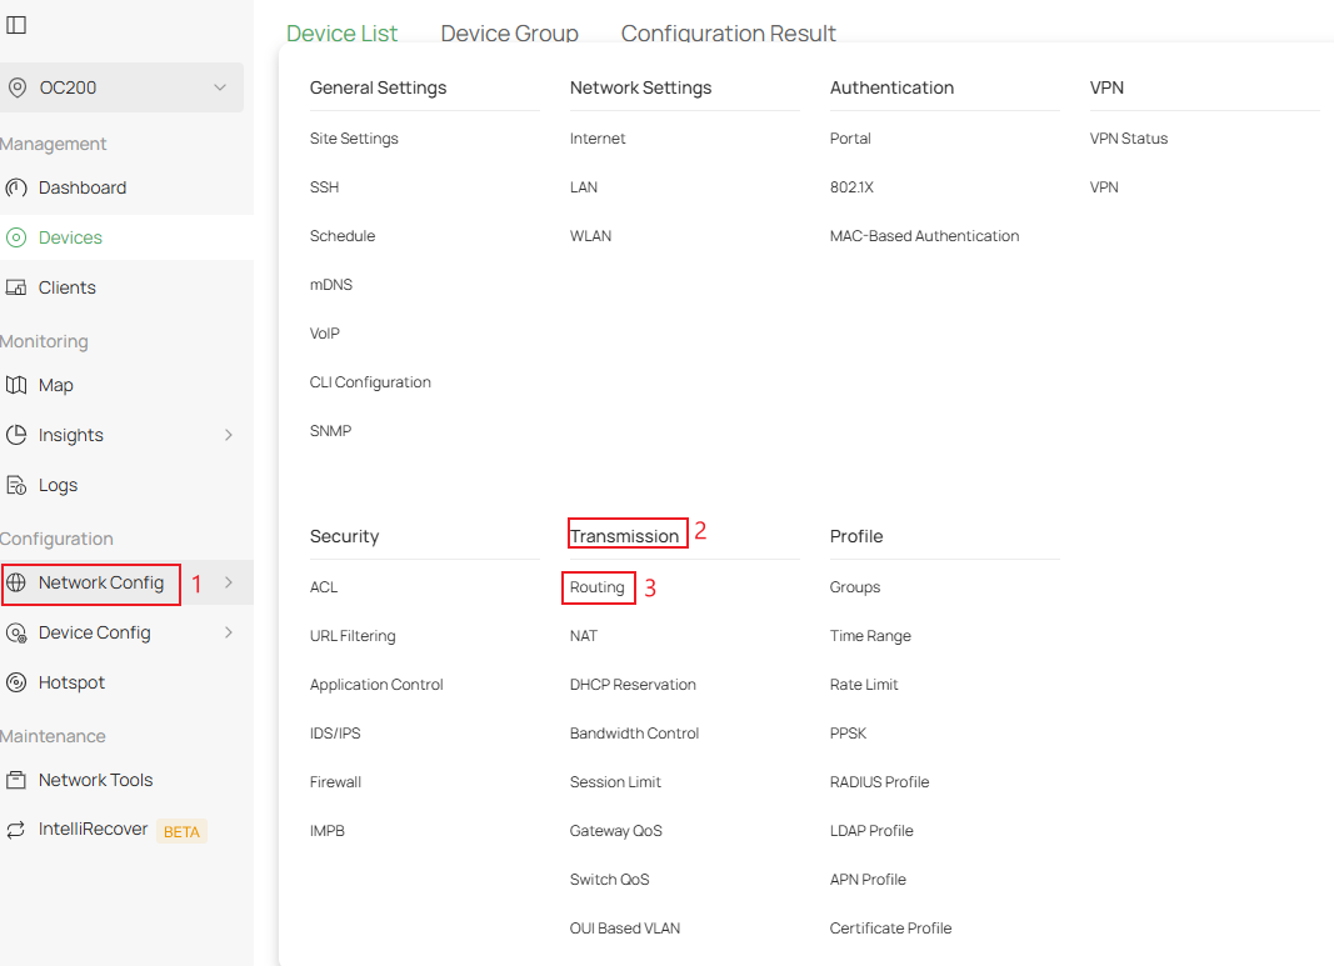
On the controller, navigate to Network Config > Transmission > Routing.
Step 6. Go to Static Route and click Create New Route
Next fill in the parameters and click Create

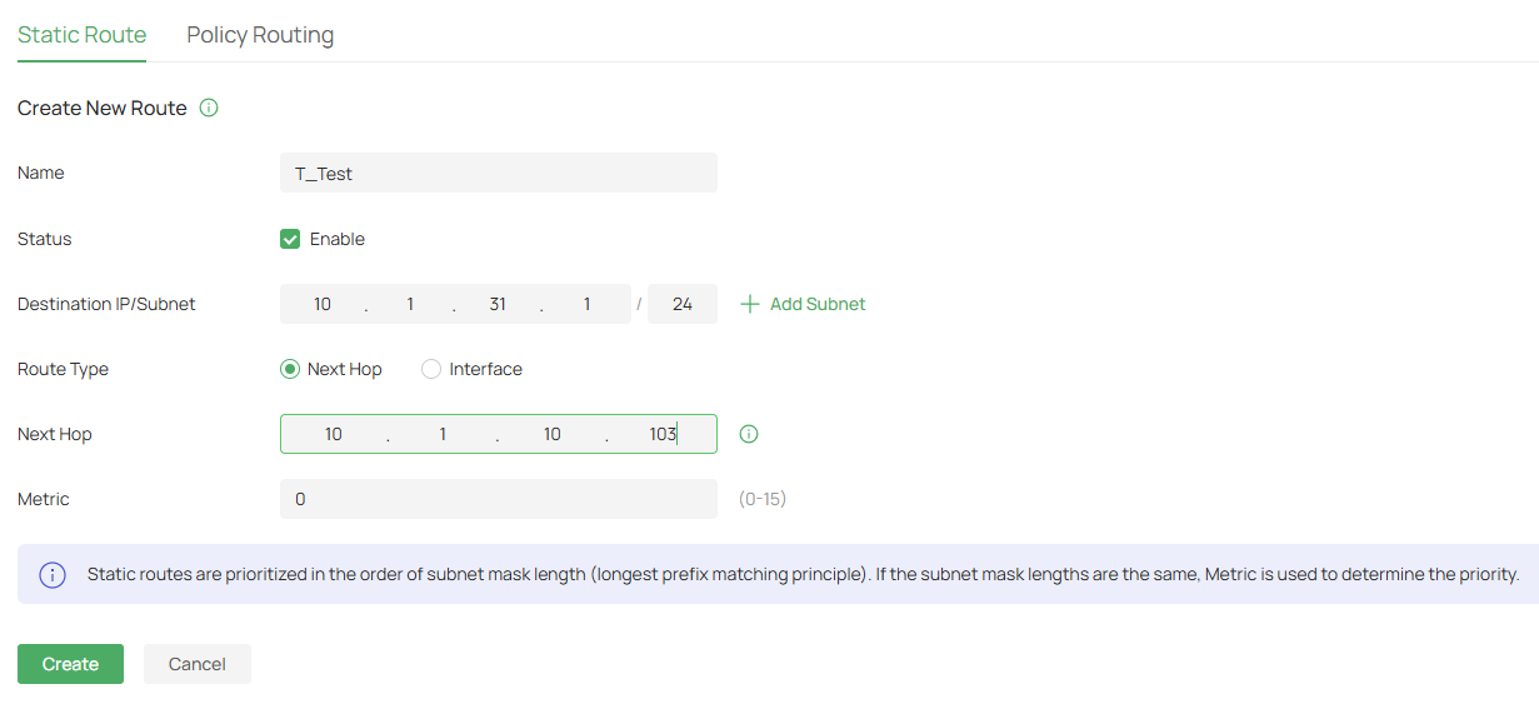
Note: The Next Hop should be an IP address on the switch that is reachable from the router. This allows the router to forward traffic for the VLAN subnet to the switch.
Conclusion
After completing these steps, the Omada switch will provide DHCP services for the configured VLAN. Clients connected to the VLAN will automatically receive IP addresses and be able to communicate with other networks once proper routing is configured.
To learn more about each function and configuration, please visit Support Home to download or check the manual for your product.
QA
Q1: What should I do if the client has obtained an IP address but cannot access the Internet?
A1: Verify that a static route exists on the gateway pointing to the subnet hosted by the switch and ensure the switch has a valid route toward the Internet.
