


Contents
Configuration for Manual IPsec
Configuration for IPsec Server
Introduction
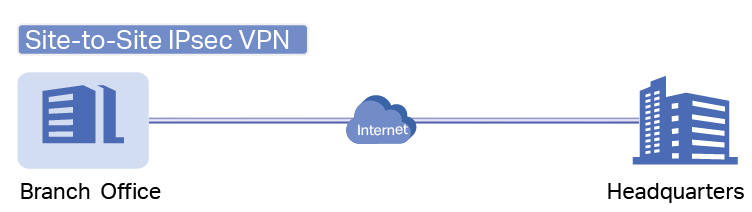
IPsec Site-to-Site VPN enables the connection of geographically separated networks. Large enterprises commonly use it to establish secure VPN connections between branch offices and headquarters. The IPsec VPN connects branch routers over the public network, ensuring secure transmission of private network data.
Omada gateways support two types of Site-to-Site IPsec VPN: Auto IPsec and Manual IPsec. This article introduces how to configure both Manual and Auto IPsec VPNs using the Omada controller.
Requirements
- Omada Gateways
- Omada Controller (Software Controller, Hardware Controller, and Cloud-based Controller v6.2 and above)
Configuration
For example, suppose two gateways (Gateway A and Gateway B) are deployed at two different sites. Follow the steps below to configure Manual IPsec and establish a secure private tunnel between the two gateways.
Configuration for Manual IPsec
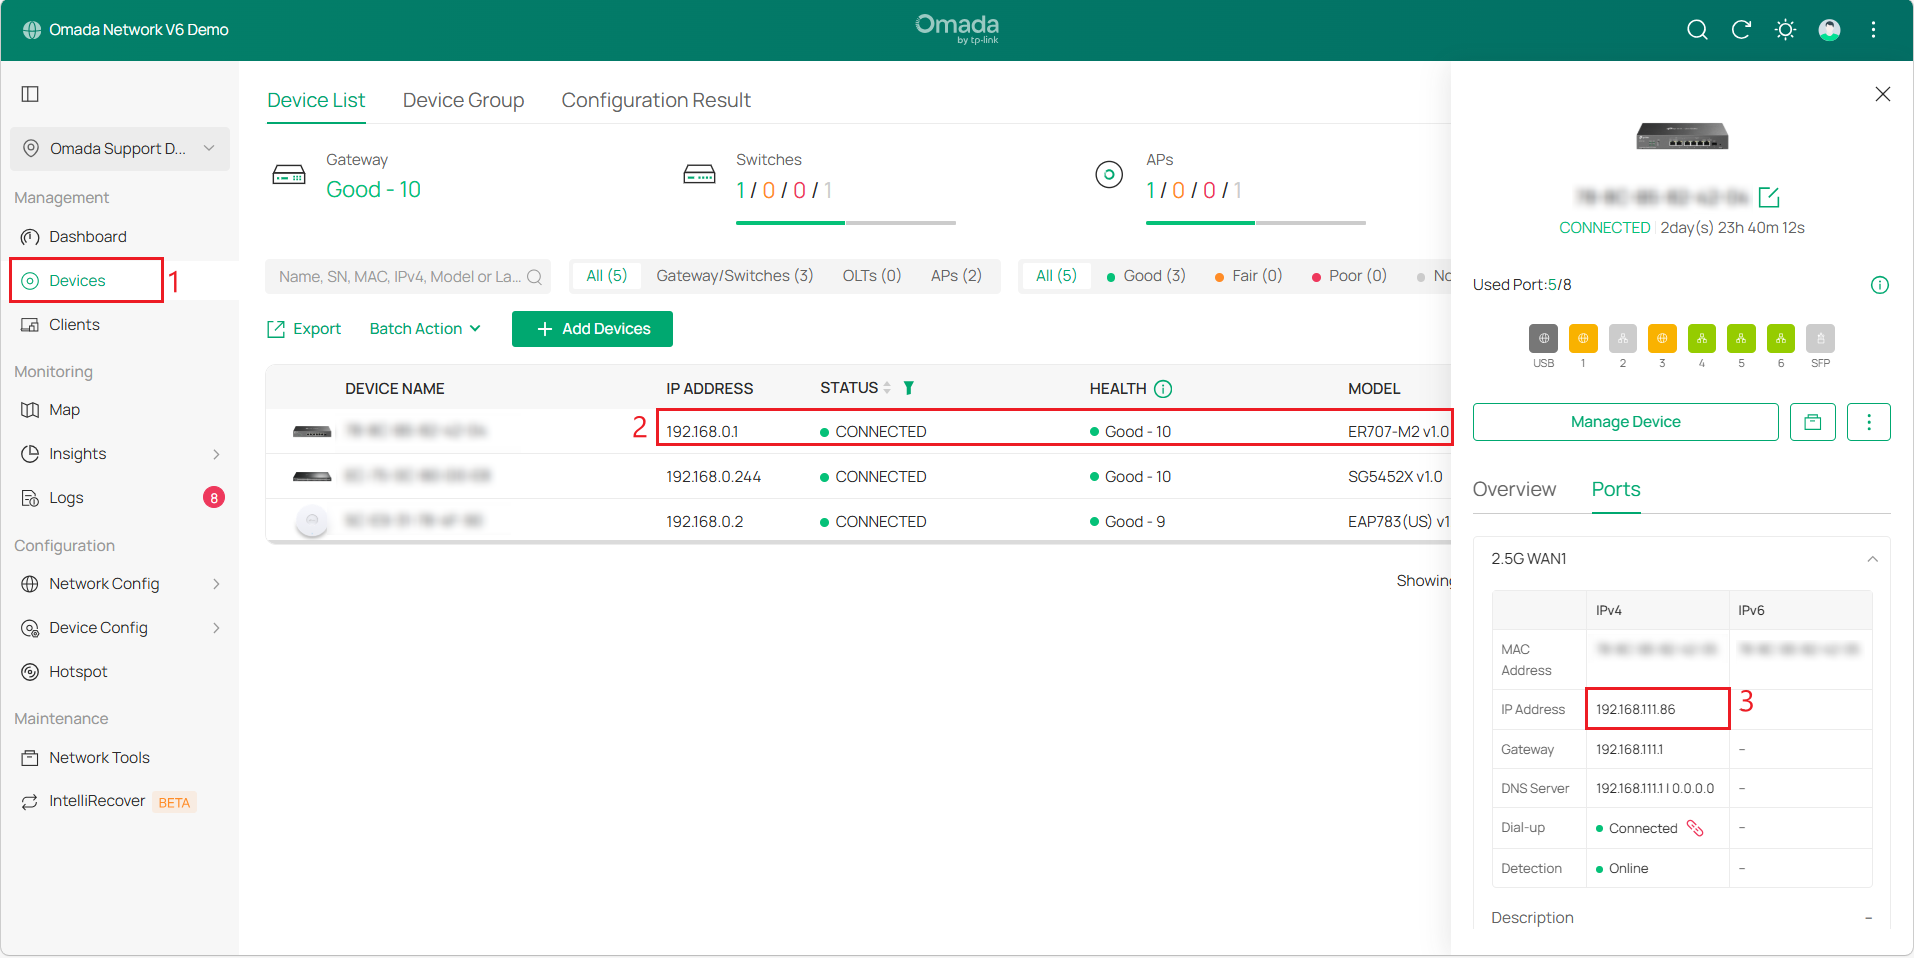
Step 1. Log in to the Omada Controller, navigate to Site View > Devices, and verify Gateway A's LAN IP. Click on Gateway A to open its properties window. Then, go to the Ports tab to find Gateway A’s WAN IP.
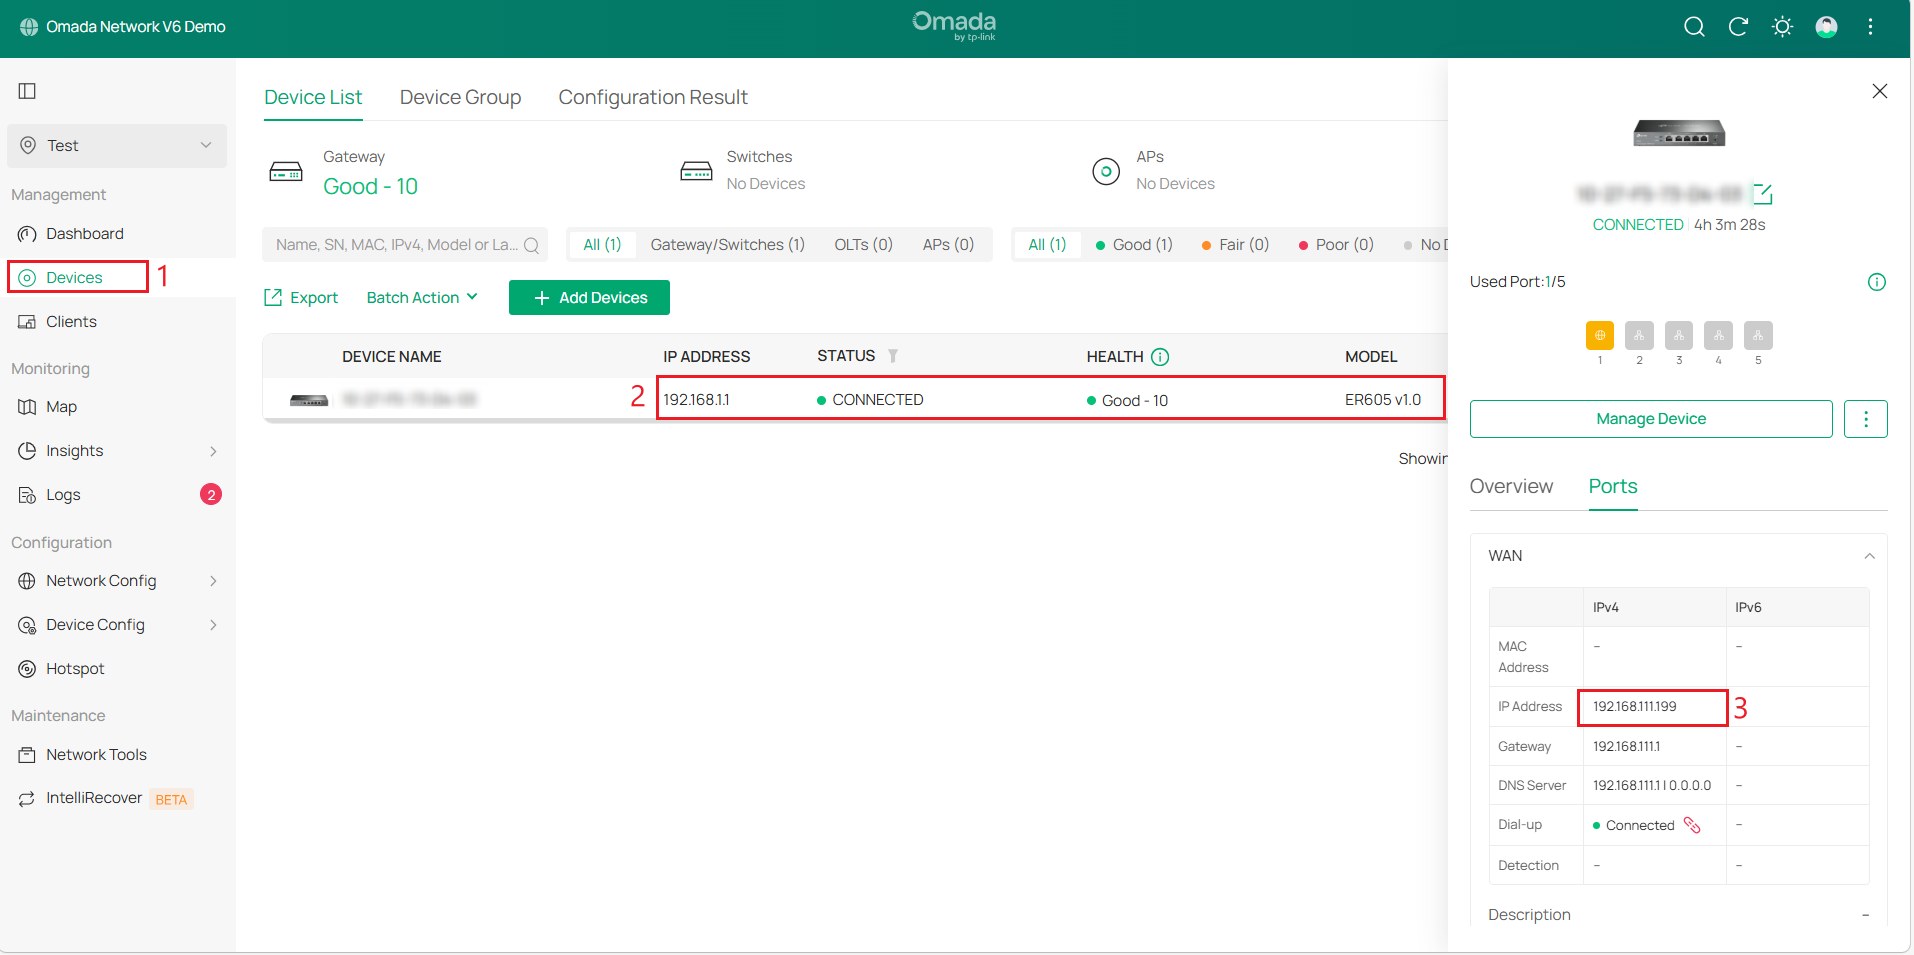
Repeat the above steps to get Site2_Gateway B’s WAN IP and LAN IP.
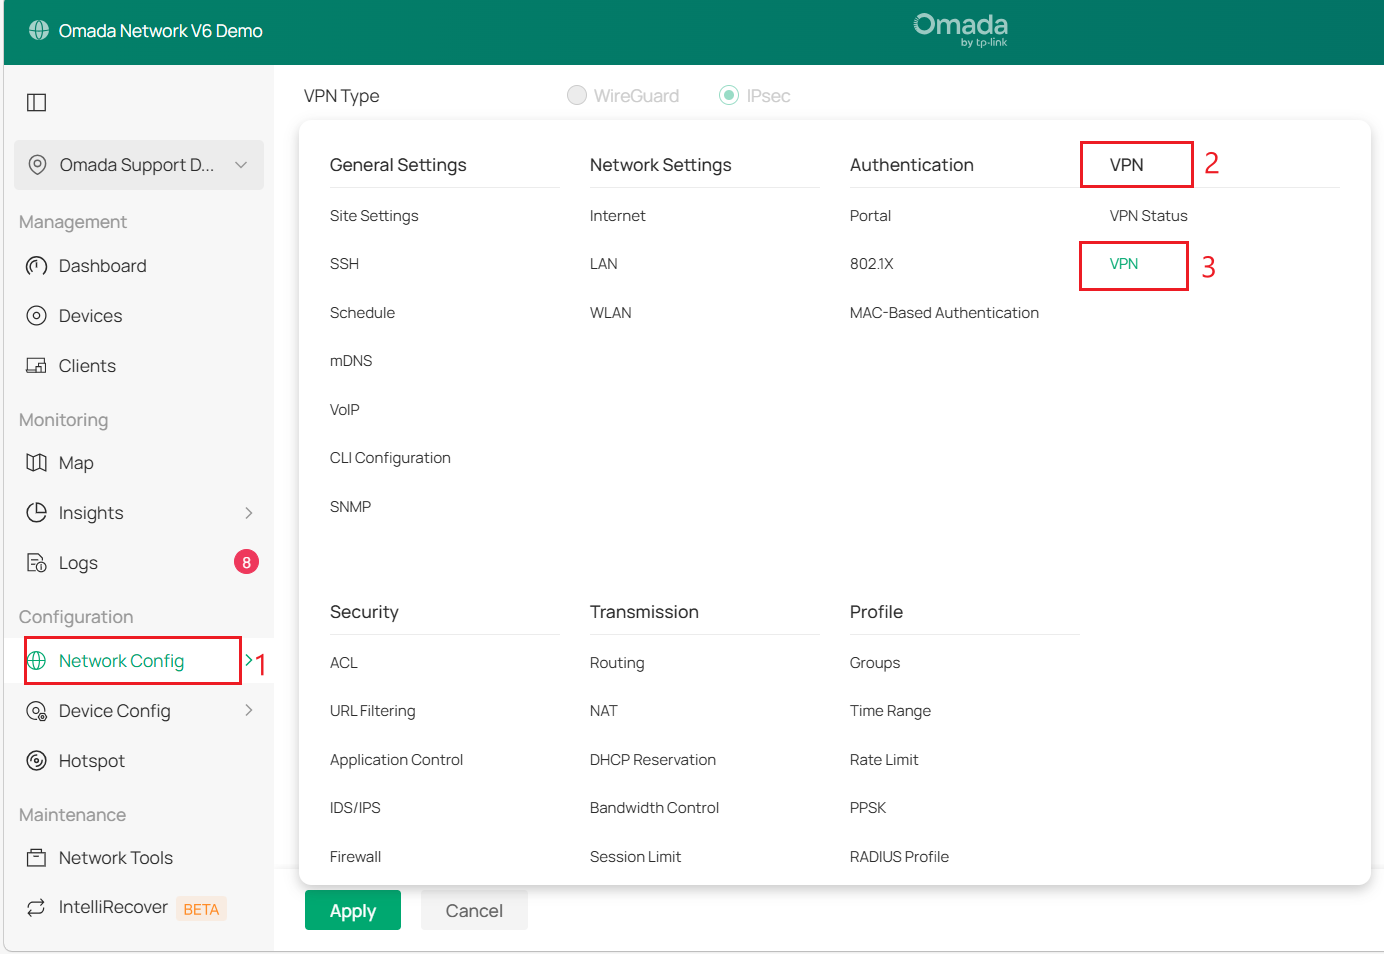
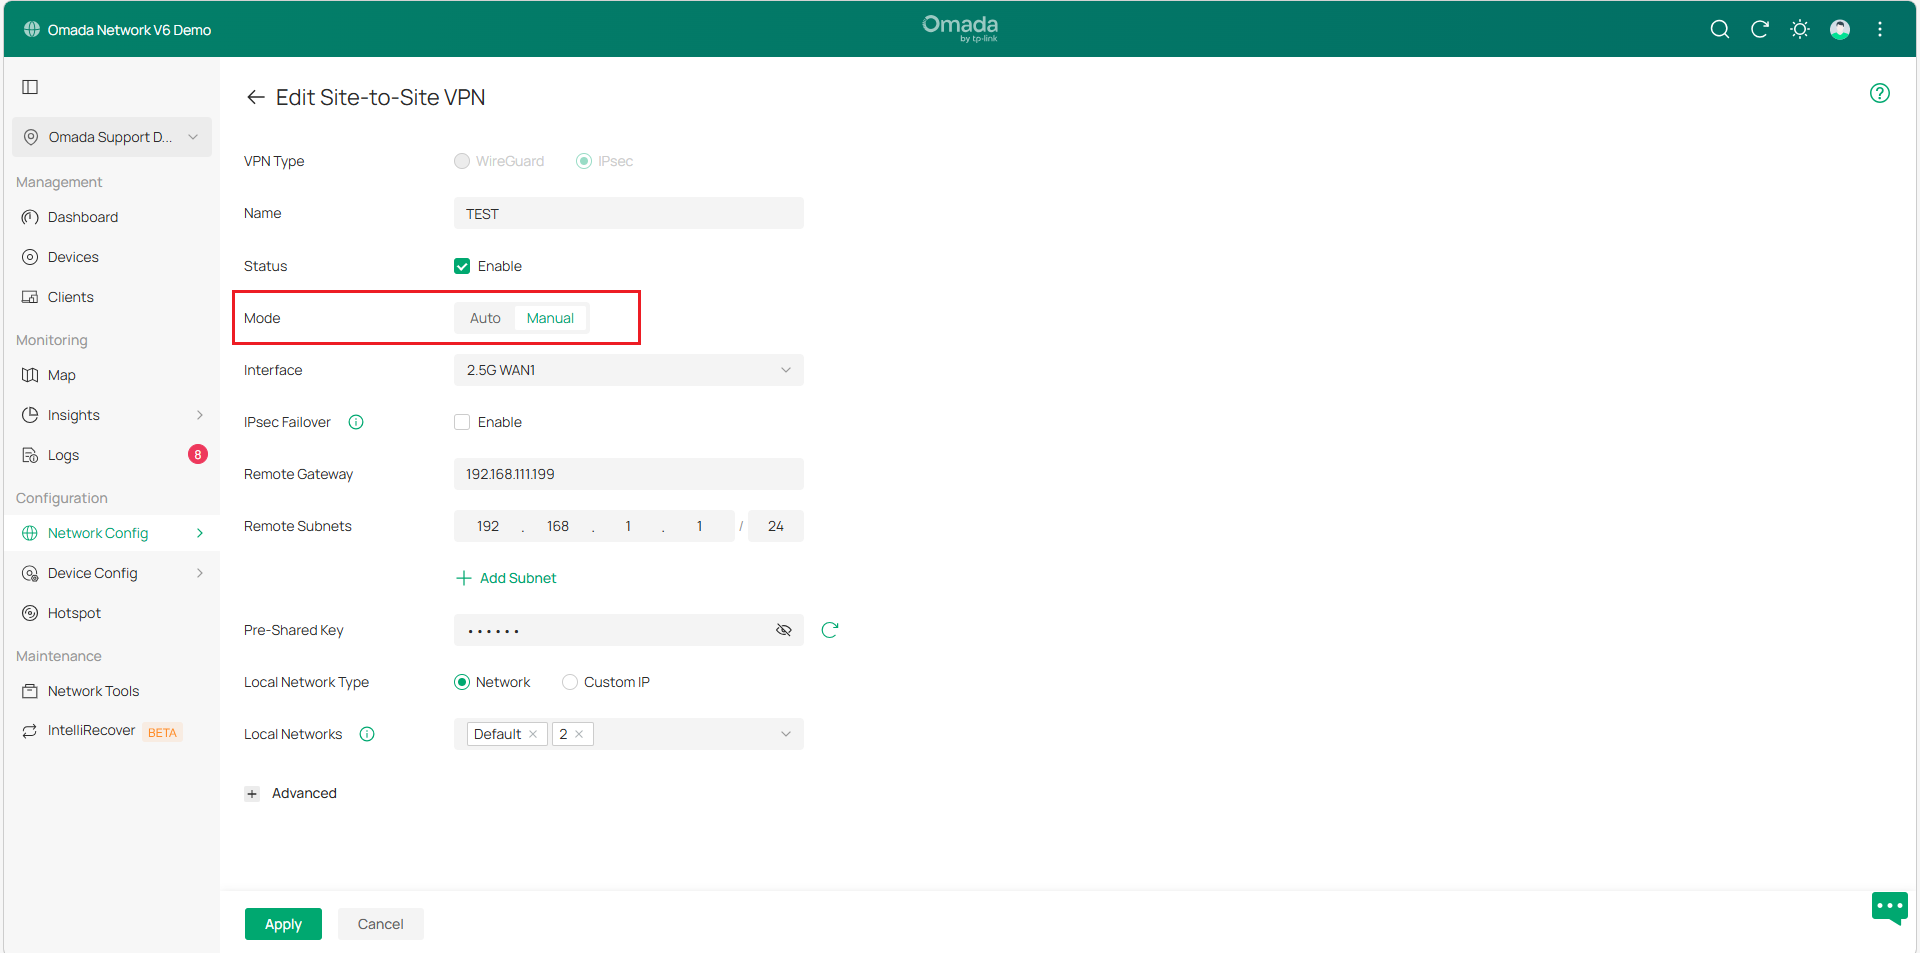
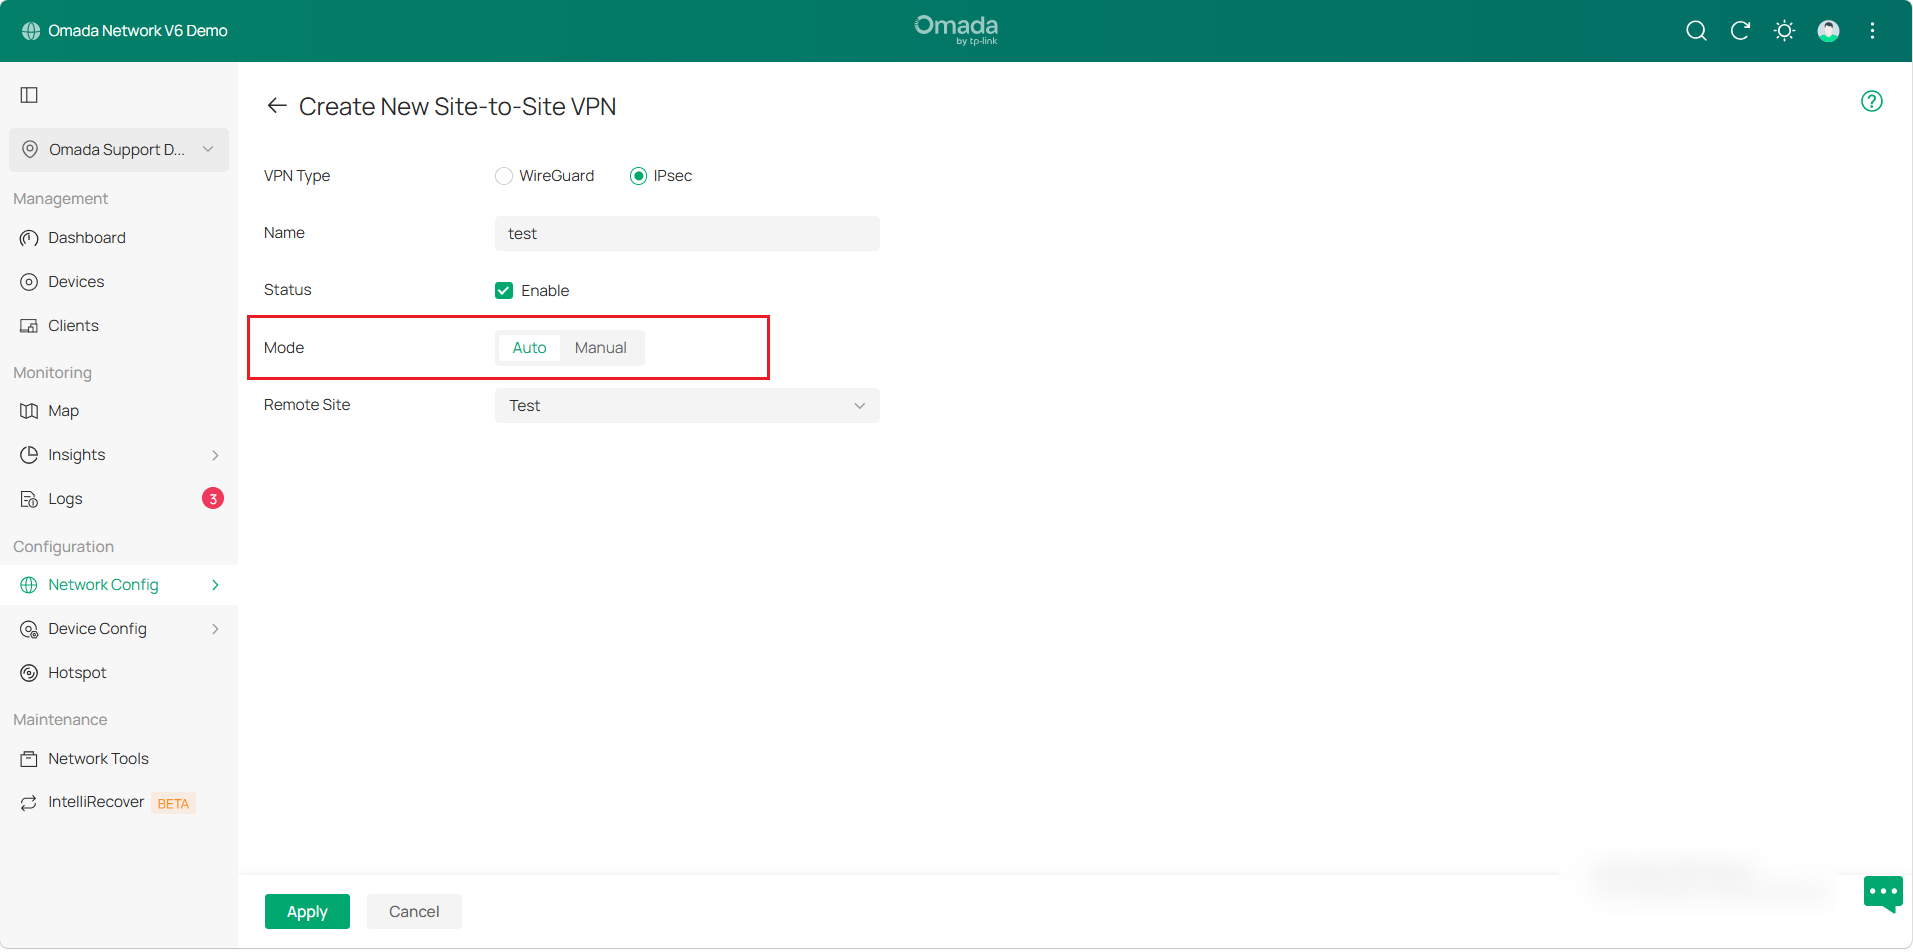
Step 2. Go to Network Config > VPN > VPN > Site-to-Site VPN to create and configure an IPsec VPN policy on gateway A.
Step 3. Select the Manual mode and refer to the explanation table below to configure the parameters.
|
Status |
Check the box to enable the VPN tunnel. |
|
Remote Gateway |
Enter the WAN IP address/domain name for Gateway B. |
|
Remote Subnets |
Enter the LAN IP address range for Gateway B. |
|
Local Networks |
Select the networks in Gateway A, and the VPN policy will be applied to the selected networks. |
|
Pre-Shared Key |
Enter the Pre-Shared Key (PSK) that serves as the authentication key. Both sites must use the same PSK for authentication. |
|
WAN |
Select the WAN port on which the VPN tunnel will be established. |
Note:
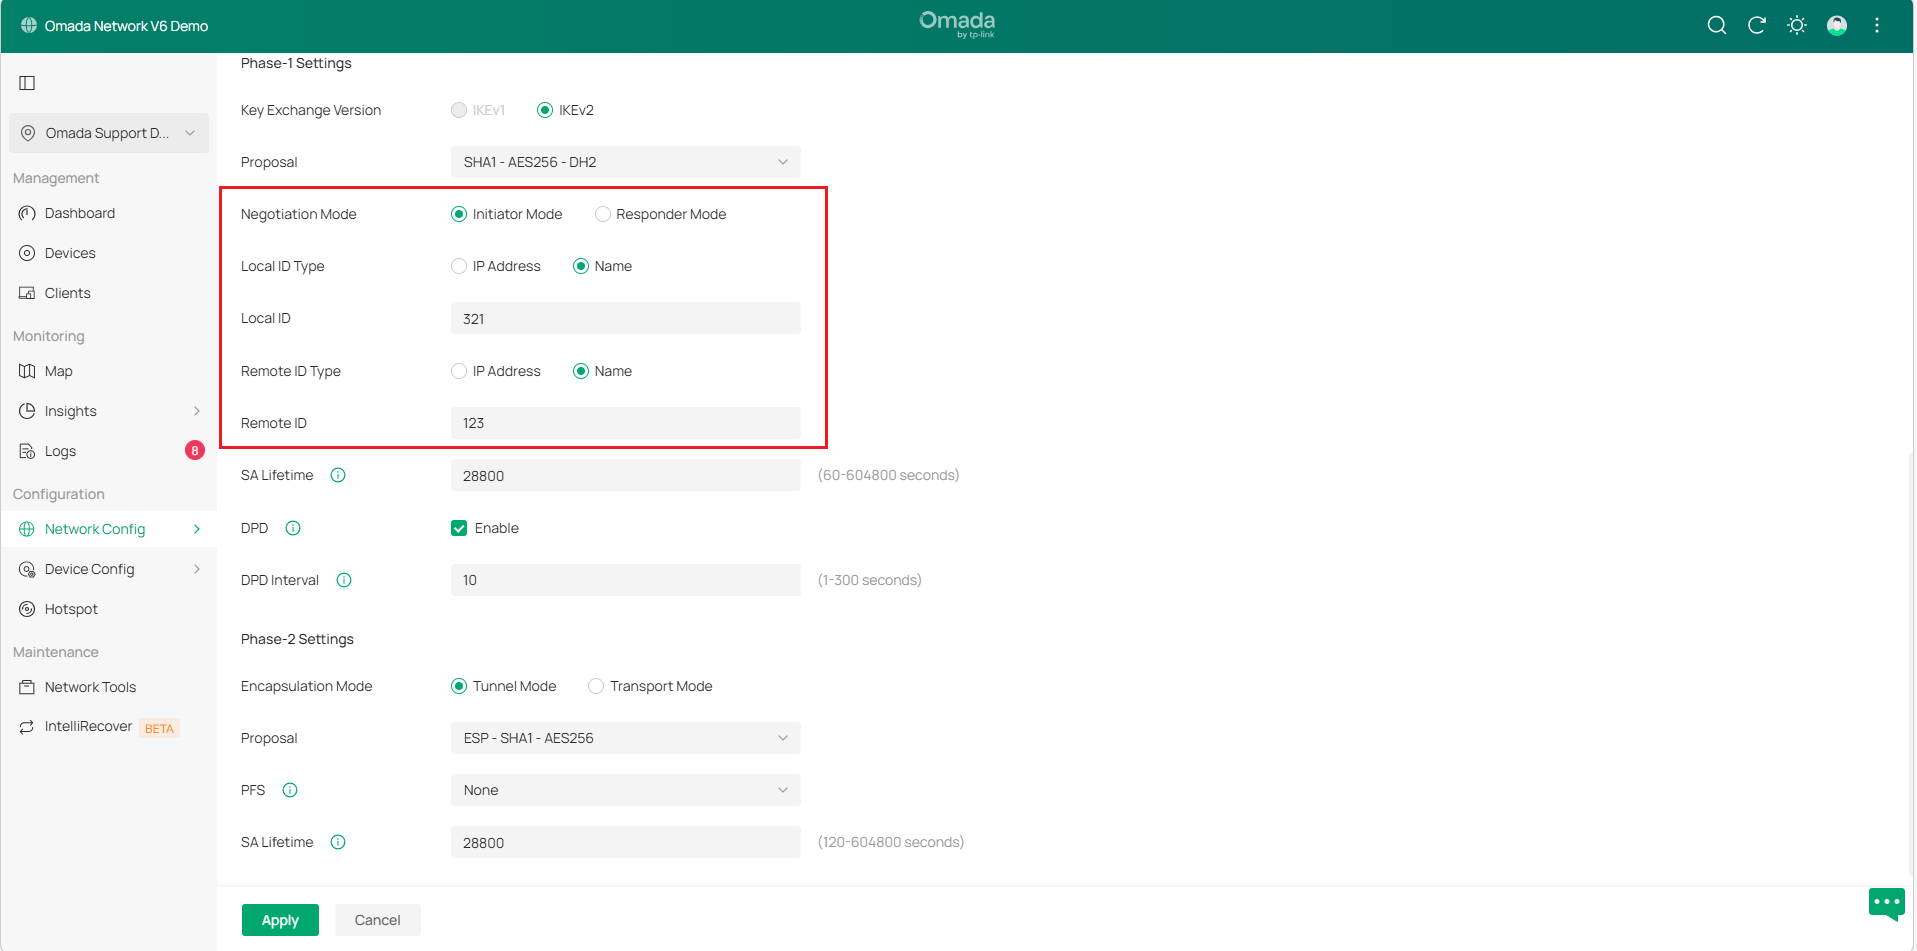
- If both gateways use public IP, set Negotiation Mode to Initiator Mode. At least one of Gateways A and B must be in Initiator mode; neither can be in Responder mode at the same time.
- If only gateway A uses a public IP, set gateway A’s Negotiation Mode to Responder Mode and enter 0.0.0.0 in Remote Gateway, indicating that IPsec negotiations initiated by all IPs are accepted. Set Local/Remote ID Type to Name according to your network requirement. You can also enter the public IP address of the remote network device in the Remote Gateway field.
Step 4. Change the Site View, go to Settings > VPN > VPN > Site-to-Site VPN to configure IPsec on gateway B.
Note:
- It is recommended to use IKEv2 mode for higher security and better performance unless the peer device only supports IKEv1 negotiation mode.
- IPsec IKEv1 does not support multiple remote subnets in a single tunnel. For configurations requiring multiple remote subnets, consider using IKEv2 or alternative solutions.
- The gateways at both ends must use the same negotiation mode, pre-shared key, and encryption algorithm to ensure the tunnel is successfully established.
- Avoid conflicts between the Remote Subnet and the Local Subnet
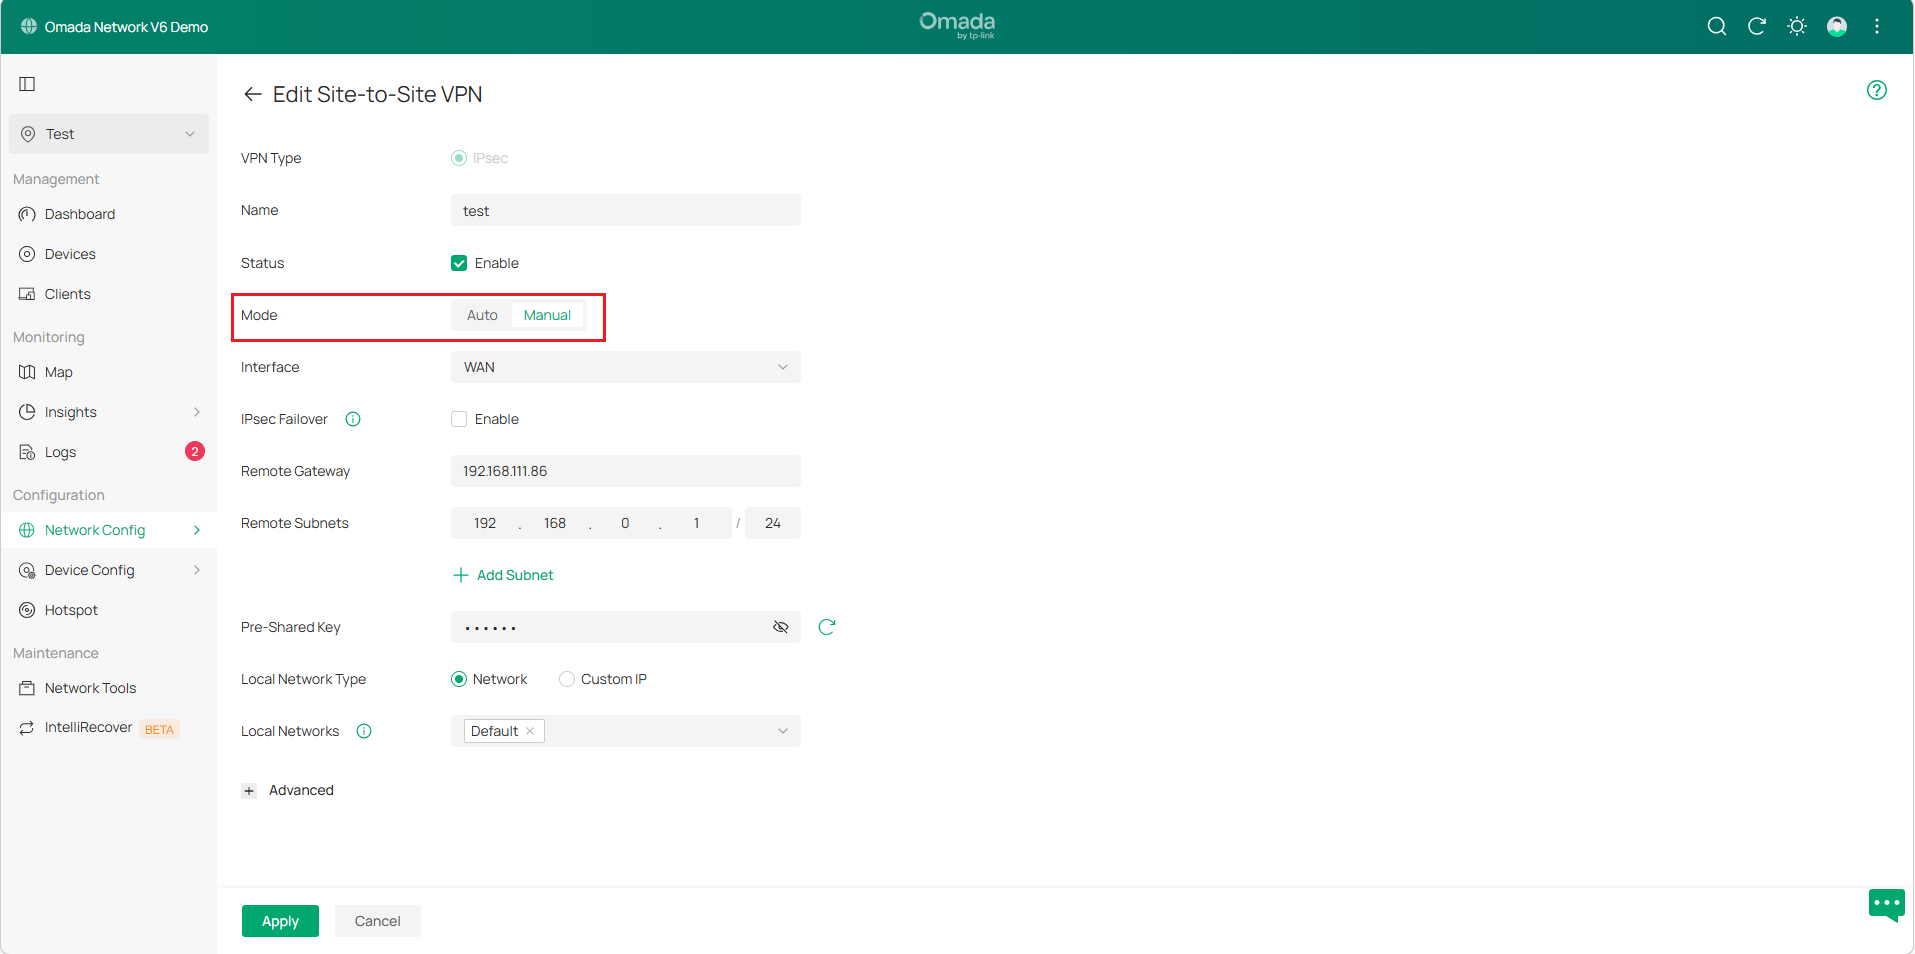
Configuration for Auto IPsec
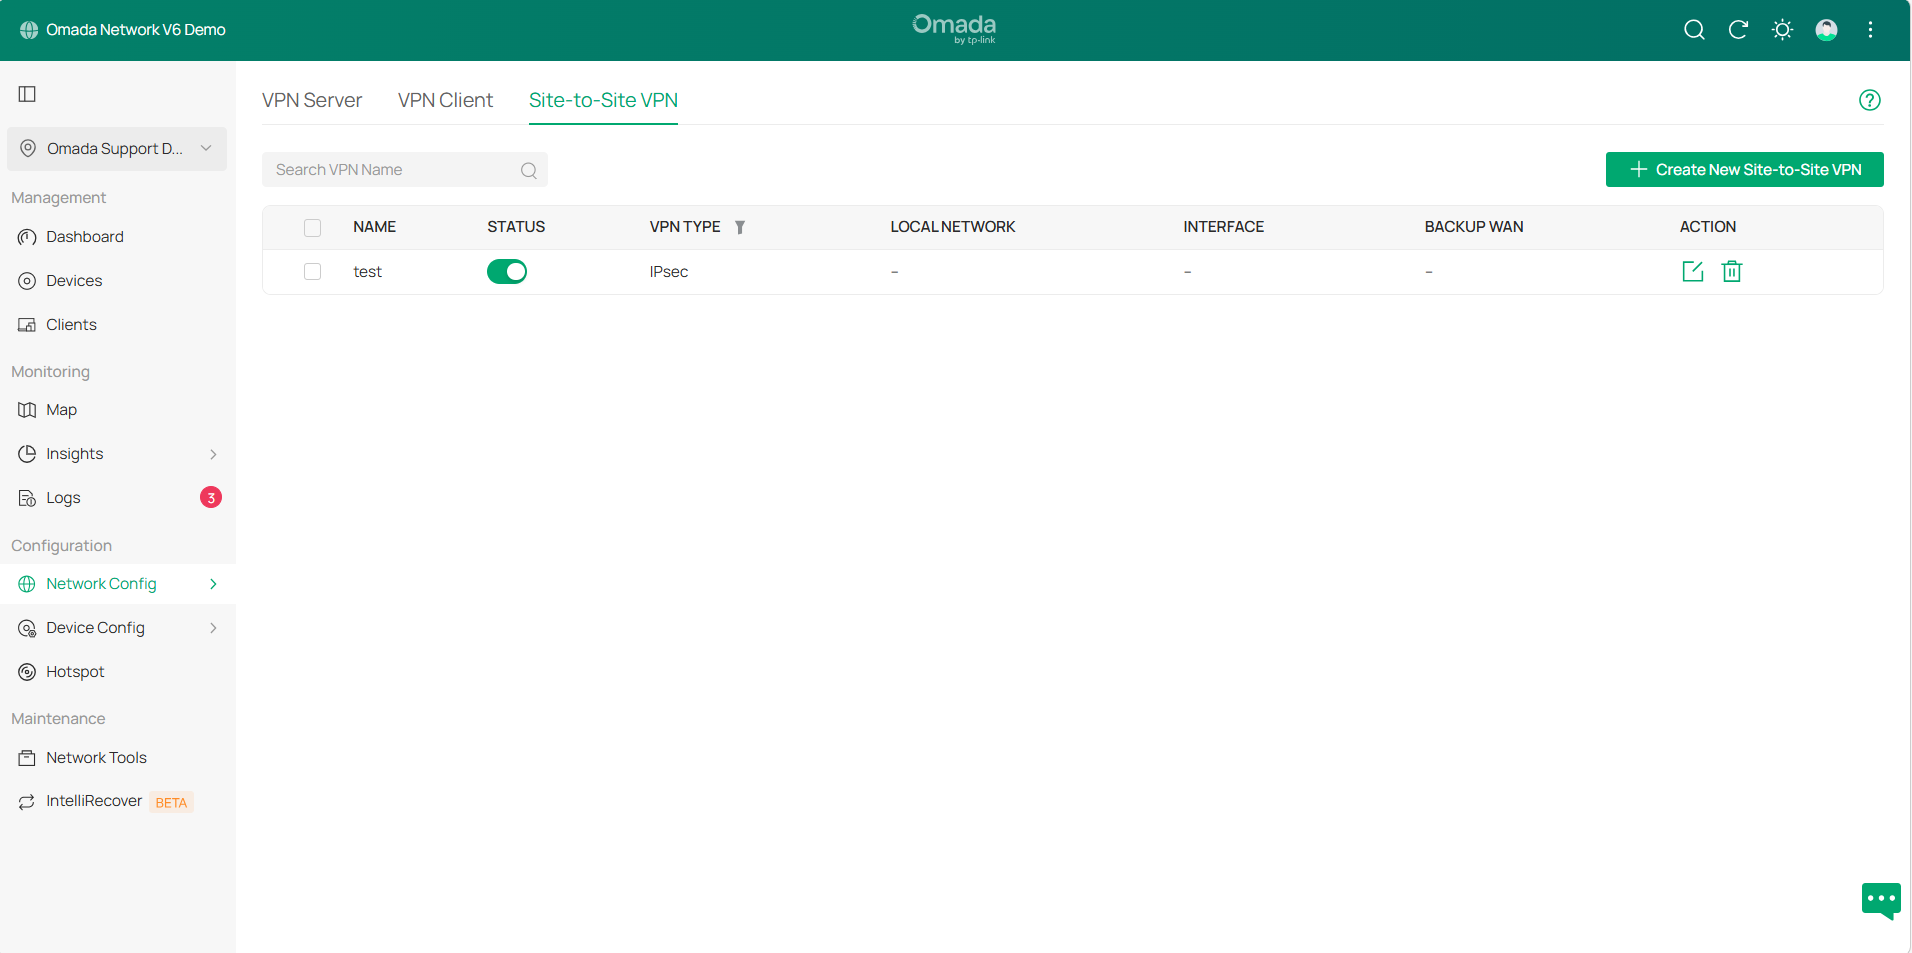
The setup process is the same as Manual IPsec. Select Auto mode, configure other settings as needed, and apply the settings.
And the VPN policy will be displayed automatically.
Configuration for IPsec Server
Most phones support IKEv2 VPN, especially after Android removed L2TP. When away from home, using your phone to connect to your router via VPN is a simple and secure way to access your network. To configure client-to-site VPN, please refer to the following steps:
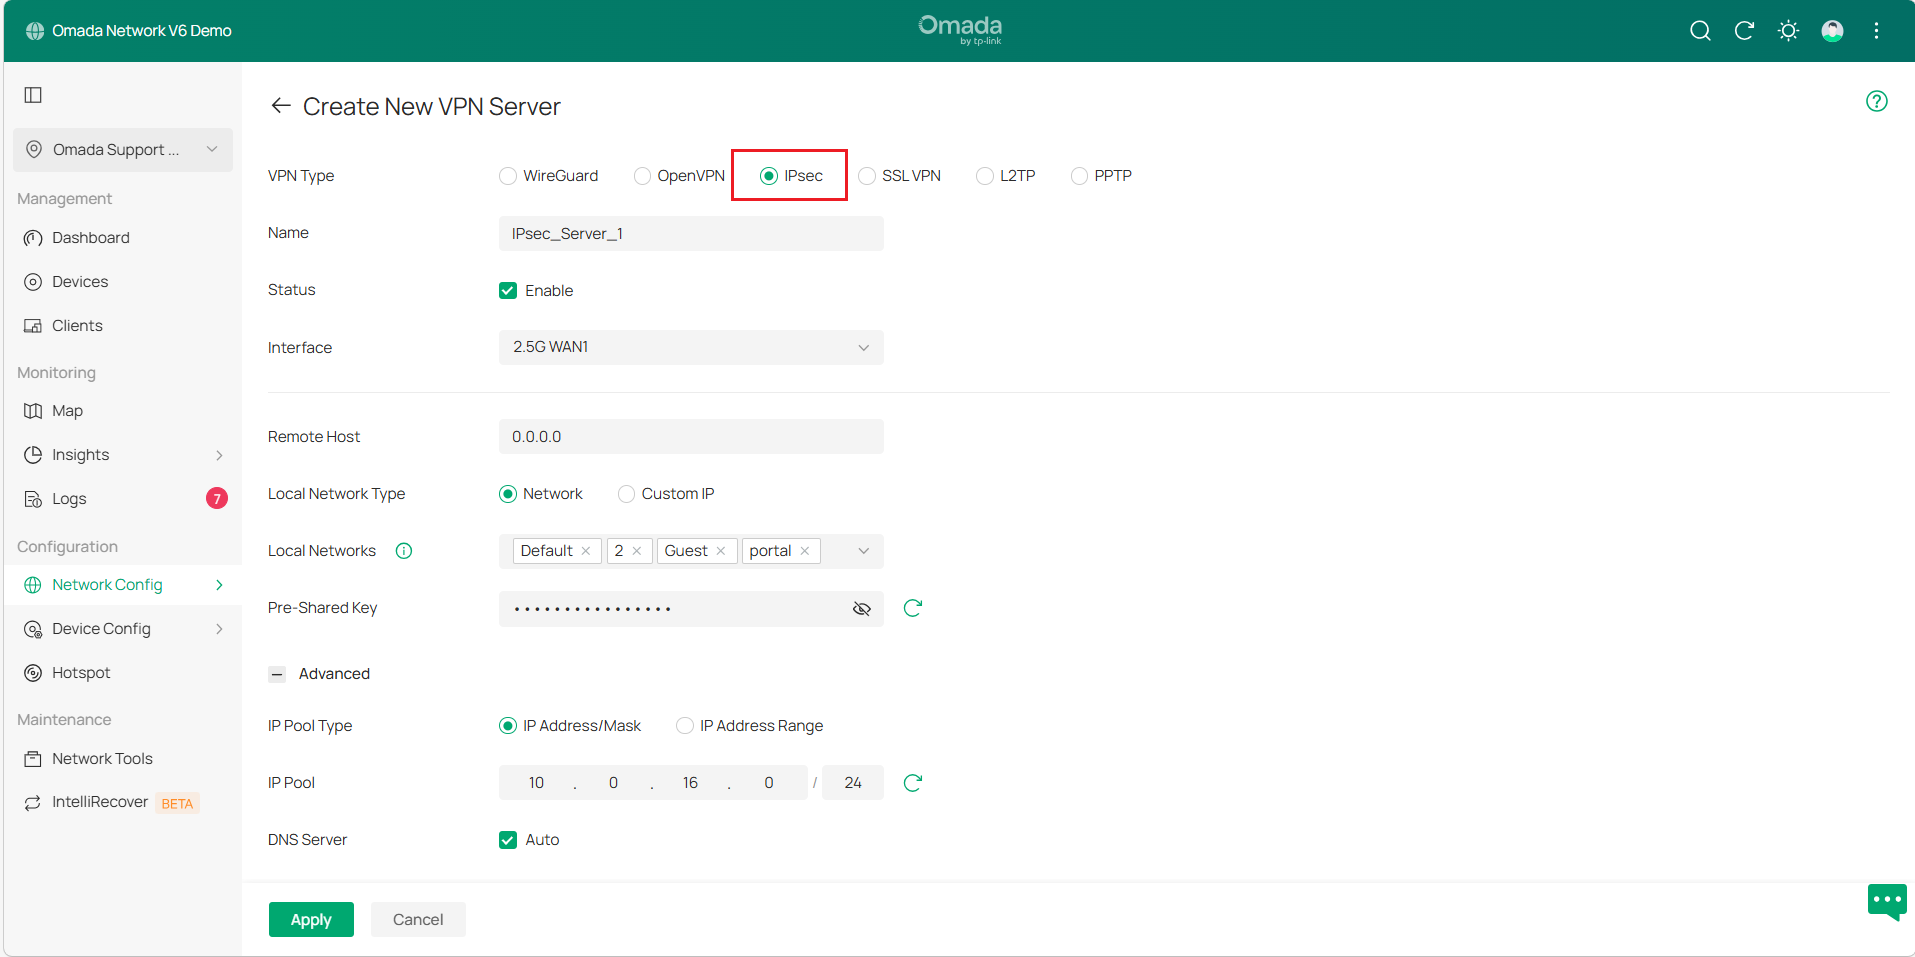
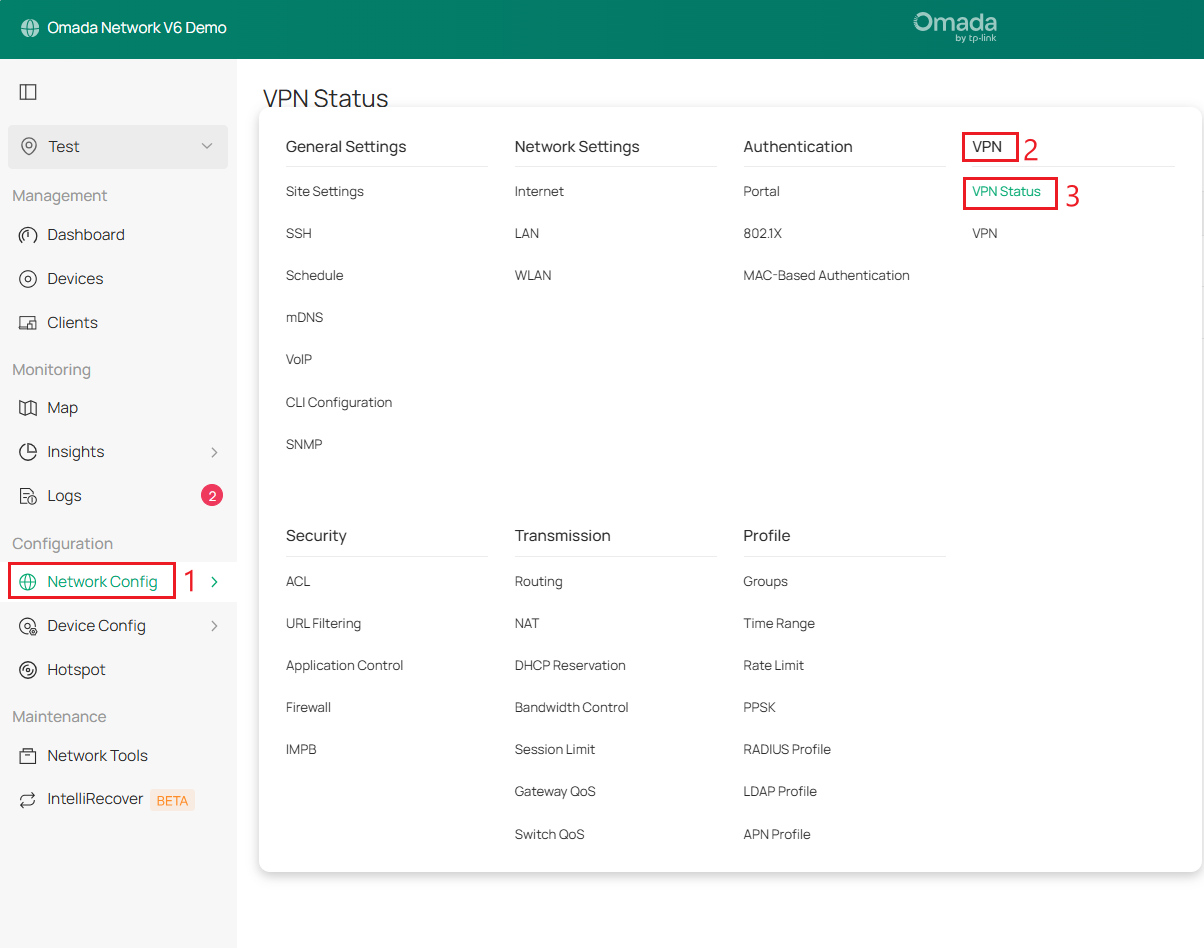
Step 1. Log in to the Omada Controller, navigate to Network Config > VPN > VPN >VPN Server to create a new VPN server, configure the basic parameters for the IPsec policy, or use the default settings.
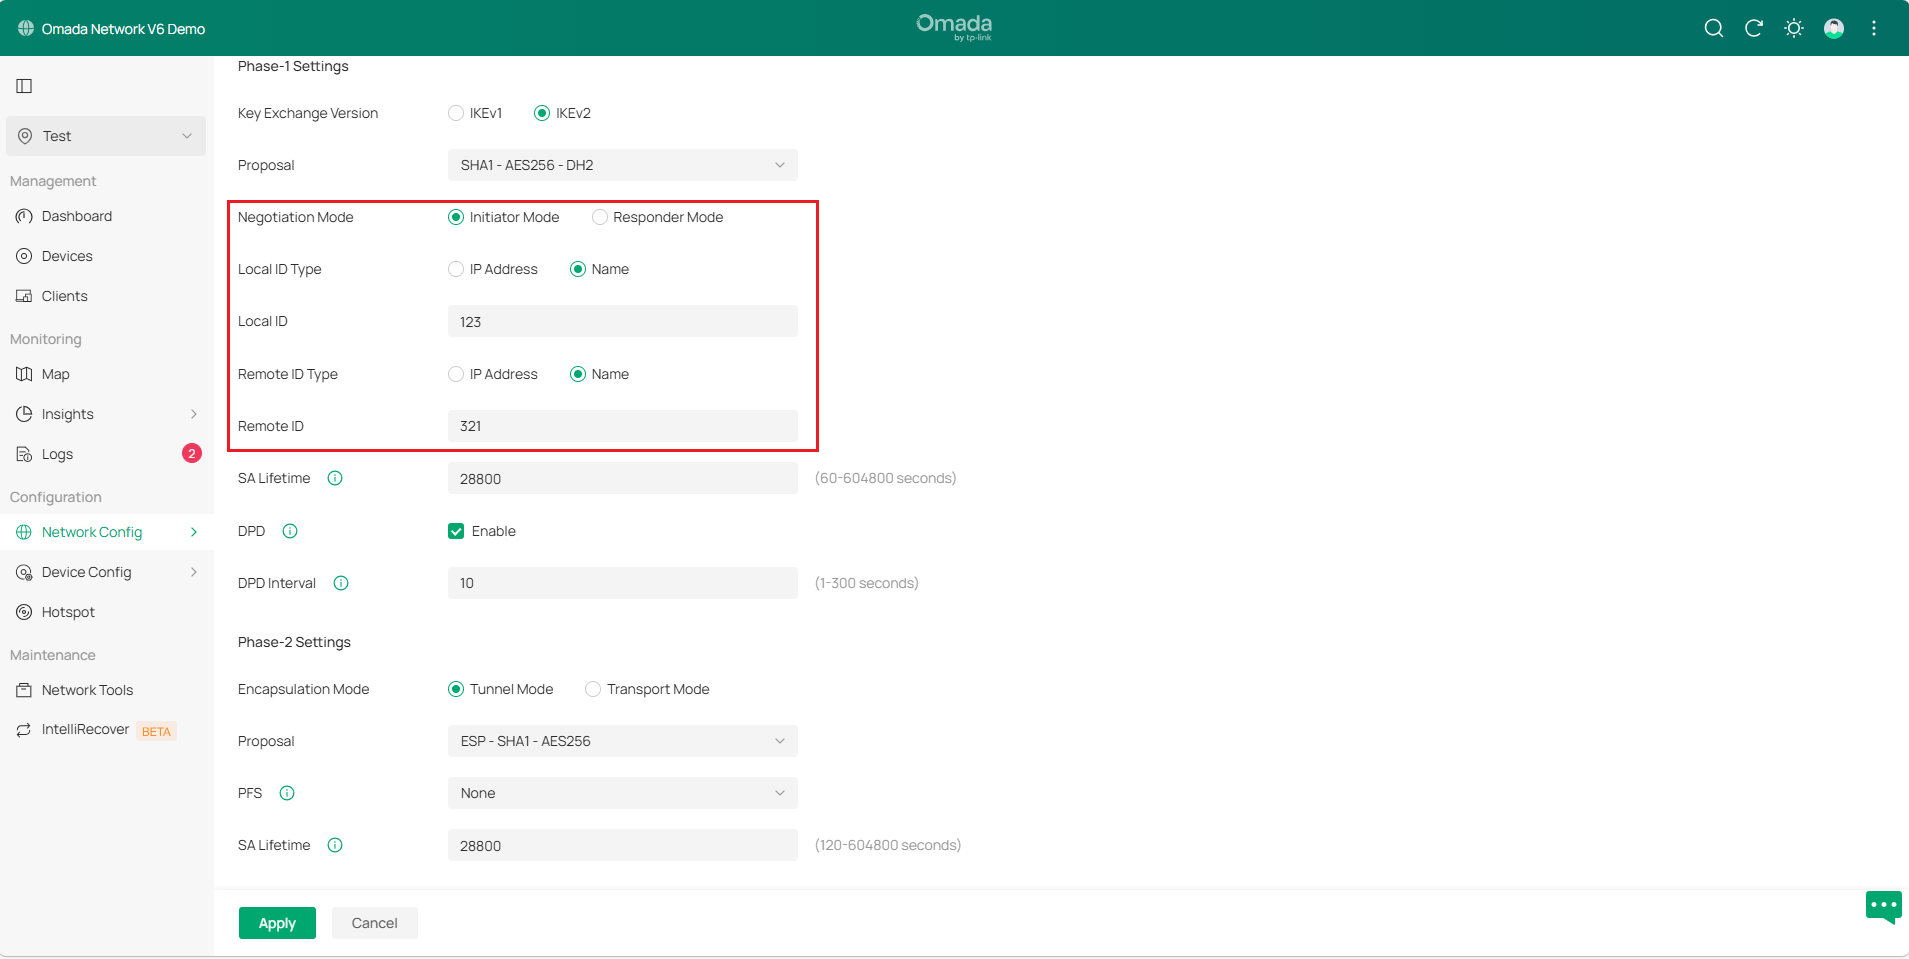
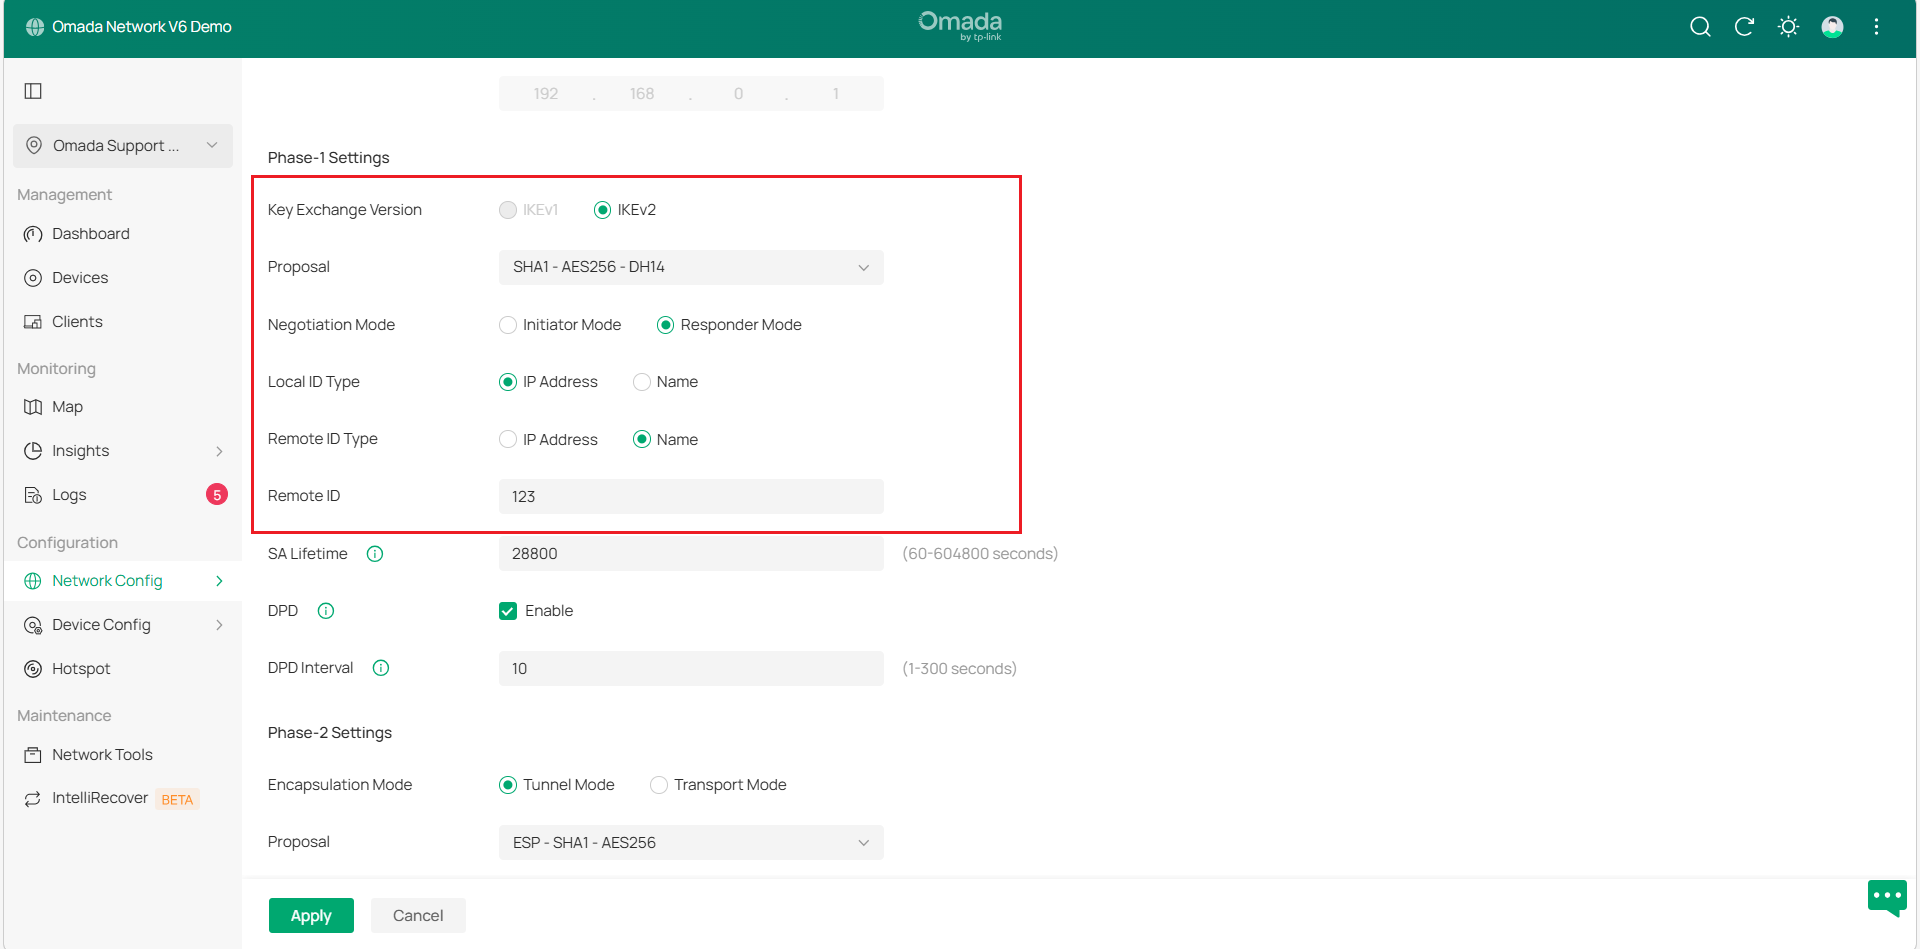
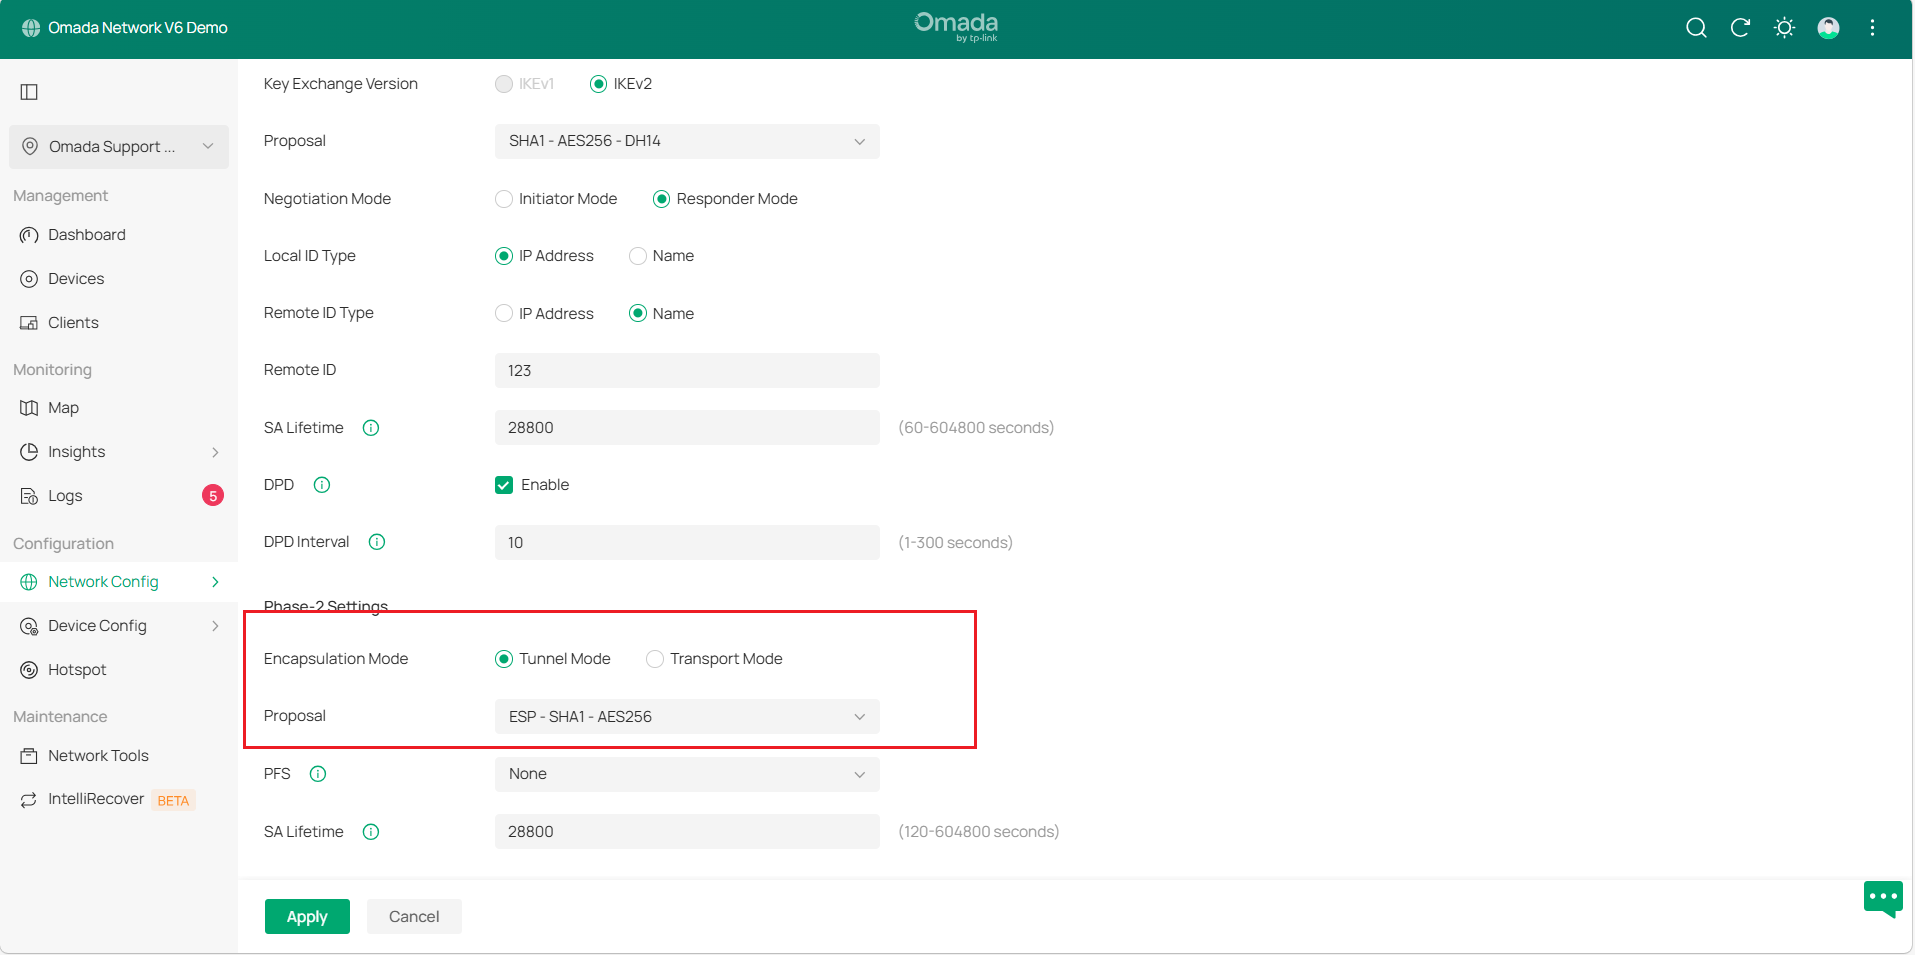
Step 2. Click Advanced Settings to load the following page, configure the Phase-1 Settings as follows:
- Select IKE Protocol Version as IKEv2.
- Select a proposal supported by the VPN client.
- Specify Negotiation Mode as Responder Mode.
- Specify Local ID Type as IP Address.
- Specify the Remote ID Type as NAME and specify the remote ID as 123.
Note:
1) For Samsung cellphones, the Remote ID type should be selected as IP address.
2) Since each phone supports different proposals, we only list some common proposal combinations here. If the above four combinations cannot be successfully connected, please contact TP-Link technical support.
3) Since IKEv2 for Android cannot edit the Local ID Type, only the IP address can be used. So it is required that there must be no NAT device on the front of the Omada router, which means the WAN IP address of the Omada router must be a public IP address for the client to be able to connect successfully.
Step 3. Configure the Phase-2 Settings as follows:
- Specify Encapsulation Mode as Tunnel Mode.
- Select a proposal supported by the VPN client.
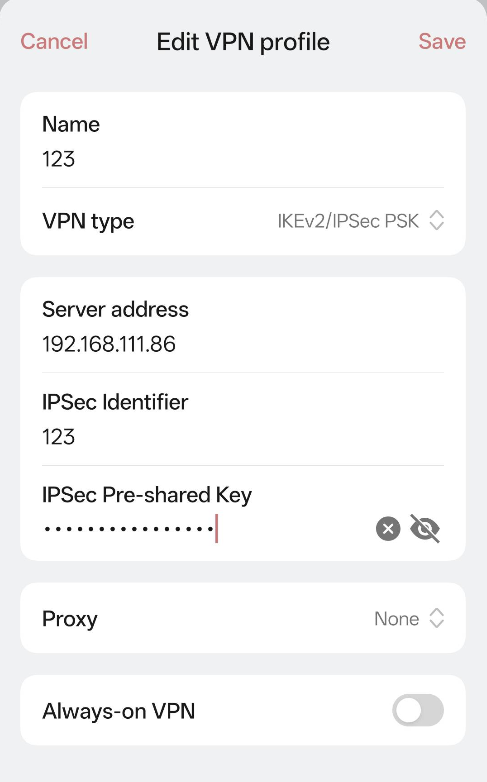
Configure the IKEv2 VPN settings on Android:
Here we use a phone with Android 12 as an example. Configure the IKEv2 VPN with the following parameters. Click Save and connect to the VPN server.
- Specify Name as test.
- Specify VPN type as IKEv2/IPsec PSK.
- Specify the server address as the Gateway WAN IP.
- Specify IP Identifier as 123.
- Specify IPsec Pre-shared Key.
- Specify Proxy as None.
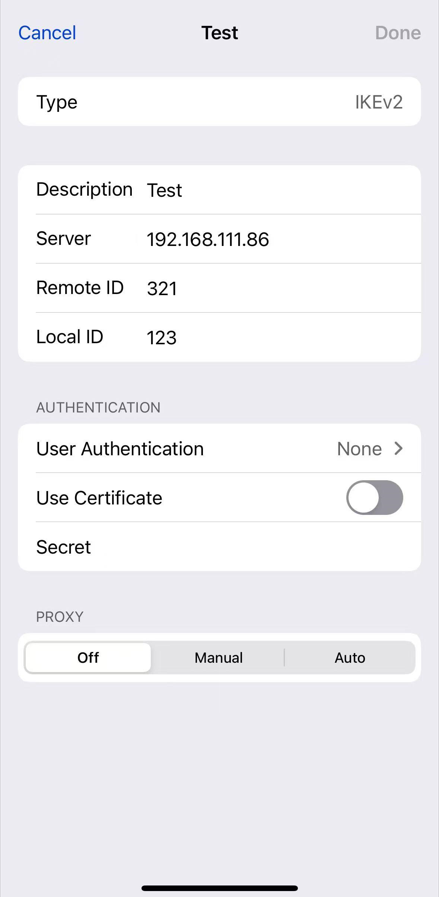
Configure IKEv2 VPN settings on iOS Devices:
Since iOS supports changing the Local ID Type, we set it to NAME in the phase-1 settings and specify Local ID as 321. The other settings are the same as above.
- Specify Type as IKEv2.
- Specify Description as Test.
- Specify Server as the Gateway WAN IP.
- Specify Remote ID as 321.
- Specify Local ID as 123.
- Specify User Authentication as None.
- Disable the Use Certificate.
- Specify Secret as IPsec Pre-shared Key.
- Specify PROXY as Off.
Verification
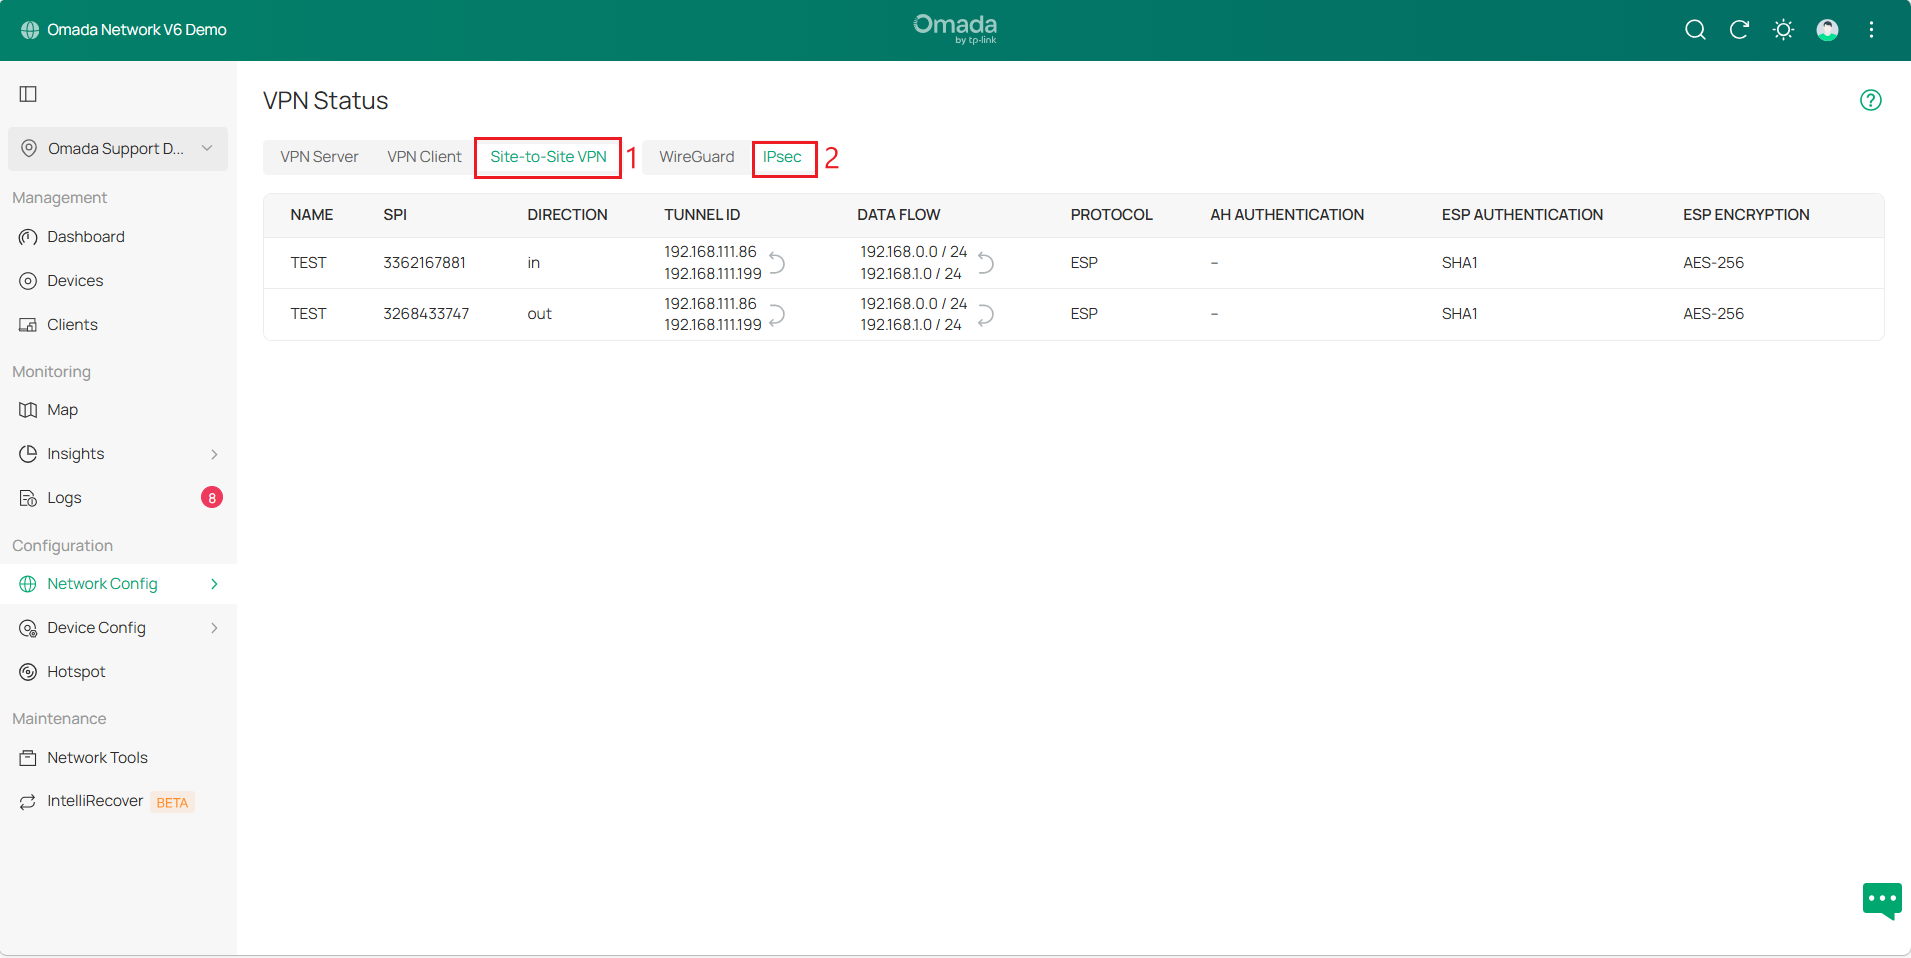
Go to Network Config > VPN > VPN Status > Site-to-Site VPN > IPsec to check the tunnel status.
Manual IPsec VPN tunnels:
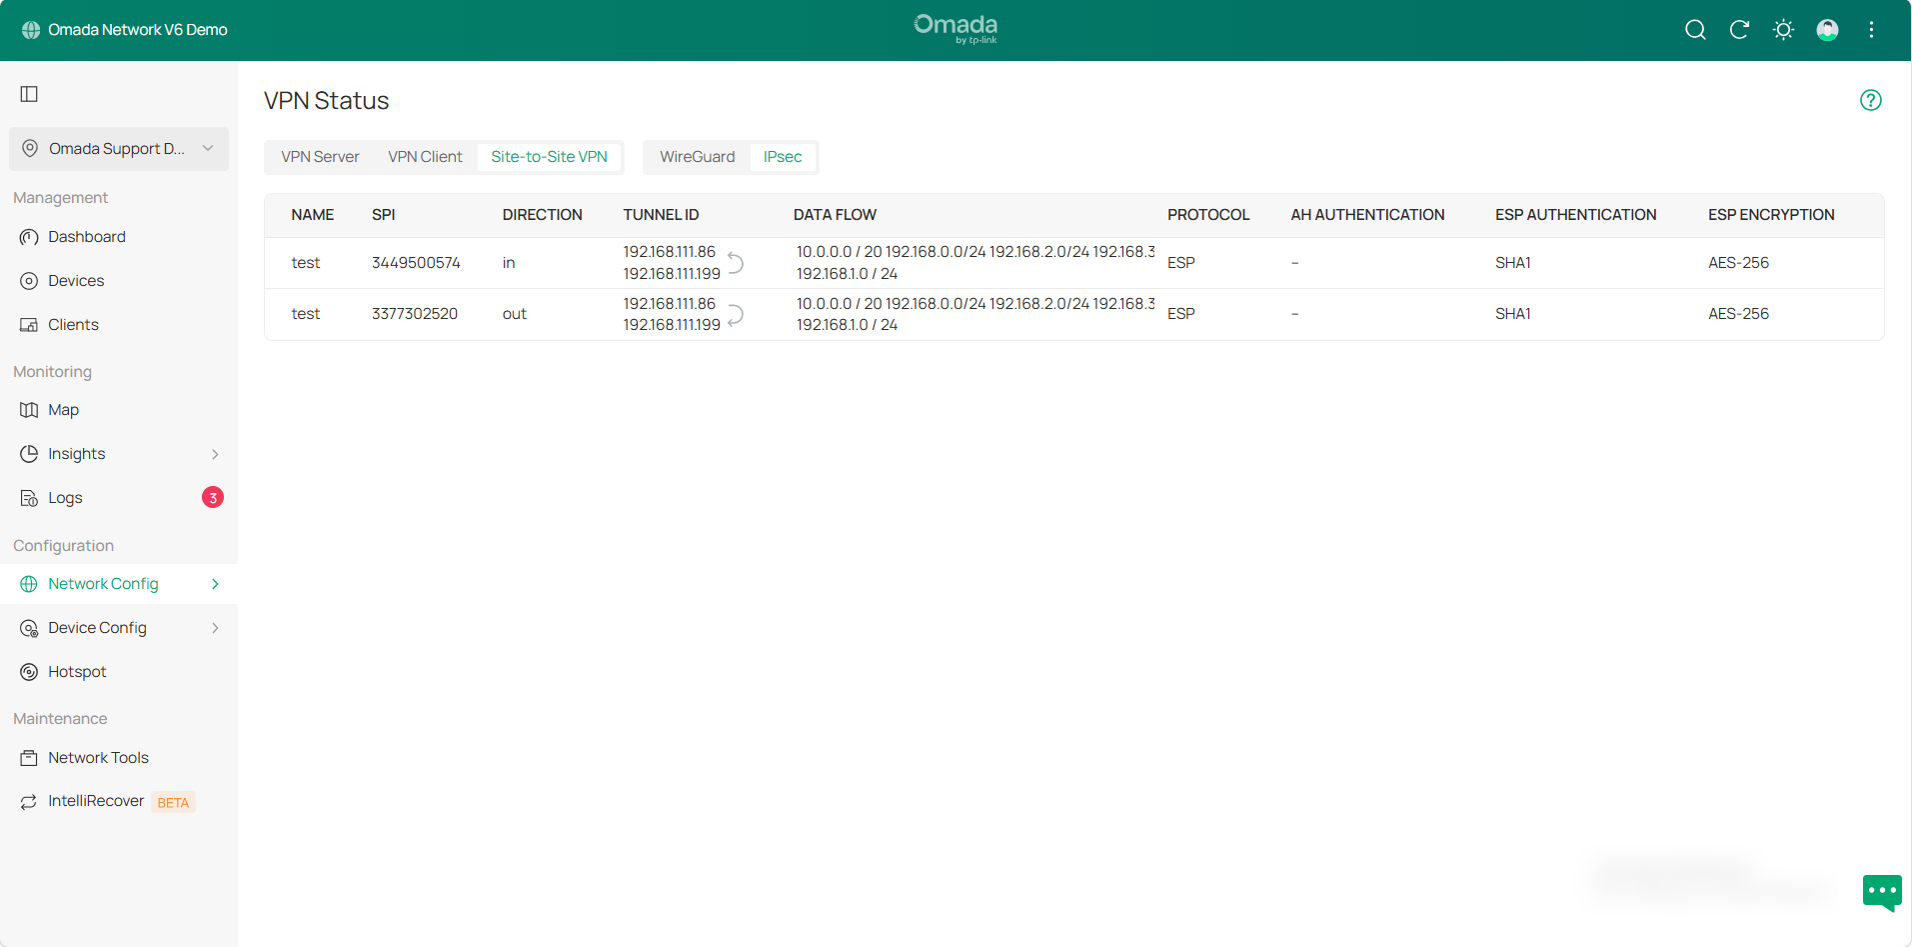
Auto IPsec VPN tunnels:
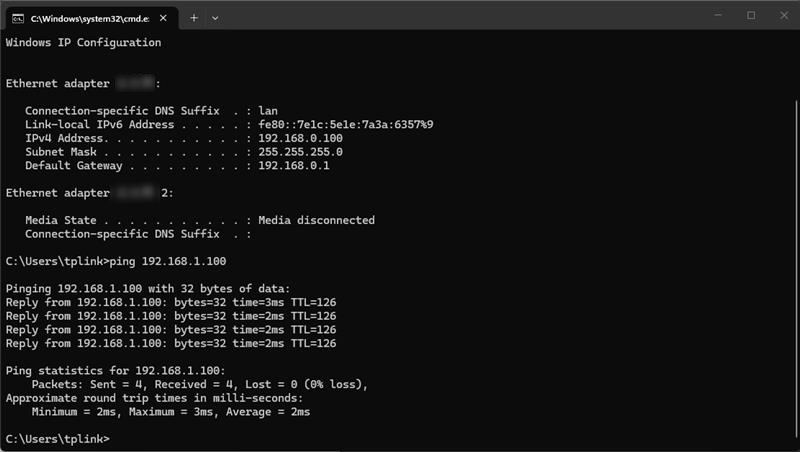
You can also try pinging the device's IP from a PC on the other Site. If there is a reply, it verifies that the IPsec VPN configuration was successful.
Conclusion
You have now successfully connected two sites via IPsec VPN.
Get to know more details of each function and configuration please go to Download Center to download the manual of your product.
