


Contents
Configure Portal Authentication in Omada App
Verify portal authentication settings
Introduction
Portal Authentication, also known as Captive Portal Authentication, is a web-based access control method that requires users to complete an authentication process before gaining Internet access. When a wireless client connects to an access point managed by Omada Controller, the client is redirected to a customized portal page where authentication credentials or access information must be provided.
Portal Authentication is commonly used in hotels, restaurants, shopping malls, offices, schools, airports, and other public venues. It helps administrators control network access, manage guest users, and deliver a branded login experience.
This article explains how to configure Portal Authentication using the Omada App, including creating a portal, generating vouchers, creating local user accounts, and verifying authentication settings.
Requirements
- Omada Controller v6 or later
- Android: Omada App v5.3.78 or later
- iOS: Omada App v5.3.22 or later
Configure Portal Authentication in Omada App
Create a portal
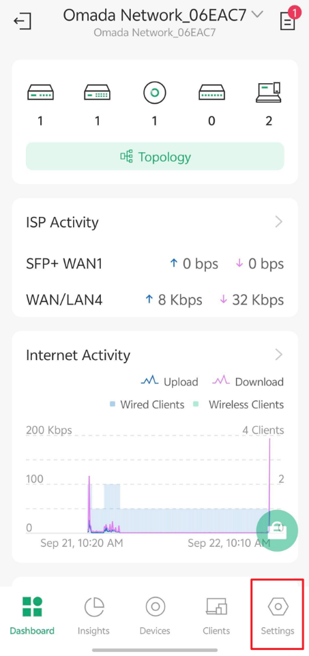
Step 1. Open the Omada App and sign in to the desired site. Tap Settings in the bottom-right corner.
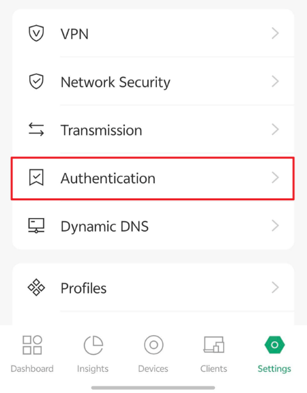
Step 2. Tap Authentication.
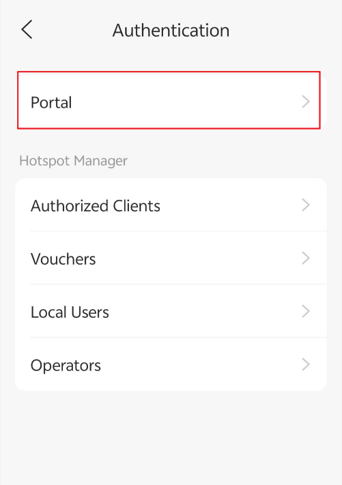
Step 3. Tap Portal to access Portal Authentication settings.
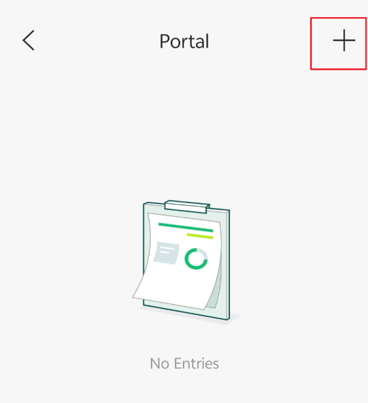
Step 4. Tap the “+” icon in the upper-right corner to create a new portal.
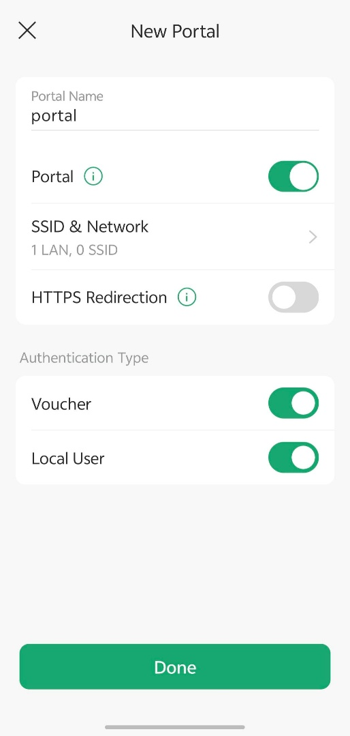
Step 5. Configure the following settings:
- Portal Name: Specify a name for the portal.
- Status: Enable or disable the portal. The portal takes effect only when it is enabled.
- SSID & Network: Select the SSID and network to which the portal authentication will be applied.
- HTTPS Redirection: Redirect clients to the HTTPS portal page after they connect.
- Authentication Type: Select the authentication methods for the portal, such as Voucher and Local User authentication.
After completing the configuration, tap Done.
Create and print vouchers
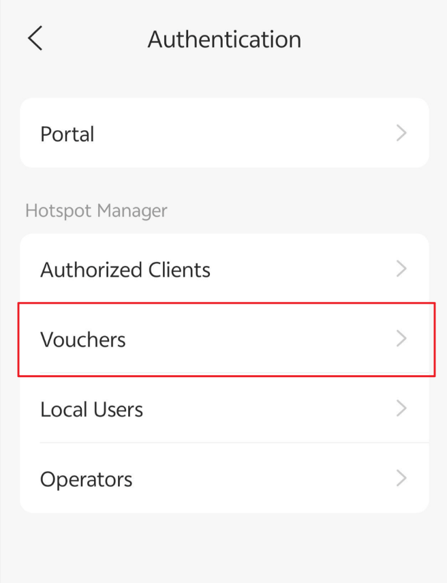
Step 1. On the Authentication page, tap Vouchers.
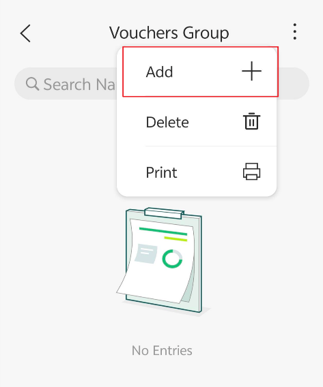
Step 2. Tap the "+" icon to create a voucher group.
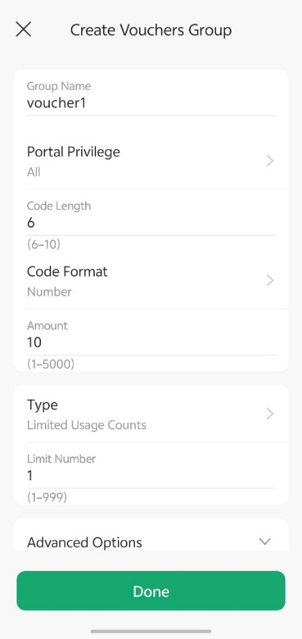
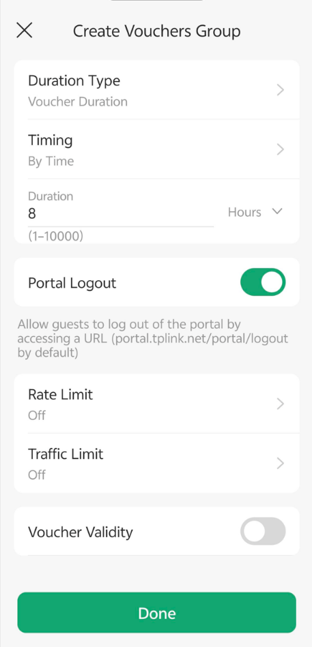
Step 3. Configure the voucher group parameters according to your deployment requirements, then tap Done.
Commen settings include:
|
Setting |
Description |
|
Group Name |
Specifies a name for the voucher group. |
|
Portal Privilege |
Selects the portal(s) that can use vouchers generated from this voucher group. |
|
Code Length |
Specifies the length of the voucher code. |
|
Code Format |
Selects the voucher code format, such as numeric or alphanumeric. |
|
Amount |
Specifies the number of vouchers to generate. |
|
Type |
Defines how vouchers can be used, such as limiting the number of usage counts. |
|
Limit Number |
Specifies the maximum number of times each voucher can be used. |
|
Duration Type |
Determines whether the validity period applies to the voucher itself (Voucher Duration) or to each authenticated client (Client Duration). |
|
Timing |
Specifies how the duration is counted. By Time counts continuously after first use, while By Usage counts only the accumulated usage time. |
|
Duration |
Specifies the length of time the voucher remains valid. |
|
Portal Logout |
Allows users to manually log out through the portal logout URL. |
|
Rate Limit |
Restricts the upload and download bandwidth available to authenticated users. |
|
Traffic Limit |
Limits the total amount of data that can be used through the voucher. |
|
Voucher Validity |
Sets an expiration date for unused vouchers. After the specified date, unused vouchers become invalid. |
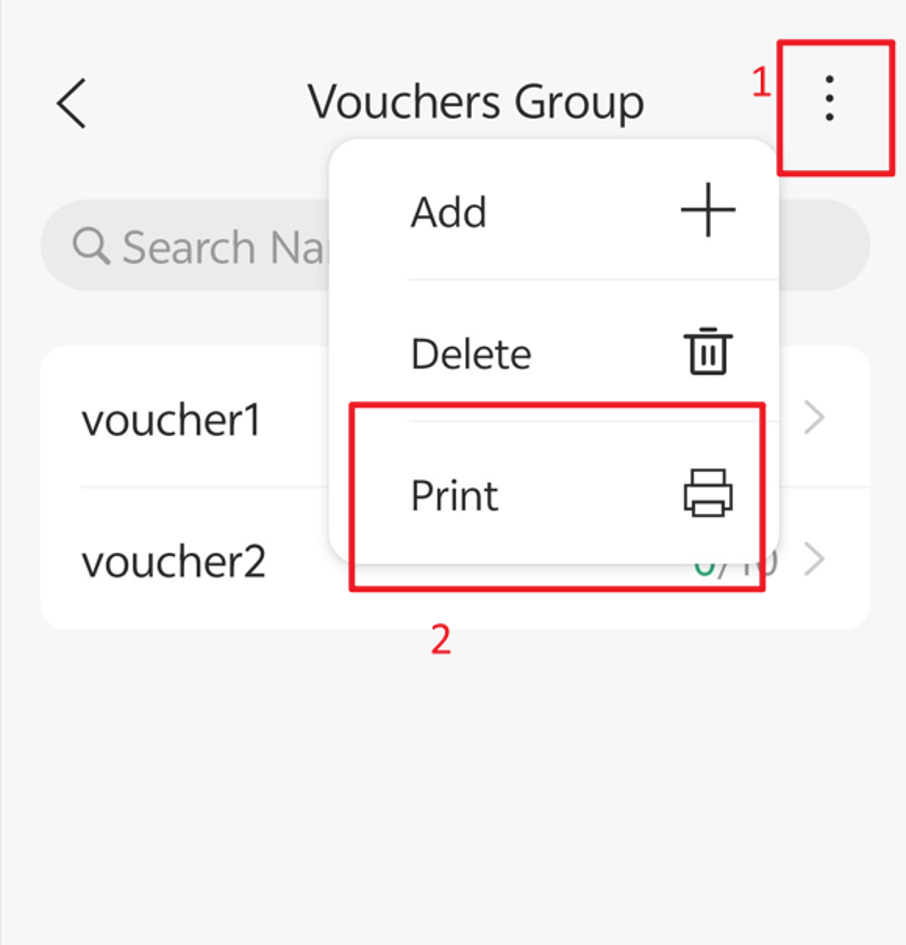
Step 4. Tap the menu in the upper-right corner, then select Print.
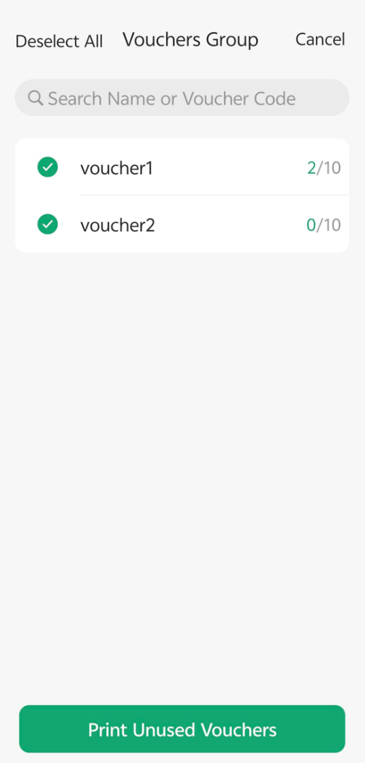
Select one or more voucher groups and tap Print Unused Vouchers to print the unused vouchers.
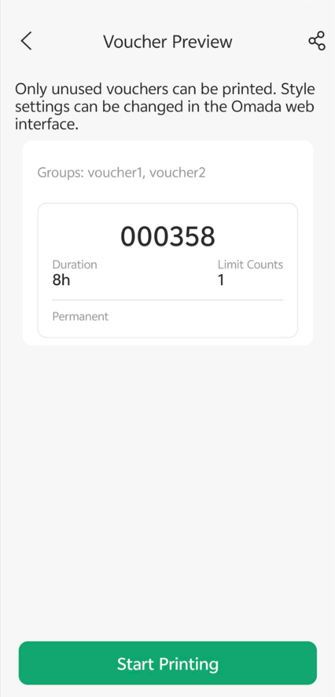
Step 5. Review the voucher preview and tap Start Printing.
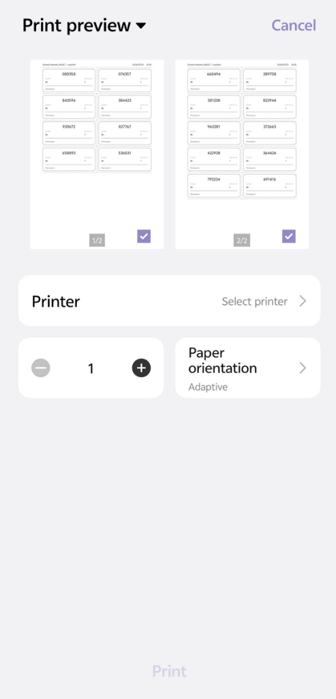
After tapping Start Printing, the app will open the system printing interface. On iOS, printing is performed through AirPrint; on Android, the system printing framework is used. You can preview the layout and configure print settings such as paper size and page orientation before printing.
If no printer is available, you can still save or share the generated PDF using the options provided by your mobile device.
Note:
1, The voucher preview displays the current voucher card style for the selected voucher group, including information such as the voucher code, duration, usage limits, and validity period. If the voucher group uses the default template, the default card style is displayed. If the voucher card style has been customized in the Omada Controller web interface, the customized style will be shown in the preview instead.
2, The voucher preview is provided only as a sample of the voucher group's card layout. The voucher code shown in the preview is for illustration purposes only and does not represent the actual voucher codes or the number of vouchers that will be printed.
Create local users
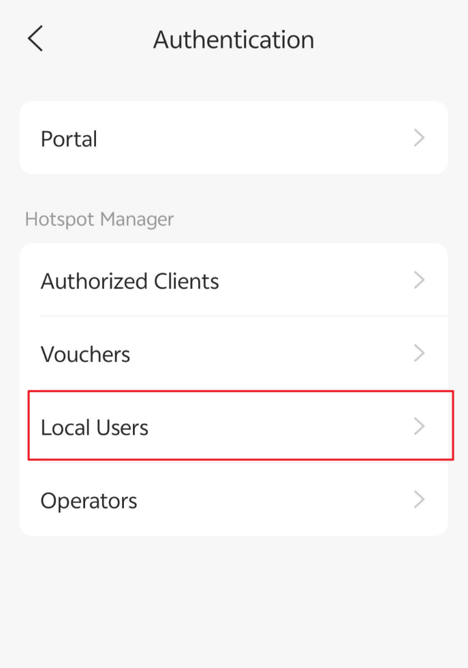
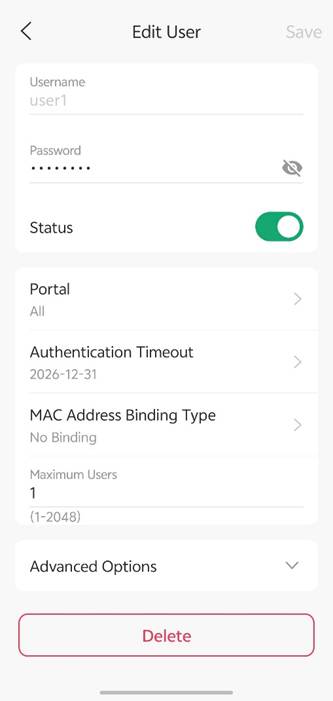
Step 1. On the Authentication page, tap Local Users.
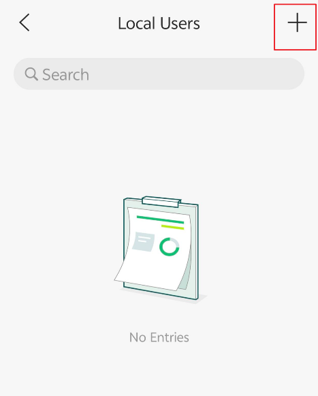
Step 2. Tap the “+” icon to add a local user.
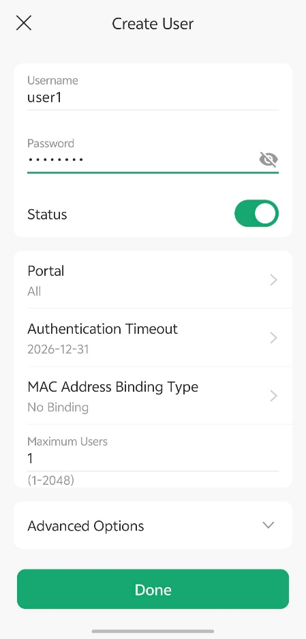
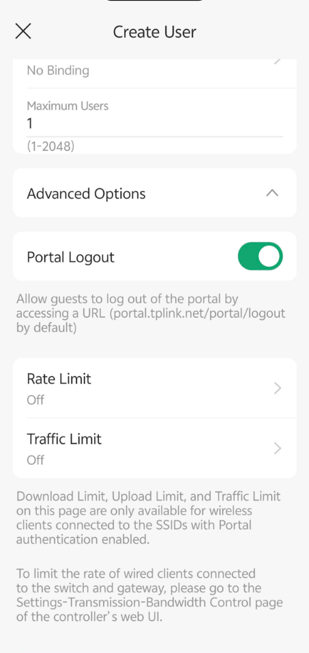
Step 3. Configure the required user information, then tap Done.
Common settings include:
|
Setting |
Description |
|
Username |
Specifies the username used for local user authentication. |
|
Password |
Specifies the password used for local user authentication. |
|
Status |
Enables or disables the local user account. Only enabled users can authenticate through the portal. |
|
Portal |
Selects the portal(s) that the local user can access. |
|
Authentication Timeout |
Specifies when the local user account expires. After the configured date and time, the account can no longer be used for authentication. |
|
MAC Address Binding Type |
Specifies whether the account is bound to a client MAC address and defines the binding method. |
|
Maximum Users |
Specifies the maximum number of clients that can simultaneously use the local user account. |
|
Portal Logout |
Allows authenticated users to manually log out through the portal logout URL. |
|
Rate Limit |
Restricts the upload and download bandwidth available to the authenticated user. This option is available only for wireless clients connected to SSIDs with Portal authentication enabled. |
|
Traffic Limit |
Limits the total amount of data that the authenticated user can consume. This option is available only for wireless clients connected to SSIDs with Portal authentication enabled. |
Verify portal authentication settings
After configuration is complete, verify that Portal Authentication is functioning properly.
Verify authorized clients
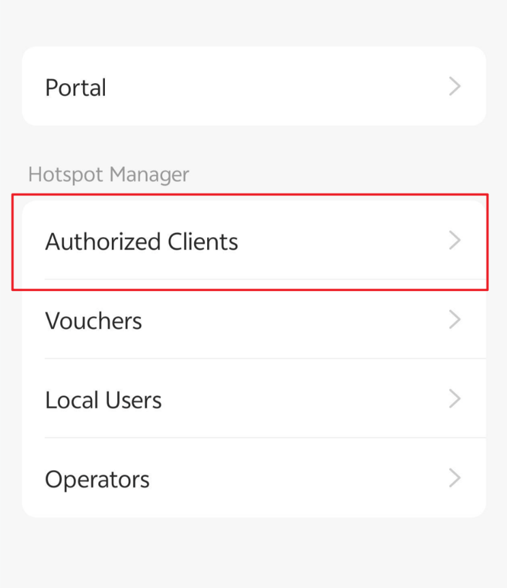
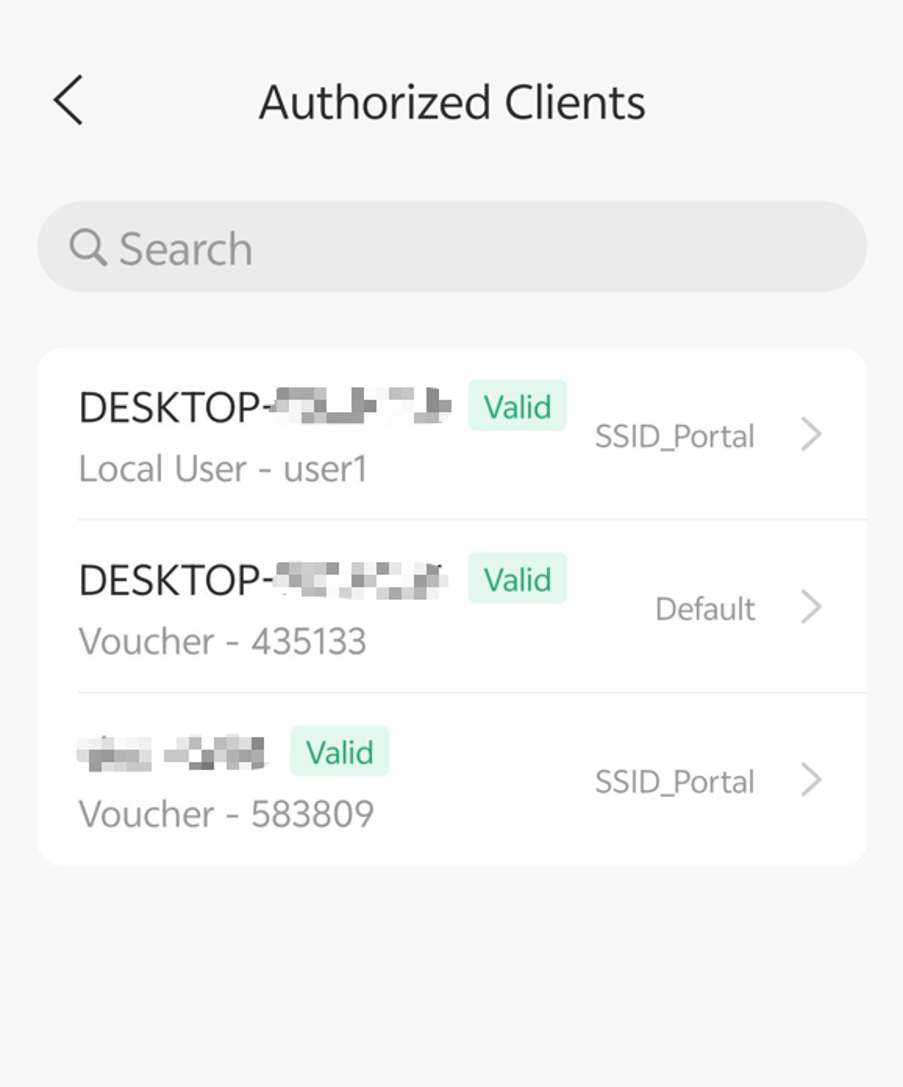
Step 1. Tap Authorized Clients.
This page displays clients that have successfully completed Portal Authentication.
From this page, administrators can:
- View authenticated users
- Extend authentication duration
- Revoke authentication privileges
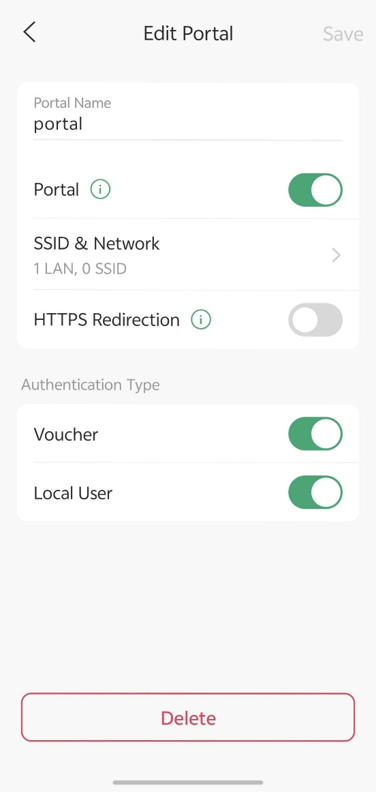
Verify portal configuration
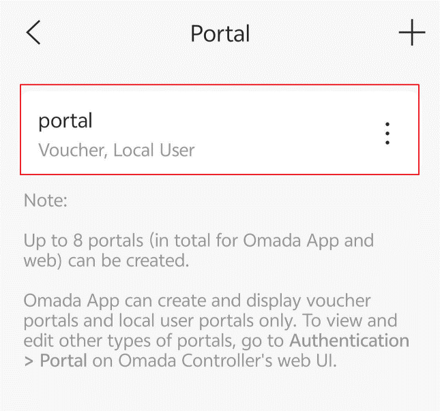
Step 2. Return to Authentication > Portal.
Confirm that the newly created portal appears in the portal list.
Select the portal to:
- Review configuration details
- Modify portal settings
- Delete the portal if necessary
Verify voucher configuration
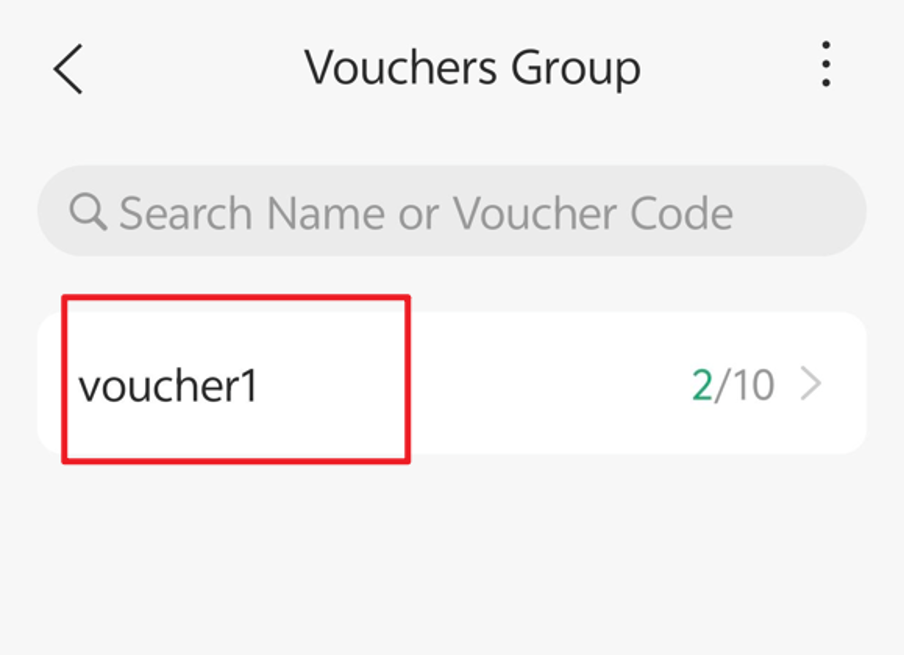
Step 3. Navigate to Authentication > Vouchers.
Confirm that the voucher group appears in the voucher list.
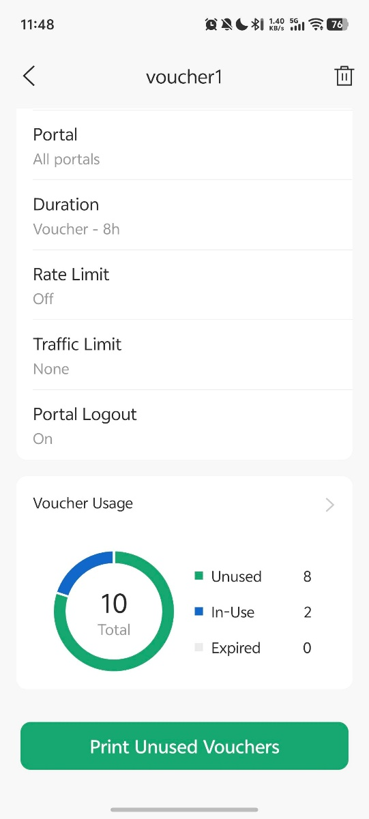
Select the voucher group to:
- View voucher information
- Monitor voucher usage
- Print unused vouchers
Verify local users
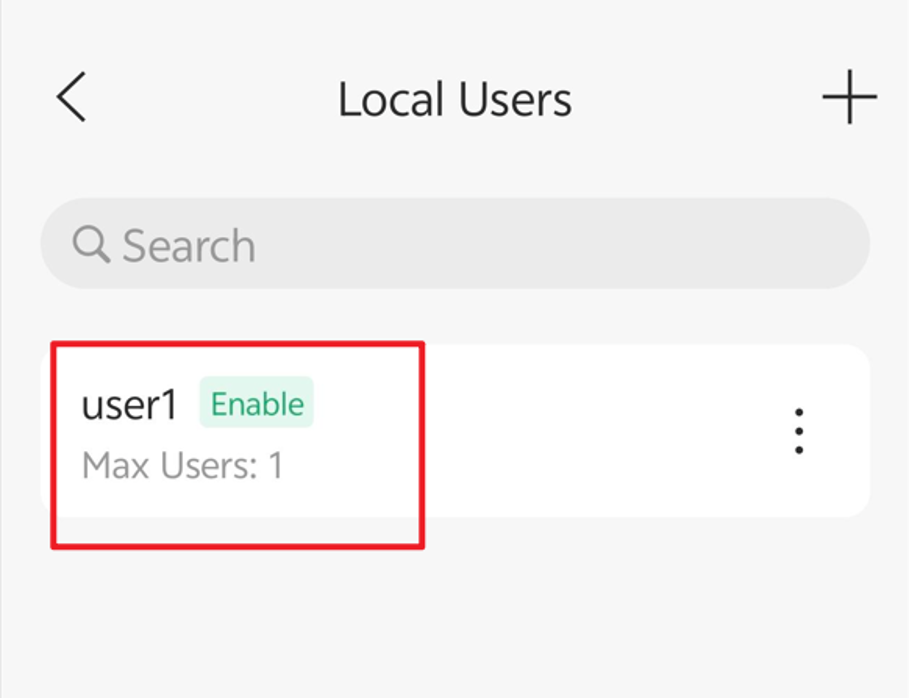
Step 4. Navigate to Authentication > Local Users.
Confirm that the newly created user account appears in the list.
Select the user account to:
- Review account details
- Edit user information
- Delete the account when no longer required
Conclusion
The Omada App provides a convenient way to deploy and manage Portal Authentication directly from a mobile device. Administrators can quickly create portal profiles, generate vouchers for guest access, create local user accounts, and monitor authenticated clients without accessing the controller's web interface.
By implementing Portal Authentication, organizations can improve guest network management, enhance security, and provide a professional login experience for visitors. For additional Portal Authentication options and advanced configurations, refer to the product documentation available on the Omada Support Portal.
To learn more about each function and configuration, please visit Support Home to download or check the manual for your product.
