


Content
Configuration for Hardware or Software Controller
Configuration with Mobile Omada App
Configuration for Cloud-Based Controller
Configuration with Mobile Omada App
Introduction
Adopting an Omada EAP into an Omada Controller allows for centralized management, seamless roaming, and advanced configuration across the network. This guide explains how to adopt EAPs in controller mode, both locally and remotely, using hardware, software, or cloud-based controllers via the Omada app or a PC.
Requirements
- Omada Controller
- Omada EAP
Note: To take a basic example, EAPs are assumed to be in the same subnet with the controller.
Choose a Method
Choose a management platform to manage the EAPs and a management device to log in to the platform. To learn how to choose one based on your needs, refer to: The differences and commonalities of three Omada Controllers.
Management Platform
The Omada Software Controller, Omada Hardware Controller, and Omada Cloud-Based Controller can be used to manage EAPs.
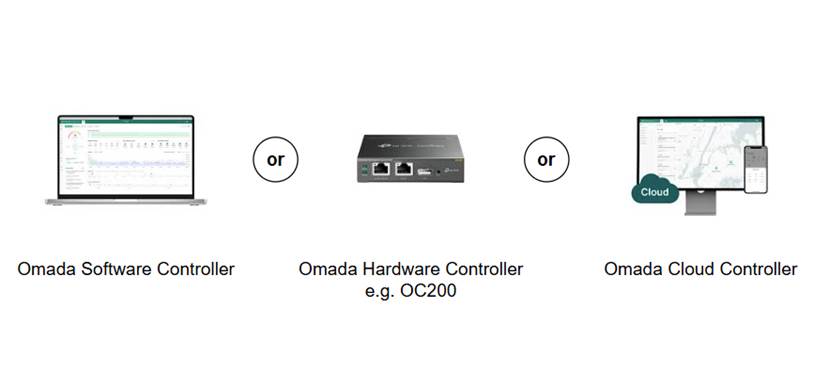
Note: Omada Software Controller only supports Windows and Linux systems. For other operating systems, you are recommended to install a virtual machine on the computer so that you can run Omada Software Controller on it.
Management Device
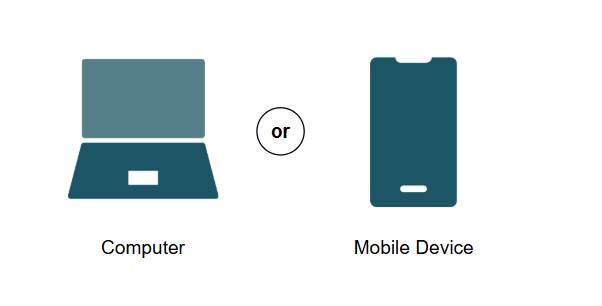
Note: To log in via a computer, you are recommended to use the latest version of Google Chrome, Firefox, IE or Safari. To log in via a mobile device, download the latest Omada app first.
Configuration for Hardware or Software Controller
Configuration with a PC
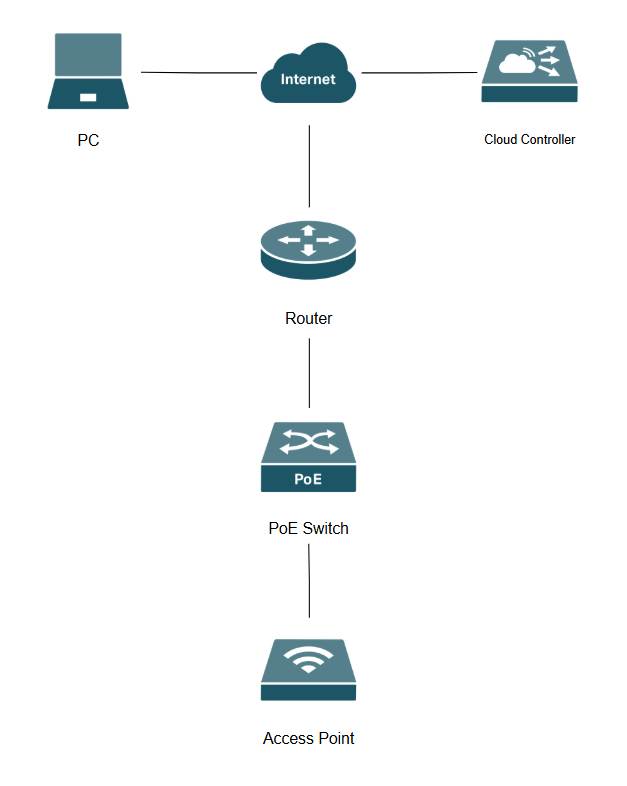
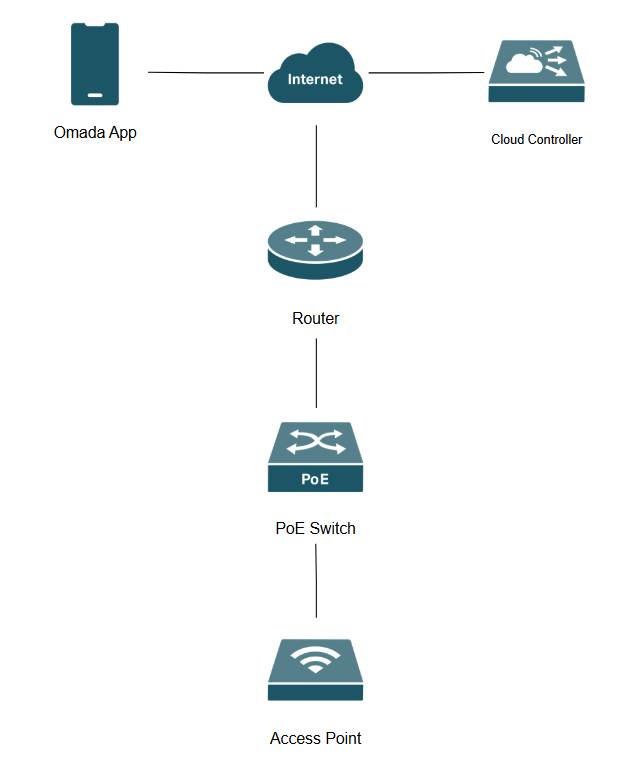
Network Topology
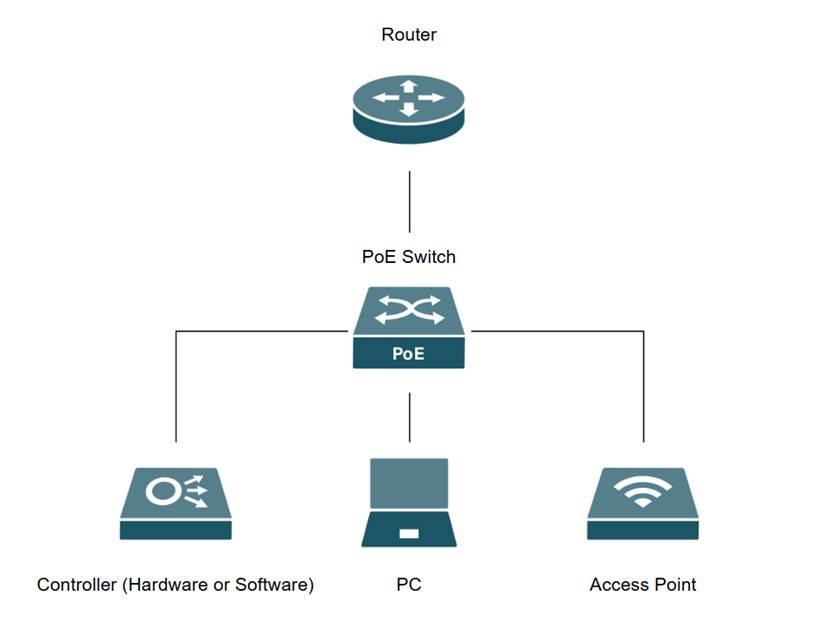
A Windows 11 Laptop is used for this section along with controller version 6.2.0.17, an OC200, ER7206 , SG2008P, and EAP772.
Step 1. Power on EAP via PoE injector or PoE switch and connect to the same network as the controller. Log in to the Omada Controller via the IP address in the web browser and select the Site from the Global View drop-down menu.
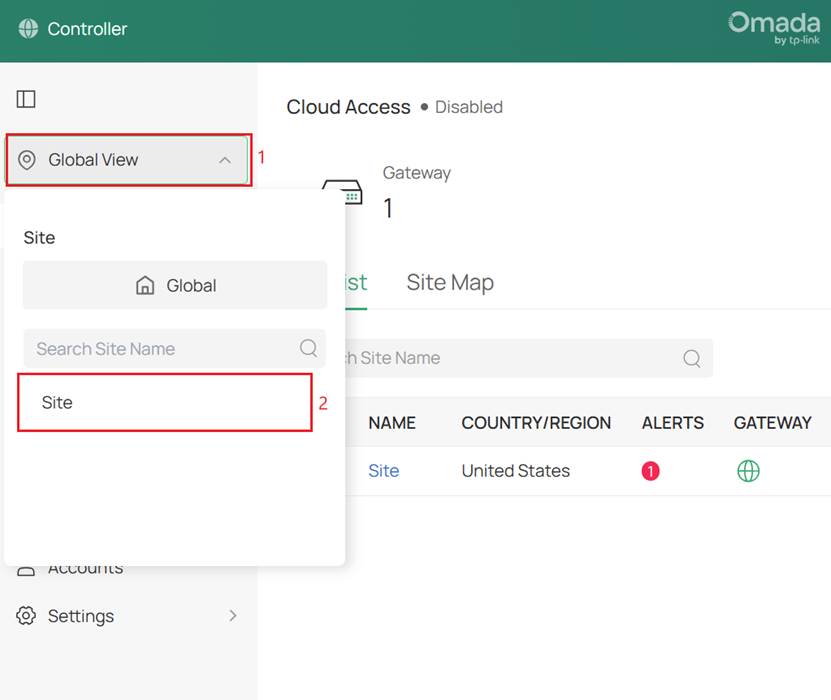
Note 1: To find Omada Controller IP address, you can refer to: How to find IP address of my Omada Devices
Note 2: To use Cloud Management, go to Global View > Settings and enable Cloud Access and bind the TP-Link ID.
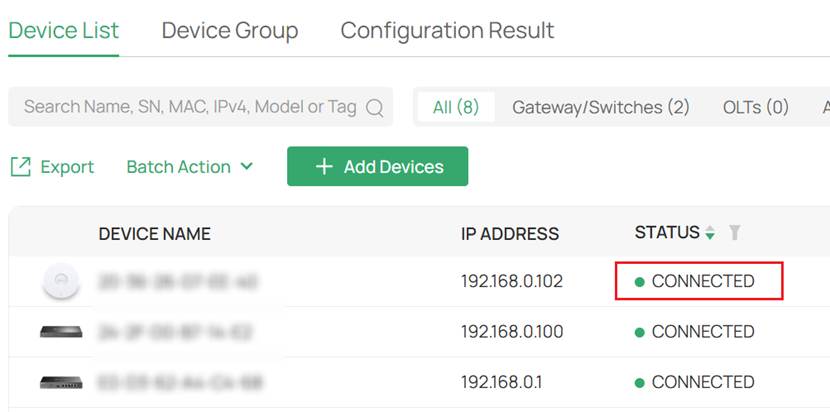
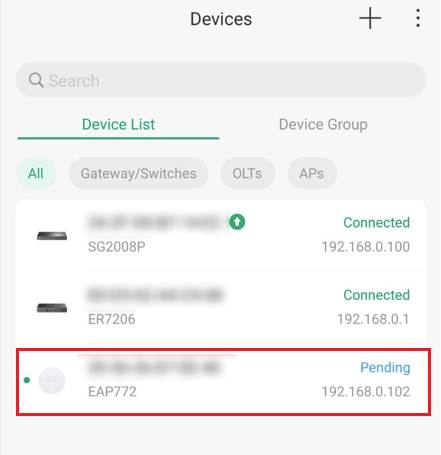
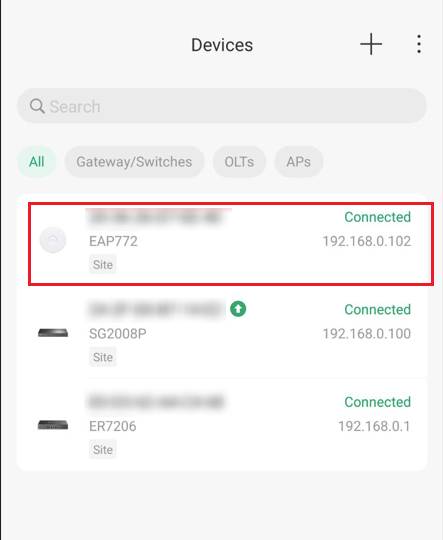
Step 2. Navigate to Devices. The EAP should appear in the list with a status of Pending. Click the Adopt button in the “Action” column. After successful adoption, the status will show Connected. 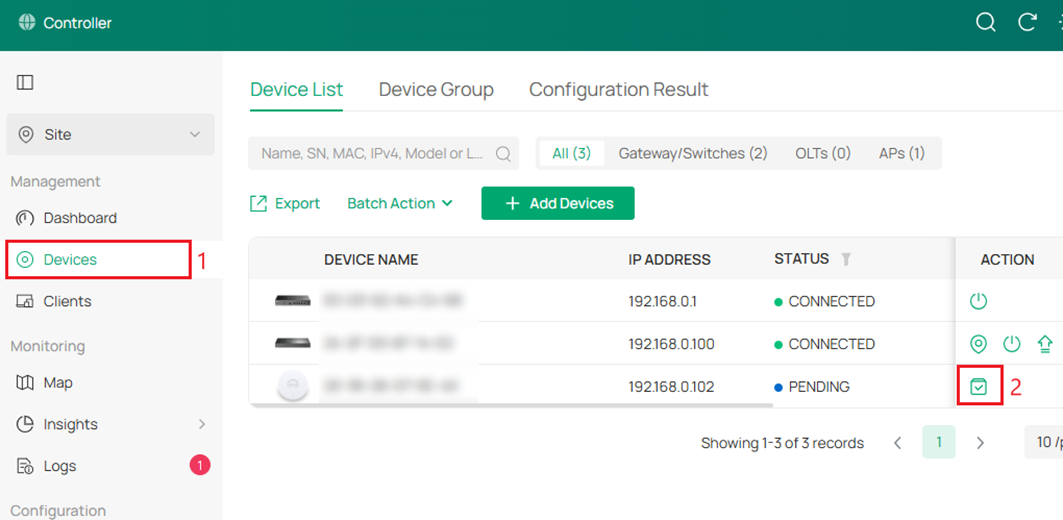
Note: If the status changes to “Adopt Failed,” please refer to: What to do if Omada Device Adoption Failure
Configuration with Mobile Omada App
Network Topology

An mobile phone with Omada App is used for this section along with controller version 6.0.0.33, an OC200, ER7206 , SG2008P, and EAP772.
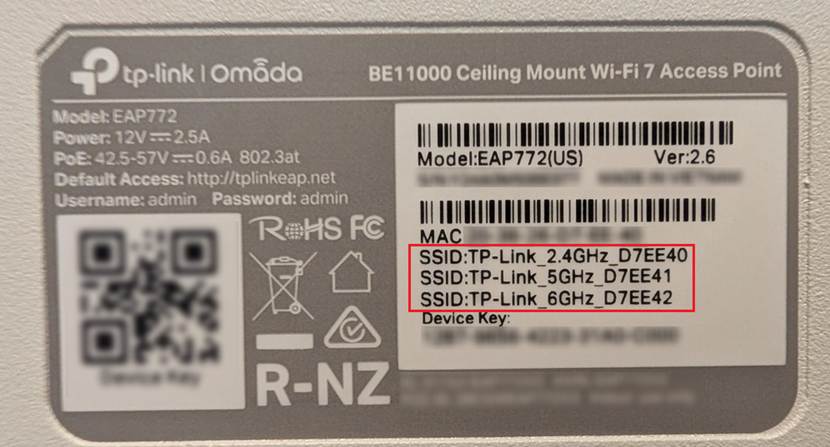
Step 1. Power on EAP via PoE injector or PoE switch and connect to the same network as the controller. On the mobile device, connect to the default SSID on the back of the EAP.
Step 2. Once connected to the default SSID of the EAP, open the Omada App and select the “+” button. Select the controller.
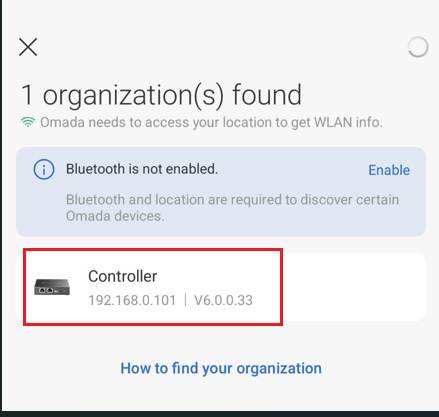
Note: To use Cloud Management, go to Global View > Settings and enable Cloud Access and bind the TP-Link ID. The Controller will then be listed under Cloud Management.
Step 3. Click on Devices and find the EAP connected to the network in a Pending status. Click on the EAP and press the Adopt button.
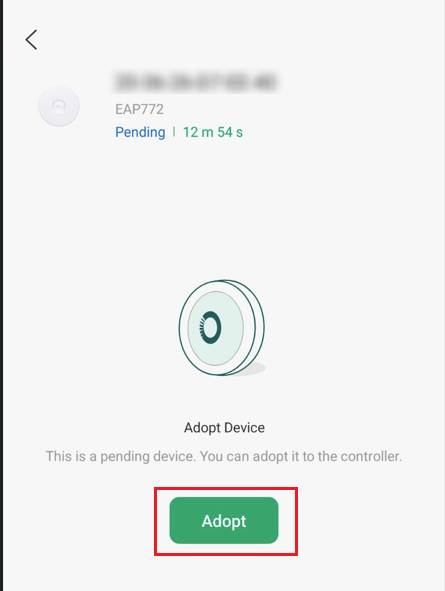
Note: When the EAP is adopted by the Controller, the default SSID will no longer broadcast. It is recommended to create an SSID before adopting the EAP to the Controller to reconnect to the EAP after adoption.
Step 4. Once the EAP adopts to the Controller, it will disconnect the default SSID and may display a “Network timeout” error message.

Step 5. In wireless settings on the mobile device, connect to the SSID created before adopting the EAP.. Open the Omada App and the EAP is now adopted and Connected to the network.
Note: For Cloud Management, reconnecting to the SSID is not needed.
Configuration for Cloud-Based Controller
Configuration with a PC
Network Topology
Note: Cloud Controller version 6.2.0.100 is used in this scenario along with an ER7206, SG2008P, and EAP772.
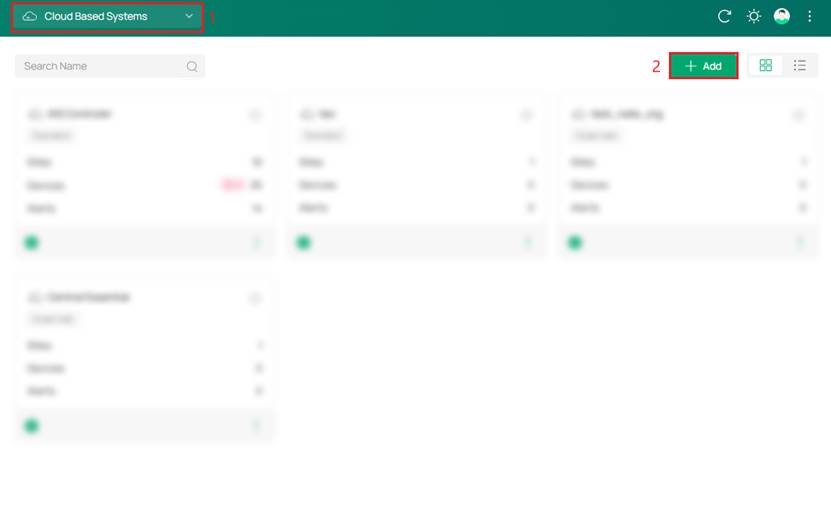
Step 1. Go to Omada Cloud Management Platform and log in with TP-Link ID and select Cloud Based Systems and select Add.
Note: Create a TP-Link ID if one has not already been created.
Step 2. Configure and create an Organization
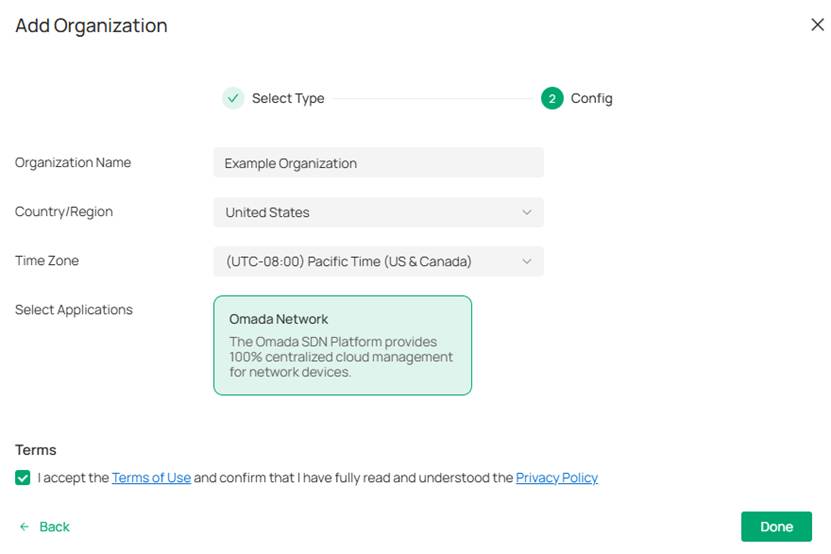
Note: An Essentials account was selected for this scenario
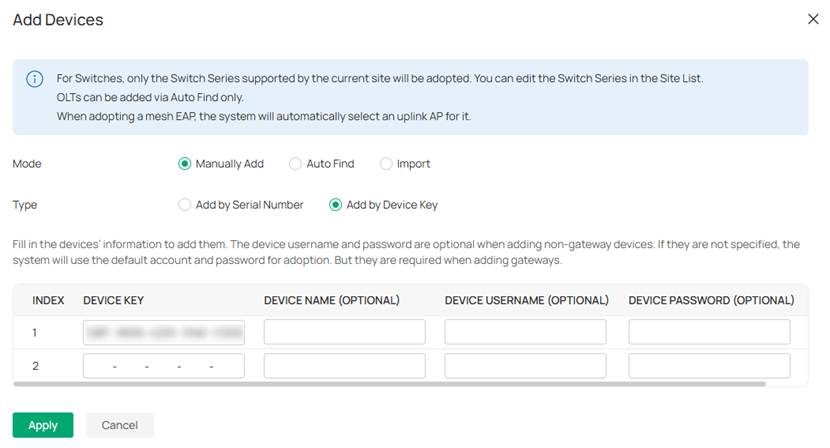
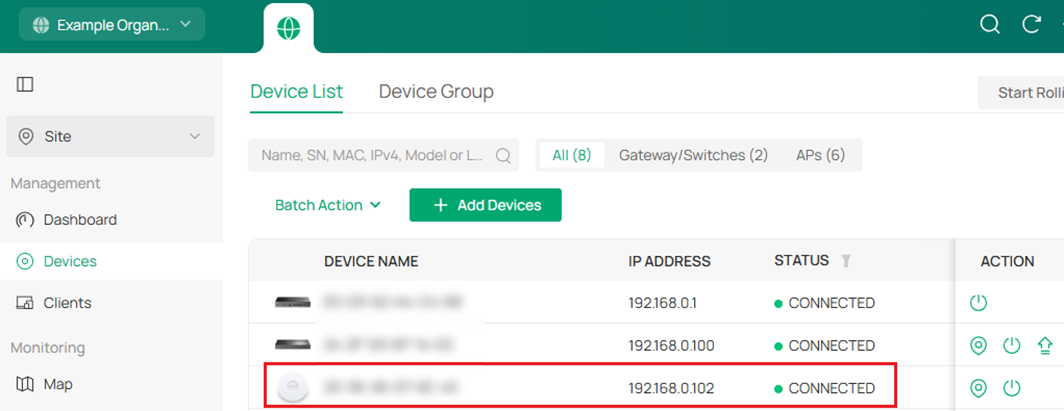
Step 3. Add a new Site and go to site view and the Devices tab. Click on Add Devices.
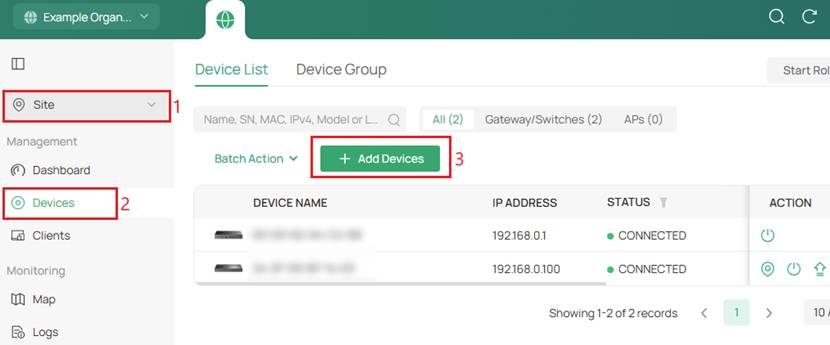
A router and switch have already been connected to the site.
Step 4. Add EAP by Device Key which can be found on the back of the EAP.
Step 5. EAP will now be adopted and Connected.
Note: If EAP is stuck in “Preconfigured,” then Factory Reset the device and make sure it has Internet access and is getting an IP address.
Configuration with Mobile Omada App
Network Topology
Cloud Controller version 6.2.0.100 is used in this scenario along with an ER7206, SG2008P, and EAP772.
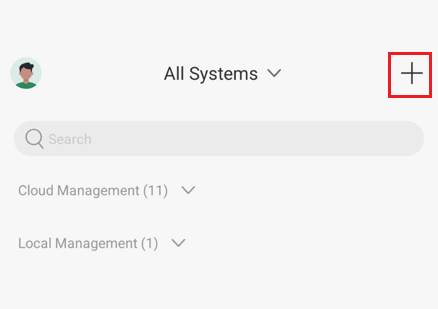
Step 1. Open the Omada App, login with TP-Link ID, and select the created Cloud Based System.

Note: To create one, click the + icon and select Add Essential Organization.
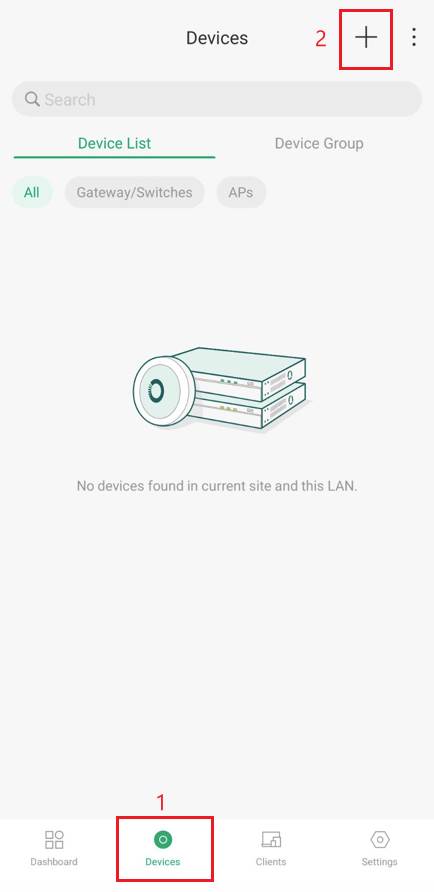
Step 2. Go to Devices and tap on the “+” symbol to add devices
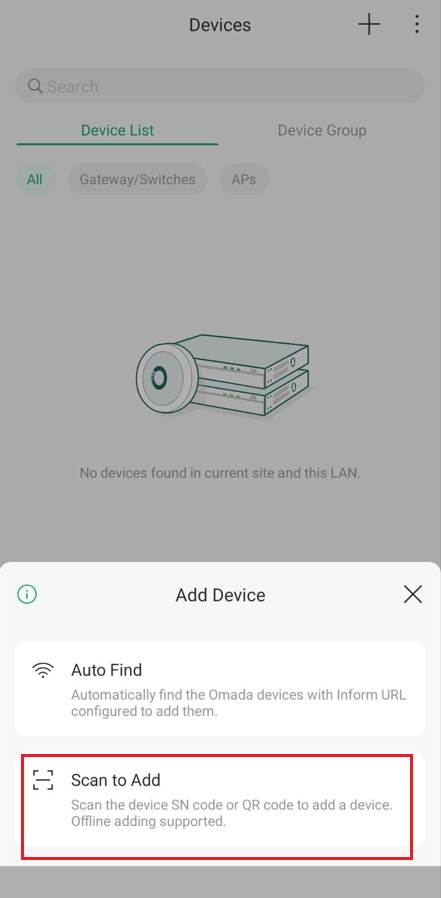
Step 3. Select Scan to Add and scan the QR code on the back of the devices to adopt them.
Note: If you want to use Auto Find, you need to log in to the EAP in standalone mode and insert the Inform URL of the controller.

Conclusion
We’ve successfully adopted an EAP in Controller Mode using hardware, software, and cloud controllers via PC and mobile devices.
Q1: What credentials do I need to adopt the EAP?
A1: If the EAP is fresh out of the box or recently factory-reset, the controller will automatically adopt it using the default credentials (admin for both username and password). If the EAP was previously set up in standalone mode, you will need to use the custom username and password that was created for it.
Q2: Why does my EAP show up as "Managed by Others" or fail to adopt?
A2: "Managed by Others" means the EAP is currently bound to a different controller or retains old configuration data. To fix this, either enter the username and password of the old controller when prompted, or simply perform a physical hard reset on the EAP (hold the reset button with a paperclip until the LED flashes). Once it reboots, it will show as "Pending" and can be adopted normally.
Q3: How does adopting an EAP into a Cloud-Based Controller differ from a local controller?
A3: Local controllers rely on Layer 2 broadcast discovery to find EAPs on the same network. Because the Cloud-Based Controller (CBC) lives on the internet, the EAPs cannot discover it automatically. Point the EAPs to the cloud. The EAP must have an active internet connection (usually provided by a router via DHCP) to communicate with the TP-Link Cloud.
Q4: My EAP is brand new and I don't have an existing Wi-Fi network to connect my phone to. How do I access the controller?
A4: Brand new Omada EAPs broadcast a default, open Wi-Fi network (the SSID is usually printed on the back of the unit, formatted like Omada_2.4GHz_XXXXXX). Connect the smartphone directly to this default Wi-Fi network. Once connected, open the Omada App, locate the local controller, and proceed with the adoption.
Get to know more details of each function and configuration please go to Download Center to download the manual of your product.
