


Contents
Introduction
Some Omada AP devices now support both Internal (Directional) and External (Omnidirectional) antennas. Users can switch between the two as needed using the Antenna Selection Feature. This article introduces the new functionality available on specific Omada EAP devices that enables both Directional and Omnidirectional Antenna operation in Standalone Mode.
Requirements
- A Directional and Omnidirectional Antenna capable Omada device.
- Omada Controller v6.1
Configuration
In Standalone Mode
The following section provides the configuration steps accessing the Directional and Omnidirectional Antenna settings of capable device in Standalone Mode using an EAP725-Outdoor as an example.
After logging into the GUI of the EAP725-Outdoor, go to Wireless, Antenna, and click on the Antenna Mode drop down menu and choose the desired Antenna Mode. Click Save to apply configuration.
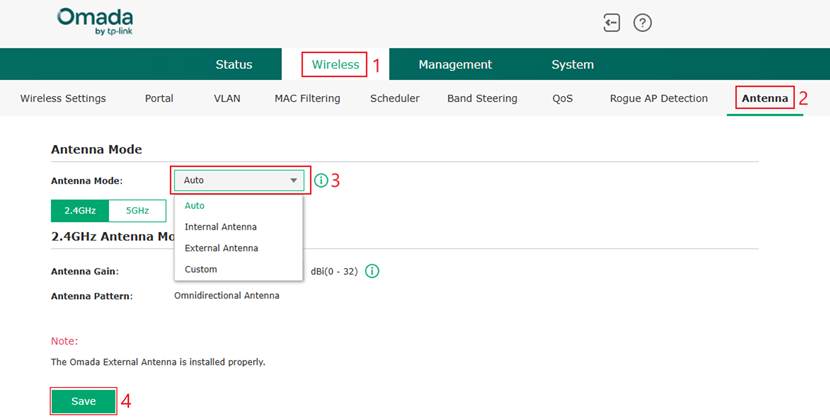
Explanation of Antenna Mode
The EAP725-Outdoor is equipped with two sets of antennas: Directional and Omnidirectional. The antenna-switching feature allows users to switch the antenna type as needed.
There are four types of antenna modes: Auto Mode, Internal Antenna Mode, External Antenna Mode, and Custom Mode.
The functions of the four modes are as follows:
Auto Mode: In this mode, the device will switch between internal and external antenna automatically. When the system detects that all external antennas are properly installed and connected, all frequency bands (2.4 GHz and 5 GHz) will automatically switch to the external omnidirectional antennas. If the system detects an installation issue, such as missing or partially connected antennas, all frequency bands automatically revert to the internal directional antennas.
Internal Antenna Mode: All frequency bands switch to and operate using the internal directional antennas.
External Antenna Mode: All frequency bands switch to and operate using the external omnidirectional antennas.
Custom Mode: Allows user-defined configuration, enabling different antenna selections for the 2.4 GHz and 5 GHz bands as needed. When the internal directional antenna is selected, the antenna gain cannot be modified.
When the external omnidirectional antenna is selected, users must enter the gain value corresponding to the installed external antenna based on actual conditions.
In Controller Mode
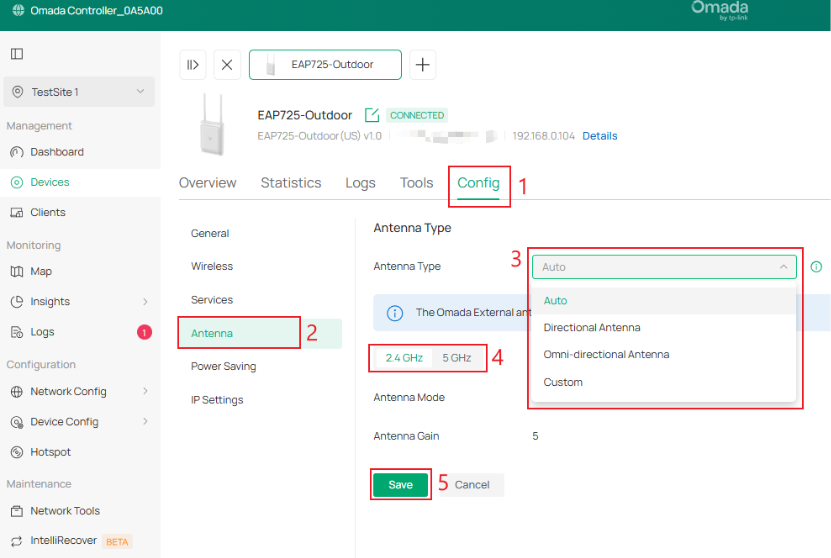
The following section provides the configuration steps for accessing the Directional and Omnidirectional Antenna settings of a capable device in Controller Mode v6.1 using an EAP725-Outdoor as an example.
After adopting the Omada device into the Controller Site, follow these steps to configure the Antenna Mode under Controller Mode.
Step 1. Go to the Site view > Devices > Select the EAP device, in this case the EAP725-Outdoor. A device menu will appear on the right side of the screen. Click on Manage Device.
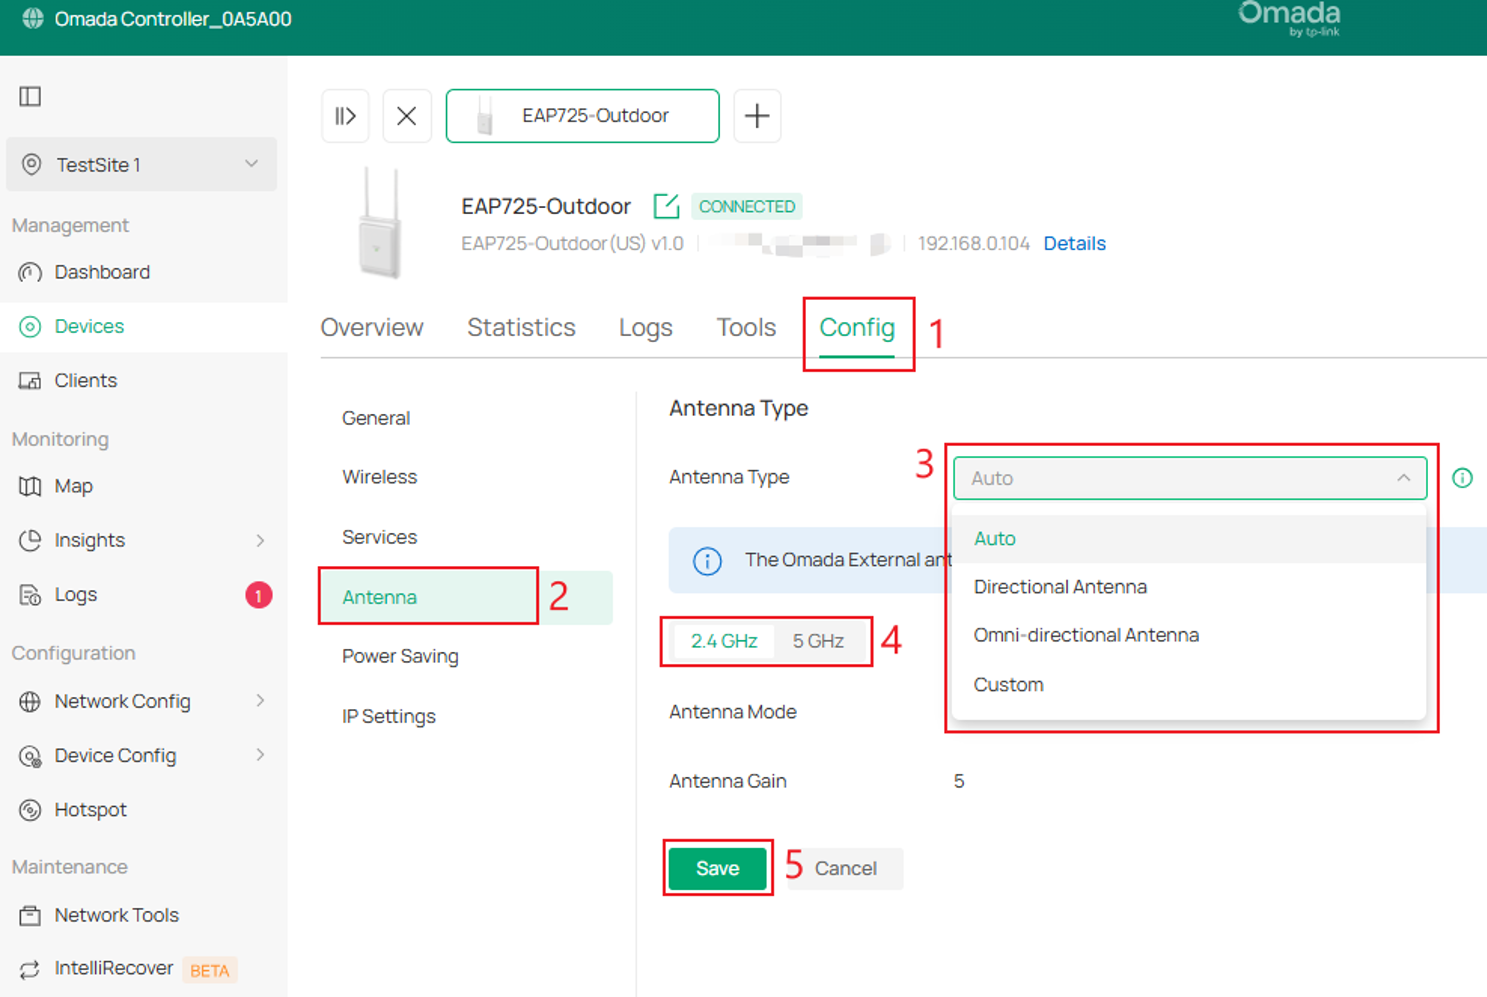
Step 2. Click on Config > Antenna. Within Antenna Settings, select the Antenna Type, the Radio Frequency and click Save.
Get to know more details of each function and configuration please go to Download Center to download the manual of your product.
QA
Q1: What is the difference between directional antenna and omnidirectional antenna and their respective characteristics? What scenarios are they suitable for?
A1: The omnidirectional antenna provides full 360° horizontal coverage but has a shorter effective range. In contrast, a directional antenna focuses its signal within a specific coverage angle, which varies by model. For example, the EAP725-Outdoor has a 90° directional angle. Different directional models may have different main-lobe angles.
Directional antennas provide long-distance, focused signal transmission, making them better suited for targeted or point-to-point coverage, while omnidirectional antennas remain ideal for broad, wide-area coverage.
Q2: Why does the device remain on the internal antenna when Auto Mode is selected, and multiple external antennas are connected?
A2: The external antenna detection in Auto Mode requires the use of the original antenna, the use of other antennas may cause unrecognizability, or it may be caused by the external antenna not being installed in place, please try to remove and reinstall.
Q3: How should I fill in the antenna gain value when multiple external antennas are connected in Custom Mode?
A3: To ensure that the Tx power of the device complies with the regulations, the user needs to fill in the actual gain of the external antenna used, and the device will dynamically adjust the Tx power according to the gain filled in by the user to ensure that the final Tx power complies with the regulations.
Q4: How do I access the GUI in Standalone Mode
A4: Connect a PC to the same network, find the Access Point’s IP in your router’s DHCP client list, then enter that IP in a browser and sign in with the admin credentials you set during initial setup.
Q5: How do I access the device wirelessly?
A5: Connect to the SSID located on the back of the device and follow the configuration instructions.
Q6: I cannot find the Access Point’s IP address
A6: Check the DHCP client list on the gateway or use a network scanner to locate the device hostname. You can also connect directly to the Access Point’s management VLAN and scan that subnet.
Q7: Do I need to reboot after changing Antenna Mode
A7: No manual reboot is required. After you click Save the radio restarts briefly and applies the new setting.
Q8: Can I set different antennas for 2.4 GHz and 5 GHz
A8: Yes. Use Custom Mode to assign per band and enter the correct gain for each band.
Q9: I see the message: No Omada External Antenna is installed
A9: Verify that the external antenna in use is an original TP-Link antenna, as non-original antennas may not be properly detected by the device. Install the Omada External Antennas by securely hand-tightening the connectors between the EAP unit and the antennas. Once properly installed, the system will display the message: “The Omada External Antenna is installed properly.”
Q10: I see the message: The Omada External Antenna is not installed properly. Please reinstall and tighten the antenna.
A10: Reseat and hand-tighten the connectors. The message will change to The Omada External Antenna is installed properly.
Q11: Does changing the Antenna Mode affect my SSID, Channel, or Tx power?
A11: Changing the Antenna Mode does not affect the SSID or channel. However, it may alter the Tx Power configurable range because antenna gain values differ between modes. If the previously configured Tx Power value falls outside the new allowable range, the system will automatically adjust the Tx Power displayed on the page to a valid setting.
