


Contents
Configure Port Mirroring in Standalone Mode
Configure Port Mirroring in Omada Controller
Introduction
Port mirroring copies network traffic from one or more source ports to a destination (monitor) port, allowing network administrators to analyze traffic for security, performance monitoring, and troubleshooting without disrupting the live network.
Requirements
- Omada Access, Access Plus, Access Pro, Access Max, Aggregation, Campus Switch
- Omada Controller(Software Controller / Hardware Controller / Cloud Based Controller, V6.0 and above)
Configuration
Configure Port Mirroring in Standalone Mode
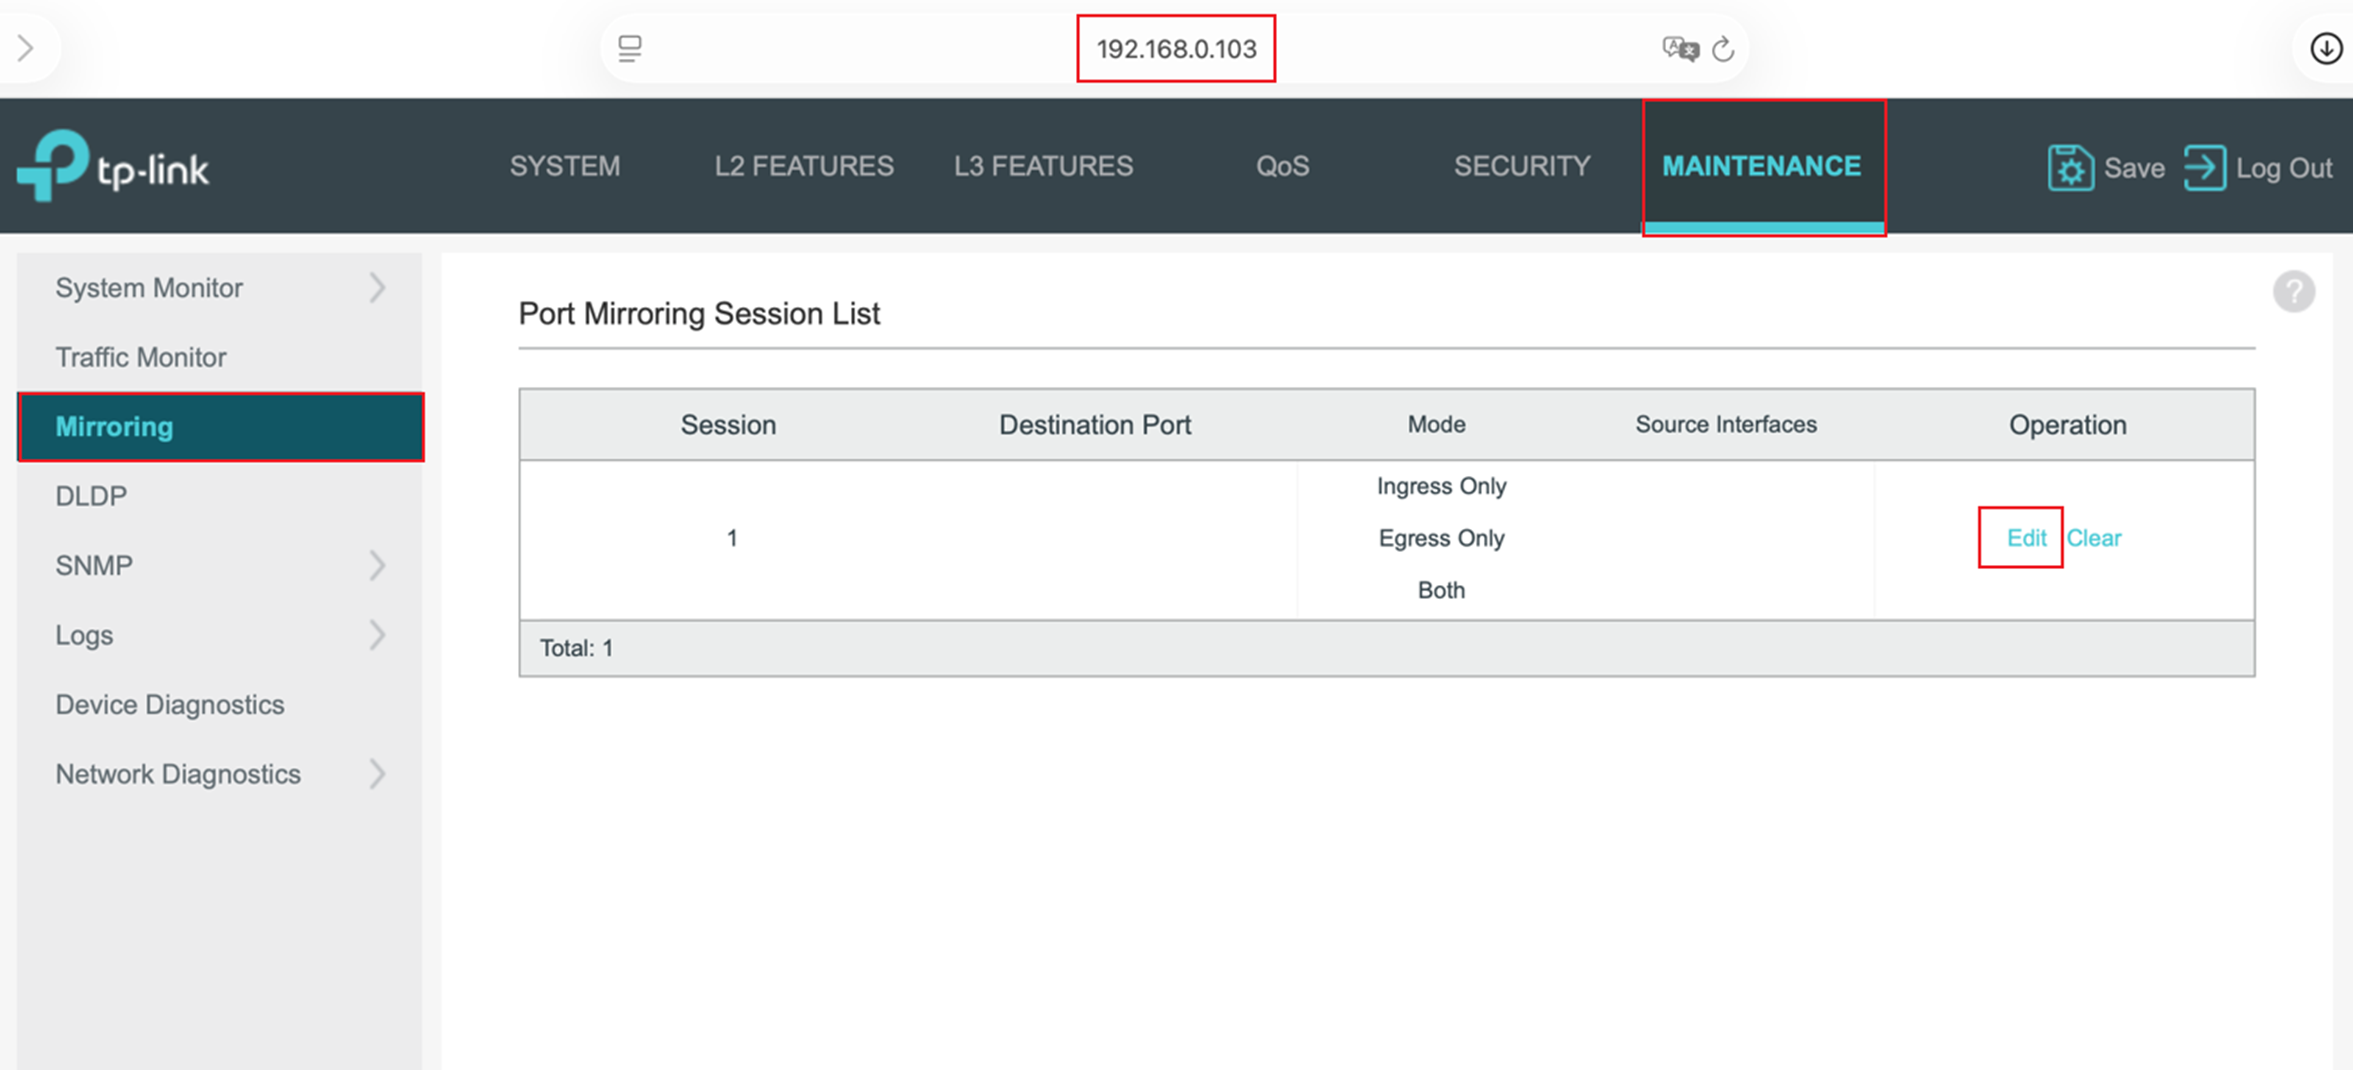
Step 1. Open a web browser and enter the device’s IP address to access the switch’s Web Management Interface. Once logged in, click MAINTENANCE > Mirroring > Edit to access the Source Port and Destination Port Config page.
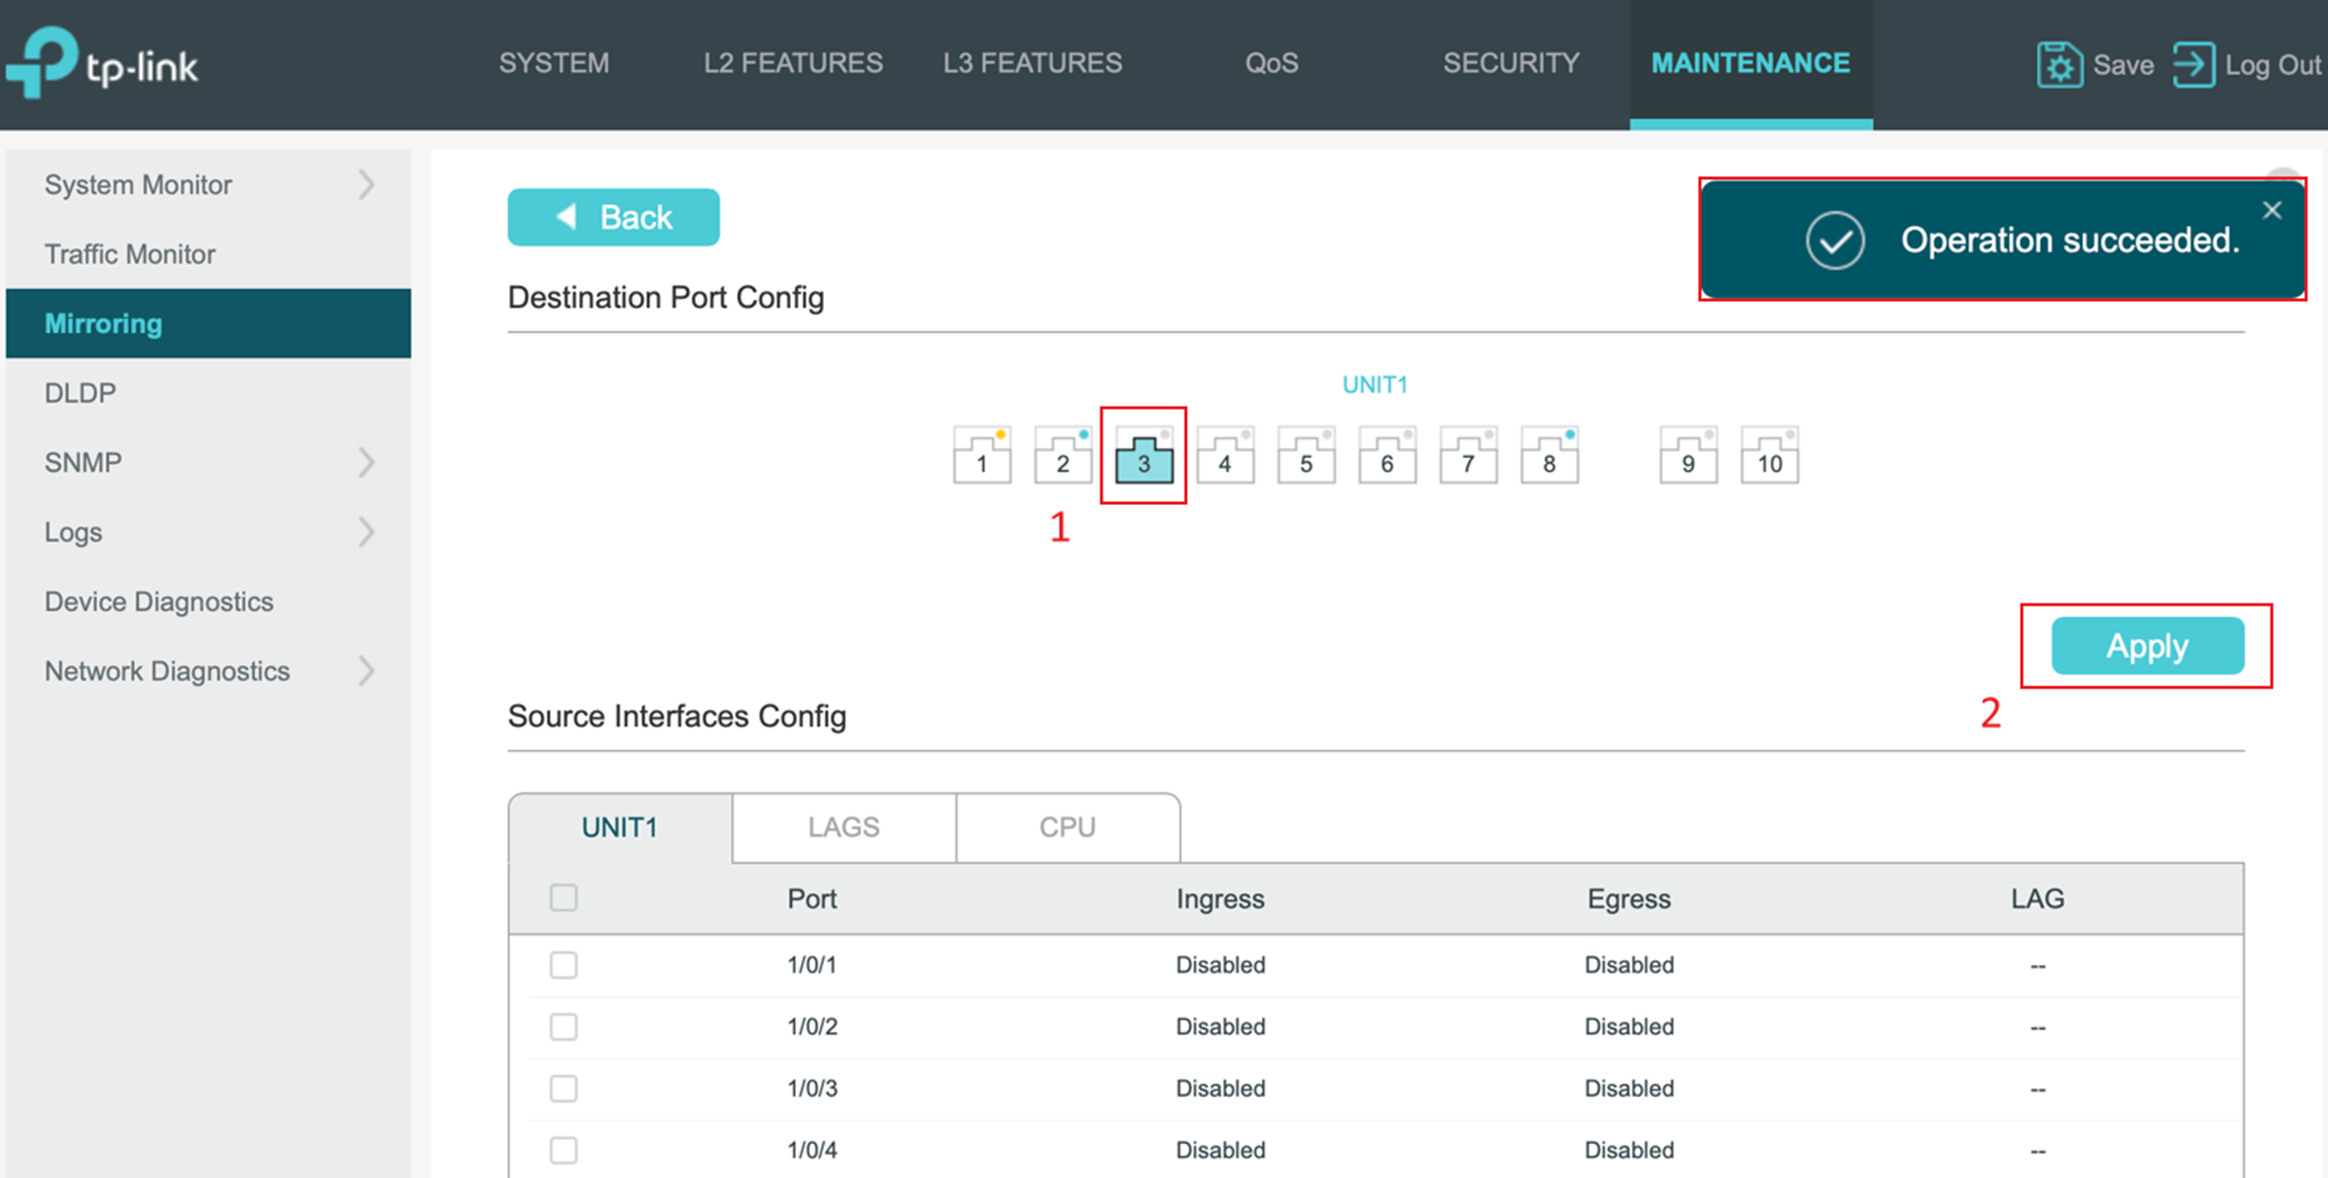
Step 2. Select a Destination Port and then click Apply to confirm the configuration.
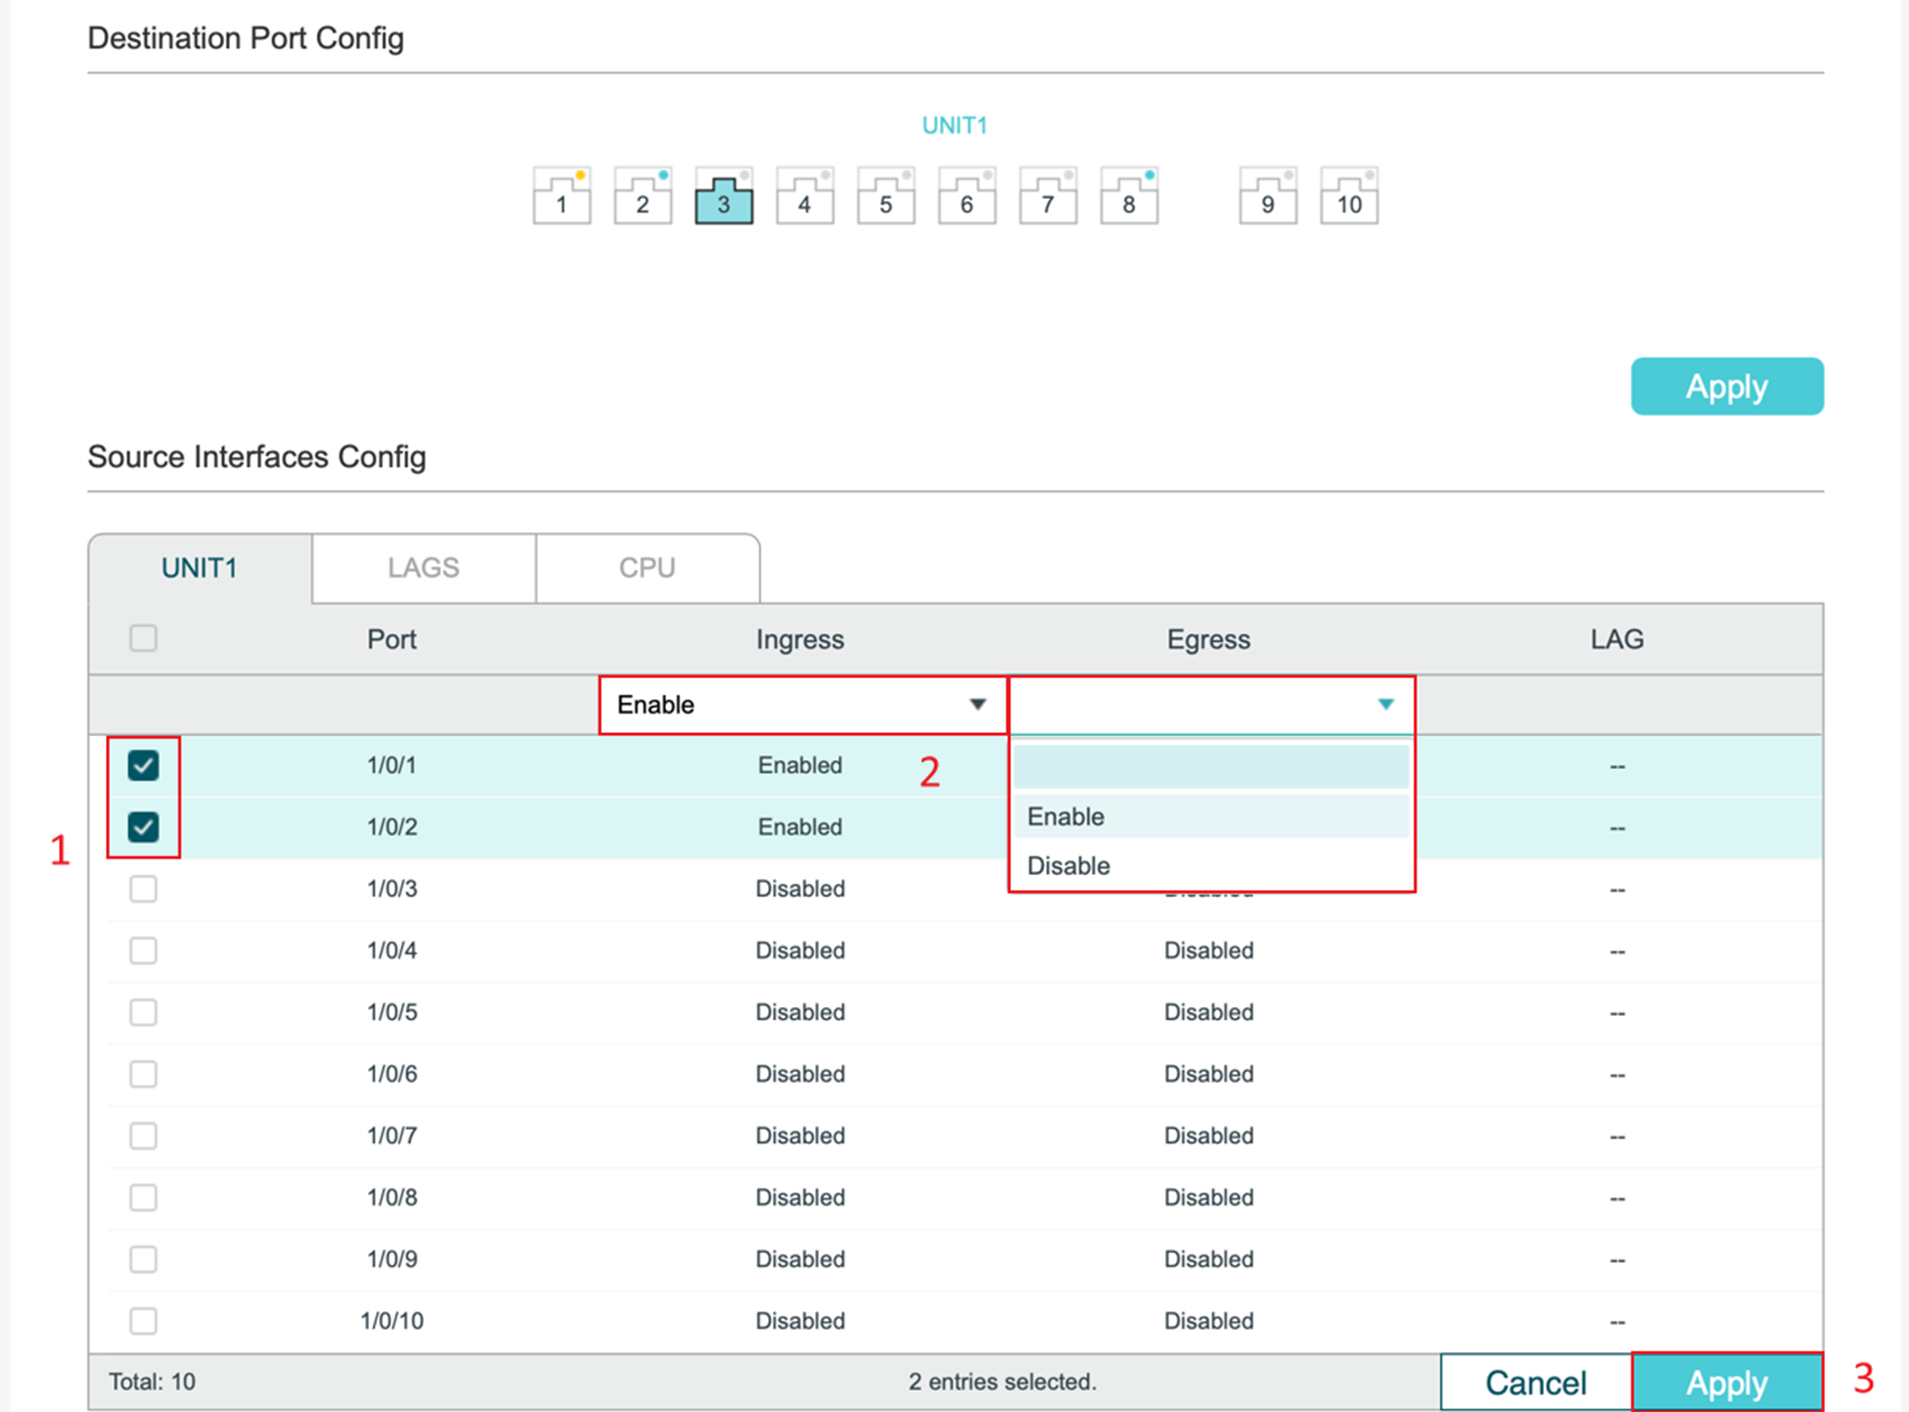
Step 3. Select the source interface(s) by checking the checkbox. Don’t forget to configure Ingress and Egress for these ports.
Ingress refers to traffic entering the port, and Egress refers to traffic leaving the port.
Then click Apply to save the configuration.
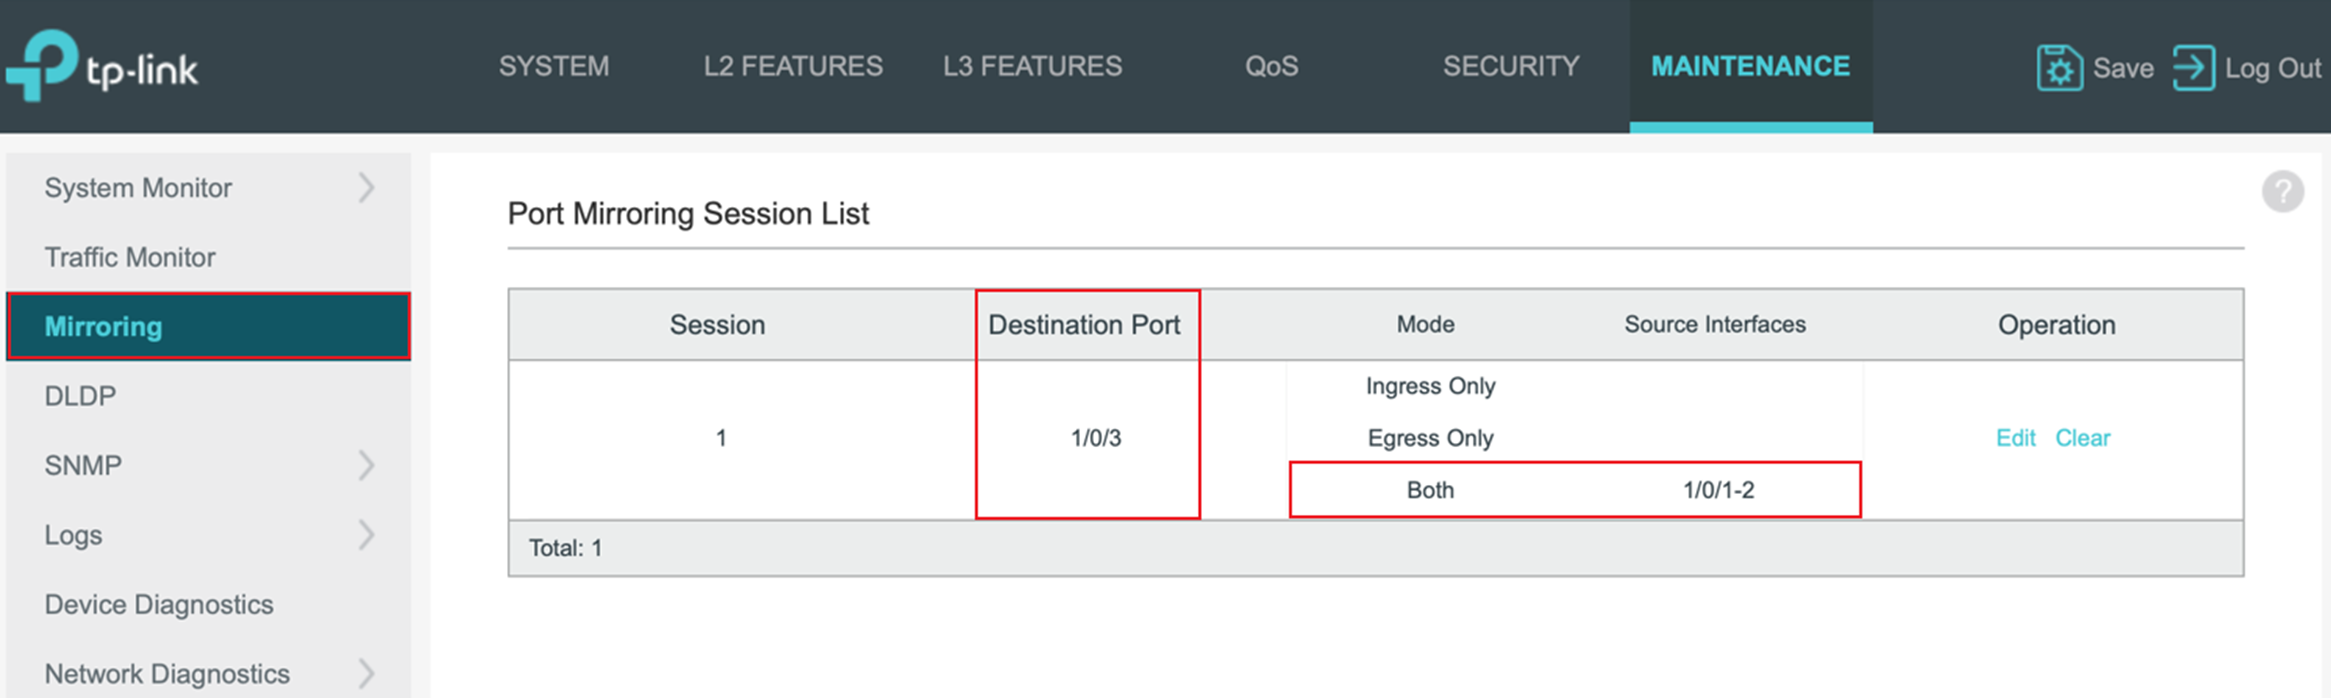
Step 4. Click the Mirroring tab to return to the Port Mirroring Session List page. You can verify the mirroring status.
Configure Port Mirroring in Omada Controller
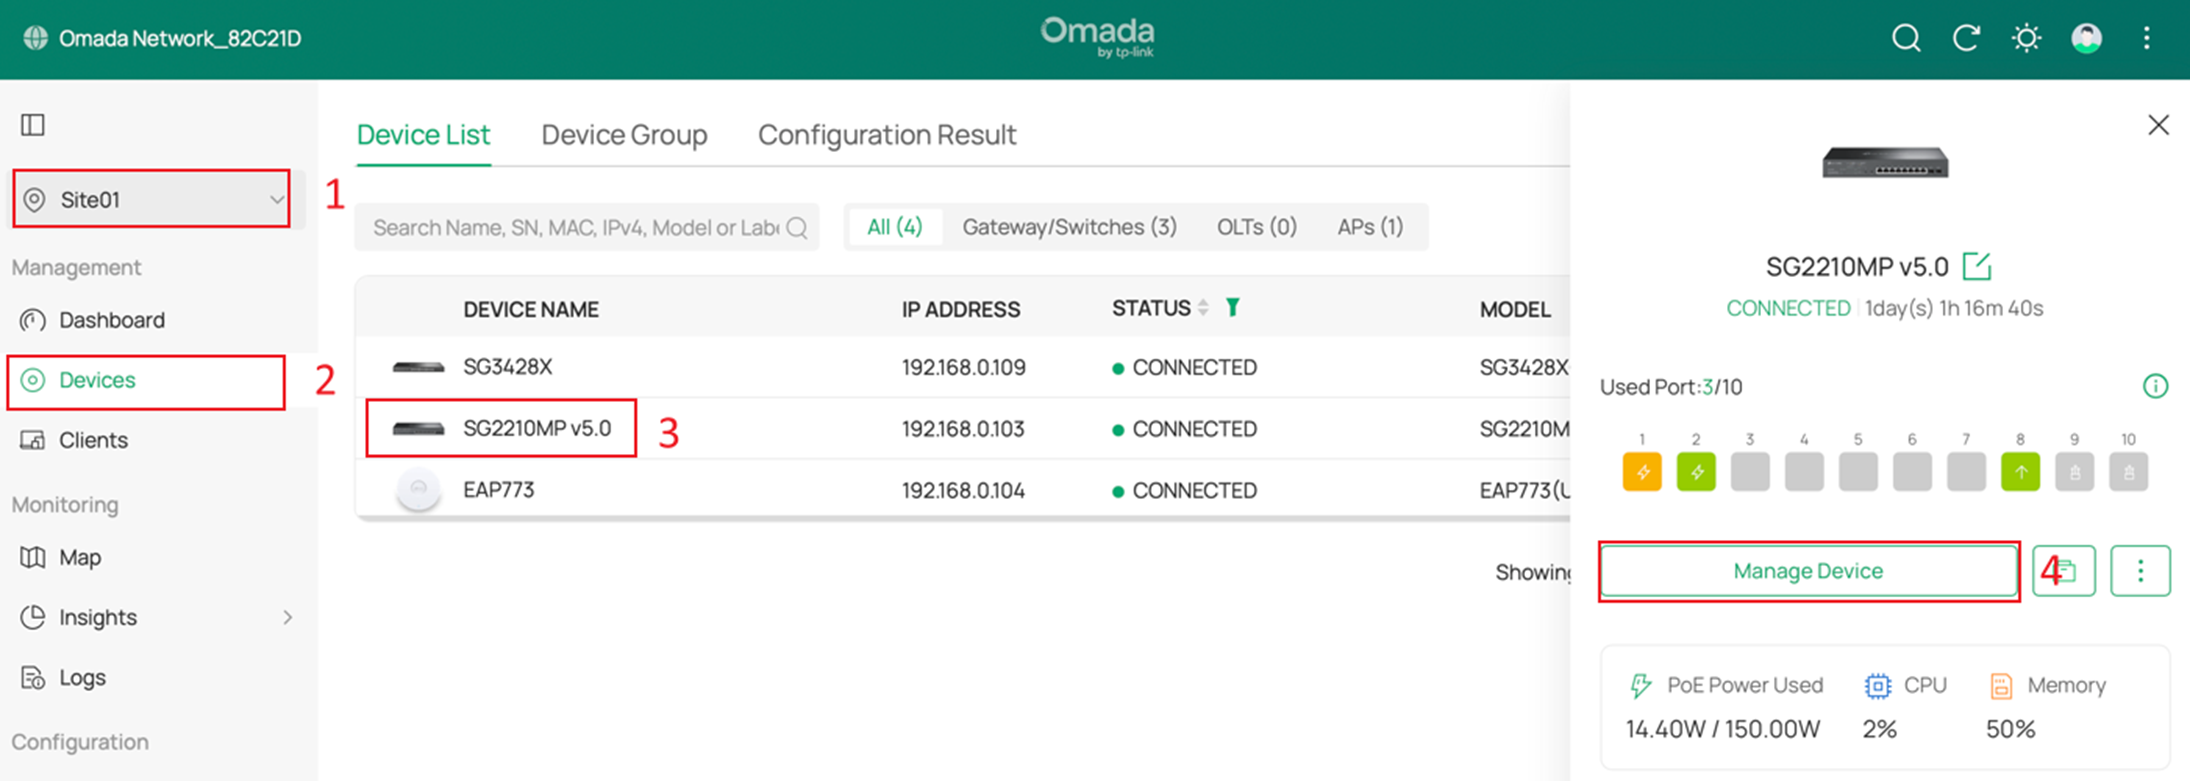
Step 1. On the Site page, locate the switch you want to configure. Click on the switch, and in the pop-up menu, click Manage Device.
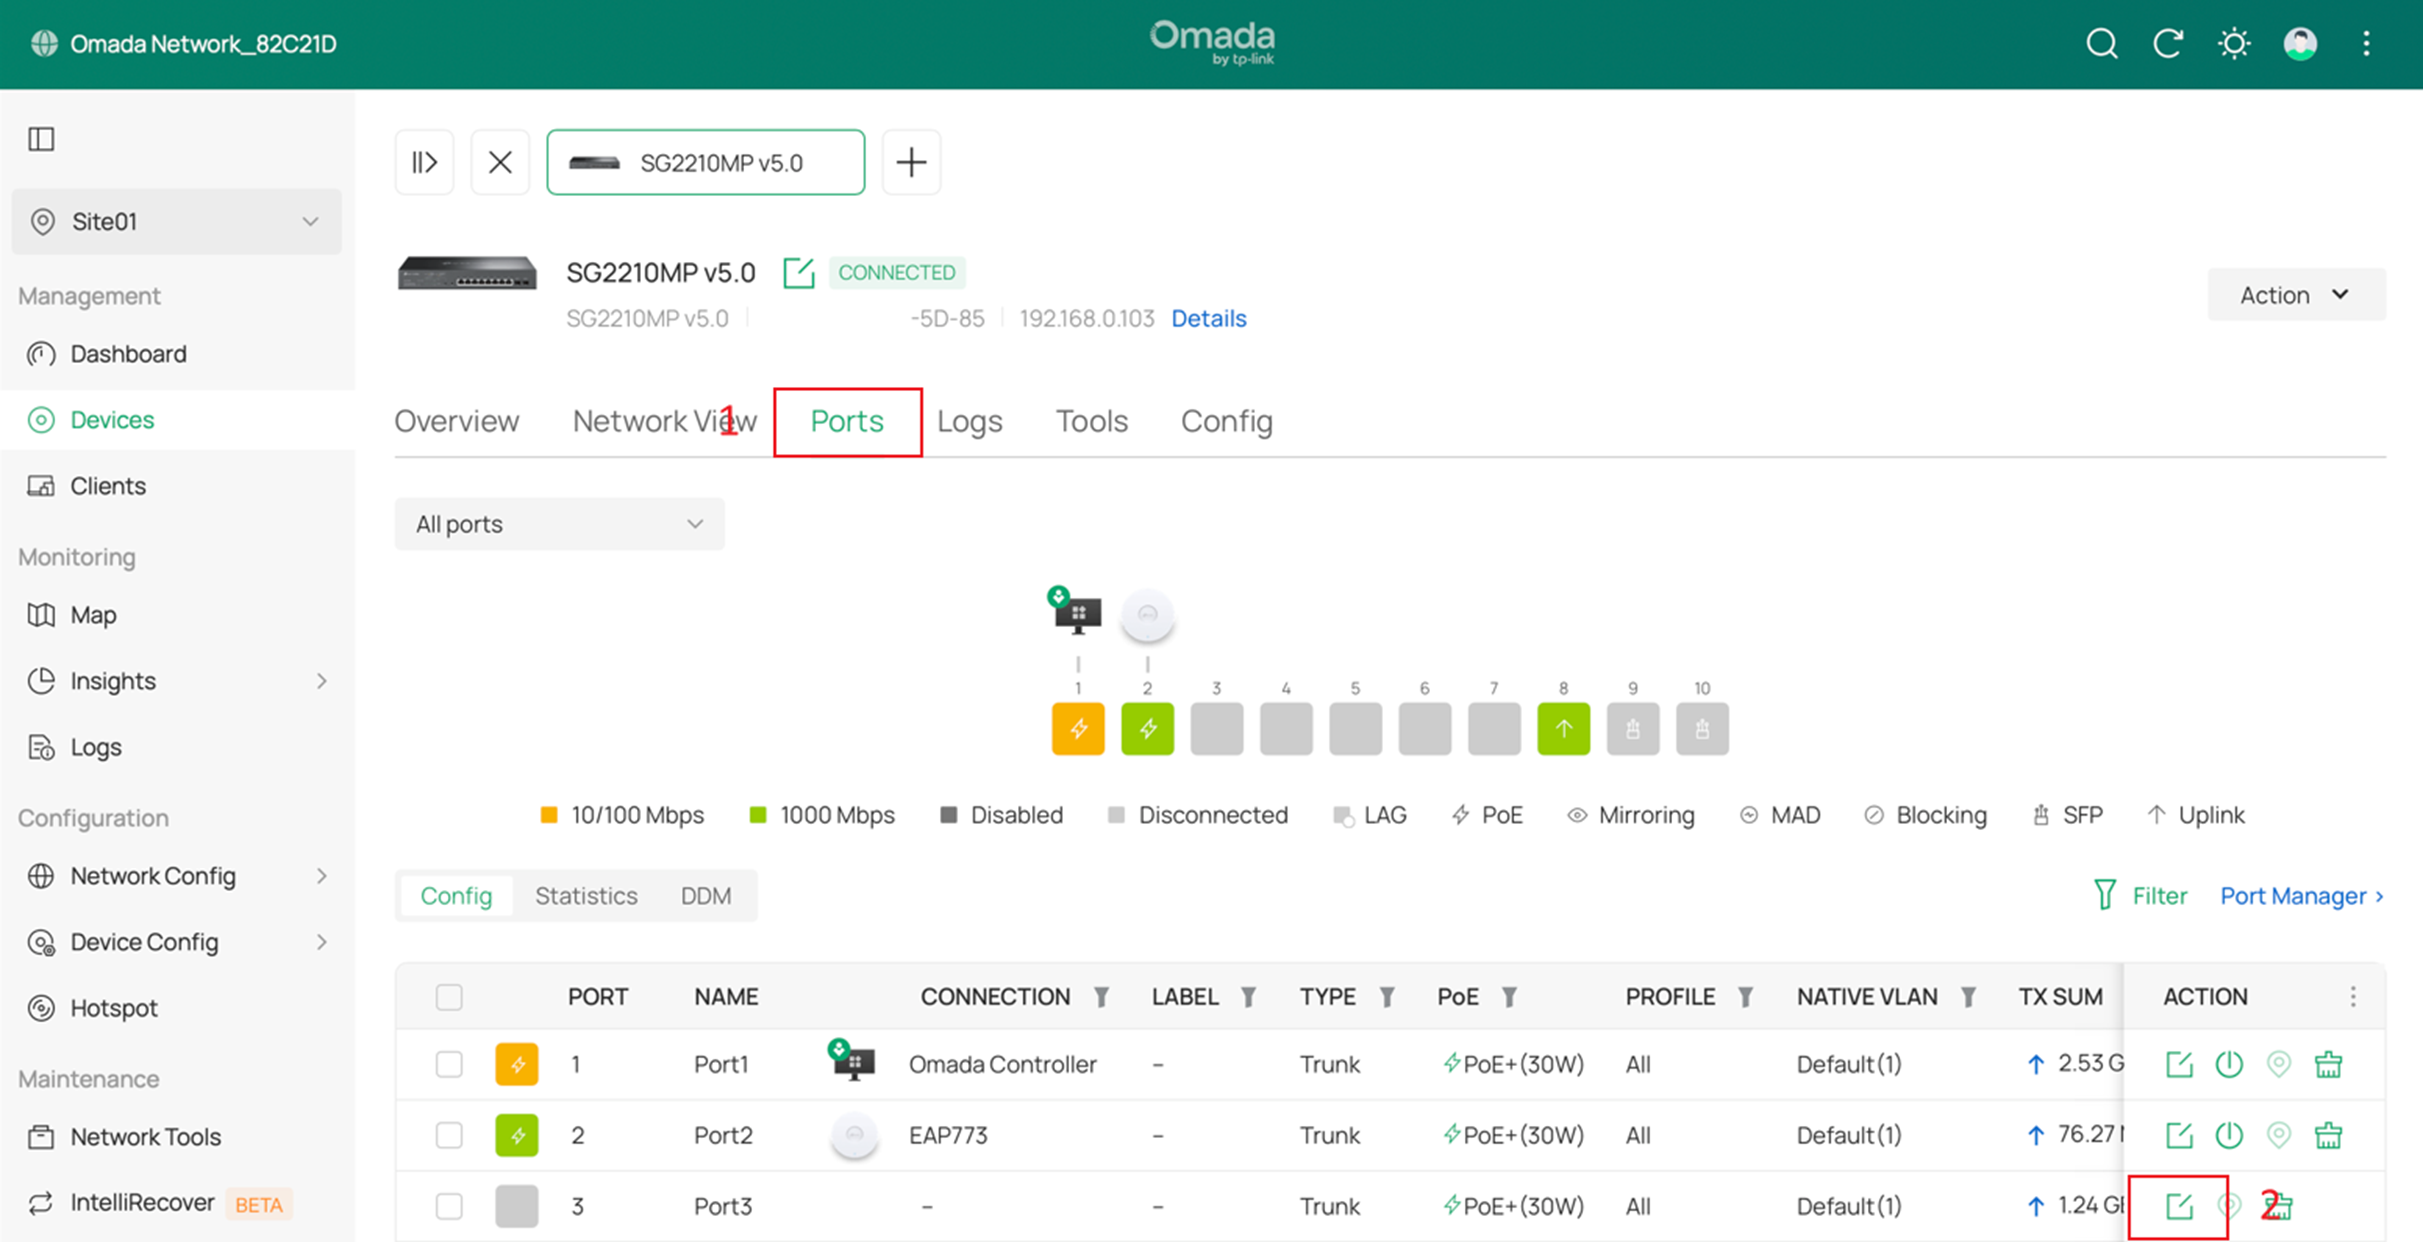
Step 2. Navigate to the Ports tab and click the Edit button for the port you intend to use as the destination port.
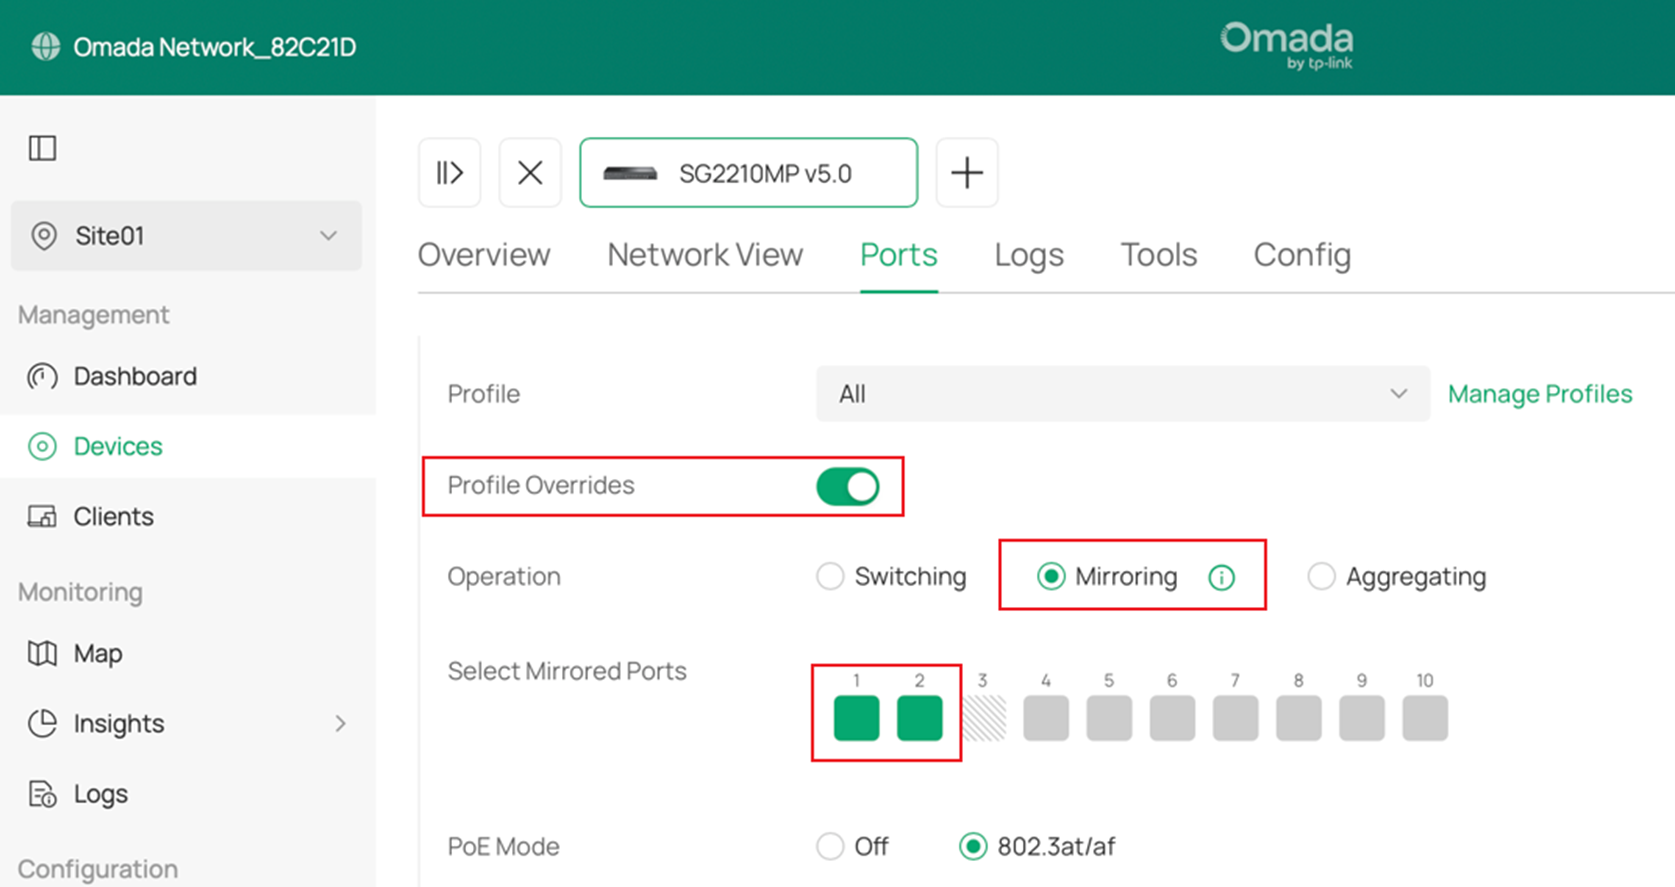
Step 3. In the port’s configuration page, open the Profile Overrides section. Change the Operation setting from Switching to Mirroring. Then, under Select Mirrored Ports, choose the source port(s) you want to mirror.
Step 4. Return to the switch’s Ports tab. You can verify the port status here. The destination port now displays an eye icon, indicating that it is configured as a mirroring port. Hovering over the icon shows which source ports are being mirrored.

Conclusion
The destination port has now been successfully configured as a mirroring port, and the selected source ports are actively mirrored to it.
Get to know more details of each function and configuration please go to Download Center to download the manual of your product.
