Note: For Omada SDN Controller v 4.3 and above
When networks in different geographical locations want to establish a network connection, it is recommended to create the site-to-site IPsec VPN tunnels on the Omada gateway on the Omada SDN Controller. Omada managed gateway supports two types of site-to-site VPNs: Auto IPsec and Manual IPsec.
This article will show you how to configure Auto IPsec on Omada gateway in controller mode, for configuring Manual IPsec VPN, please refer to How to Set up Site-to-Site Manual IPsec VPN Tunnels on Omada Gateway in Controller Mode?

Application Scenario
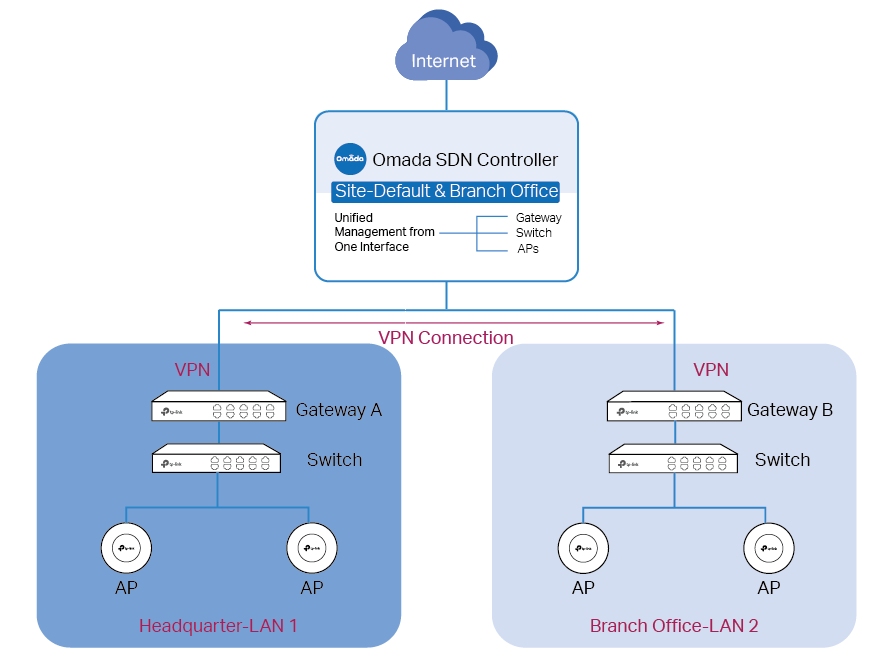
A company wants to provide its branch office with access to the network in headquarter. The gateways in headquarter and its branch office are managed by the same controller, but they are on different sites. Also, the Omada gateway is not behind any NAT device, in other words, the Omada gateway is receiving a public IP address on the WAN interface
In this scenario, it is recommended to configure Auto IPsec on the site of headquarter. Take the following topology as an example.
Note: If the Omada gateway is behind a NAT device, Auto IPsec is not applicable. It is recommended to configure Manual IPsec in this situation.

Configuration
Step 1. Create a new VPN policy
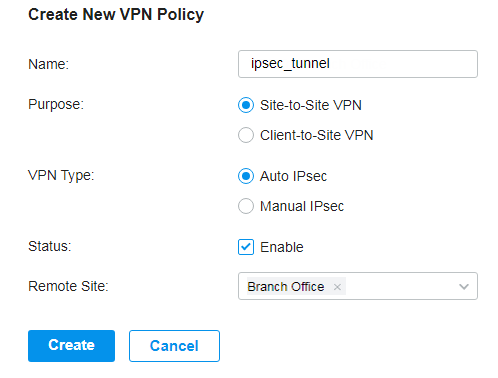
Go to Settings > VPN and click + Create New VPN Policy.

Step 2. Configure the parameters for the new VPN policy
Enter a name to identify the VPN policy, select the purpose for the new entry as Site-to-Site VPN, and the VPN Type as Auto IPsec. Then choose the site of the branch office, and click Create.

Verification of the Auto IPsec VPN tunnel
Go to Insight > VPN Status > IPsec SA and check the IPsec SA entries. When two IPsec SA entries with the name IPsec_tunnel are displayed in the table, the VPN tunnel is successfully established.


