


How to Configure the DHCP Server in Standalone Mode
How to Configure the DHCP Server in Controller Mode
Introduction
When creating a LAN Network, the Omada Gateway can enable the DHCP Server service to assign IP addresses and other network configuration parameters, such as subnet mask, gateway address, and DNS server addresses, to connected clients.
Requirements
- Omada Gateway (Fully Compatible with Omada Controller v6.2)
- Omada Controller v6.2 and above
Configuration
This article introduces how to configure the DHCP function on the Omada Gateway in both Standalone and Controller modes.
How to Configure the DHCP Server in Standalone Mode
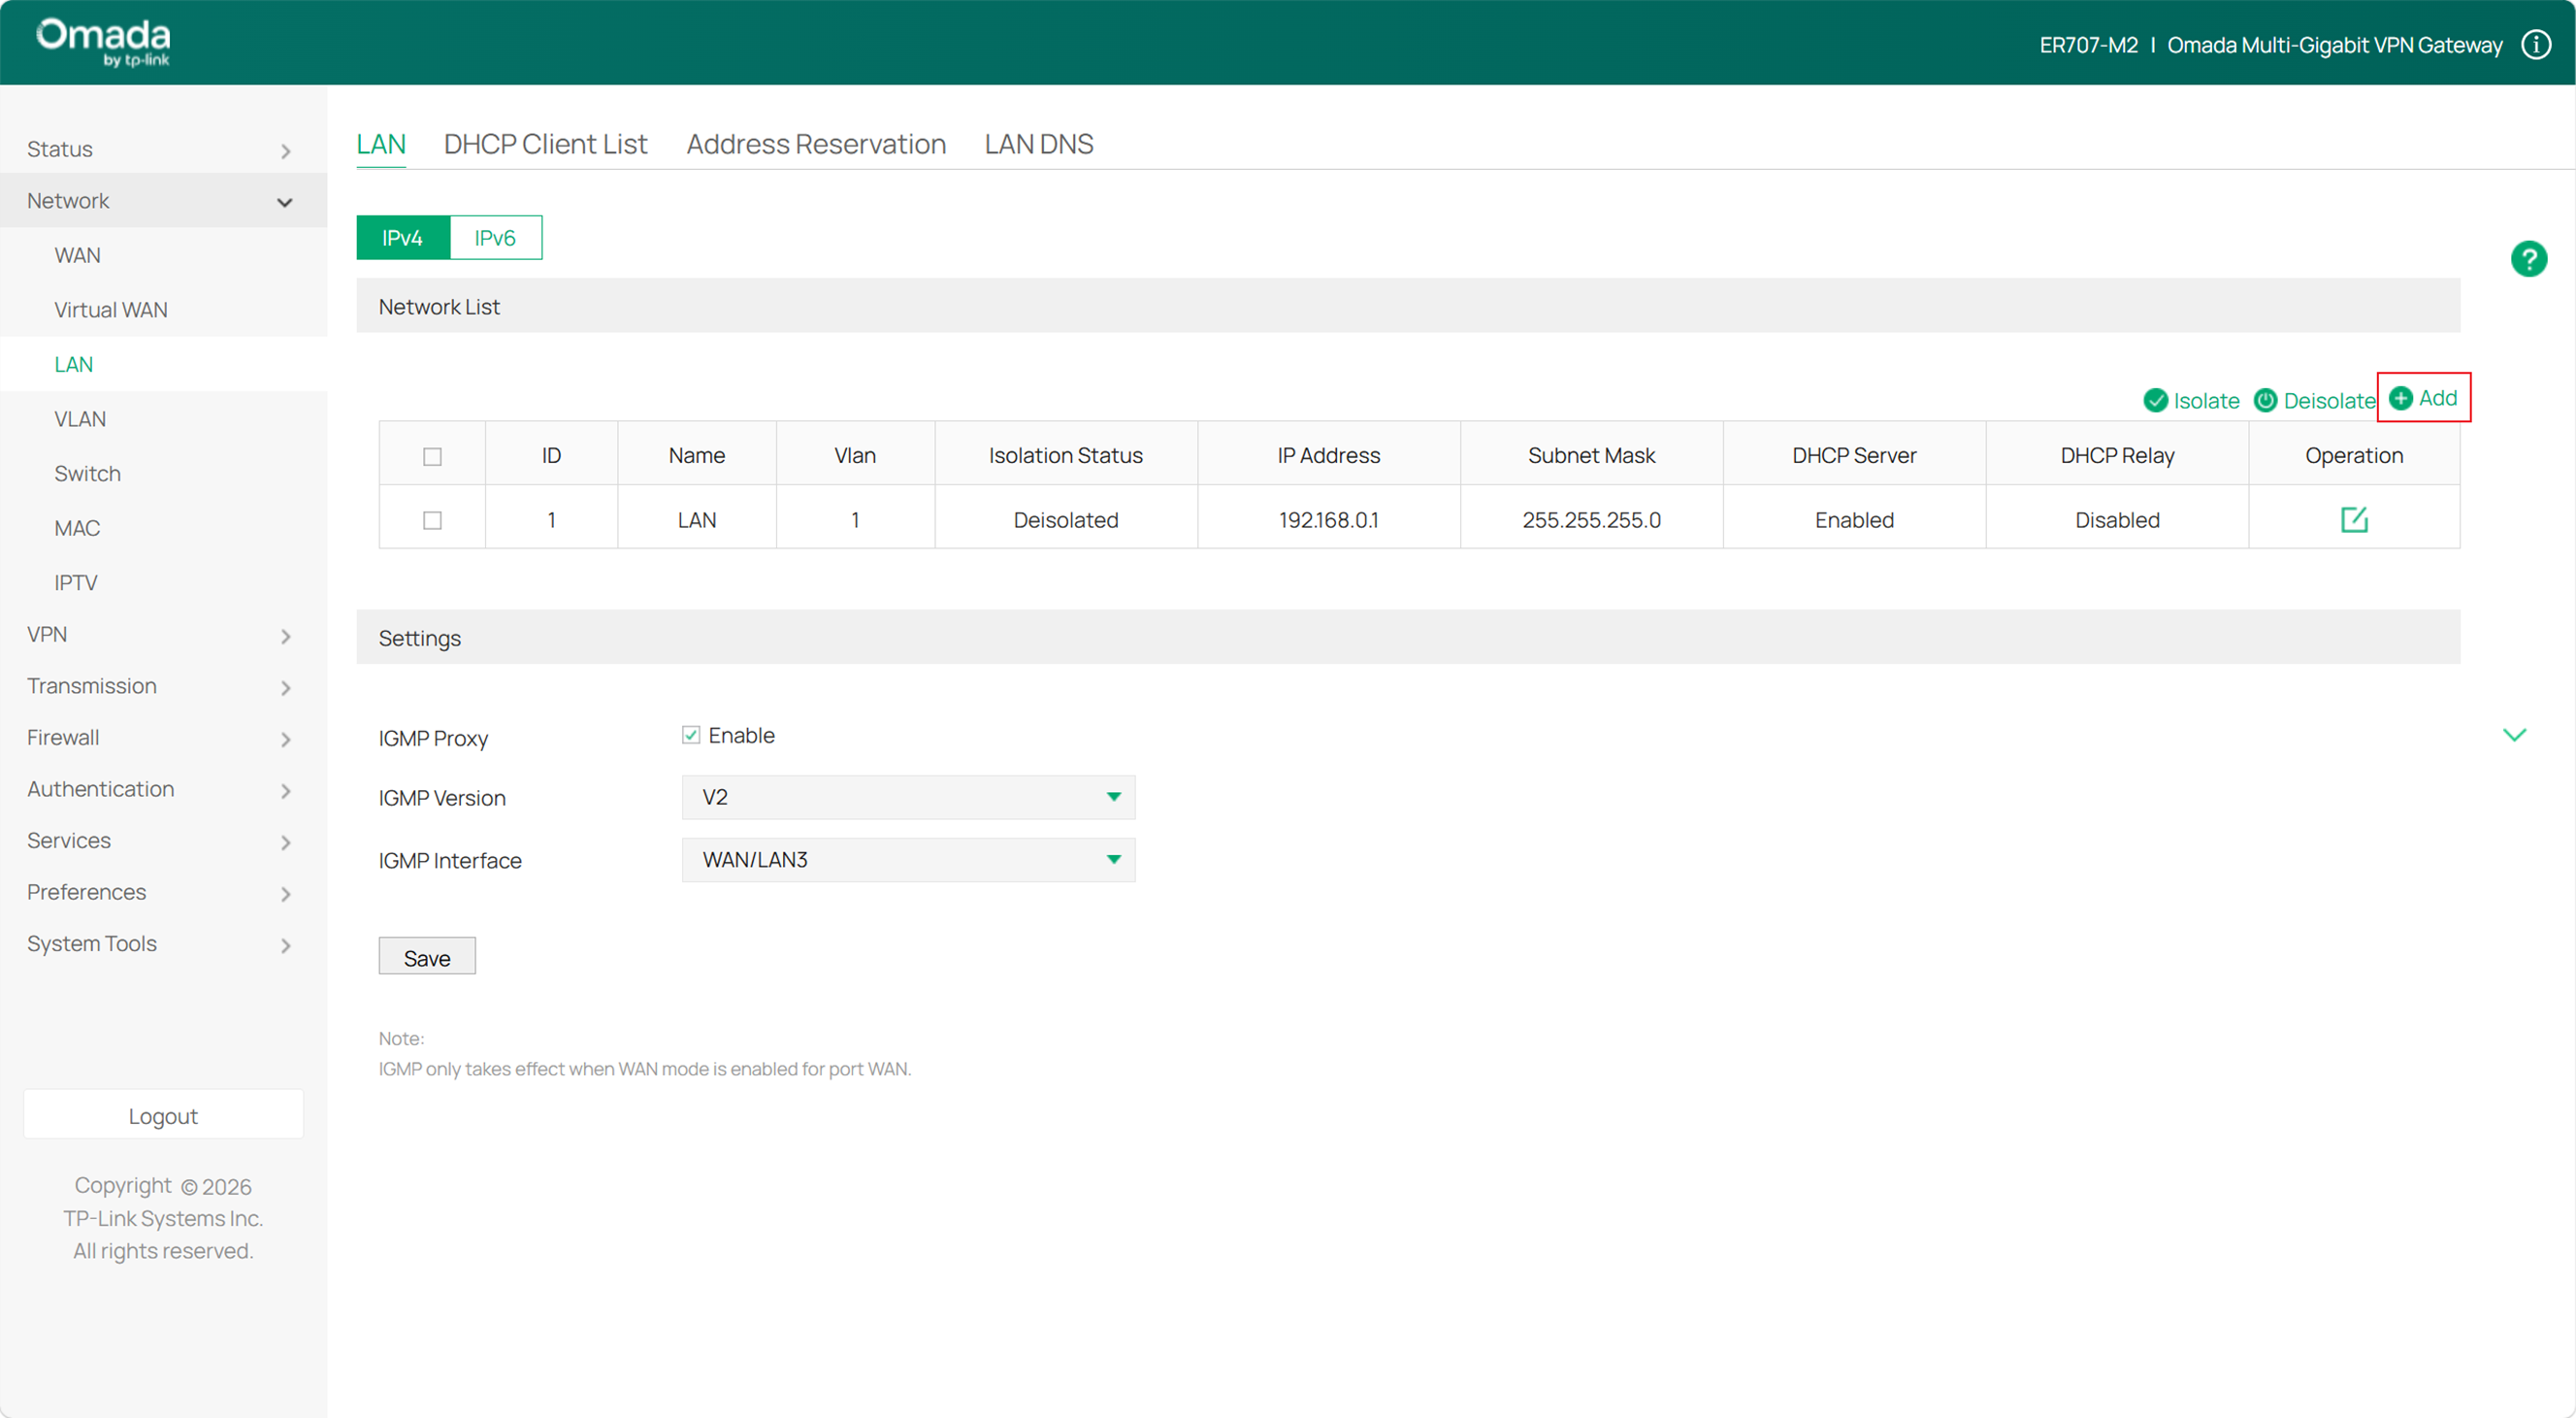
Step 1. Go to the LAN configuration
In standalone mode, you can configure the DHCP Server service when you click Add to add an L3 network interface in Network > LAN > Network List.
Step 2. Fill in the basic information of the DHCP Server
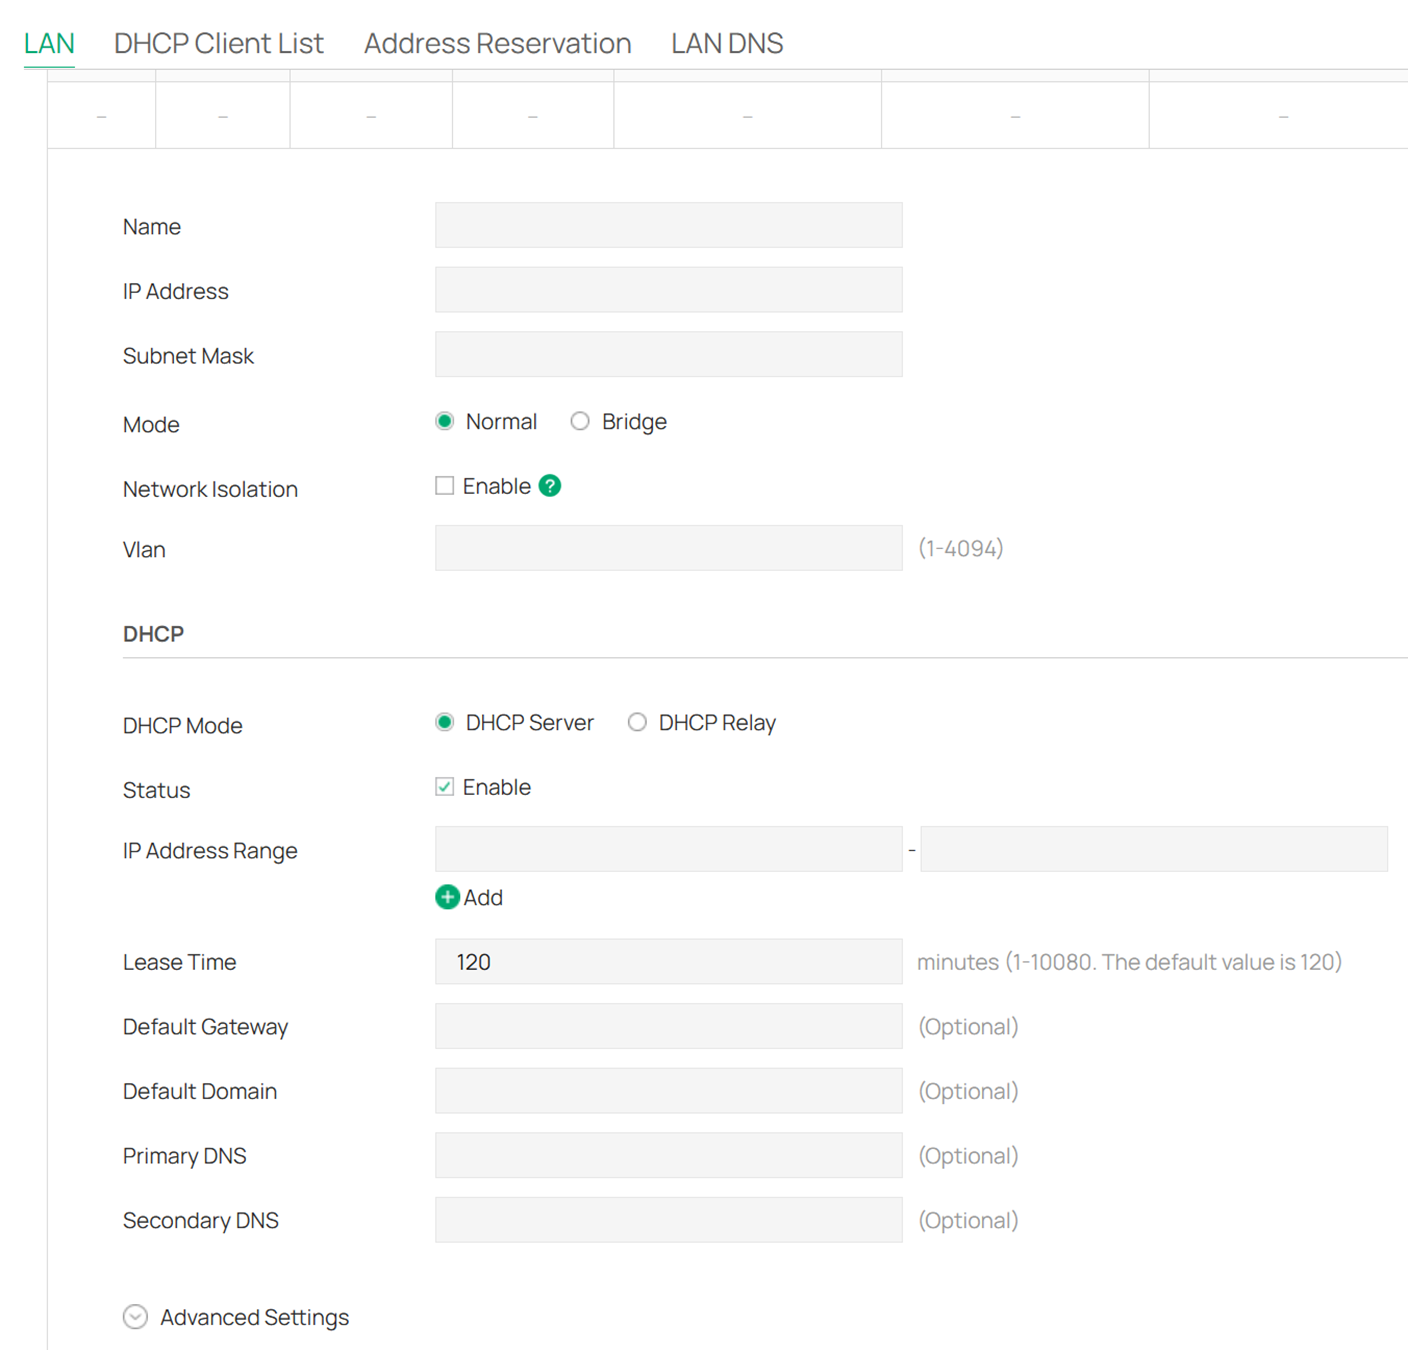
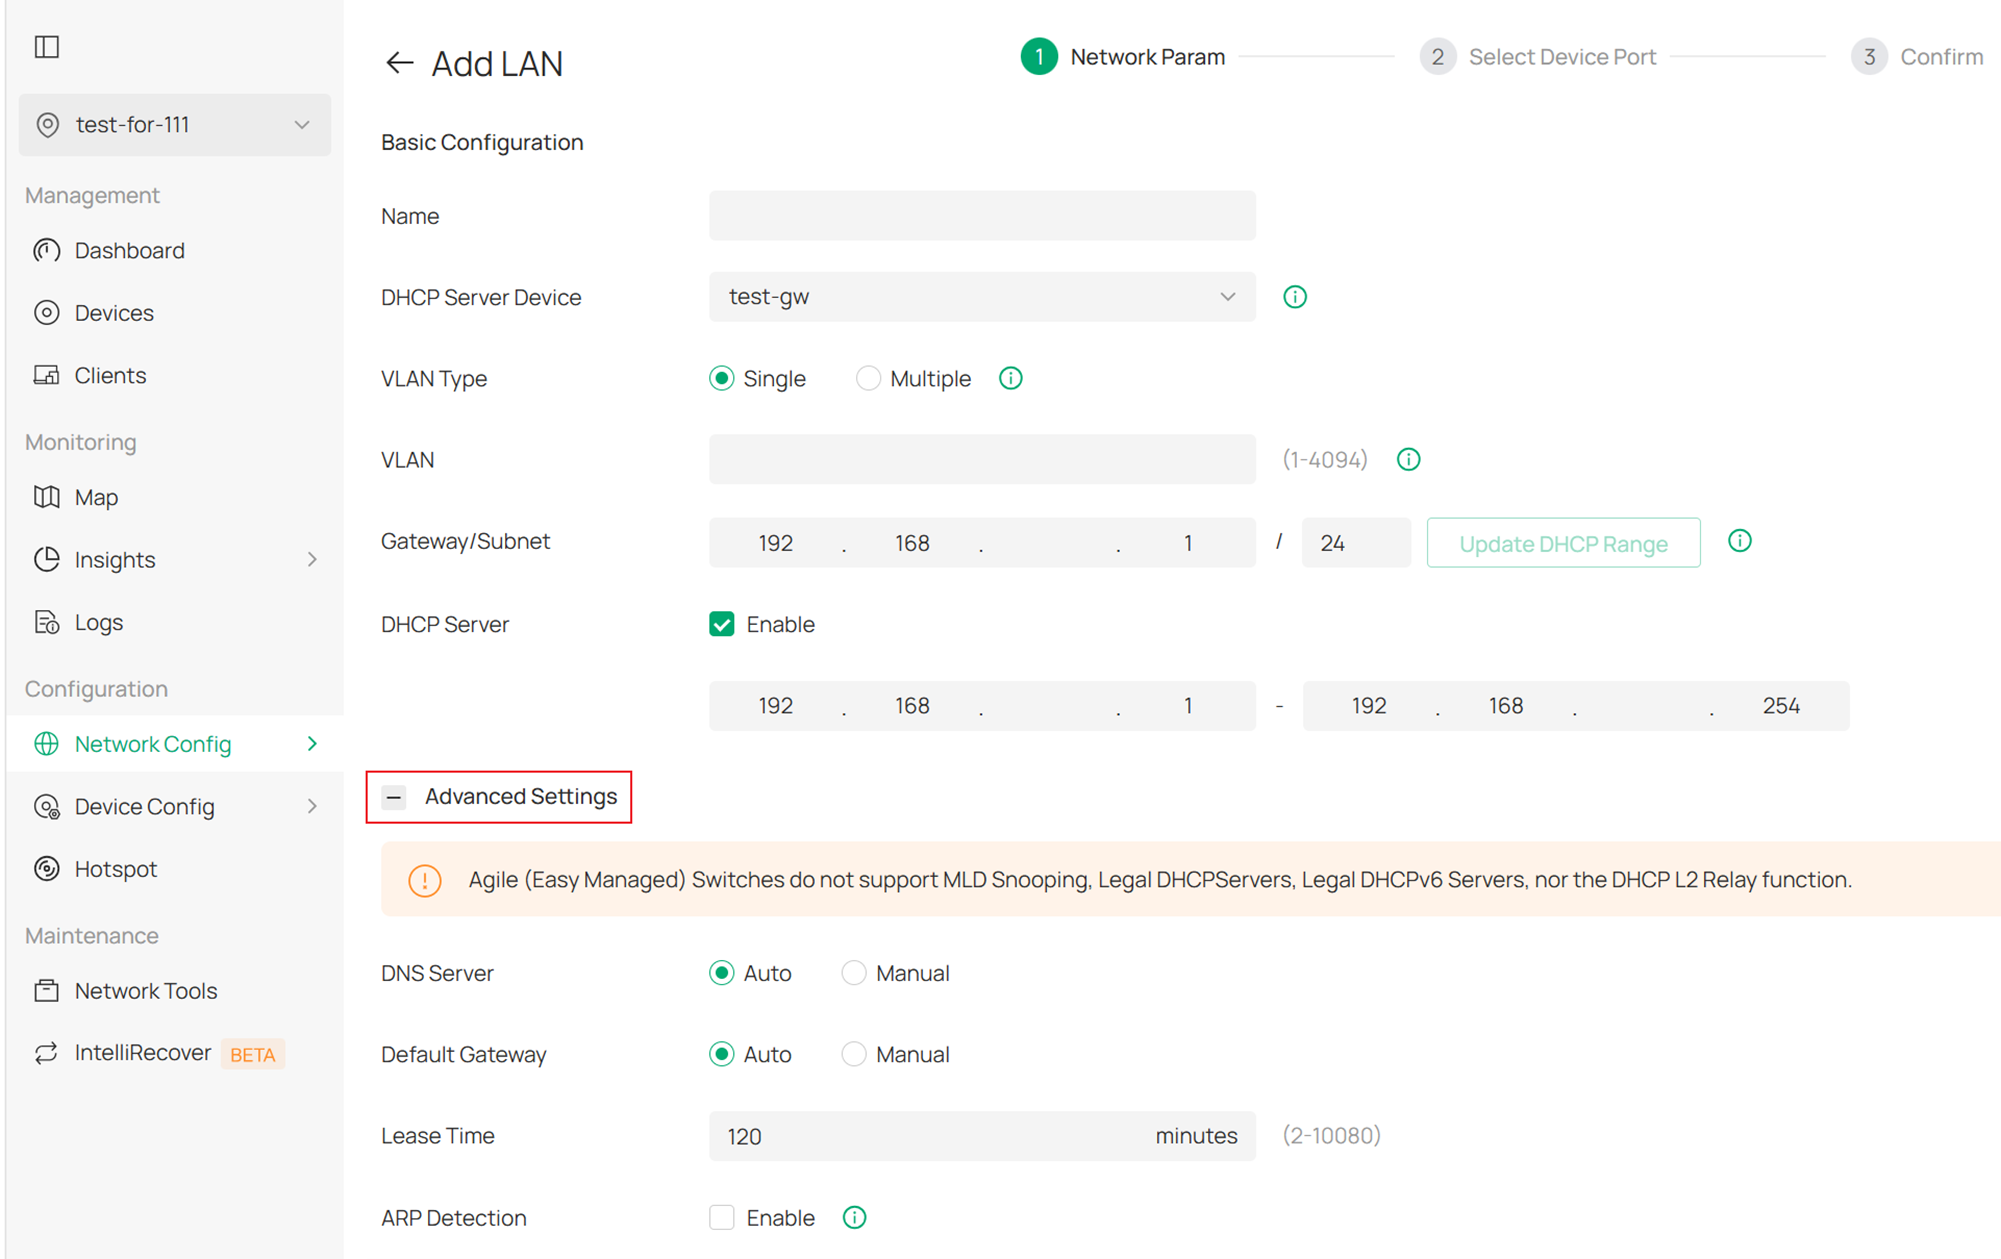
The DHCP Server runs on the corresponding LAN Network, so you need to complete the basic configuration of the LAN Network first.
IP Address: The address will be used for the DHCP Server.
Vlan: Configure the corresponding VLAN, and the interaction between the DHCP Server and the client will be performed in this VLAN.
IP Address Range: Configure the DHCP address pool range, which needs to be in the same subnet as the DHCP Server.
Lease Time: Configure the lease duration.
Default Gateway: Configure the client's gateway information.
Primary DNS/Secondary DNS: Assign DNS Servers to the client.
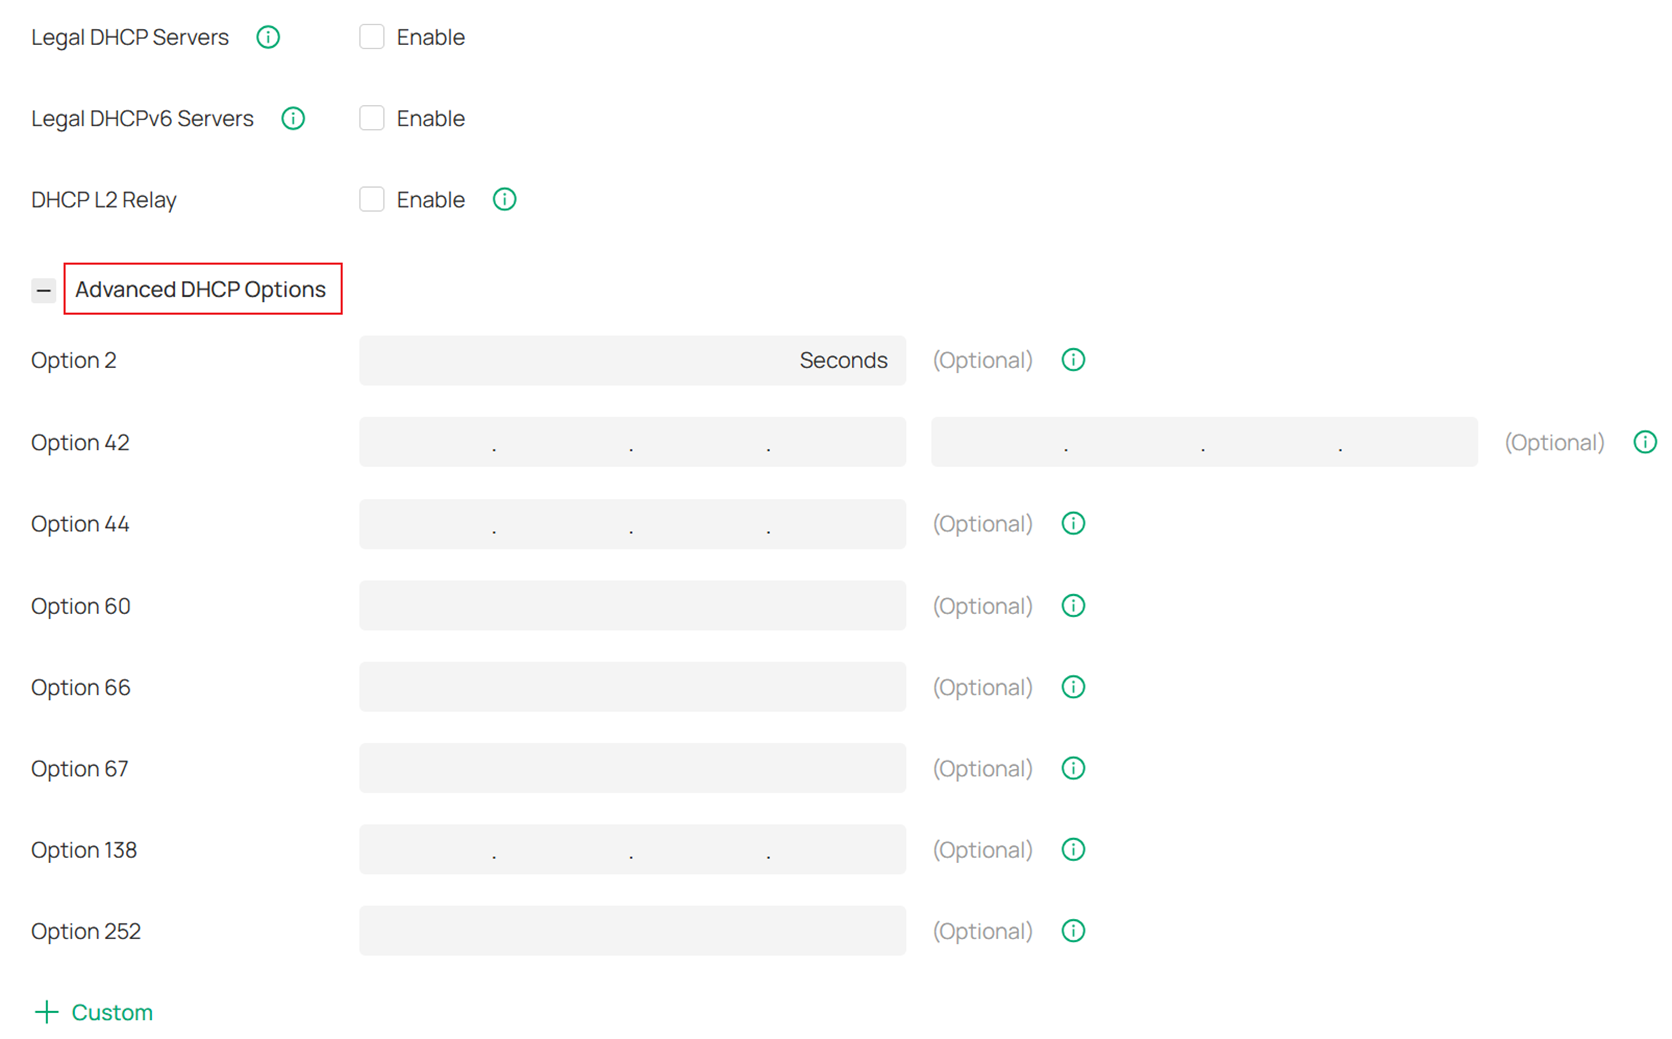
Step 3. Fill in the Advanced Settings of the DHCP Server
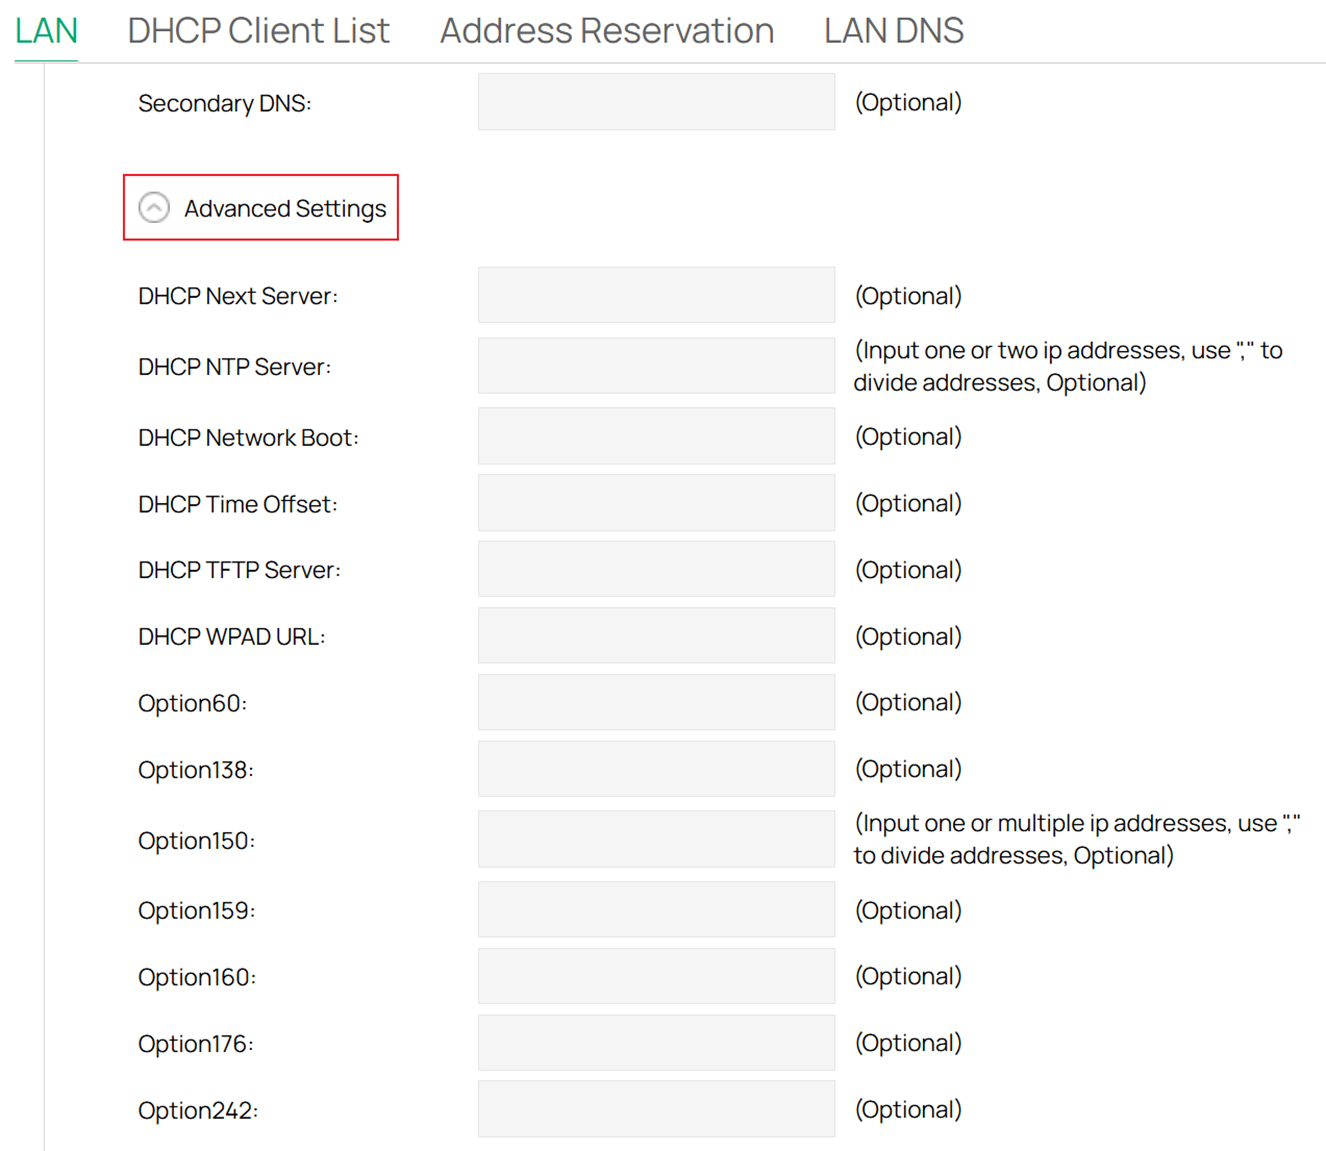
DHCP Next Server: Specify the server IP address that the DHCP client will use in the next step.
DHCP NTP Server (Option 42): Enter one or two DHCP NTP Server addresses to get the system time from the internet. Use "," to divide addresses.
DHCP Network Boot (Option 67): Enter the value for DHCP Option 67. It specifies the boot file name.
DHCP Time Offset (Option 2): Enter the time offset of the DHCP client’s subnet in seconds from the UTC time.
DHCP TFTP Server (Option 66): Enter the TFTP server address for file transfer.
DHCP WPAD URL (Option 252): Enter the DHCP WPAD (Web Proxy Auto-Discovery) URL for the DHCP client to configure its proxy settings.
Option 60 (Optional): Enter the value for DHCP Option 60. DHCP clients use this field to optionally identify the vendor type and configuration of a DHCP client.
Option 138 (Optional): Enter the value for DHCP Option 138. It is used in discovering the devices by the controller.
Option 150 (Optional): Enter the value for DHCP Option 150. It specifies the TFTP server information and supports multiple TFTP server IP addresses.
Option 159 (Optional): Enter the value for DHCP Option 159. This option is used to configure a set of ports bound to a shared IPv4 address.
Option 160 (Optional): Enter the value for DHCP Option 160. This option is used to configure the DHCP captive portal.
Option 176 (Optional): Enter the value for DHCP Option 176. This option is used to configure parameters for IP phones.
Option 242 (Optional): Enter the value for DHCP Option 242. This option is used to provide the TMS address automatically.
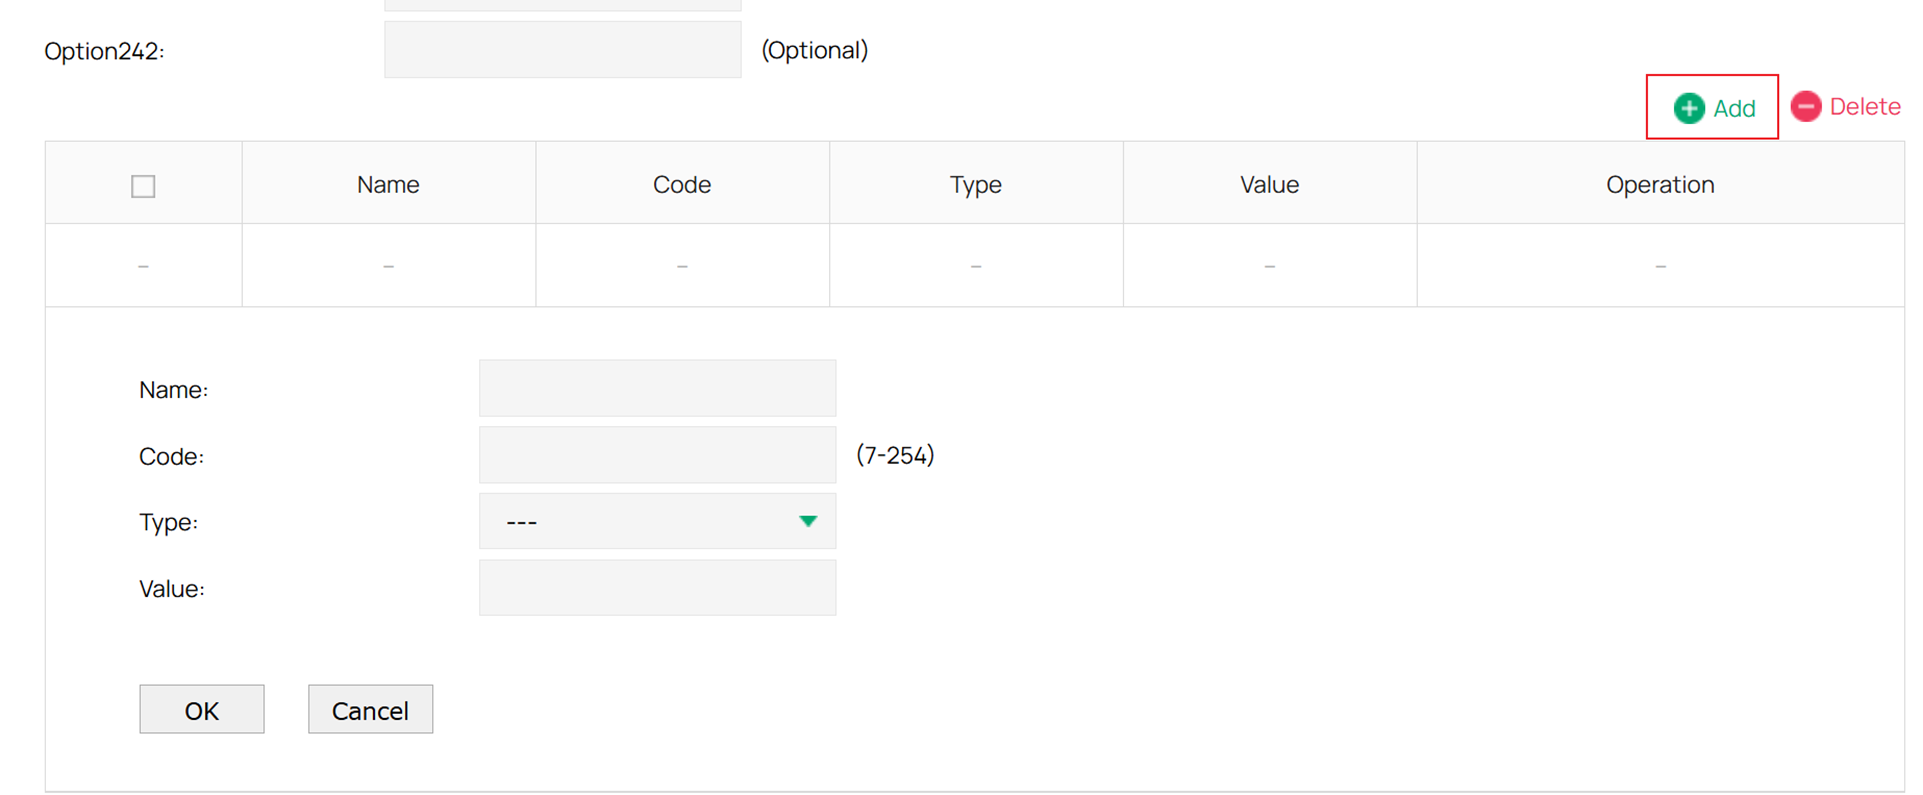
If the option you need is not listed, you can choose to add one. Specify the option type and enter its value according to your needs.
How to Configure the DHCP Server in Controller Mode
Step 1. Edit the VLAN configuration
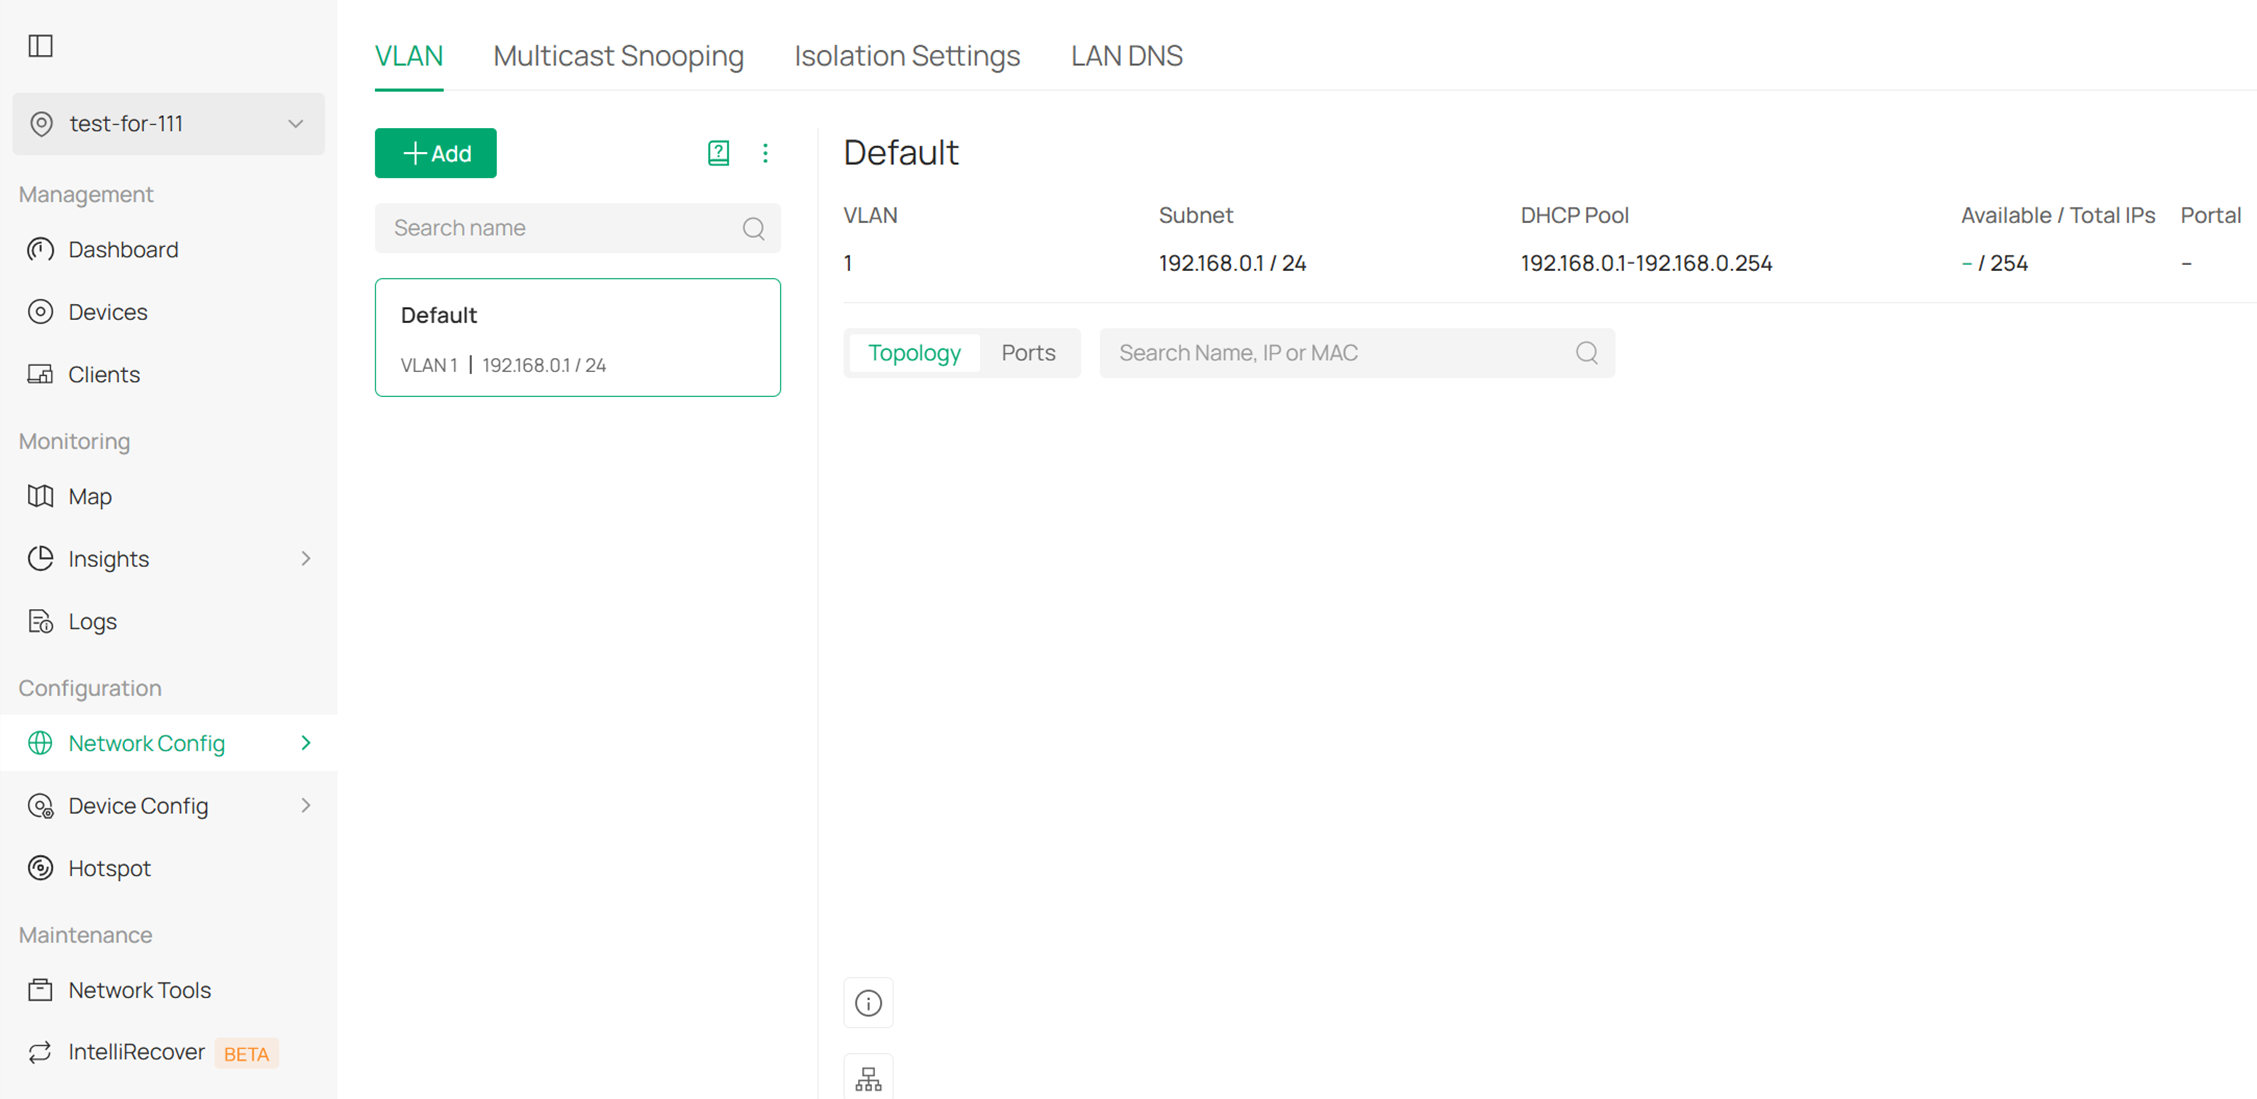
In Controller mode, you can configure the DHCP Server service when you click Create New LAN to create an L3 network interface in Network Config > Network Settings > LAN > VLAN.
Most of the configurations are almost the same as those in Standalone mode, and these fields can be configured according to your network planning needs.
Of course, you can also configure Advanced DHCP Options according to your network needs.
Conclusion
Through the above operations, the DHCP Server setup on the Omada gateway has been successfully completed.
Get to know more details of each function and configuration please go to Download Center to download the manual of your product.
