


Contents
Configuration in Standalone Mode
Configuration in Controller Mode
Introduction
Omada has published the brand new 5G ODU (OutDoor Unit) ER701-5G-OD, which supports dual SIM (Backup mode) and 5G WAN connection with speeds up to 7.01 Gbps. This article introduces how to set up the 5G WAN connection with a SIM card.
The ER701-5G-OD primarily provides WAN network connectivity in scenarios where wired network access is unavailable or serves as a backup WAN for IDU devices. It’s commonly installed outdoors where the cellular network signal is better. This device has only one port, which supports PoE as power input; a passive PoE adapter is also included in the product package. Therefore, it is recommended to insert the SIM card before installation and connect the device directly to a PoE power source after outdoor installation. We aim to minimize frequent physical operations after installation, as it’s typically installed in hard-to-reach locations.
Requirements
- ER701-5G-Outdoor
- Compatible SIM Cards
Configuration
Configuration in Standalone Mode
This section will introduce how to make the WAN configuration under standalone mode.
- Through the Omada App
Step 1. Power on the ER701-5G-OD and insert a compatible SIM card. In the factory reset state, the ER701-5G-OD will broadcast a 2.4Ghz SSID named Omada_2.4GHz_XXXXXX. This SSID is designed for convenience device configuration. Go to the wireless settings on your phone and connect to this SSID.
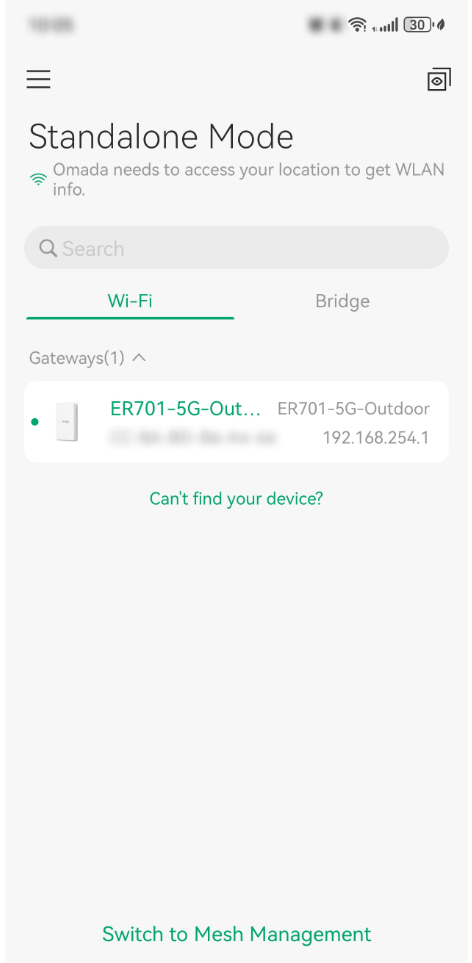
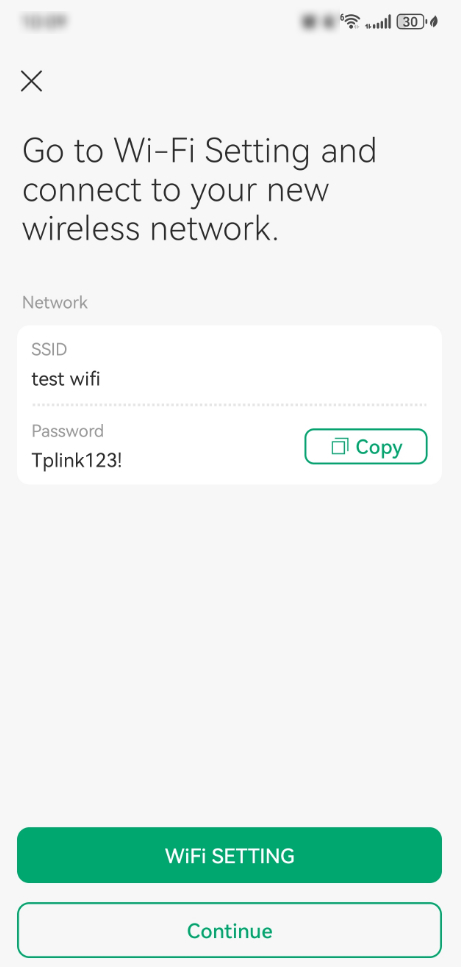
Step 2. Open the Omada App and go to the Standalone Mode page. It will automatically appear on the Wi-Fi list.
Step 3. Follow the App's instructions to complete the quick setup. This includes setting up the device account, configuring SIM card settings, and wireless configuration.
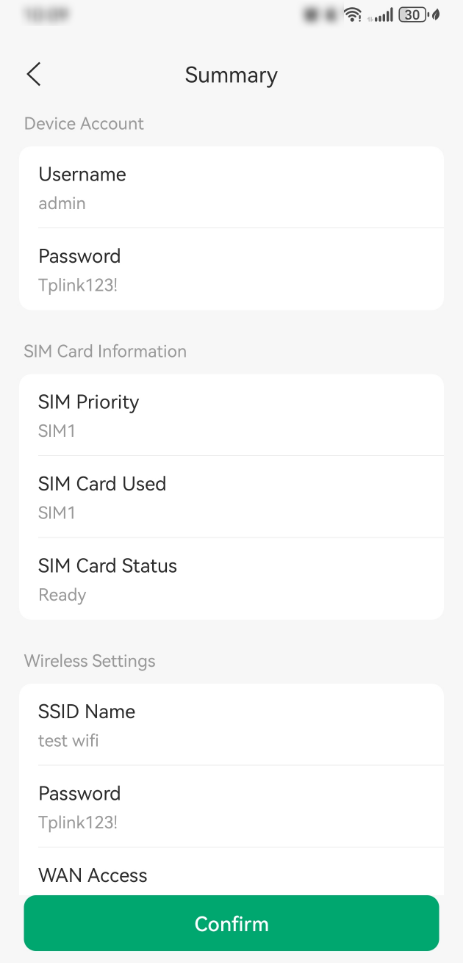
After completing the setup, you will see the summary page. Click Confirm to finalize and apply the settings.
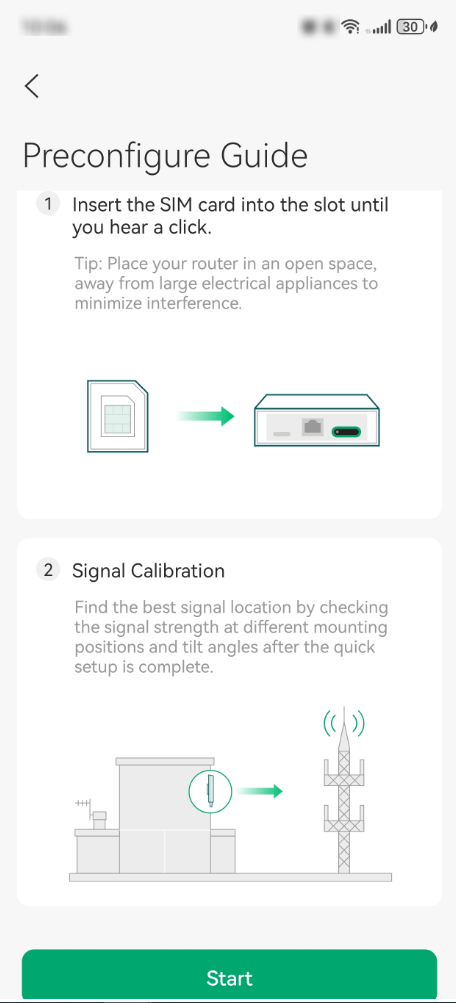
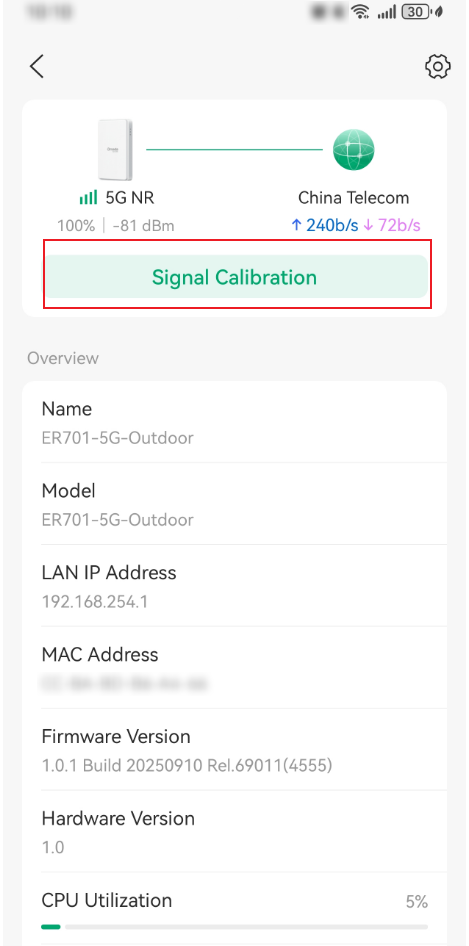
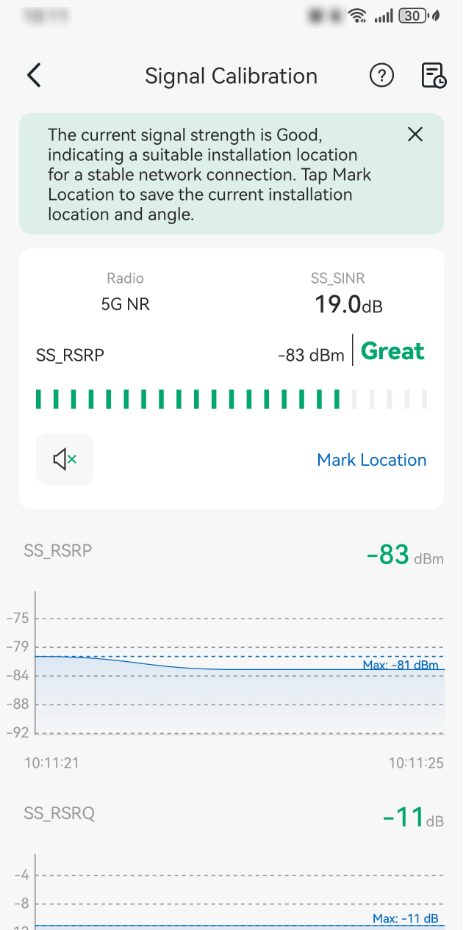
Step 4. After successfully applying the configuration, you can log in to the device page and perform Signal Calibration. Adjust the device's angle using the signal calibration function and find the optimal location for installation where the signal is strongest.
- Through the Web UI
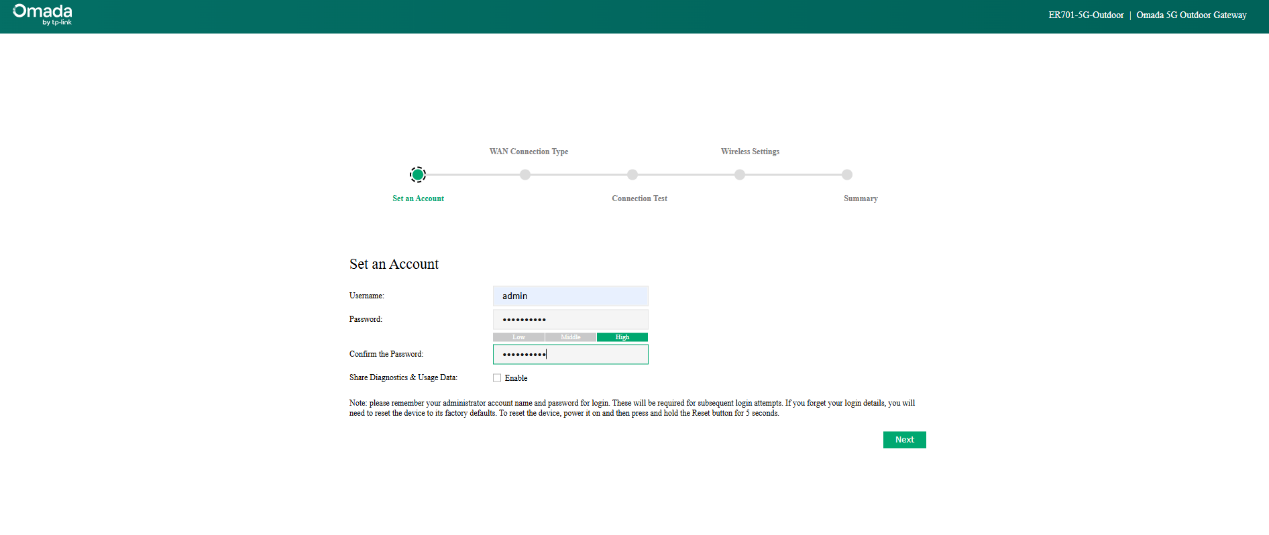
Step 1. Connect to the ER701-5G-OD's default SSID and access its default IP address (192.168.254.1) or use the default domain name (https://mobile.omada.net) to log in to the device's web management interface.
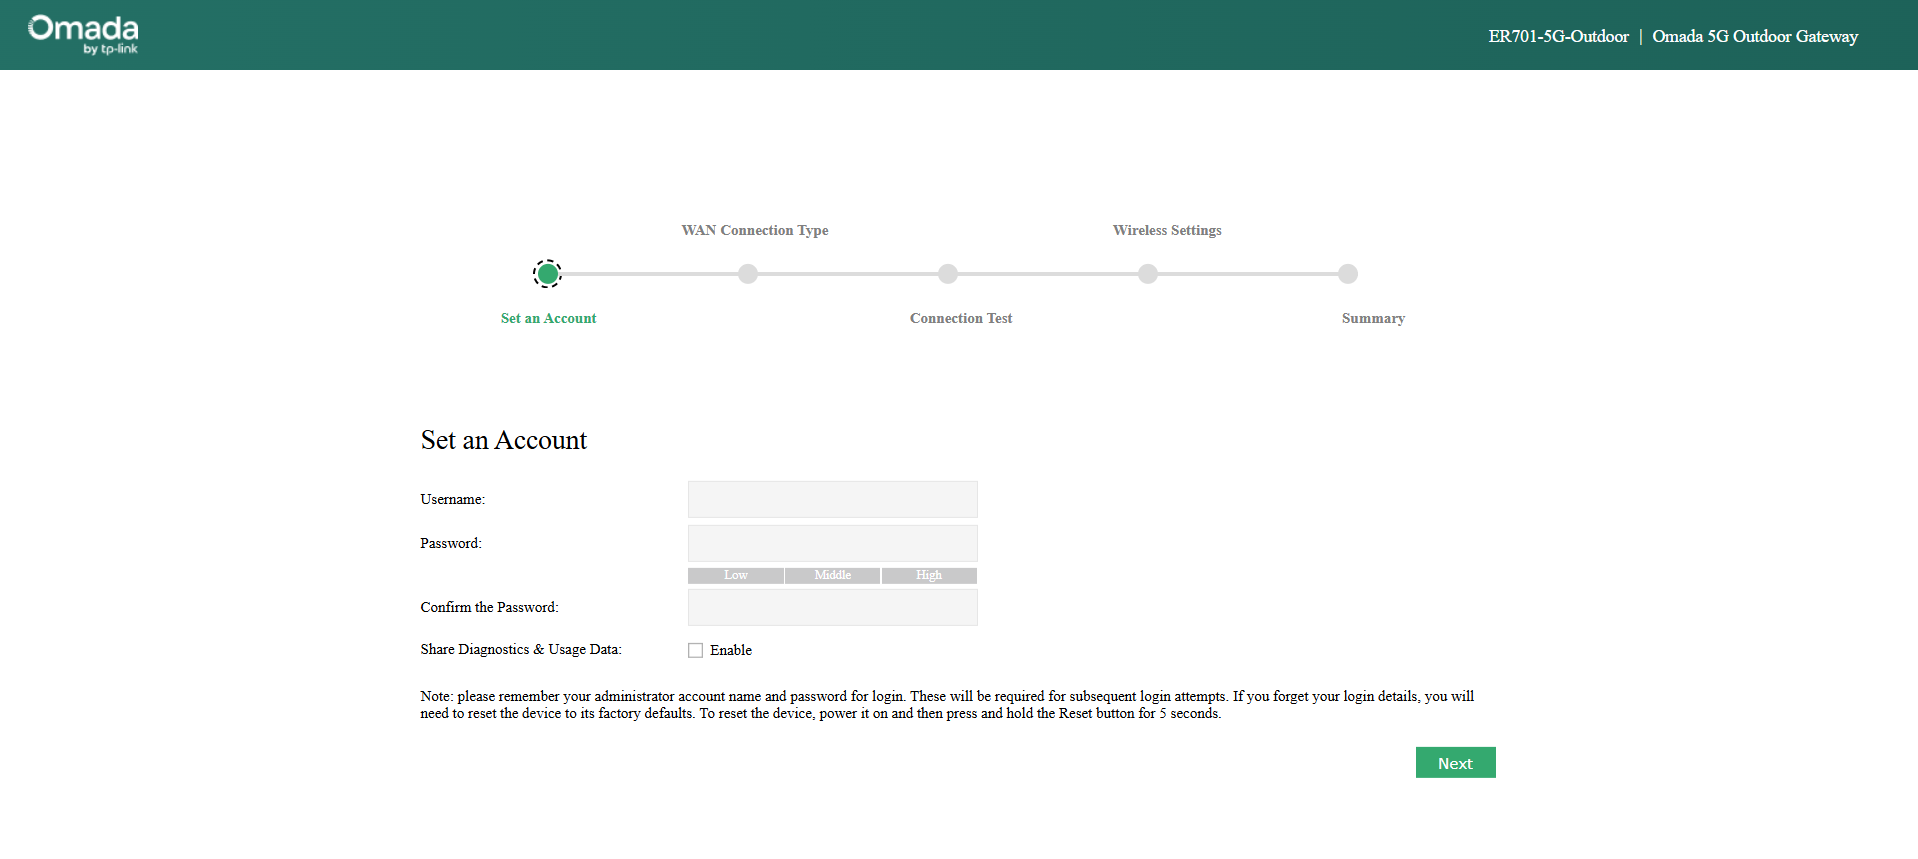
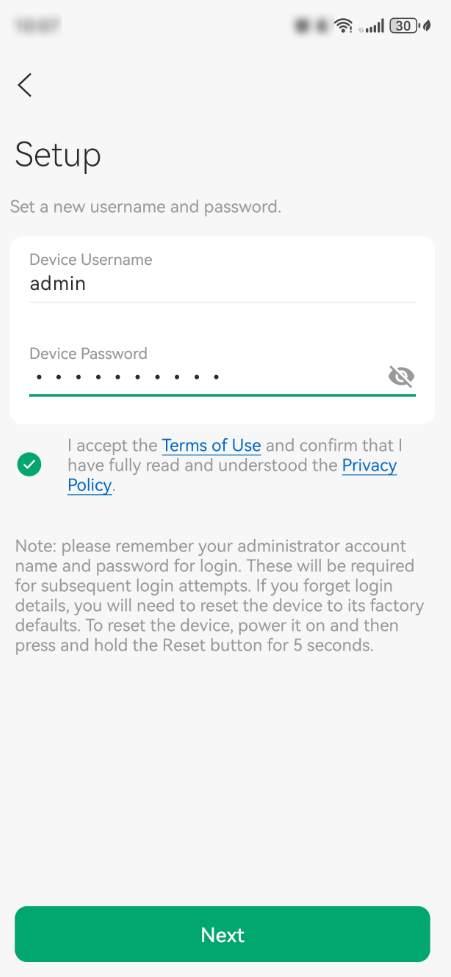
Step 2. Set up the username and password for the device. Then click Next to continue.
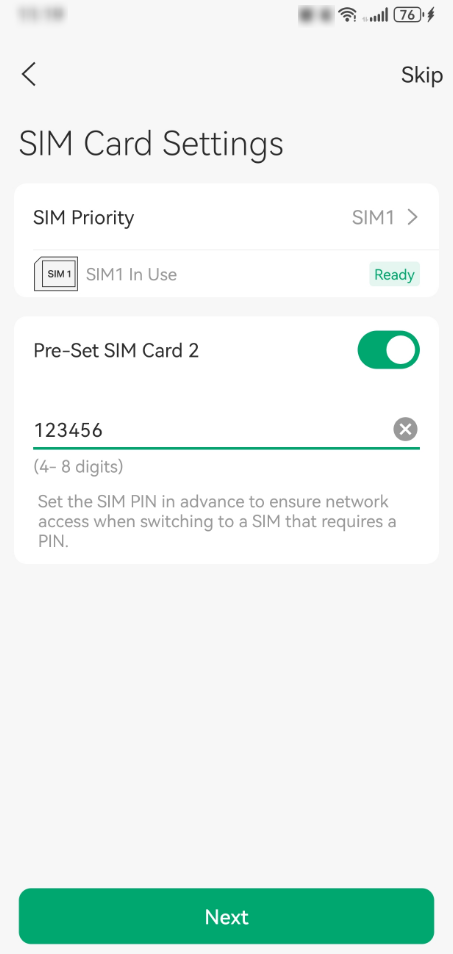
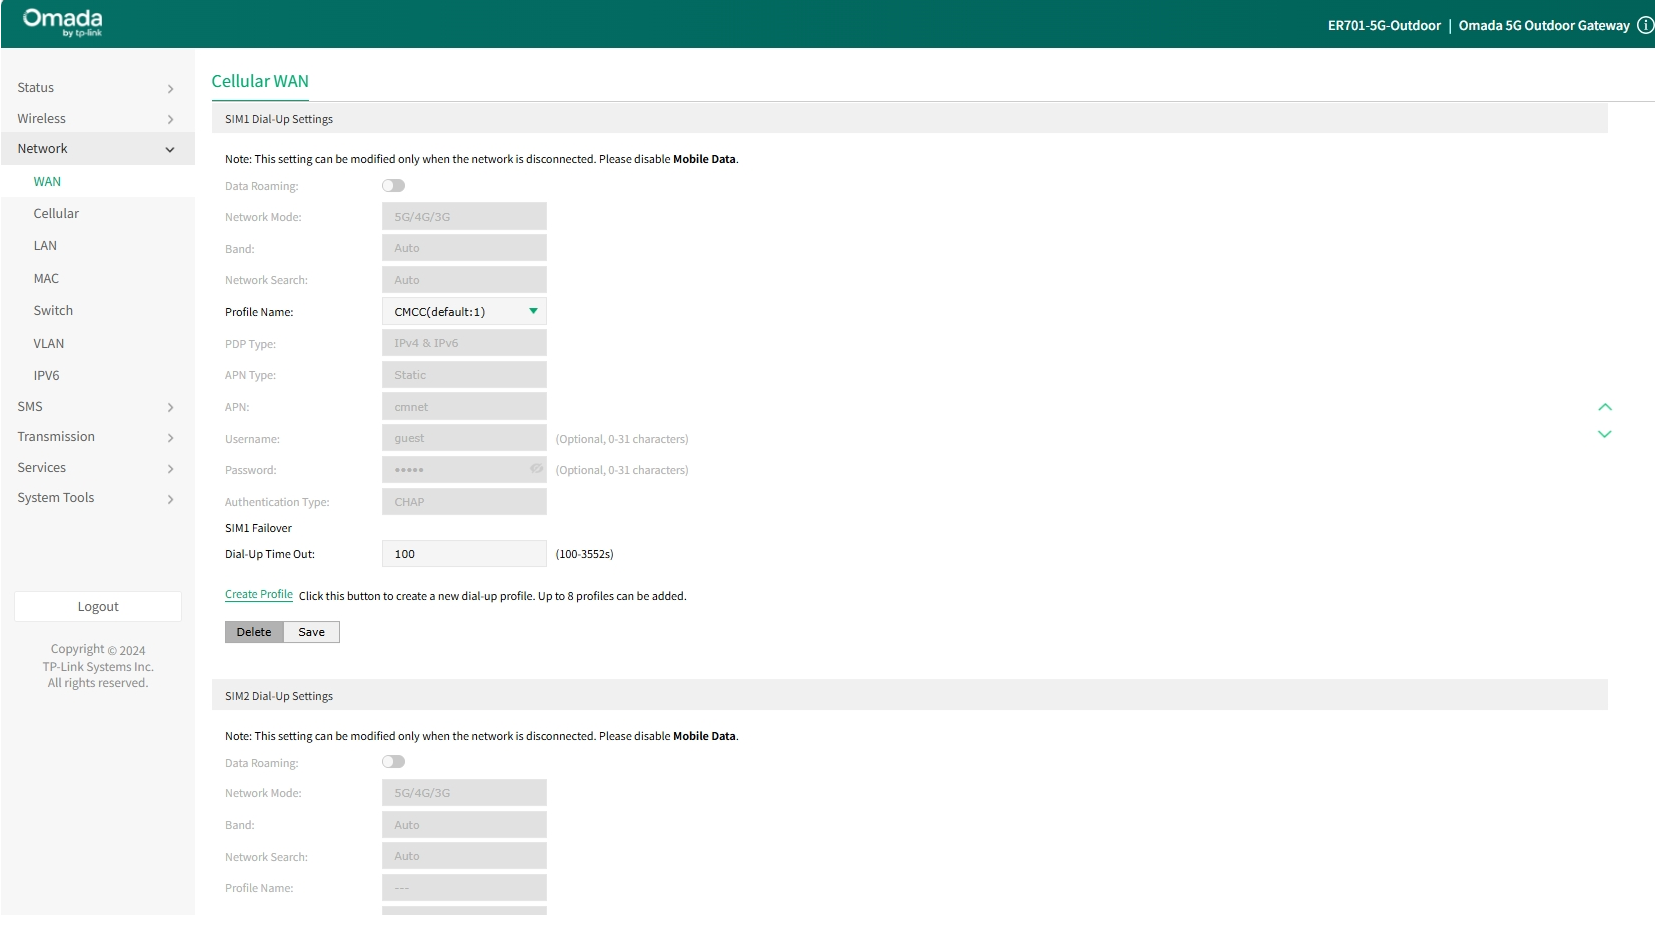
Step 3. The next page is the WAN Connection Setup page, as the ER701-5G-OD supports cellular WAN only. This is also the page for setting up the SIM card. There are two SIM card slots equipped on the device, but only one SIM card can work at the same time. On this page, you can configure the SIM card priority to decide which SIM card will be used first.
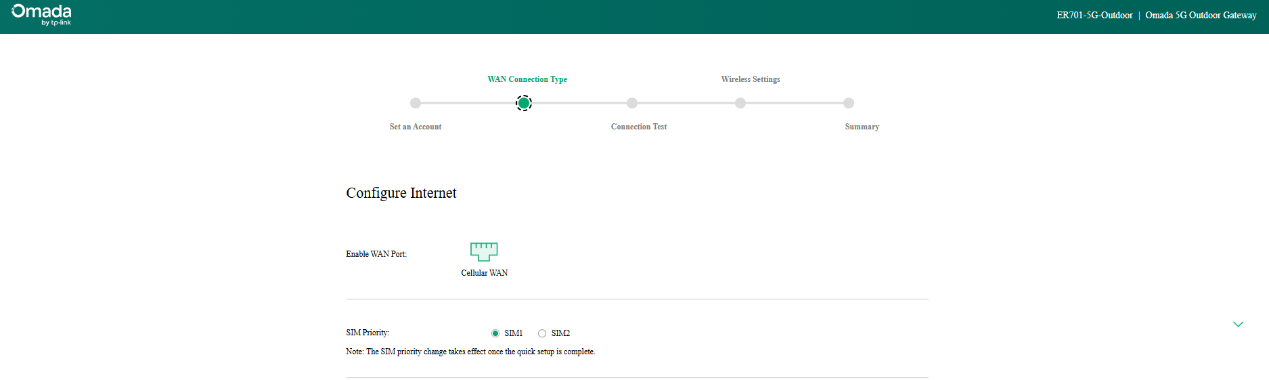
After inserting a compatible SIM card, the configuration profile will be automatically prepared. Typically, automatic configuration will allow you to connect to the internet. You can also configure it manually.
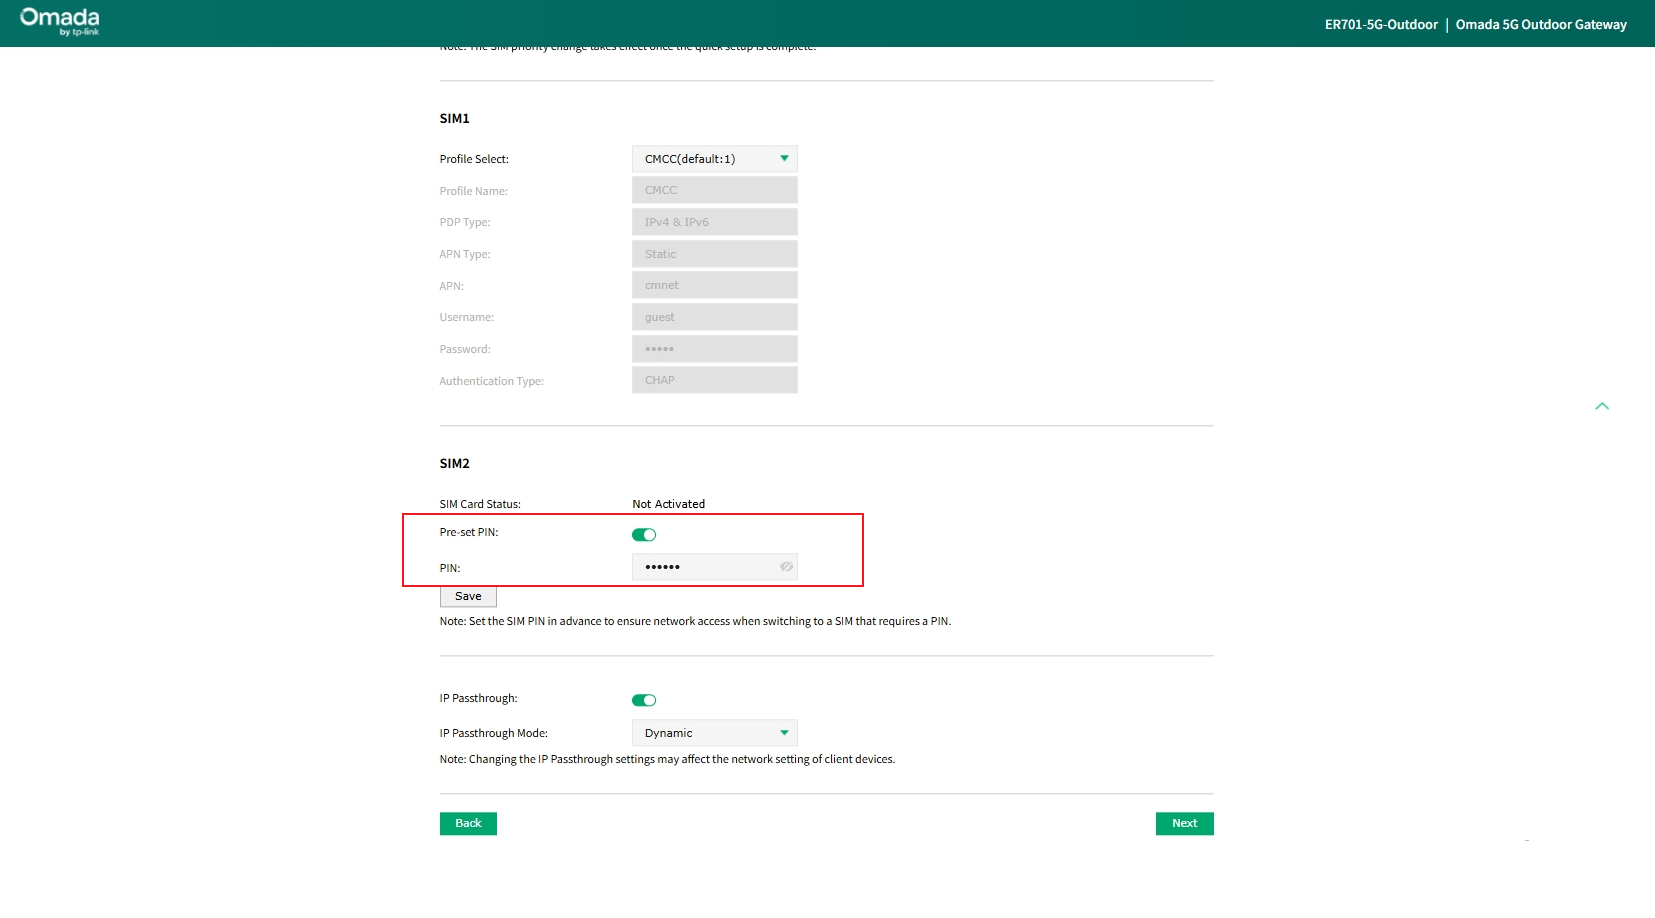
Note: Set the SIM PIN in advance to ensure network access when switching to a SIM that requires a PIN.
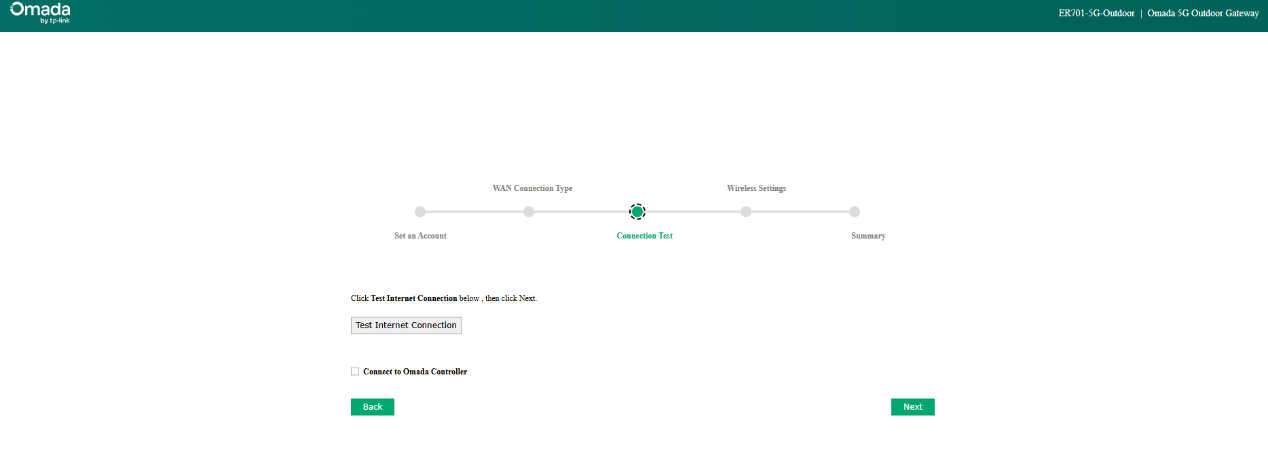
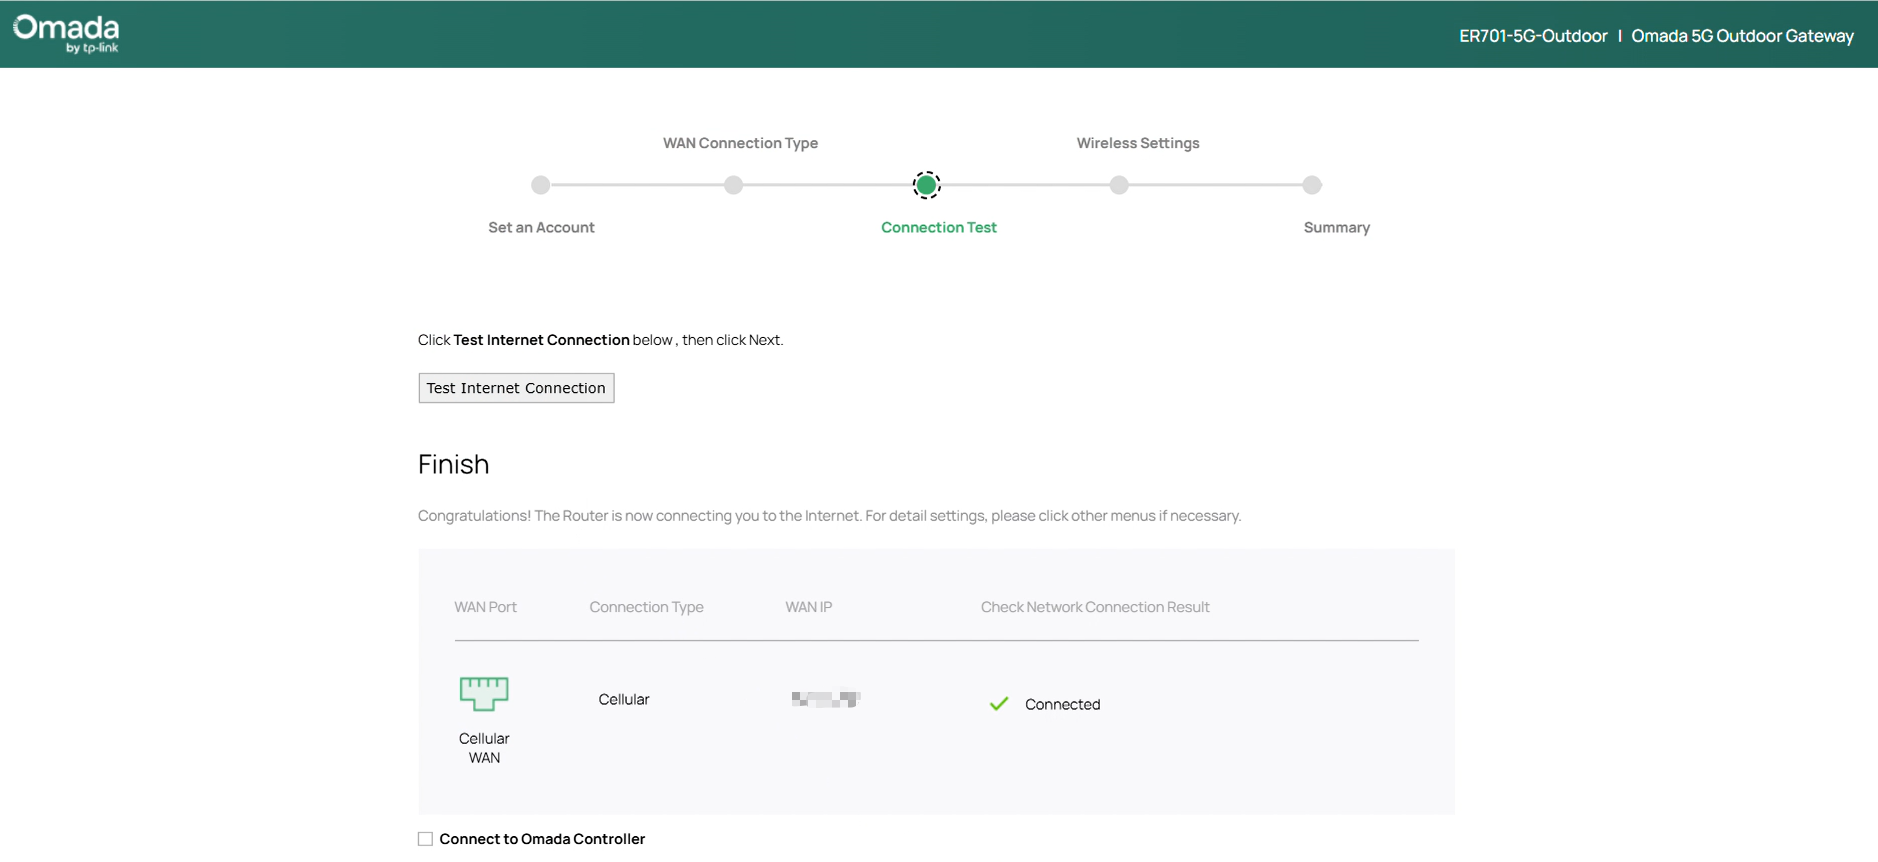
Step 4. The next page allows you to test the Cellular WAN connection after setting up the SIM cards. Click Test Internet Connection to start the test and check the result. Click Next to proceed to the next page.
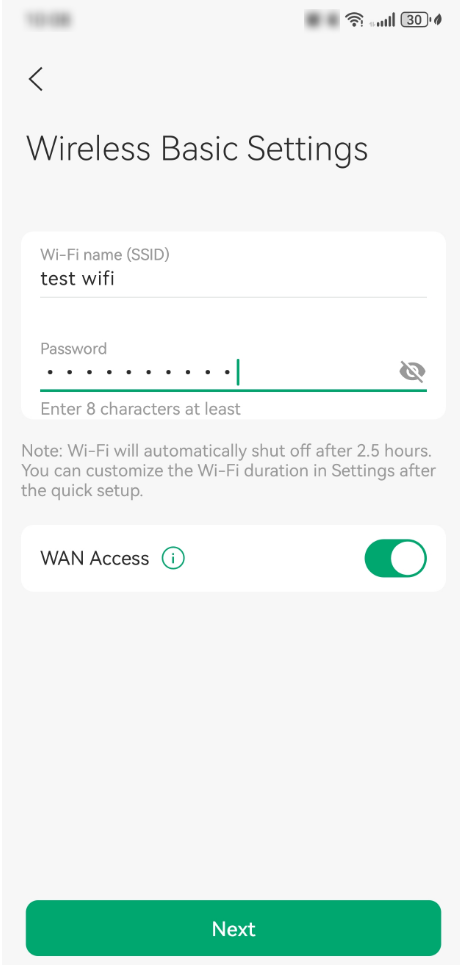
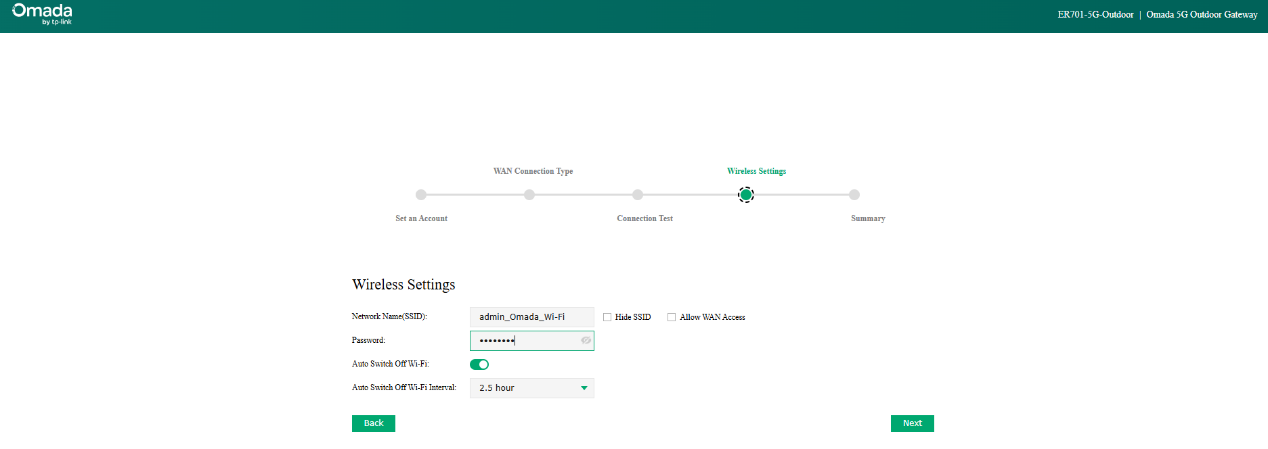
Step 5. The next page is the Wireless Settings page. As introduced, the SSID on ER701-5G-OD is 2.4Ghz Wi-Fi 4 with a maximum throughput of 150Mbps, designed for the convenience of configuring this device, not recommended to be used for Internet access. You could choose to hide it or turn it off automatically after a while. Click Next to proceed to the next page.
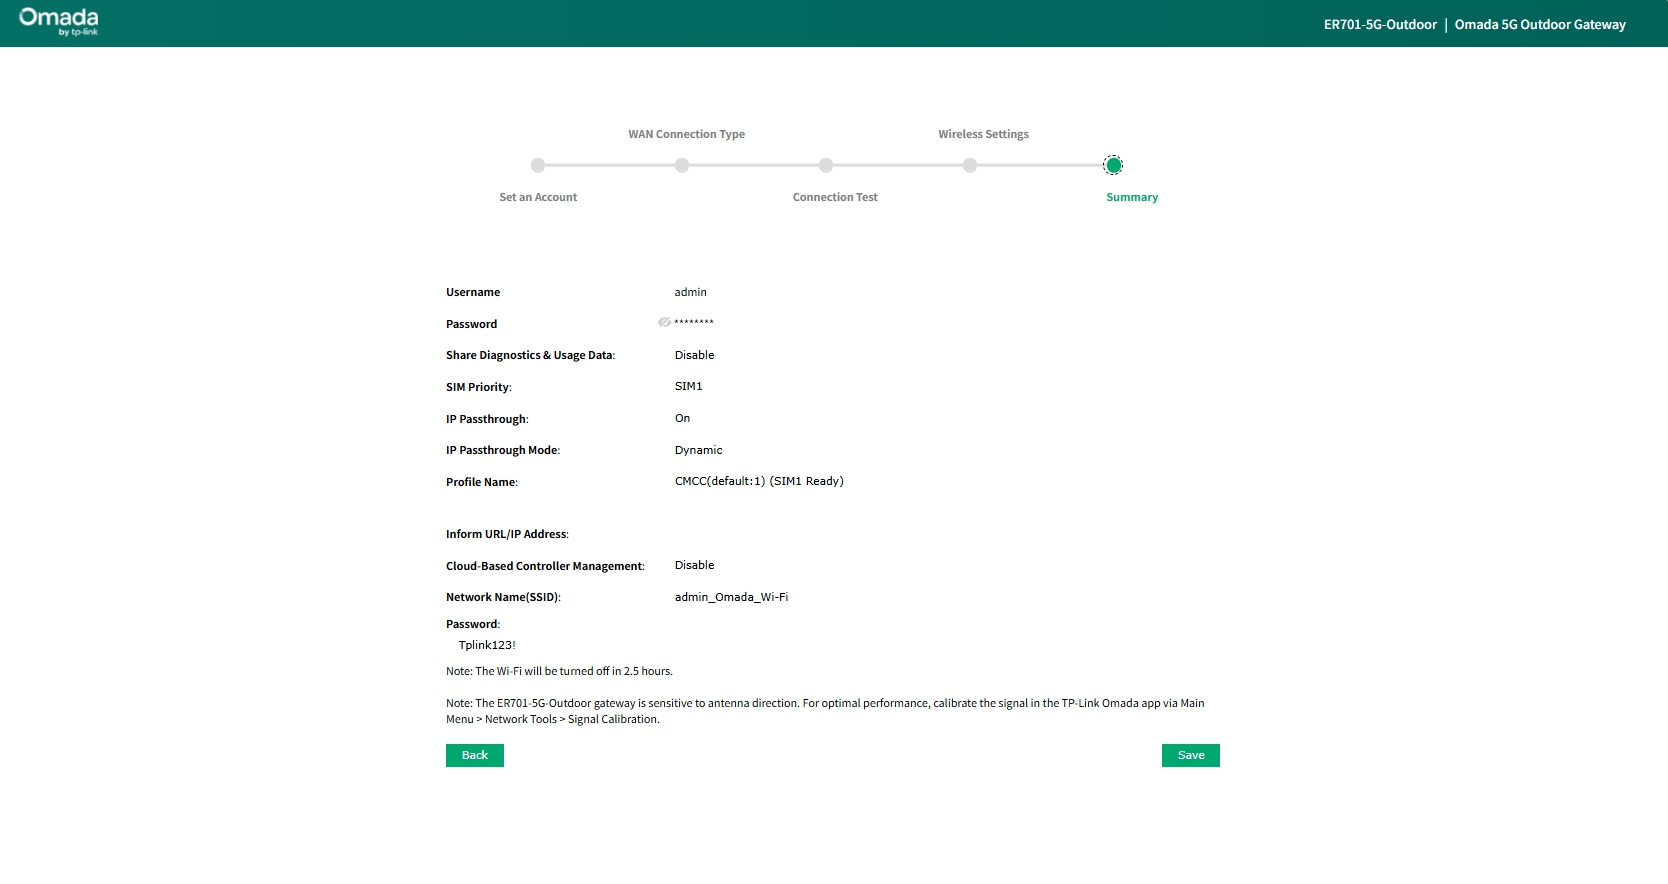
Step 6. The final page is the summary page, where you can check all the configurations you have done in the previous steps. If everything looks good, click Save to finish the setup process, and click Back to return to any previous steps to change the configuration.
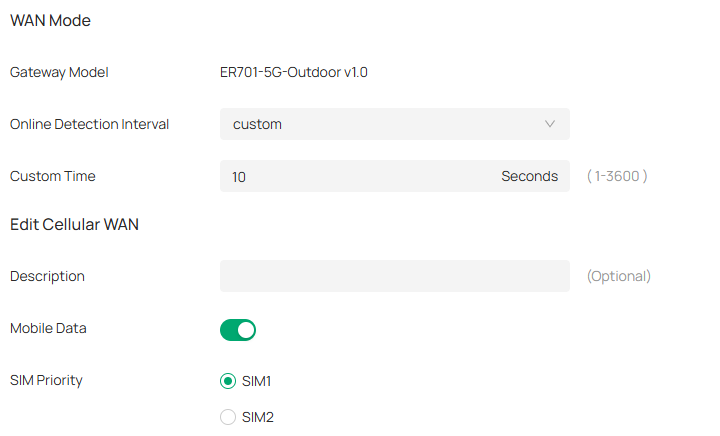
Step 7. After finishing the quick setup process and entering the management UI, the WAN configuration could be changed at Network > WAN, including the SIM card priority, SIM card profile, Data Roaming status, Mobile Data status, and so on.

Configuration in Controller Mode
This section will introduce the WAN configuration when it is managed by the Omada Controller.
Step 1. Insert the SIM card and power the ER701-5G-OD using a passive PoE adapter or PoE switch.
Step 2. Adopt the device to the Omada Controller. For the adoption process, please refer to the following FAQs:
How to discover and manage 5G ODU device via on-premise controller
How to discover and manage 5G ODU device via Omada Central
Step 3. After adopting, the SIM card inserted should be able to auto dial up if it is compatible with the device. Follow the next steps for additional configuration on Cellular WAN.
If you are using the device in IPPT mode, the configuration will be available on the device configuration page. Go to Devices, click on the ER701-5G-OD, click Manage Device > Config > Internet.
If you are using the device in router mode, the configuration will be available in the site settings page. Go to Network Config > Network Settings > Internet.
On the Internet page of ER701-5G-OD, the SIM card priority, SIM card profile, Data Roaming status, Mobile Data status, and so on could be configured.

Conclusion
Here we have finished introducing how to set up the 5G WAN connection and change the related configuration after finishing setting up in both standalone mode and controller mode.
Get to know more details of each function and configuration please go to Download Center to download the manual of your product.
