


Contents
Introduction
The Remote Registration feature allows IPCs (IP Cameras) to be remotely added to an Omada NVR, enabling efficient deployment and management over long distances. This feature is suitable for a variety of scenarios, including:
- Multi-site monitoring: Such as chain stores, schools, factories, and other distributed environments, enabling centralized management of cameras across multiple locations.
- Rapid deployment: Suitable for emergency or temporary monitoring scenarios, enabling quick installation and configuration of devices.
- Outdoor environments: Such as fields, farms, forests, and other outdoor areas.
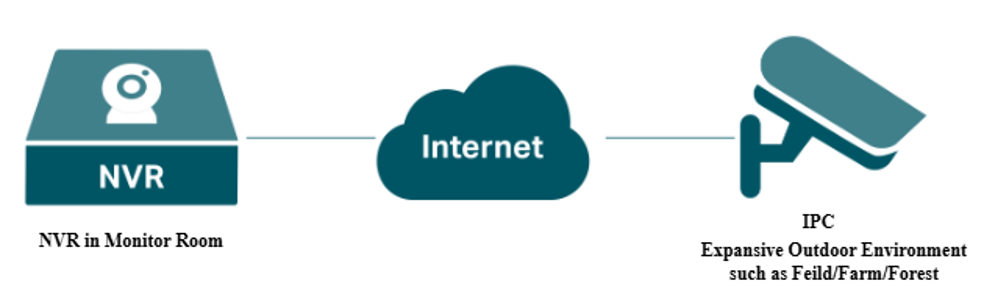
This article introduces how to remotely add IPCs to an NVR. It covers typical topology structures, application scenarios and configuration steps.
Requirements
- Omada IP Cameras (IPCs)
- Omada Network Video Recorders (NVRs)
Configuration
- Before starting to configure, ensure your devices support the Remote Registration feature.
- The following configuration guide includes both NVR and IPC configuration.
- Both NVR Web UI and GUI support the Remote Registration. The following configuration steps take NVR Web UI as an example.
NVR Configuration
Go to System > Network > Network Service > Remote Registration, enable the Remote Registration feature and configure the Verification Code.
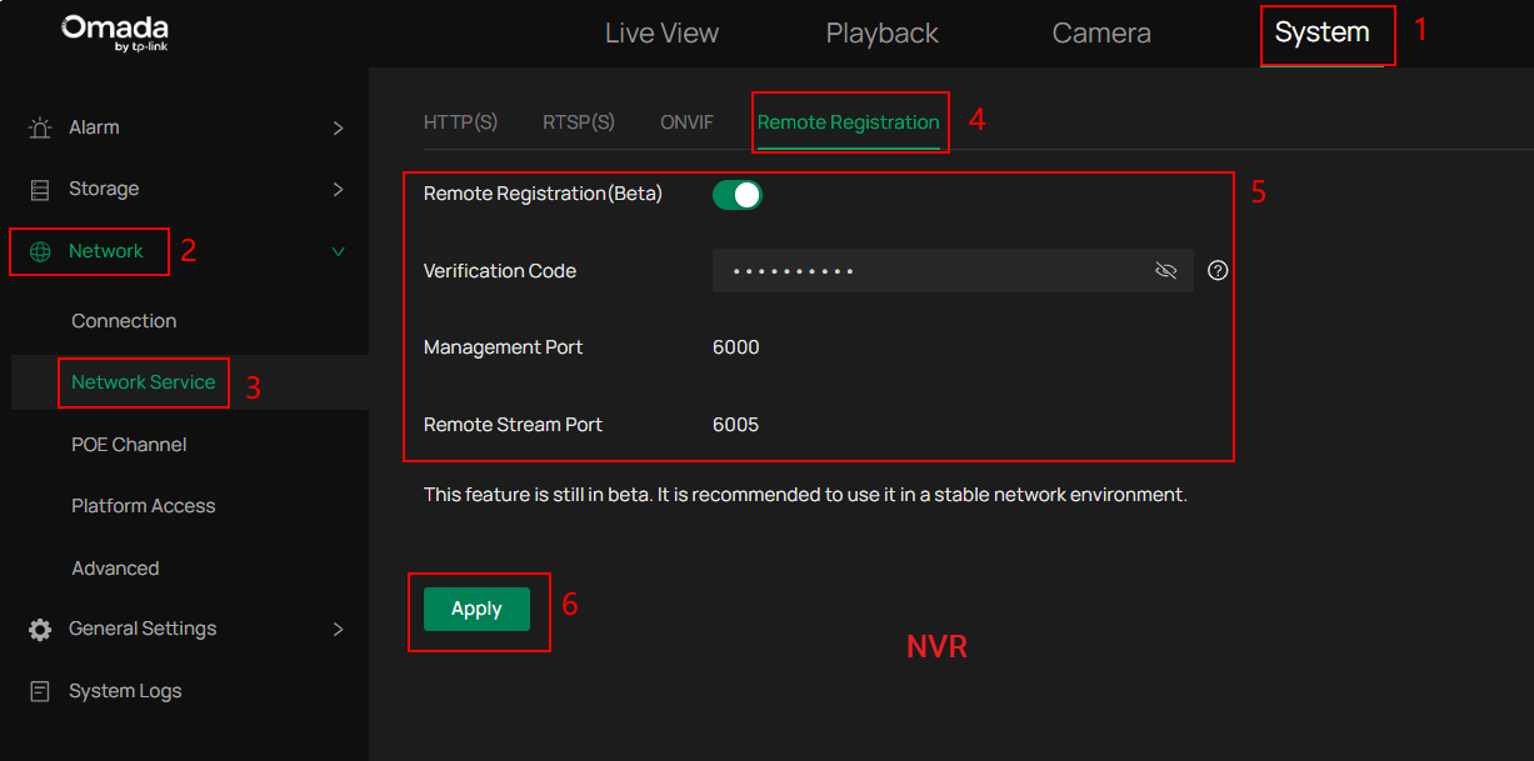
Notes:
The Verification Code must be 9 to 32 characters and a combination of uppercase letters, lowercase letters, numbers, and symbols. Password cannot contain three consecutive identical characters. The Verification Code cannot contain three consecutive numbers or letters.
The default Management Port and Remote Stream Port are 6000 and 6005. However, if those ports conflict with existing ports in the environment, they can also be changed at the Network > Network Service > HTTP(s) > Management Port and Network > Network Service > RTSP(s) > Remote Stream Port.
IPC Configuration
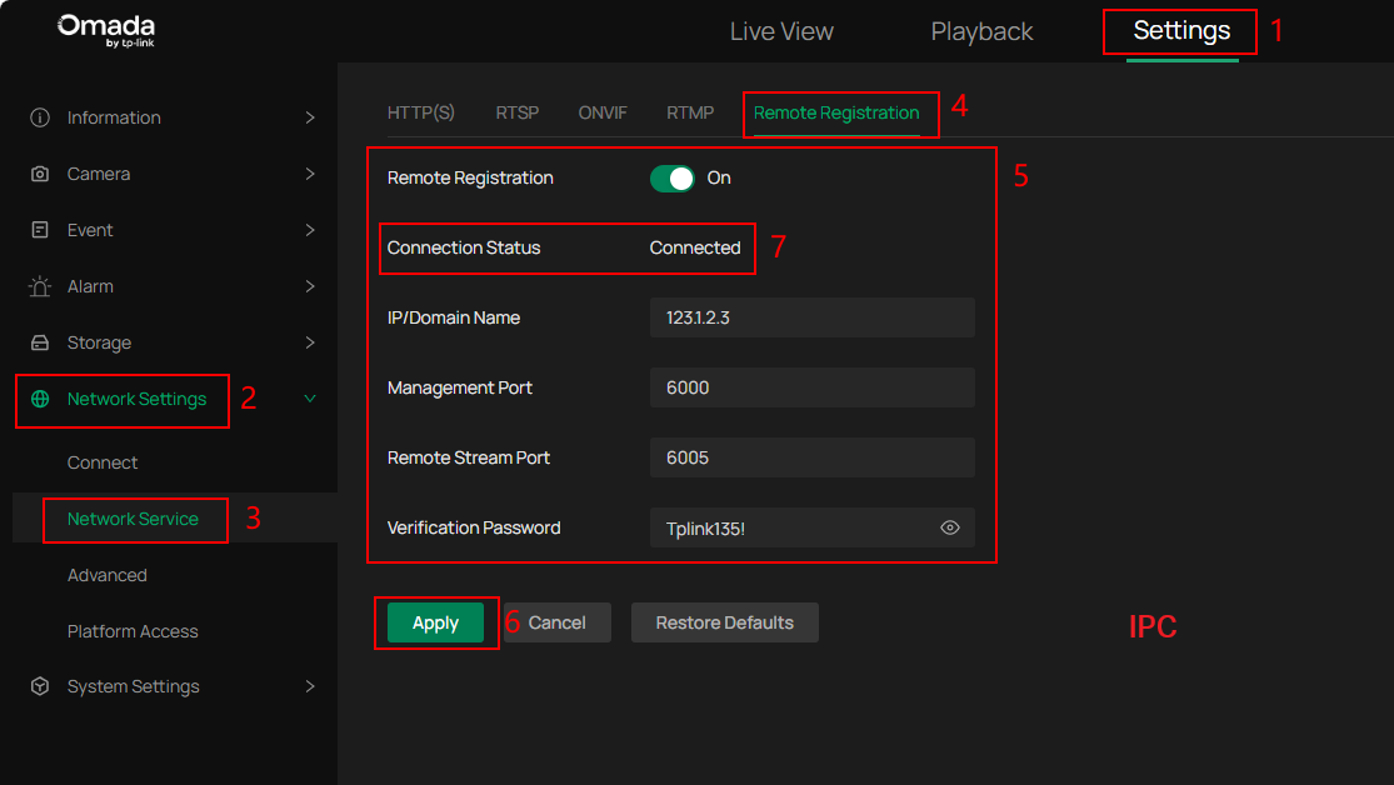
You can setup the IPC and log in the IP Camera Web UI. Go to Settings > Network Settings > Network Service > Remote Registration, enable the Remote Registration feature and configure other parameters.
There are two configuration scenarios: One where the NVR has a public IP Address, and one where it is behind a private IP address.
Scenario 1: NVR’s IP address is a Private IP address
The NVR’s IP address is a Private IP address. The router connected to the NVR must have a Public IP address. Meanwhile, the router needs to map the Management Port and Remote Stream Port to the public network using UPnP or other methods (e.g. the port forwarding feature of router). A typical topology diagram is as follows:
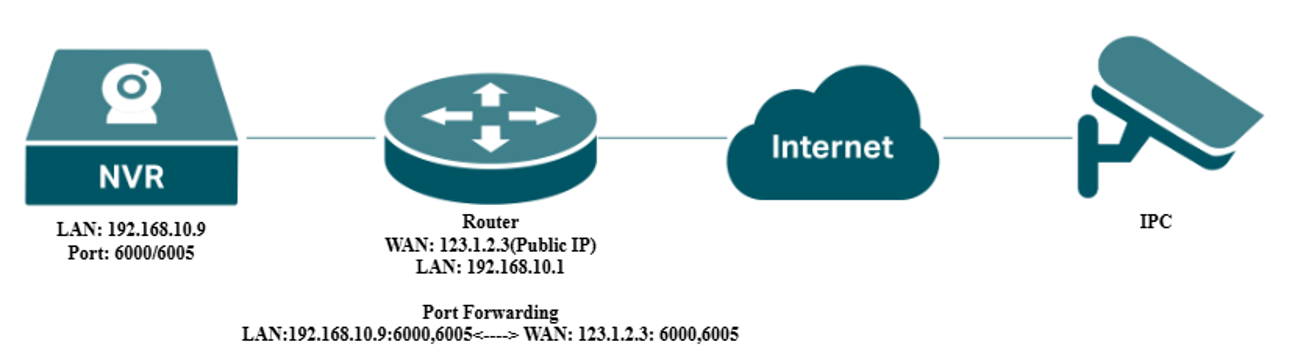
The IP/Domain Name should be the Public IP address of the Router, and the ports should also be the external ports on the public network mapped from these two ports of NVR.
Once connected, the status will display as “Connected”.
Scenario 2: NVR’s IP address is a Public IP address
The NVR’s IP address is a Public IP address. A typical topology diagram is as follows:
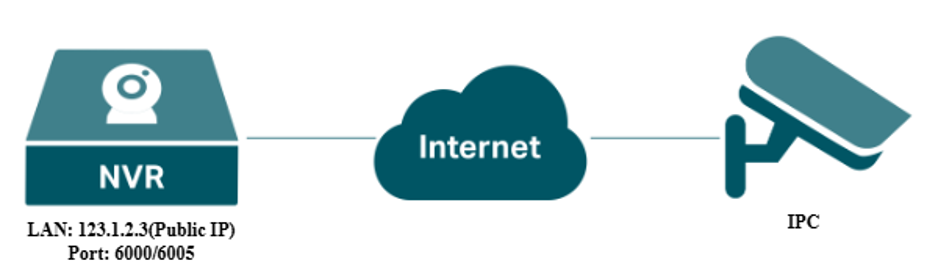
Configure the IPC with NVR information. Just input the NVR’s Public IP address (or Domain Name with DDNS support), port, and verification code.
Add the IPC
Log in NVR’s Web UI, and go to Camera page, add the IPC on NVR Web UI.
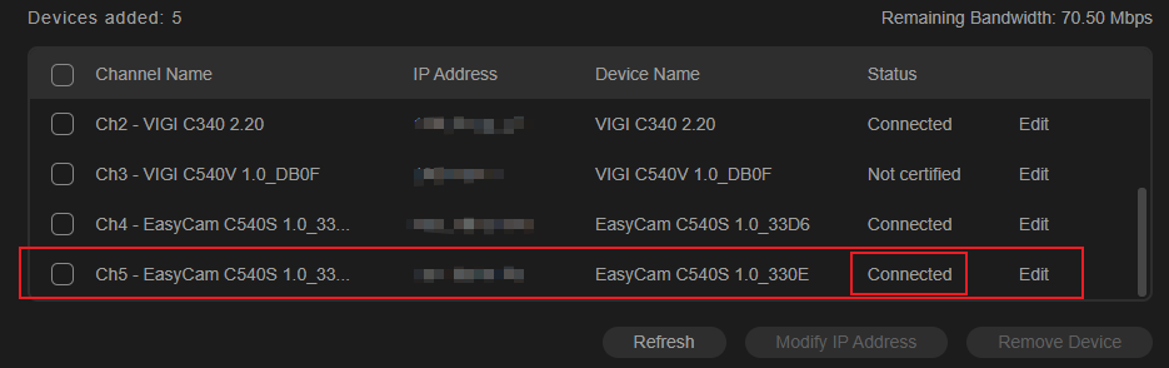
- For the first-time connection, the NVR will automatically add the IPC with the same login username and password. You can see the IPC on the Devices Added list, and the IPC status will change to ‘Connected’.

- If the username and password are not same for the first-time connection, then the IPC’s status is ‘Not certified’ in Device Added list.
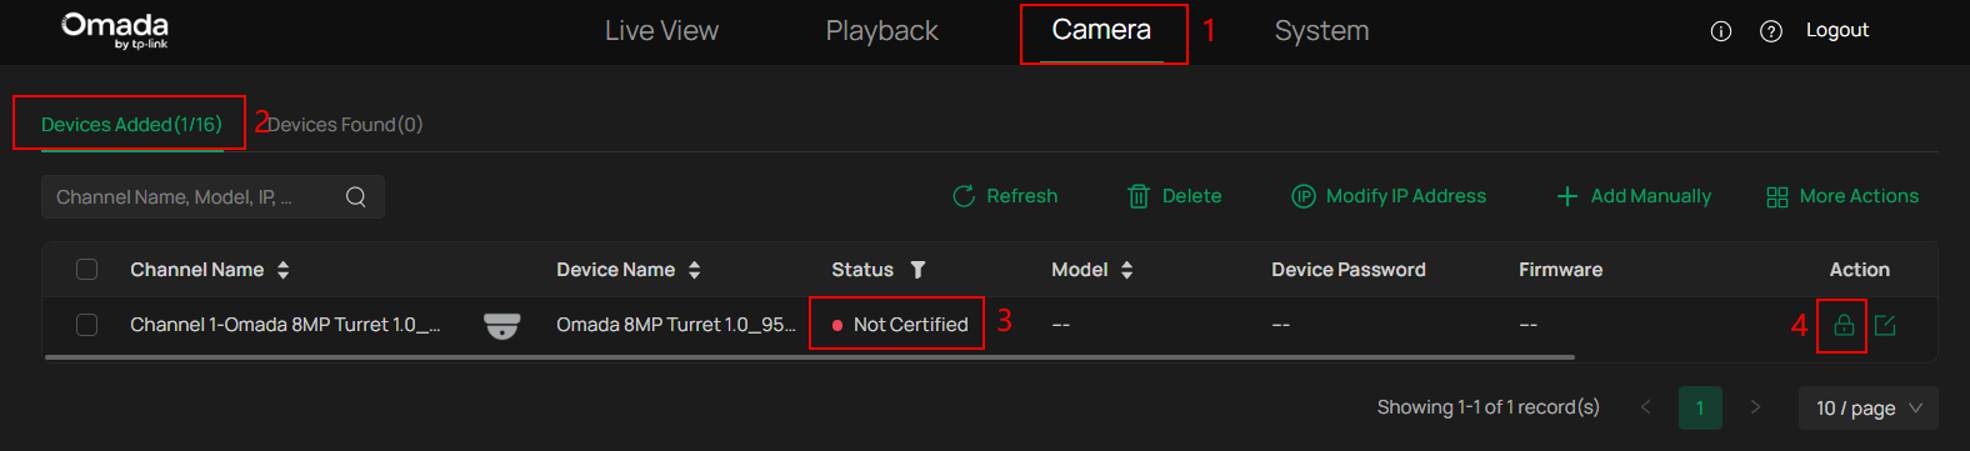
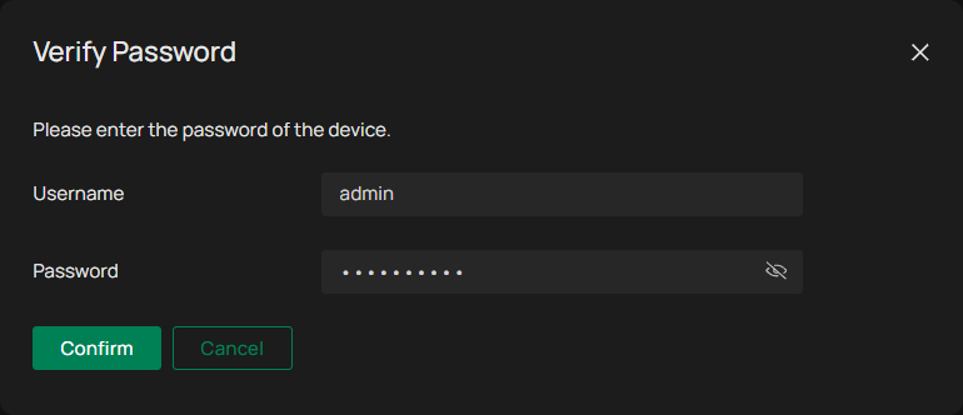
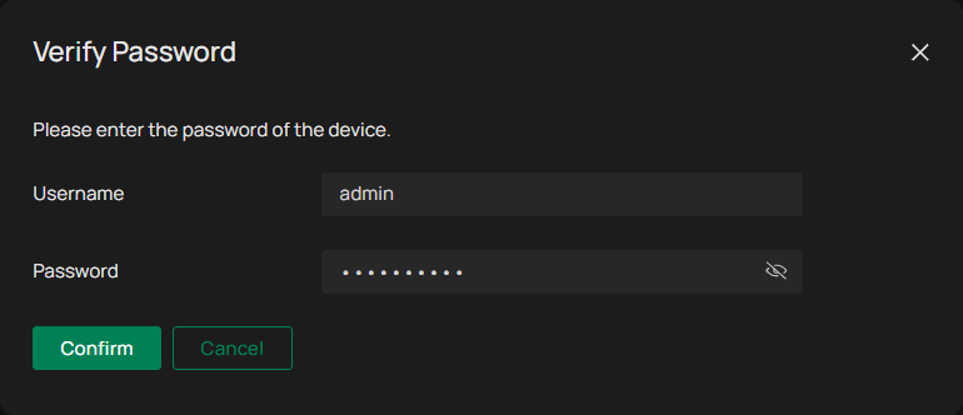
Please click the lock icon to input correct IPC’s password. Then click ‘Confirm, the IPC’s status change to ‘connected’.
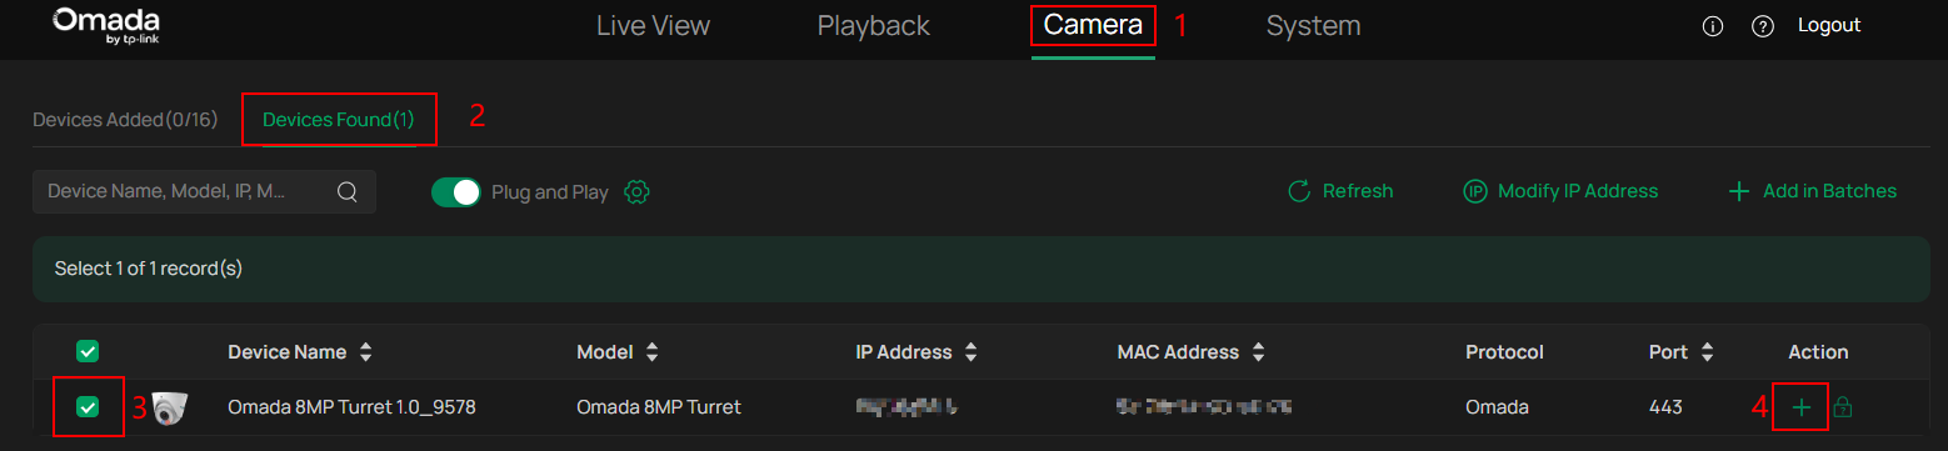
- For non-first-time additions after deleting the IPC, the remote IPC will shows in the Device Found List, please click “+” to add the IPC.
A dialog box will pop up to confirm that the device added was successful. Click “Complete” to finish adding the IPC.
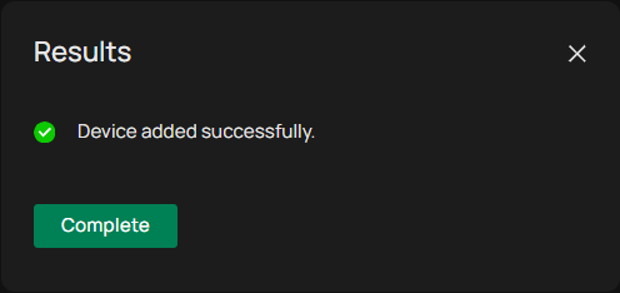
The IPC will appear in the “Device Added” list, and the NVR will automatically add the IPC with the same login username and password.
If the username and password are incorrect, then the IPC’s status also is ‘Not certified’ in Device Added list.
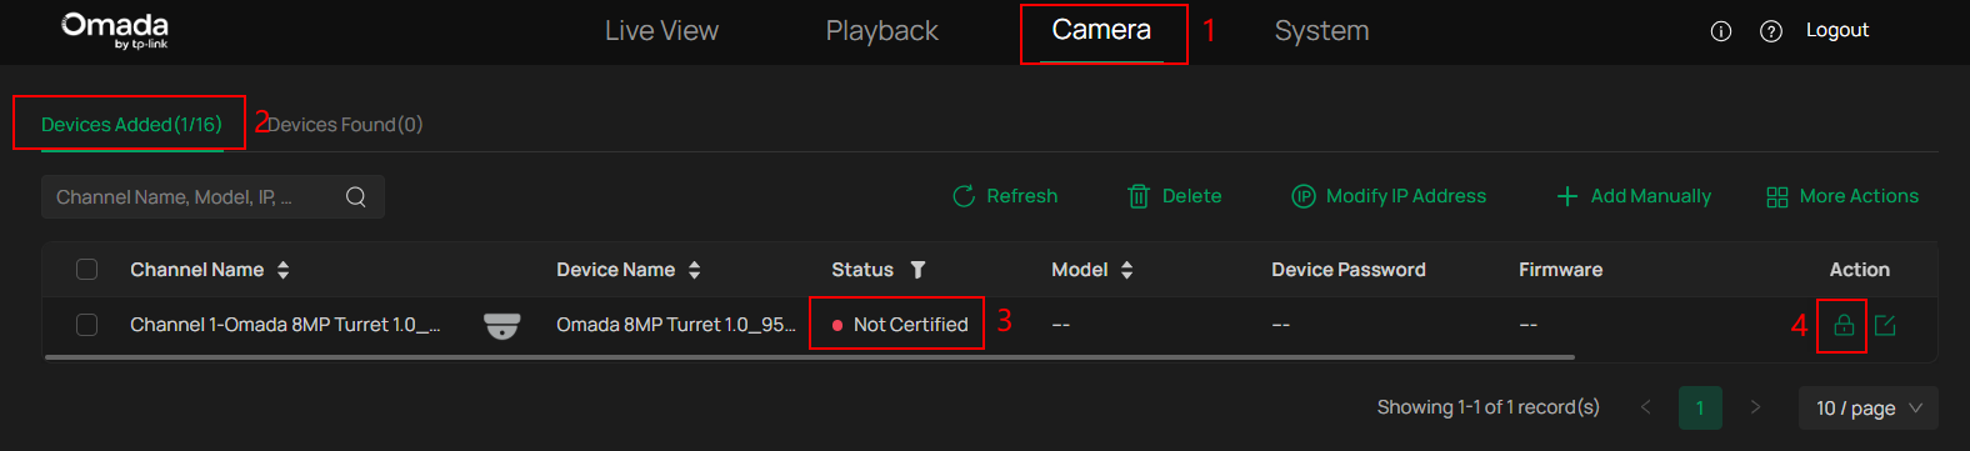
Please click the lock icon to input correct IPC’s password. Then click ‘Confirm, the IPC’s status change to ‘connected’.
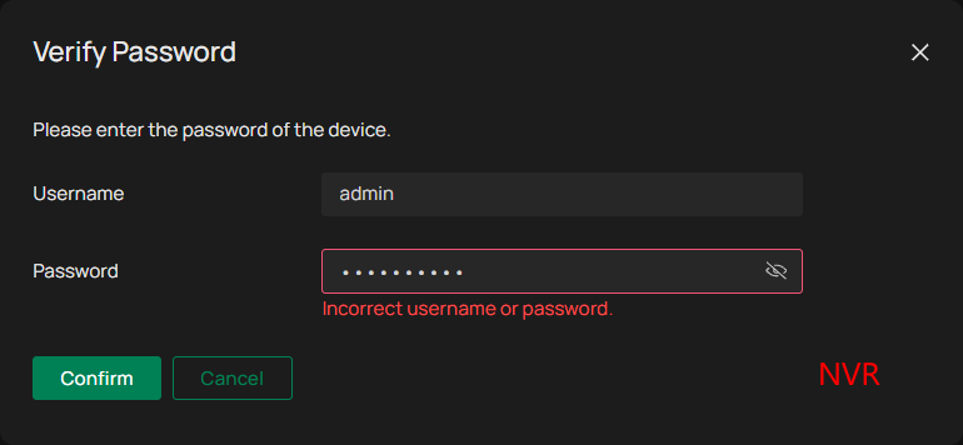
If the username or password is incorrect, the window will prompt " incorrect username or password ", so NVR verify IPC’s password failed.
When the NVR verify password failed, the IPC’s Connection Status shows ‘NVR login failed’ on IPC Web.
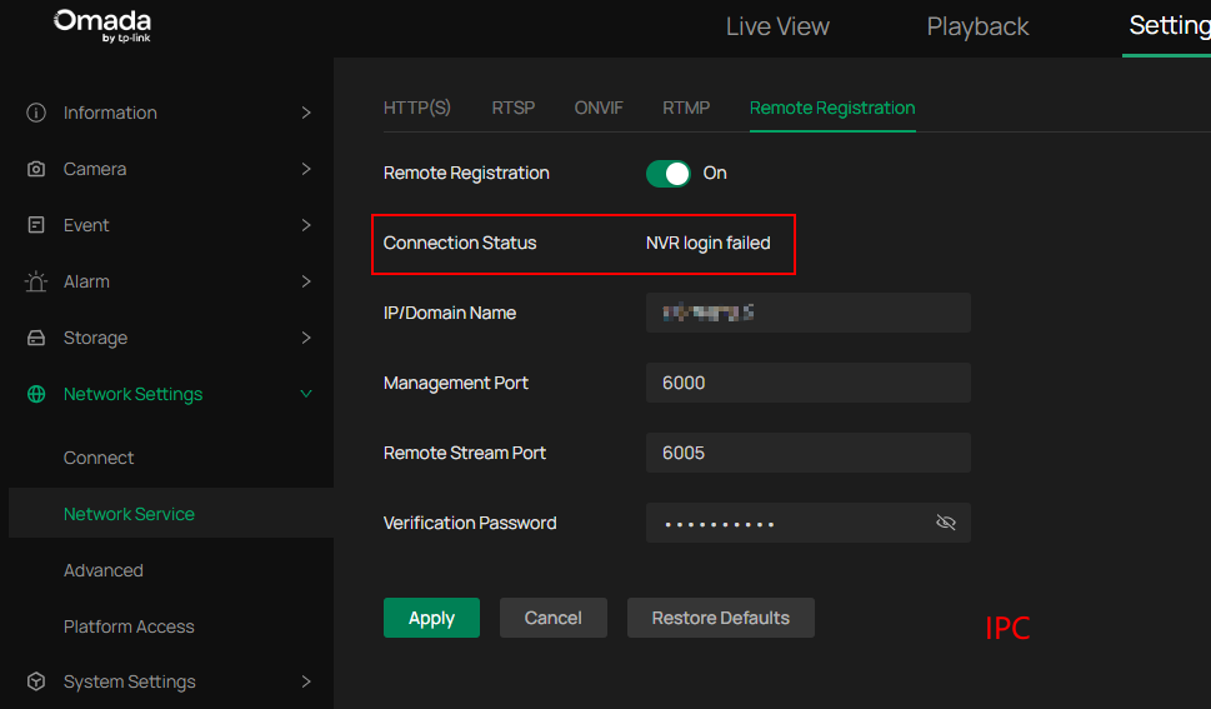
Please input correct username and password again to finish the remote IPC addition. Then the IPC’s status change to ‘connected’ in Device added list.
Conclusion
With the steps above, you have successful adding the Omada IPC to an Omada NVR remotely.
To learn more about each function and configuration, please visit Support Home to download or check the manual for your product.
