


Contents
Introduction
The Migration feature in Omada Controller includes Site Migration and Controller Migration, covering all the needs to migrate both a single site and the whole controller.
Requirements
- Omada Controller (Hardware controller/Software controller v6.2.10 and above)
- PC
Configuration
Before proceeding with migration, please check the following notes:
- The ER7212PC, a 3-in-1 router, supports configuration and data migration only between ER7212PC devices running the same or higher firmware version. Configurations cannot be imported or exported between the ER7212PC and software controllers, hardware controllers, or the Omada Central Controller.
- For controller versions 5.13.11.41 and higher, controller migration is supported only when importing a configuration file from a controller with the same Major. Minor. Patch version number (e.g. 5.13.11).
Site Migration
Site Migration allows administrators to export a site from the current controller to any other controller with the same or higher firmware version. All the site's configurations and data will be migrated to the target controller. The process of migrating configurations and data from one site to another controller can be summarized in three steps: Export Site, Migrate Site, and Migrate Devices.
Step 1. Export Site
Export configurations and site data to be migrated as a backup file.
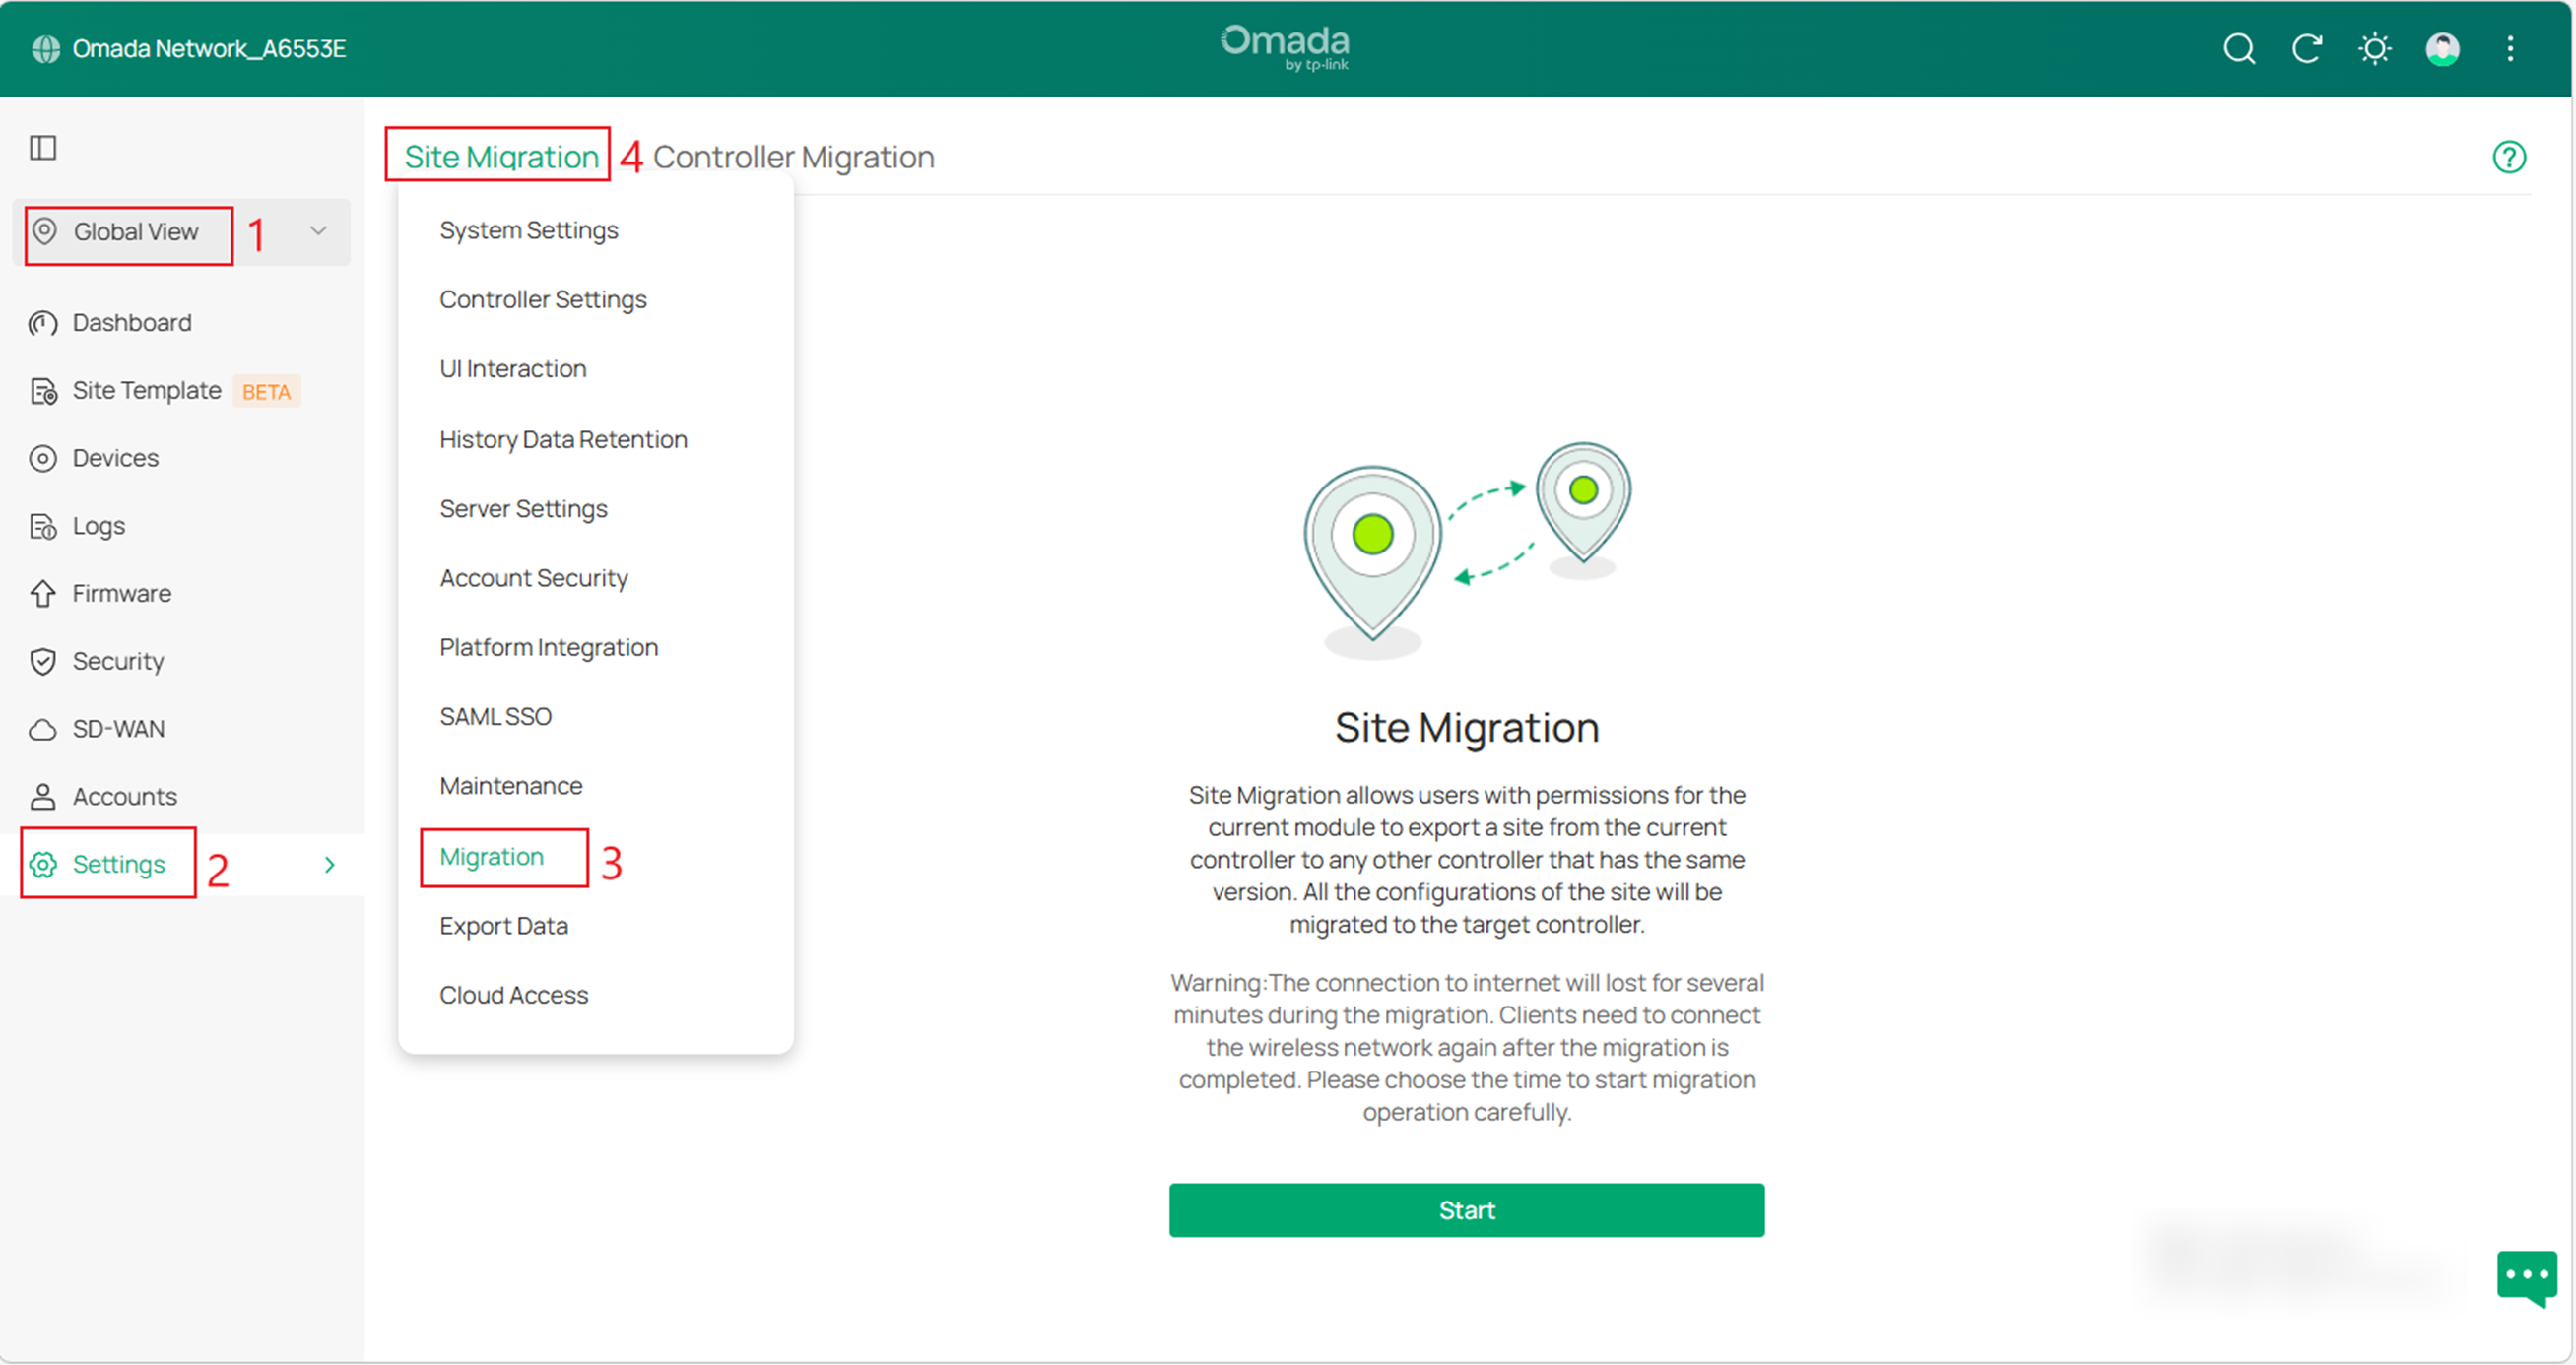
A. Launch the controller and access the Global View. Go to Settings > Migration. On the Site Migration tab, click the Start button.
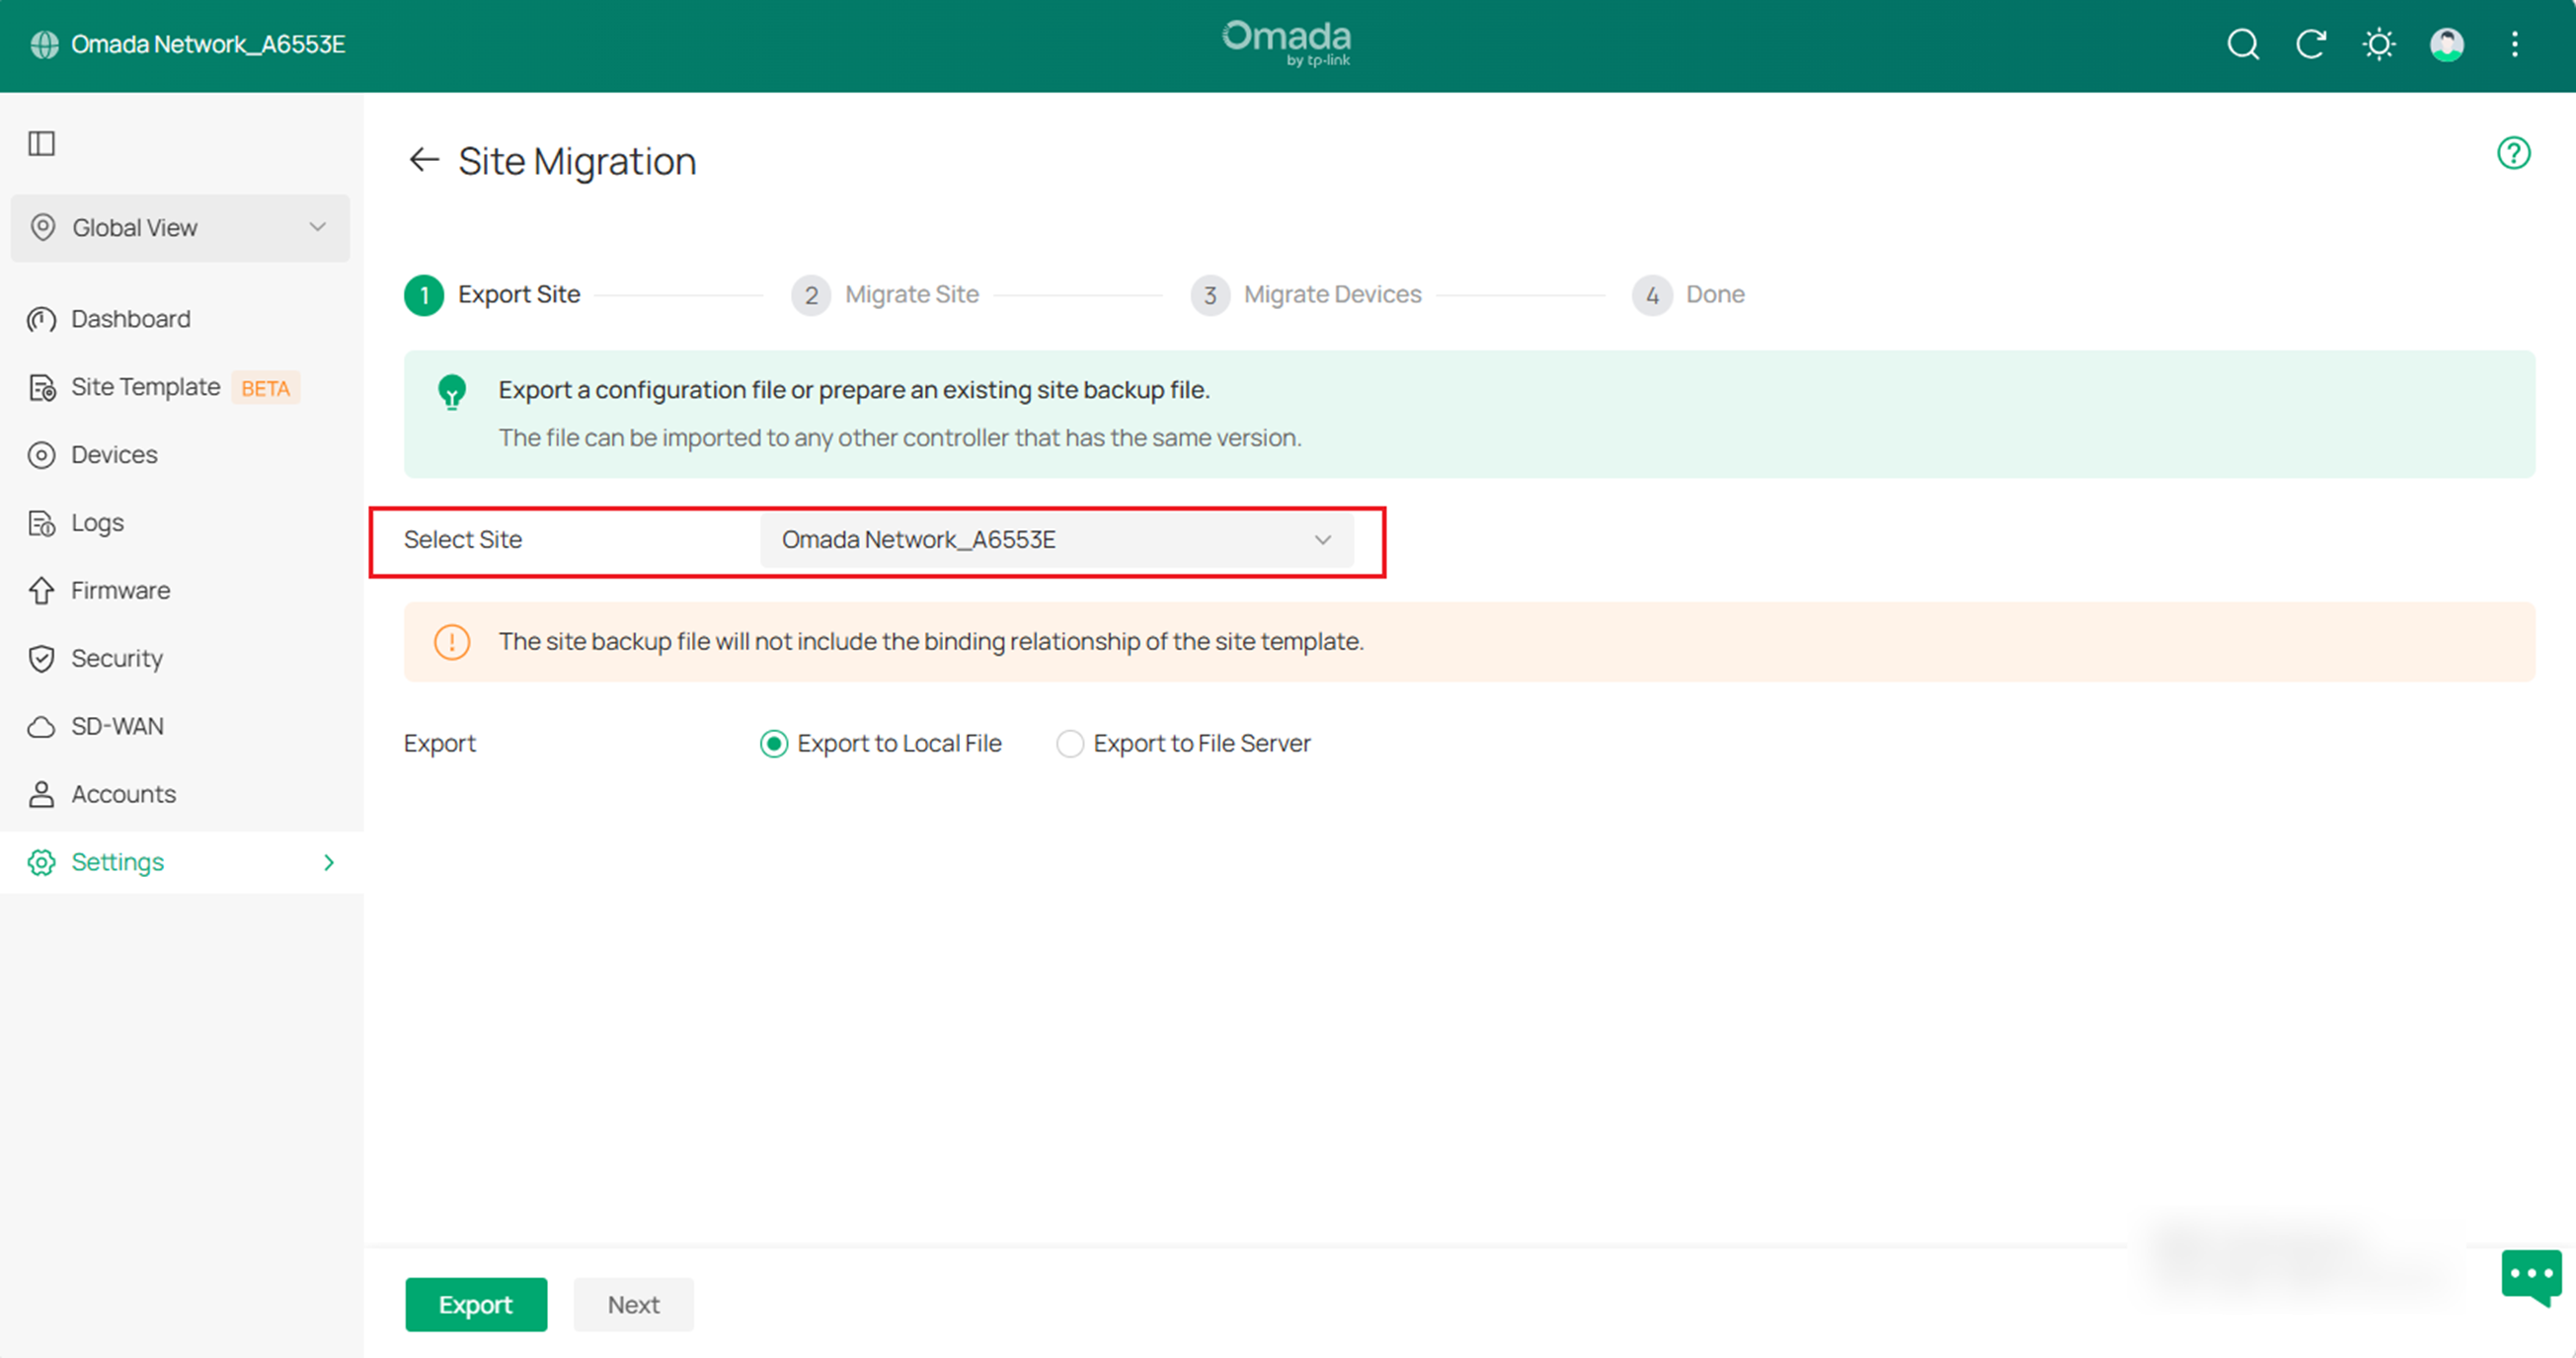
B. Select the site to be imported into the second controller in the Select Site drop-down list. Then, choose where you want to export and save the backup file. Click Export to download the file of the current site. If you have backed up the file, click Next.
Step 2. Migrate Site
In the target controller, import the backup file of the original site.
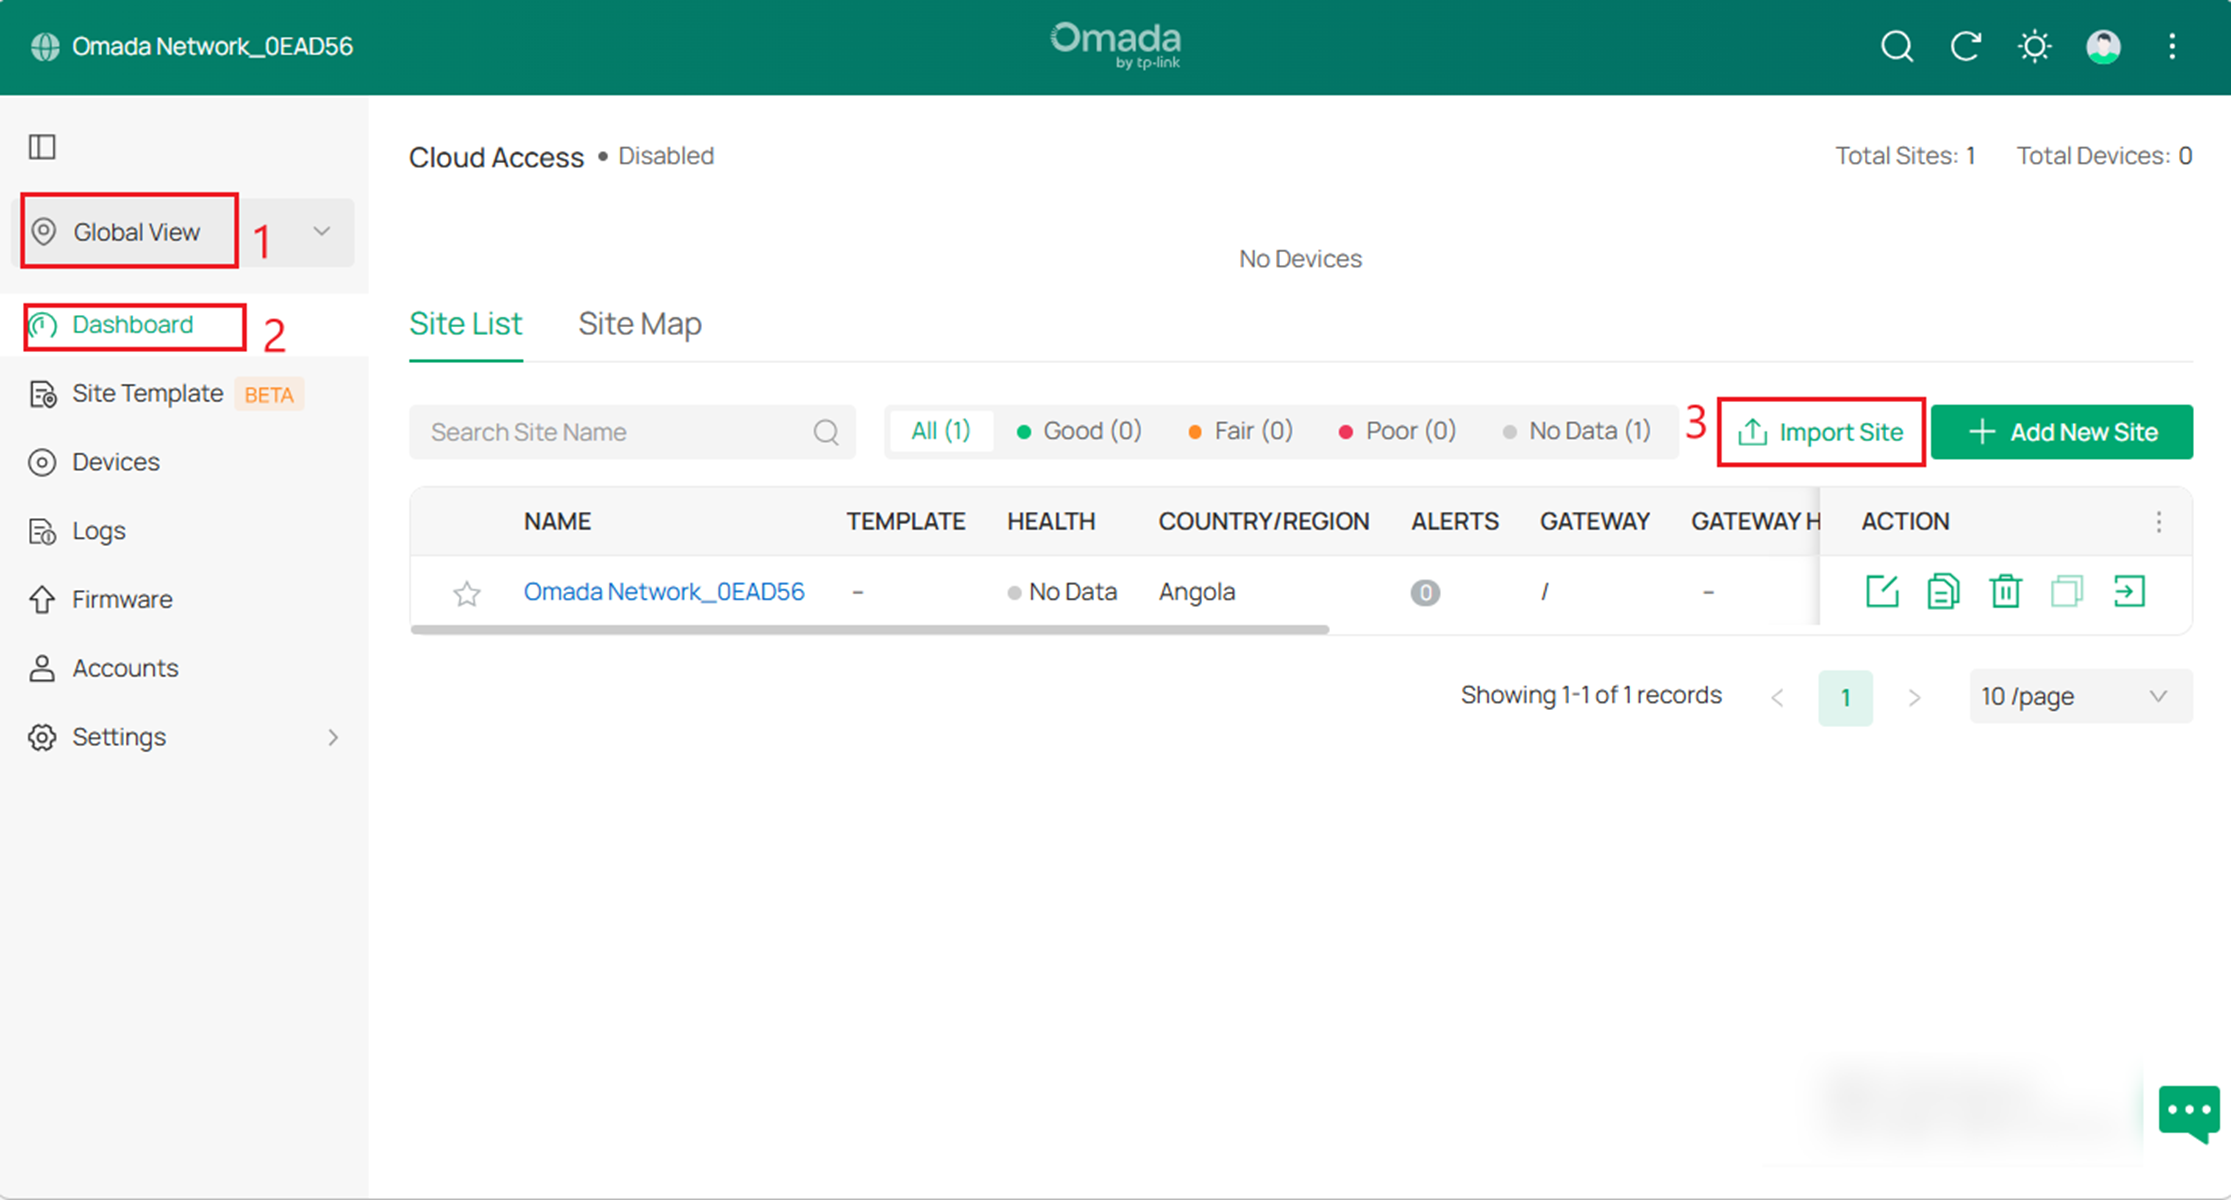
A. Start and log in to the target controller, access the Global View, go to Dashboard > Site List, and click Import Site to upload the backup file of your site. The following window will pop up.
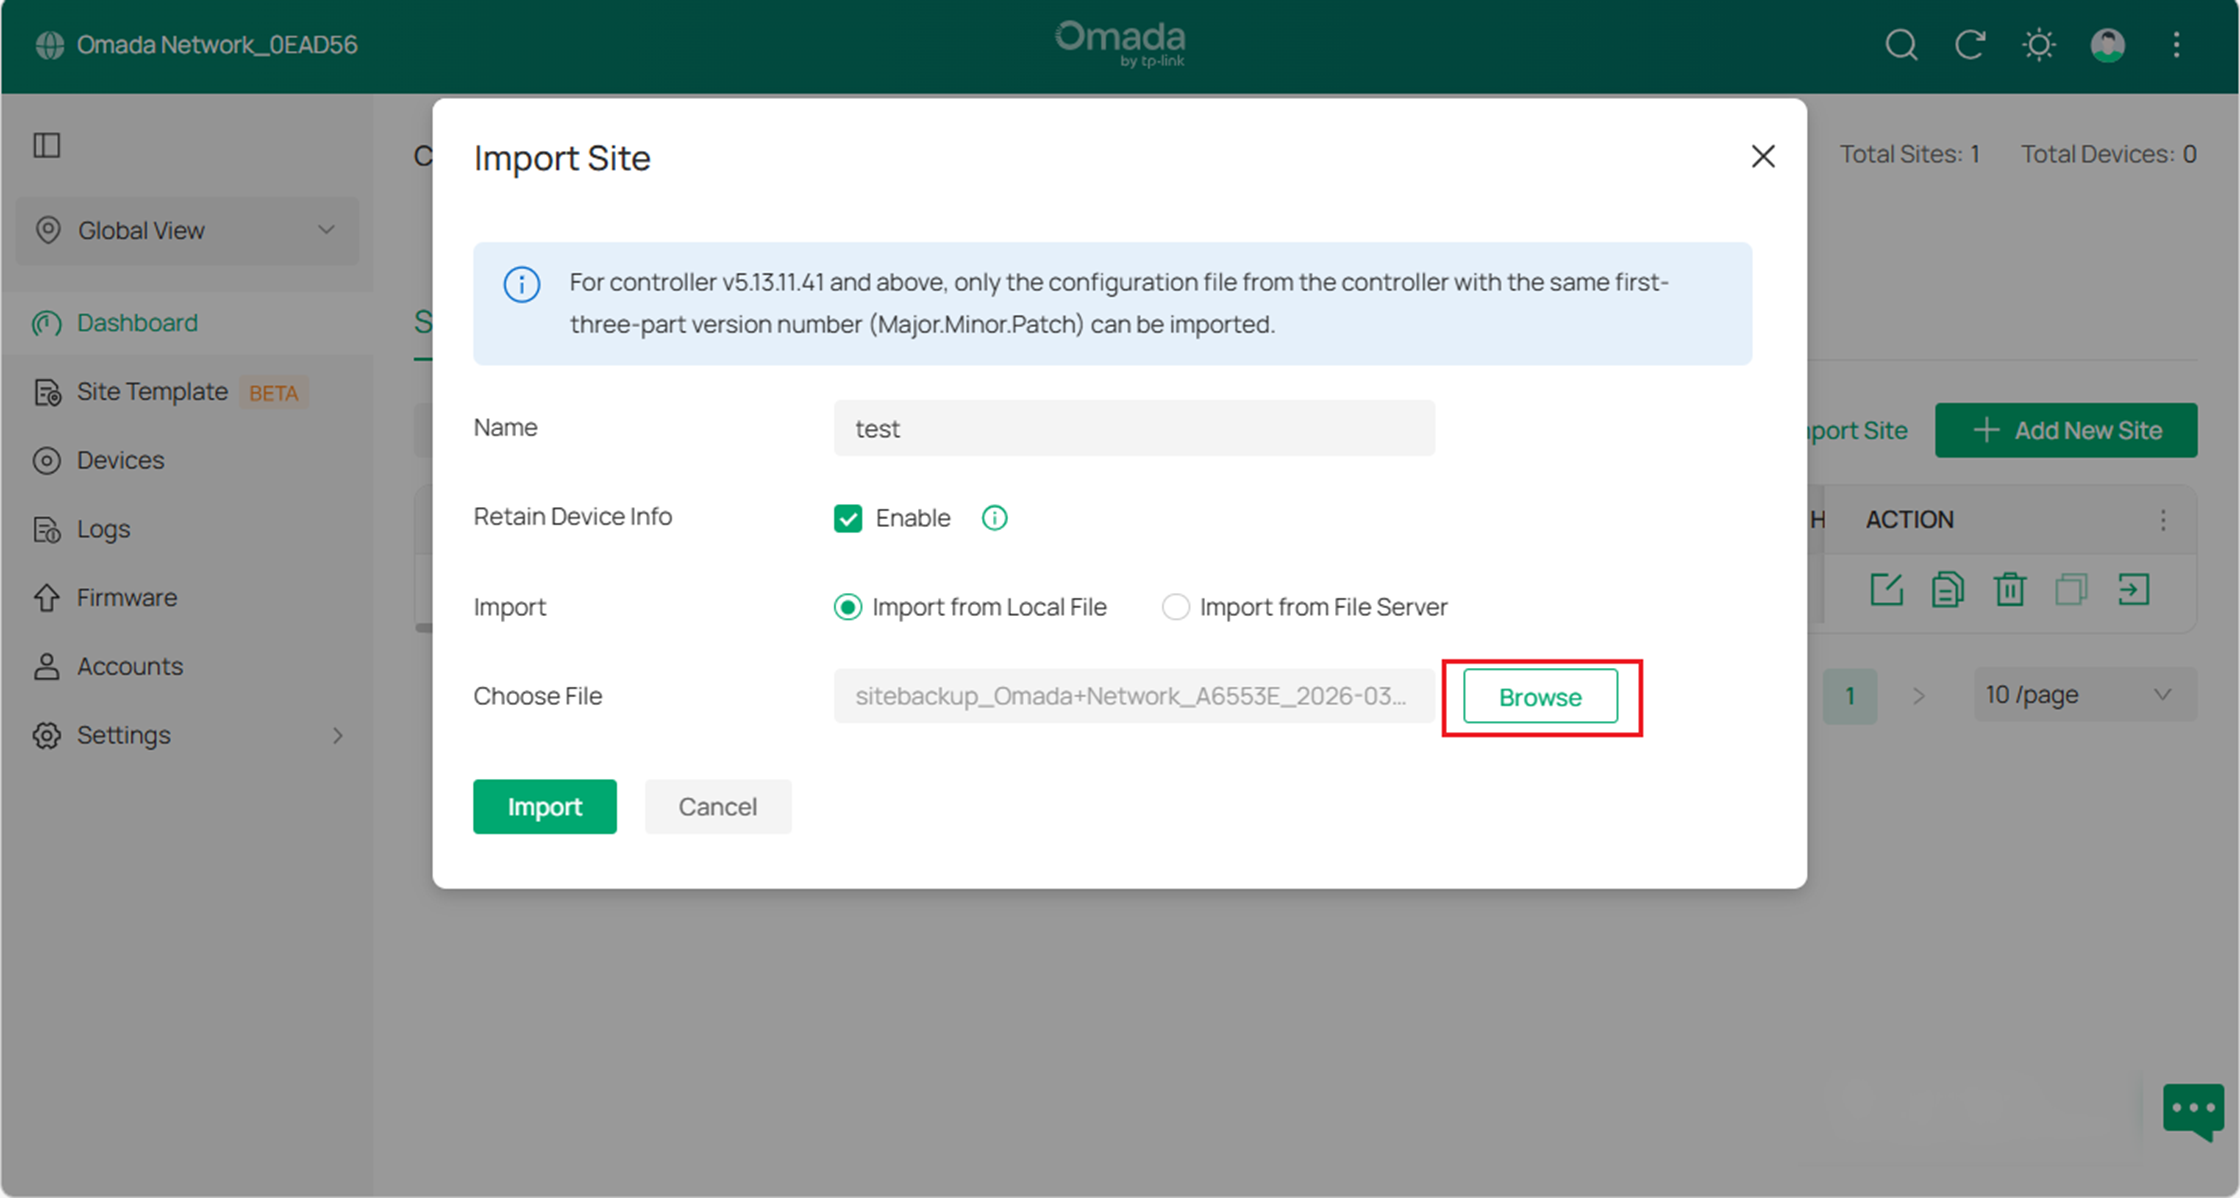
B. Enter a unique name for the new site. Click Browse to upload the file of the site to be imported and click Import to import the site.
Note: For organization V5.13.11.41 and above, only the configuration file from the organization with the same first-three-part version number (Major. Minor. Patch ) can be imported.
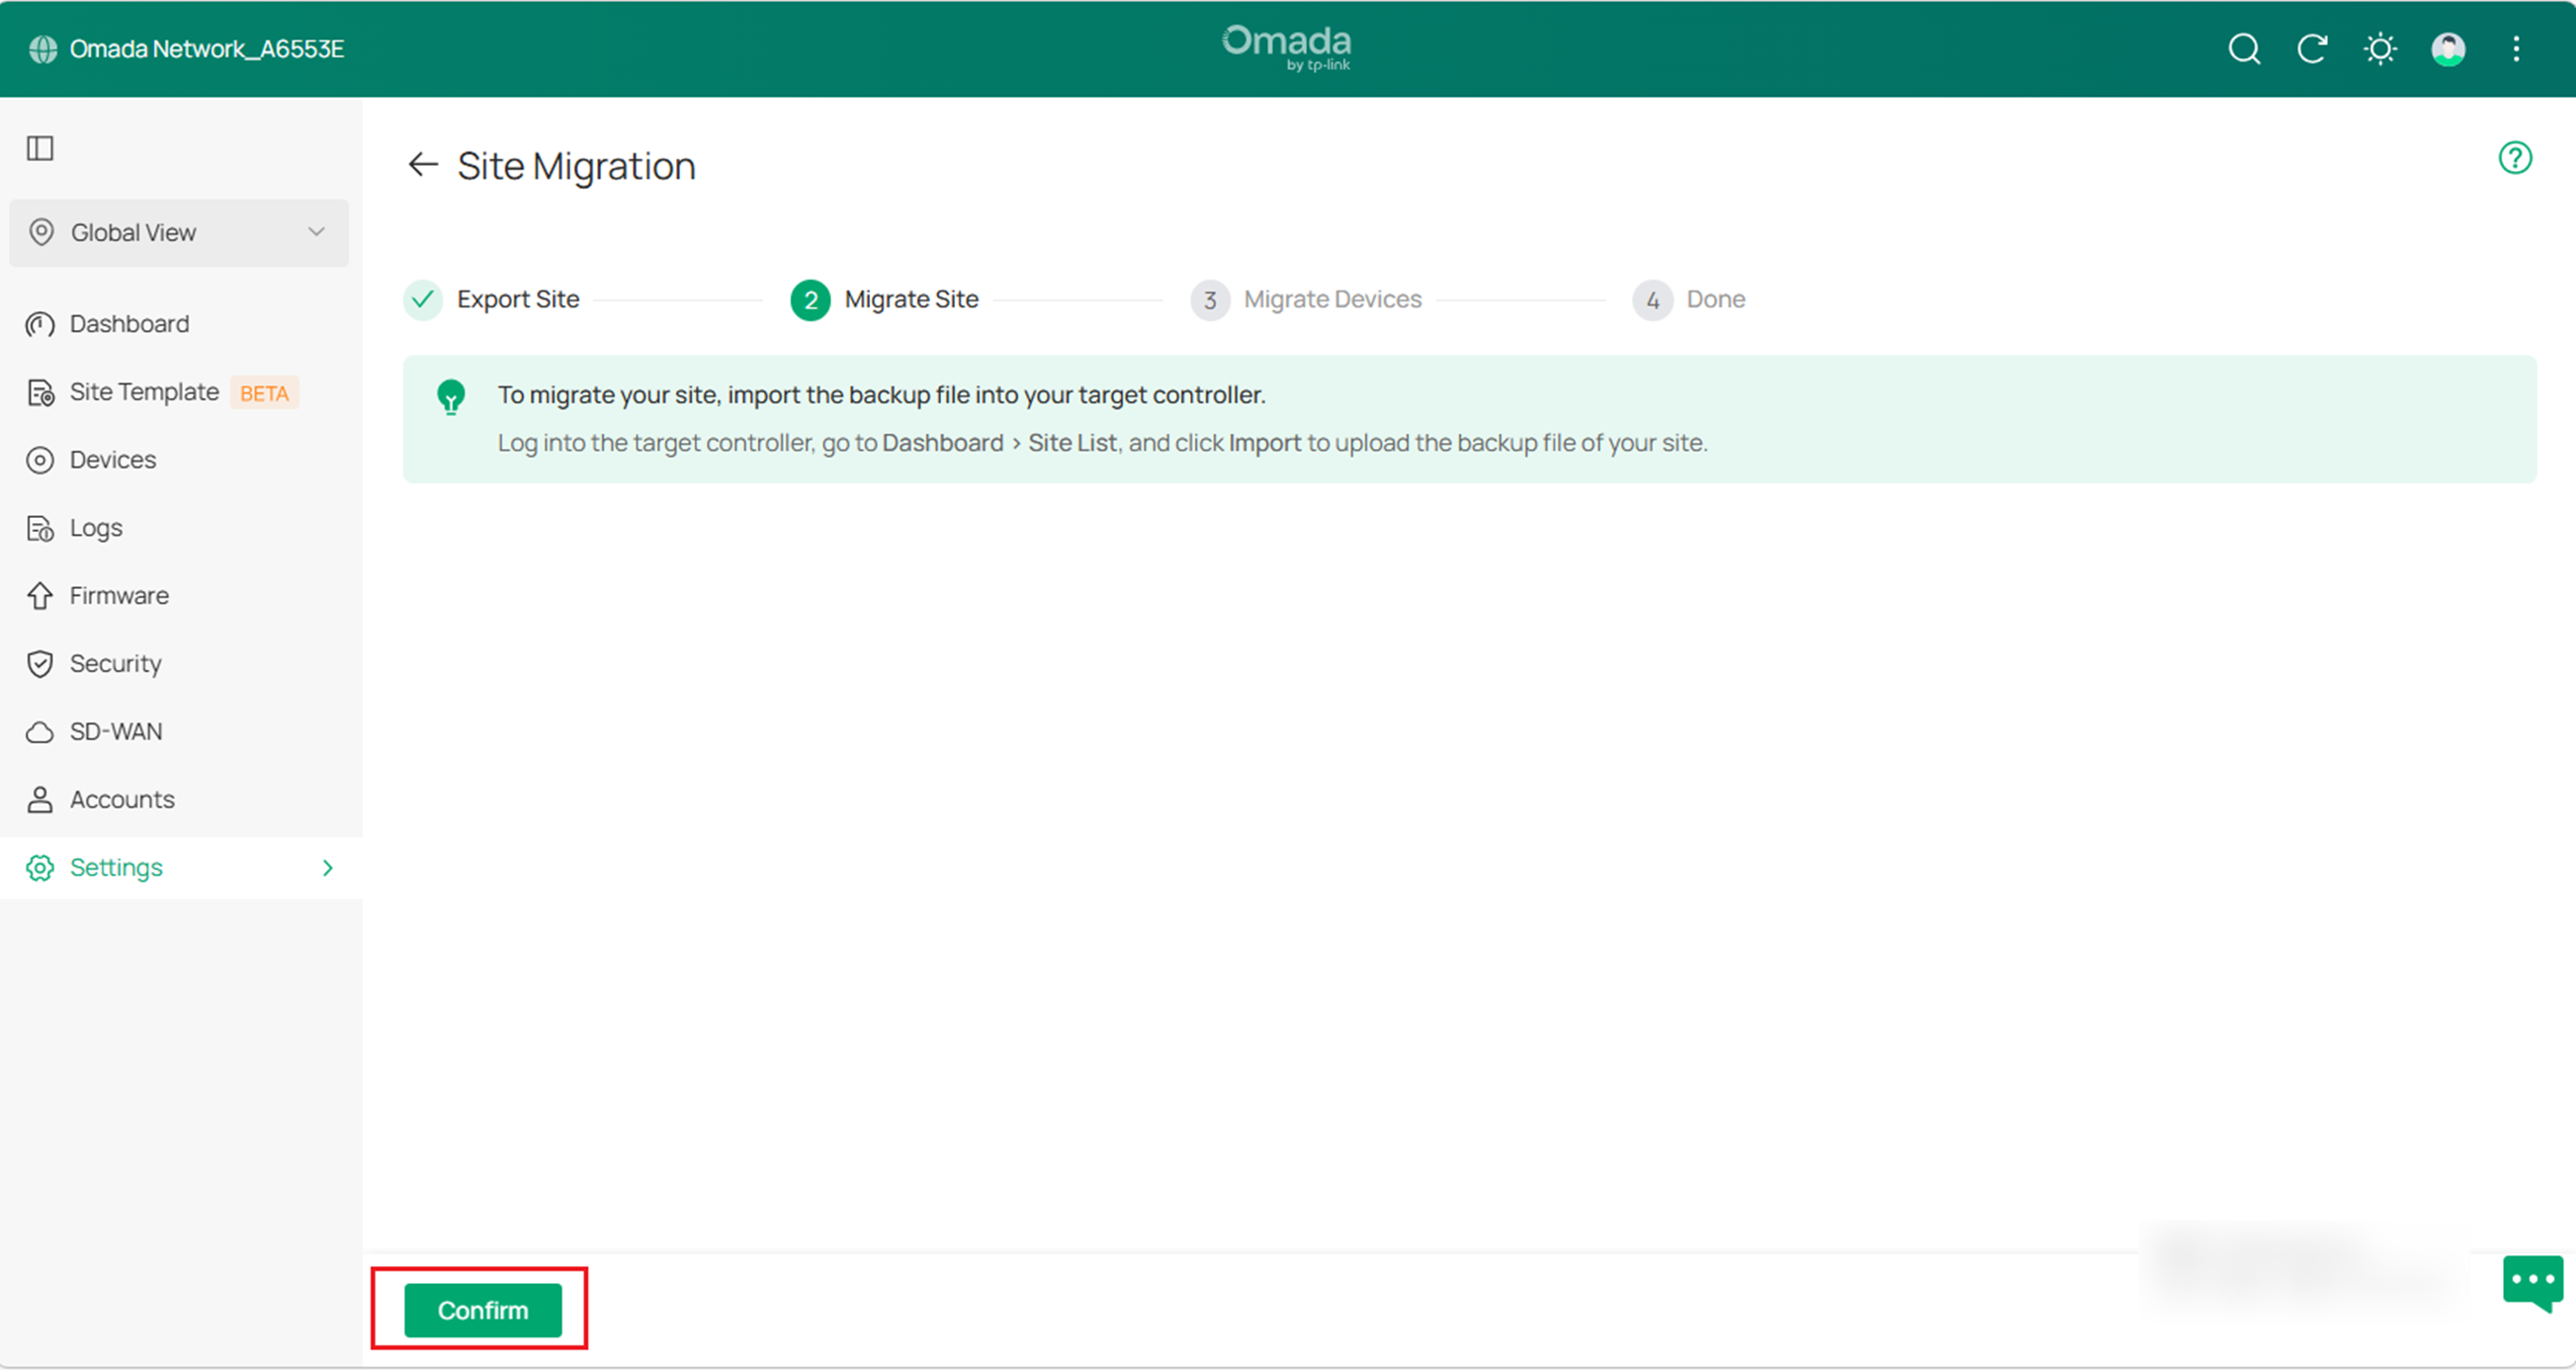
C. After the file has been imported to the target controller, go back to the previous controller and click Confirm.
Step 3. Migrate Devices
Migrate the devices on the original site to the target controller.
A. Enter your target controller's IP address or URL into the Controller IP/Inform URL input field. (Taking the inform URL as an example)
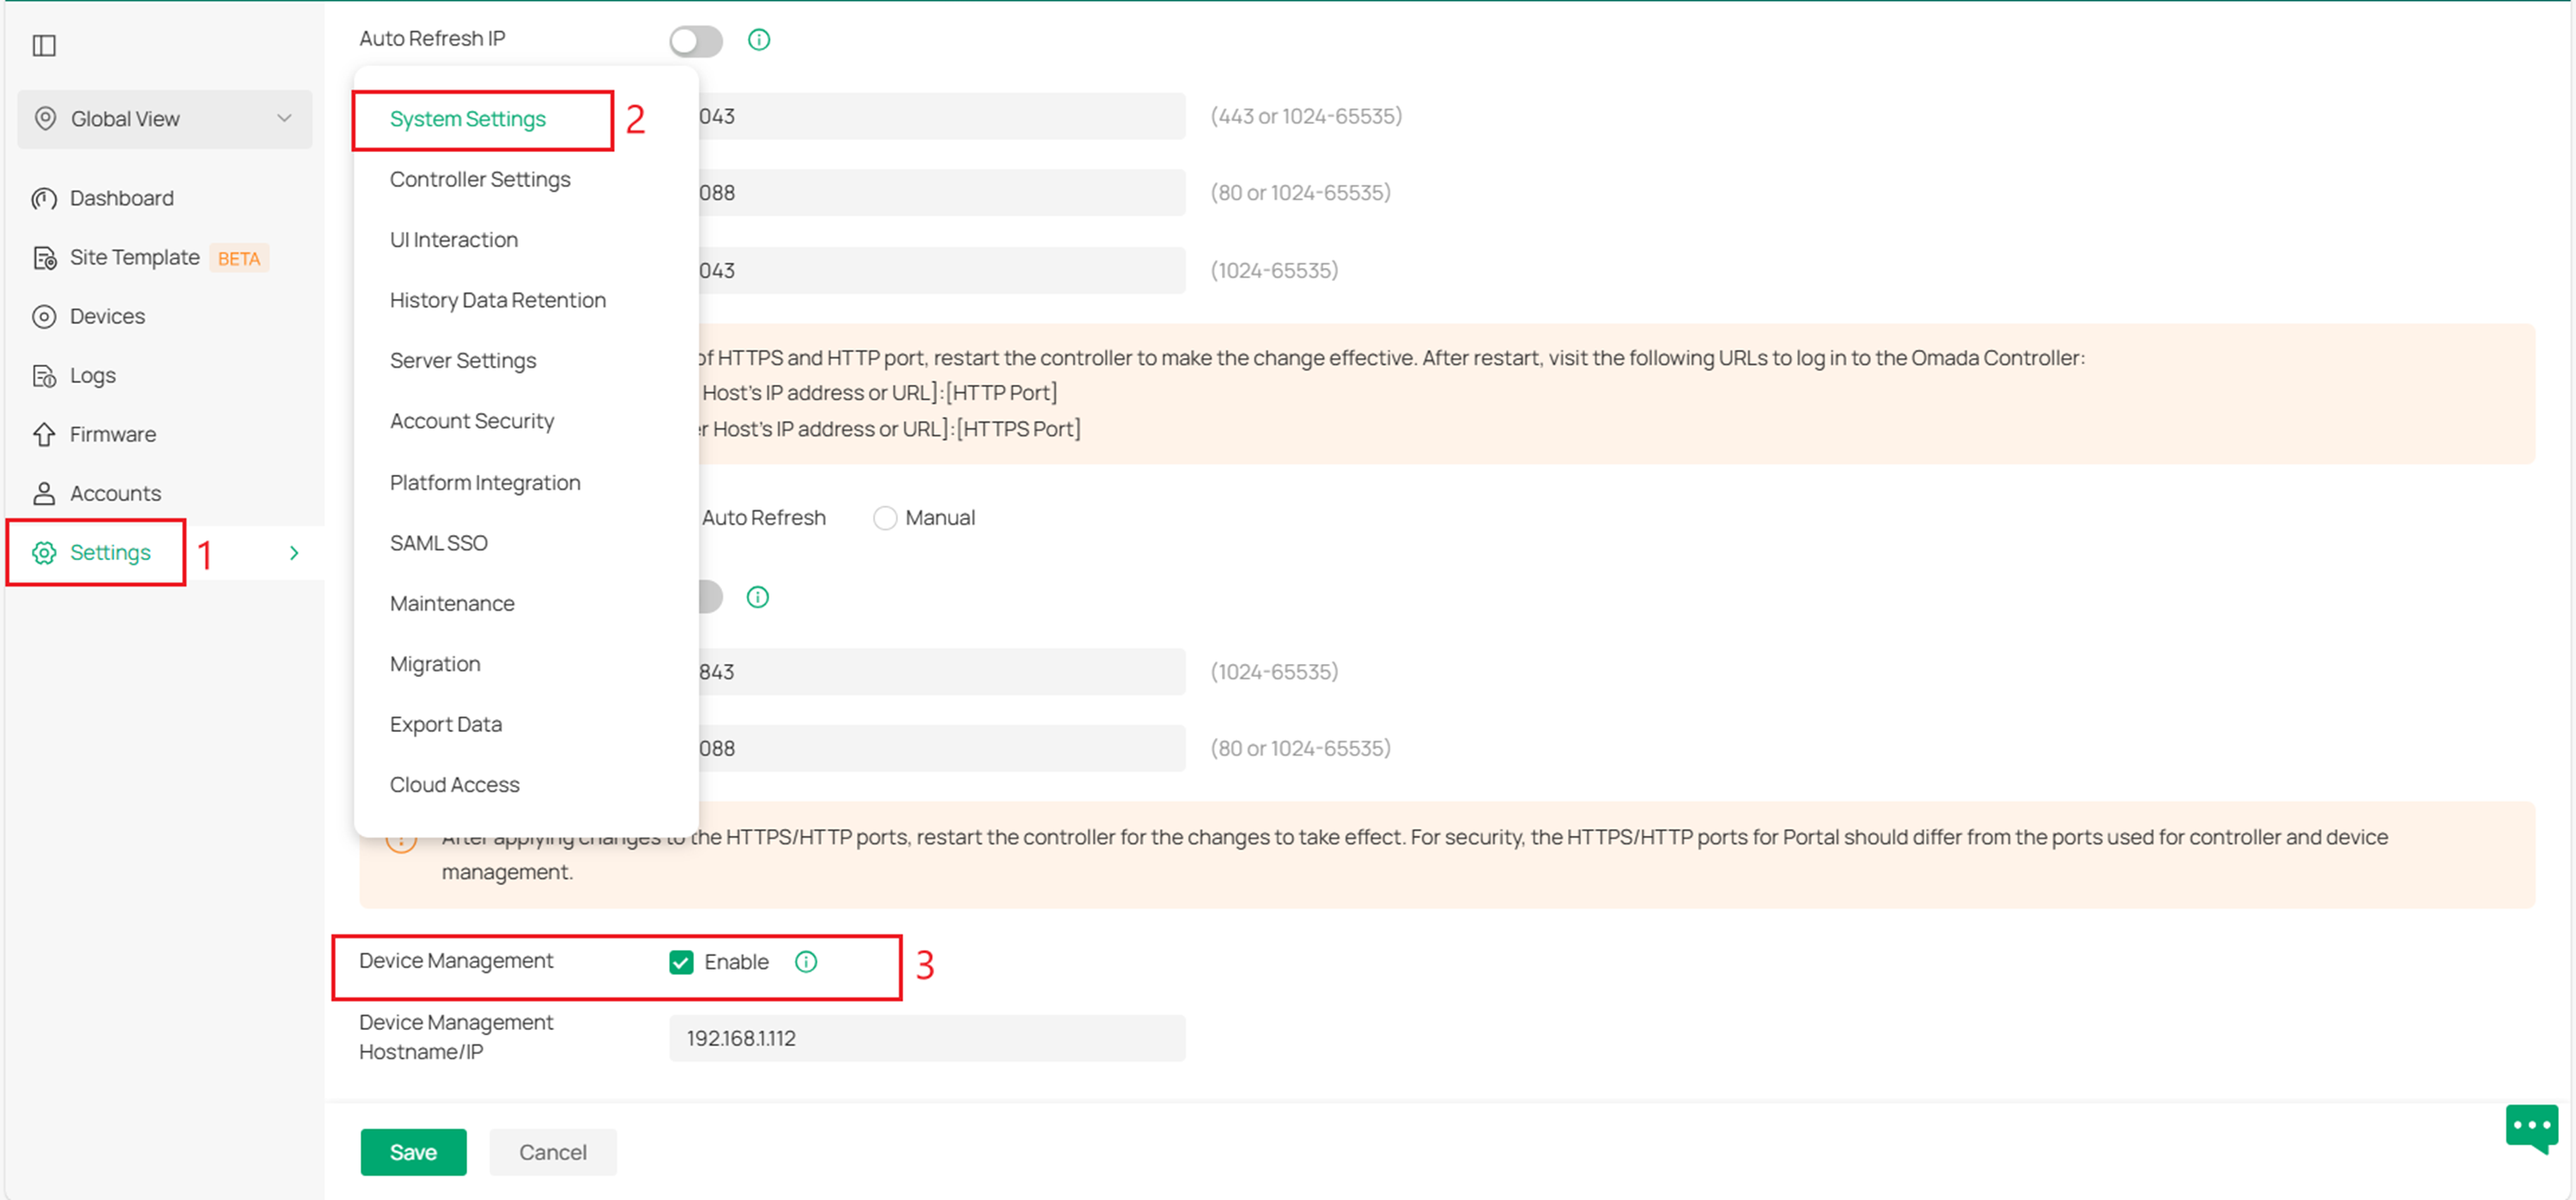
To activate the site URL, please enable Device Management at Global view > System settings on your target controller. Then enter the Device Management Hostname/IP and save settings.
Go to the Dashboard page, and copy the URL of the target site as shown below.
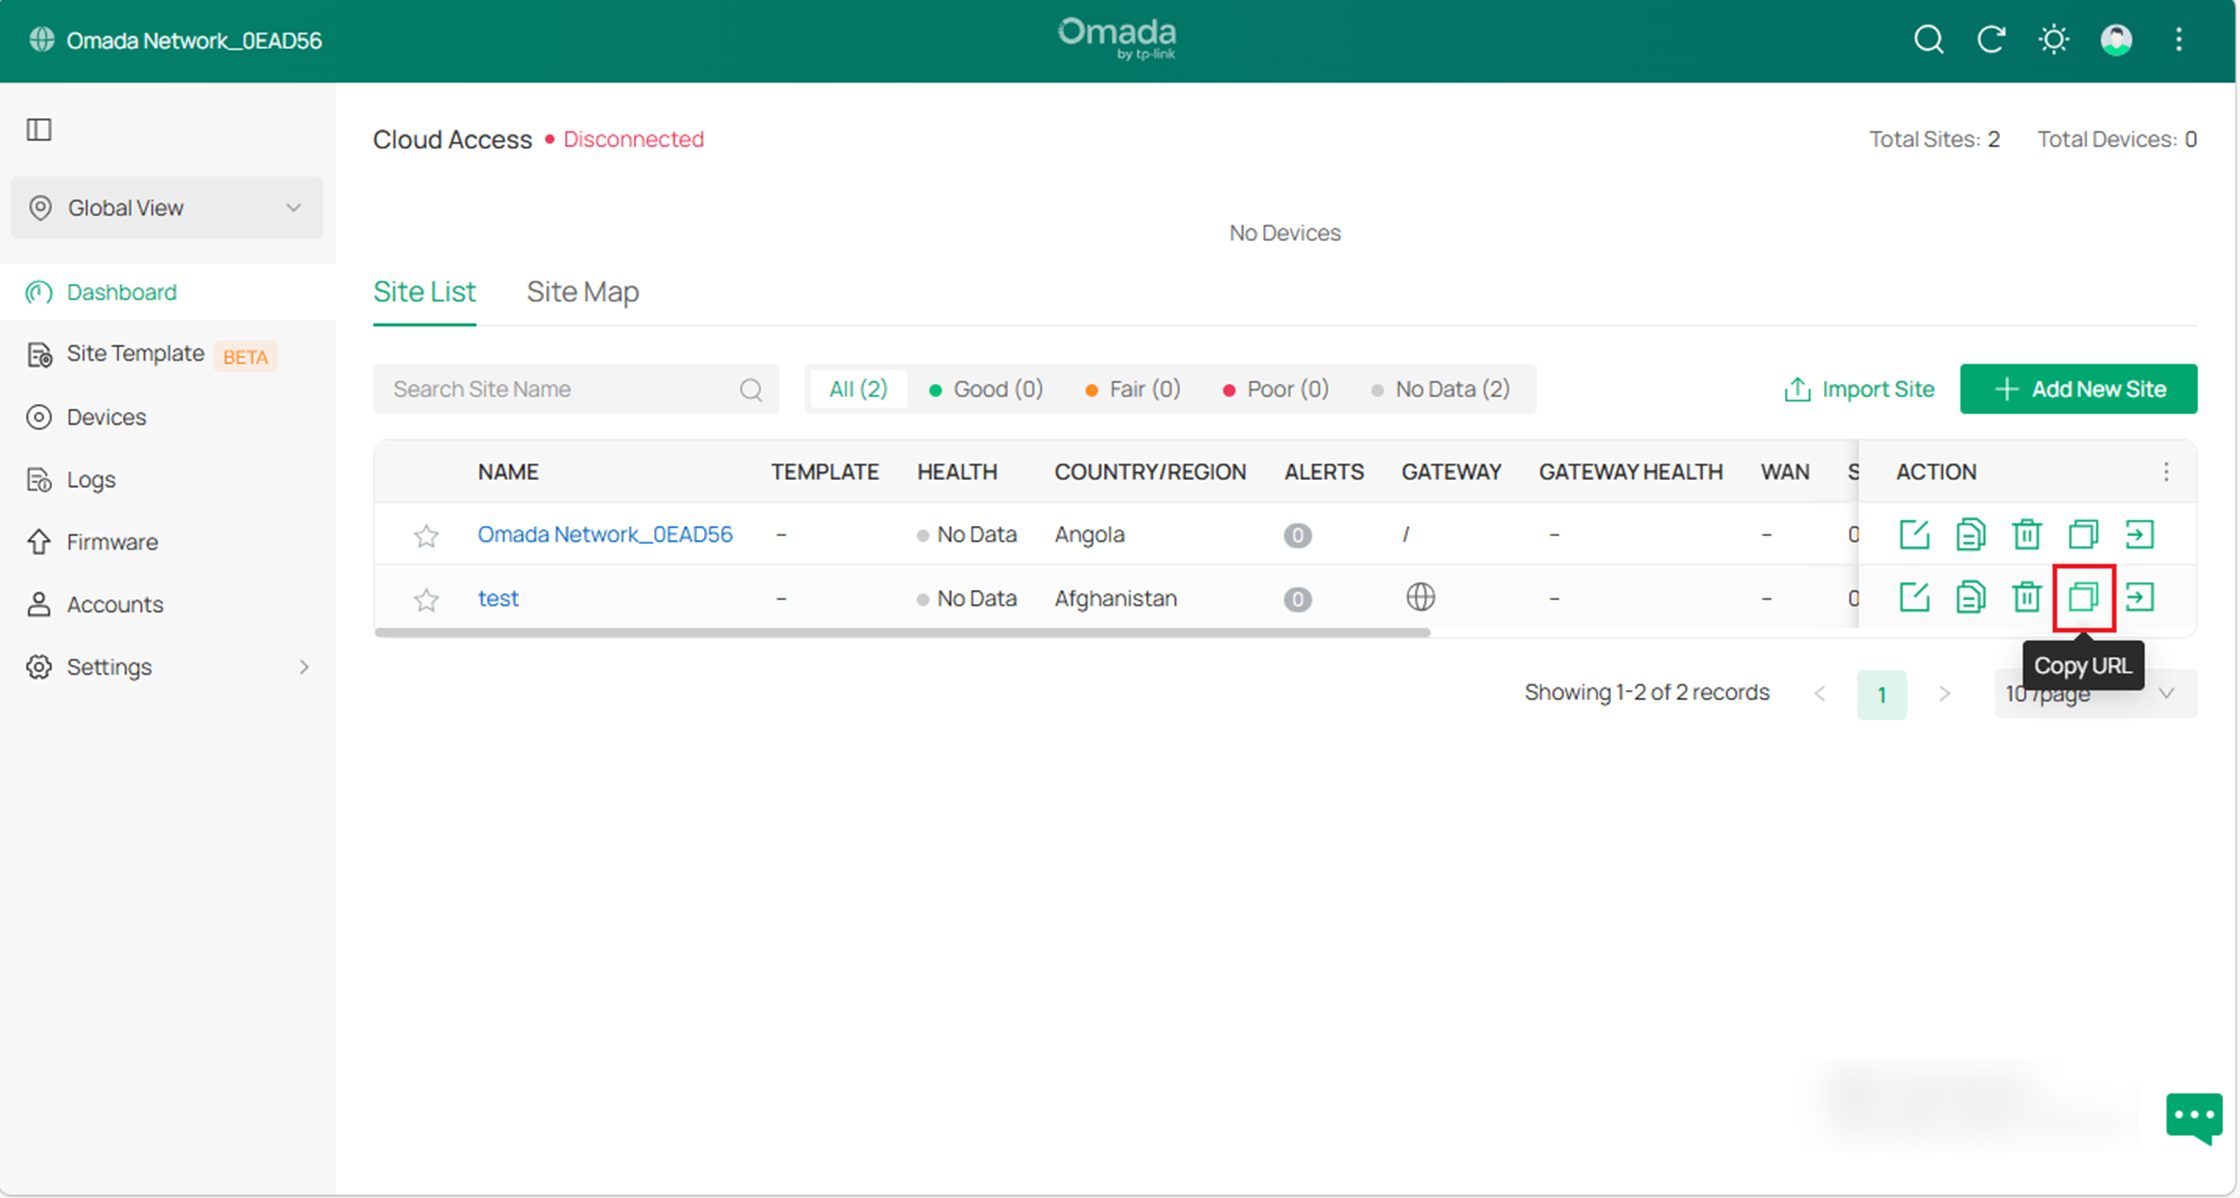
Note: The hardware and software controllers only support the site URL.
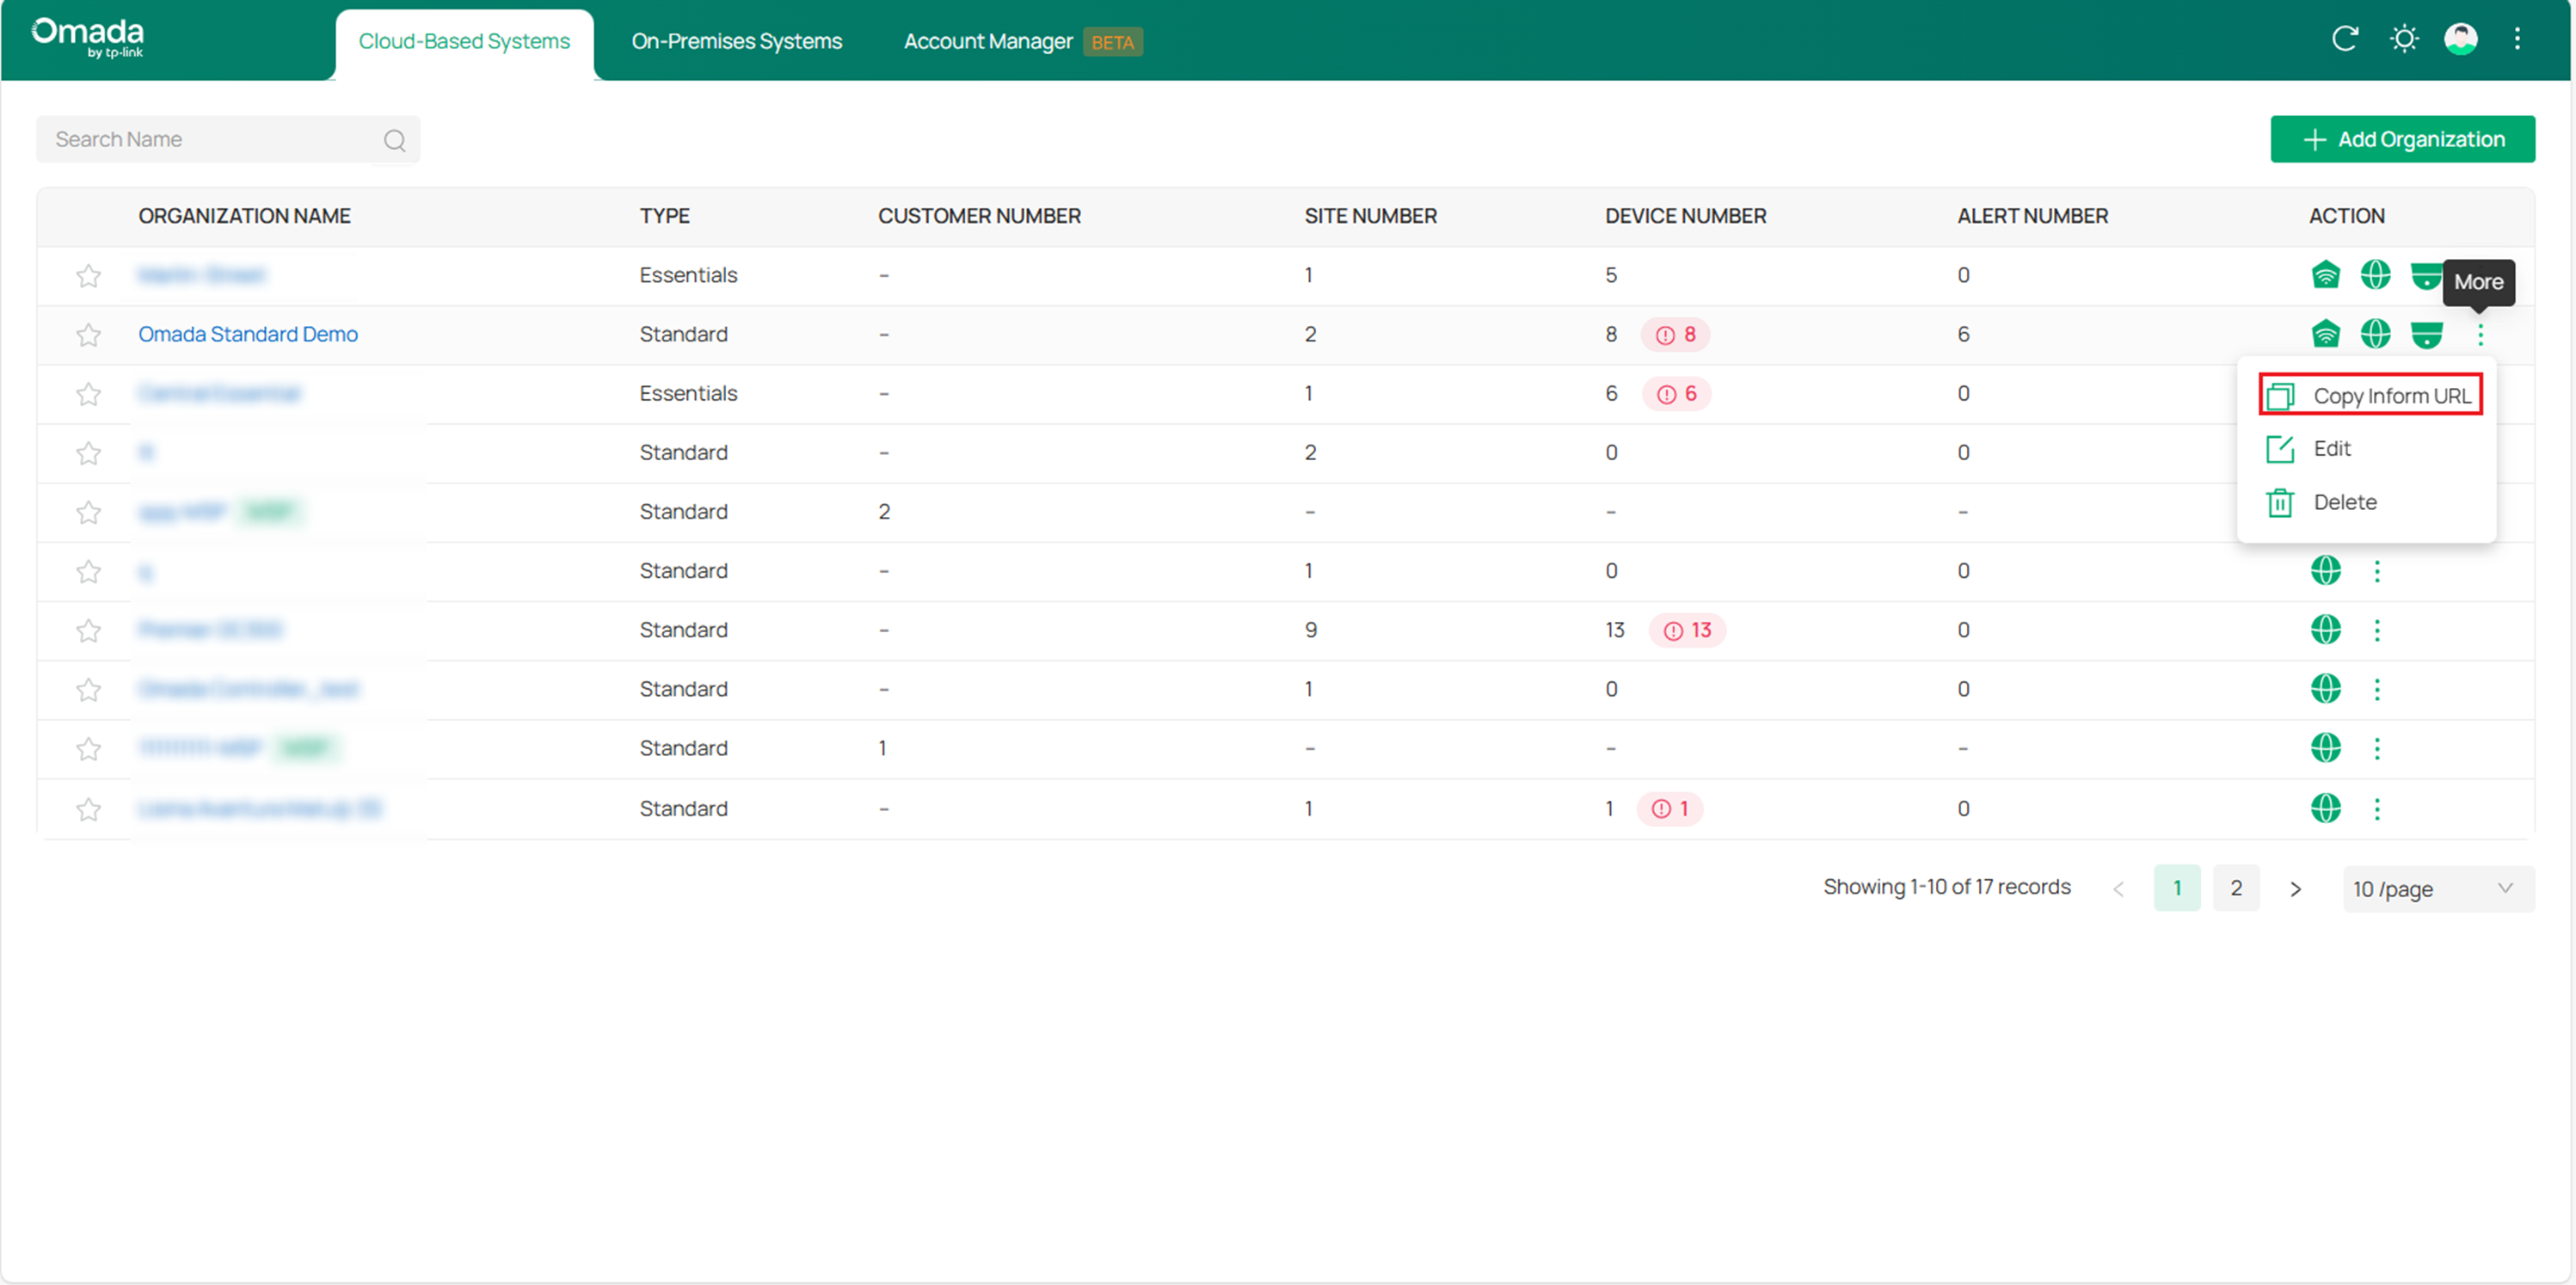
For cloud-based controllers, you can find the controller inform URL under More > Copy Inform URL on the home page.
Then paste the URL into the Controller IP/Inform URL field.
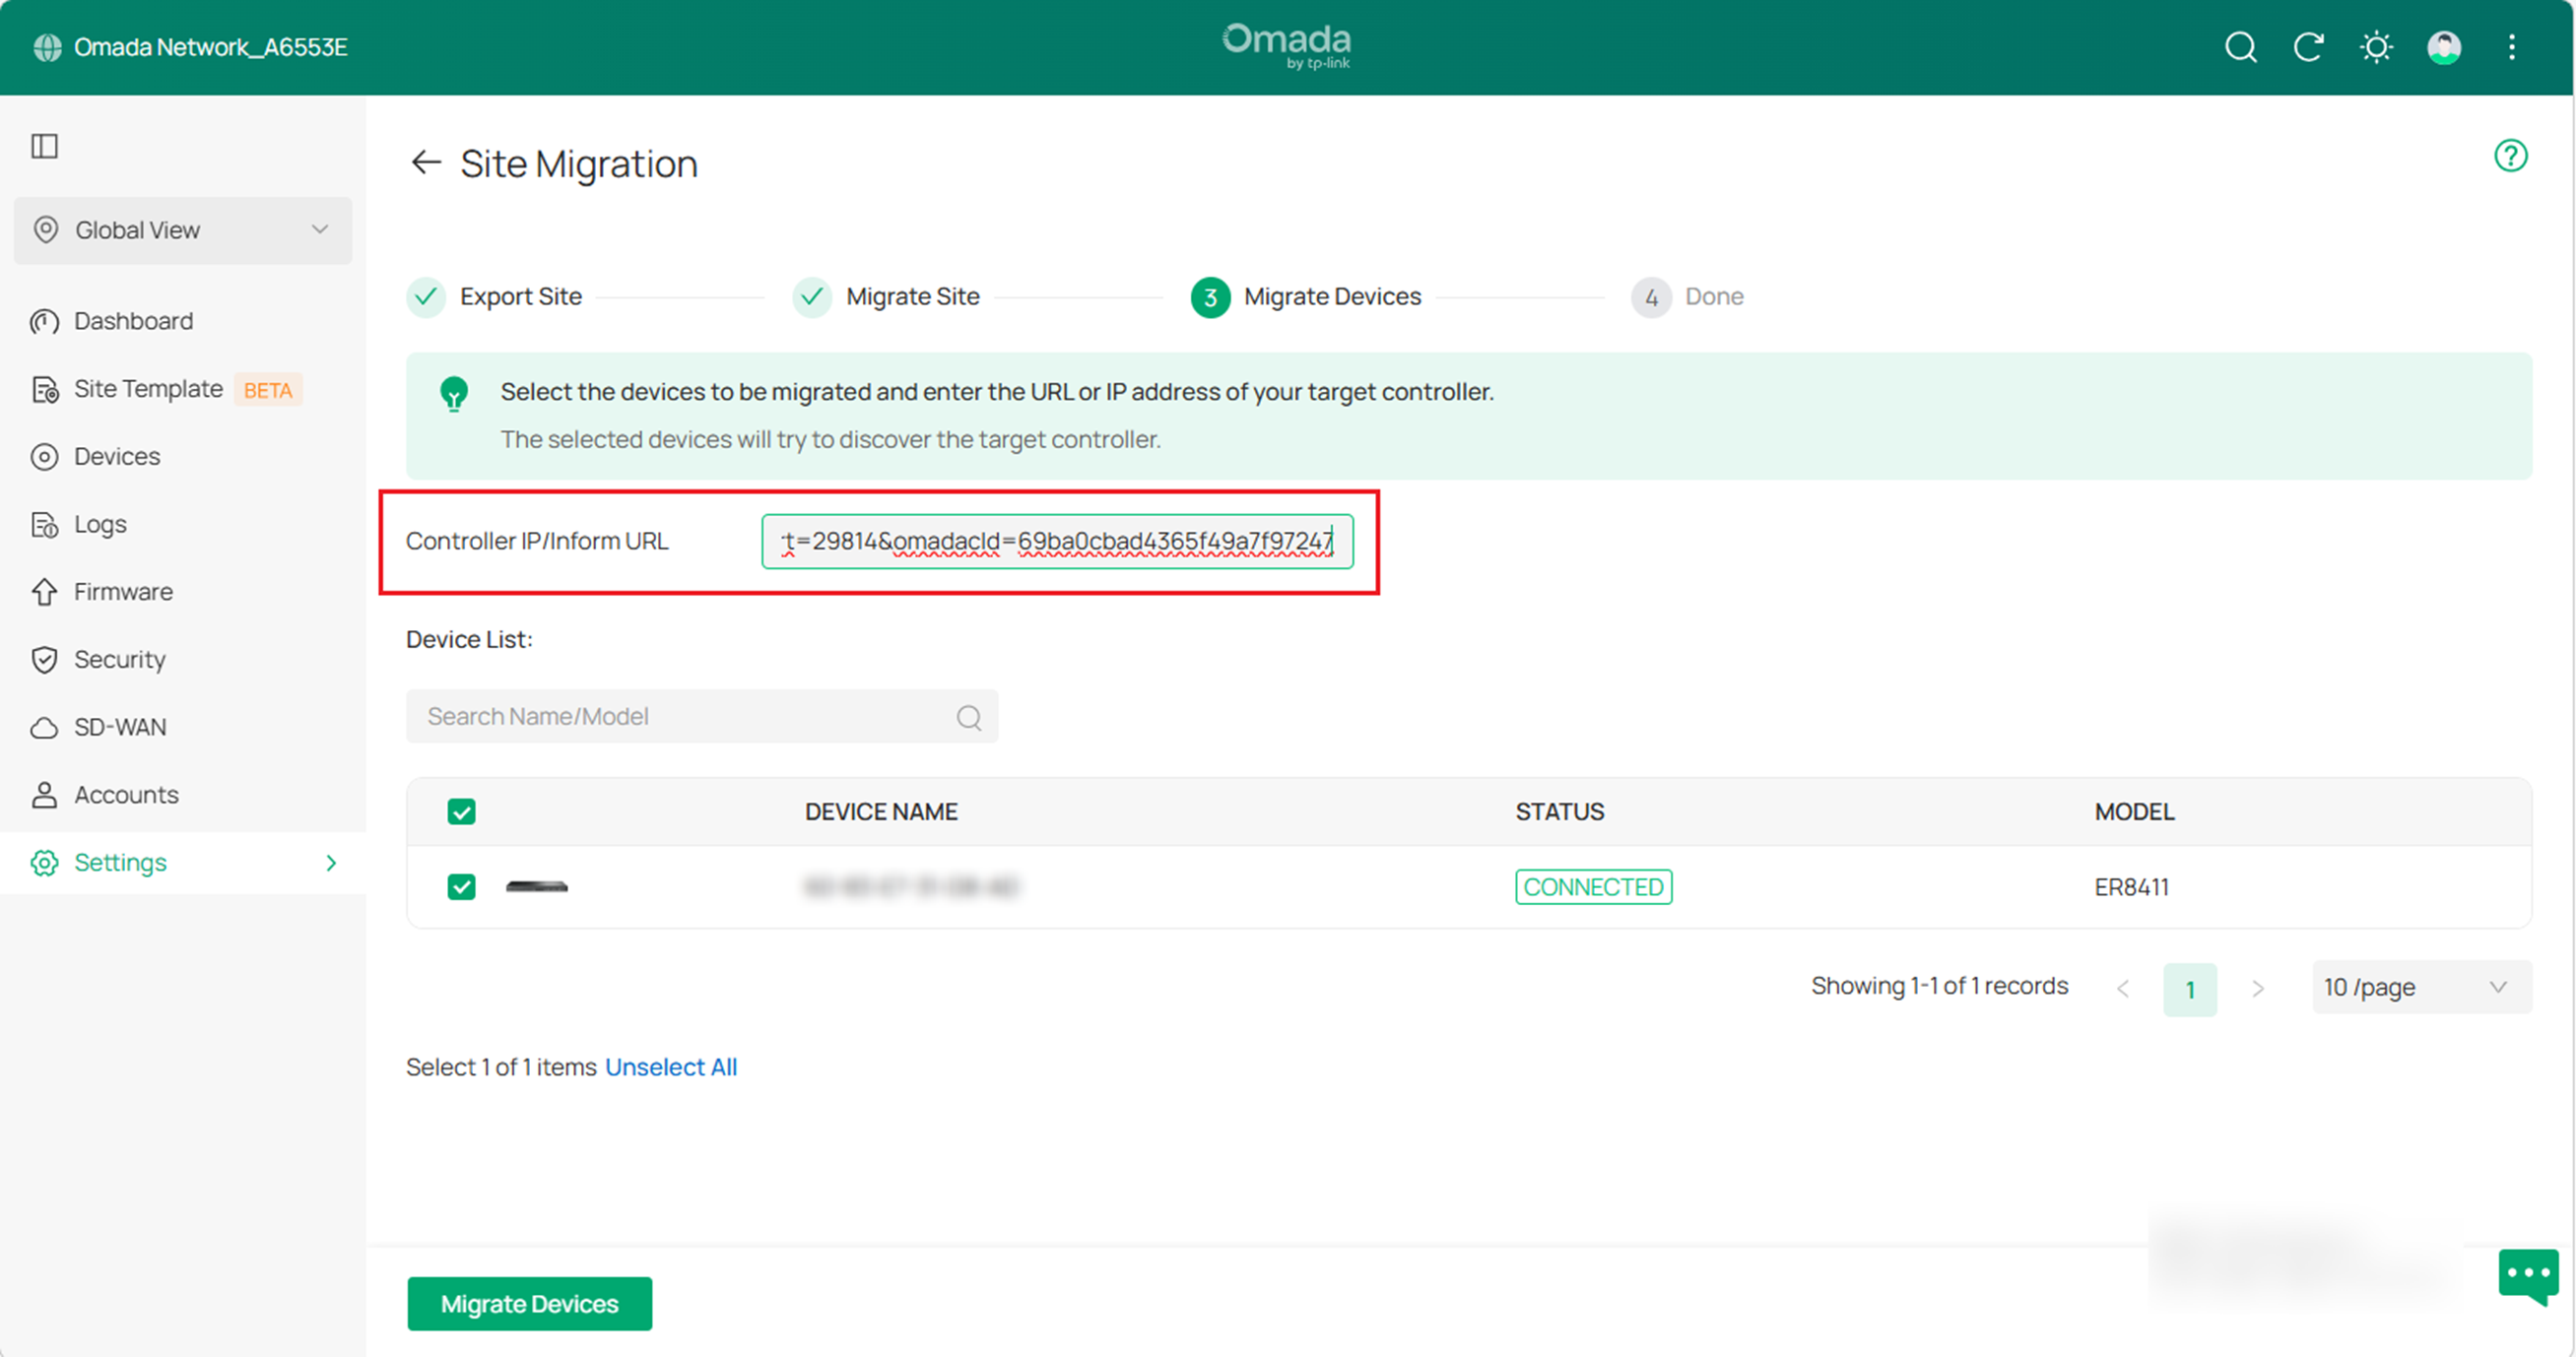
Note: Make sure that you enter the correct IP address or URL of the target controller to establish the communication between managed devices and your target controller. Otherwise the managed devices cannot be adopted by the target controller.
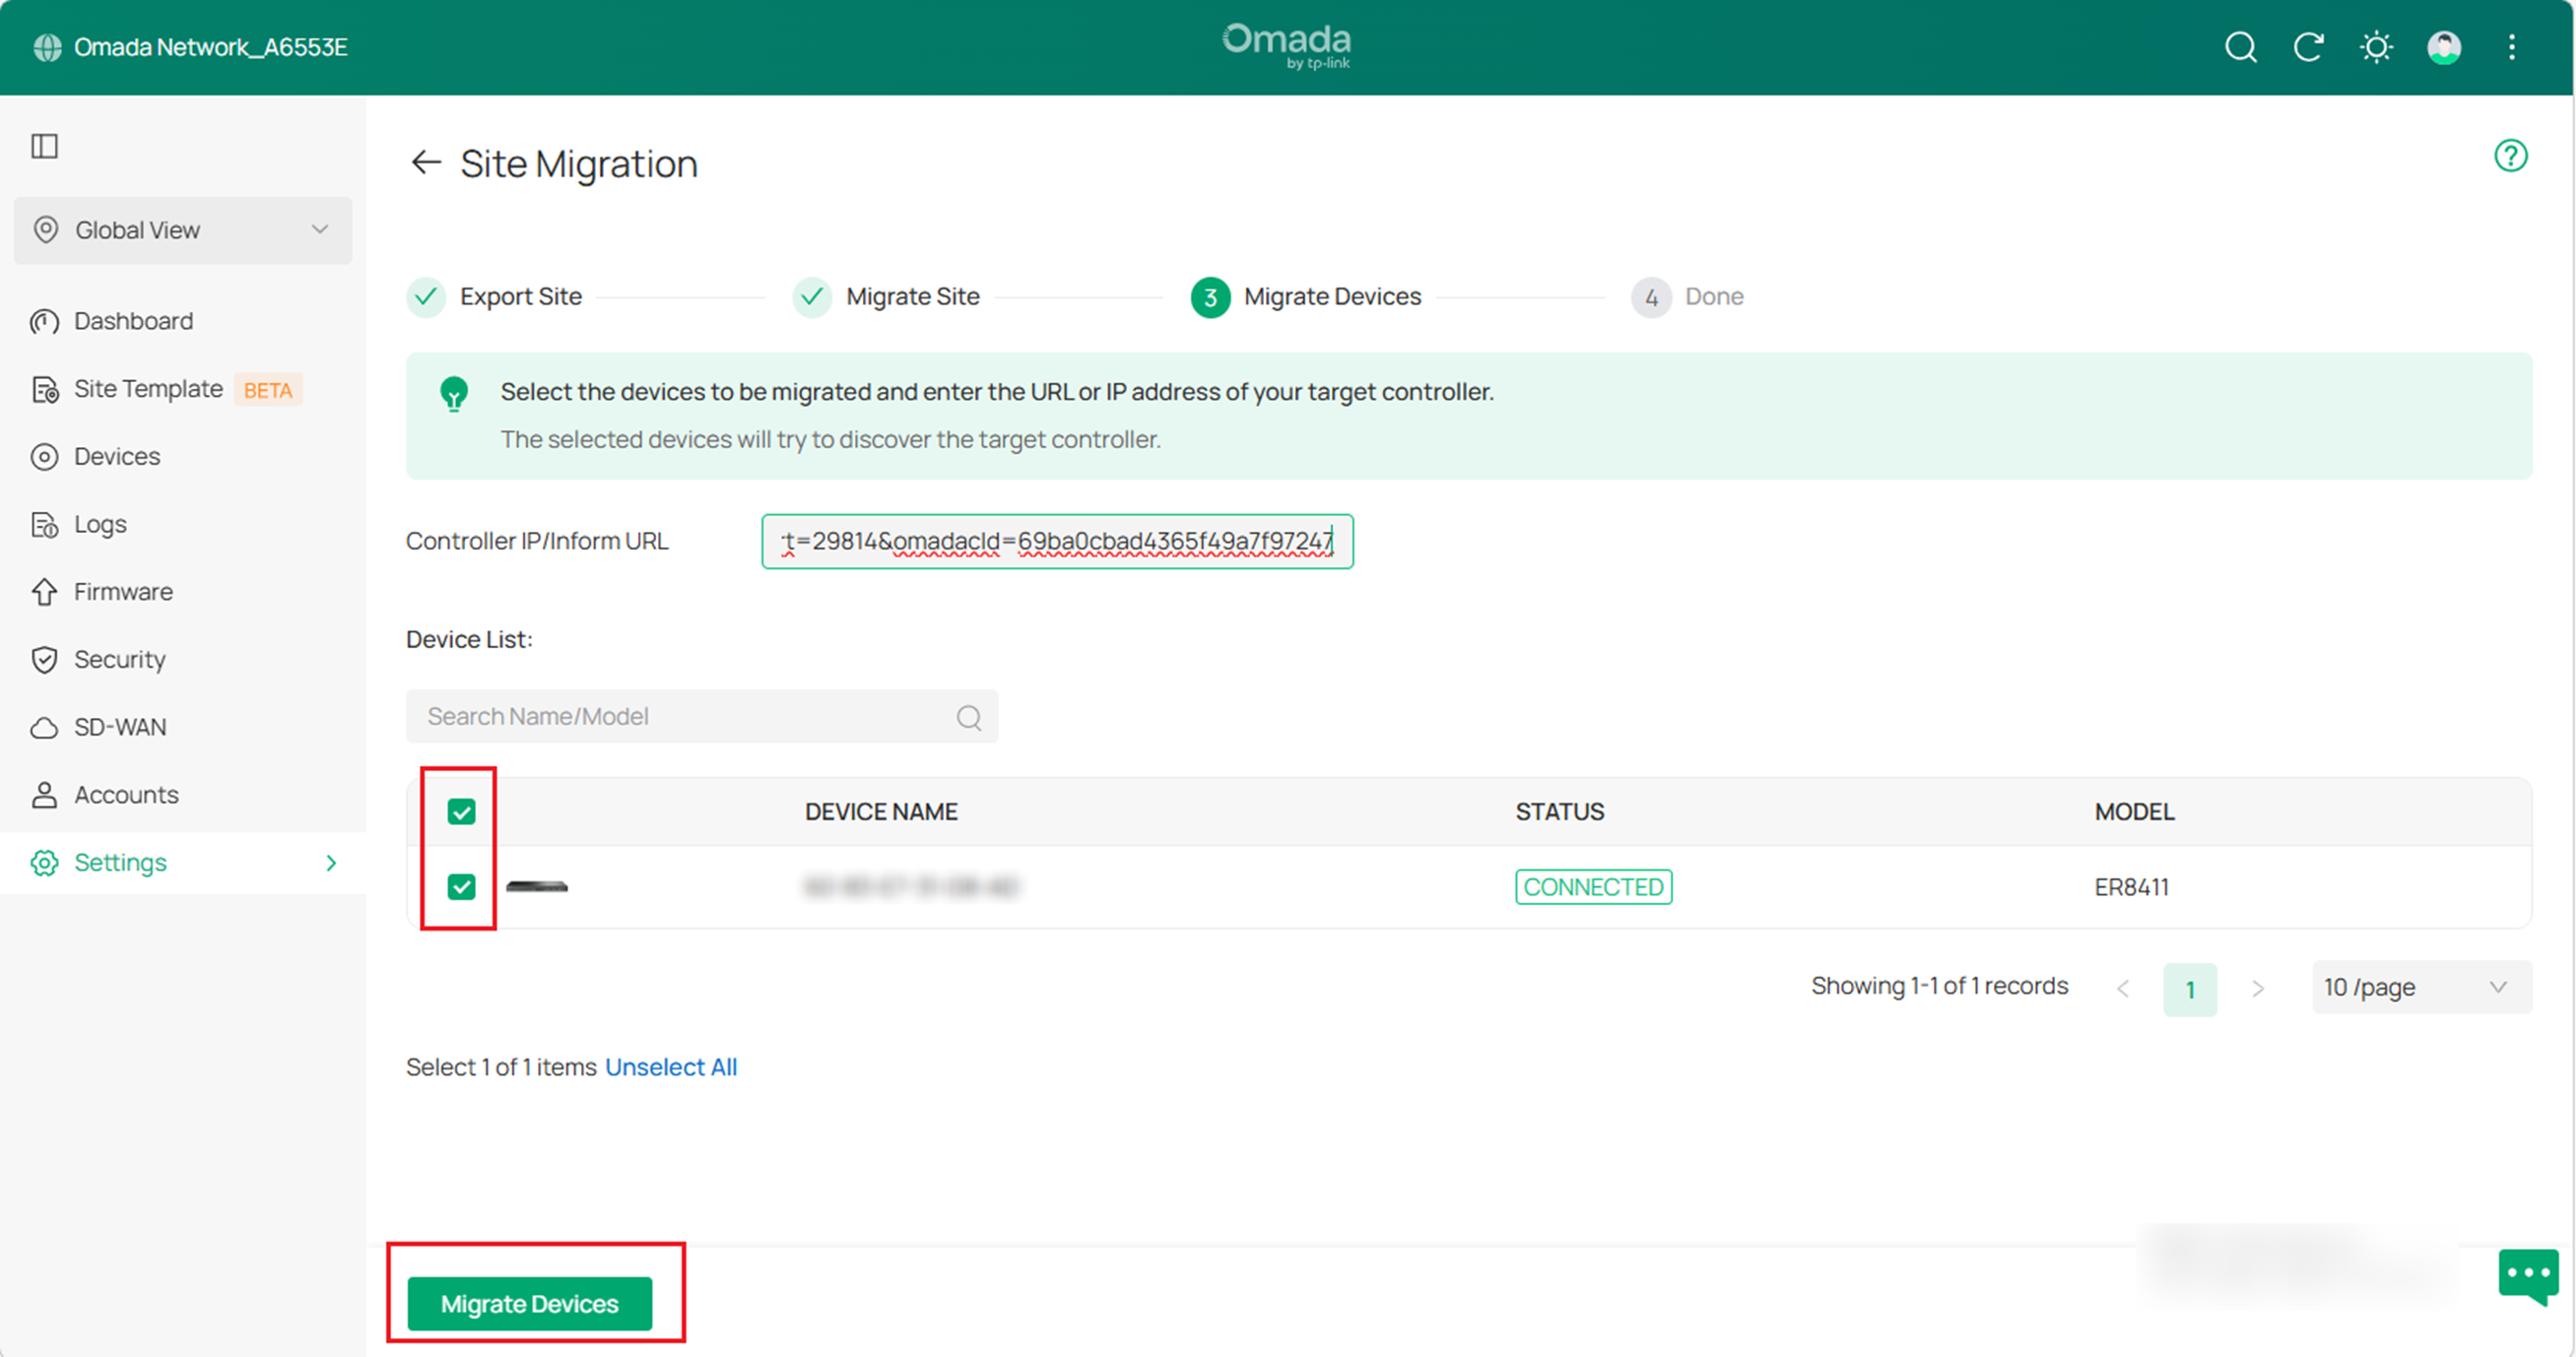
B. Select the devices that are to be migrated by clicking the box next to each device. By default, all the devices are selected. Click Migrate Devices to migrate the selected devices to the target controller.
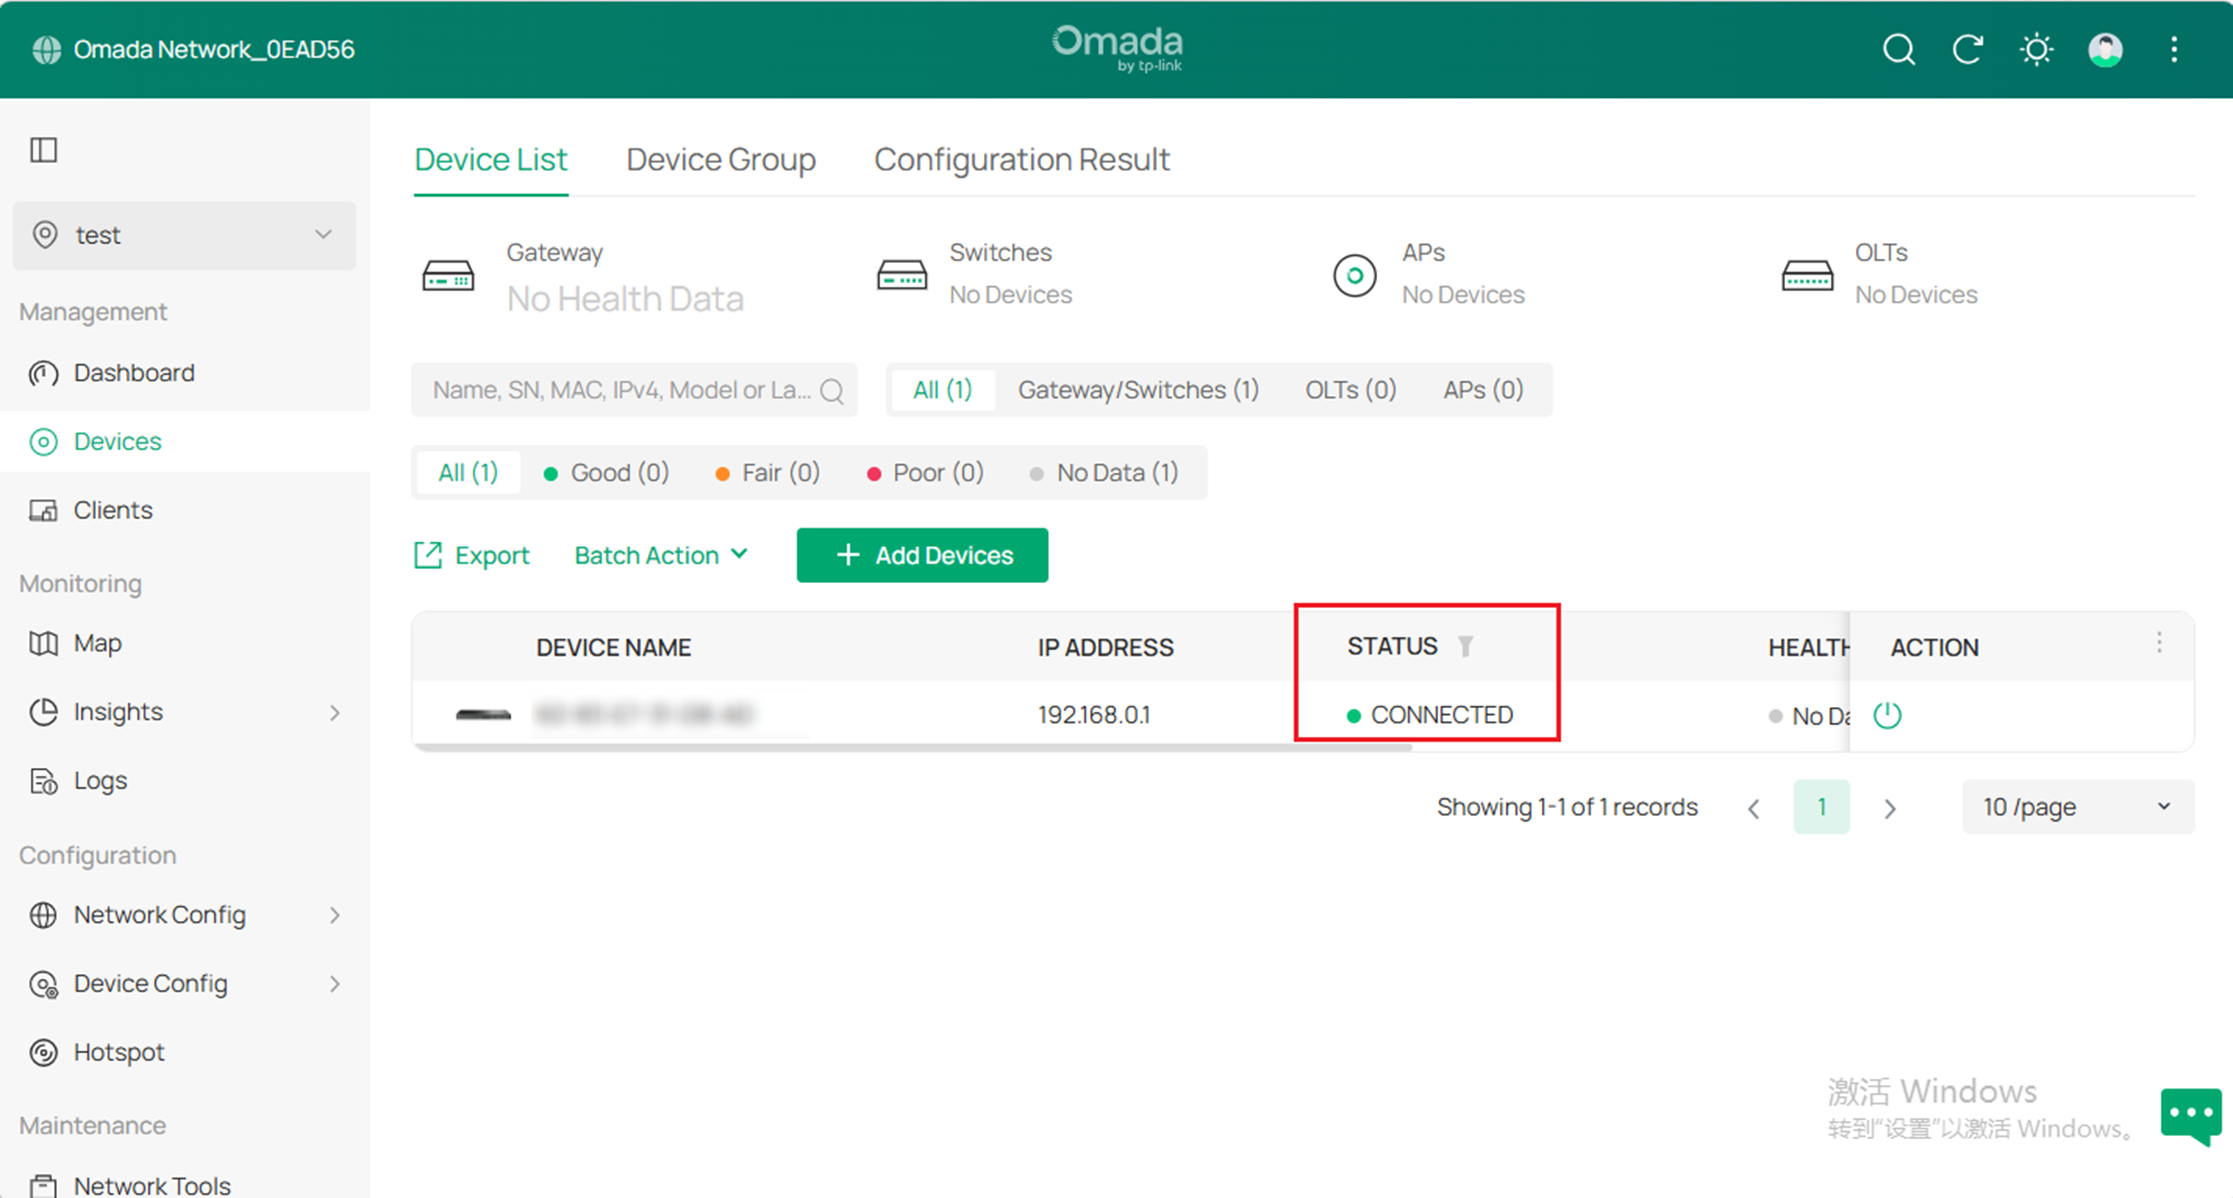
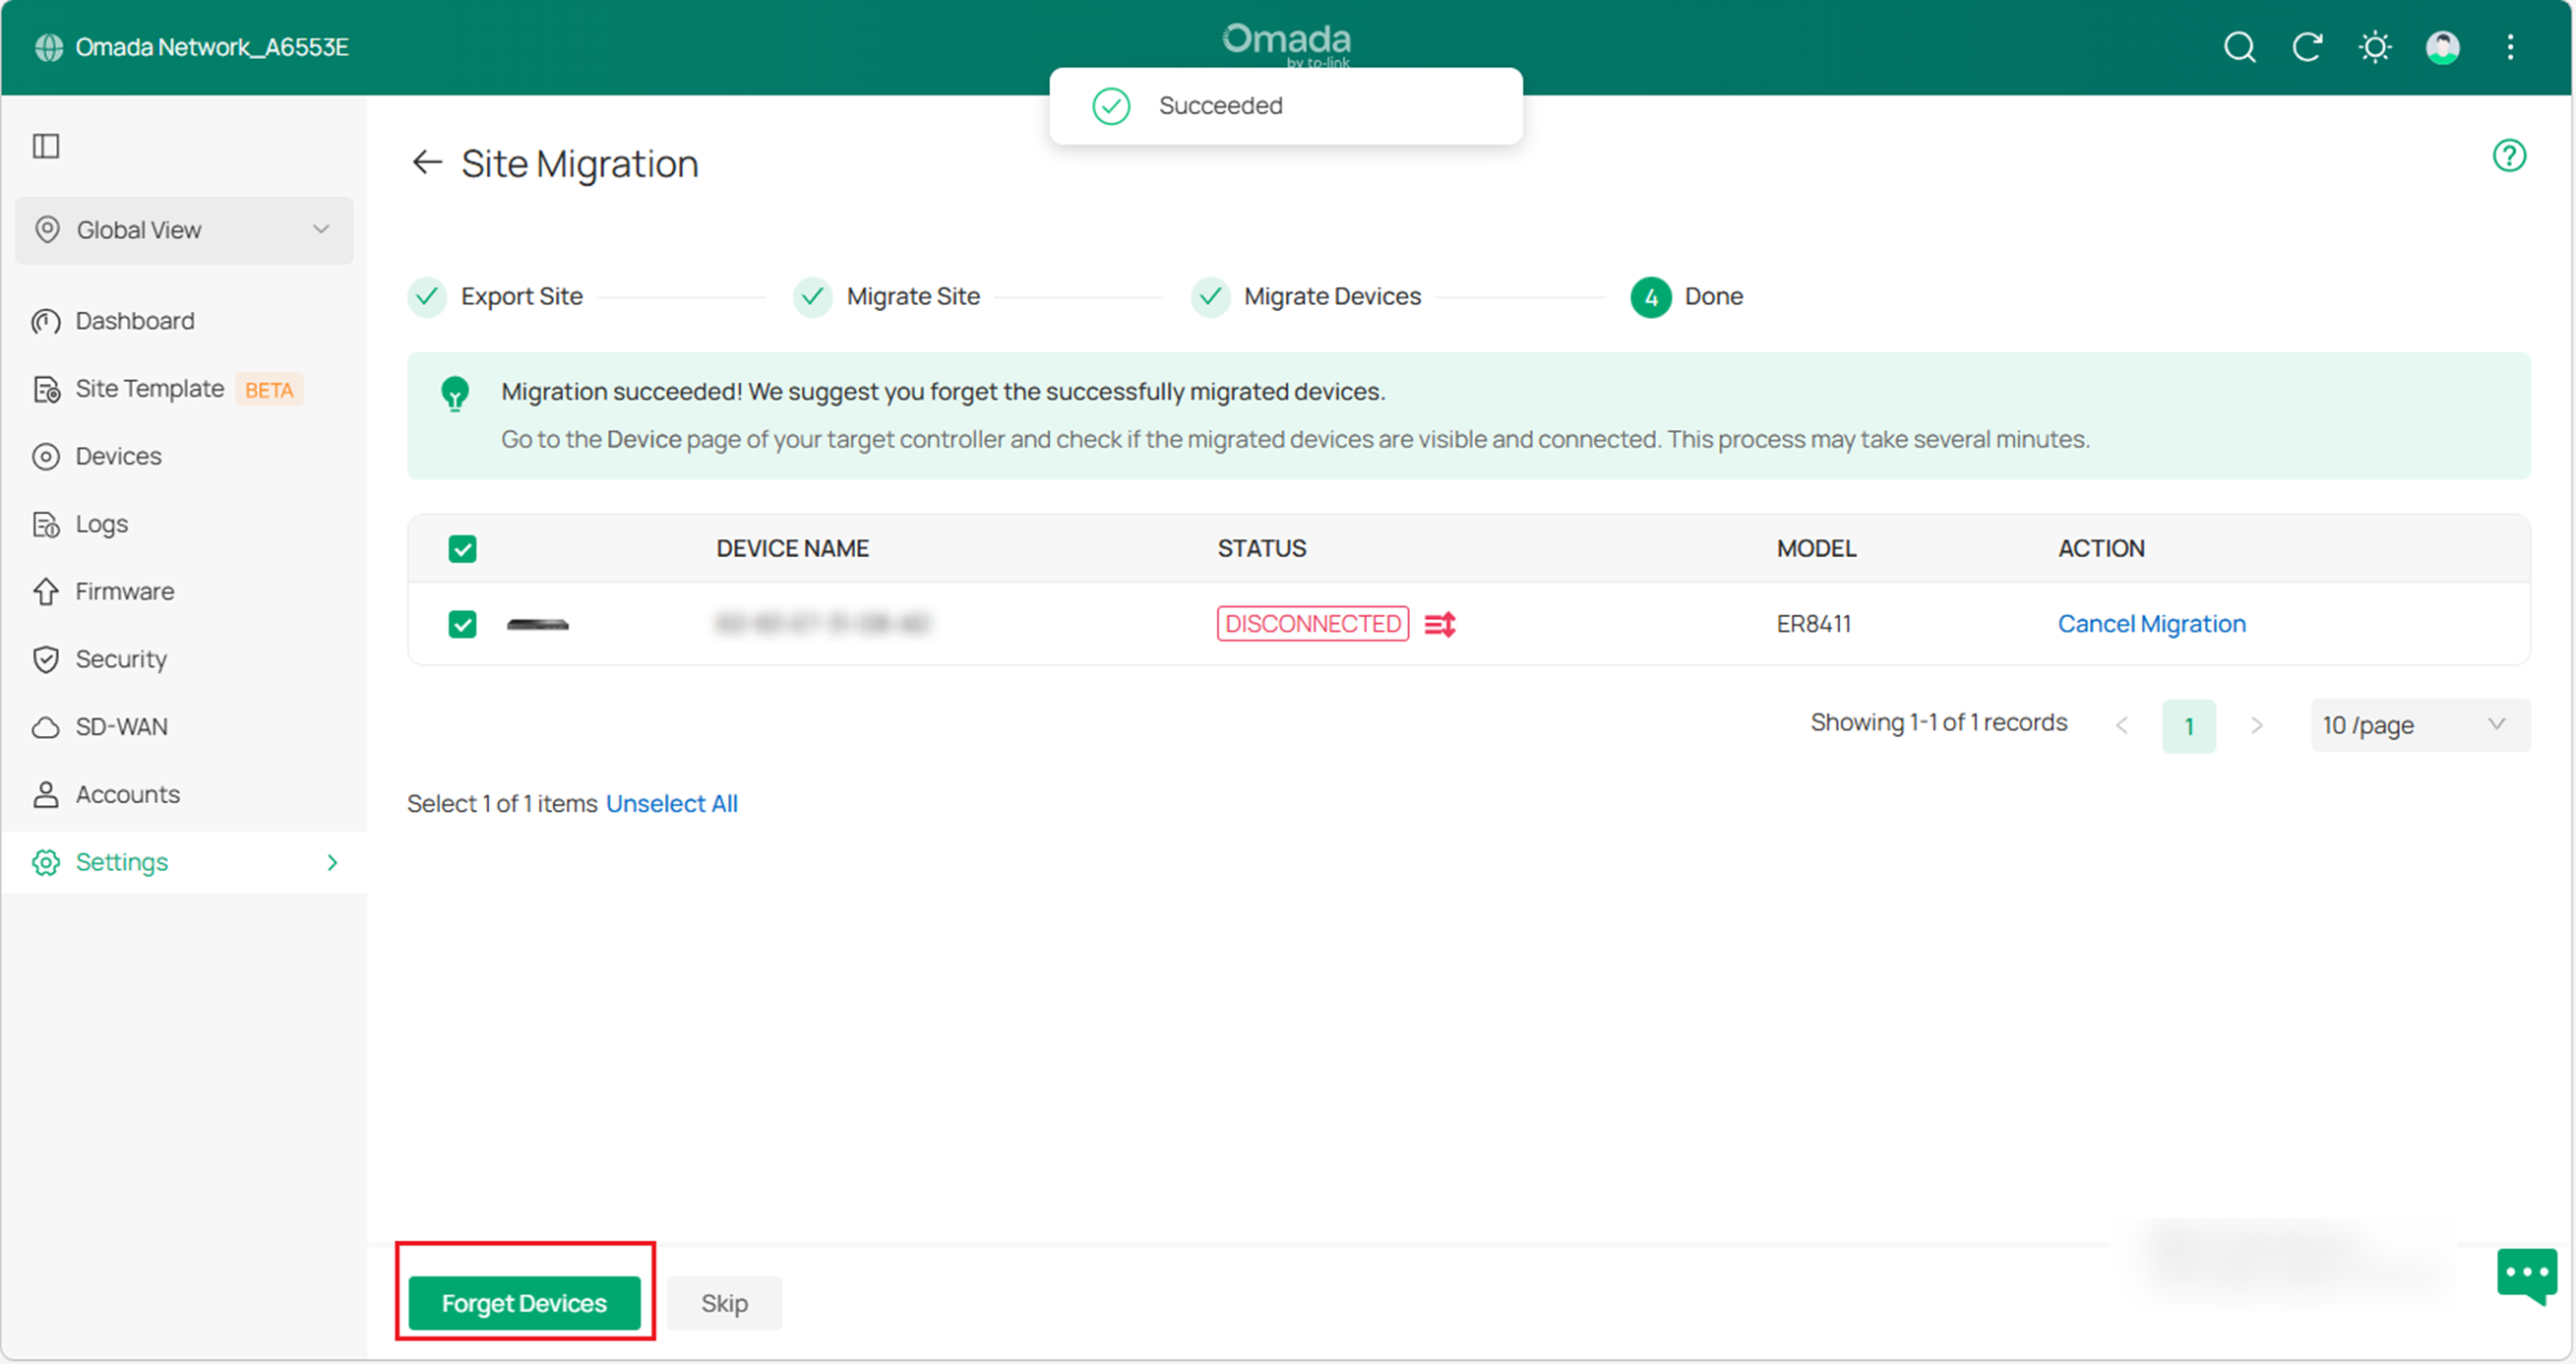
C. Verify that all the migrated devices are visible and connected to the target controller. When all the migrated devices are in Connected status on the Device page on the target controller, click Forget Devices on the previous site to finish the migration process.
D. When the migration process is completed, all the configuration and data are migrated to the target controller. You can delete the previous site if necessary.
Controller Migration
Controller Migration allows Omada administrators to migrate the configurations and data from the current controller to any other controller with the same or higher firmware version. The process of migrating configurations and data from the current controller to another controller can be summarized in three steps: Export Controller, Migrate Controller, and Migrate Devices.
Note: Please note that the ER7212PC is special. Its backup file cannot be imported into other controllers. It can only be imported into the ER7212PC with the same hardware.
Step 1: Export Controller
Export the configurations and data of the current Controller as a backup file.
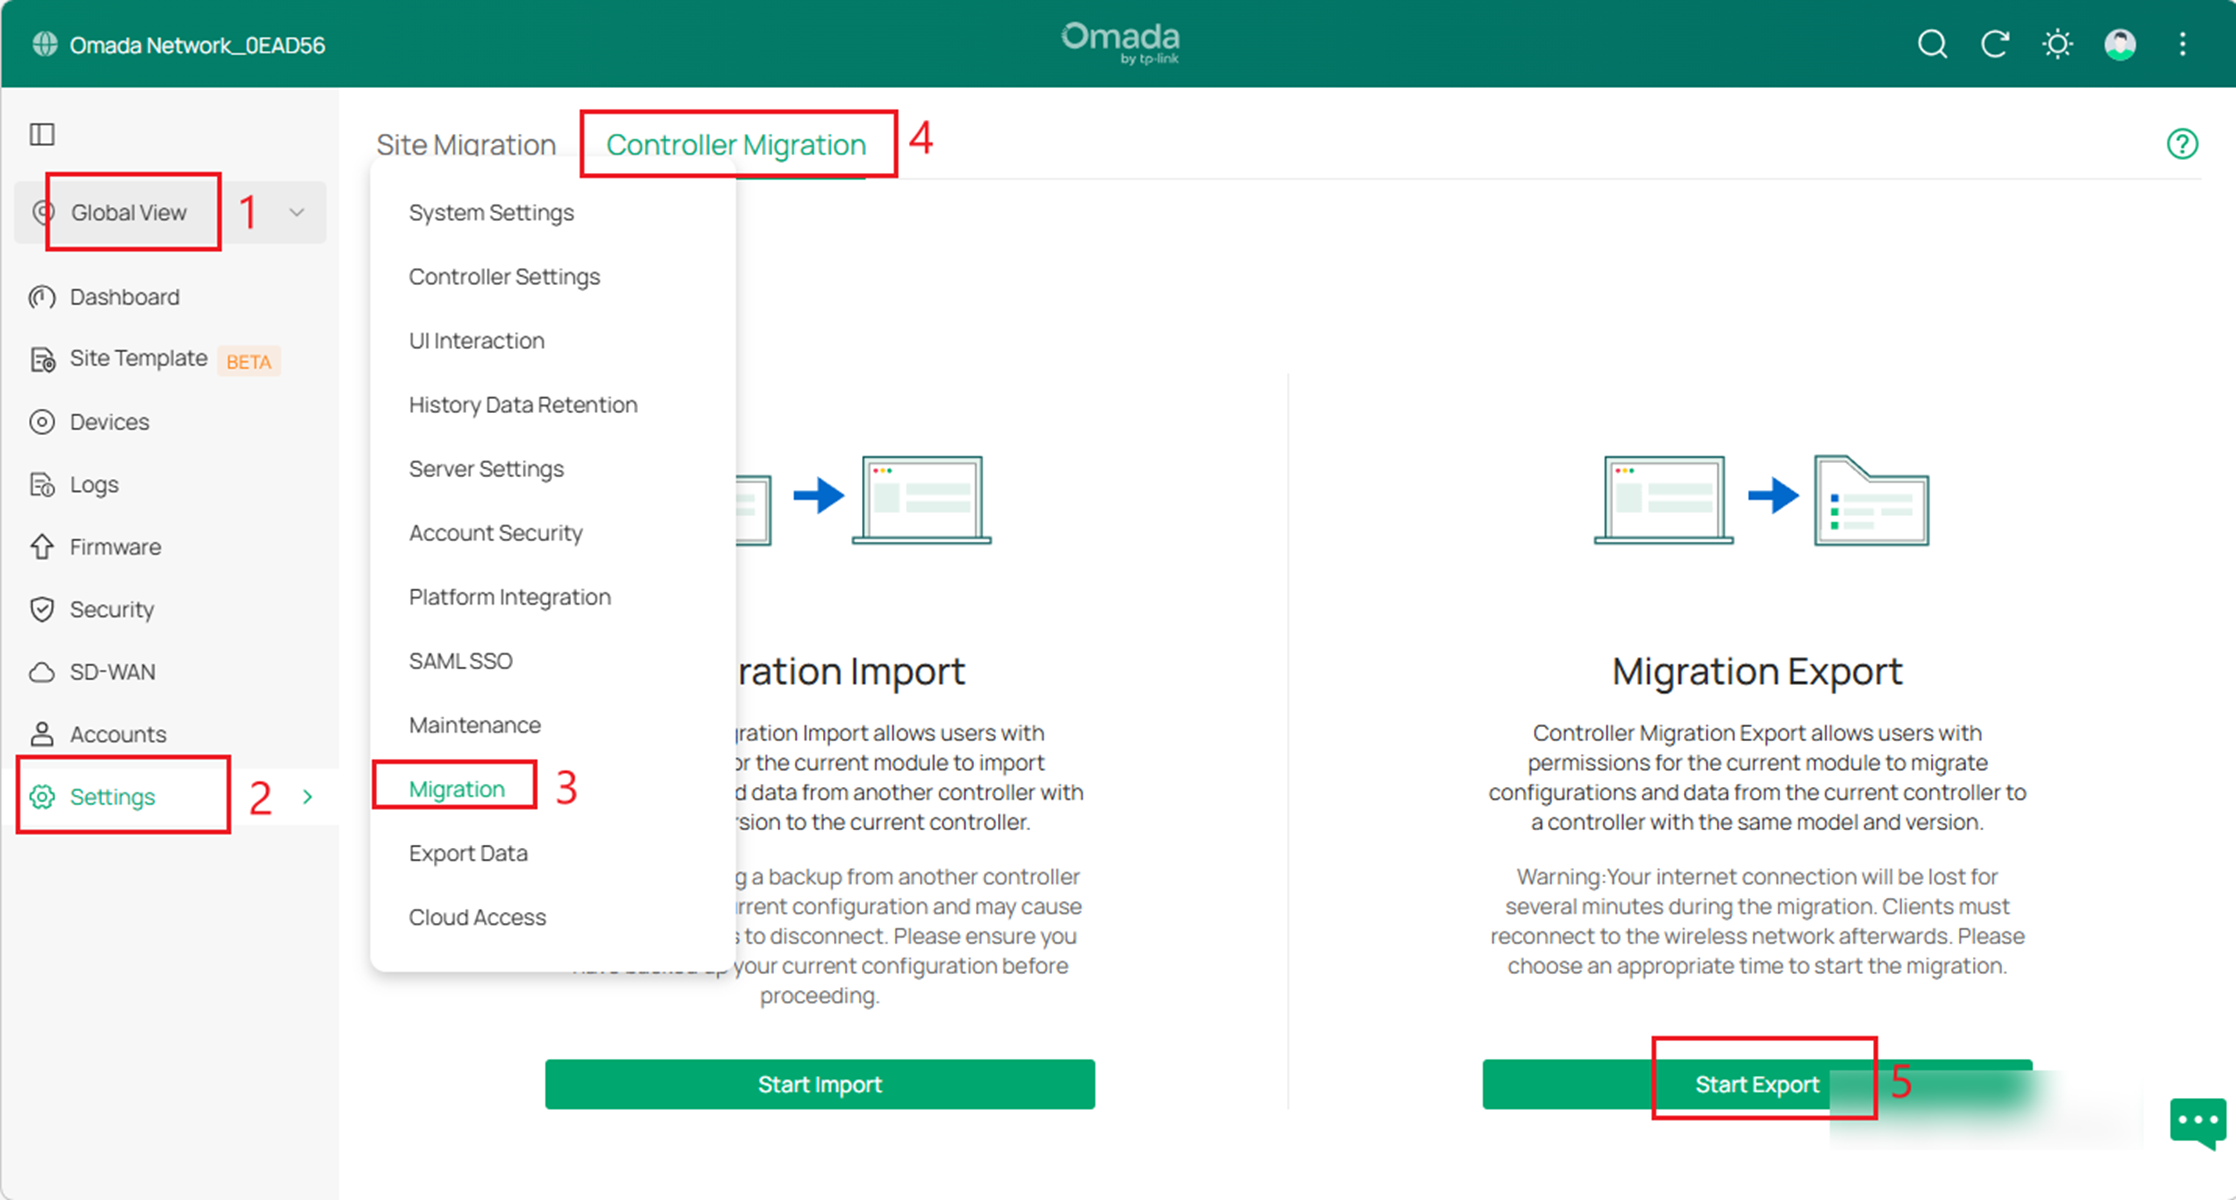
A. Launch the controller and access the Global View. Go to Settings > Migration. On the Controller Migration tab, click the Start Export button on the Migration Export page. If you already have a backup file, you can import it directly into Migration Import.
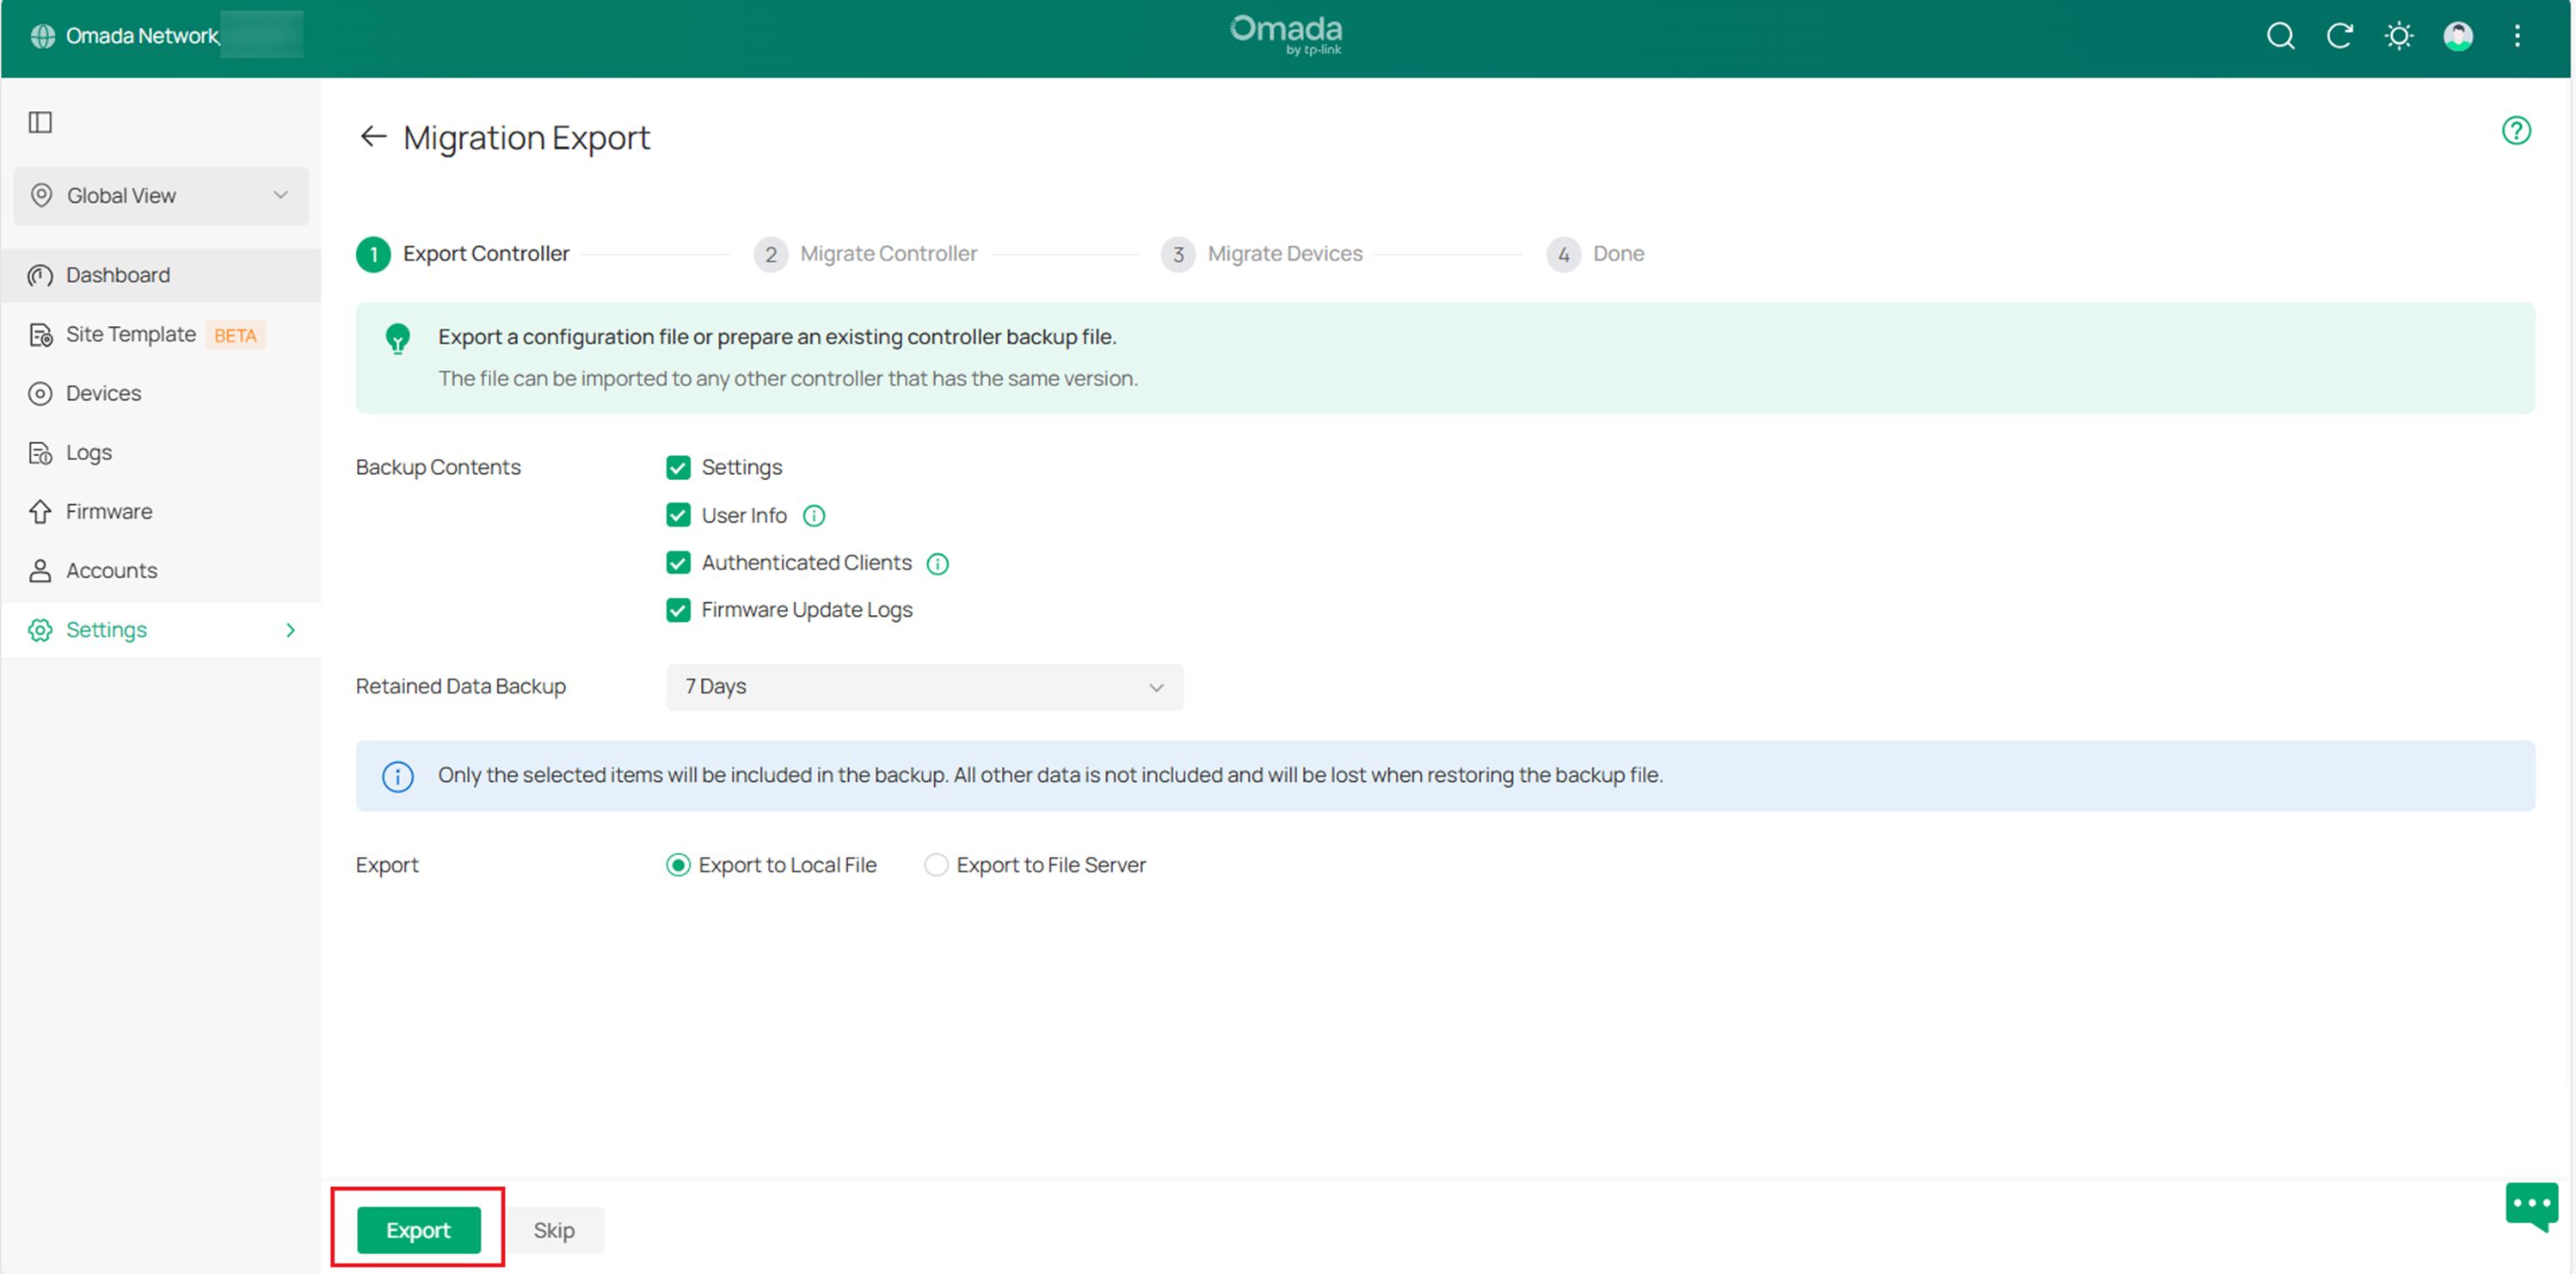
B. Please select the content you want to back up according to your needs. If you only choose Settings and User info, Retained Data Backup will not be displayed. The time needs to be selected only when exporting the Authenticated Clients and Firmware Update Logs. Click Export to export the configurations and data of your current controller as a backup file. If you have backed up the file, click Skip.
Step 2: Migrate Controller
In the target controller, import the current controller's backup file.
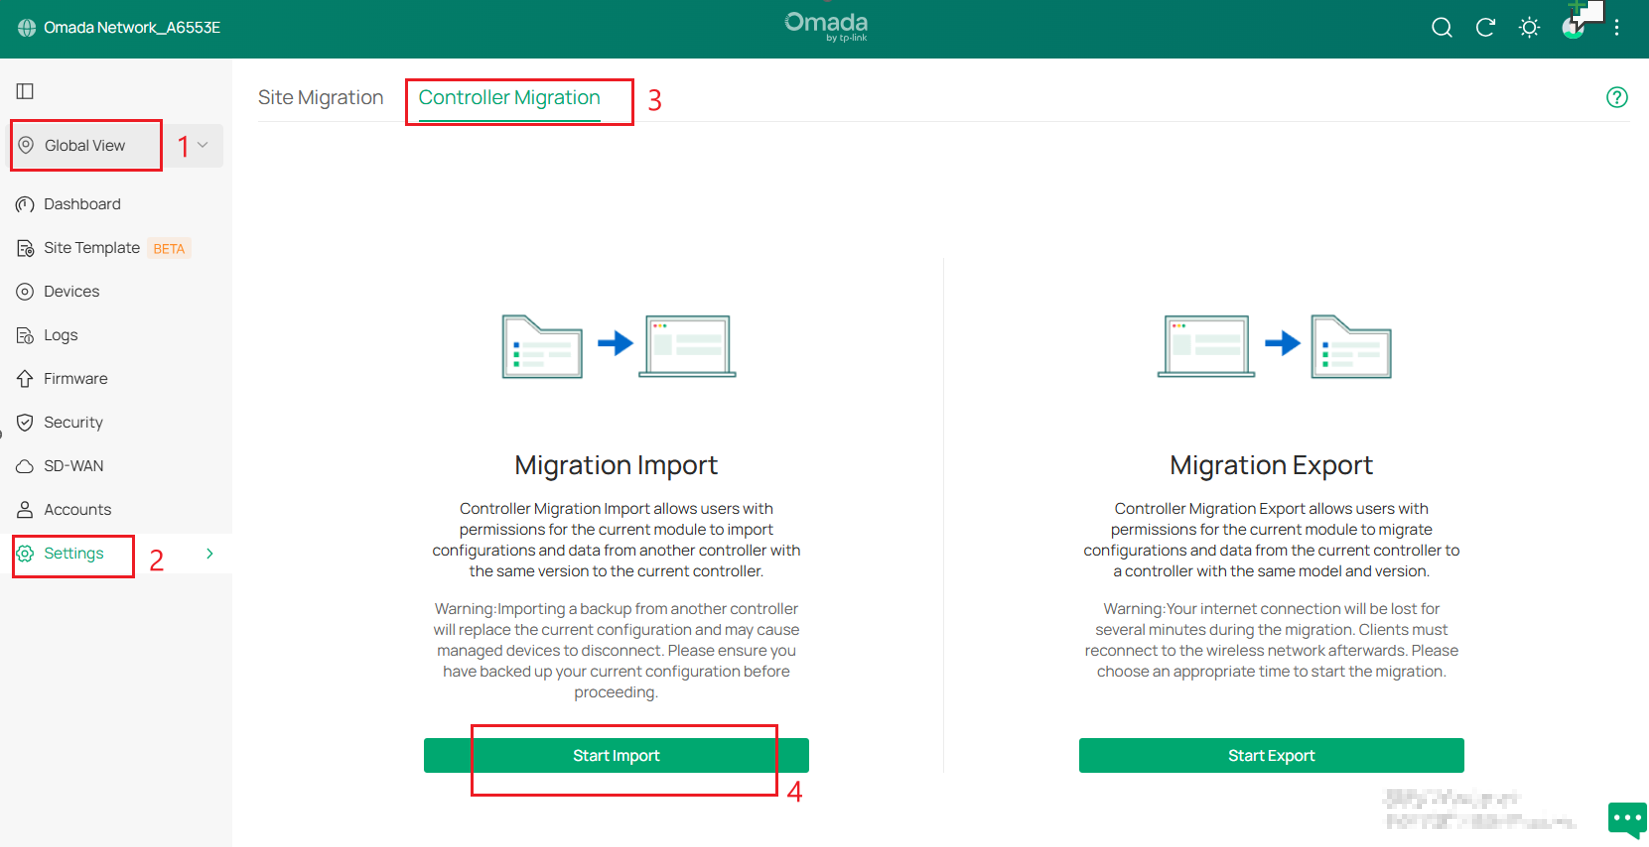
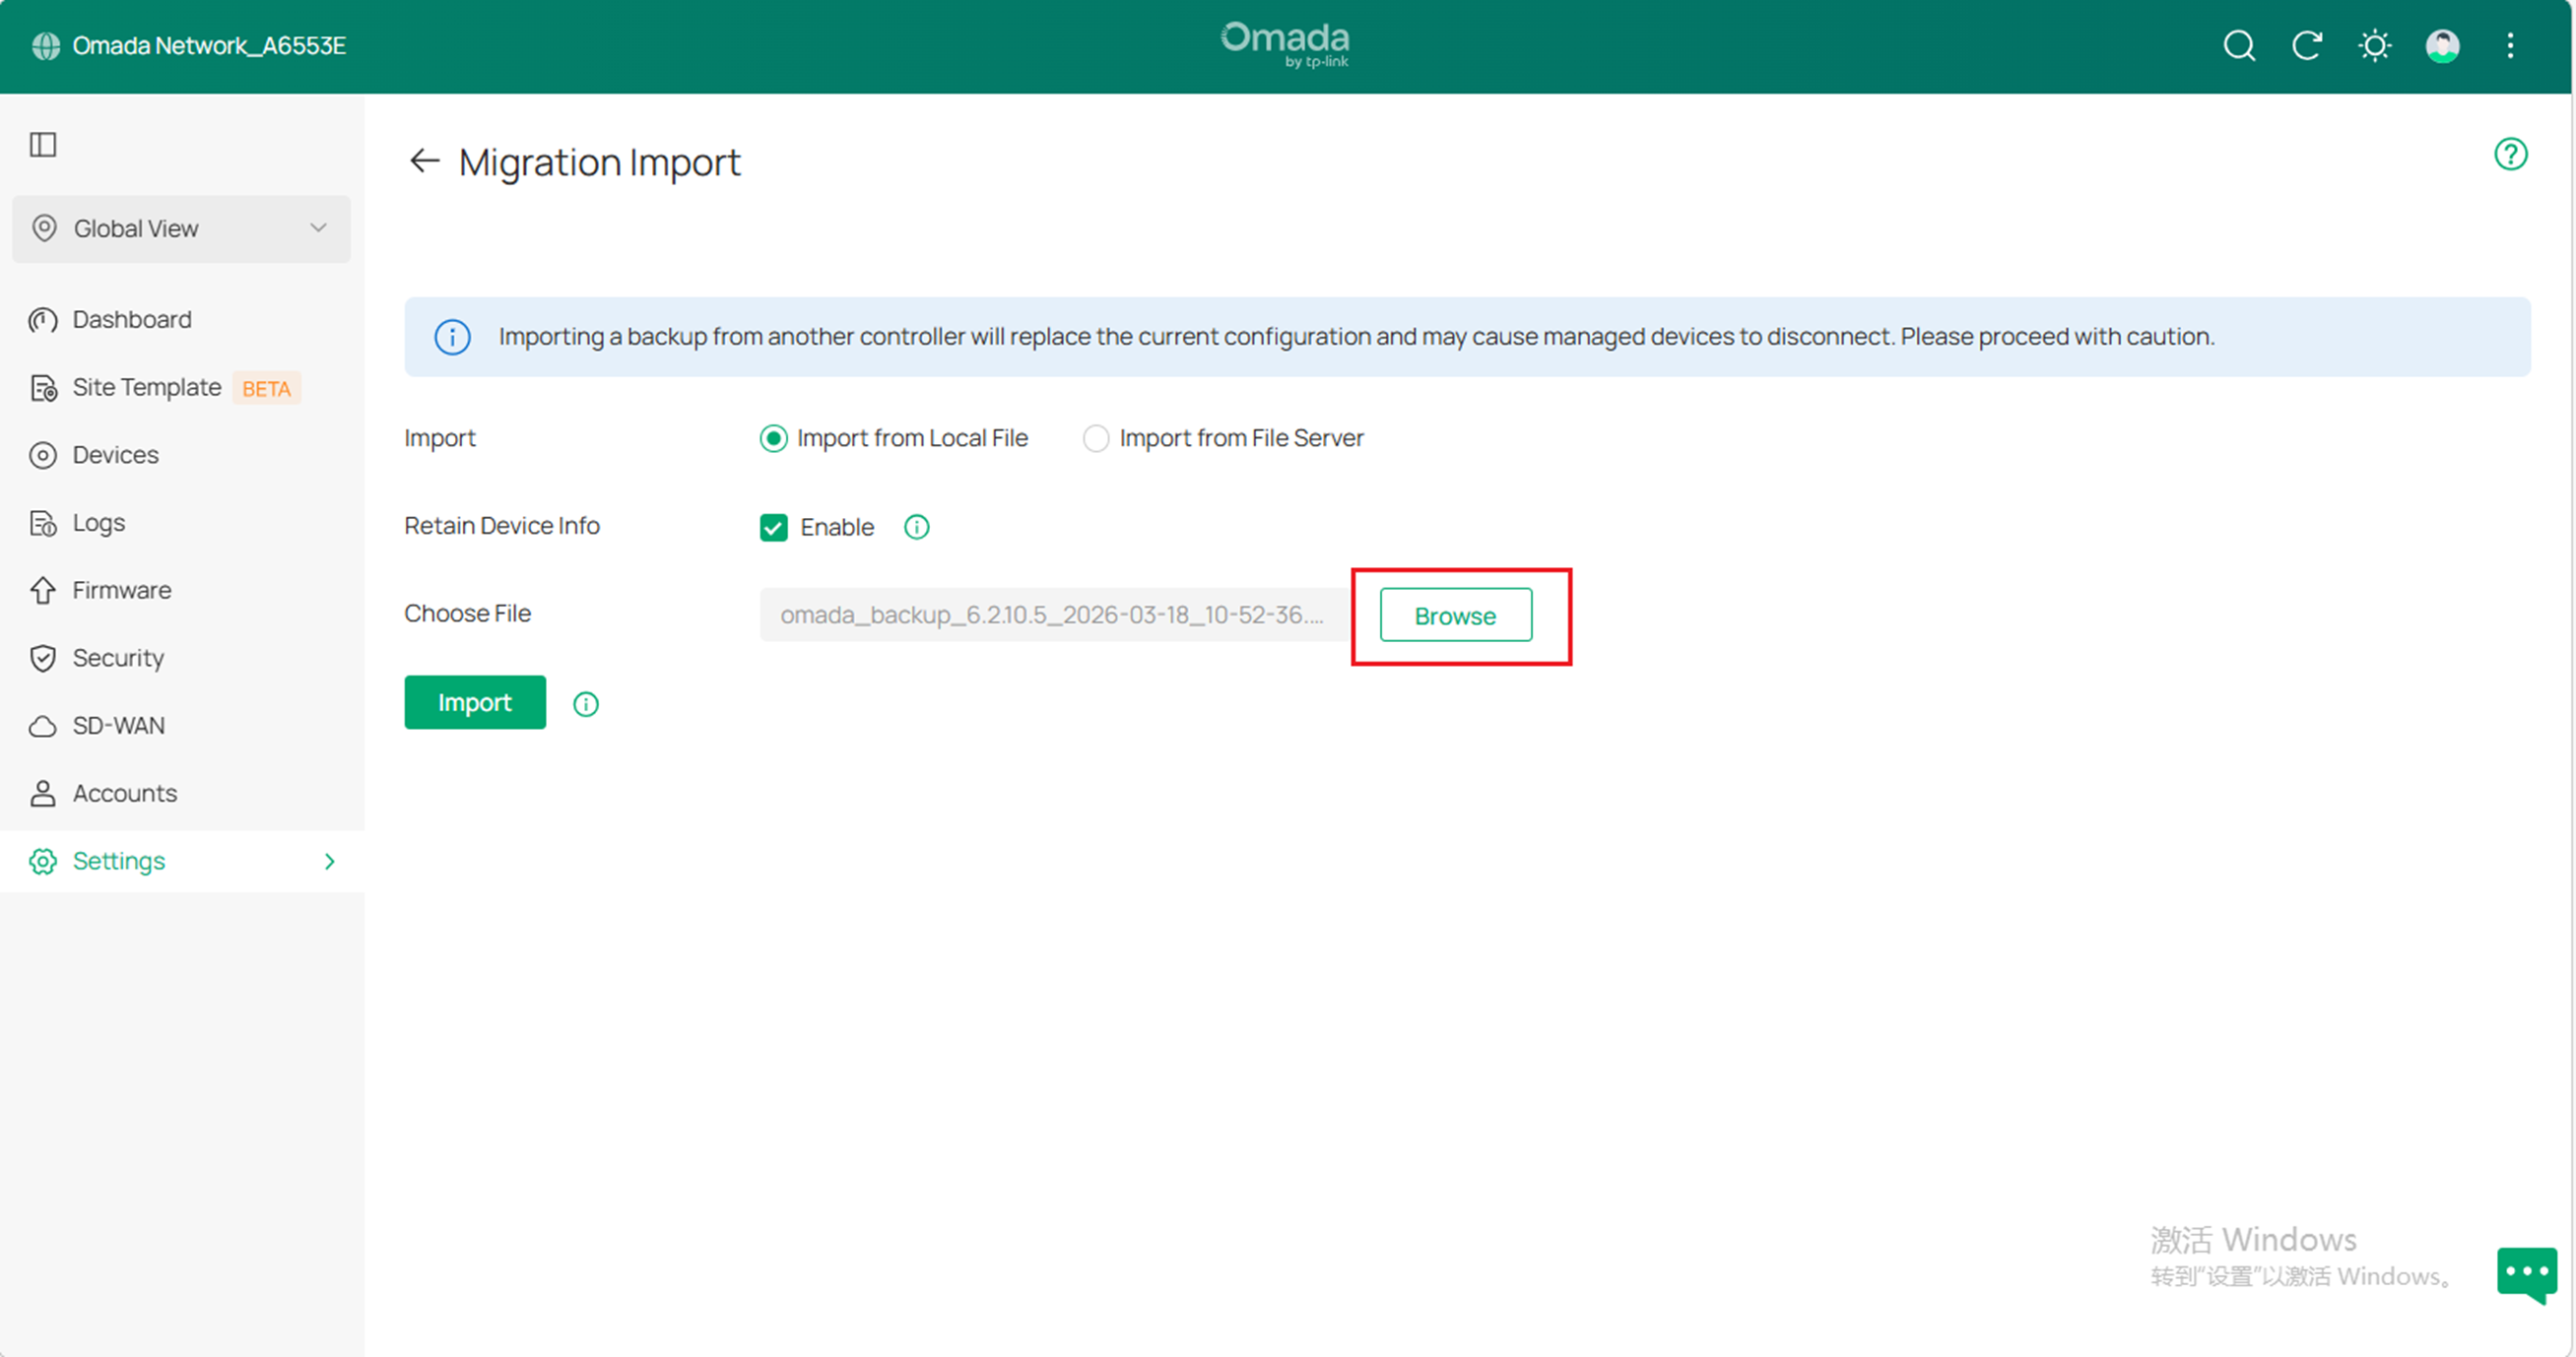
A. Log in to the target controller. Launch the controller and access the Global View. Go to Settings > Migration > Controller Migration > Start Import. Click Browse to locate and choose the backup file of the previous controller. Then click Import to upload the file.
Note: Migration Import supports importing configurations from other controllers.
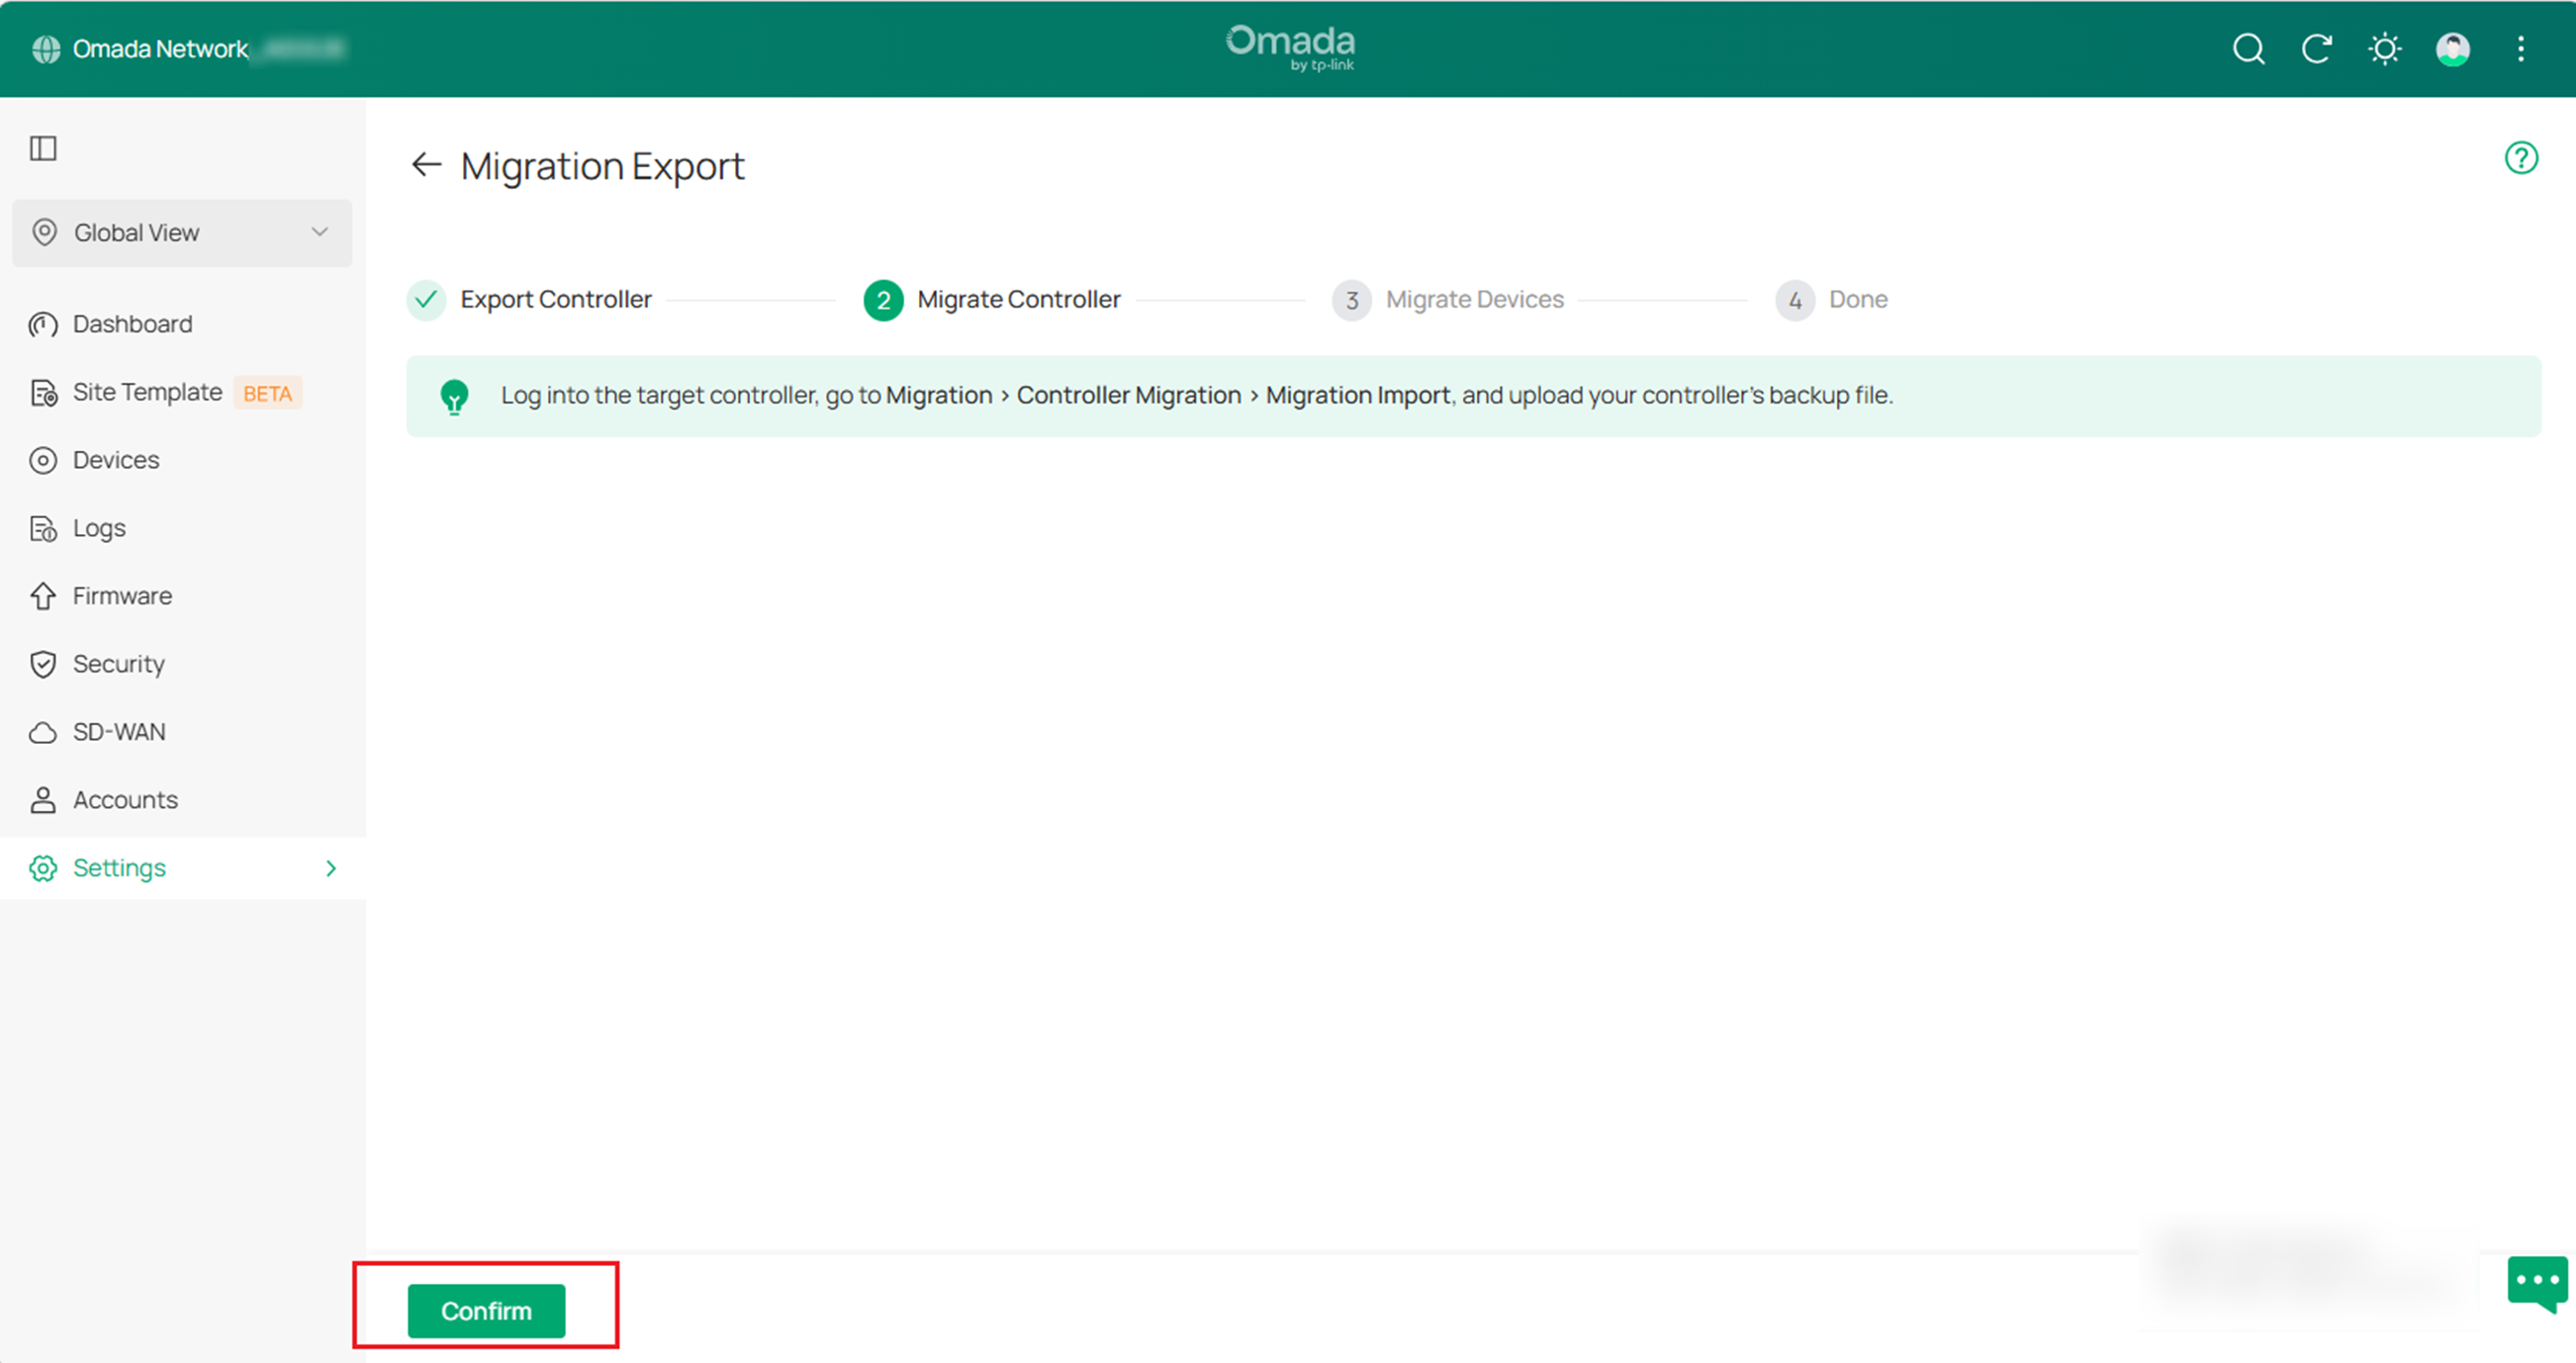
B. After importing the file to the target controller, return to the previous controller and click Confirm.
Note: During the migration operation for controller V5.15.24 and above, if you skip the backup file import step on the target controller and proceed directly to device migration, the target controller will fail to adopt the devices automatically. Always follow the operation sequence specified in the migration guide.
Step 3: Migrate Devices
Migrate the devices on the current controller to the target controller.
A. Enter your target controller's IP address or URL into the Controller IP/Inform URL input field. (Taking IP address as an example)
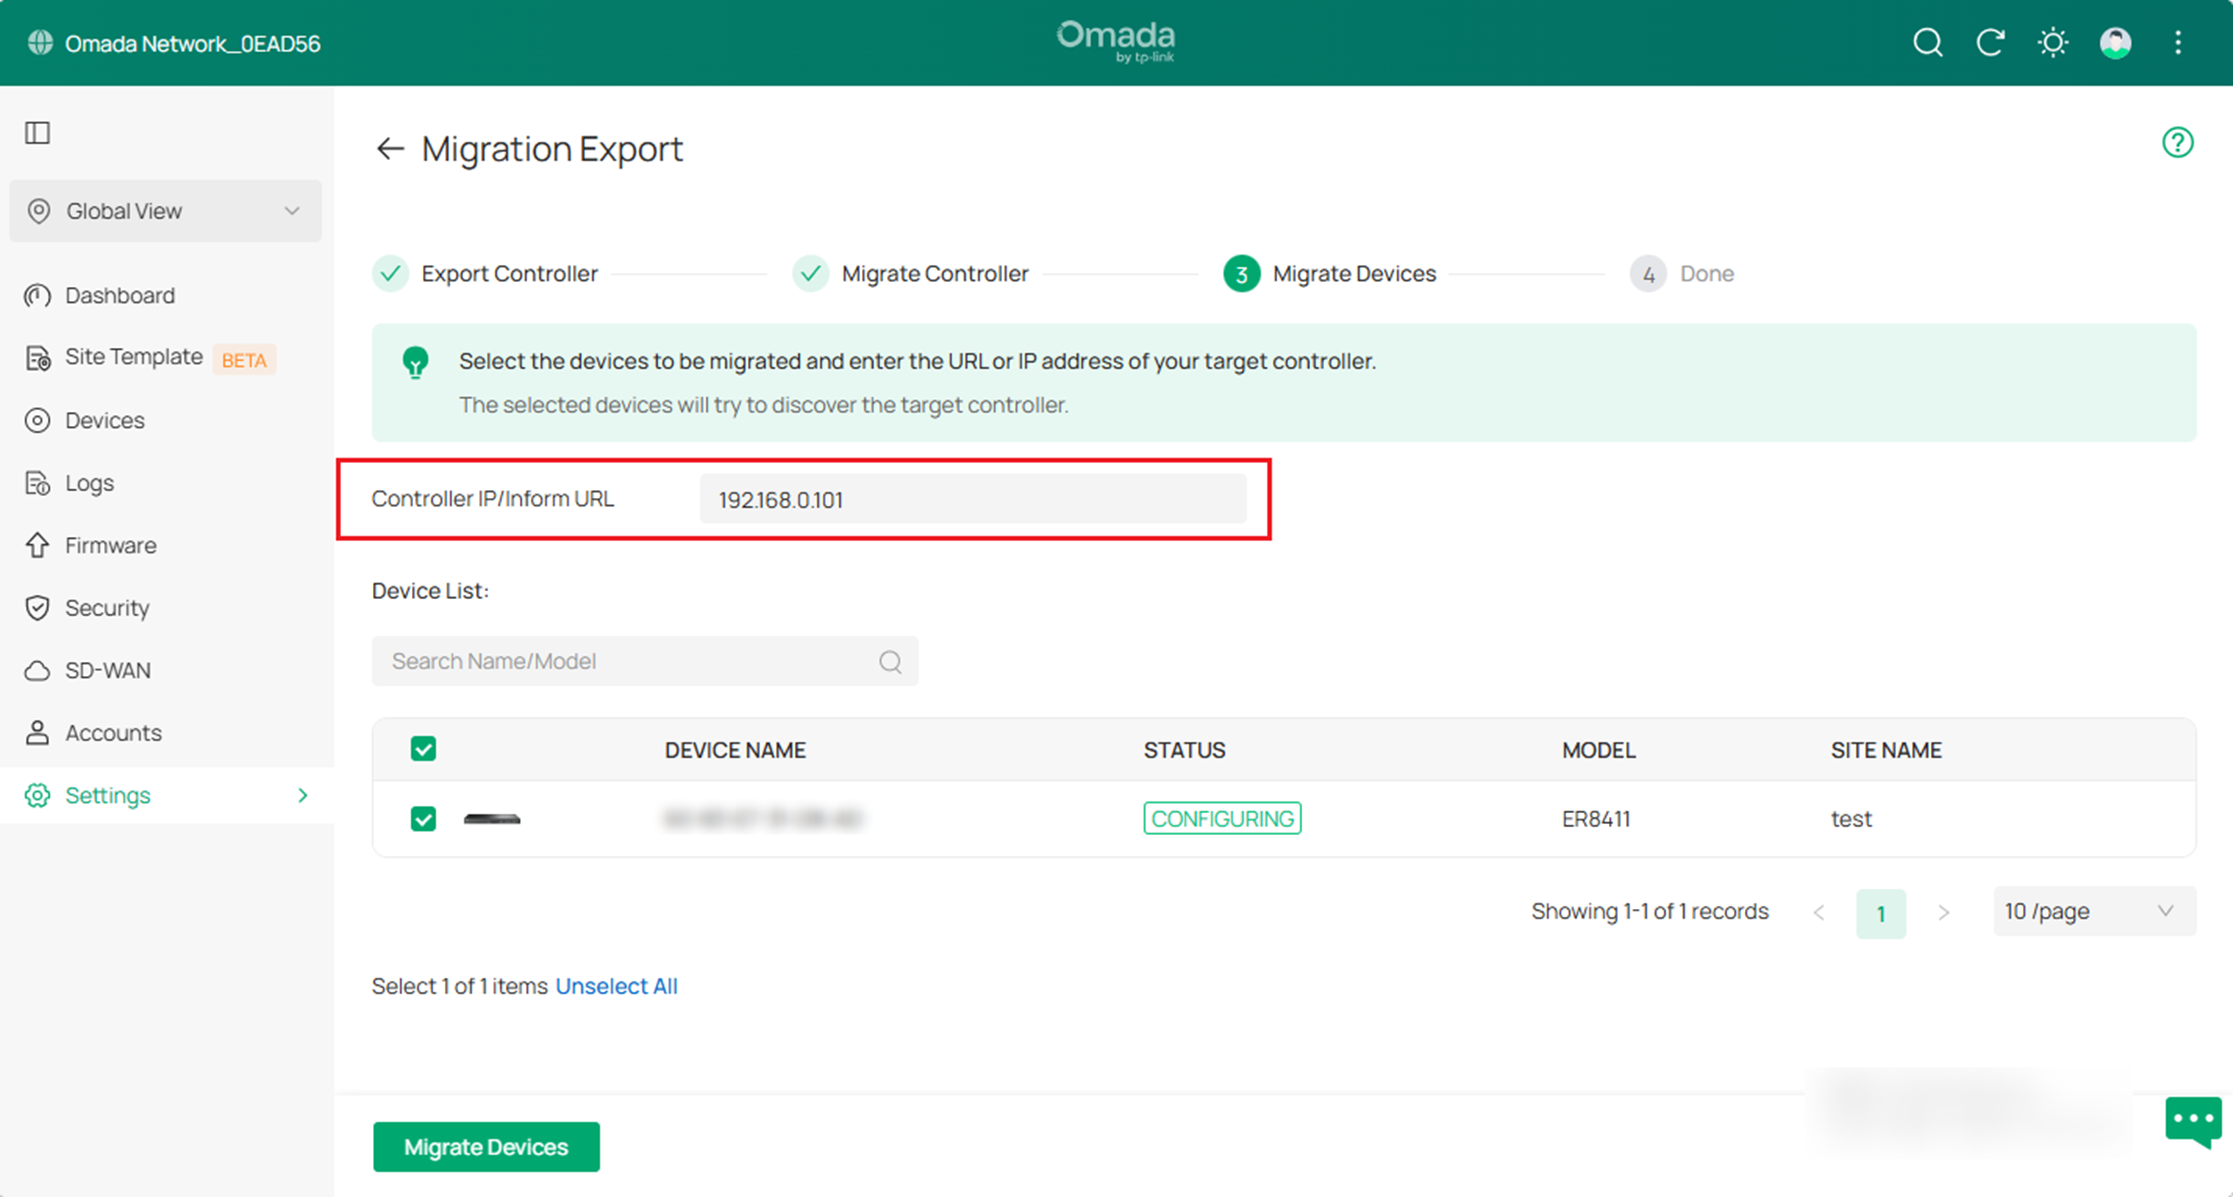
Note: Ensure you enter the target controller's IP address or URL to establish communication between Omada-managed devices and your target controller. Otherwise, the target controller cannot adopt Omada-managed devices.
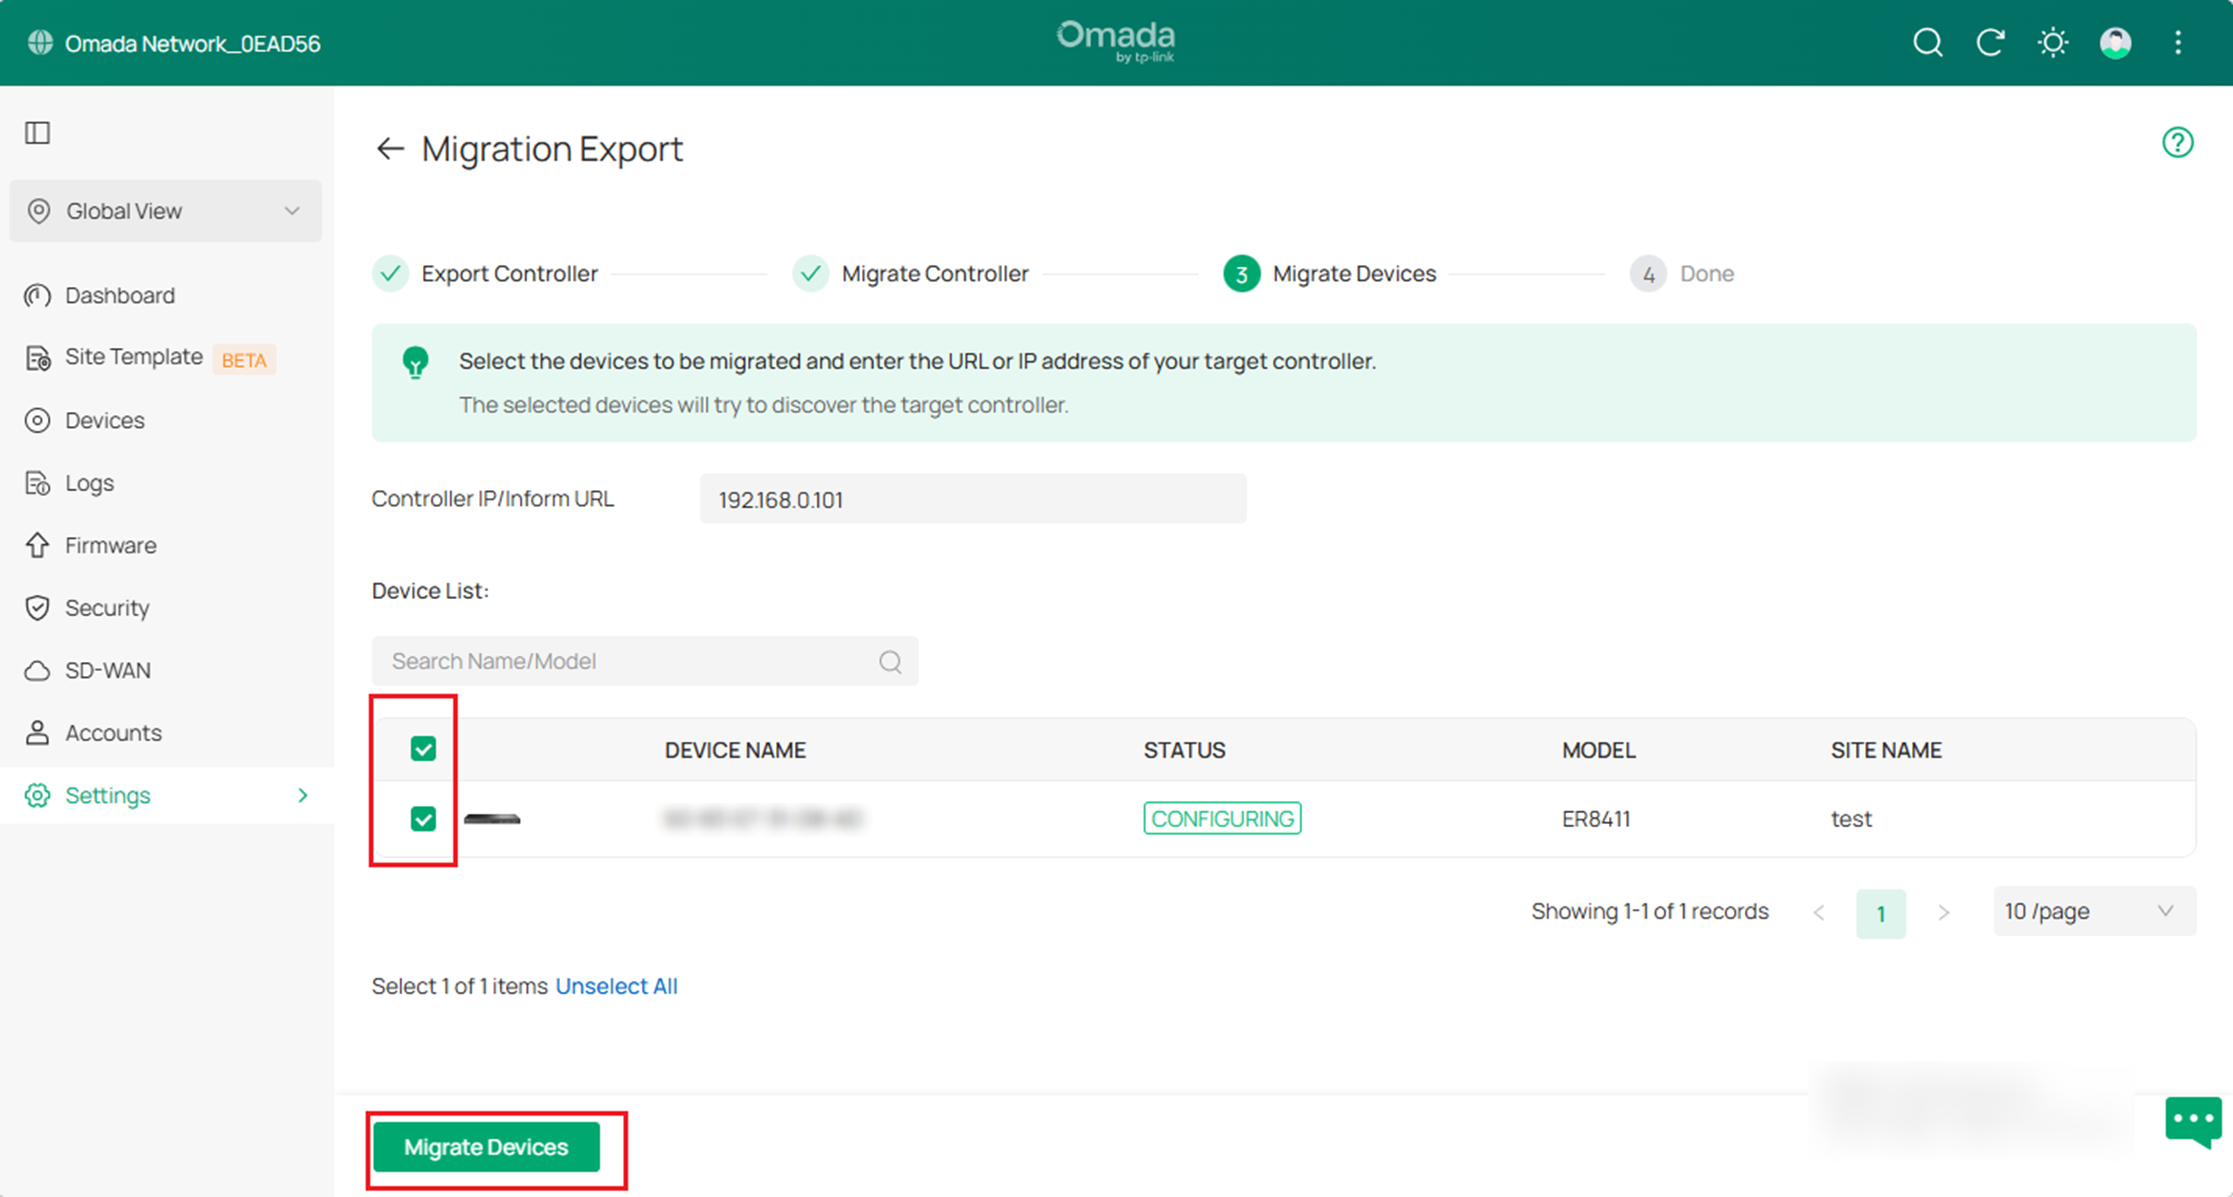
B. Click the box next to each device to select it for migration. By default, all devices are selected. Click Migrate Devices to migrate the selected devices to the target controller.
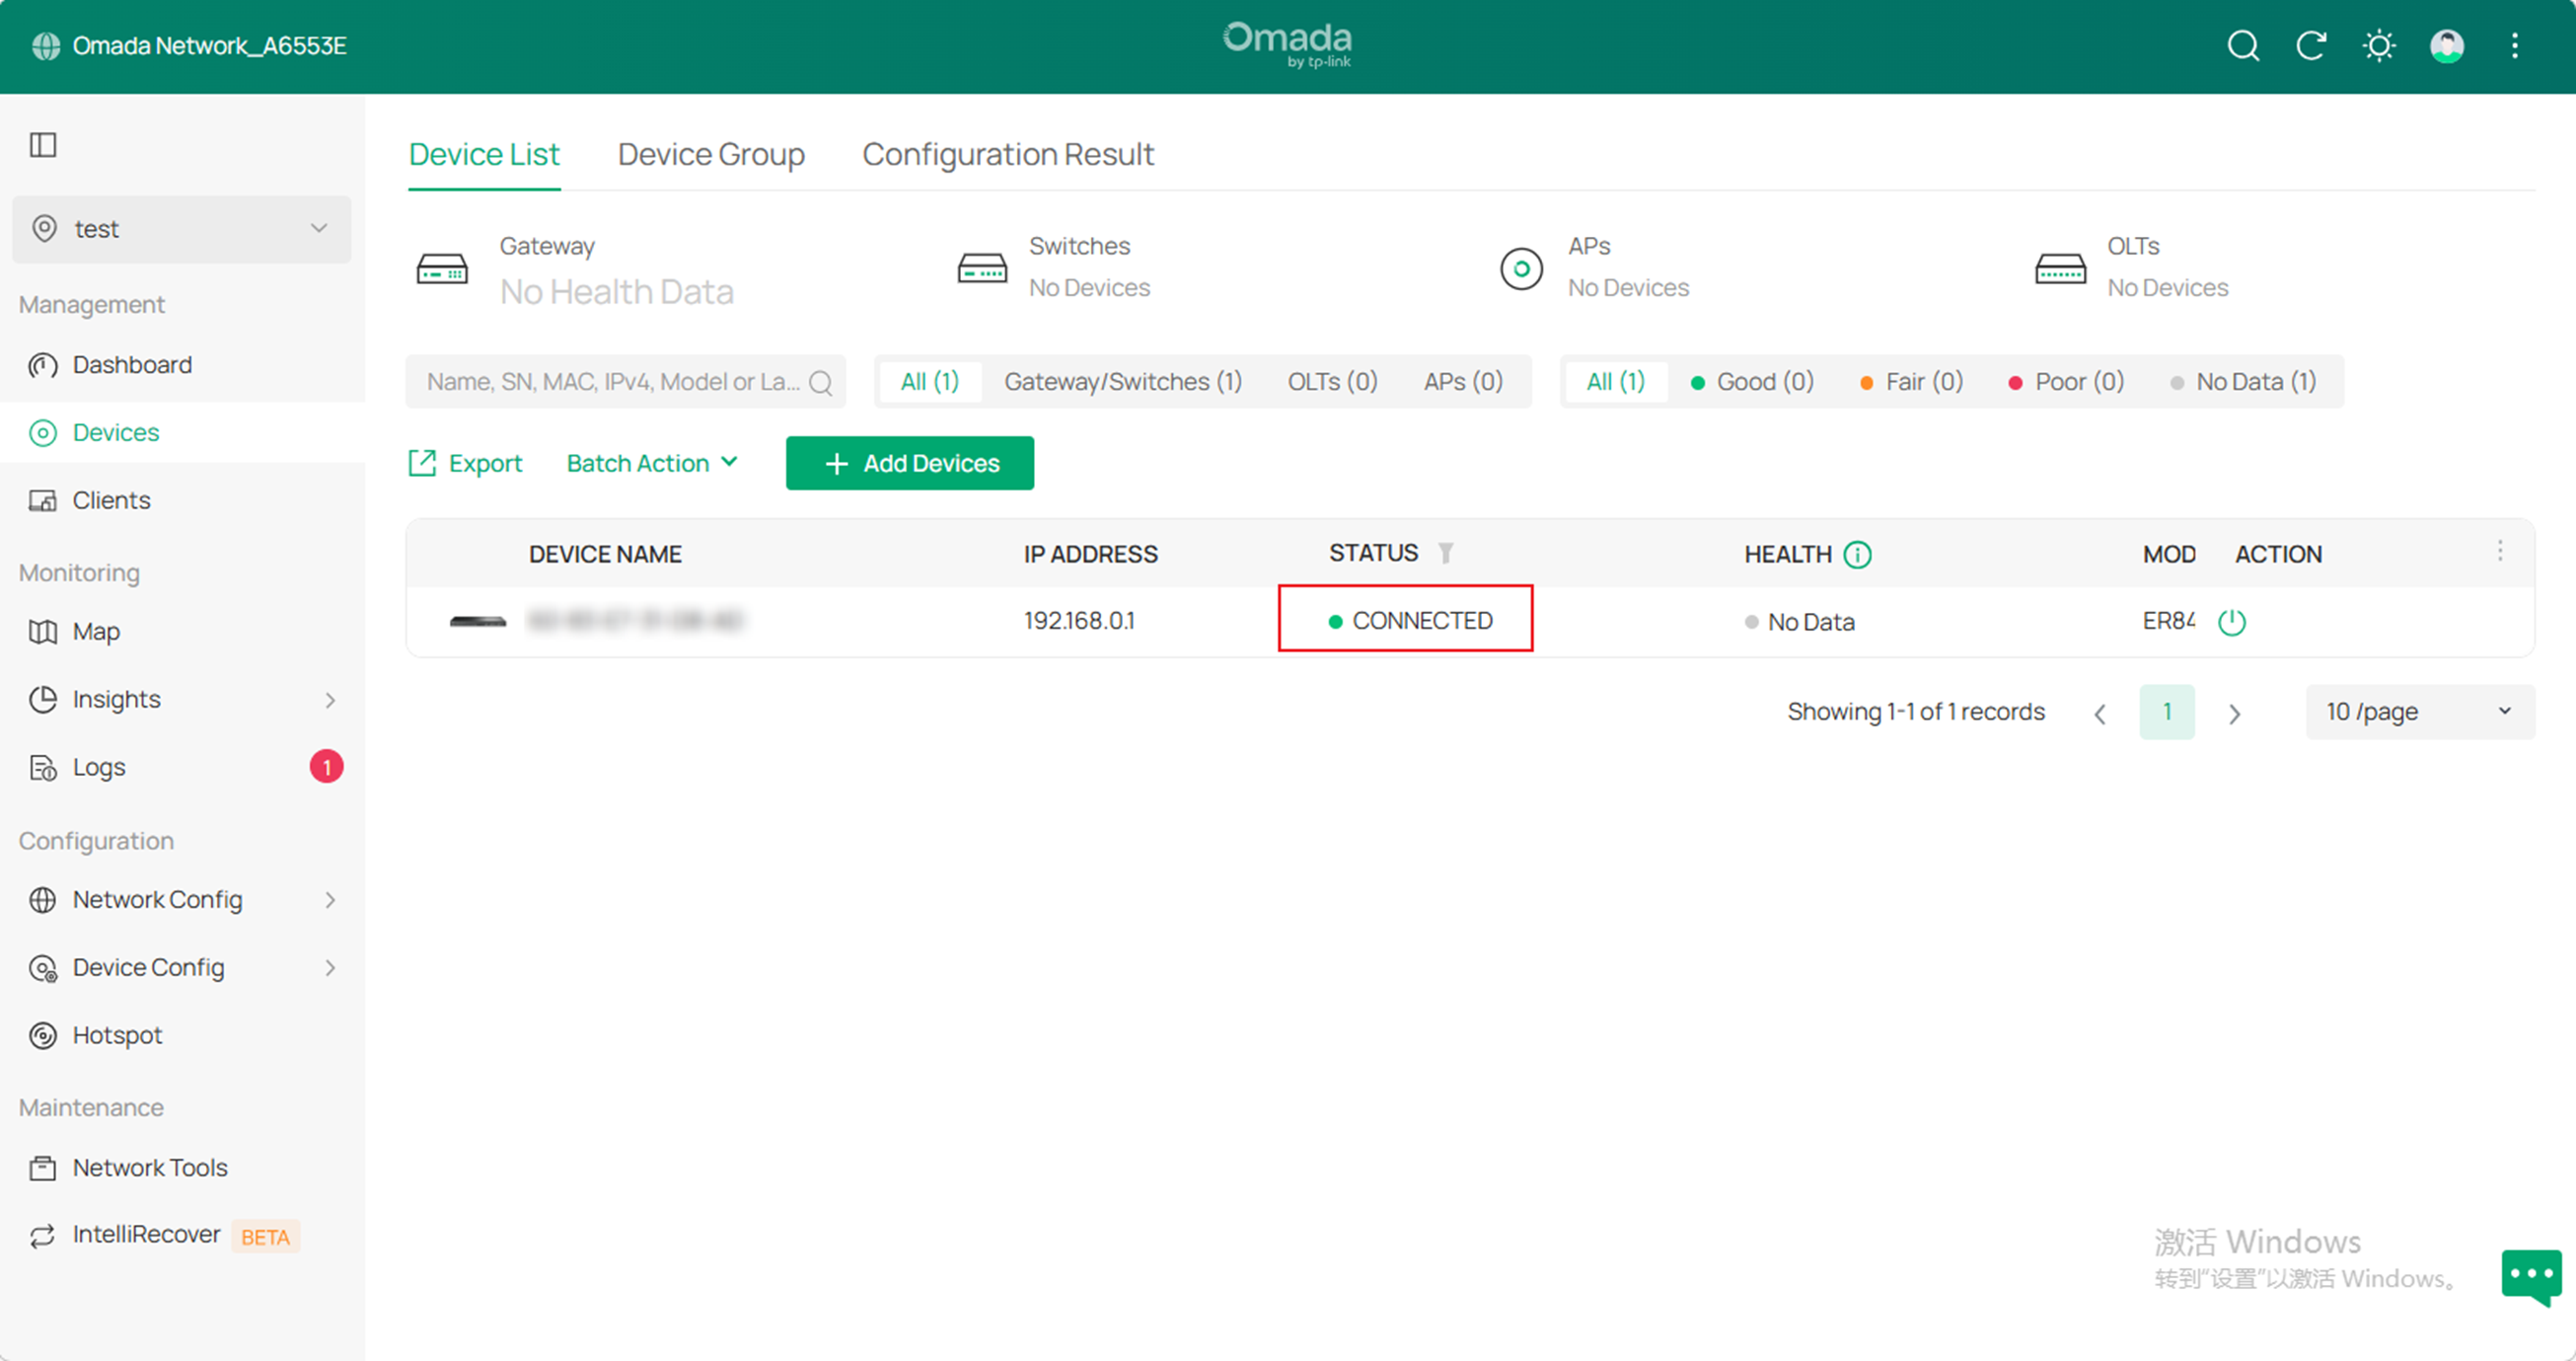
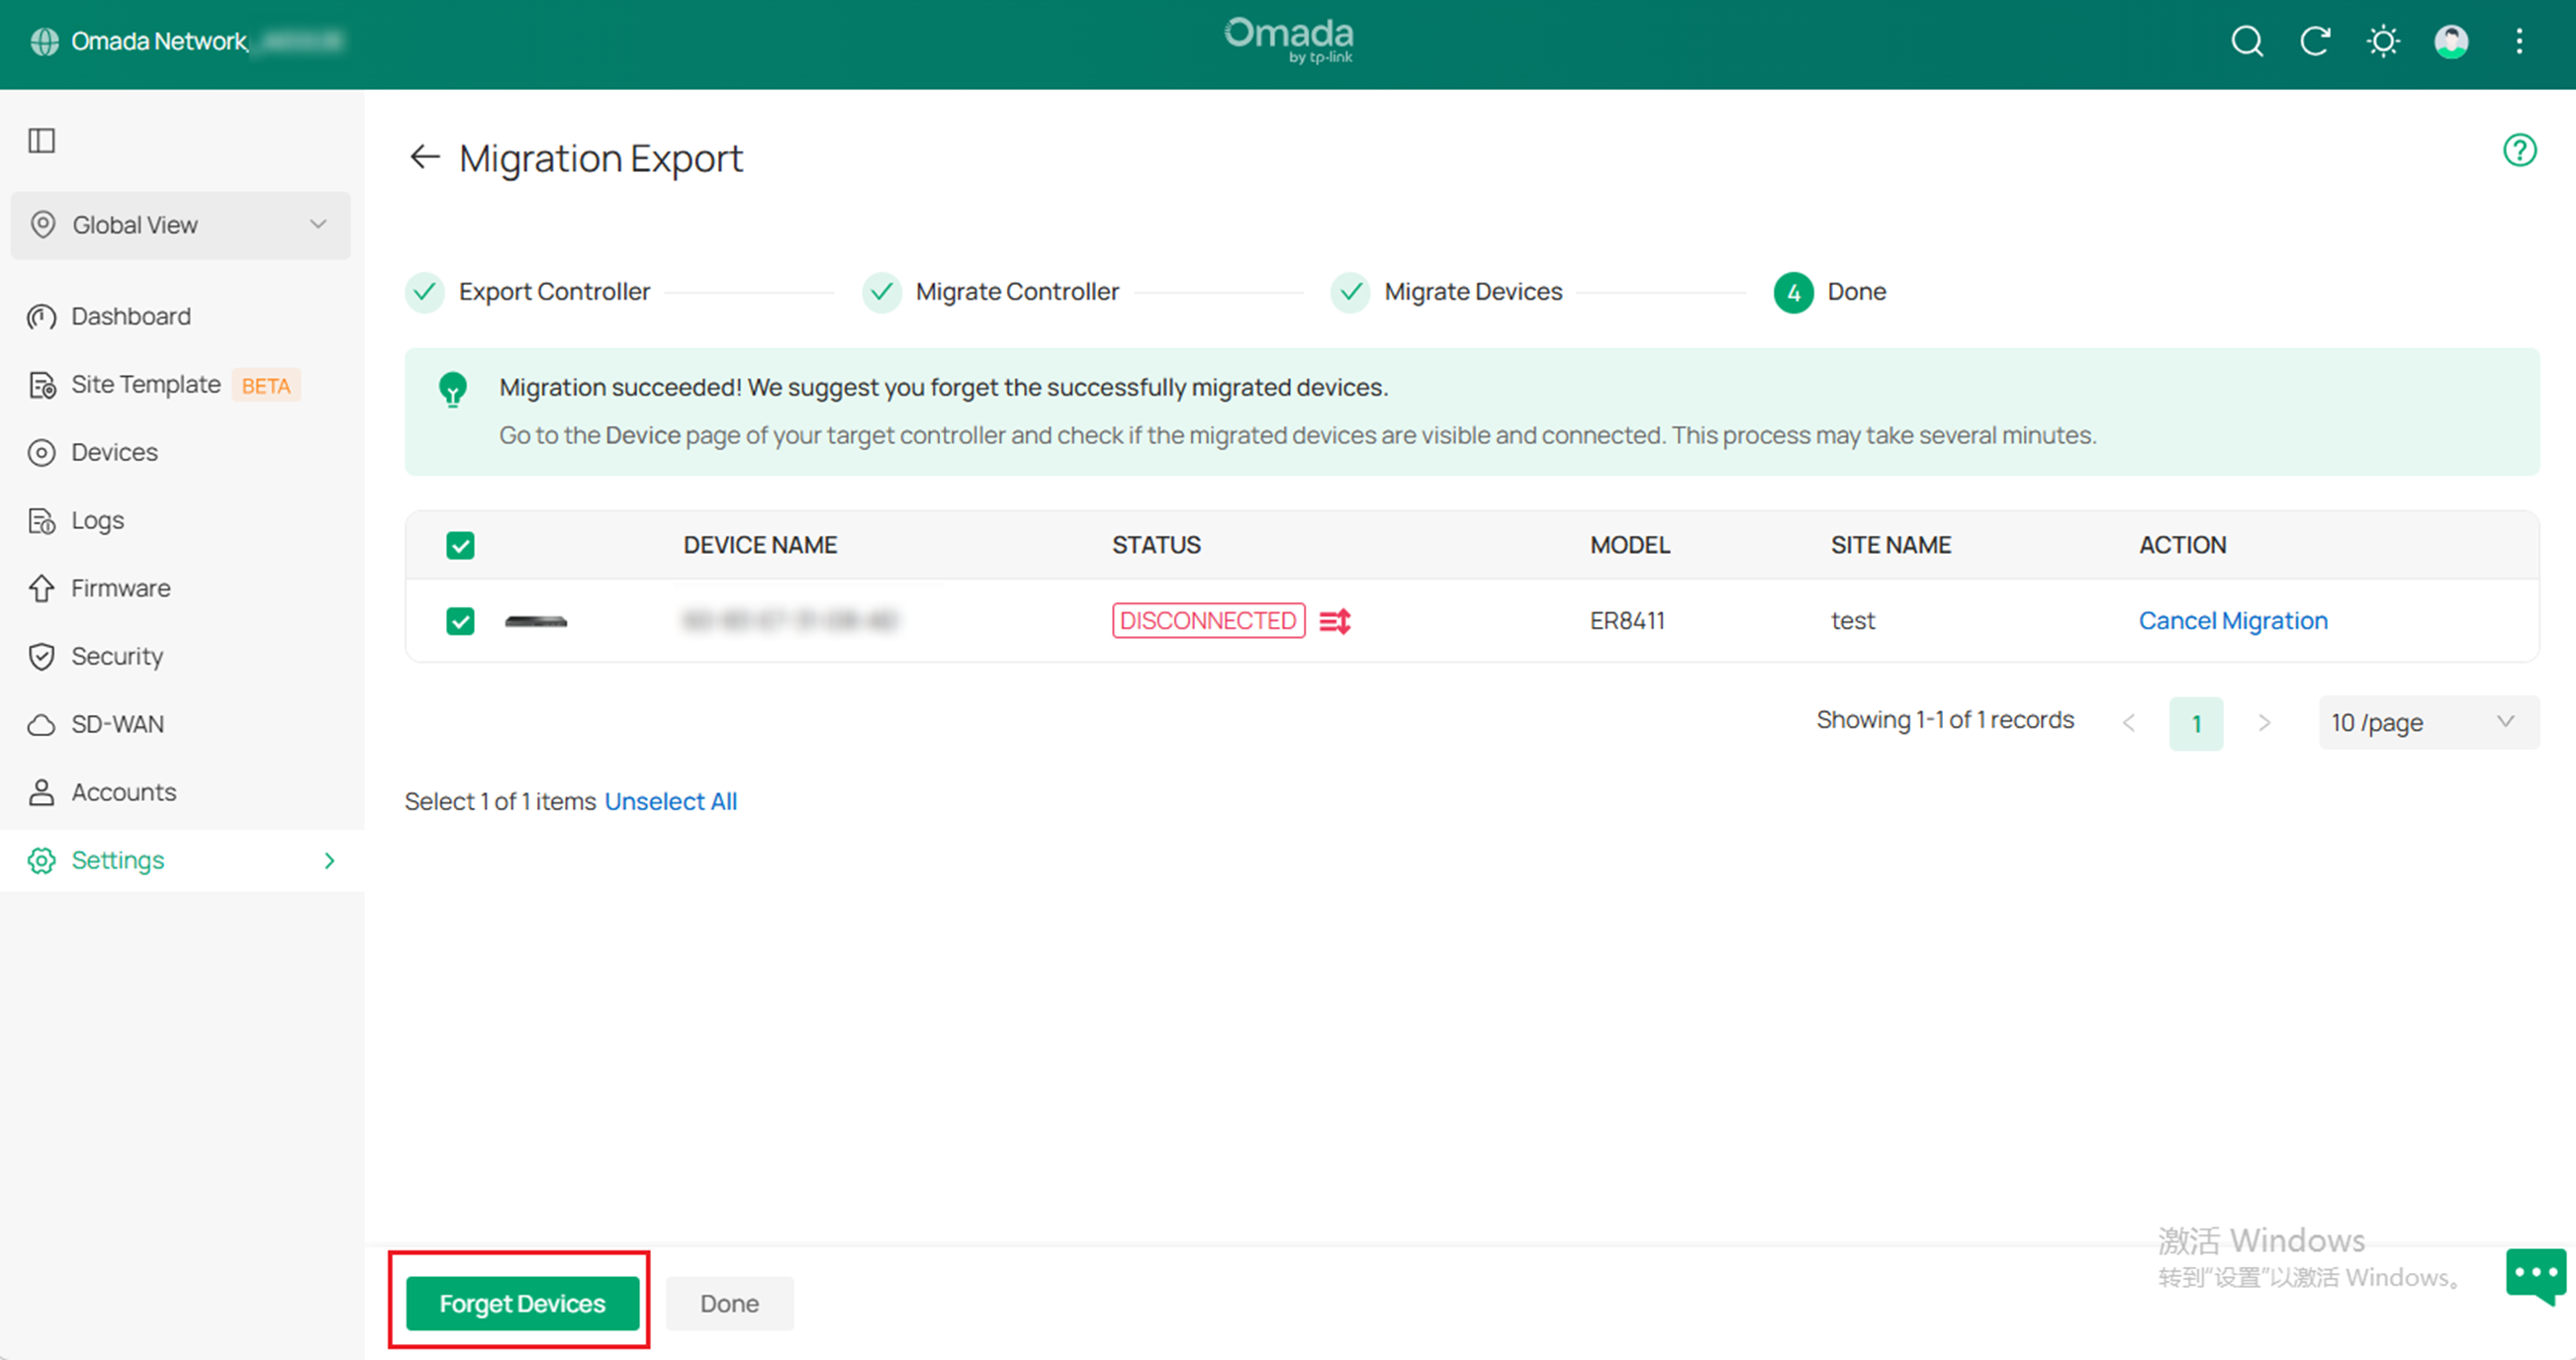
C. Verify that all the migrated devices are visible and connected to the target controller. When all the migrated devices are in Connected status on the Device page on the target Controller, click Forget Devices on the previous Controller to finish the migration process.
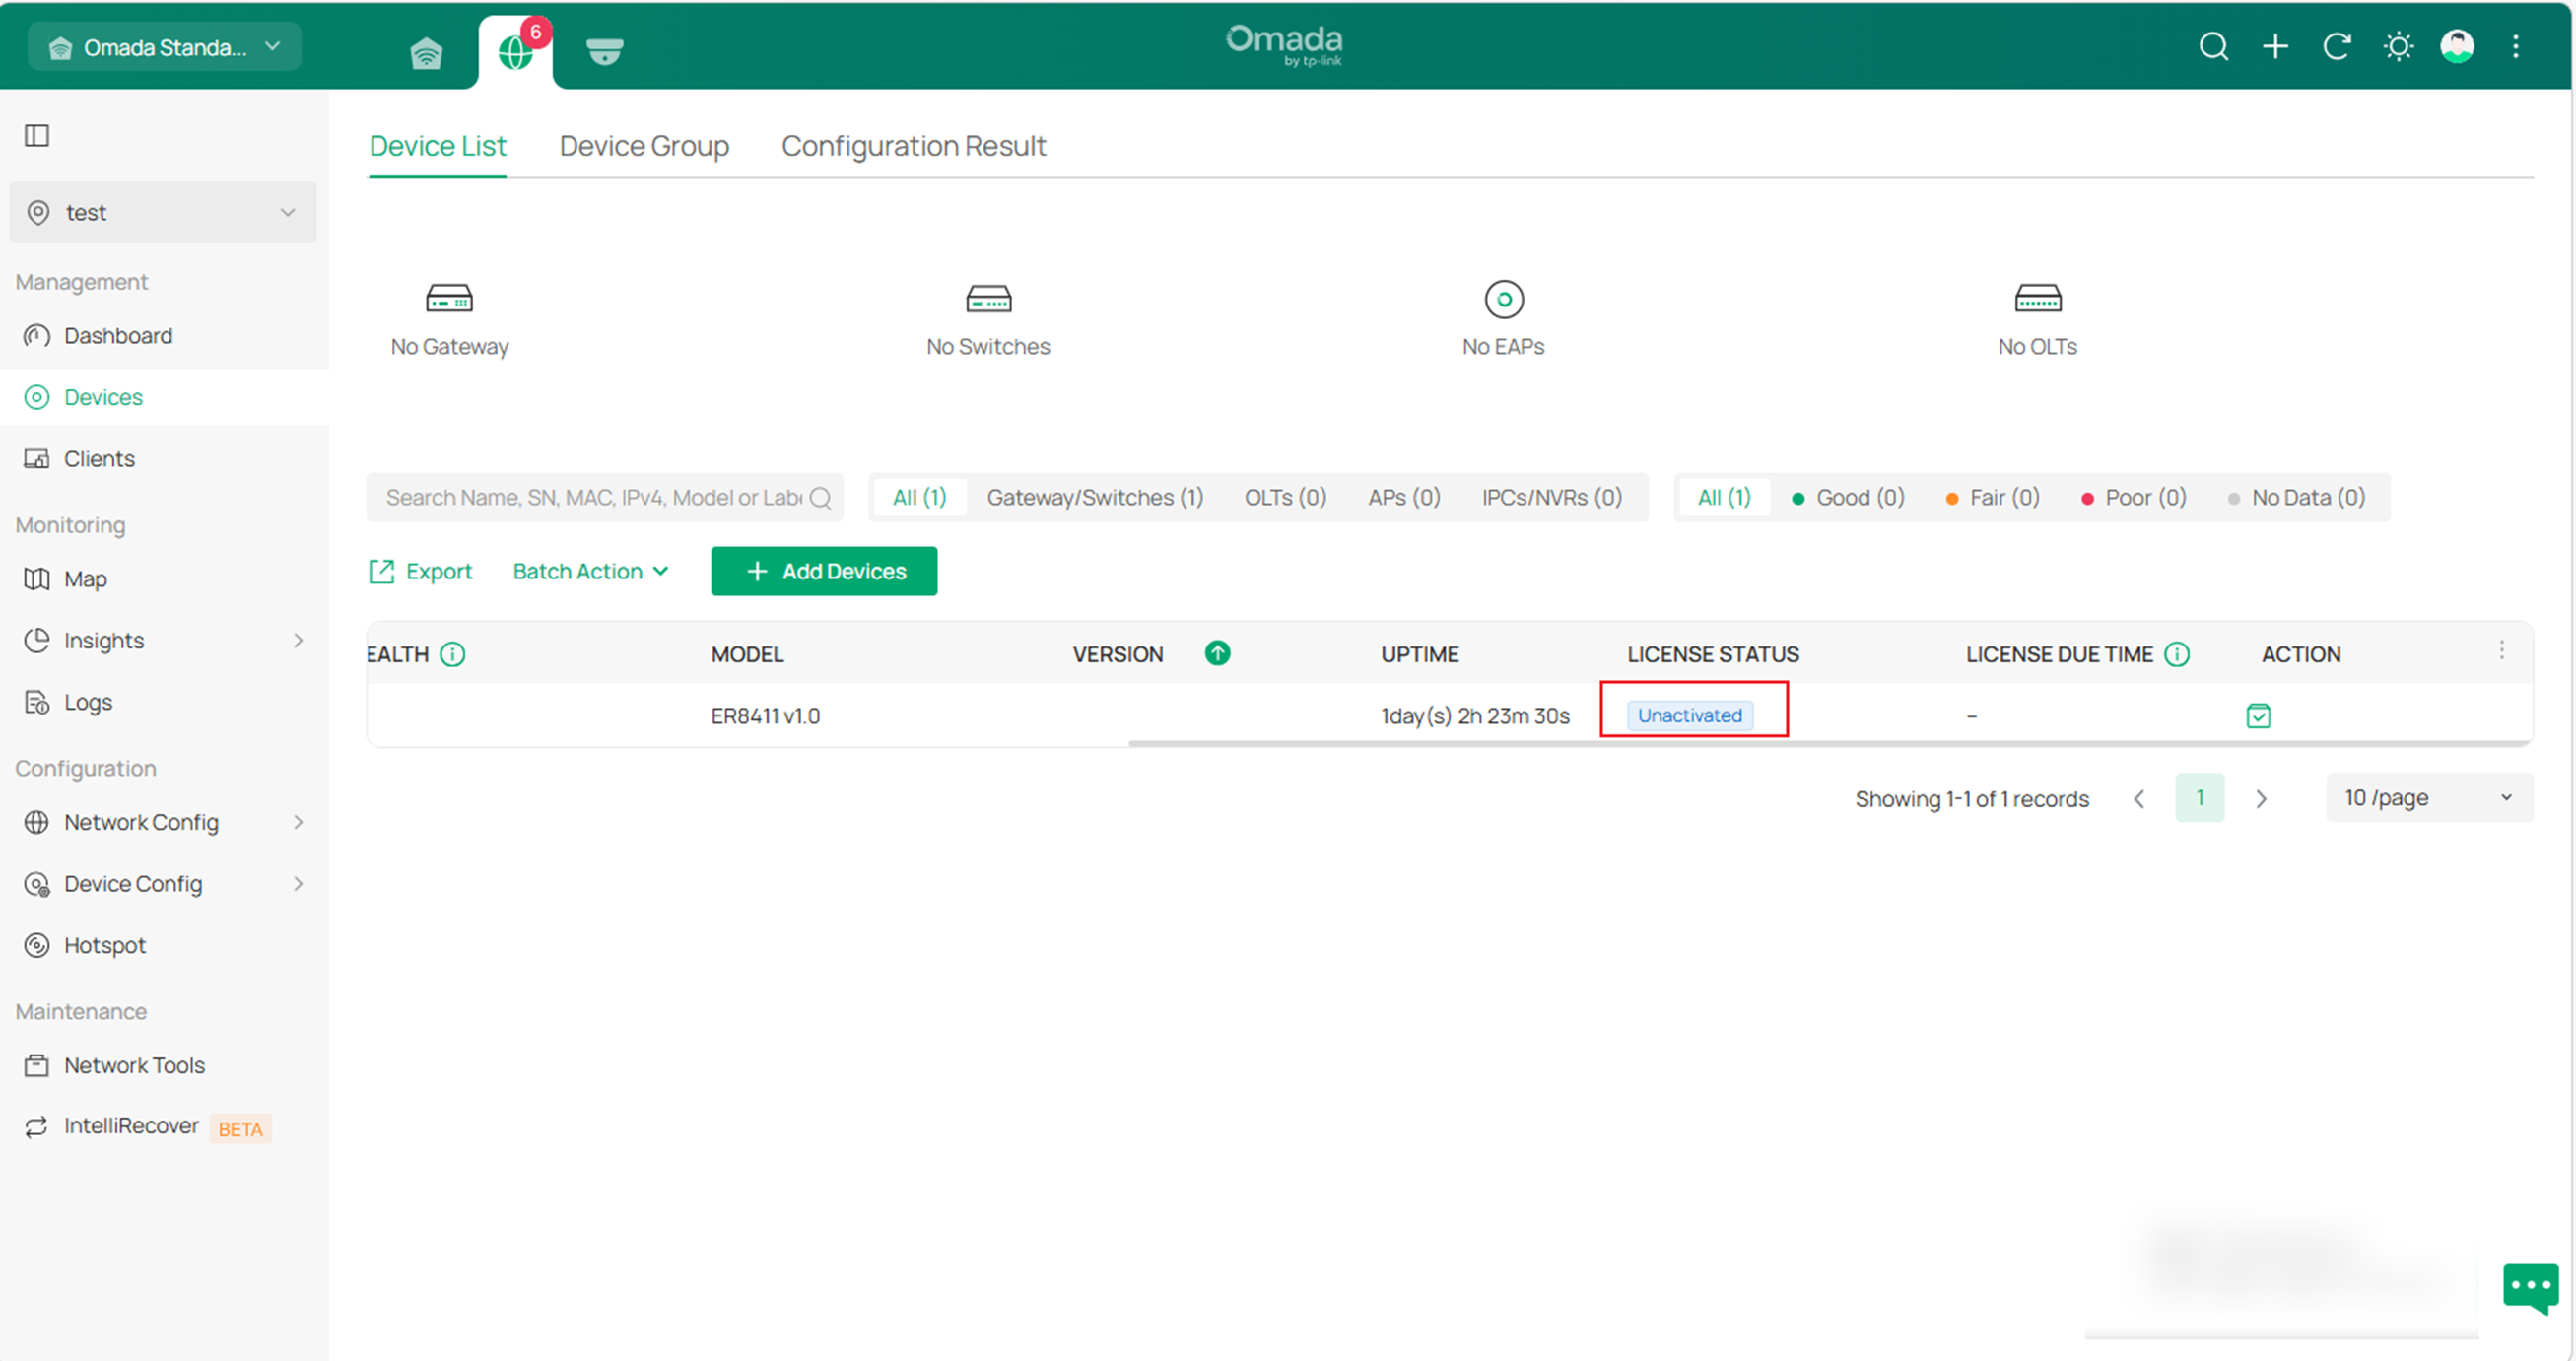
D. When you try to migrate the on-premises controller to Cloud-based Controller, the devices would be Unactivated in the target controller. You may refer to the guide to activate it by assigning a license: Omada License Configuration Guide
All configuration and data are migrated to the target controller upon completion of the migration process. If necessary, you can uninstall the previous controller.
Conclusion
With the above instructions, you can learn how to migrate the site and the controller step by step.
Get to know more details of each function and configuration please go to Download Center to download the manual of your product.
