


How to configure SSL Certificates for Omada Controller


Objective
This guide provides instructions for configuring SSL/TLS certificates on Omada SDN Controller.
Requirements
- Omada Controller 6.1
- OpenSSL
Introduction
Omada Controller uses SSL/TLS certificates to secure communication for services such as HTTPS and RadSec (RADIUS over TLS). In most internal or private deployments, it’s common to maintain your own CA using OpenSSL, which is simple and sufficient for typical use cases. Larger enterprise networks may use centralized PKI systems to manage certificates.
This article focuses on using a self-created Certificate Authority (CA) to issue certificates for Omada Controller, which is useful for testing or internal network environments.
Configuration
HTTPS Certificate
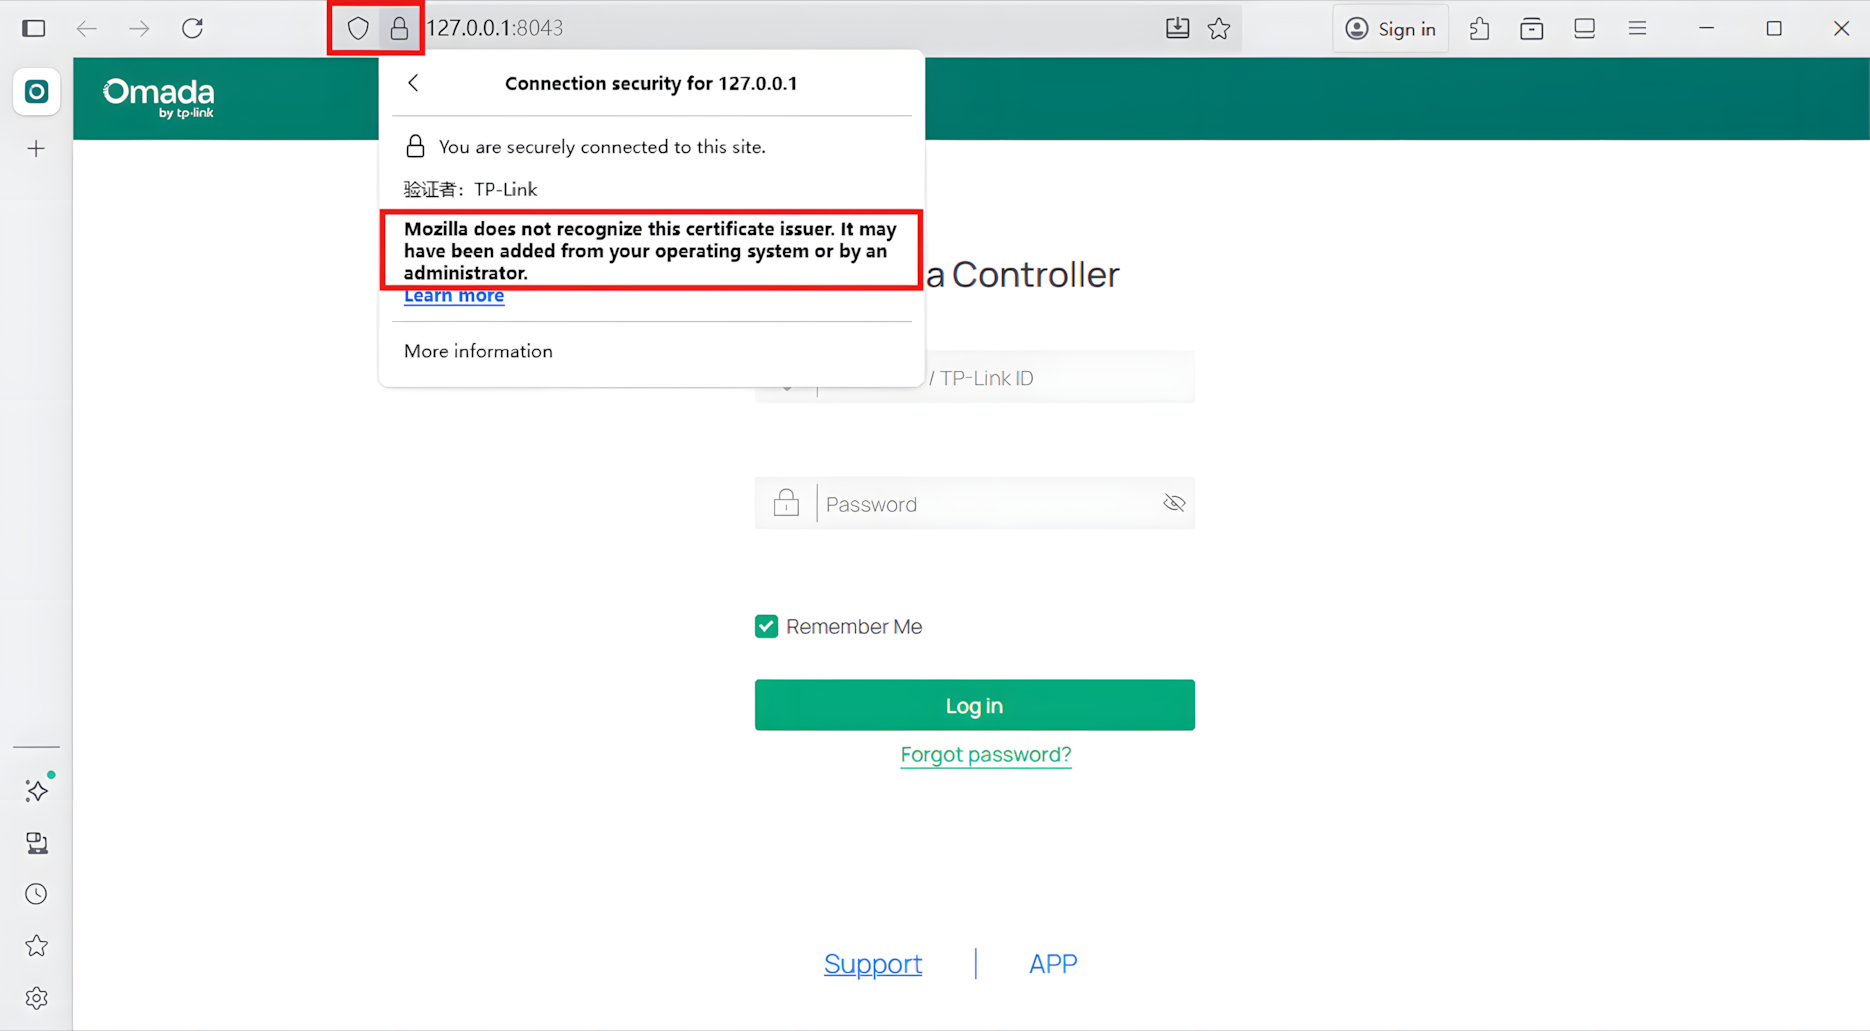
Omada Software Controller uses HTTPS by default. When you access the Controller via domain name or IP address, your browser may show a warning like “untrusted certificate” or “connection not secure.” This happens because Omada uses a self-signed certificate, which is not trusted by browsers by default. To avoid browser warnings about untrusted certificates, you can import an HTTPS certificate signed by a trusted public CA, or use one issued by a personal or internal CA.
Note: Before creating your own CA, make sure your computer has OpenSSL installed and you can access a command-line interface. It’s recommended to perform these steps in a local or trusted environment to keep your private keys secure. Certificate files are generally safe to share publicly, but key files should always be kept private—especially if you're not sure what the key is for or how it affects security.
Step 1. Create a Self-Signed Root CA Certificate
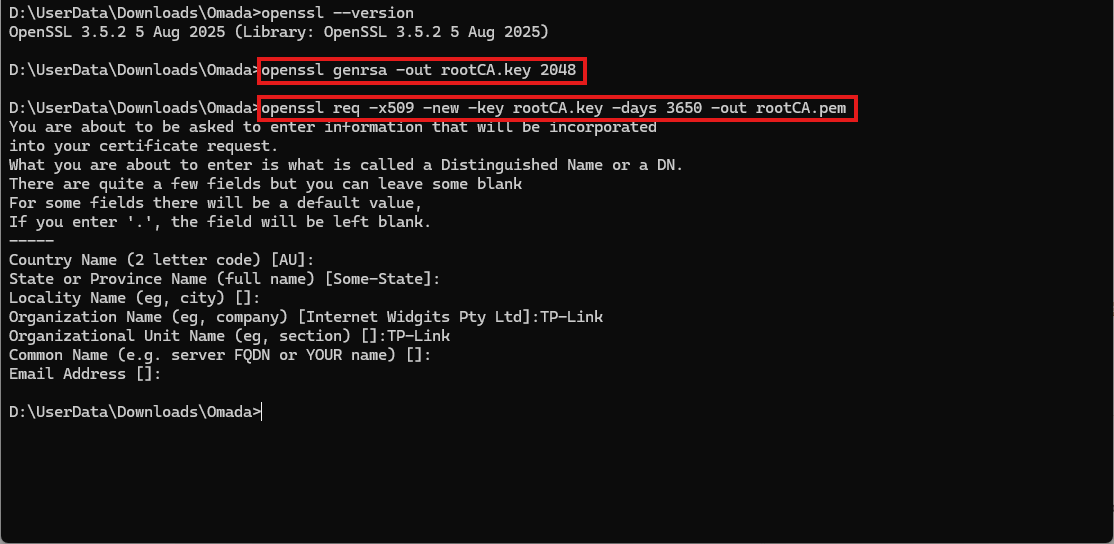
openssl genrsa -out rootCA.key 2048
This command creates a 2048-bit key pair for your CA. The key is used to sign certificates and must be kept secure.
openssl req -x509 -new -key rootCA.key -days 3650 -out rootCA.pem
This command generates a root certificate (rootCA.pem) valid for 10 years. It is self-signed using the CA's private key.
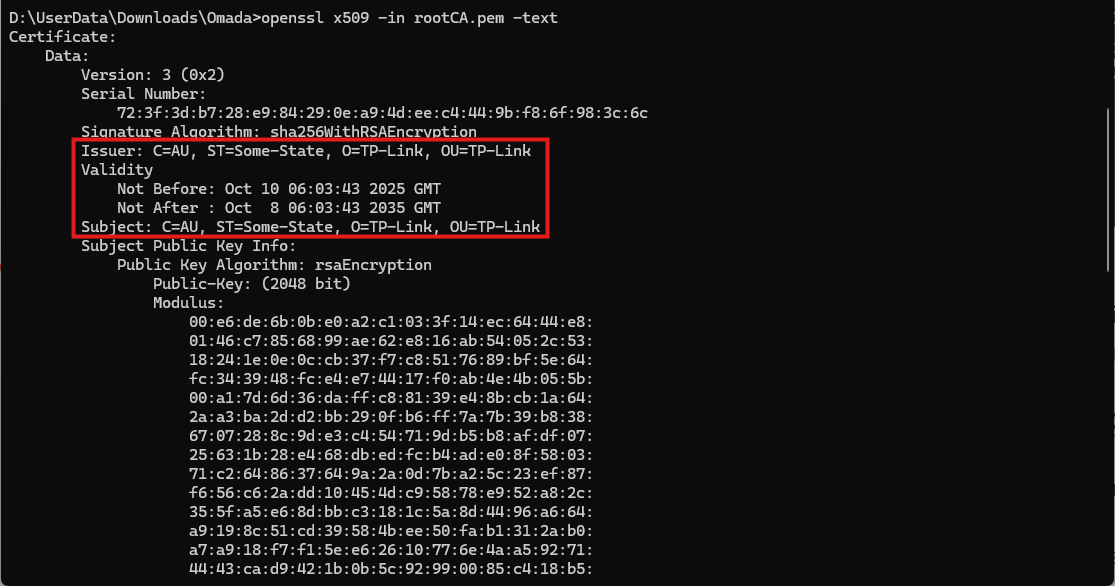
openssl x509 -in rootCA.pem -text
You can use the command to view the detailed contents of the root certificate.
Step 2. Generate Server Key and Certificate Signing Request (CSR)
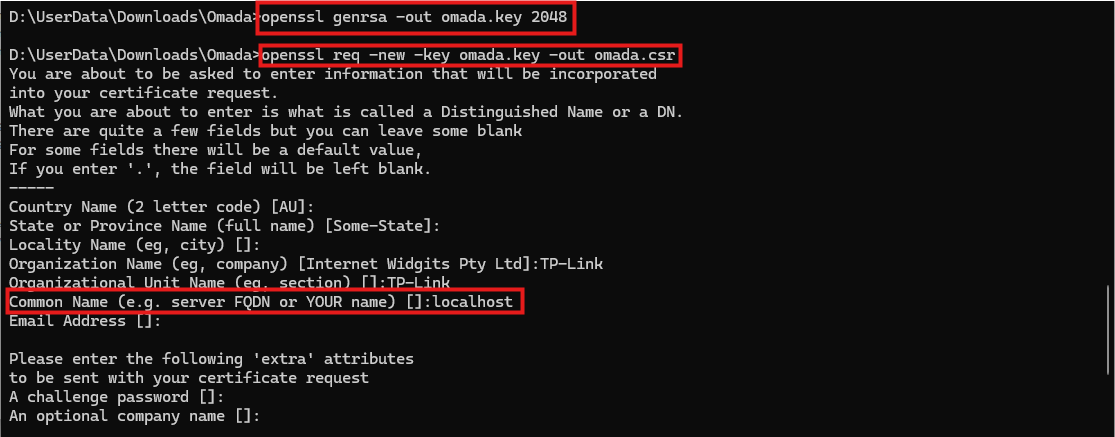
To prepare for issuing a certificate for Omada Controller, first generate a server key and a CSR:
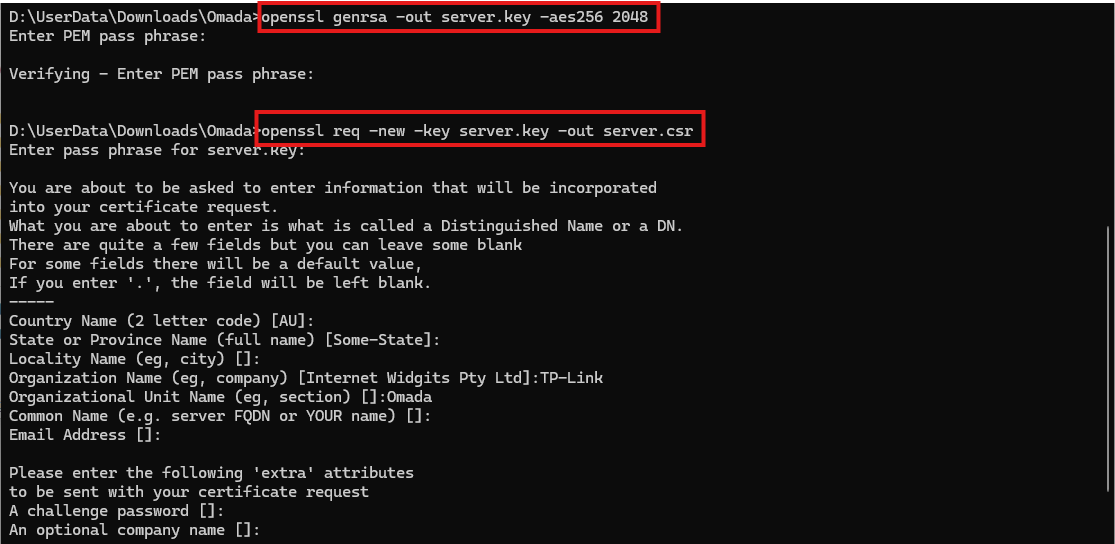
openssl genrsa -out omada.key 2048
This command generates a 2048-bit RSA key pair and saves it to omada.key. This key will be used to secure communications and sign the certificate request.
openssl req -new -key omada.key -out omada.csr
This command creates a Certificate Signing Request (CSR) using the previously generated key. The CSR contains information about the server and is used to request a certificate from a Certificate Authority (CA).
openssl req -in omada.csr -text
You can use the command to view the detailed contents of the CSR.

Step 3. Sign the Server Certificate Using Your Own CA
Modern browsers require certificates to include a Subject Alternative Name (SAN) field. To include SAN and other required extensions, create a file named server.txt in your working directory with the following content:
# server.txt
[server_cert]
basicConstraints = CA:FALSE
keyUsage = digitalSignature, keyEncipherment
extendedKeyUsage = serverAuth
subjectAltName = @alt_names
[alt_names]
DNS.1 = omada.local
IP.1 = 127.0.0.1
# end
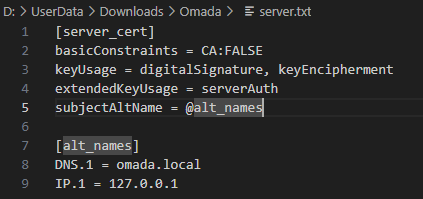
Note: Make sure to adjust the DNS.1 and IP.1 values to match your actual server Domain Name or IP address.
For more details on the extension file format, refer to the x509v3_config - OpenSSL Documentation and openssl-x509 - OpenSSL Documentation.
Then sign a certificate using your root CA:
openssl x509 -req -in omada.csr -CA rootCA.pem -CAkey rootCA.key -days 365 -sha256 -extfile server.txt -extensions server_cert -out omada.pem
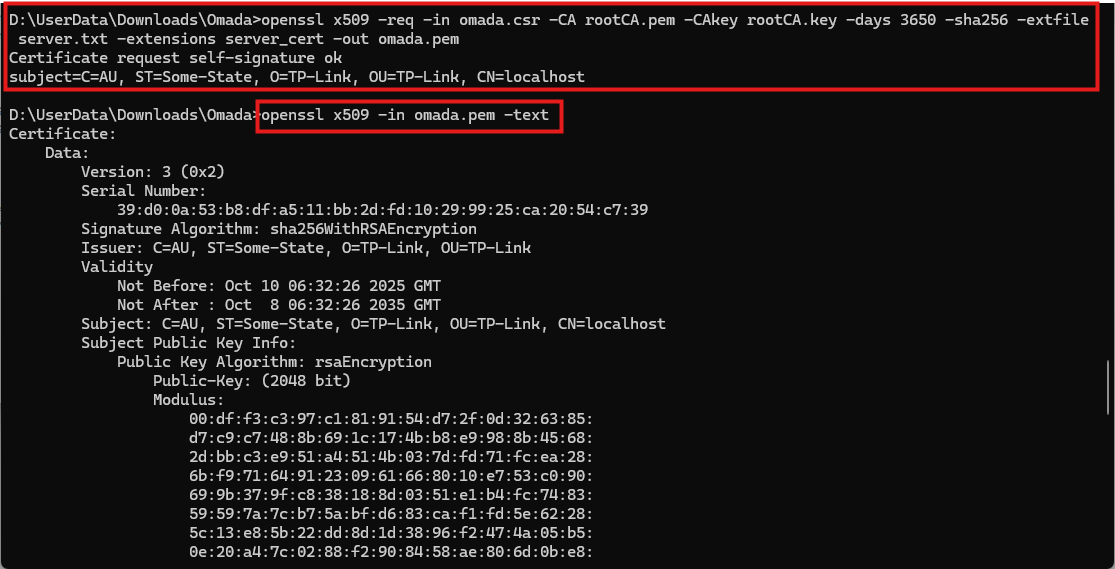
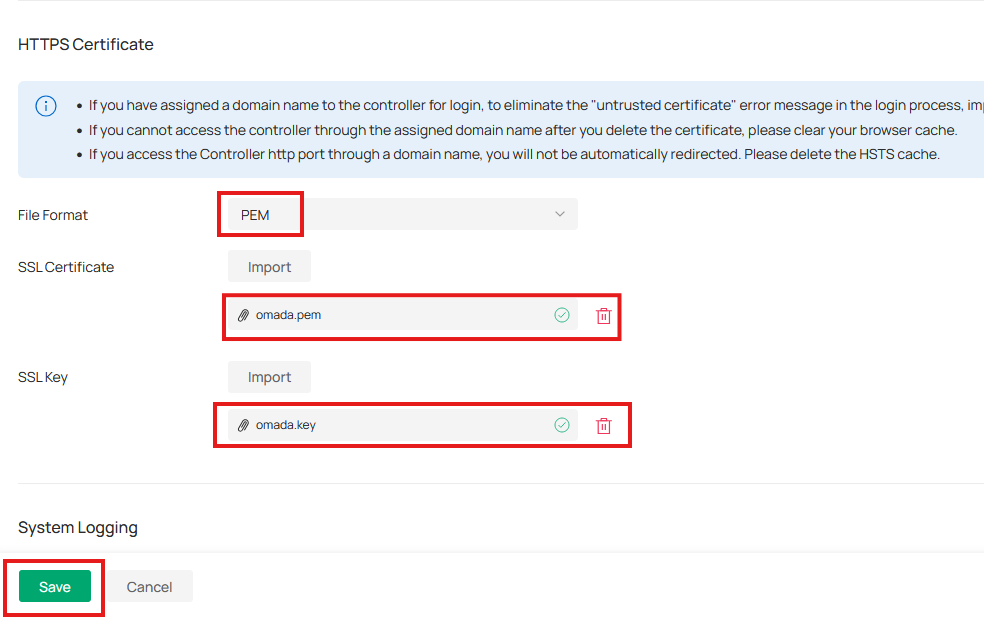
The resulting omada.pem is your server certificate, which can be used along with omada.key to enable HTTPS on Omada Controller. You can upload it at Global > Settings > System Settings > HTTPS Certificate. Make sure to import the CA certificate into your browser’s trusted root certificate store. After that, restart the Omada Controller to take effect.
Certificate Profile and RadSec
RadSec (RADIUS over TLS) improves traditional RADIUS by adding TLS encryption. Standard RADIUS runs over UDP without protection, while RadSec secures traffic with confidentiality, integrity, and certificate-based authentication. In Omada Controller, administrators configure certificates so that access devices and RADIUS servers can build secure TLS tunnels. Proper certificate management is required before enabling RadSec to ensure a trusted and encrypted connection.
You can enable RadSec at Site View > Network Config > Profile > RADIUS Profile.

Note: When enabling RadSec, you must configure both a CA Certificate and a Client Certificate:
CA Certificate: Used to verify the identity of the RADIUS server. The access device checks that the server’s certificate is signed by this trusted CA before establishing a TLS tunnel.
Client Certificate: Used by the access device to prove its own identity to the RADIUS server. This ensures mutual authentication, so that both sides can trust each other.
To simplify certificate management, Omada Controller provides the Certificate Profile module. This module is used to store and manage the CA and client certificates required for RadSec.
Step 1. Create a Self-Signed Root CA Certificate
If you have already created a self-signed CA for HTTPS configuration, you can reuse the same CA here. The CA will be used to sign both the RADIUS server certificate and the client certificate. If you have not created one yet, please refer to the HTTPS Certificate section for detailed instructions on generating a self-signed CA with OpenSSL.
Step 2. Generate RADIUS Server and Client Certificates
After creating the self-signed CA (Step 1), use it to issue two certificates: one for the RADIUS server and one for the access device. Both must be signed by the same CA to establish mutual trust.
2.1 Generate RADIUS Server Certificate
openssl genrsa -out server.key -aes256 2048
This Command generate a RSA key pair. The RSA key is encrypted with AES-256, which will be used by the RADIUS Server.
openssl req -new -key server.key -out server.csr
This command creates a CSR file (server.csr) that contains the server’s identity information (such as Common Name, Organization, etc.). The CSR will be signed by the CA to produce a valid certificate.
openssl x509 -req -in server.csr -days 3650 -sha256 -CA rootCA.pem -CAkey rootCA.key -out server.pem
This command signs the CSR with the root CA created in Step 1. The result is a server certificate (server.pem) valid for 3650 days.
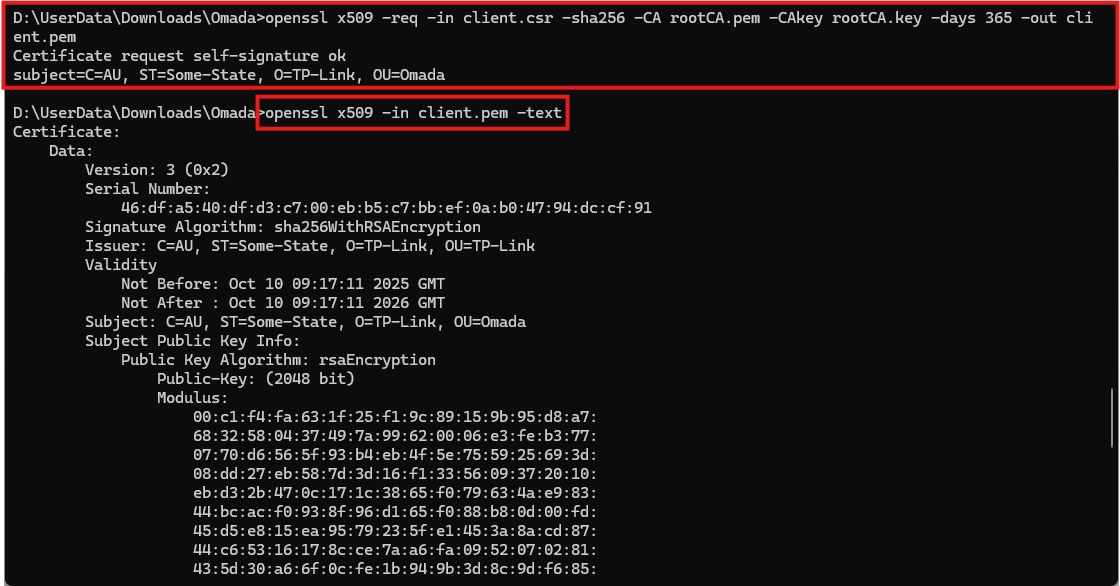
openssl x509 -in server.pem -text
You can use the command to view the detailed contents of the certificate.

2.2 Generate Client Certificate
Note: The process is the same as generating the server certificate. The difference is that this client certificate will be assigned to the access device through the Controller. It allows the access device to prove its identity to the RADIUS server during the TLS handshake. Together with the CA certificate, this ensures mutual authentication and a secure RadSec connection.
openssl genrsa -out client.key -aes256 2048
openssl req -new -key client.key -out client.csr
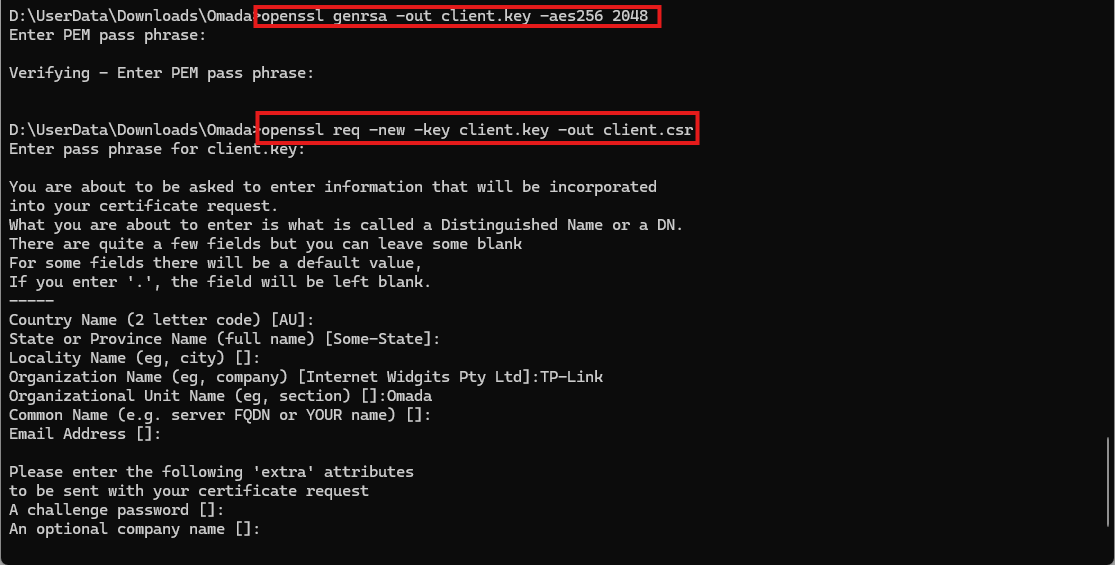
openssl x509 -req -in client.csr -sha256 -CA rootCA.pem -CAkey rootCA.key -days 365 -out client.pem
Step 3. Import Certificates into Certificate Profile
In Omada Controller, go to Site View > Network Config > Profile > Certificate Profile and add the certificates generated in the previous steps.
Import the CA Certificate

Import the Client Certificate
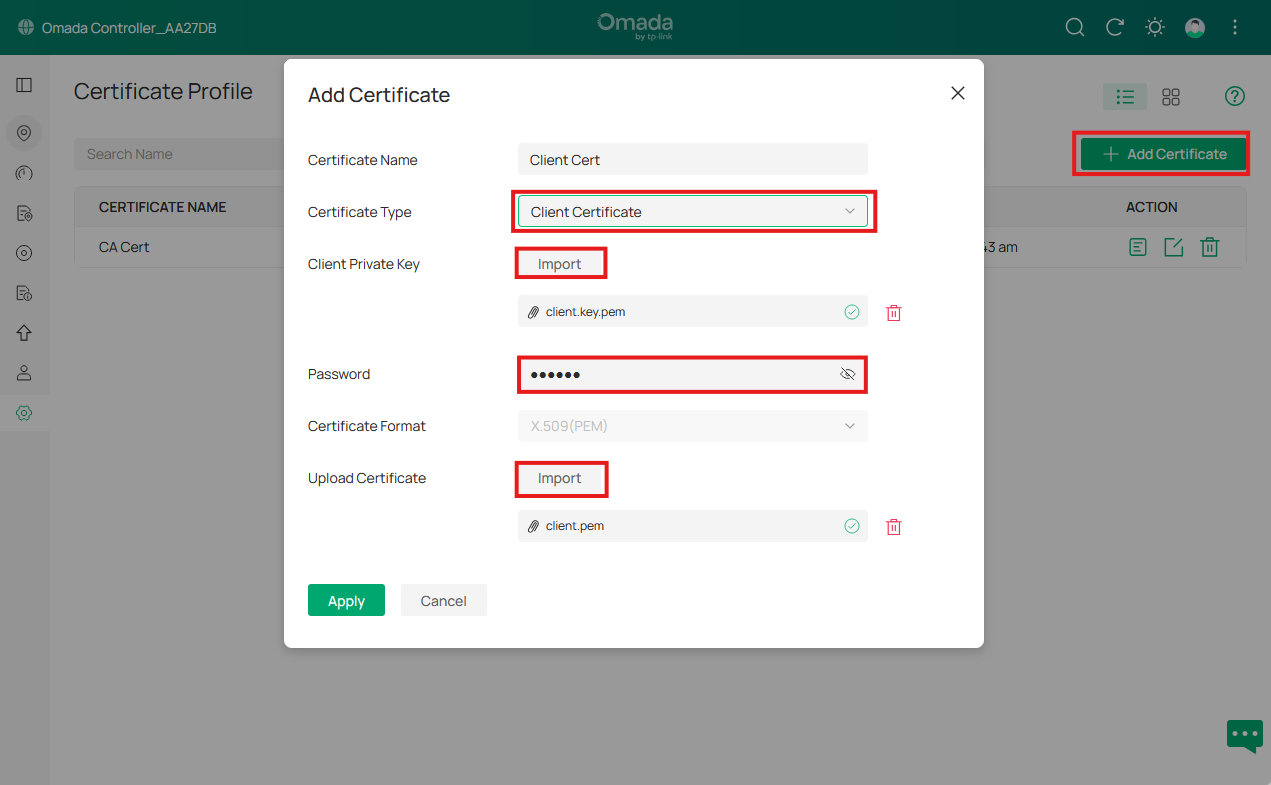
Note: The password under Client Private Key is the passphrase set when creating the client key, used to protect it with encryption.
Step 4. Configure RADIUS Profile
When configuring the RADIUS profile, enable RadSec and reference the CA certificate created in earlier steps. This CA certificate is used to verify the RADIUS server’s certificate during the TLS handshake.
The client certificate is presented to the server for verification. If the RADIUS server is configured to authenticate clients, you must specify a client certificate that is signed by a CA trusted by the server, this CA can be the same one (as in this article) that issued the server certificate, or it can be a different one. If client authentication is not required, this field can be left blank.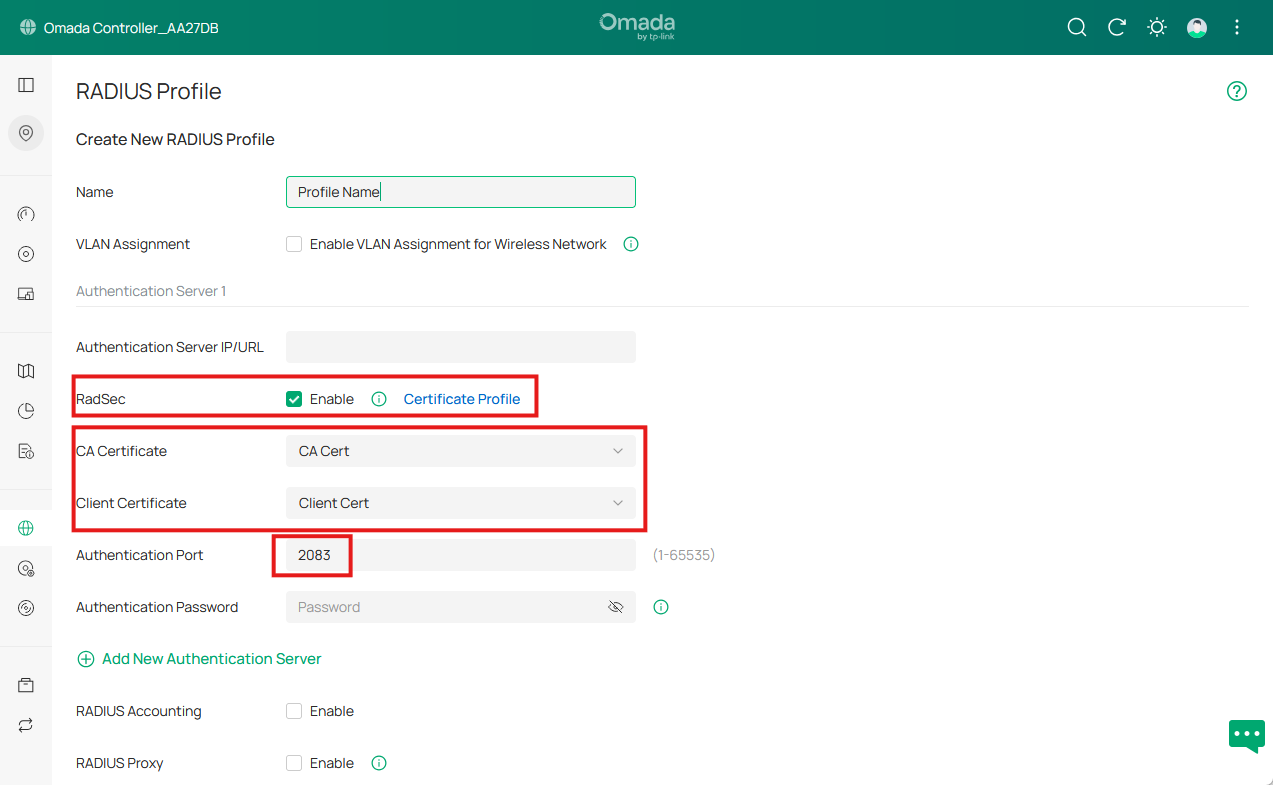
Conclusion
Using OpenSSL, we built a self-signed CA, successfully issued HTTPS, client, and server certificates, and uploaded them to the Controller for authentication.
To get to know more details of each function and configuration please go to Download Center to download the manual of your product.
QA
Q1: Why does the browser still show the certificate as untrusted even after configuring the HTTPS certificate?
A1: First, make sure your browser has installed the CA certificate. Second, ensure that your HTTPS Certificate meets the following requirements:
- The key length must be at least 2048 bits, 4096 bits is the recommended choice.
- The certificate must include the Subject Alternative Name (SAN) field.
- The certificate must specify its intended usage in the Extended Key Usage (EKU) field.
- The certificate validity period must not exceed 825 days.
Finally, you can verify whether your certificate is valid using the following command:
openssl verify -CAfile <your_ca_certificate.pem> <your_server_certificate.pem>
Q2: How can I identify the format of my certificate or key file?
A2: You can usually identify the format by looking at the file content (not just the extension)
- PEM format
Common extensions: .pem, .crt, .cer, .key
Note: A file is recognized as PEM if its content consists of Base64-encoded data enclosed by the appropriate BEGIN/END markers. The file extension is not relevant.
Content is human-readable, begins with lines like:
|
Key |
"---BEGIN PRIVATE KEY---" |
"---BEGIN RSA PRIVATE KEY---" |
|
Certificate |
"---BEGIN CERTIFICATE---" |
- DER format
Common extensions: .der, .cer
Content is binary, not human-readable.
To inspect:
openssl x509 -in <your_cert.der> -inform der -text
- PFX/PKCS#12 format
Common extensions: .pfx, .p12
Binary file bundling certificate + key
To inspect:
openssl pkcs12 -in <your_cert.pfx> -info
- JKS(Java Keystore)
Common extension: .jks
Binary format used by Java
To inspect:
keytool -list -v -keystore <your_cert.jks>
Note: keytool is not part of OpenSSL. It comes with the Java Development Kit (JDK), so you need to have JDK installed to use it.
