


Contents
Configuration for OpenVPN Server
Configuration for Windows Devices
Configuration for Linux Devices
Configuration for MacOS Devices
Configuration for Android Devices
Introduction
OpenVPN is open-source virtual private network (VPN) software that utilizes SSL/TLS protocols for encrypted communication. It provides secure remote access and site-to-site connections and is widely used to protect network communications and enforce access controls. Omada Gateway can act as an OpenVPN server that enables clients to access the intranet or the internet securely.
Requirements
- Omada Gateway
- Omada Network System v6.1 and above
- Android devices / iOS devices / Windows devices / Linux devices / MacOS devices
Configuration
In the following sections, we will guide you through configuring OpenVPN connections from Android, iOS, Windows, Linux, and macOS devices to an Omada Gateway according to the topology below.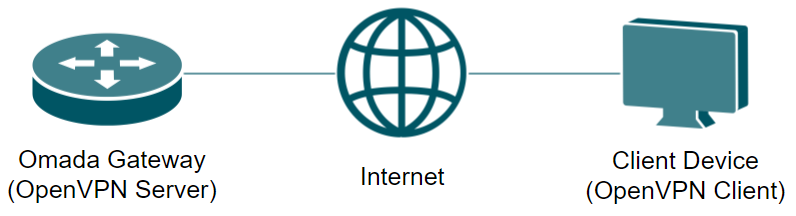
Before that, let’s first configure the OpenVPN Server on the Omada Gateway adopted by an Omada Controller.
Configuration for OpenVPN Server
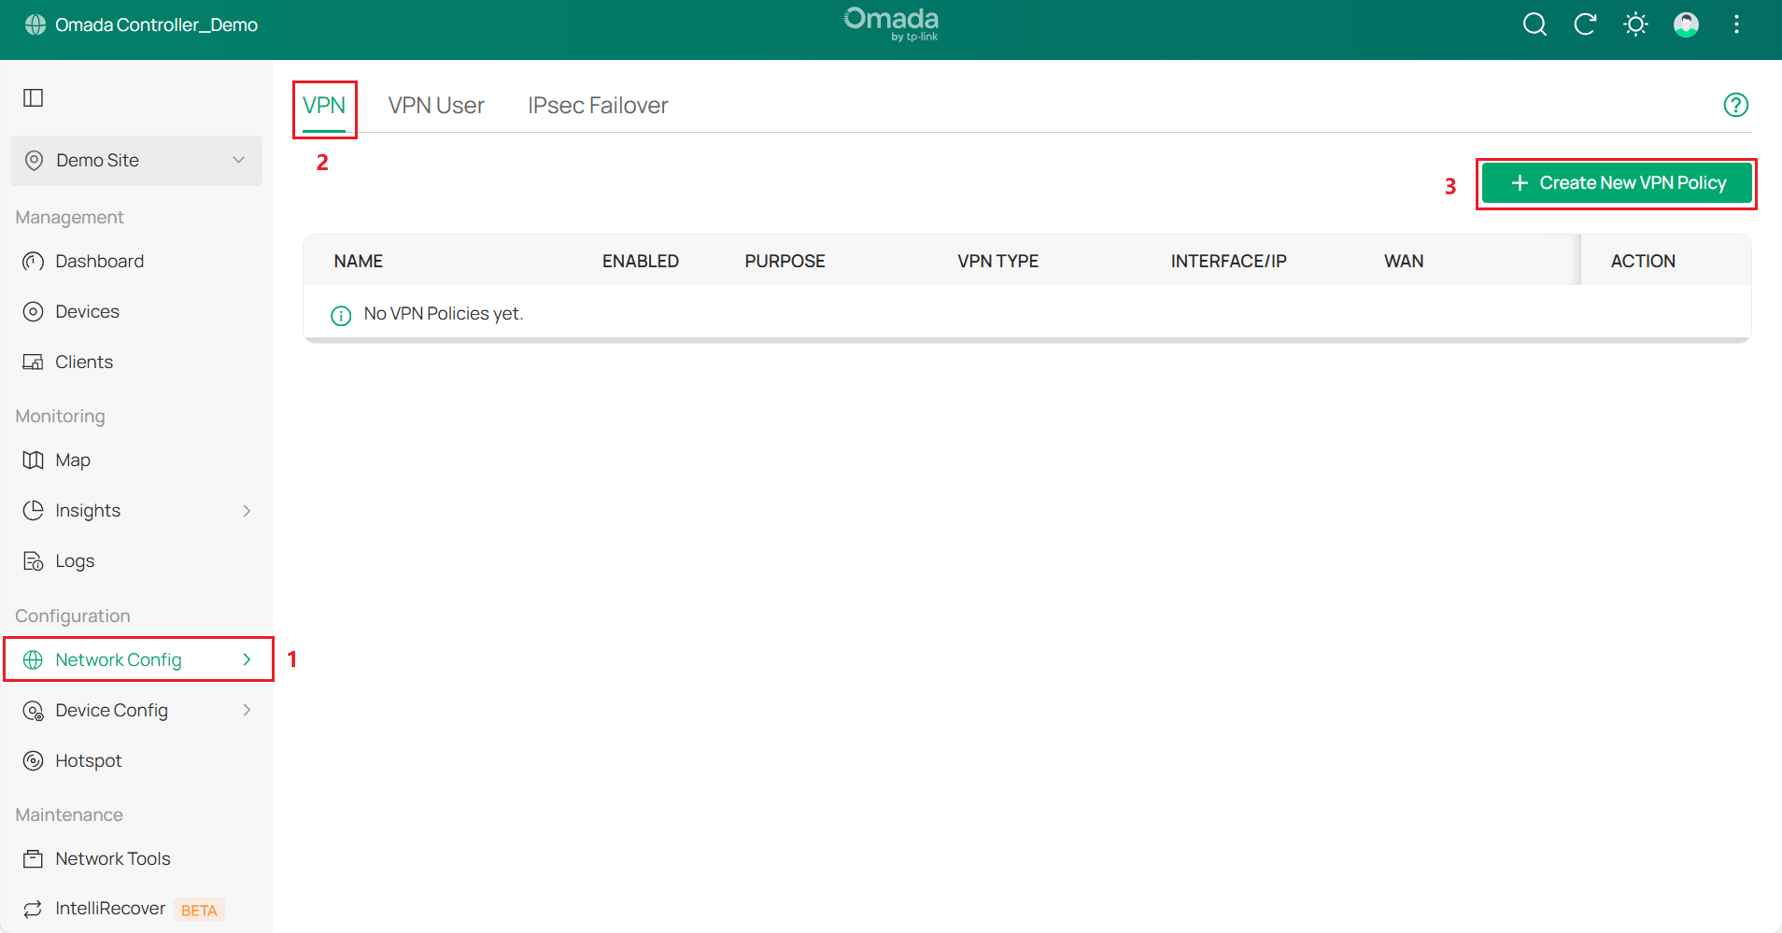
Step 1. Create a new OpenVPN Policy.
Go to Network > VPN, click Create New VPN Policy.
Select the Purpose as Client -to-Site VPN, and VPN type as VPN Server-OpenVPN.
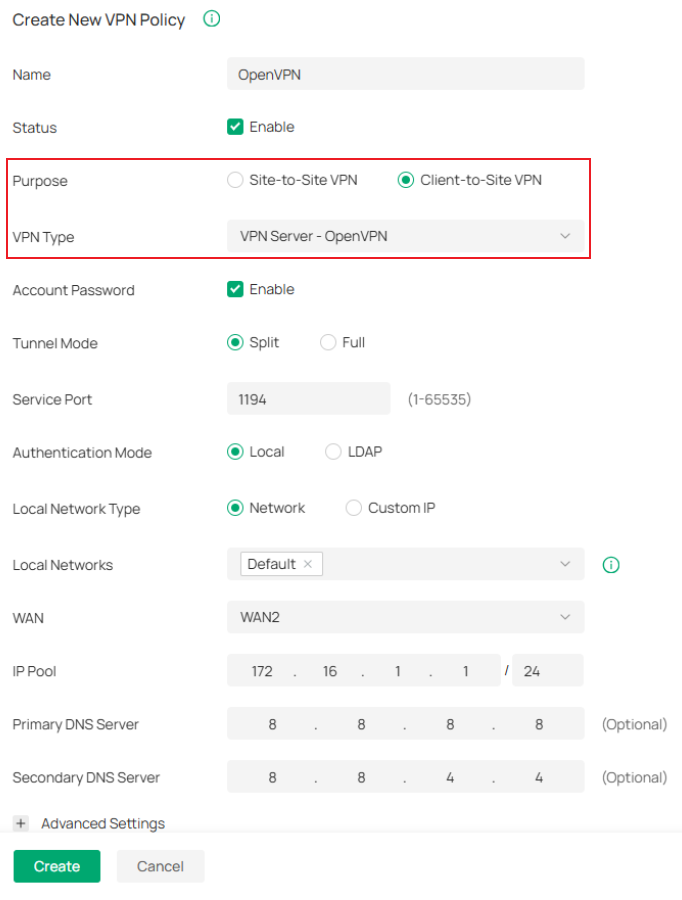
Configure the other content as needed, then click Create. We use split mode as an example and select the local network as the Default LAN (192.168.0.1/24).
Step 2. Download the .ovpn file.
Click the export button to download the .ovpn file.

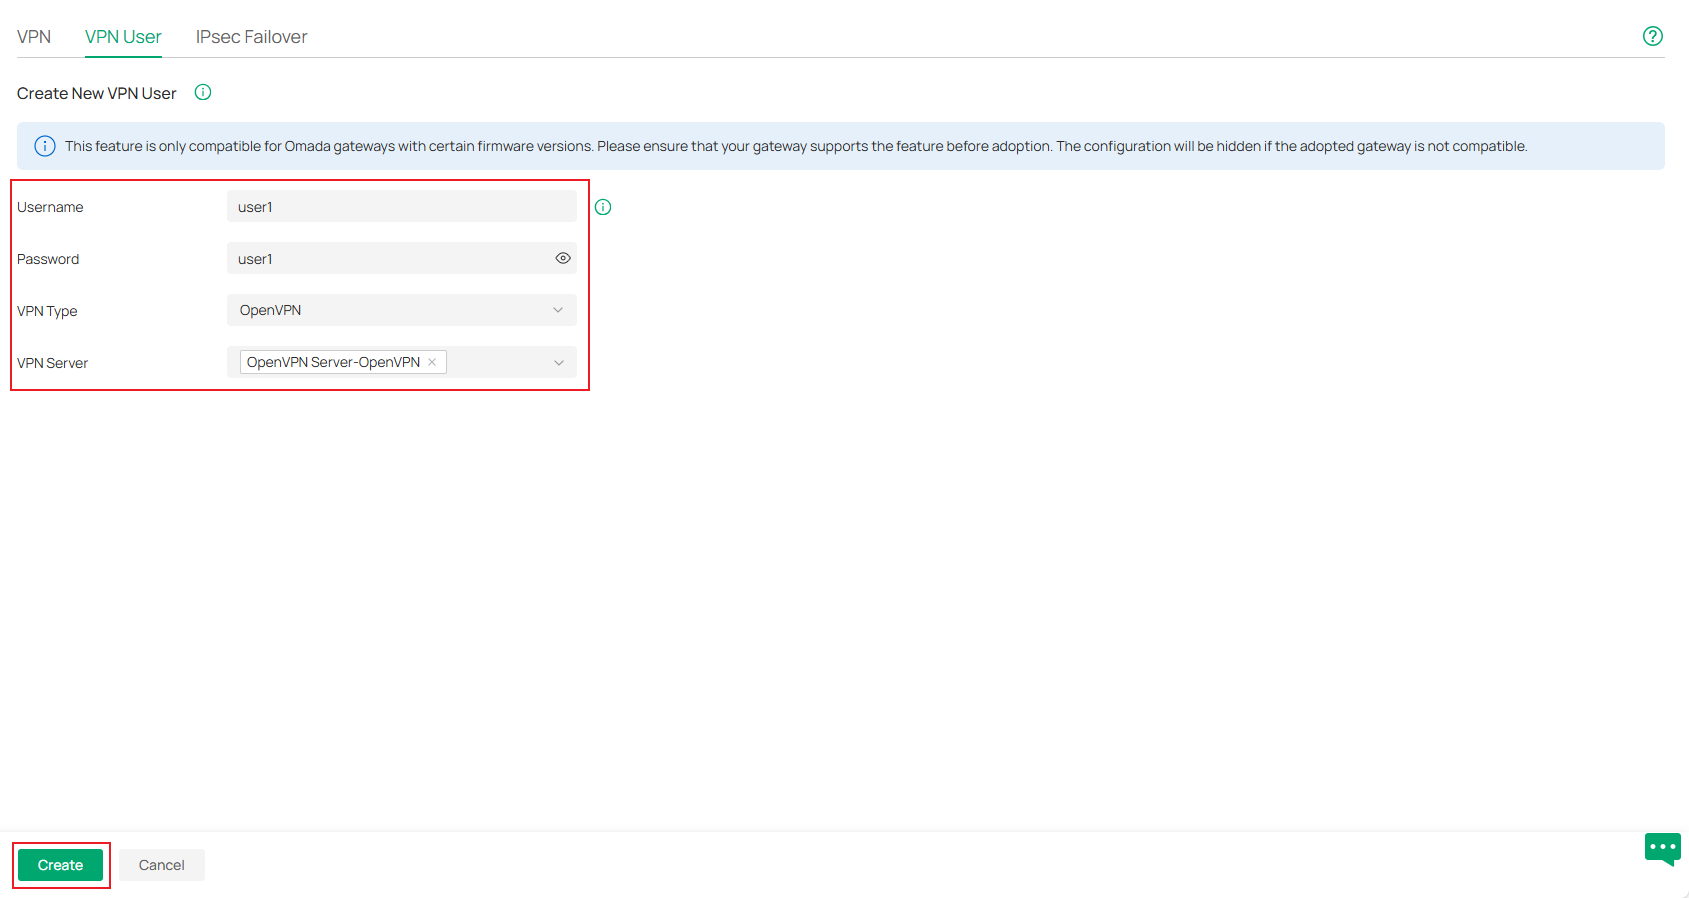
Step 3. Configure the OpenVPN users.
Go to VPN User, click Create New VPN User.

Select the VPN type as OpenVPN, and select the VPN Server as the OpenVPN server we created before. Then click Create.
Now we have finished the configuration for the OpenVPN Server and have configured an OpenVPN user.

Configuration for Windows Devices
Step 1. Go to https://openvpn.net, download, and install OpenVPN Connect.
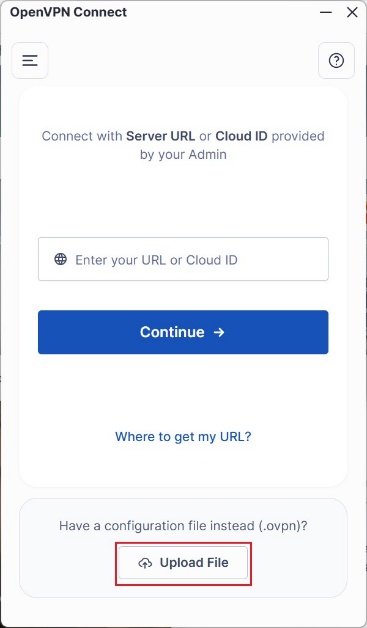
Step 2. Enter OpenVPN Connect, click Upload File to upload the .ovpn file we downloaded from the Omada Controller.
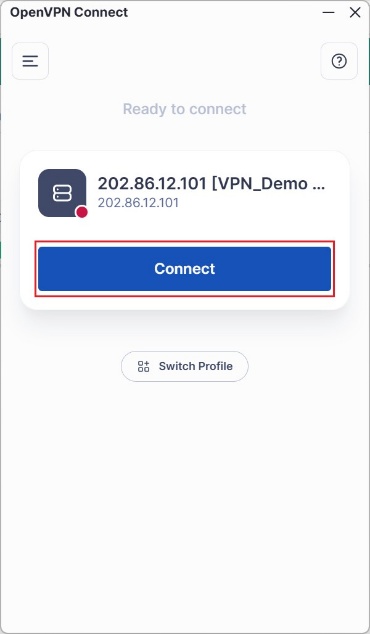
Step 3. Click Connect.
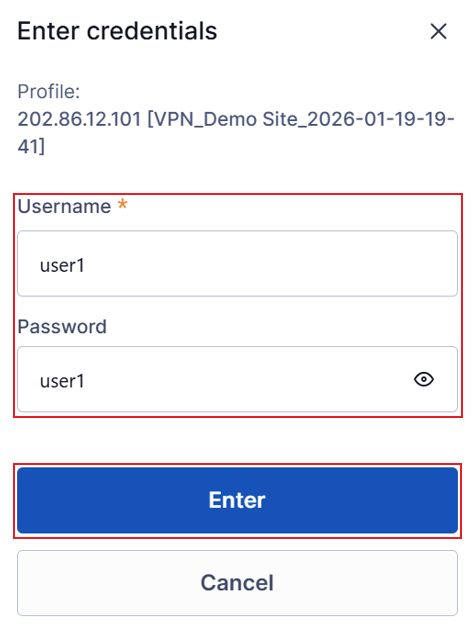
Step 4. Enter the Username and Password of the OpenVPN user. Then click Enter.
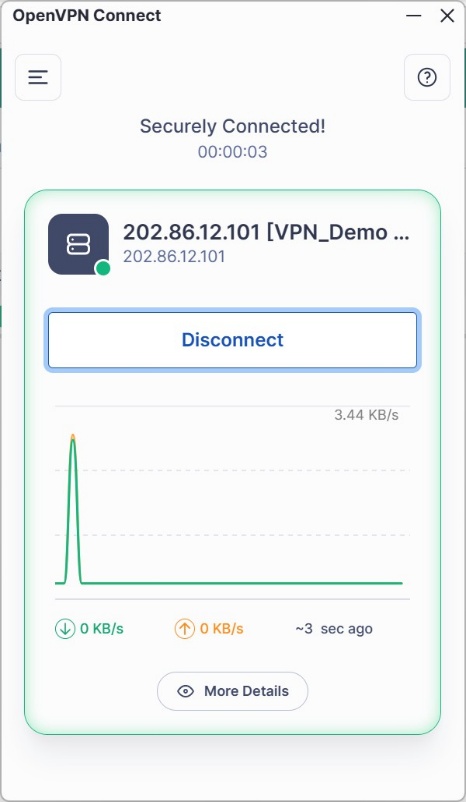
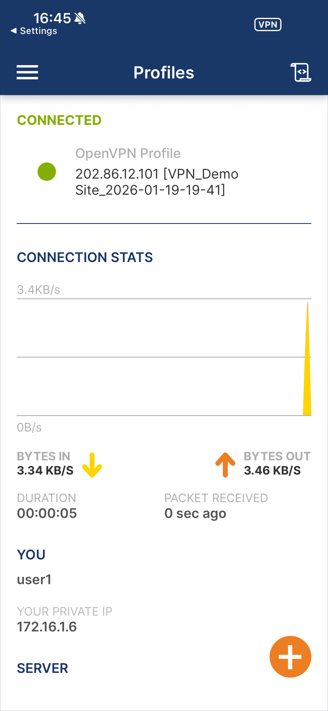
Finally, we connected to the OpenVPN server.
Configuration for Linux Devices
Step 1. Refer to the following commands to install OpenVPN.
#sudo apt update
#sudo apt install openvpn -y
Step 2. Refer to the following command to set the .ovpn file to be readable and writable only by the root user to prevent certificate leakage. (The .ovpn file exported from the Omada Controller is saved in the Download folder by default.)
#sudo chmod 600 ~/Downloads/VPN_Demo\ Site_2026-01-20-13-13.ovpn
Step 3. Refer to the following command to run the .ovpn file and enter the username and password of the OpenVPN user. If the connection is built successfully, the terminal will display “Initialization Sequence Completed”.
#sudo openvpn --config ~/Downloads/VPN_Demo\ Site_2026-01-20-13-13.ovpn

Configuration for MacOS Devices
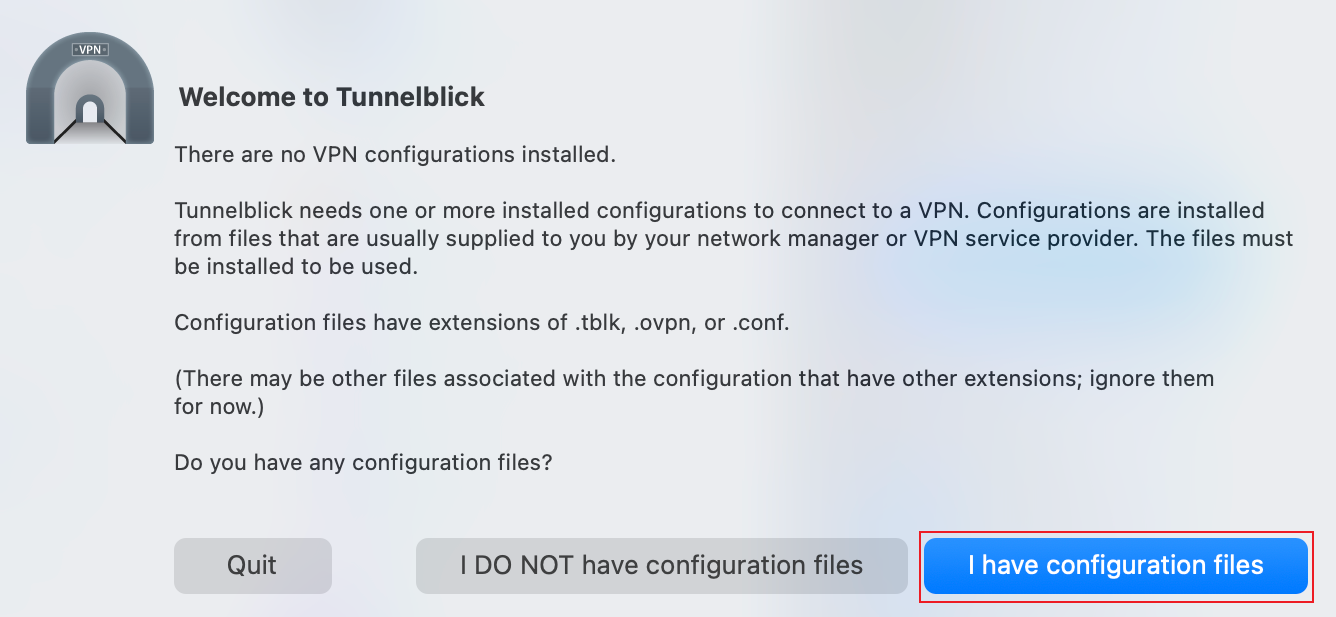
Step 1. Go to https://tunnelblick.net/, download, and install Tunnelblick.
Step 2. Enter Tunnelblick, click I have configuration files.
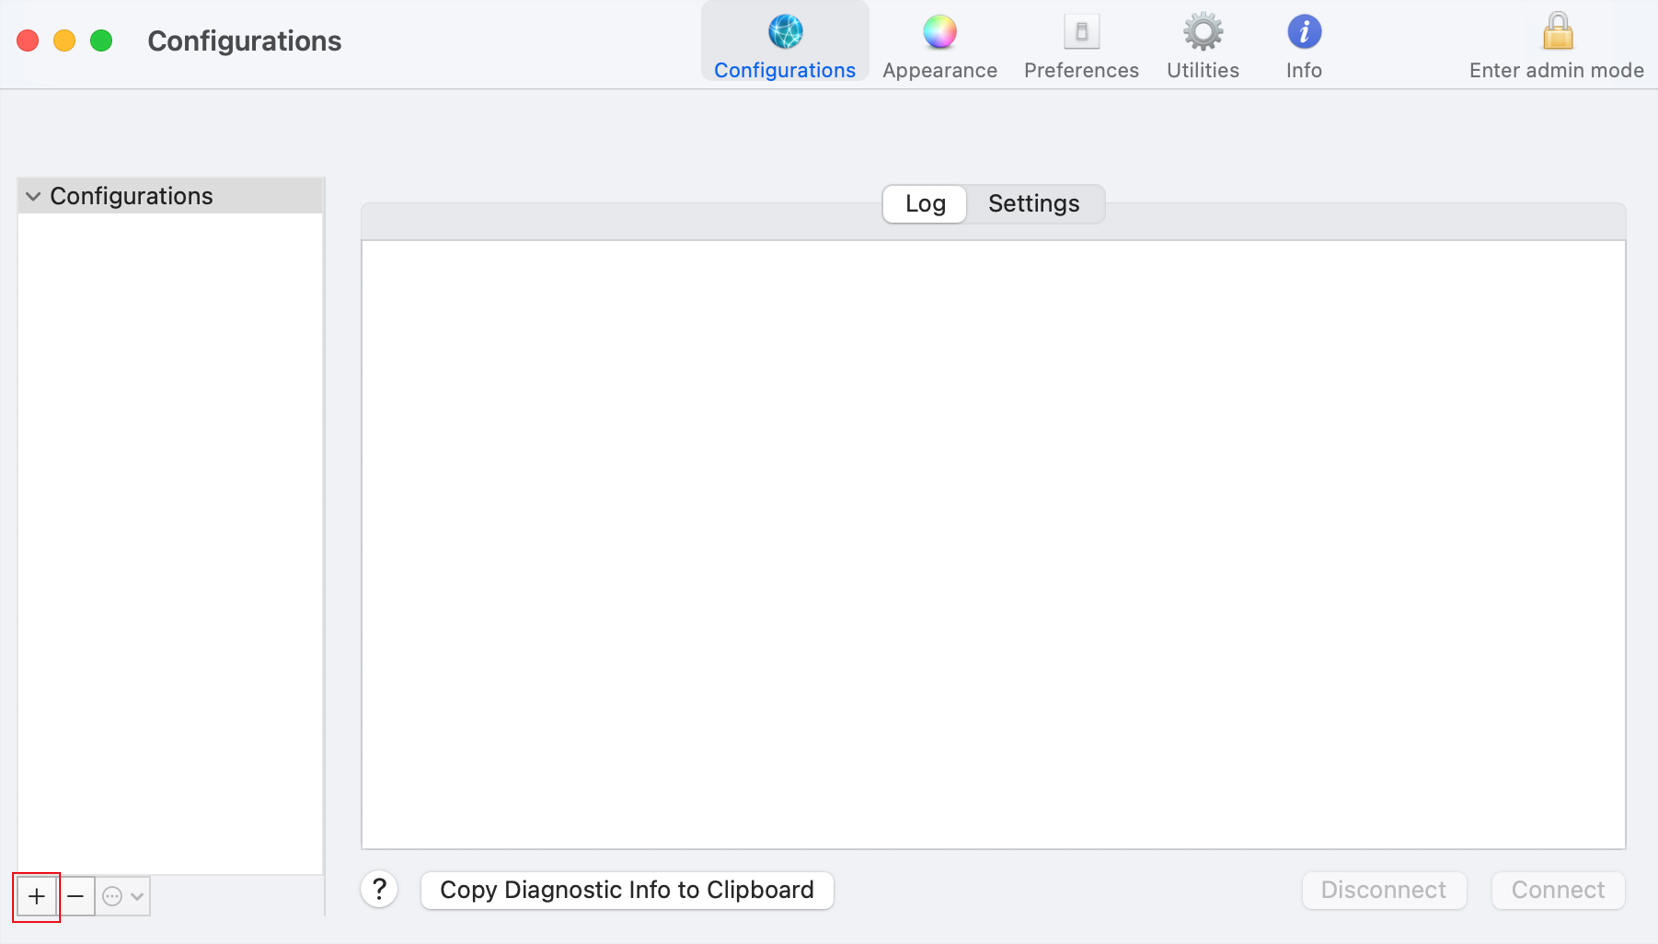
Step 3. Click the “+” in the lower-left corner to import the .ovpn file we exported from the Omada Controller.
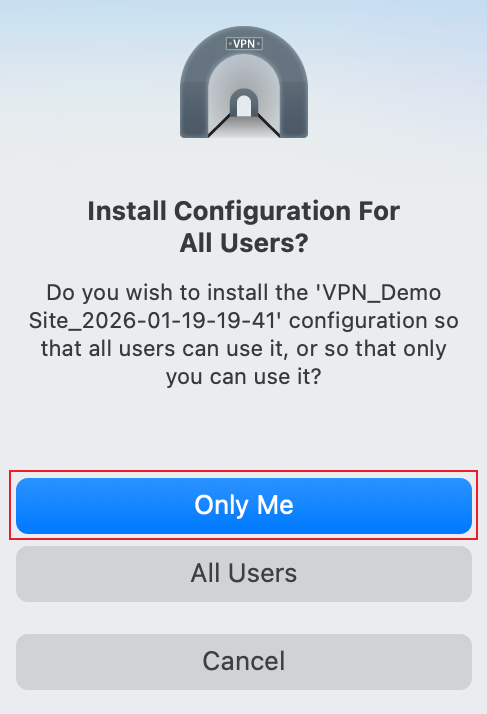
Step 4. Click Only Me.
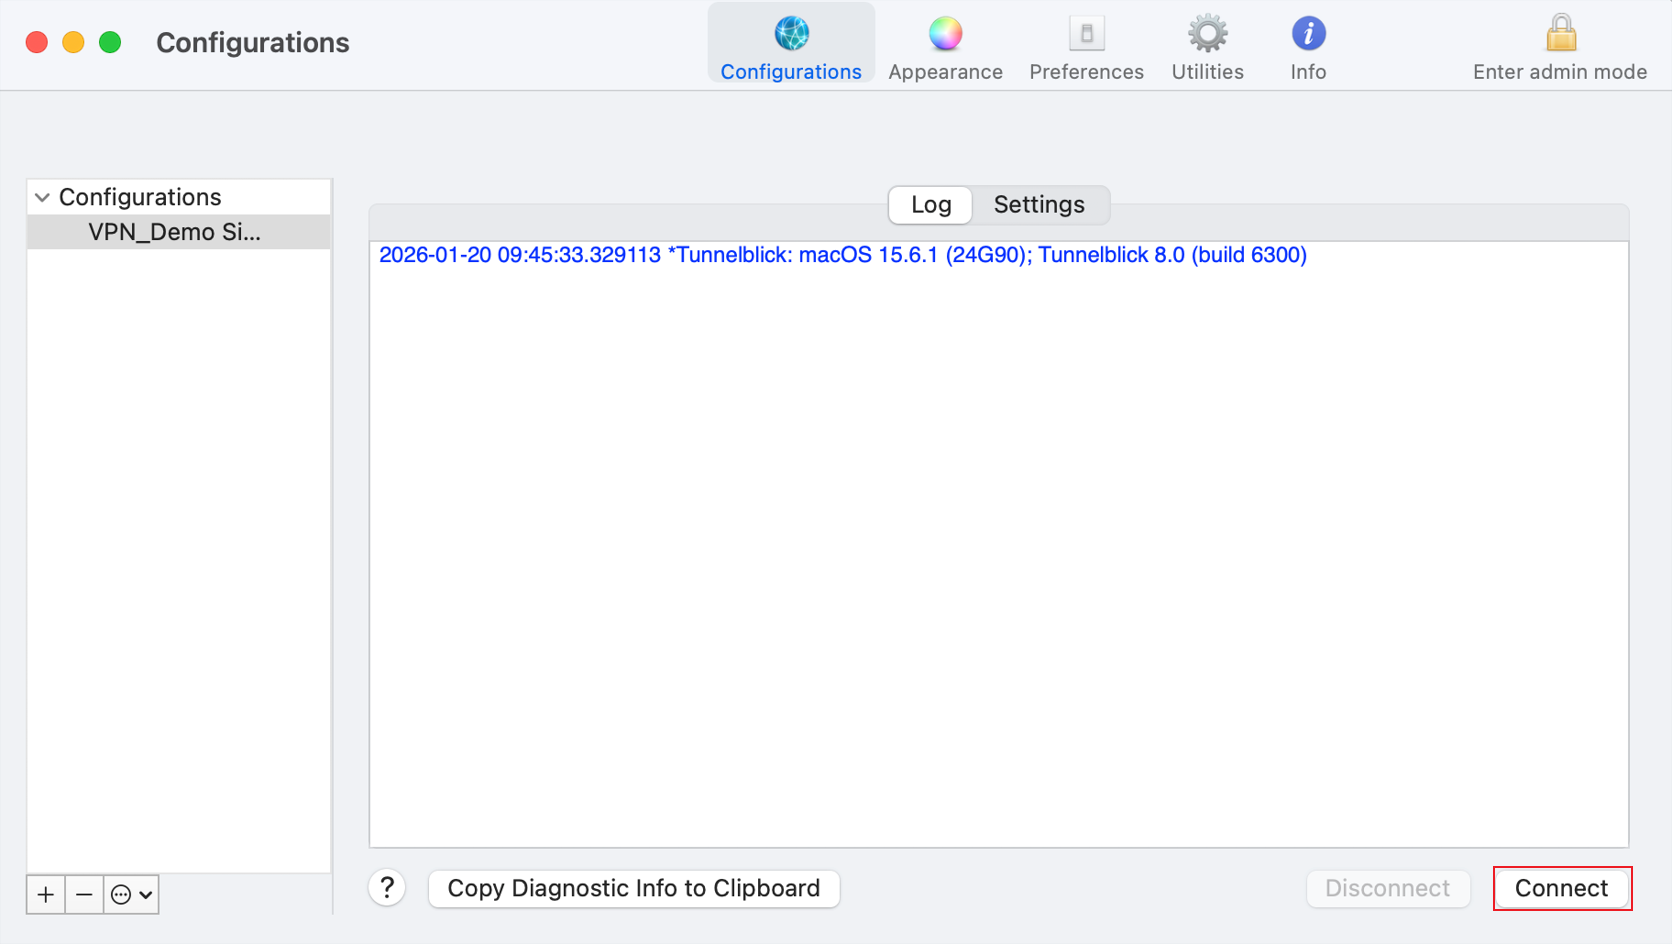
Step 5. Select the configuration file we imported and click Connect.
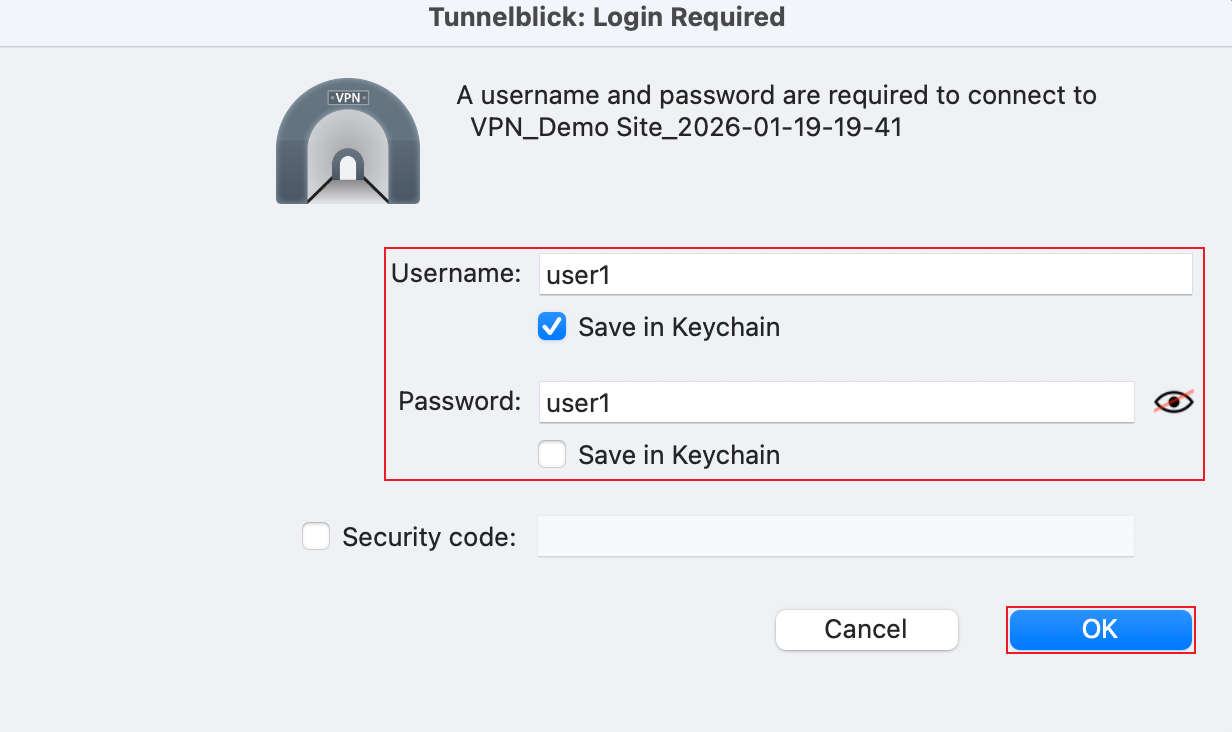
Step 6. Enter the Username and Password of the OpenVPN user. Then click OK.
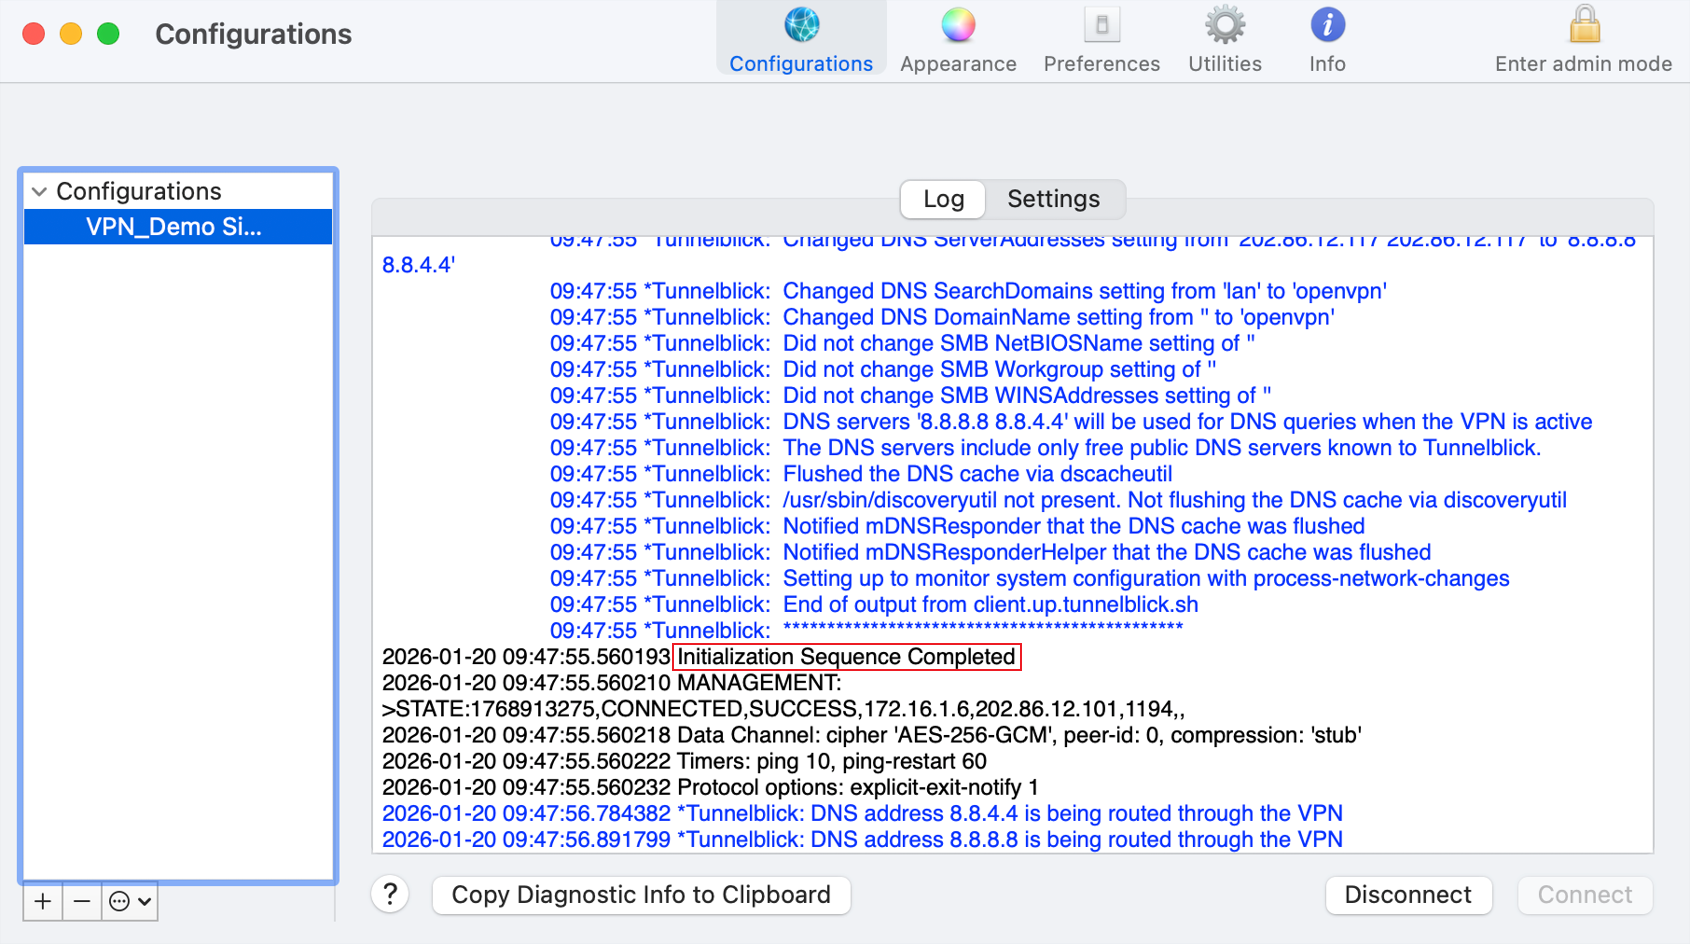
If the connection is built successfully, it will display “Initialization Sequence Completed”.
Configuration for Android Devices
Step 1. Download and install OpenVPN Connect via Google Play.
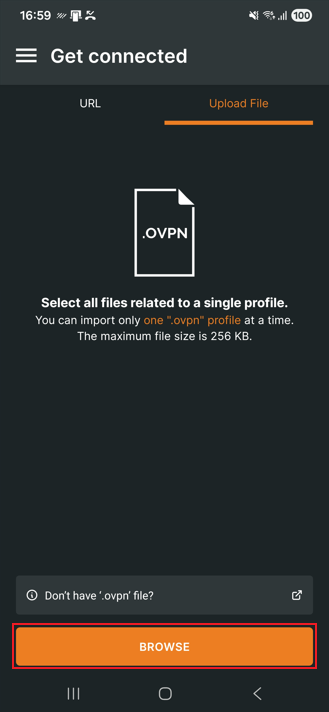
Step 2. Enter OpenVPN Connect, click Upload File to upload the .ovpn file we downloaded from the Omada Controller.
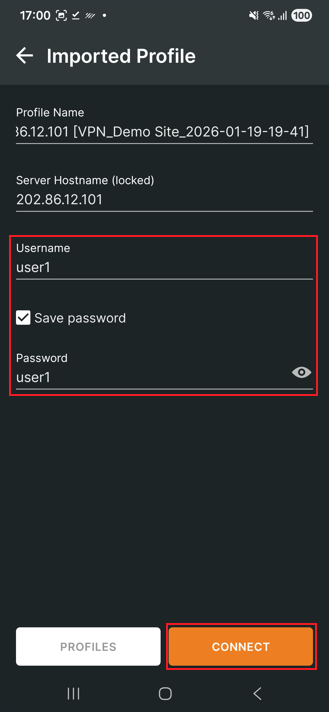
Step 3. Enter the Username and Password of the OpenVPN user. Then click Connect.
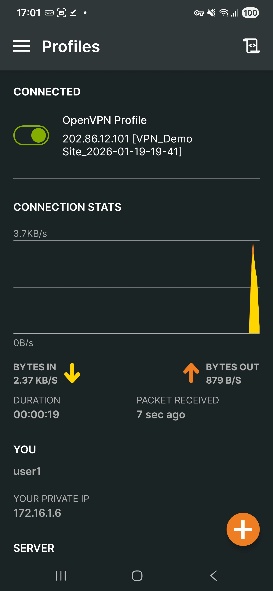
Step 4. Finally, we connected to the OpenVPN server.
Configuration for iOS Devices
Step 1. Download and install OpenVPN Connect via APP Store.
Step 2. Go to Files, find the .ovpn file we exported from the Omada Controller, and select the OpenVPN Connect app to open this file.
Step 3. Click ADD.

Step 4. Enter the Username and Password of the OpenVPN user. Then click Connect

Step 4. Finally, we connected to the OpenVPN server.
Verification
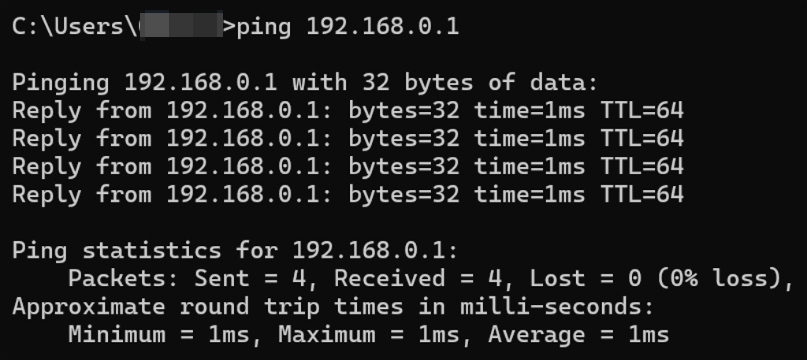
Use any type of ping tool to verify connectivity between the client device and the network permitted by the OpenVPN Server. Here, we use the Windows built-in ping tool to test connectivity between a Windows client and the Default LAN (192.168.0.1/24) as an example.
Conclusion
We have now covered how to connect an OpenVPN server on the Omada Gateway using client devices running Windows, Linux, macOS, Android, and iOS.
Get to know more details of each function and configuration please go to Download Center to download the manual of your product.
QA
Q1: What should I do if we fail to connect to the OpenVPN server
A1:
Step 1. Check the connectivity and port availability of the OpenVPN server (default port is 1194)
Step 2. Check whether an incorrect username or password was used.
