


Contents
Topology before starting configuration
Configuration for Standalone mode
Introduction
Repeater mode allows an Omada EAP to connect wirelessly to an existing router or access point and extend its wireless coverage without requiring a wired network connection. The EAP can broadcast the same SSID as the host network or use a separately configured SSID for the extended network.
This FAQ explains how to configure repeater mode using the EAP web interface in standalone mode or the Omada App.
Requirements
- A mobile device with Omada App installed or a PC
- An Omada EAP capable of Repeater mode
Note: To check if your product supports repeater mode, please check here: https://www.omadanetworks.com/omada-repeater-mode/product-list/
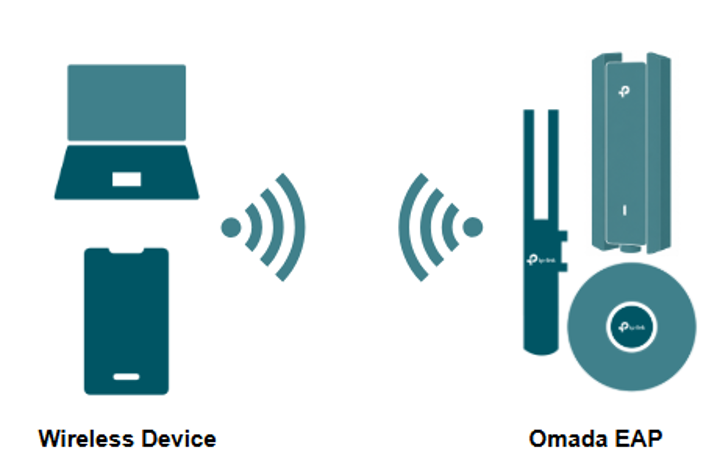
Topology before starting configuration
This is an example of the topology to initially configure repeater mode.
Configuration
There are two methods for configuring repeater mode: Standalone mode and the Omada App.
Note: Before configuring the Repeater mode, please ensure that your device is set to factory default and connected to a power source, such as a PoE Injector or power adapter.
Configuration for Standalone mode
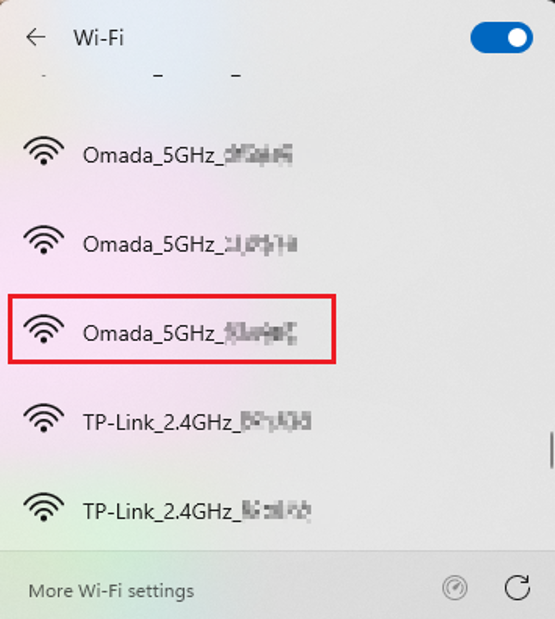
Step 1. Connect the EAP to a power source such as a PoE Injector or power supply appropriate for the EAP. The EAP will broadcast a SSID. This SSID can be found on the label of the device. The SSID will appear as TP-Link_2.4GHz/5GHz_xxxx or Omada_2.4GHz/5GHz_xxxx.
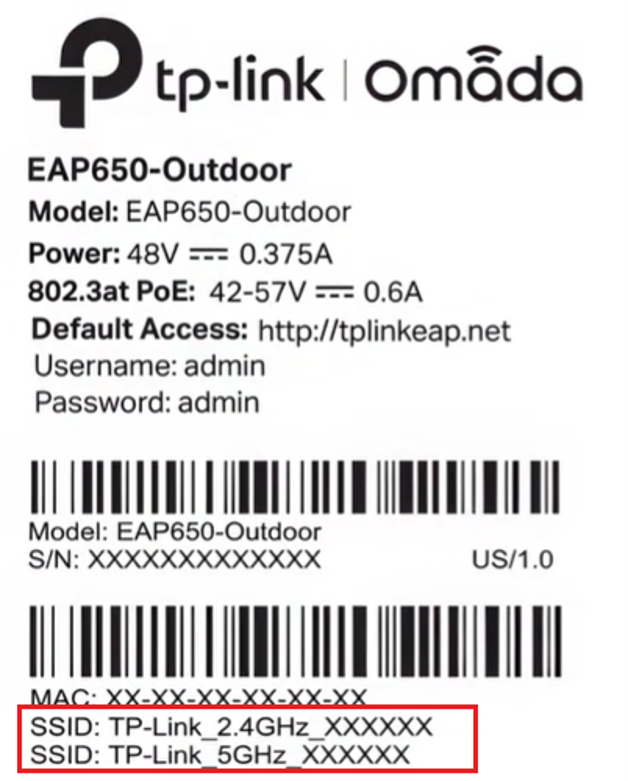
Step 2. This example uses a Windows 11 PC. Connect to the device SSID by selecting it.
Note: Configuration using a wired connection is also possible. If using this method, connect to the EAP device using its IP Address. Refer to Q6 in QA section for further details.
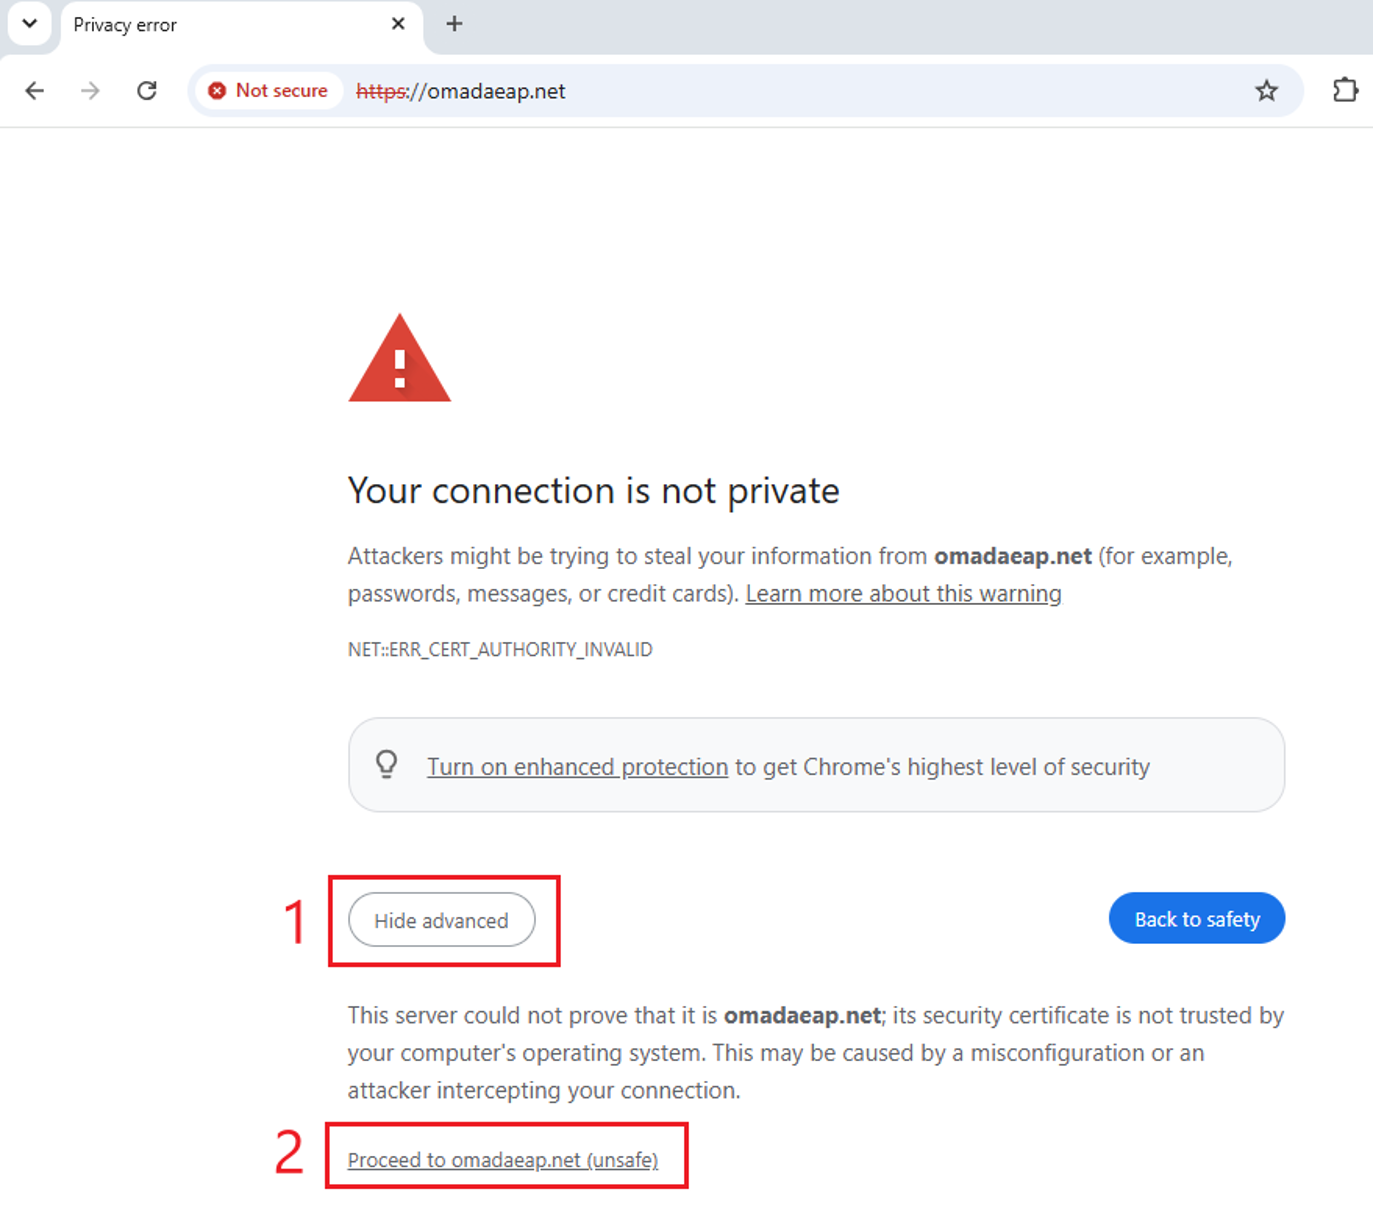
Step 3. On the device label, it will show a Default Access URL for the device. This URL will either be http://tplinkeap.net or http://omadaeap.net. Type the corresponding URL into a web browser. A warning will appear. If you are using Google Chrome, select Advanced > Proceed to website.
Note: If you are using Microsoft Edge: Advanced > Continue, Mozilla Firefox: Advanced > Accept the Risk and Continue.
Step 4. Enter a Username and Password, confirm the Password, and select Next.
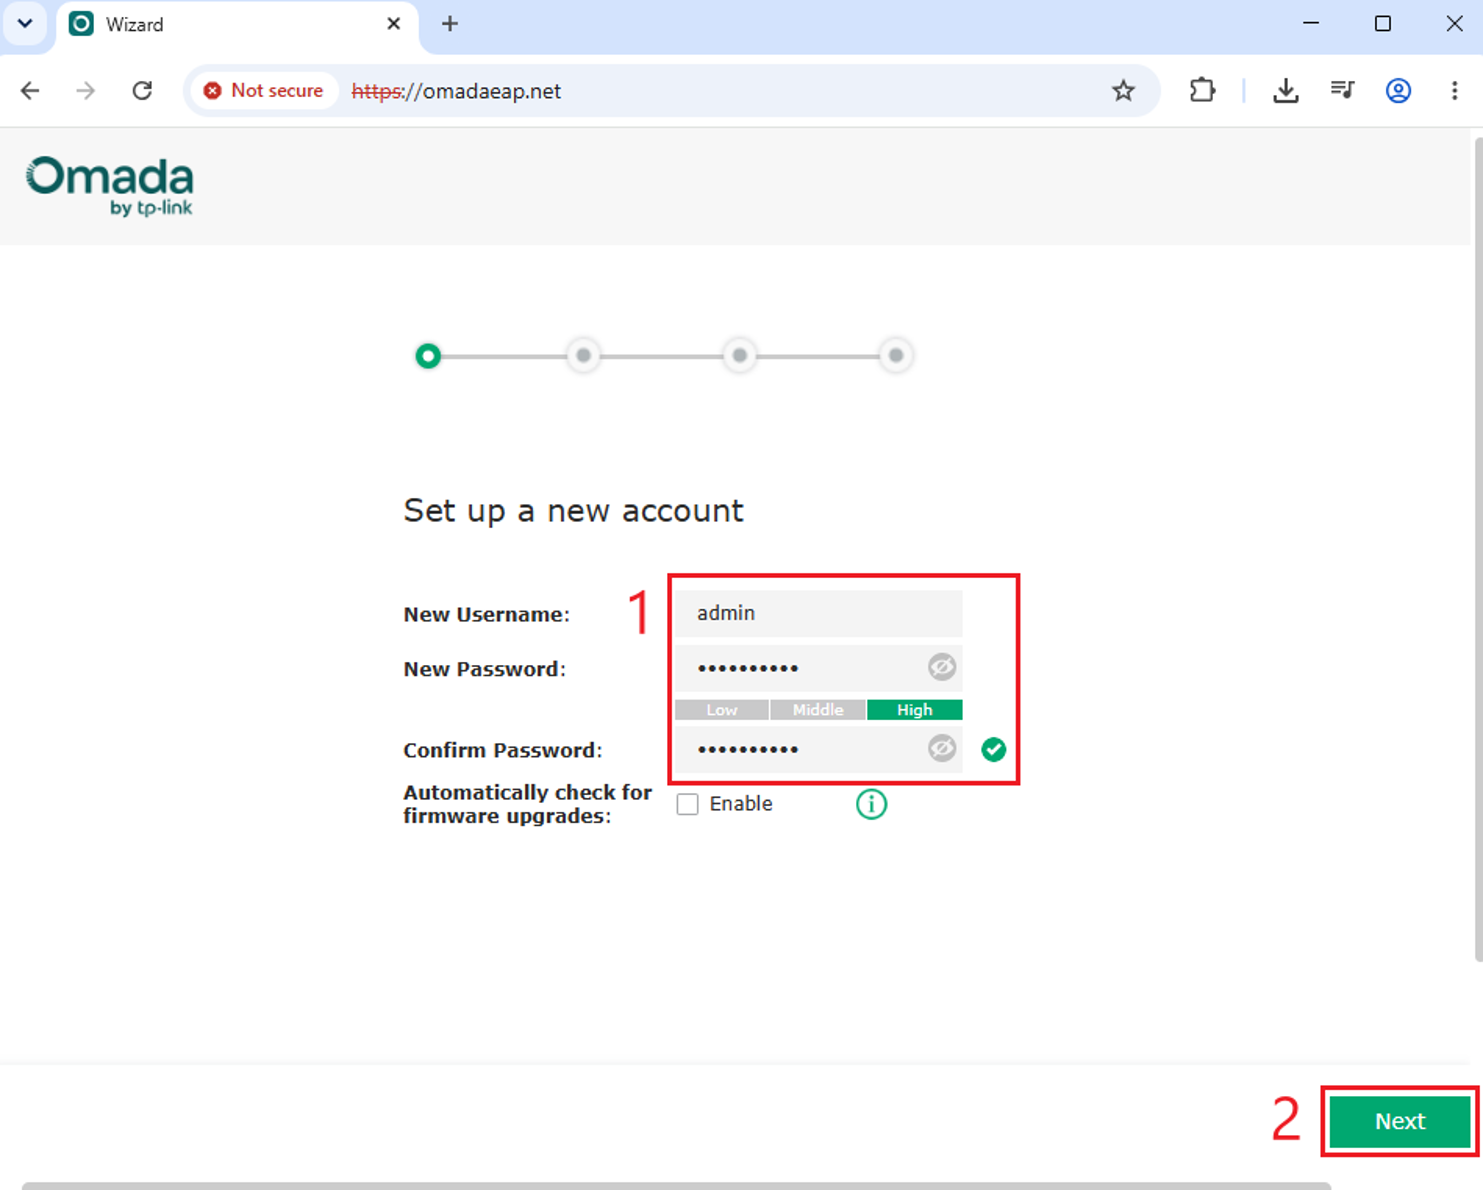
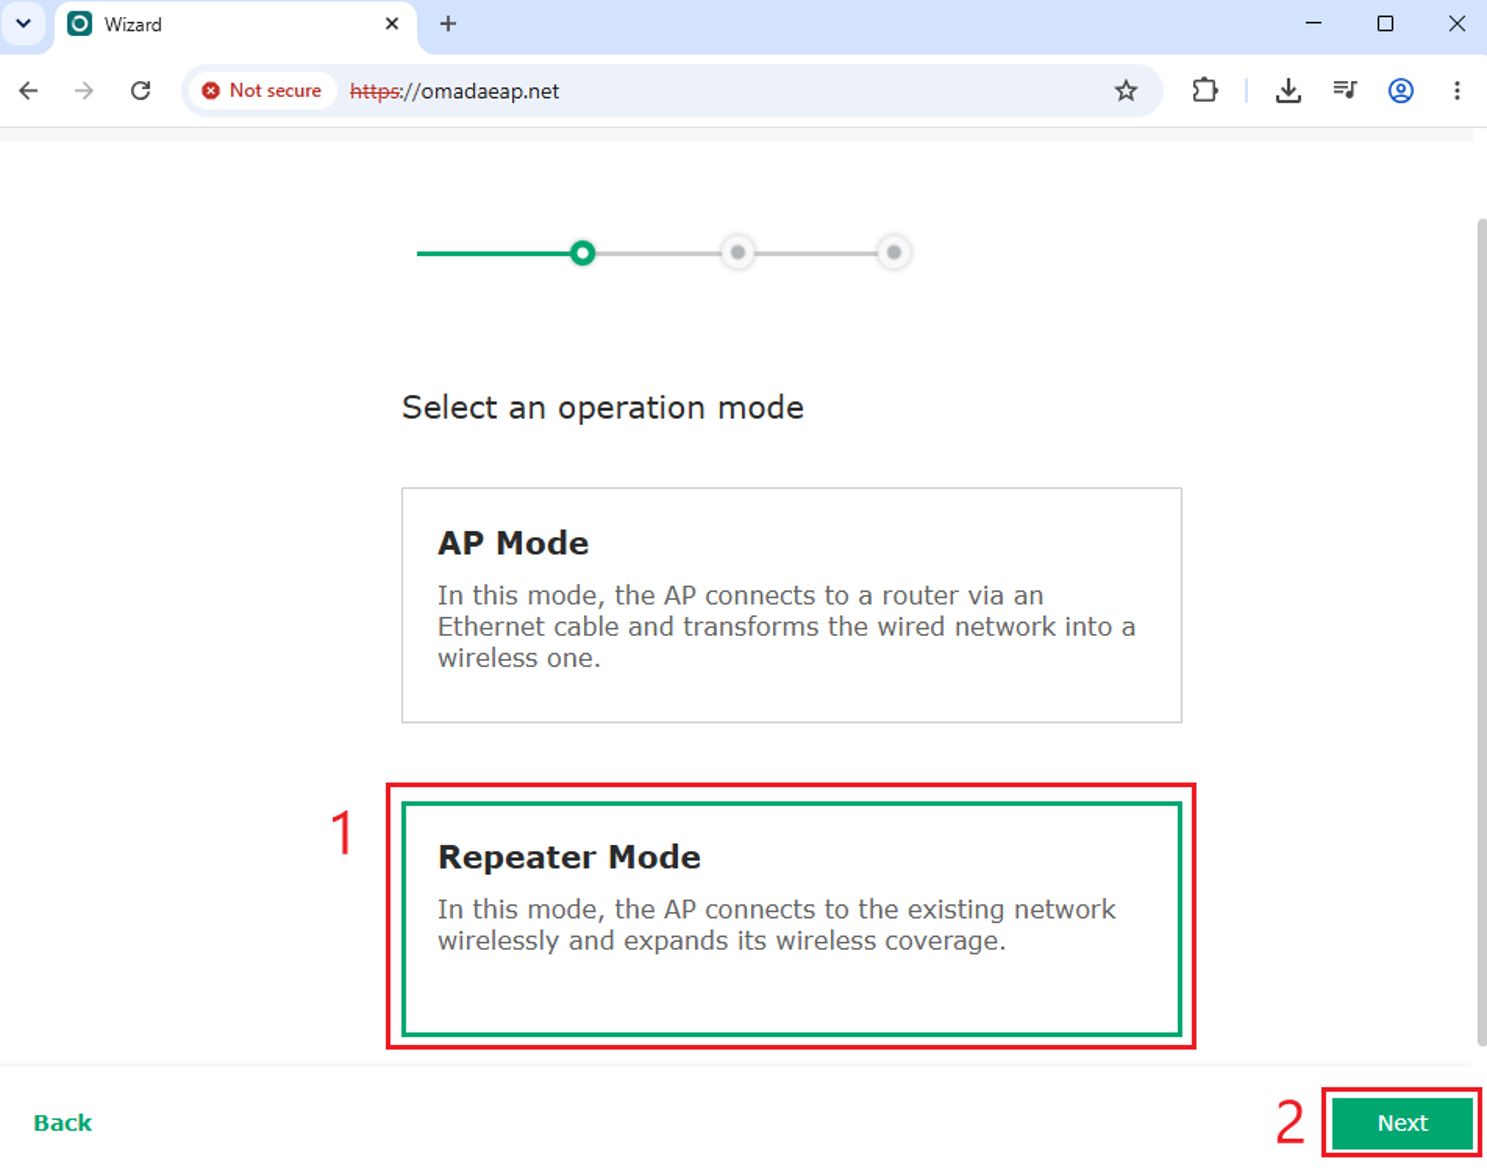
Step 5. Select Let’s Get Started on the next screen. On the operation mode screen, select Repeater Mode > Next.
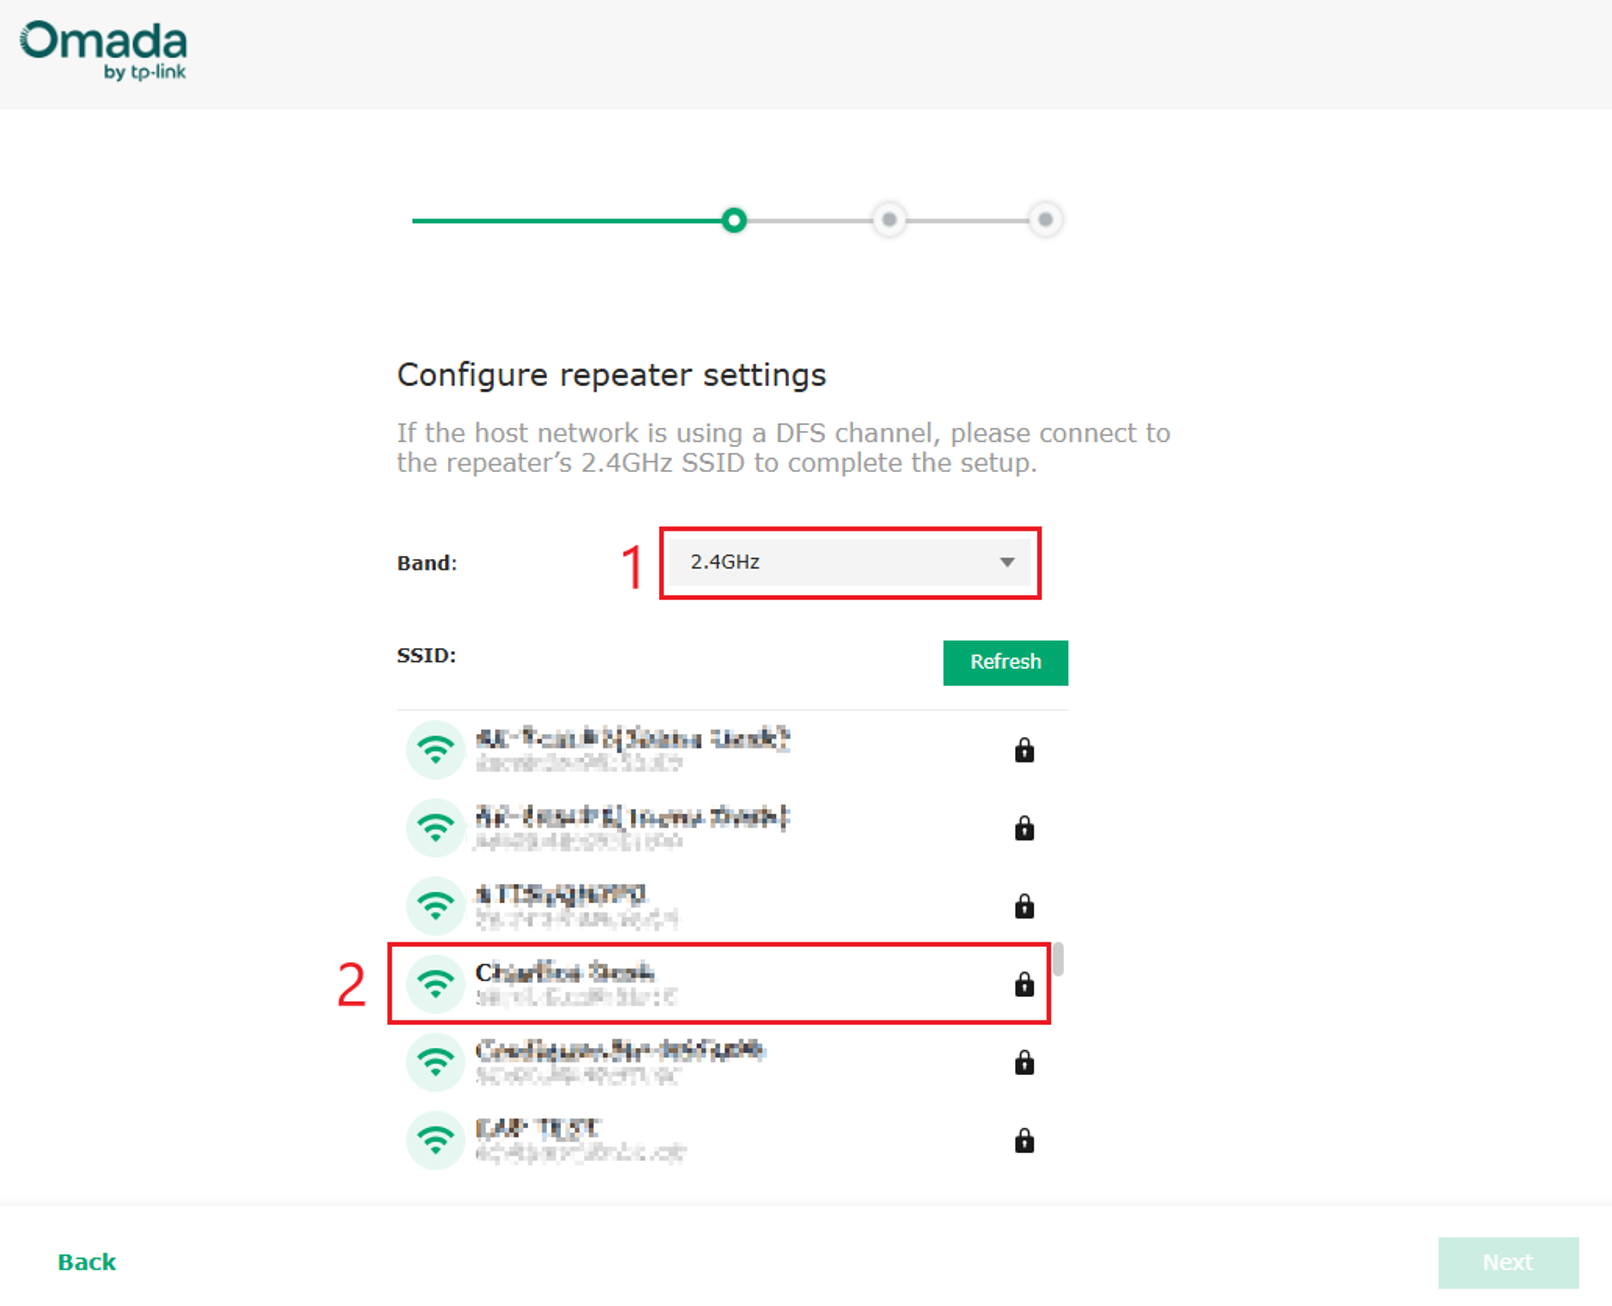
Step 6. Configure the SSID to be repeated. Click Refresh to scan for available networks. You can also click Other to manually enter the SSID and password to bridge a hidden network. Select the Band and the SSID to be repeated.
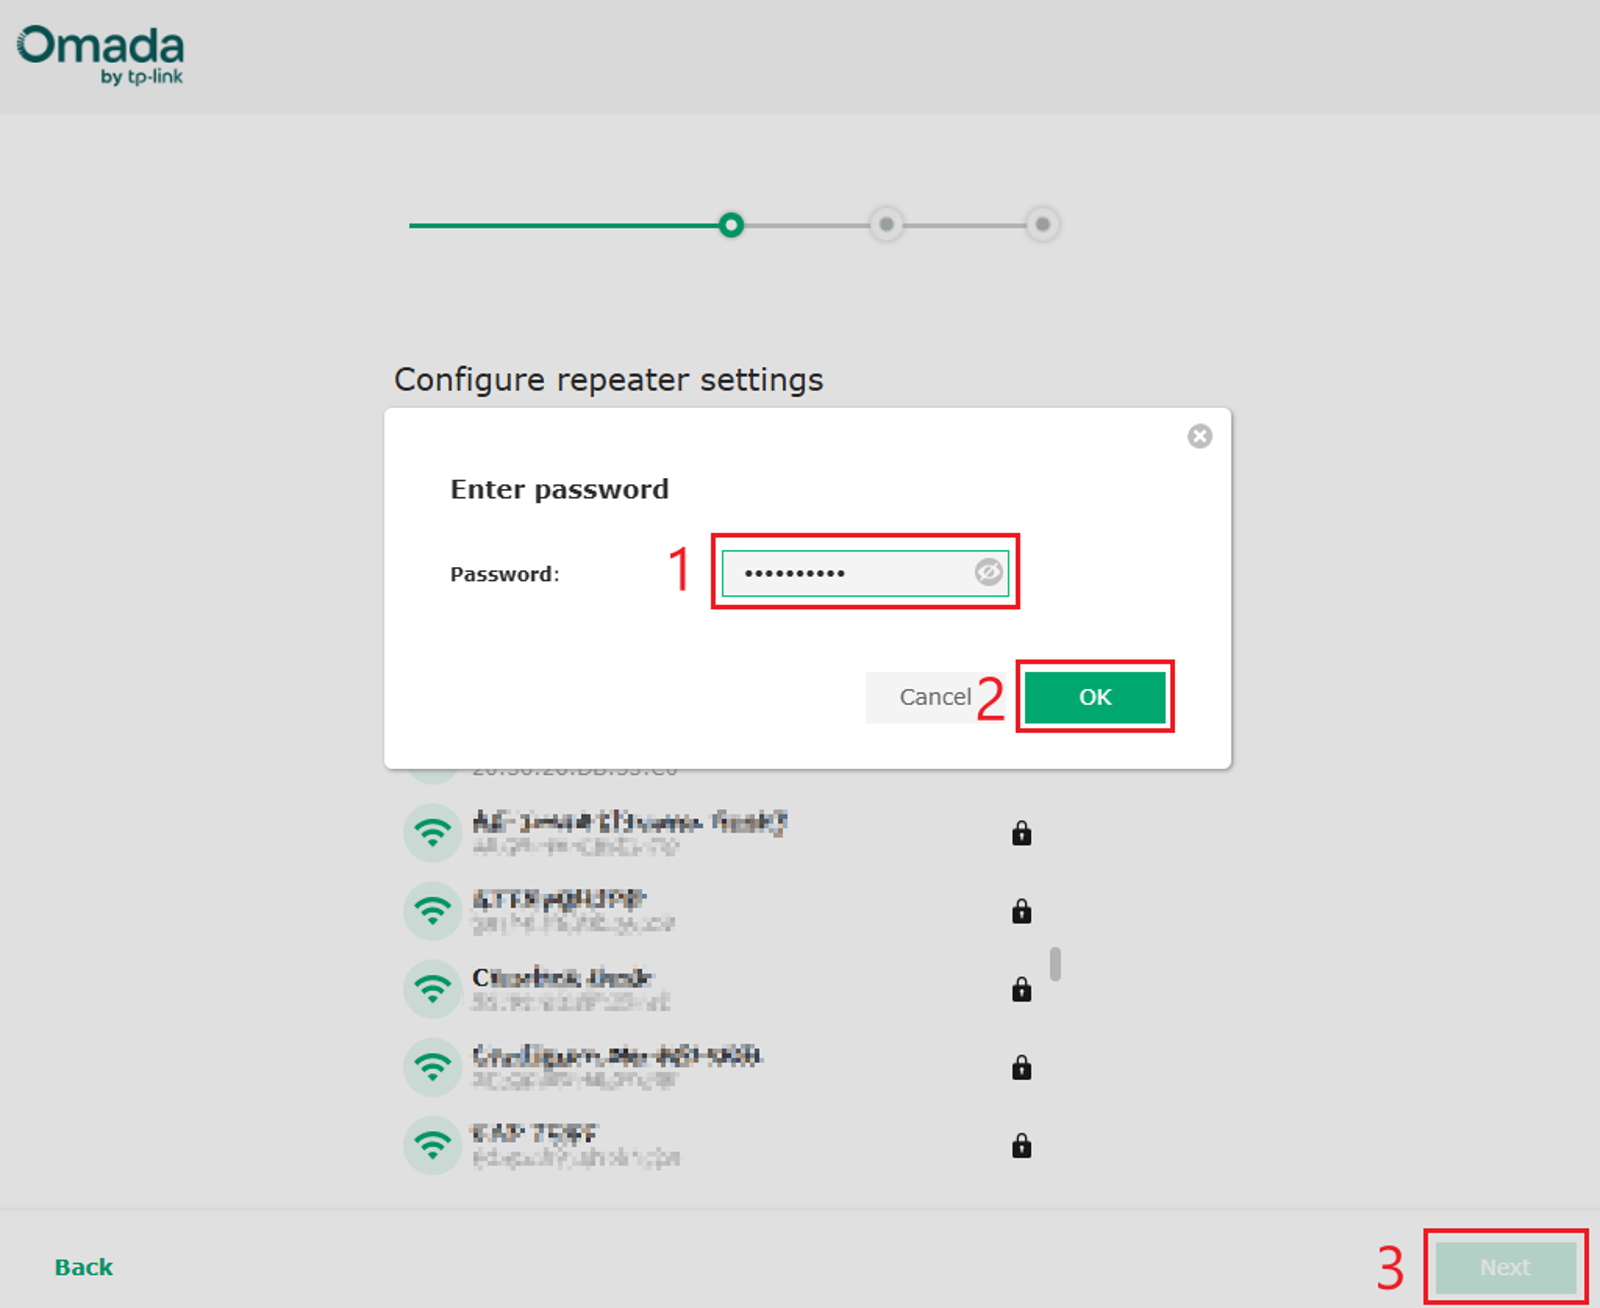
Step 7. A password prompt will appear. Enter the password for the SSID > OK > Next.
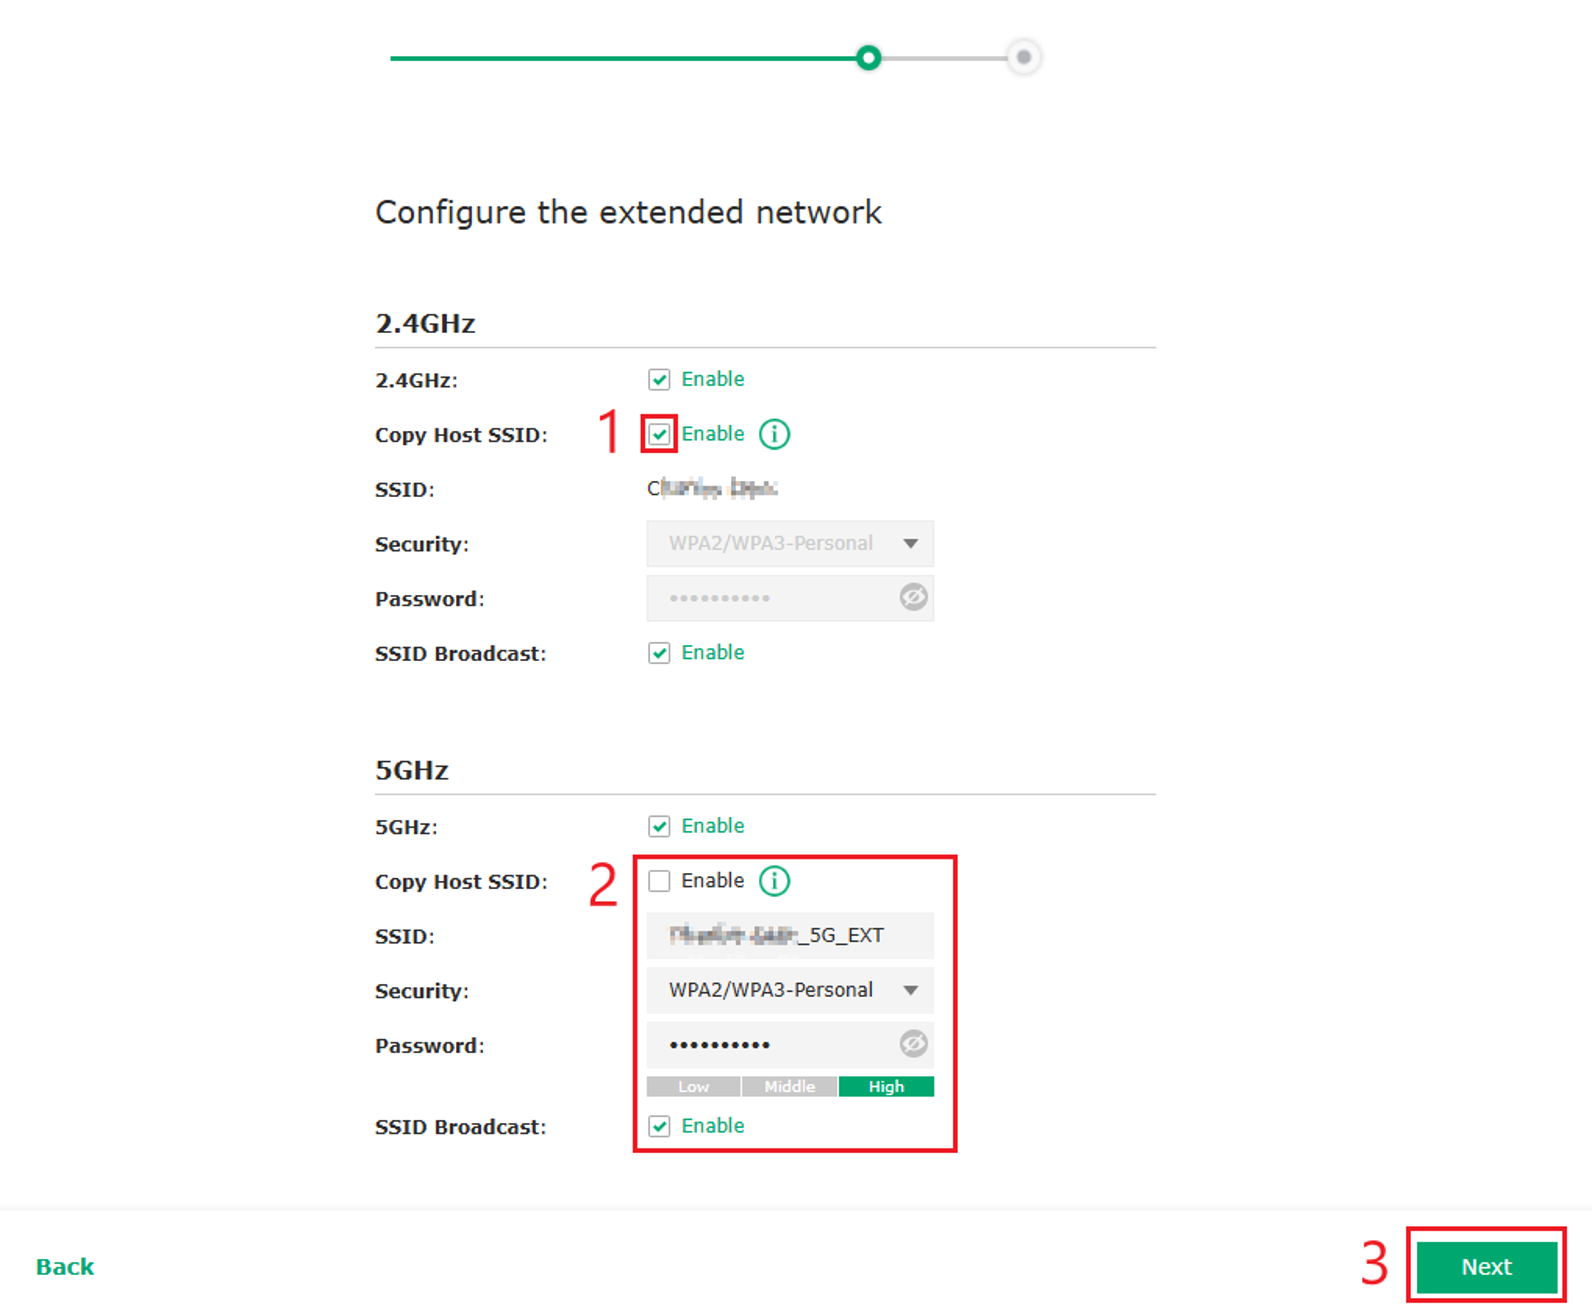
Step 8. Configure the extended network. Select Copy Host SSID then Next.
Note: Generally, for most deployments Copy Host SSID is the most common setting. To create a different extended SSID, disable Copy Host SSID and enter the desired SSID settings. The 5GHz band below is an example of this configuration labeled as “2”.
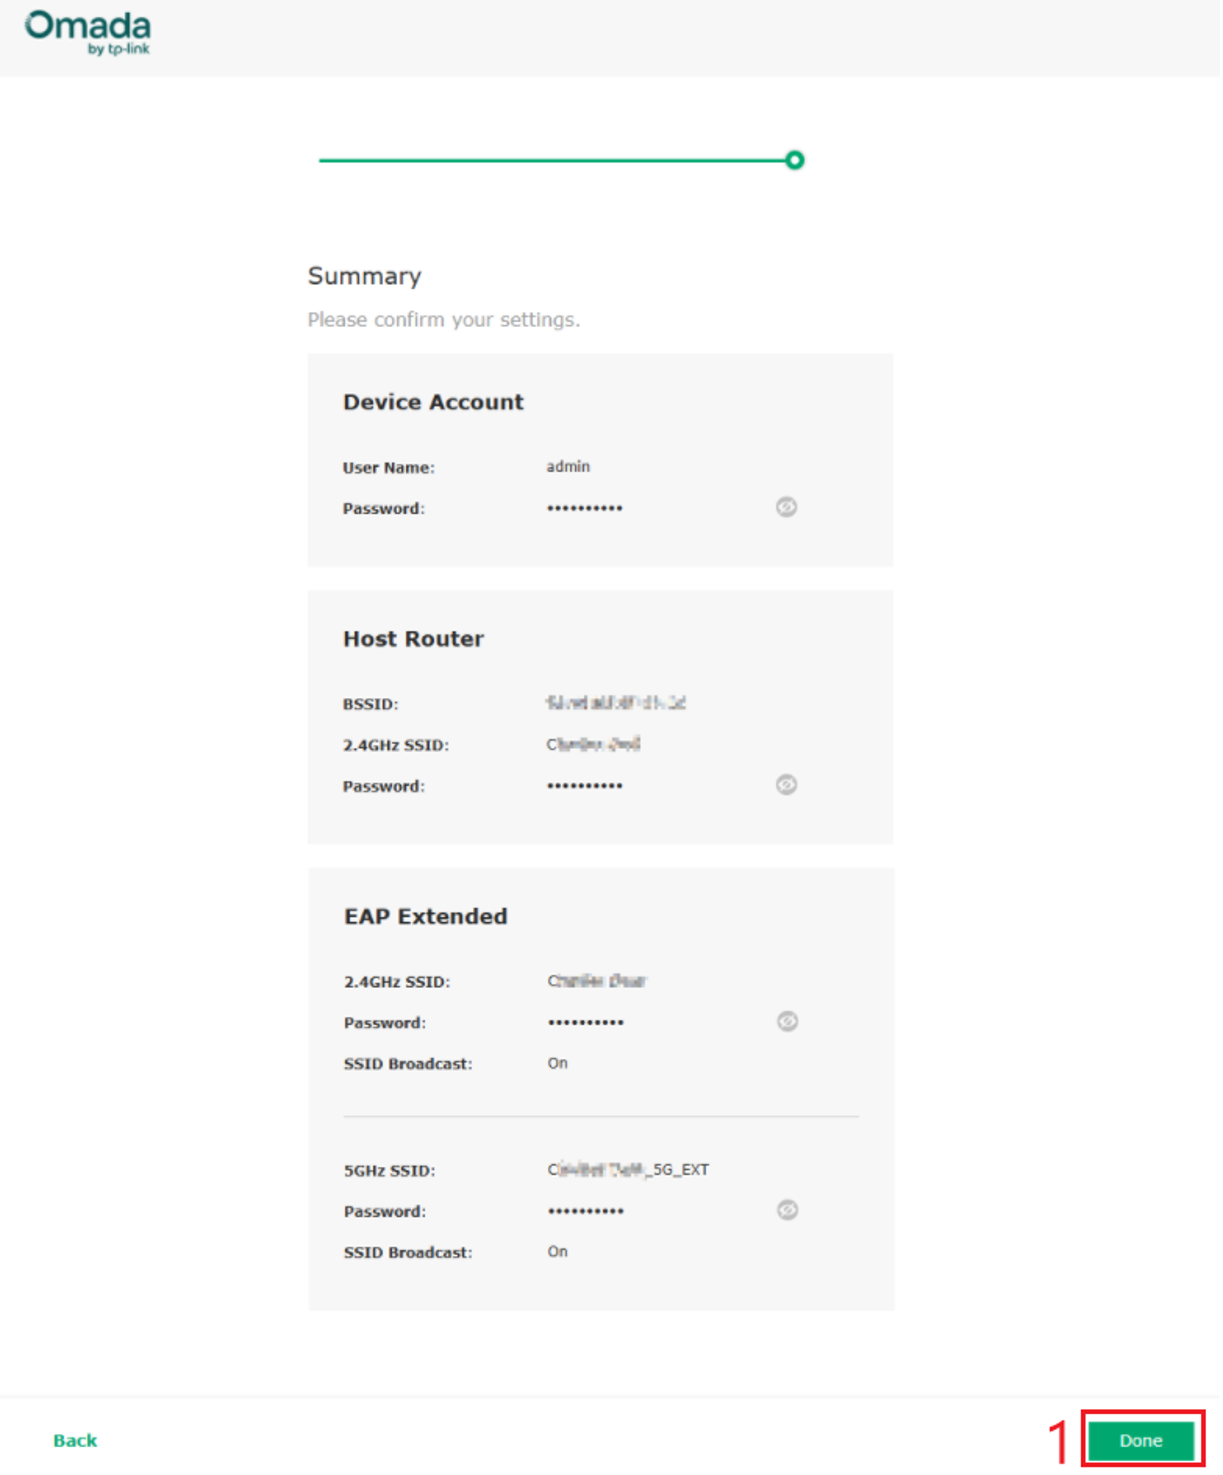
Step 9. A Summary screen will mark the last step of configuration. Remember to note down any passwords used during configuration. Select Done.
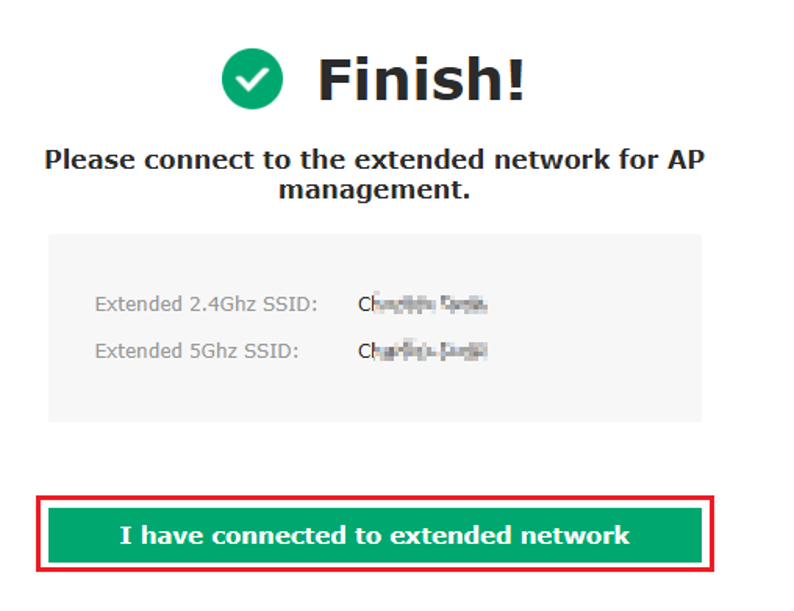
Step 10. The EAP will now configure the settings and the Finish! screen will appear. Connect to the SSID to enjoy the extended range of repeater mode. After connecting, select I have connected to extended network.
Configuration for Omada App
This section describes the configuration for repeater mode using the Omada App. Install or update the Omada App on your mobile device. Power on the Omada EAP. On a mobile device, connect to the SSID displayed on the label of the Omada EAP. The SSID will appear as TP-Link_2.4GHz/5GHz_xxxx or Omada_2.4GHz/5GHz_xxxx. Open the Omada App.
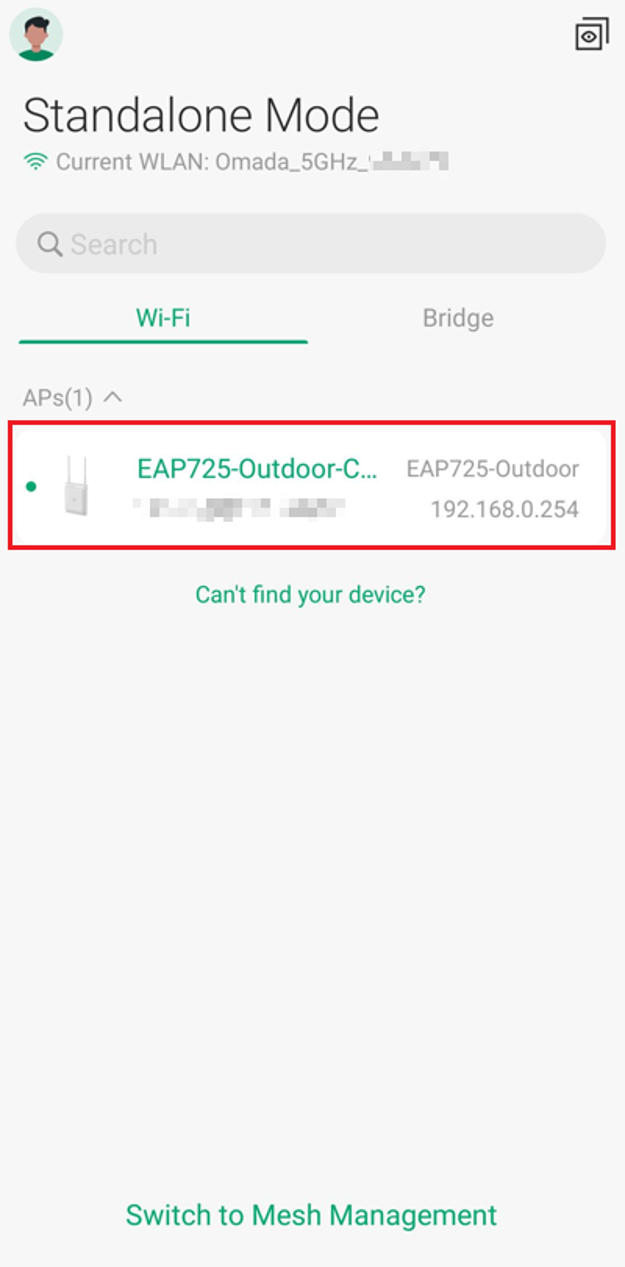
Step 1. Find the desired Omada EAP within Standalone Mode in the Omada App. Select the device to begin configuration.
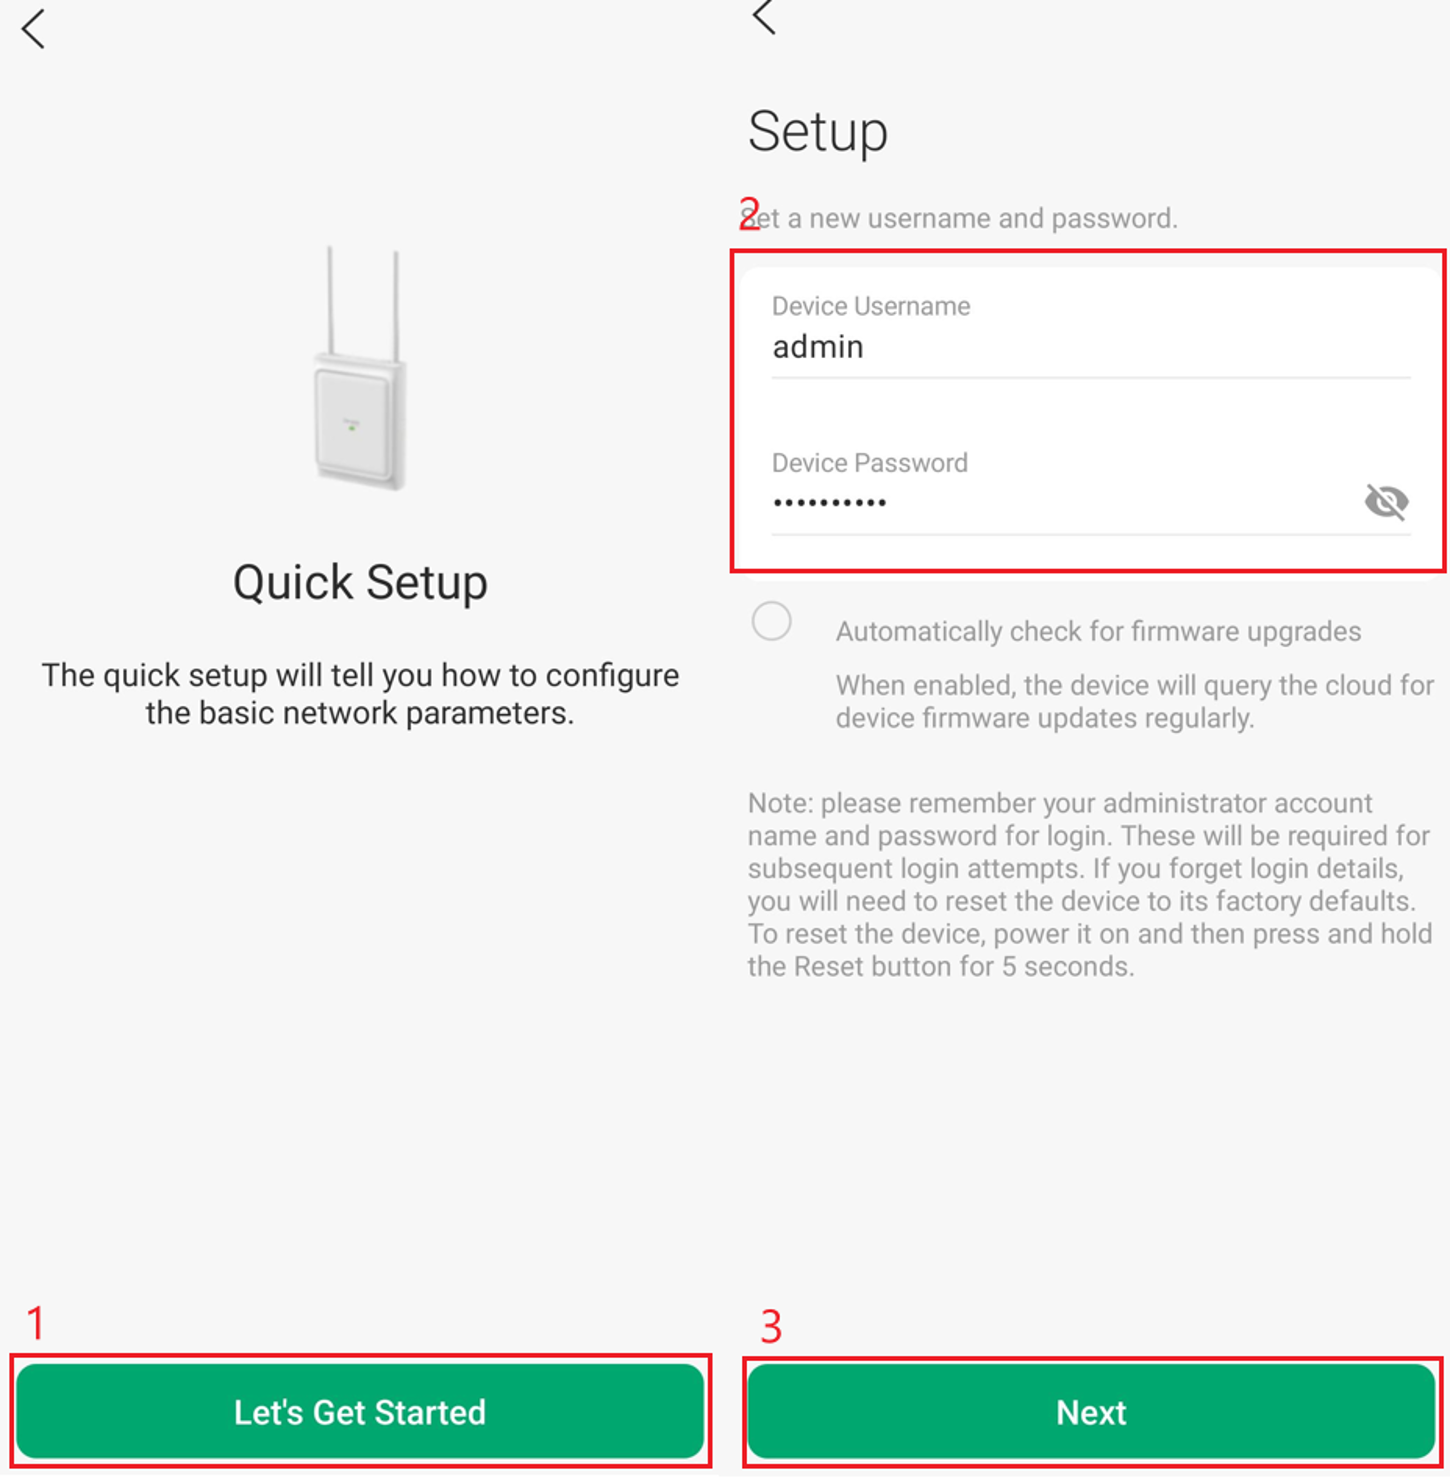
Step 2. Select Let’s Get Started, input your desired Device Username and Device Password. Select Next.
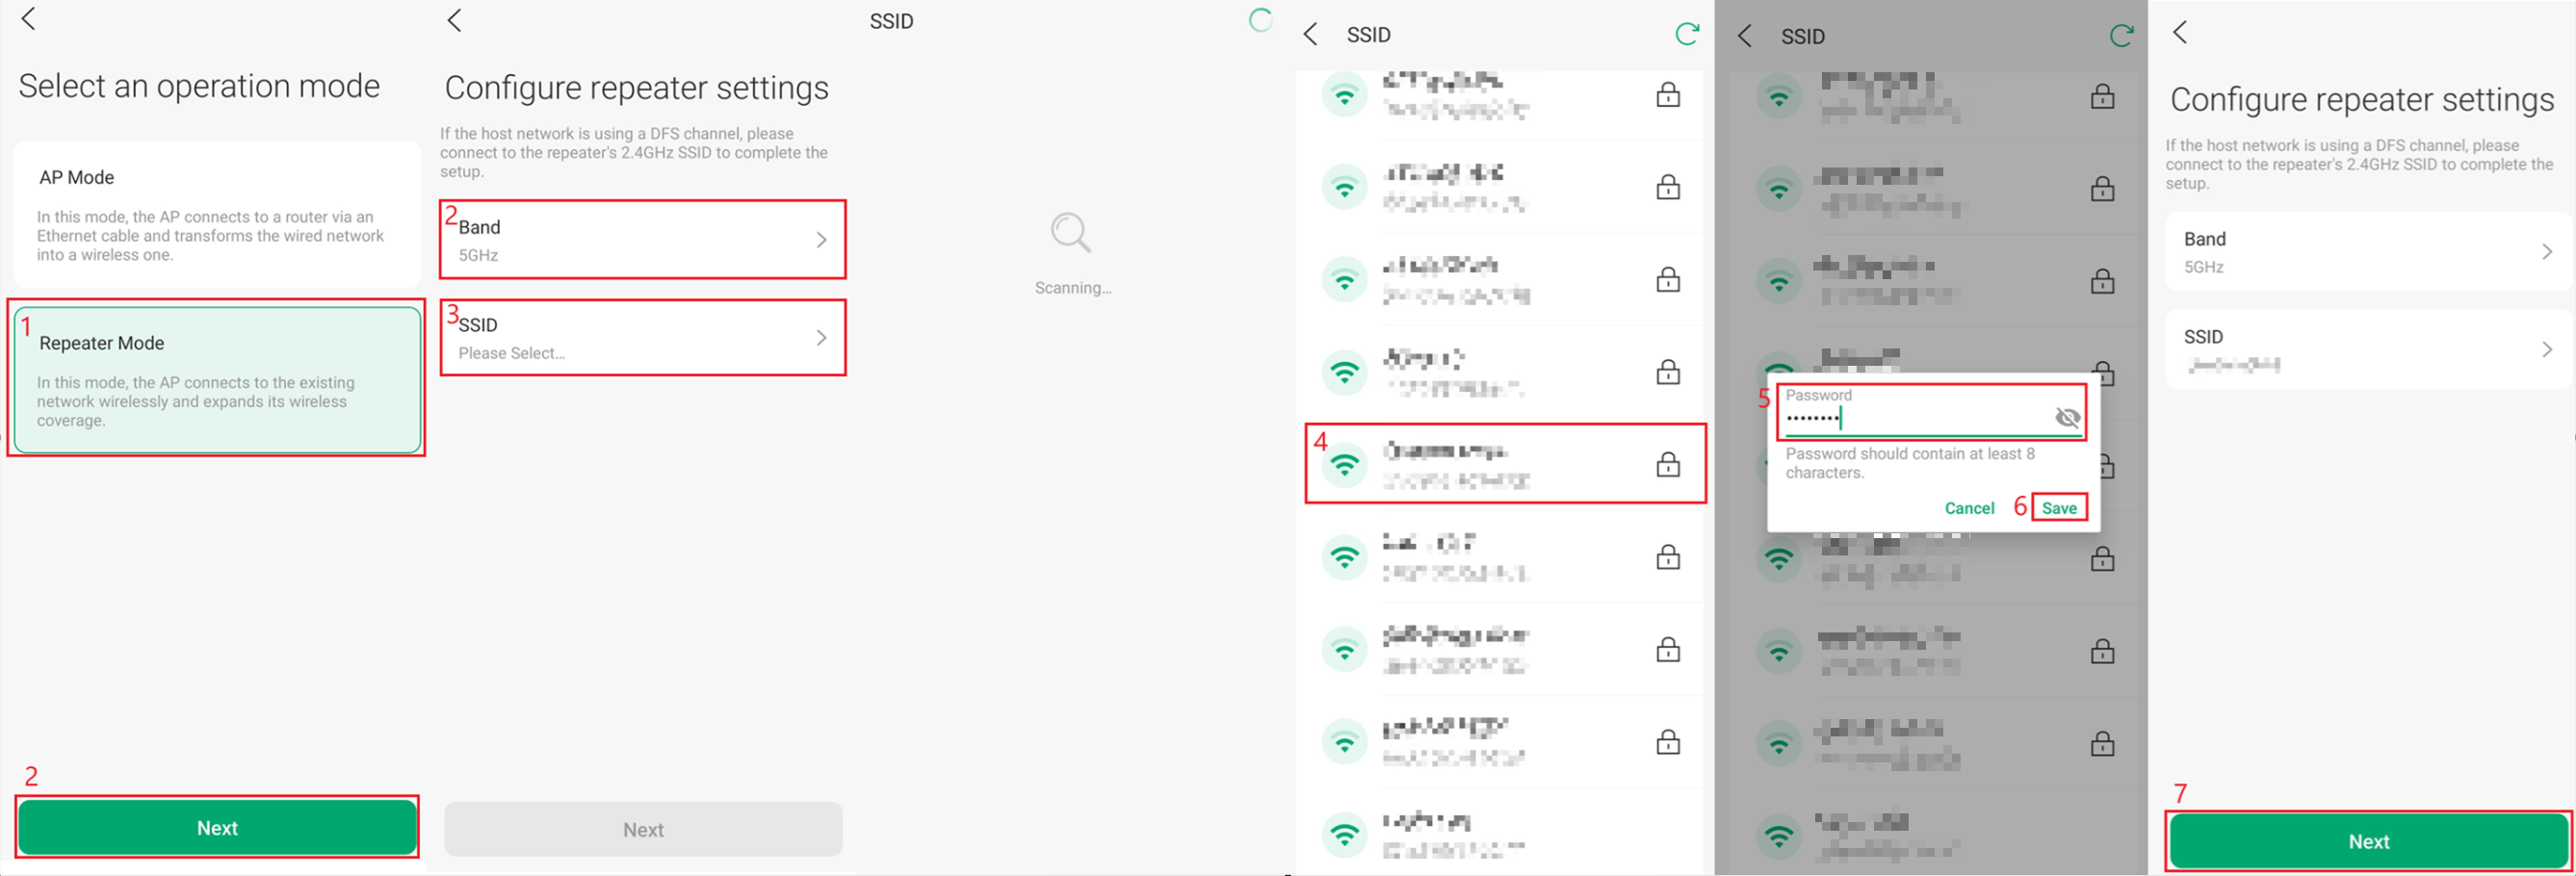
Step 3. Select Repeater Mode, select Next. Configure the Band and SSID. After selecting SSID, the EAP will scan for available SSIDs. Select the SSID you would like to configure as a Repeater. Enter the Password for this SSID and select Save. Select Next to progress to the next configuration step.
Note: Selecting the Other option to manually enter the network information. If a host device hides its SSID, the EAP may not detect it during scanning, so the SSID must be entered manually.
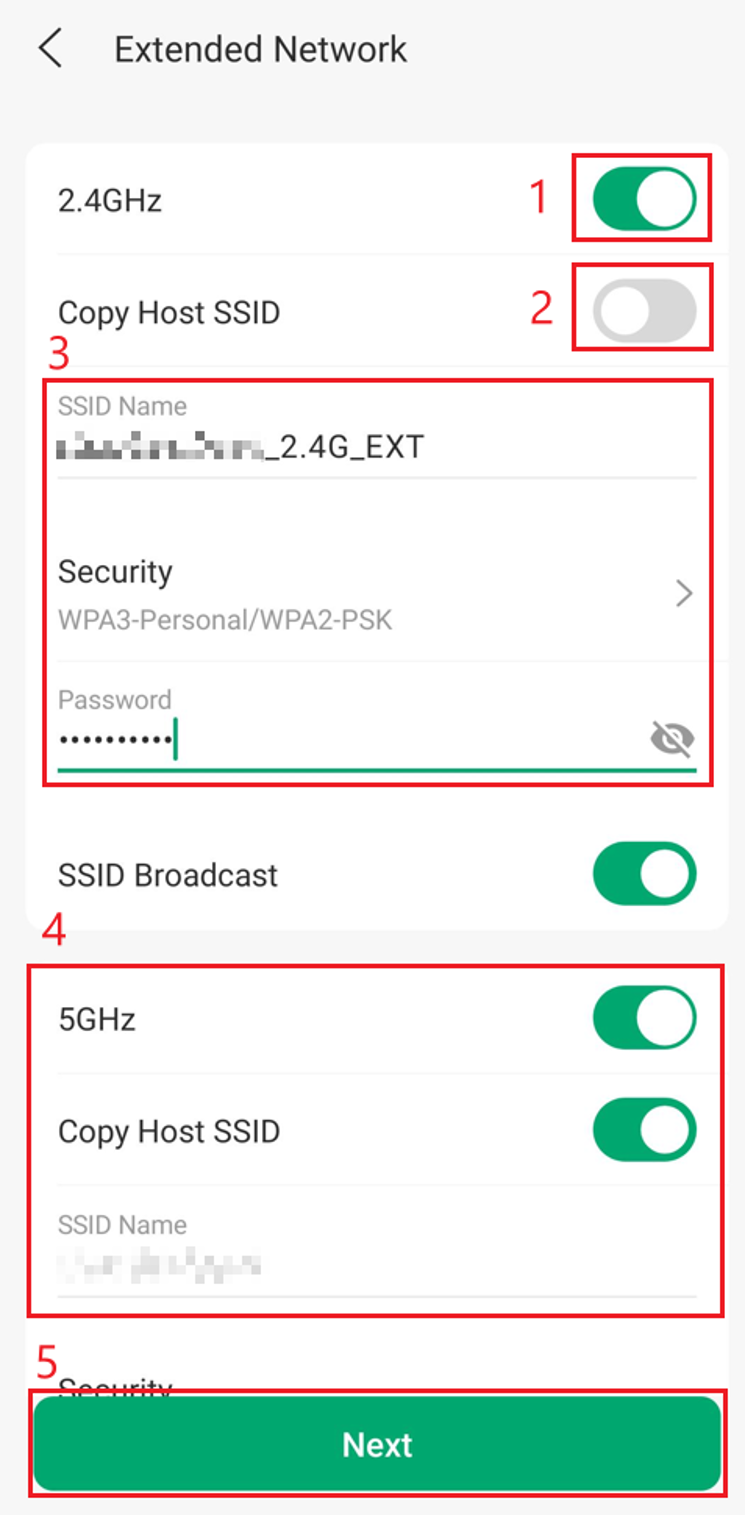
Step 4. Configure the Extended Network. There are two different configurations below for each SSID.
- If you would like to configure a new SSID to connect to, do not select Copy Host SSID and configure an SSID Name and Security settings. The 2.4GHz settings provide an example of this configuration.
- If you would like the same SSID, simply select Copy Host SSID and select Next. The 5GHz settings are an example of this configuration.
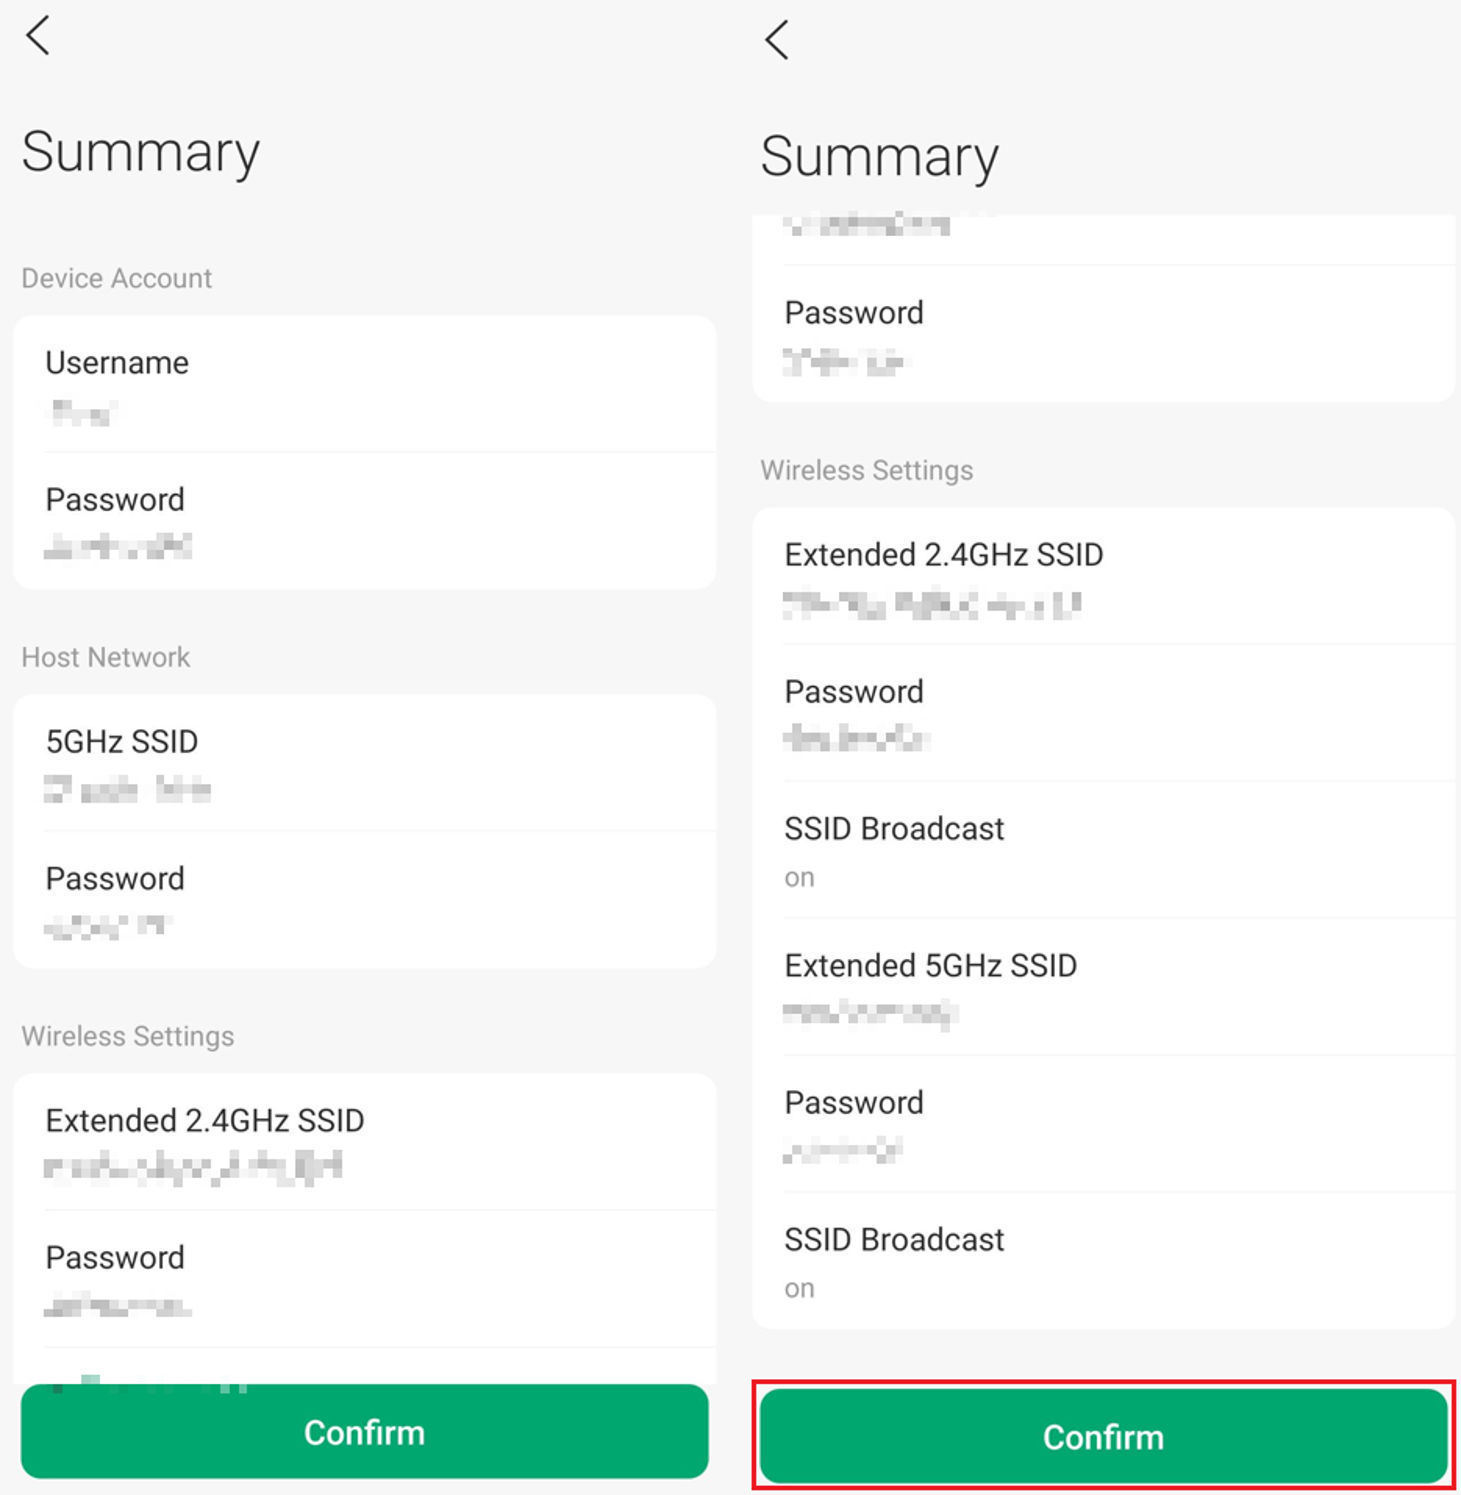
Step 5. Review the configuration before selecting Confirm.
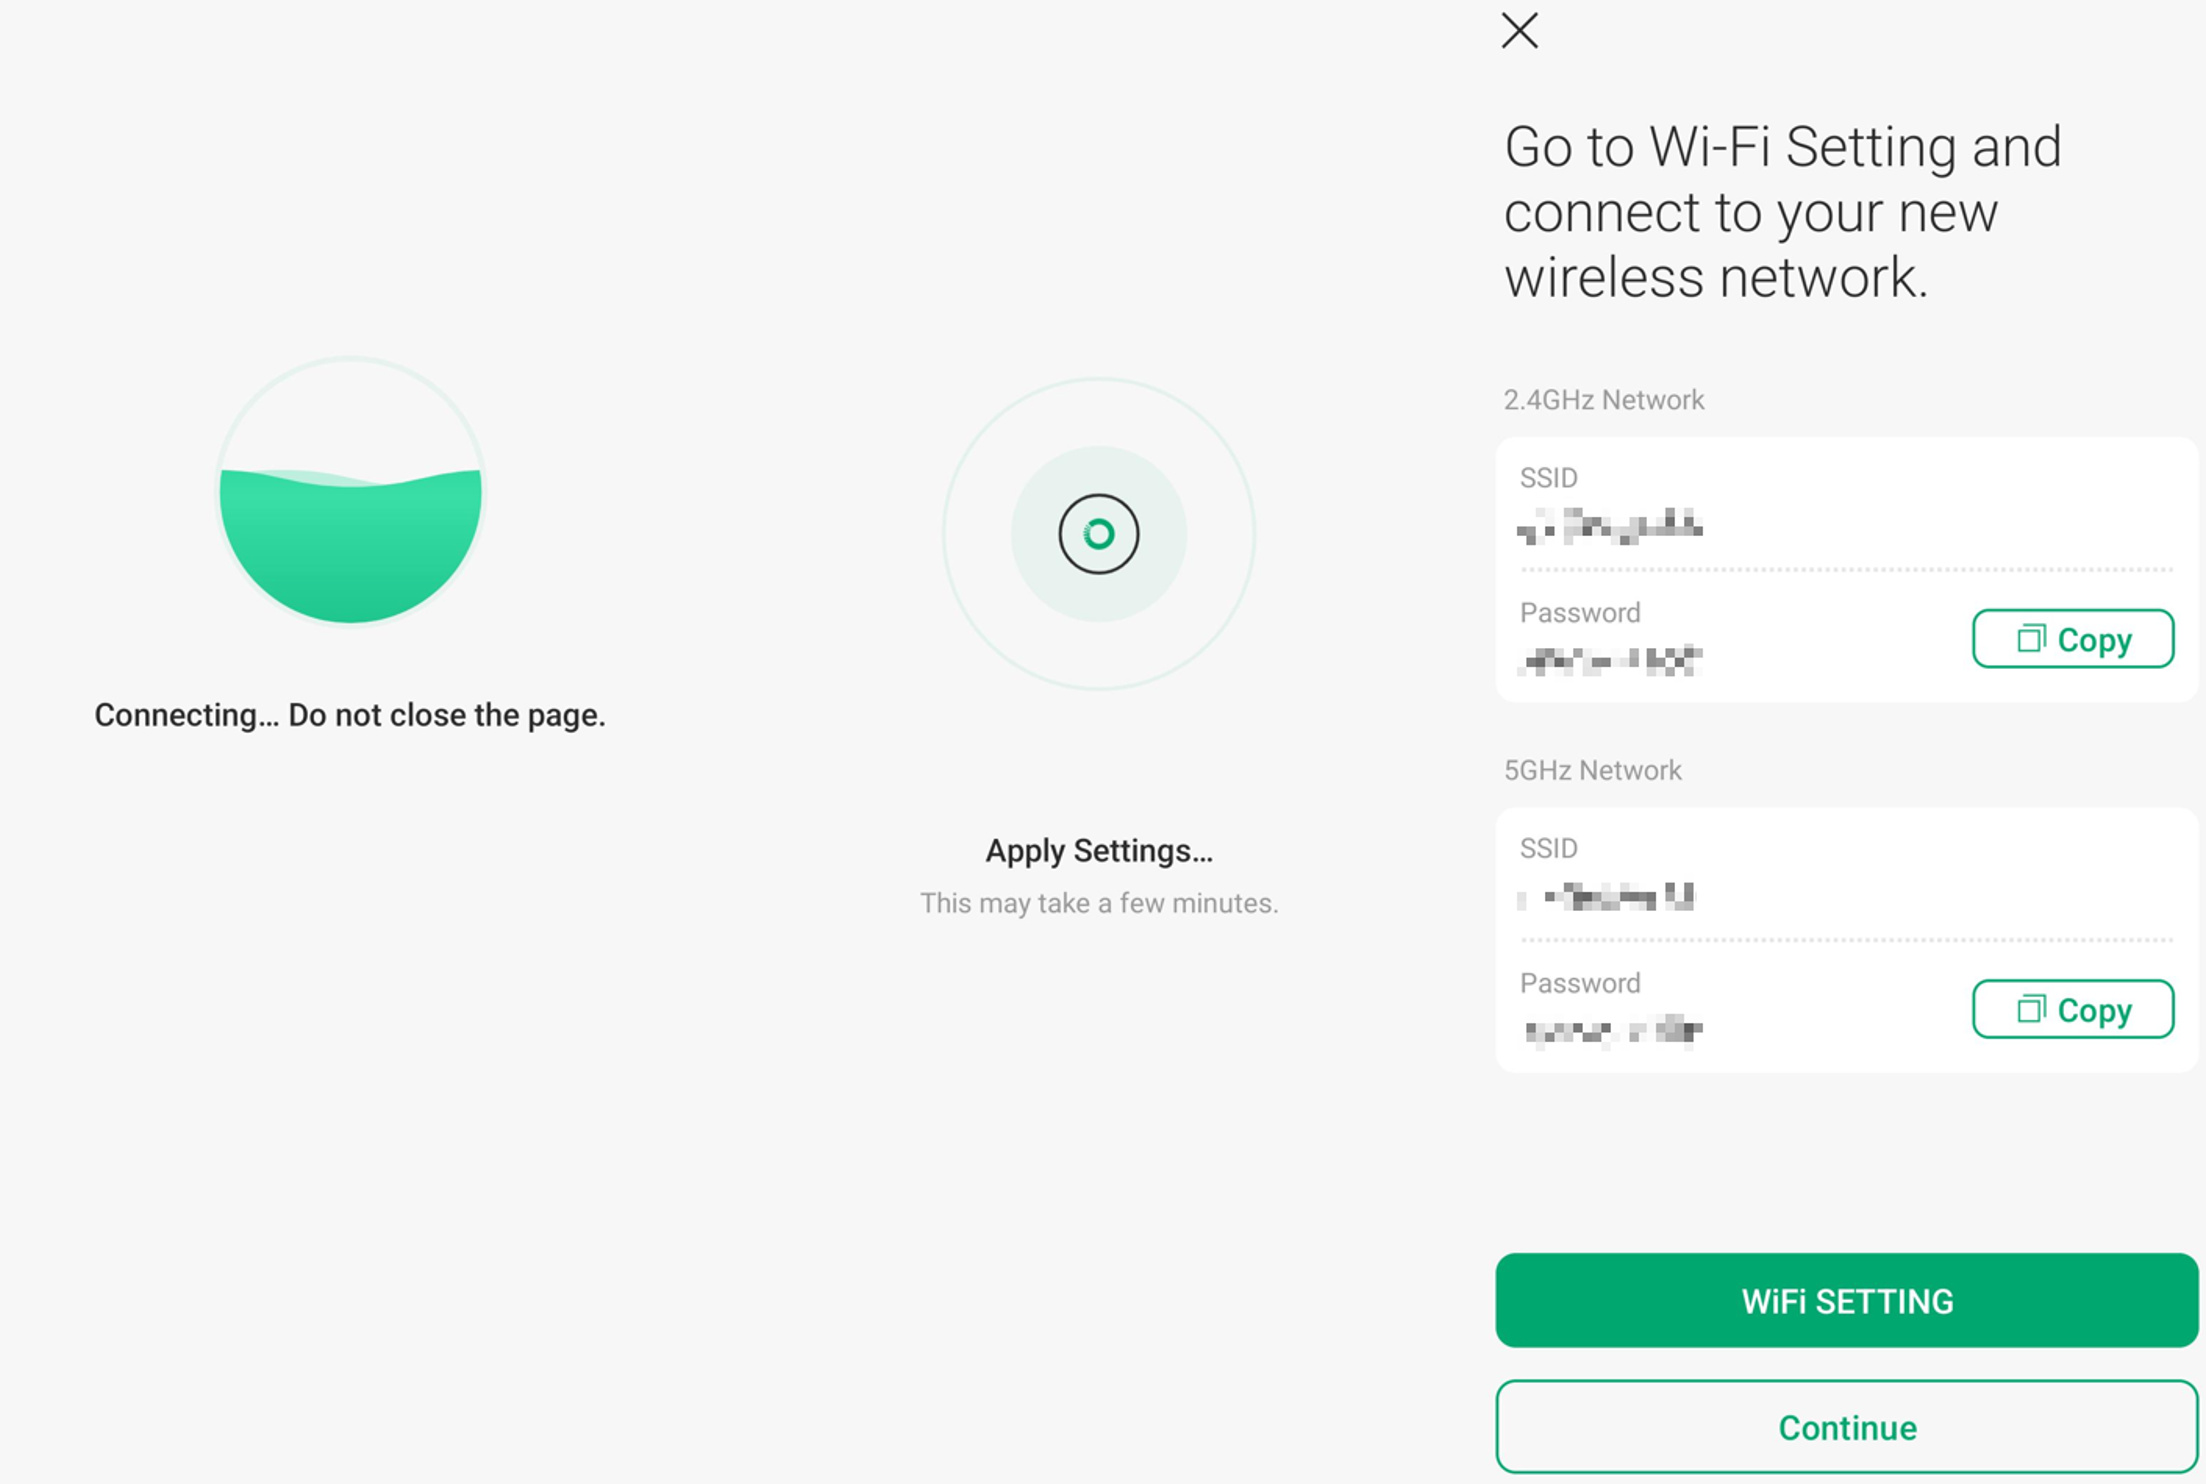
Step 6. The Omada EAP will connect and apply settings. Once it is finished, you will be shown a screen displaying the Wi-Fi Settings that you can connect to.
Conclusion
You have now configured your Omada EAP in Repeater mode using either the standalone web interface or the Omada App. The EAP can now connect wirelessly to the host network and extend Wi-Fi coverage to the desired area.
QA
Q1: I received the error: No Host Network Connection, what should I do?
A1: Verify your host network credentials, including the SSID and Password. Make sure the Omada EAP Repeater is close enough to the host router or access point to receive a strong signal and can connect to the SSID. If you have wireless MAC Filtering, wireless access control, or access control list (ACL) on your router, disable them and try again.
Q2: Will Repeater mode reduce Wi-Fi performance?
A2: Yes. Since the EAP uses the same wireless radio to receive and retransmit data, overall throughput is typically reduced compared to a wired uplink deployment.
Q3: Can I use different SSIDs for the extended network?
A3: Yes. You can copy the host network SSID to keep the same network name, or configure a different SSID and password for the extended network.
Q4: What is the recommended placement for the repeater EAP?
A4: Place the EAP within a strong and stable signal range of the host AP, not at the edge of coverage. This ensures reliable backhaul connectivity and better overall performance.
Q5: Can I repeat both 2.4GHz and 5GHz at the same time?
A5: No. Omada Outdoor EAPs support only single-band wireless bridging.
Q6: Can I set this up initially connected to a Router or PoE Switch?
A6: Yes, but this method is not recommended. Once repeater mode has been configured, disconnect the Ethernet cable before using the EAP as a repeater. Leaving the wired connection active may create a network loop. Move the EAP to the desired location and connect it only to a power source.
To learn more about each function and configuration, please visit Support Home to download or check the manual for your product.
