


Contents
Configuration Methods for adding devices:
Add Devices Through IP Address
Introduction
Omada Fusion Pro Gateway integrates networking and security functions into a single platform and supports the adoption and management of Omada Security devices. This article explains how to add Omada IPC cameras, Omada NVRs, and Omada SightCast devices to an Omada Fusion Pro Gateway through both the web interface and the Omada Guard App.
Requirements
- Omada Fusion Pro Gateway
- Omada IPC/NVR/SightCast with a supported firmware version
Configuration Methods for adding devices:
Methods for adding devices:
Add Devices on the Web Page
Connect the Omada Security device to the same network as the Omada Fusion Pro Gateway. Then go to Omada Guard > Devices and click the Adopt button to add the device.
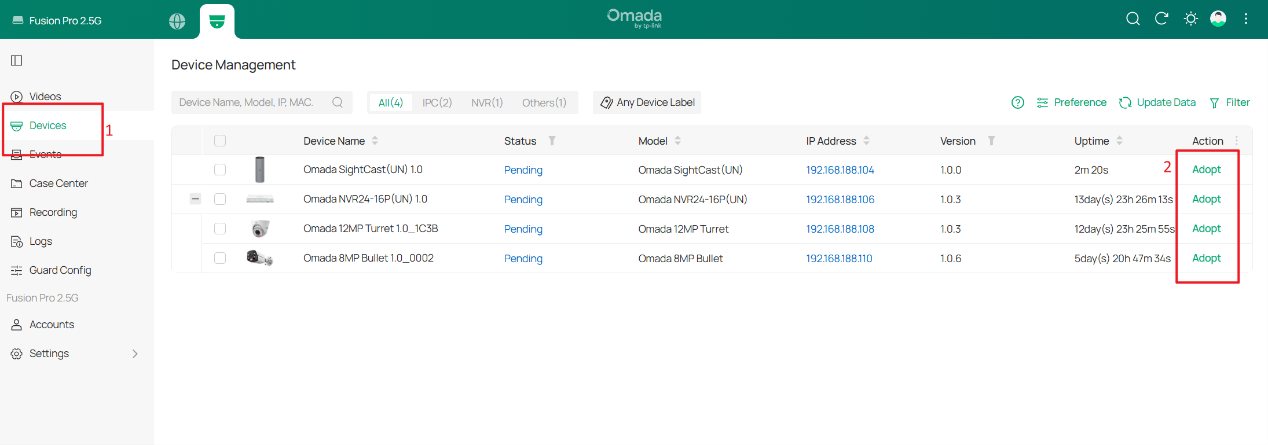
If the device cannot be discovered, please check the following:
- Ensure the device is powered on and operating normally.
- Ensure the device is connected to the network and reachable by the Fusion Pro Gateway.
- Verify that the device is not already managed by another controller or platform.
- For third-party cameras, ensure ONVIF is enabled.
- Verify that the device model and firmware version are supported.
- Ensure Omada Guard is running the latest version.
Add Devices Through IP Address
Omada NVR/IPC:
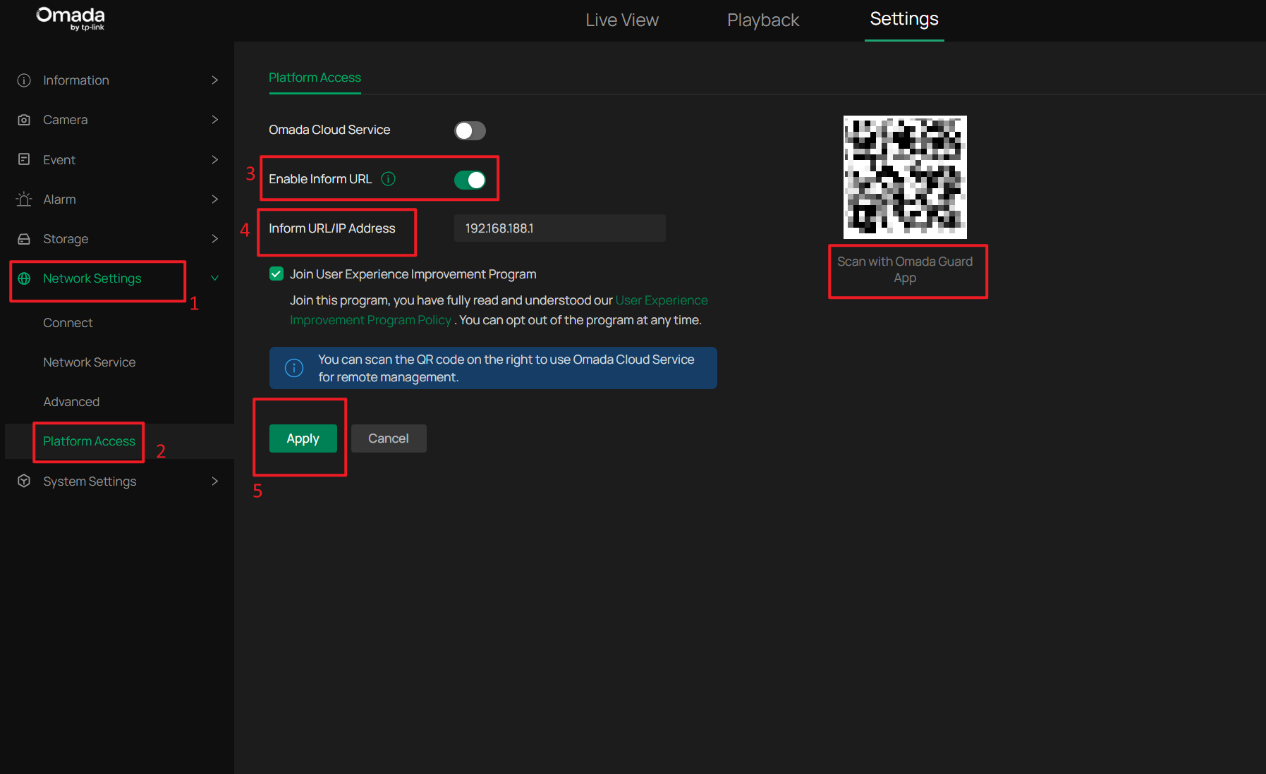
You can manually specify the Fusion Pro Gateway IP address to allow the device to discover and connect to Omada Guard. This method is commonly used in Layer 3 deployments.
Go to Network > Platform Access, select the appropriate platform access mode, and enter the IP address of the Omada Fusion Pro Gateway.
Add Devices on the App
Step 1. Detect the Omada Fusion Pro Gateway
Download and install the Omada Guard App.
Local Mode
Ensure your mobile device and the Fusion Pro Gateway are connected to the same local network.
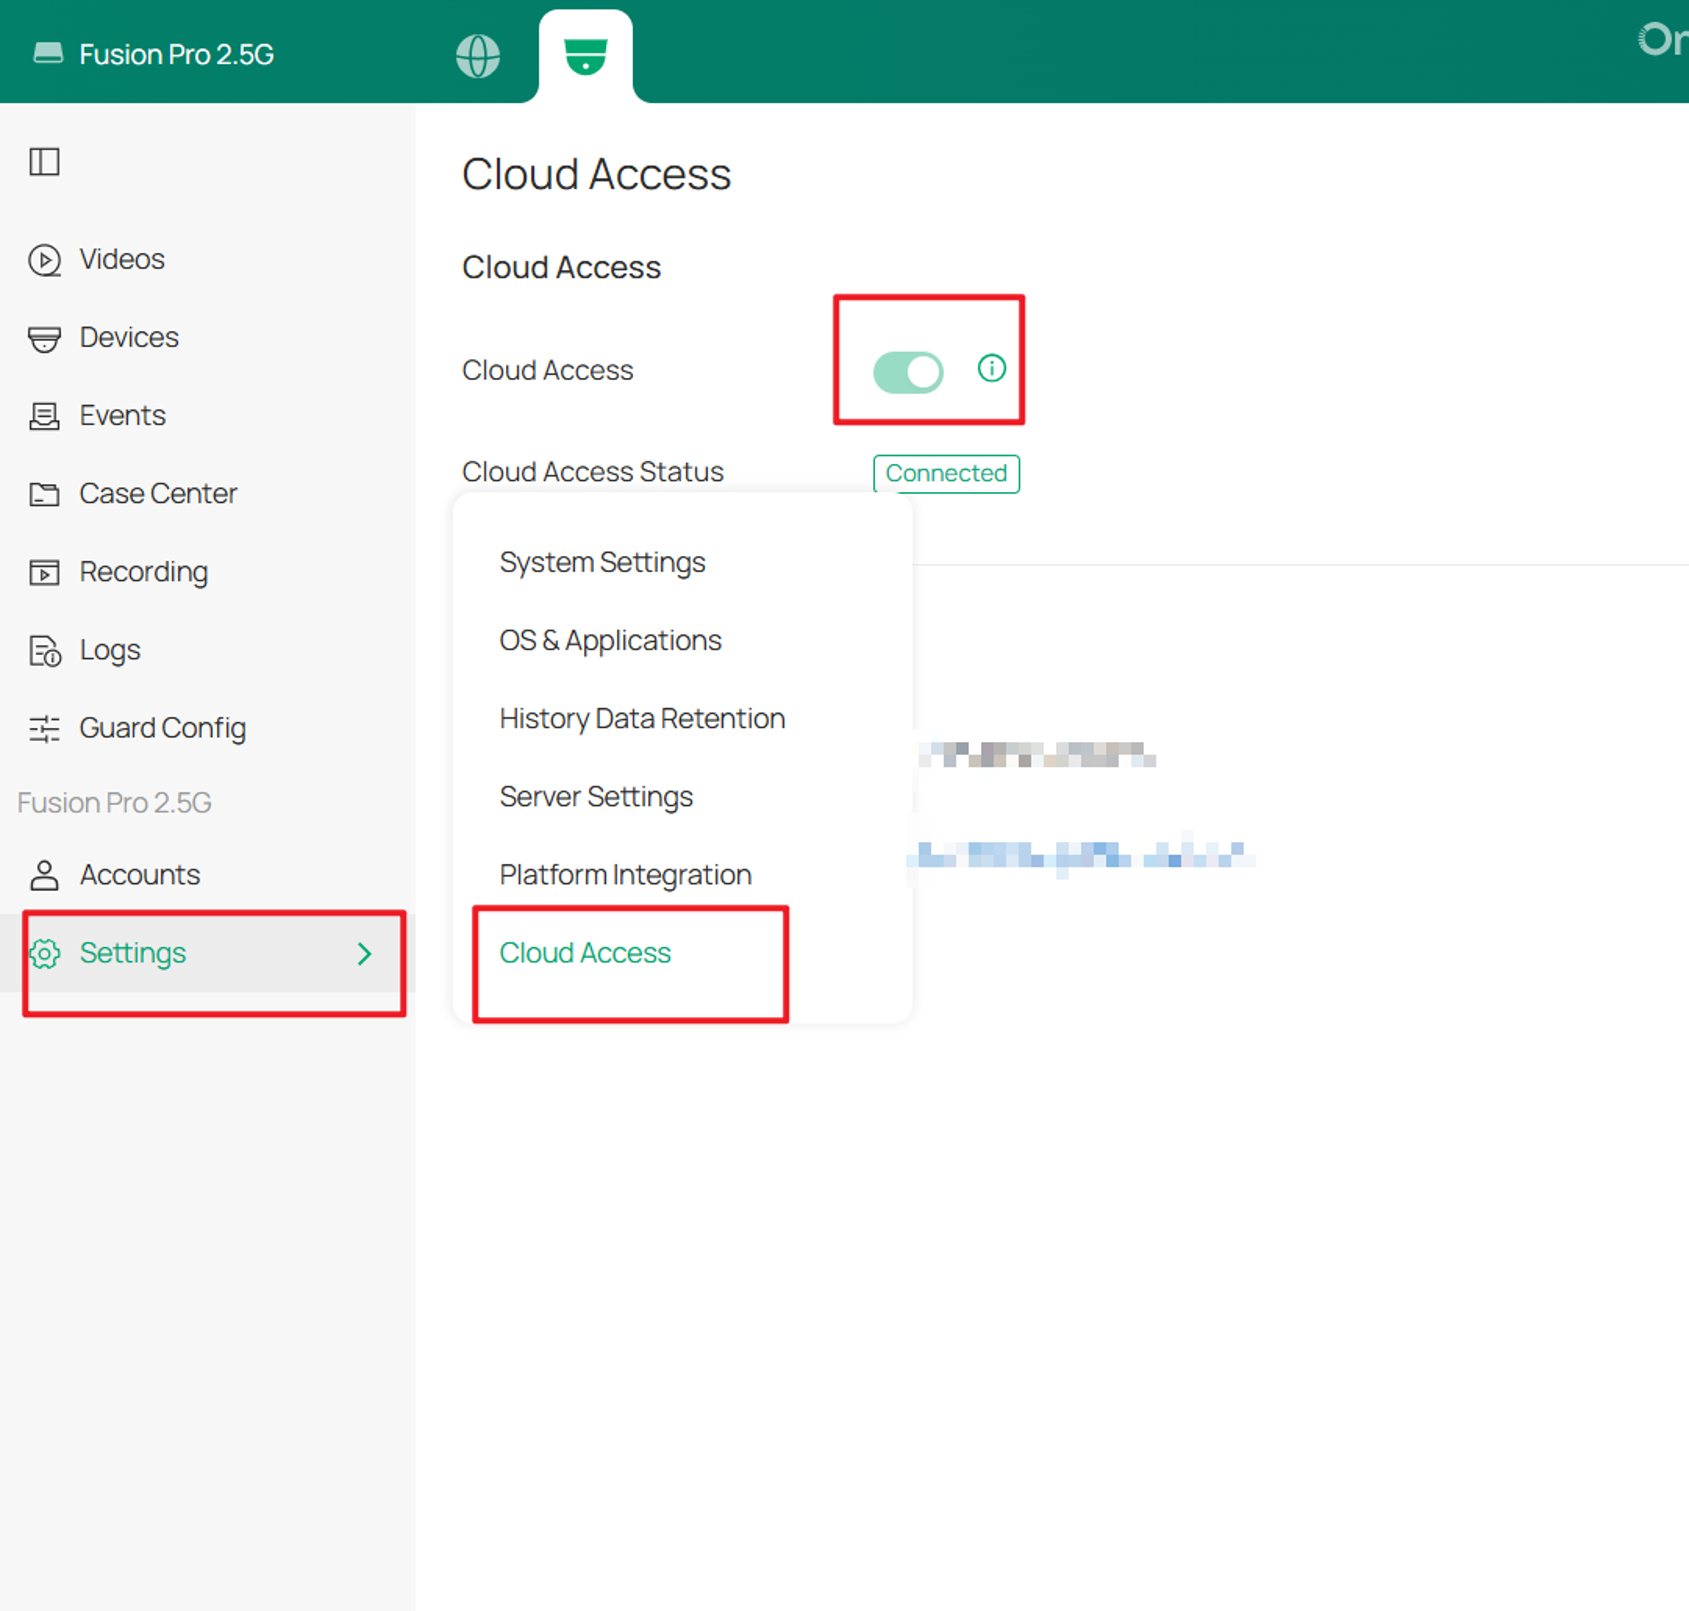
Cloud Mode
Bind your TP-Link ID to Omada Cloud. After binding is completed, you will be able to discover and manage the Fusion Pro Gateway remotely through the app.
Step 2. Discover and Adopt Devices
Tap the Fusion Pro Gateway to enter the device management page.
On the Devices page, the Fusion Pro Gateway automatically scans and displays discoverable devices on the same network.
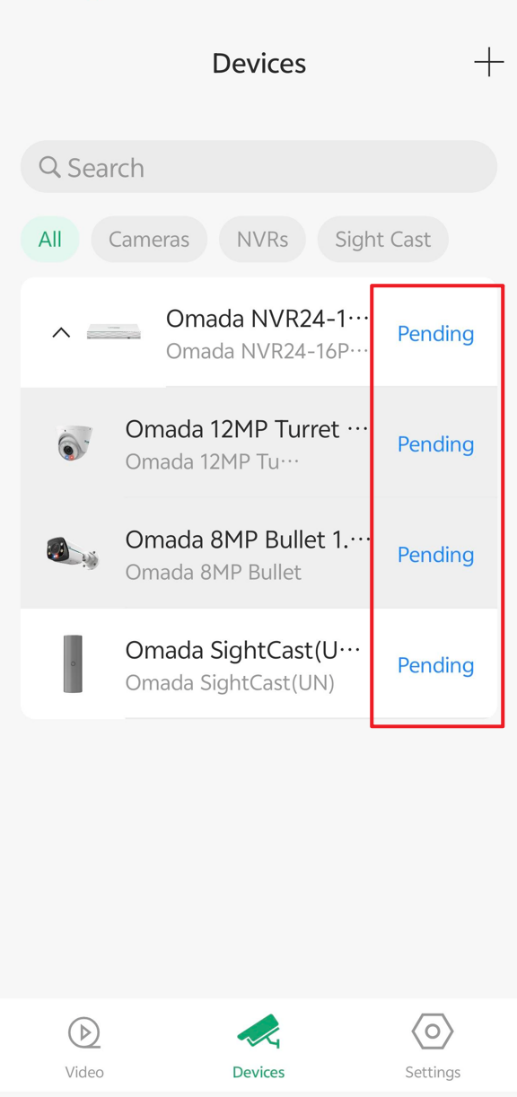
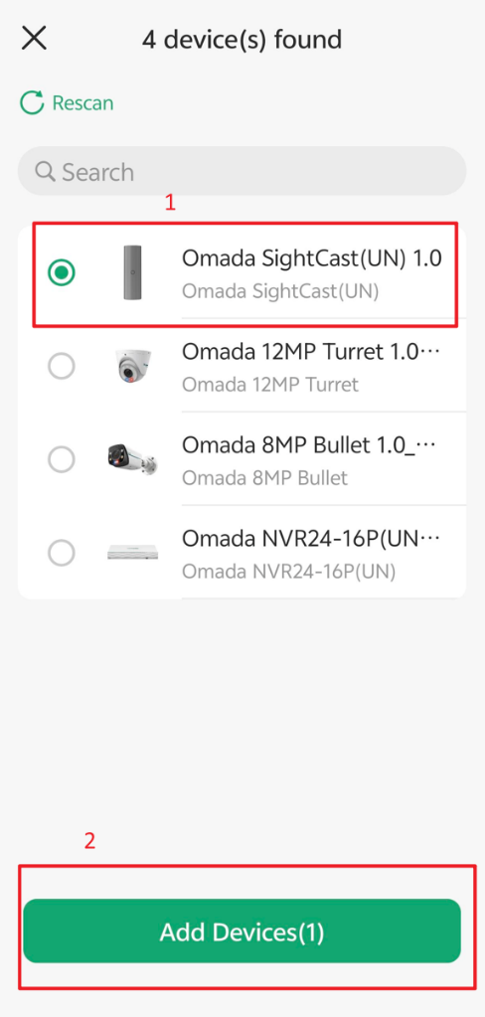
You can also tap the"+" icon in the upper-right corner to actively search for adoptable devices.
Select the device to be added, enter the device credentials, and confirm to start the adoption process.
Notes:
The default username is usually admin and may vary based on device initialization.
Devices must use the correct administrator password for verification.
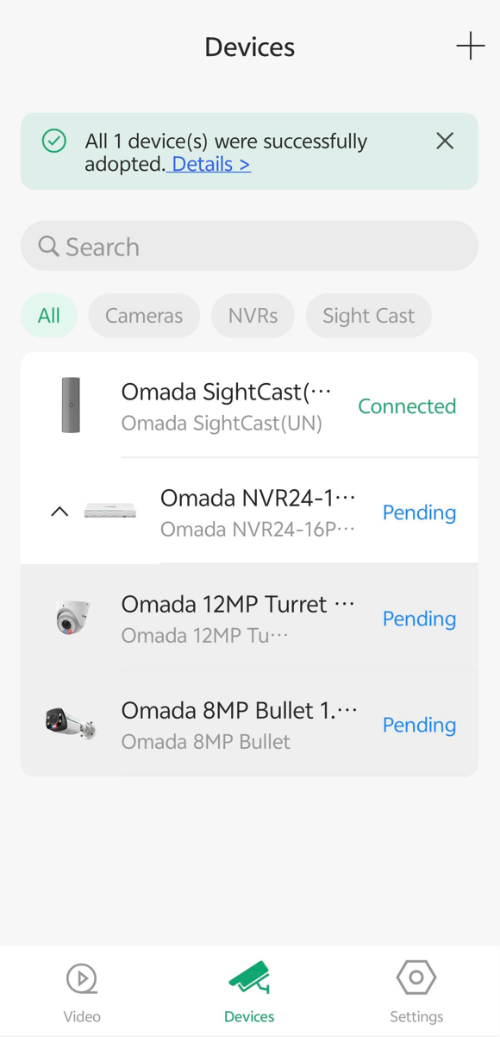
Step 3. After batch verification is completed, the validation results will be displayed. Tap Complete to return to the device list.
Possible results include:
- Successfully verified devices will be added with the status Connected.
- Devices that fail verification will display Adoption Failed.
- Some devices support re-verification after failure.
Note:
If all selected devices are in the Uninitialized state, they can be adopted directly without password verification.
If the maximum device capacity has been reached, additional devices cannot be selected for adoption.
The common status definitions are as follows:
|
Status |
Meaning |
|
Pending |
The device has not been adopted by the Fusion Pro Gateway. Uninitialized devices can be adopted directly; initialized devices require credential verification. |
|
Adopt Failed |
Device account or password verification failed. |
|
Managed by Others |
The device is currently managed by another controller or Fusion Pro Gateway. |
|
Unsupported Firmware |
The firmware version is too old to support adoption by the Fusion Pro Gateway. |
|
Not Initialized |
The device has not completed initialization and requires setup before adoption. |
|
Connected |
The device has been successfully adopted and is operating normally. |
Conclusion
This article explains how to add Omada Security devices, including Omada IPCs, Omada NVRs, and Omada SightCast devices, to an Omada Fusion Pro Gateway through both the web interface and the Omada Guard App.
To learn more about each function and configuration, please visit Support Home to download or check the manual for your product.
QA
Q1: Can third-party IPC devices be added to Omada Fusion Pro Gateway?
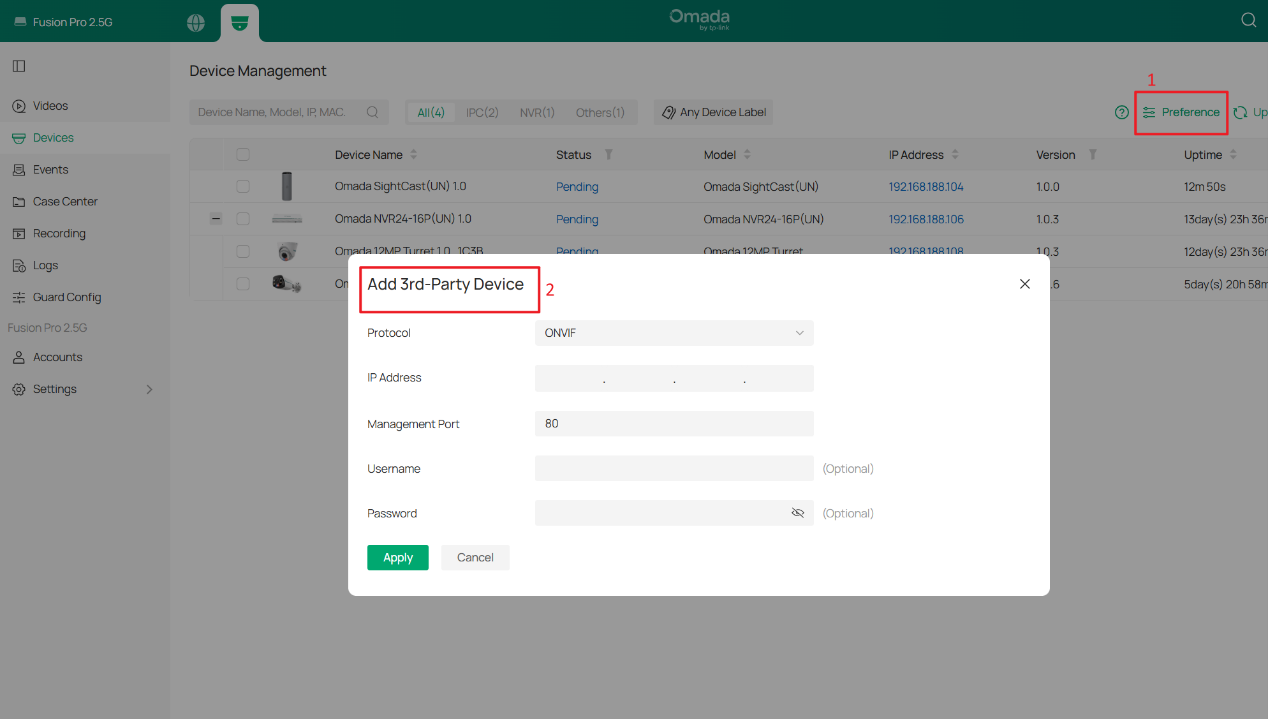
A1: Yes. Third-party devices can be added from Devices > Preference > Add 3rd-Party Device. Currently, third-party cameras that support ONVIF and RTSP protocols can be added to Omada Guard.
Q2: What is Omada SightCast?
A2: Omada SightCast is a lightweight HDMI video display endpoint designed for Omada Security deployments. Unlike IPCs and NVRs, SightCast does not record or manage cameras. Instead, it receives configuration from Omada Guard, pulls live video streams from authorized security devices, and displays them on external monitors or video walls through HDMI output.
Q3: Does Omada SightCast need to be adopted by Omada Fusion Pro Gateway?
A3: Yes. In managed deployments, Omada SightCast can be adopted by Omada Guard, allowing centralized configuration and video wall layout management from the Fusion Pro Gateway.
