


Step 2. Configure IP address on Mac
Introduction
When testing the speed of devices, iPerf can be used to measure the pure, maximum throughput of a local network without involving an ISP or external traffic. In this guide, we’ll walk through how to use iPerf to test the speed on macOS.
Note: The model of Mac used for this guide is Macbook Air running macOS Big Sur Version 11.7.10
We have some FAQ listed below about how to test the speed with iPerf.
For router: How to Use iPerf to Test the Speed on TP-Link Routers
For switch: How to Use iPerf to Test the Speed on TP-Link Switches
For EAP and wireless clients: How to Use iPerf to Test the Speed Between Omada EAP and Wireless Clients
For CPE in P2P network: How to Use iPerf to Test the Speed on TP-Link Outdoor CPE in a PtP Network
These FAQs are written with Windows computers. If you are using a Mac (by Apple Inc.), please refer to both this article and FAQs above for test.
Step 1. Install iPerf on Mac
Please visit the official website of iPerf to download the software: https://iperf.fr/iperf-download.php#macos.
Note: The version of iPerf used in this guide is iPerf3 (3.21)
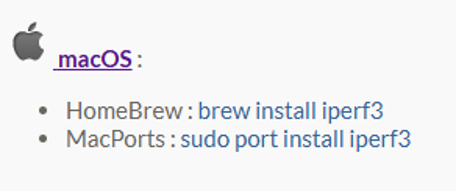
Currently, iPerf can be installed either by Homebrew or MacPorts, which are command-line package managers on macOS. I will install iPerf via Homebrew.
If you do not have Homebrew installed, here are the instructions.
Homebrew Installation Instructions
Open Terminal by pressing Command + Space and typing in Terminal then pressing Enter.
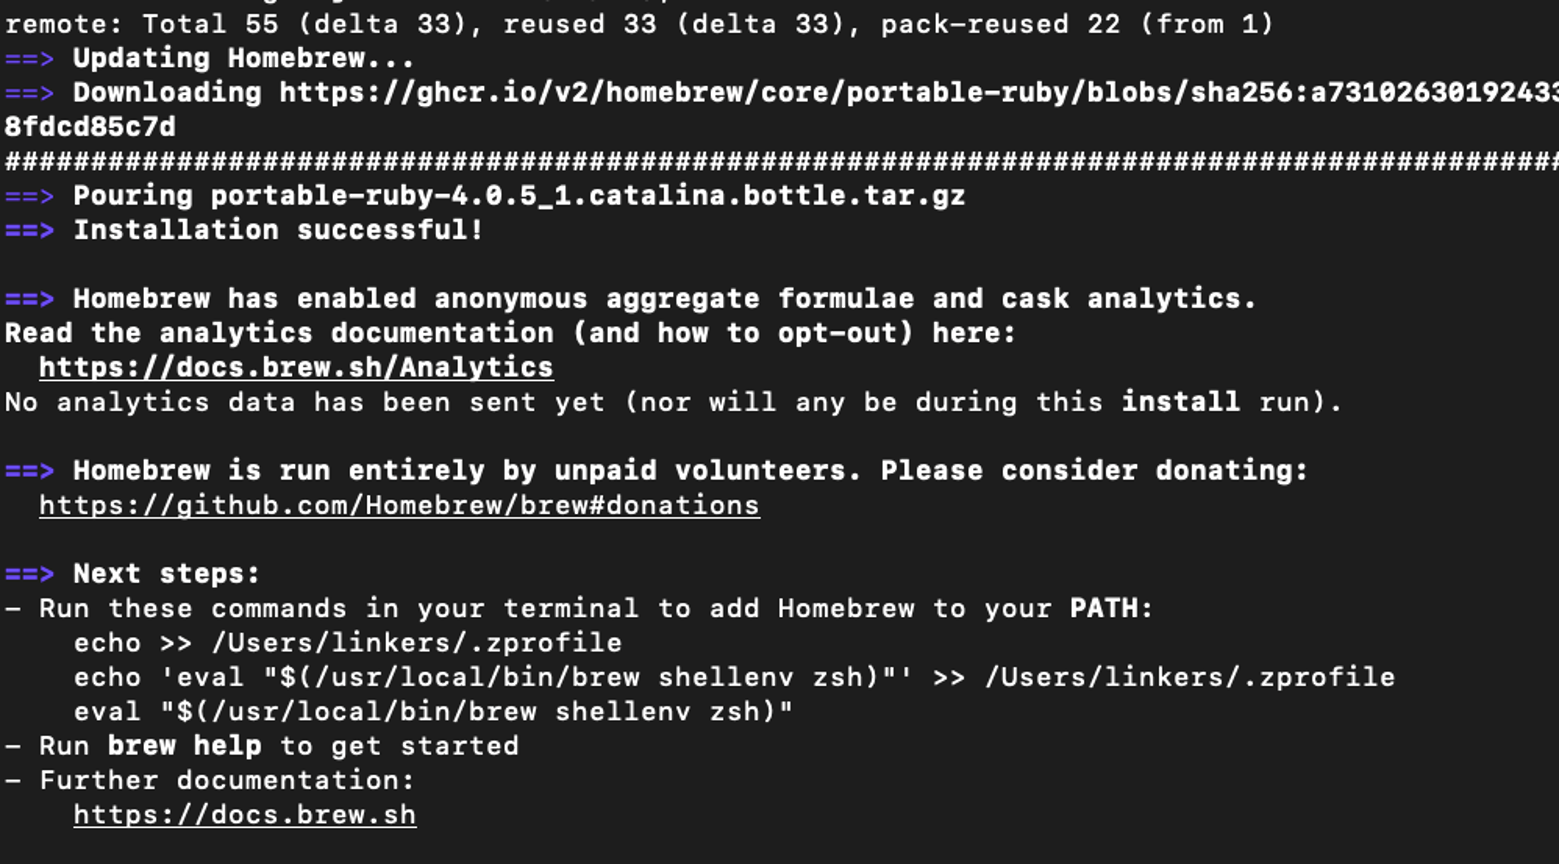
Run the following command to install Homebrew: /bin/bash -c "$(curl -fsSL https://raw.githubusercontent.com/Homebrew/install/HEAD/install.sh)":
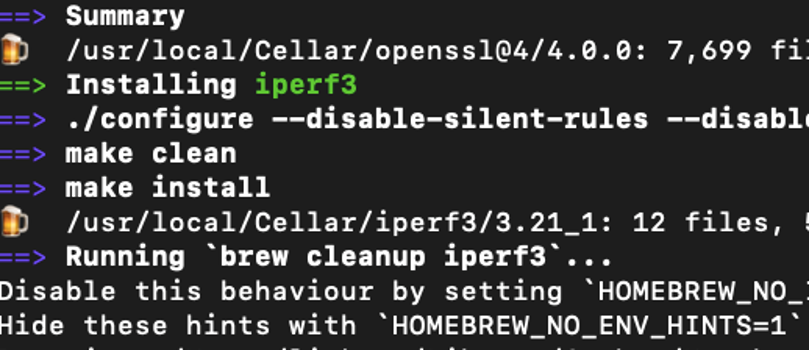
Once Homebrew is installed, run the following command to install iPerf: brew install iperf3:
To verify iPerf was installed, run the following command and you will see the version installed: iperf3 –v

Step 2. Configure IP address on Mac
Before running iPerf, the Mac needs to be on the same local subnet as the wired iPerf3 server so they can talk to each other. How this is handled depends entirely on the Omada network setup.
DHCP
If the client and server device are connected to a gateway that is actively assigning IP addresses, nothing needs to be changed. The Mac will automatically grab a local IP address via DHCP.
Static
If running a bench test or working on an isolated switch/VLAN that doesn't have an active DHCP server, then a static IP address needs to be assigned to the Mac so it can route traffic to the server.
To assign a static IP address for Mac, go to System Preferences > Network > (choose the current adapter) > Advanced >TCP/IP and set "Configure IPv4" to Manually, and assign the addresses as needed.
Note: If using a different version of MacOS, view the Mac User Guide to find where to change the TCP/IP settings based on macOS version.

Step 3. Run iPerf on Mac
The device running iPerf can be used in Client or Server mode.
Note: Both client and server must use iPerf3 (latest version).
Server Mode
Running iPerf in Server Mode allows you to configure a device to actively listen and measure the incoming traffic from an iPerf client.
To run iPerf on Mac in Server Mode, run the following command: iperf3 -s
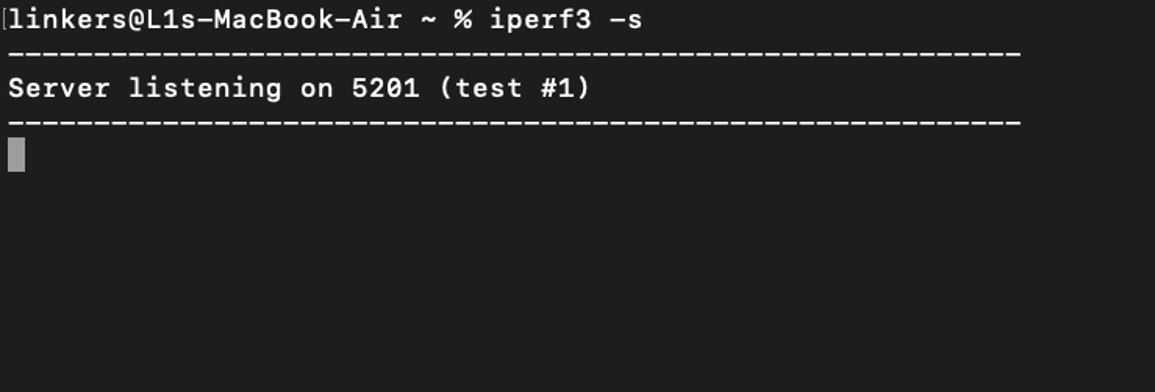
This will put your Mac into iPerf Server Mode, and it will listen for incoming traffic on the default port (5201).
Client Mode
Running iPerf in Client Mode allows a device to initiate a network speed test by connecting to a listening iPerf device running in Server Mode.
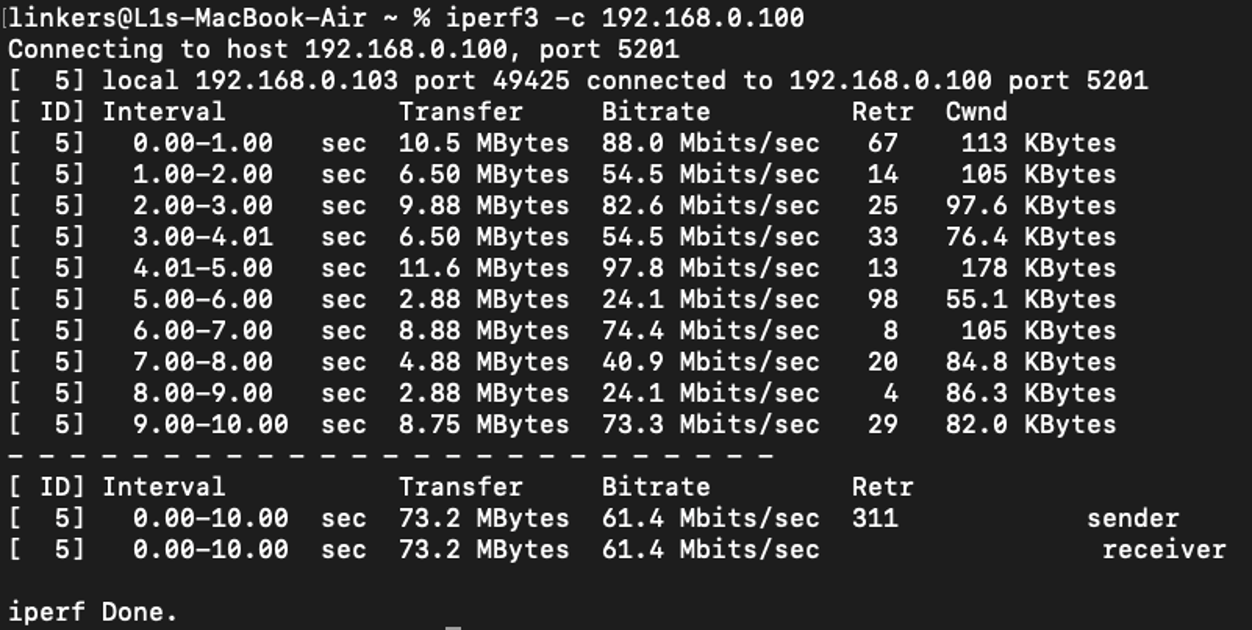
To run iPerf on Mac in Client Mode, run the following command: iperf3 -c [server local IP]
In this example, a PC running iPerf in Server Mode (192.168.0.100) is on the same LAN as the Mac (192.168.100.103).
Common Client Test Parameters
On the Client side, here are some common test parameters to use. Each of these options can be used together.
1. TCP Window Size
Sending large streams of data can generate lots of CPU usage. A larger windows size can be used to reduce the amount of processing that needs to be done on the client and server.
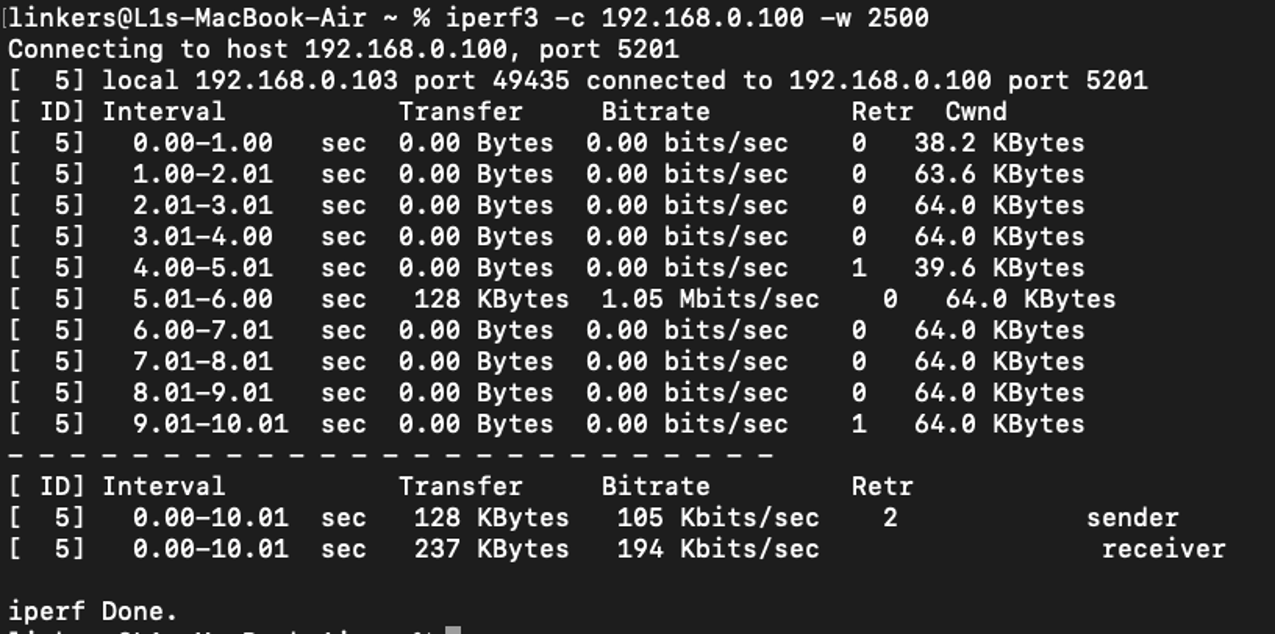
Using the –w option, the window size can be set which will specify the amount of data that can pass before synchronization is required. The default unit is bytes, but Kilobytes and Megabytes can be specified with K and M.
For example, run the following command to set the window size to 2500 bytes: iperf3 –c [server local IP] -w 2500
2. Parallel Streams
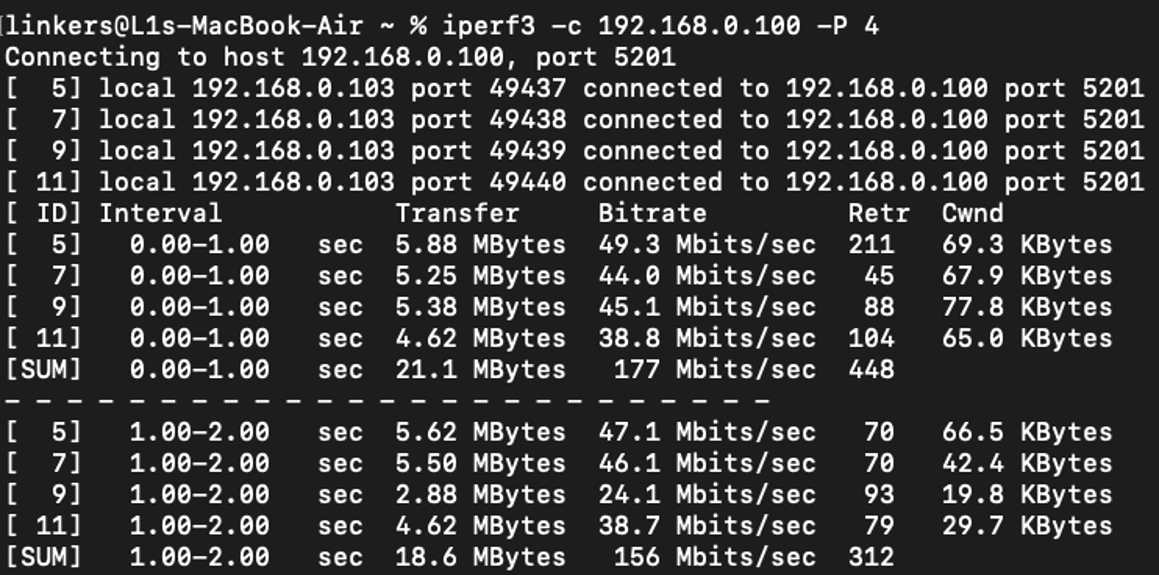
Parallel streams can be sent through the tunnel using the –P option, which will send multiple streams of traffic to thoroughly test the link and tunnel.
For example, running the following command will run four parallel streams: iperf3 –c [server local IP] -P 4
3. UDP
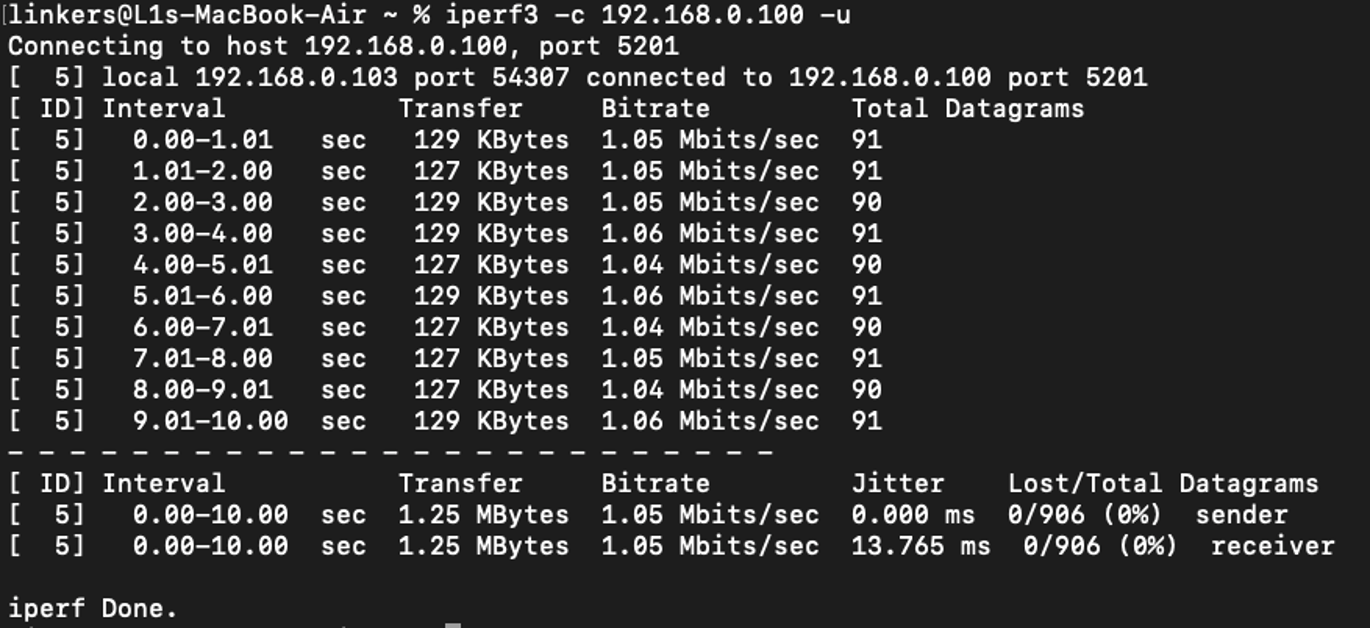
While standard TCP tests are helpful for simulating web browsing or file transfers, UDP tests will allow us to measure jitter and packet loss with real-time traffic such as VoIP, video conferencing, live streaming, or online gaming.
UDP traffic can be tested with the –u option.
For example, running the following command will test UDP traffic: iperf3 –c [server local IP] -u
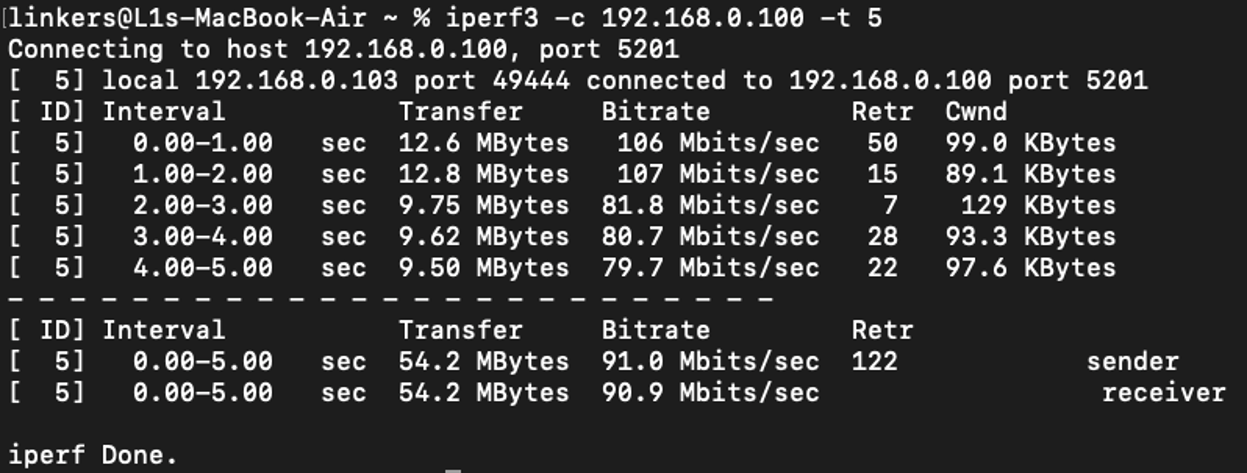
4. Duration
To specify how long the client should send traffic to the server (in seconds) before stopping and generating the final report, use the –t flag. The default is 10 seconds.
For example, running the following command will run the test for 5 seconds: iperf3 –c [server local IP] -t 5
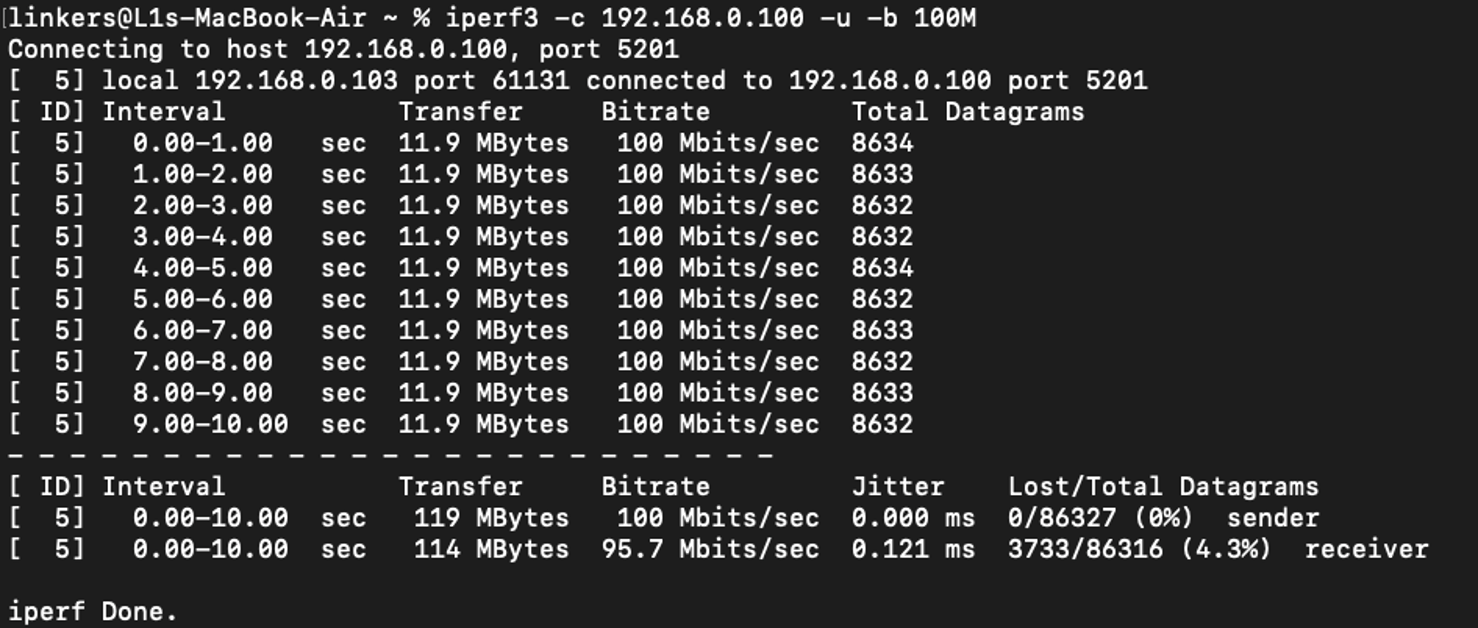
5. Bandwidth
To tell the client how much data it is allowed to send per second, the –b option can be used which stands for “bandwidth.”
This option is often used with the UDP option (-u) because by default, a UDP test is restricted to 1 Mbps.
For example, to raise the ceiling of a UDP to 100Mbps, run the following command: iperf3 –c [server local IP] -u –b 100M
Conclusion
We have successfully installed and ran iPerf on Mac in both Server and Client Mode to test the speed on macOS.
QA
Q1: Why can’t I just download a standard clickable app for iPerf on my Mac?
A1: iPerf is natively a command-line tool, and Apple's strict Gatekeeper security blocks raw loose binaries unless they are installed safely through a package manager like Homebrew.
Q2: What do I do if Terminal says "iperf3: command not found" after installation?
A2: Restart your Terminal app completely so it can refresh your system paths or manually run “which iperf3” to see if it returns a file path. If not, try reinstalling again.
Get to know more details of each function and configuration please go to Download Center to download the manual of your product.
