


Contents
How to adjust the VLAN configurations of specific switch ports
a) Adjust port VLAN configurations using Switch Profile
b) Customize port VLAN configurations
Introduction
VLAN configuration is a core functionality of an Omada Network, and you can easily set it up via the Omada App. This article will go through how to configure the VLAN using the Omada APP v5.2.1 or above.
Requirements
- Omada Network v6.2.10 or above
- Omada App v5.2.1 or above
- Omada Gateway & Managed Switch & AP
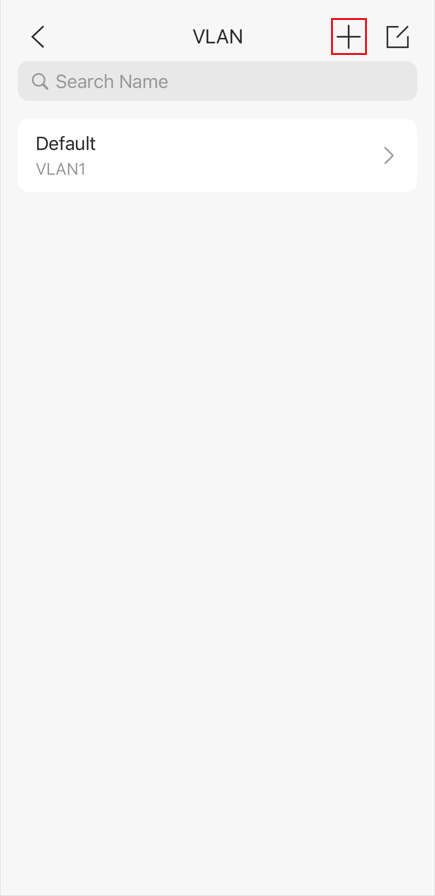
How to create a new VLAN
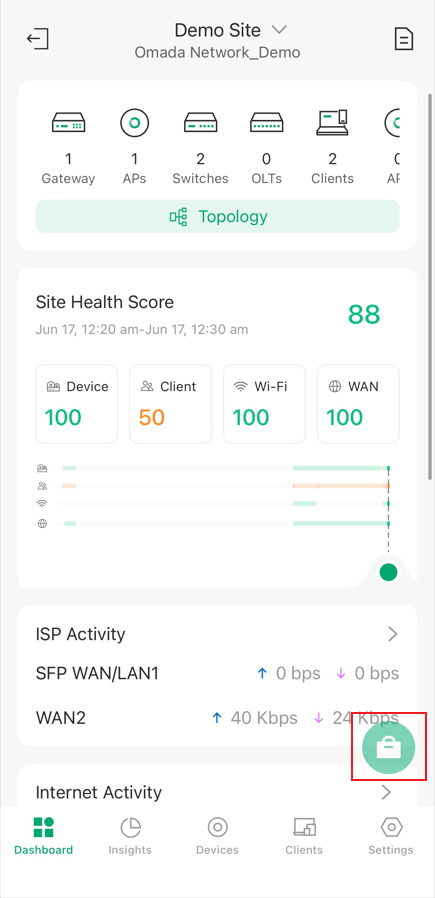
Step 1. Launch the target site of the target controller.
Step 3. Select the device on which you wish to serve as the DHCP Server. It can be a gateway, switch, or third-party device that can offer DHCP services. You can also just set it to None. Then specify the Name, VLAN ID, etc., for the new network. If you mean to maintain a network with static IP addresses, you may disable the DHCP server. Then click Next.

Step 4. Select the LAN ports you want to add to this new network. By default, all LAN ports will be added.
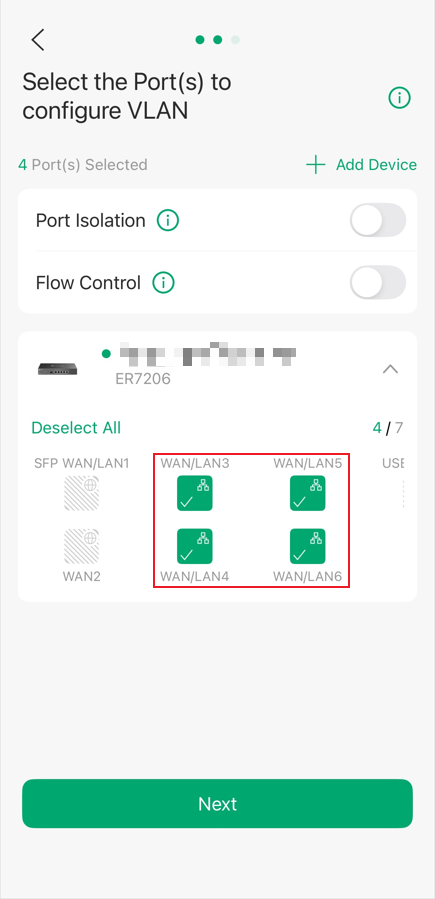
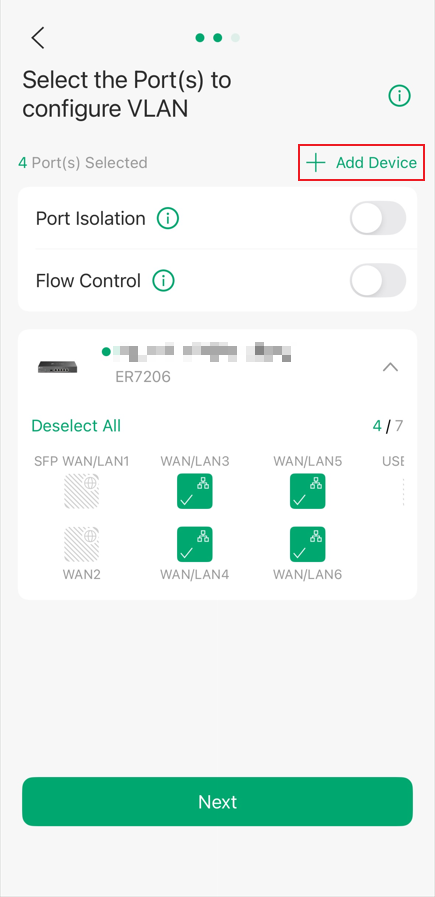
Step 5.(Optional) Click + Add Device to select the switch ports that need to be added to the new network and configured as access ports. By default, all switch ports are trunk ports and will also be added to the new network. Then click Next.
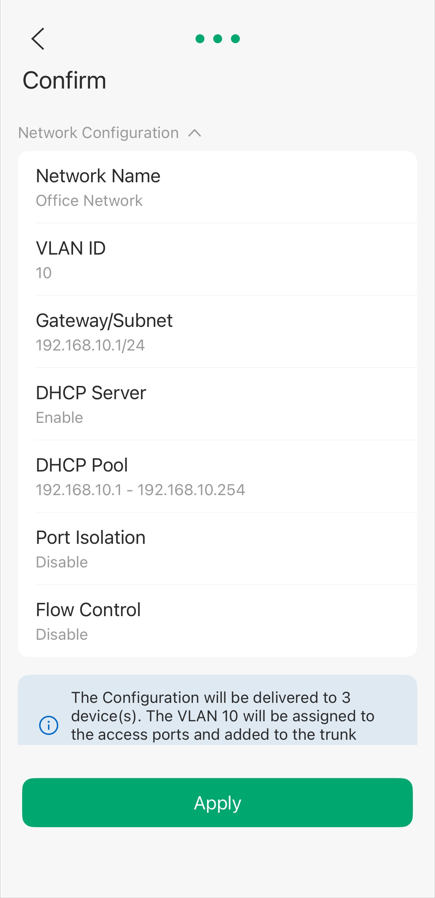
Step 6. Carefully check the settings, then click Apply.
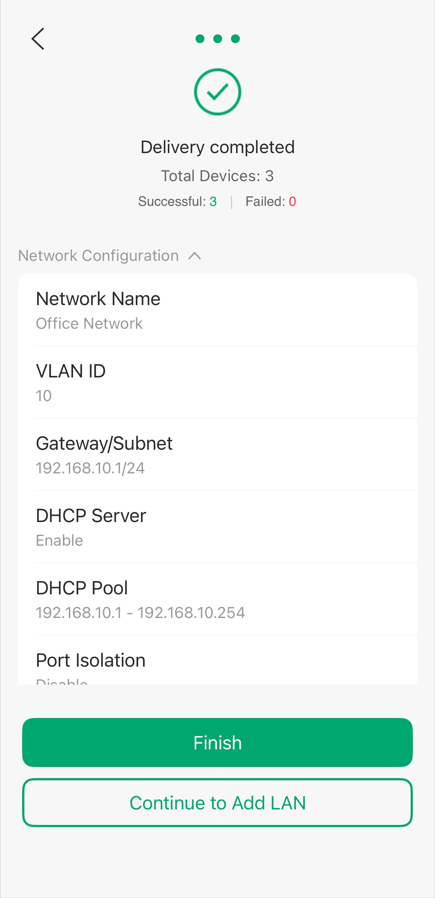
Step 7. Waiting for the configurations to be completely delivered to Omada devices, then click Finish.
How to adjust the VLAN configurations of specific switch ports
After creating VLANs, you may want to adjust the VLAN settings for some switch ports. Omada app v5.2.1 or above offers two ways to do this.
Adjust port VLAN configurations via Switch Profile
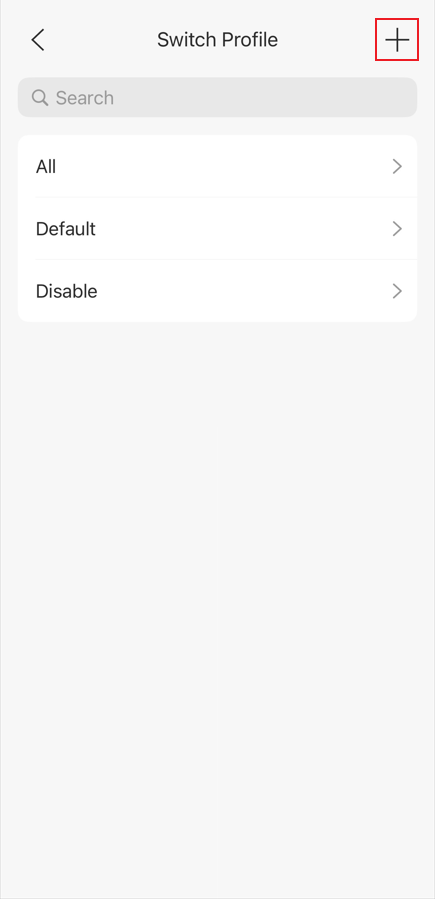
Step 1. Go to Settings > LAN Settings > Switch Profile, create + to create a new switch profile.
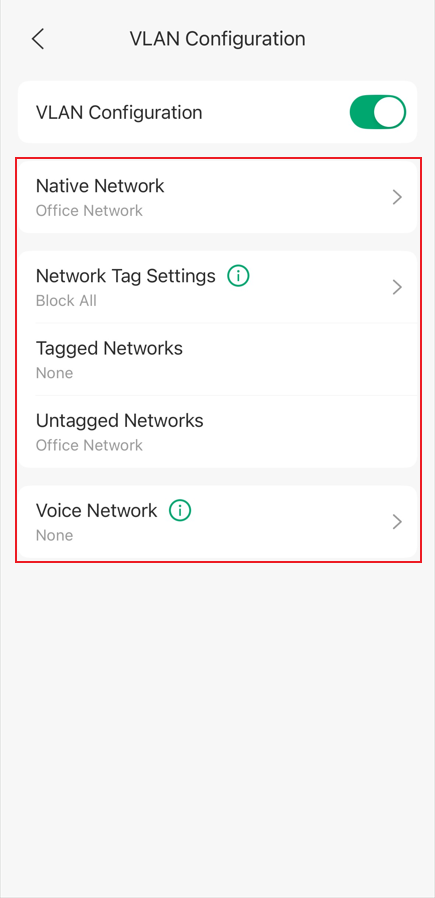
Step 2. Go to VLAN Configuration.
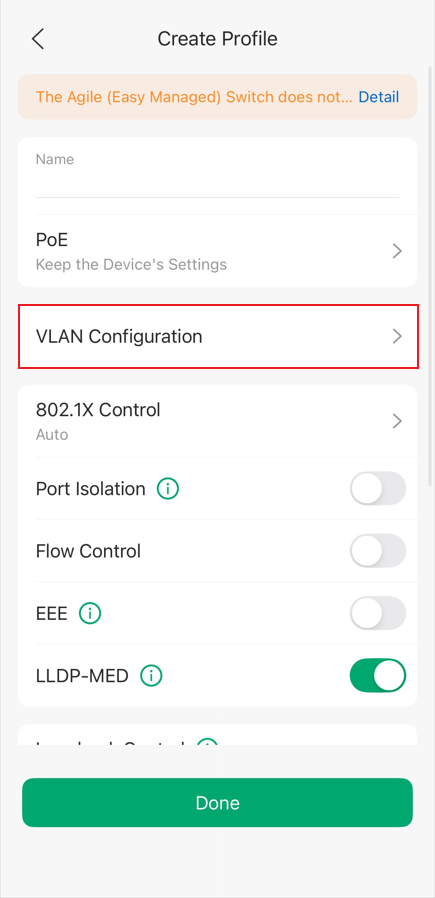
Step 3. Enable VLAN Configuration and configure the native network, tag settings, etc., as needed.
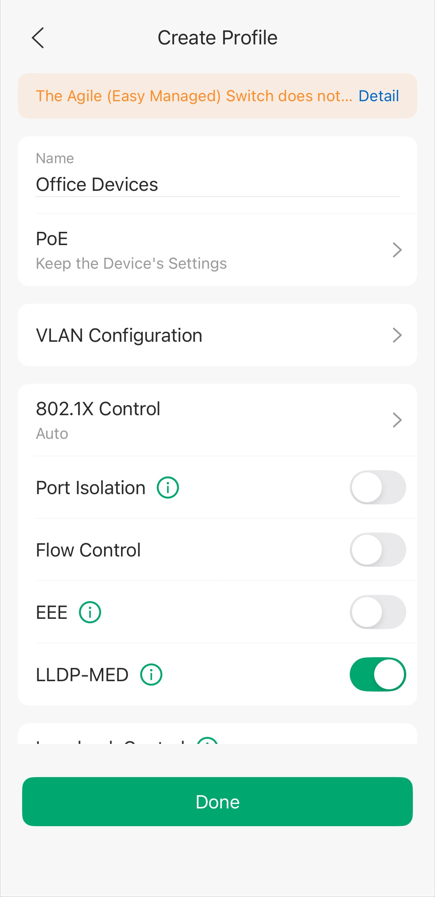
Step 4. Go back to the interface of the profile’s general configuration, configure the name, 802.1x, port isolation, etc. Then click Done.
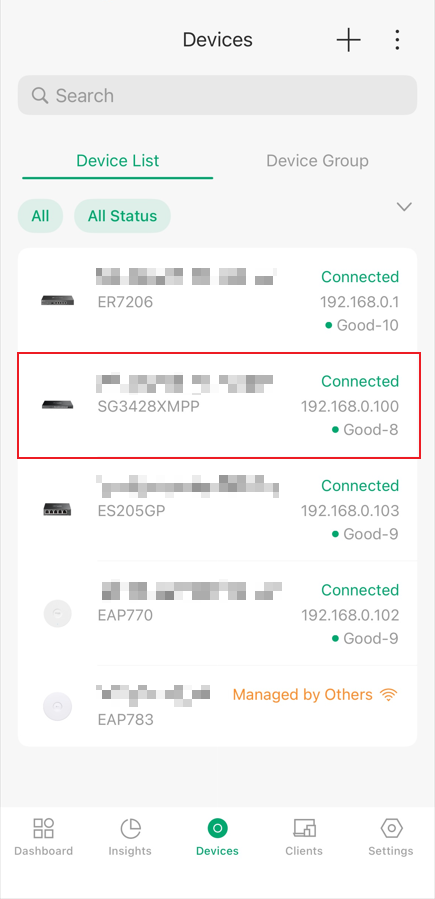
Step 5. Go to Devices, click the device you are going to configure.

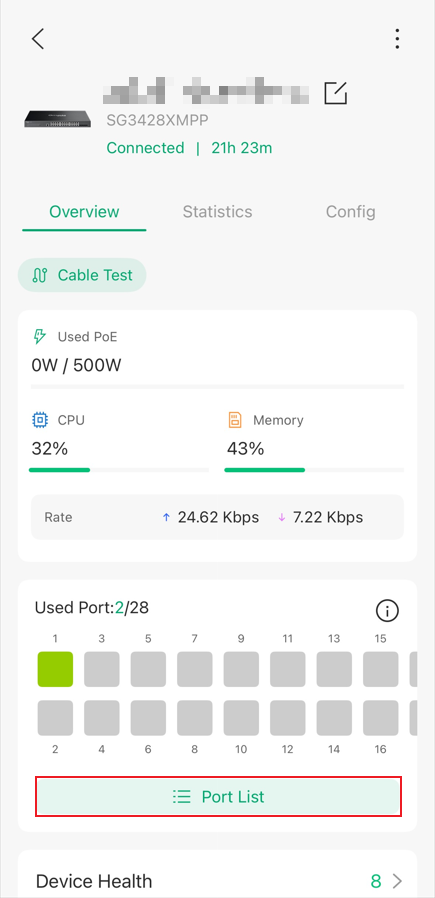
Step 6. Click Port List.

Step 7. Click the port you are going to configure, or click the edit button to configure multiple ports at once.
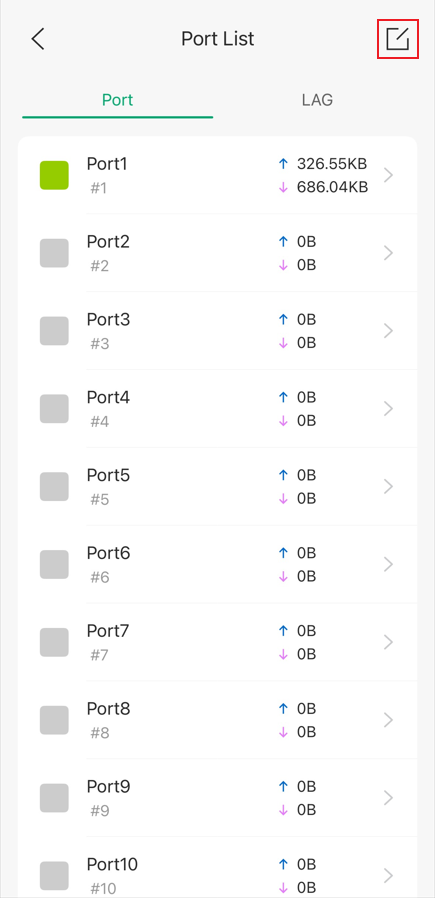
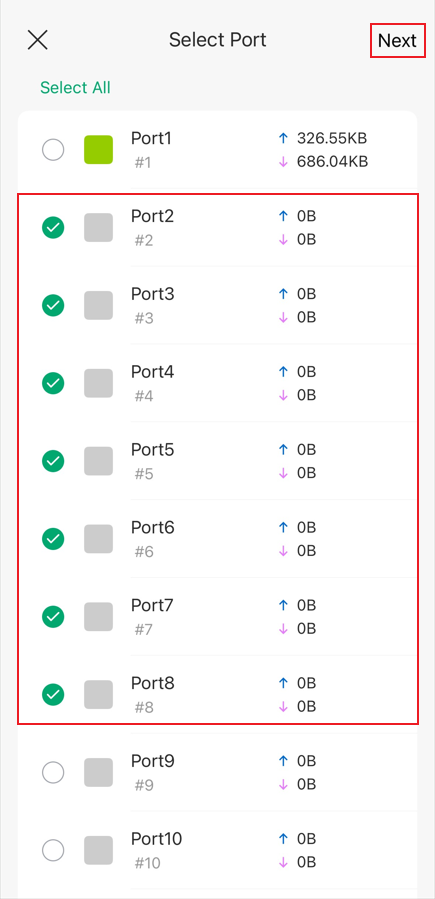
Here, we’ll use the batch configuration of ports 2-8 as an example. Click Next.

Step 8. In Basic, set the profile as the switch profile we created before.
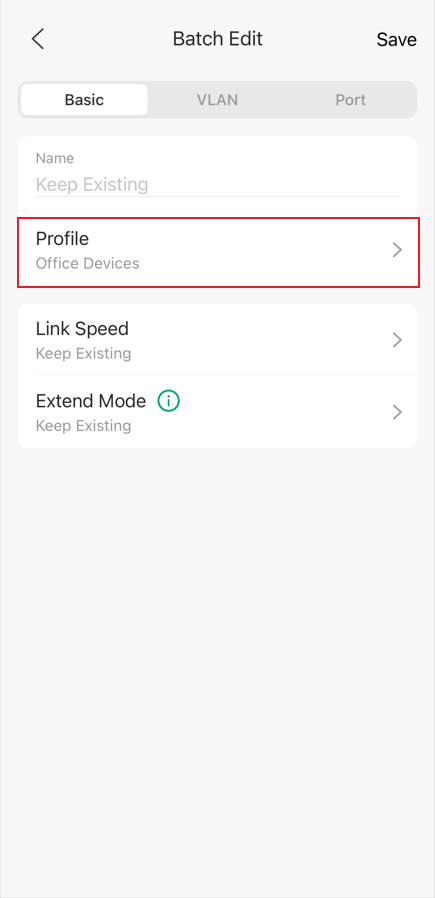
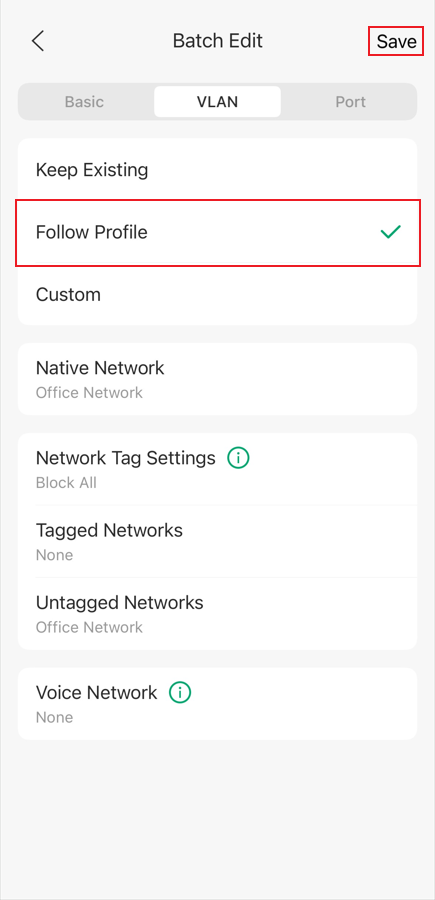
Step 9. Go to VLAN and set it to Follow Profile. Then click Save to finish the VLAN configuration for the ports on the switch.
Customize port VLAN configurations
Step 1. Go to Devices, click the device you are going to configure.
Step 2. Click Port List.
Step 3. Click the port you are going to configure, or click the edit button to configure multiple ports at once.

Here, we’ll use the batch configuration of ports 2-8 as an example. Click Next.
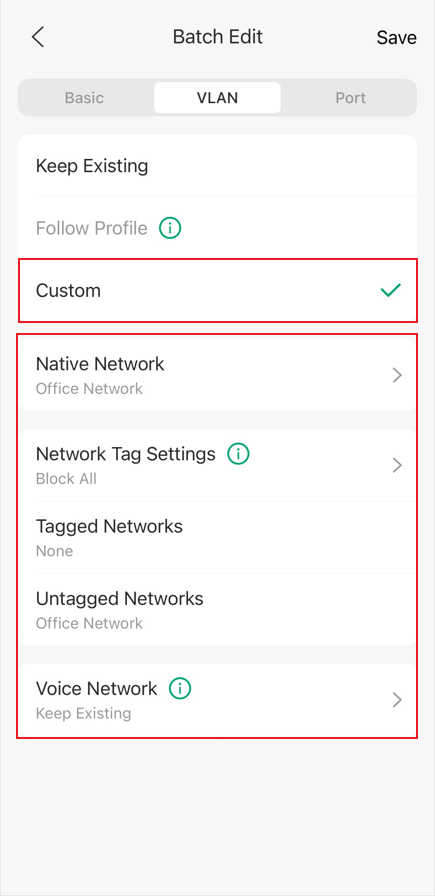
Step 4. In VLAN, set it to Custom, and configure the native network, tag settings, etc., as needed. Then click Save to finish the VLAN configuration for the ports on the switch.
Conclusion
We have now covered how to create a new VLAN using the Omada app v5.2.1 or later, as well as two methods for adjusting the VLAN configuration on switch ports after the VLAN has been created.
To learn more about each function and configuration, please visit Support Home to download or check the manual for your product.
