Contents
Introduction
Omada Fusion Pro Gateway integrates both networking and security functions into one device and supports the adoption of VIGI security devices. This article will introduce how to add VIGI devices to the Omada Fusion Pro Gateway.
Requirements
- Omada Fusion Pro Gateway
- VIGI Devices (NVR/IPC) with corresponding firmware version
Configuration
Method for adding devices:
Add devices on the web page
Connect the device to the Omada Fusion Pro Gateway, go to Omada Guard > Devices, and click the Adopt button to complete adding the device.

If you can’t discover your device, please check the following issues:
• Power on the device and confirm it's working normally.
• Connect the device to the network and confirm Fusion Pro can reach it.
• Confirm ownership: the device isn’t claimed by another Controller.
• If it’s a third-party camera, enable ONVIF in the camera settings.
• Check compatibility: confirm the device model is on the compatibility list.
• Confirm the version of Omada Guard is up to date.
Add devices through IP Address: Enter the IP Address of your Omada Guard to tell the device where to discover it. This feature is commonly used for the device to be managed by Omada Guard in Layer 3 deployments.
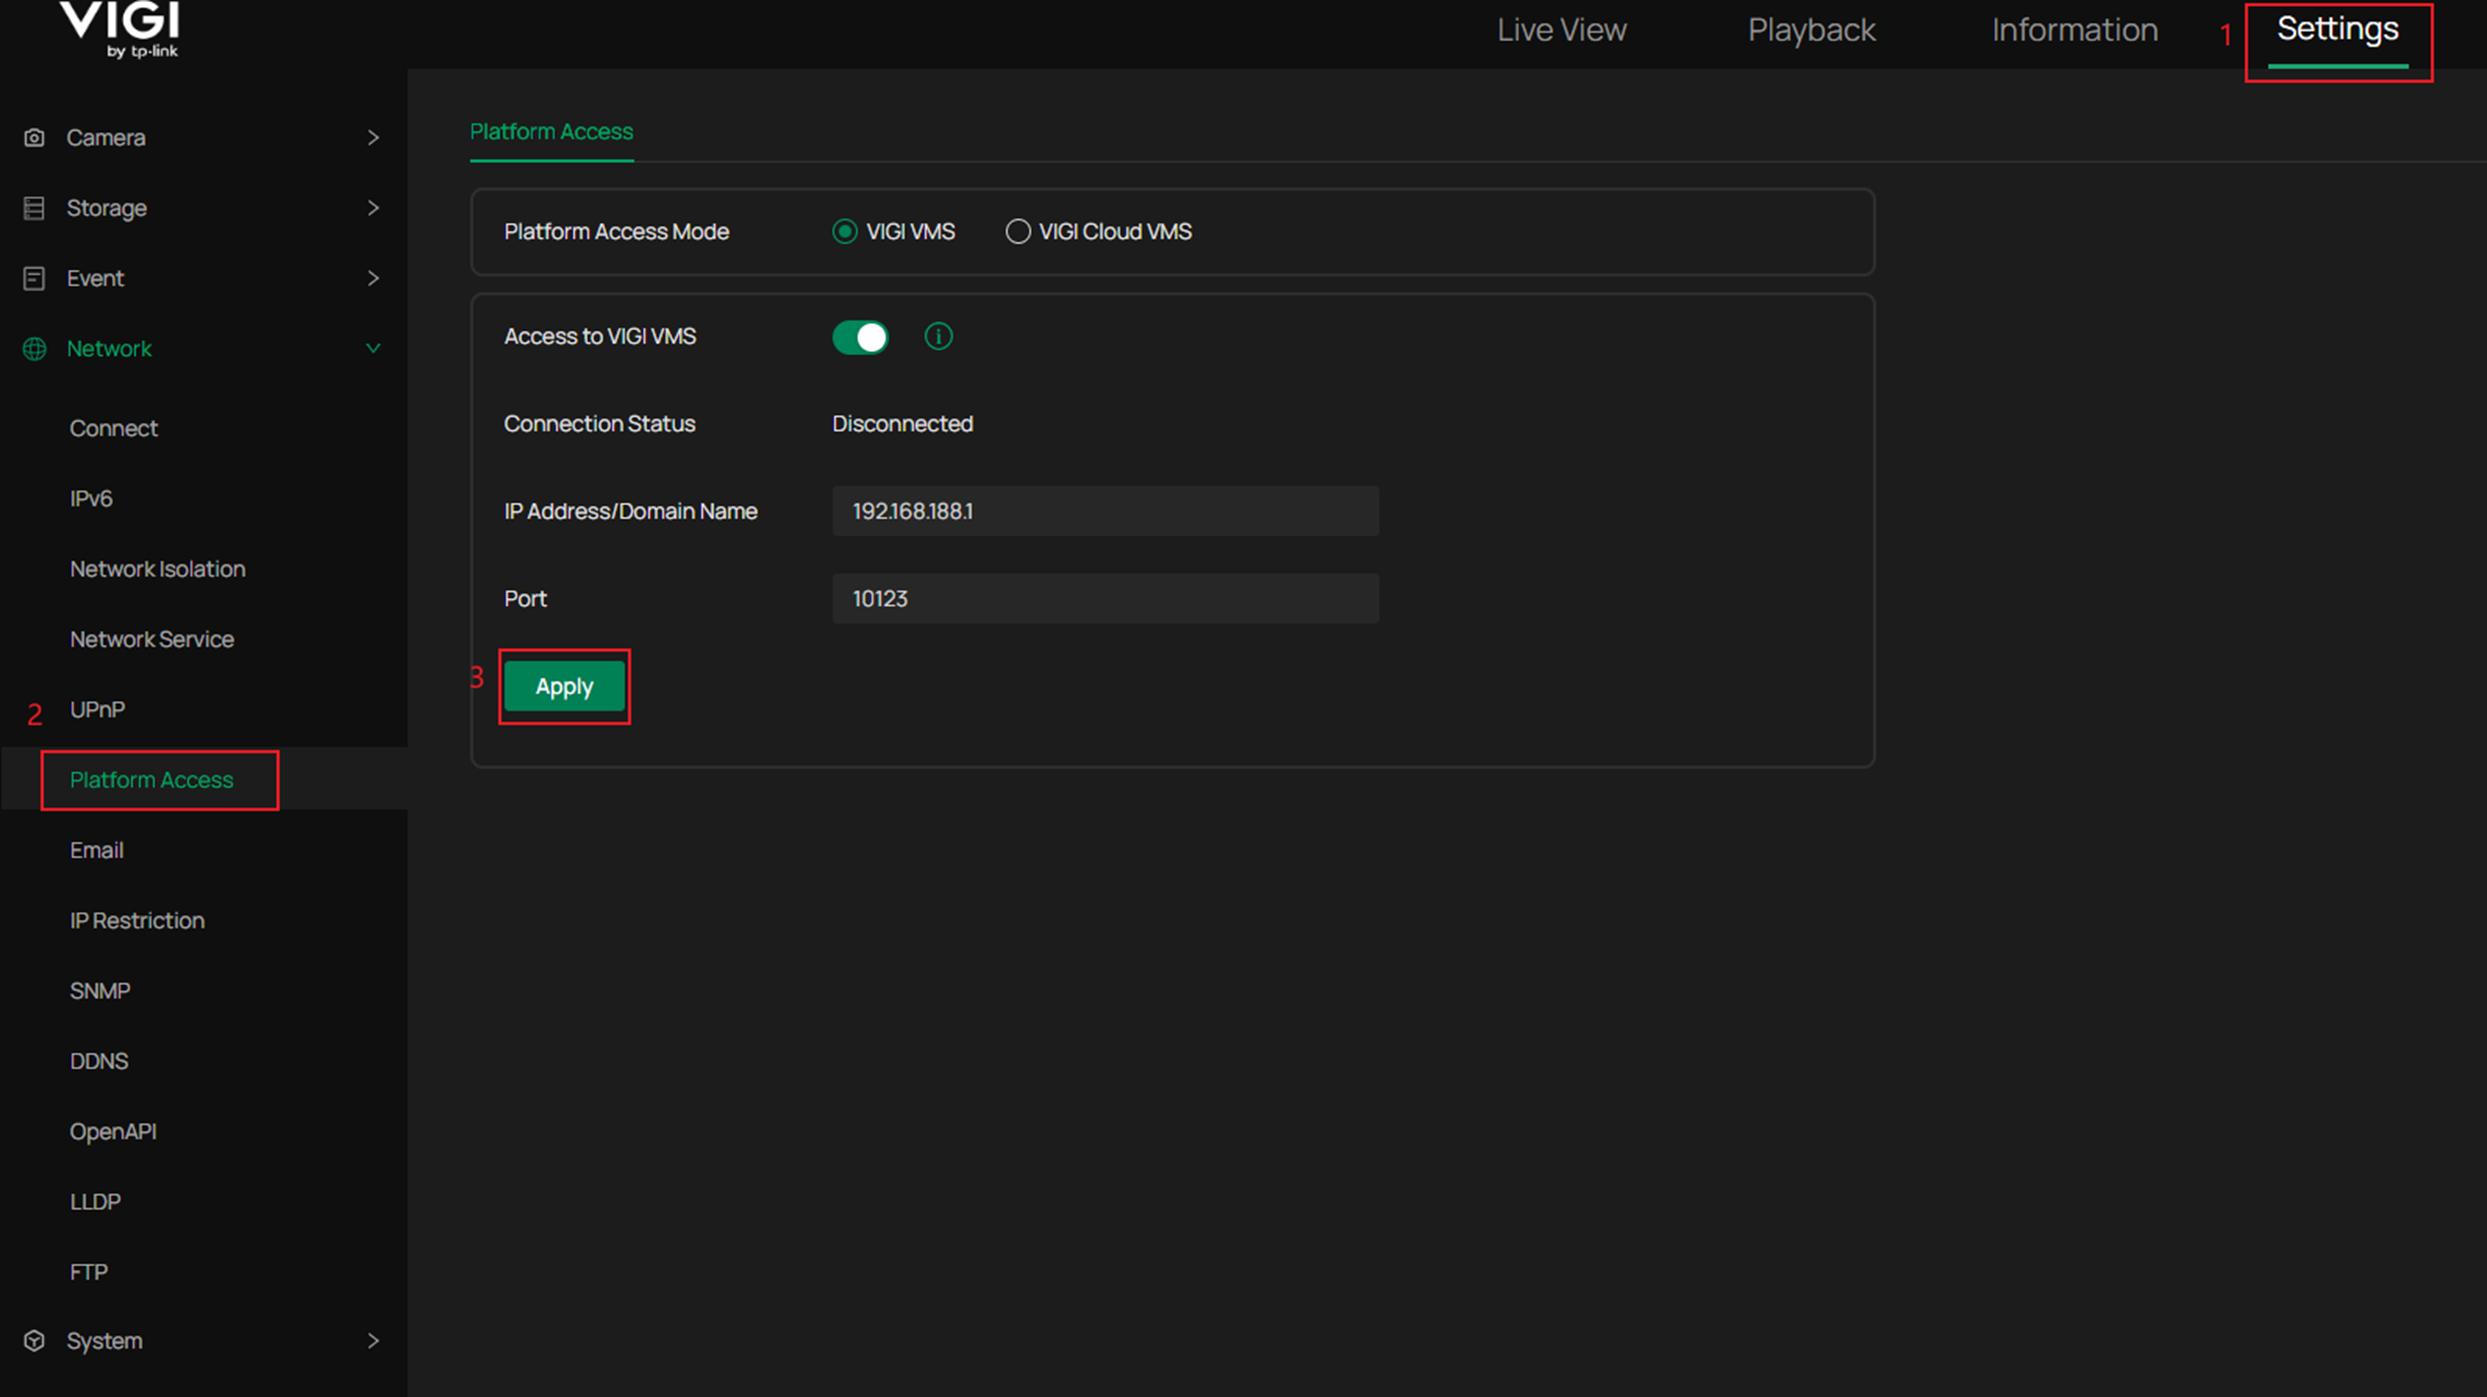
NVR: Go to Network>Platform Access, select VIGI VMS as Platform Access Mode, enter the IP address of Omada Fusion Gateway, usually 192.168.188.1.
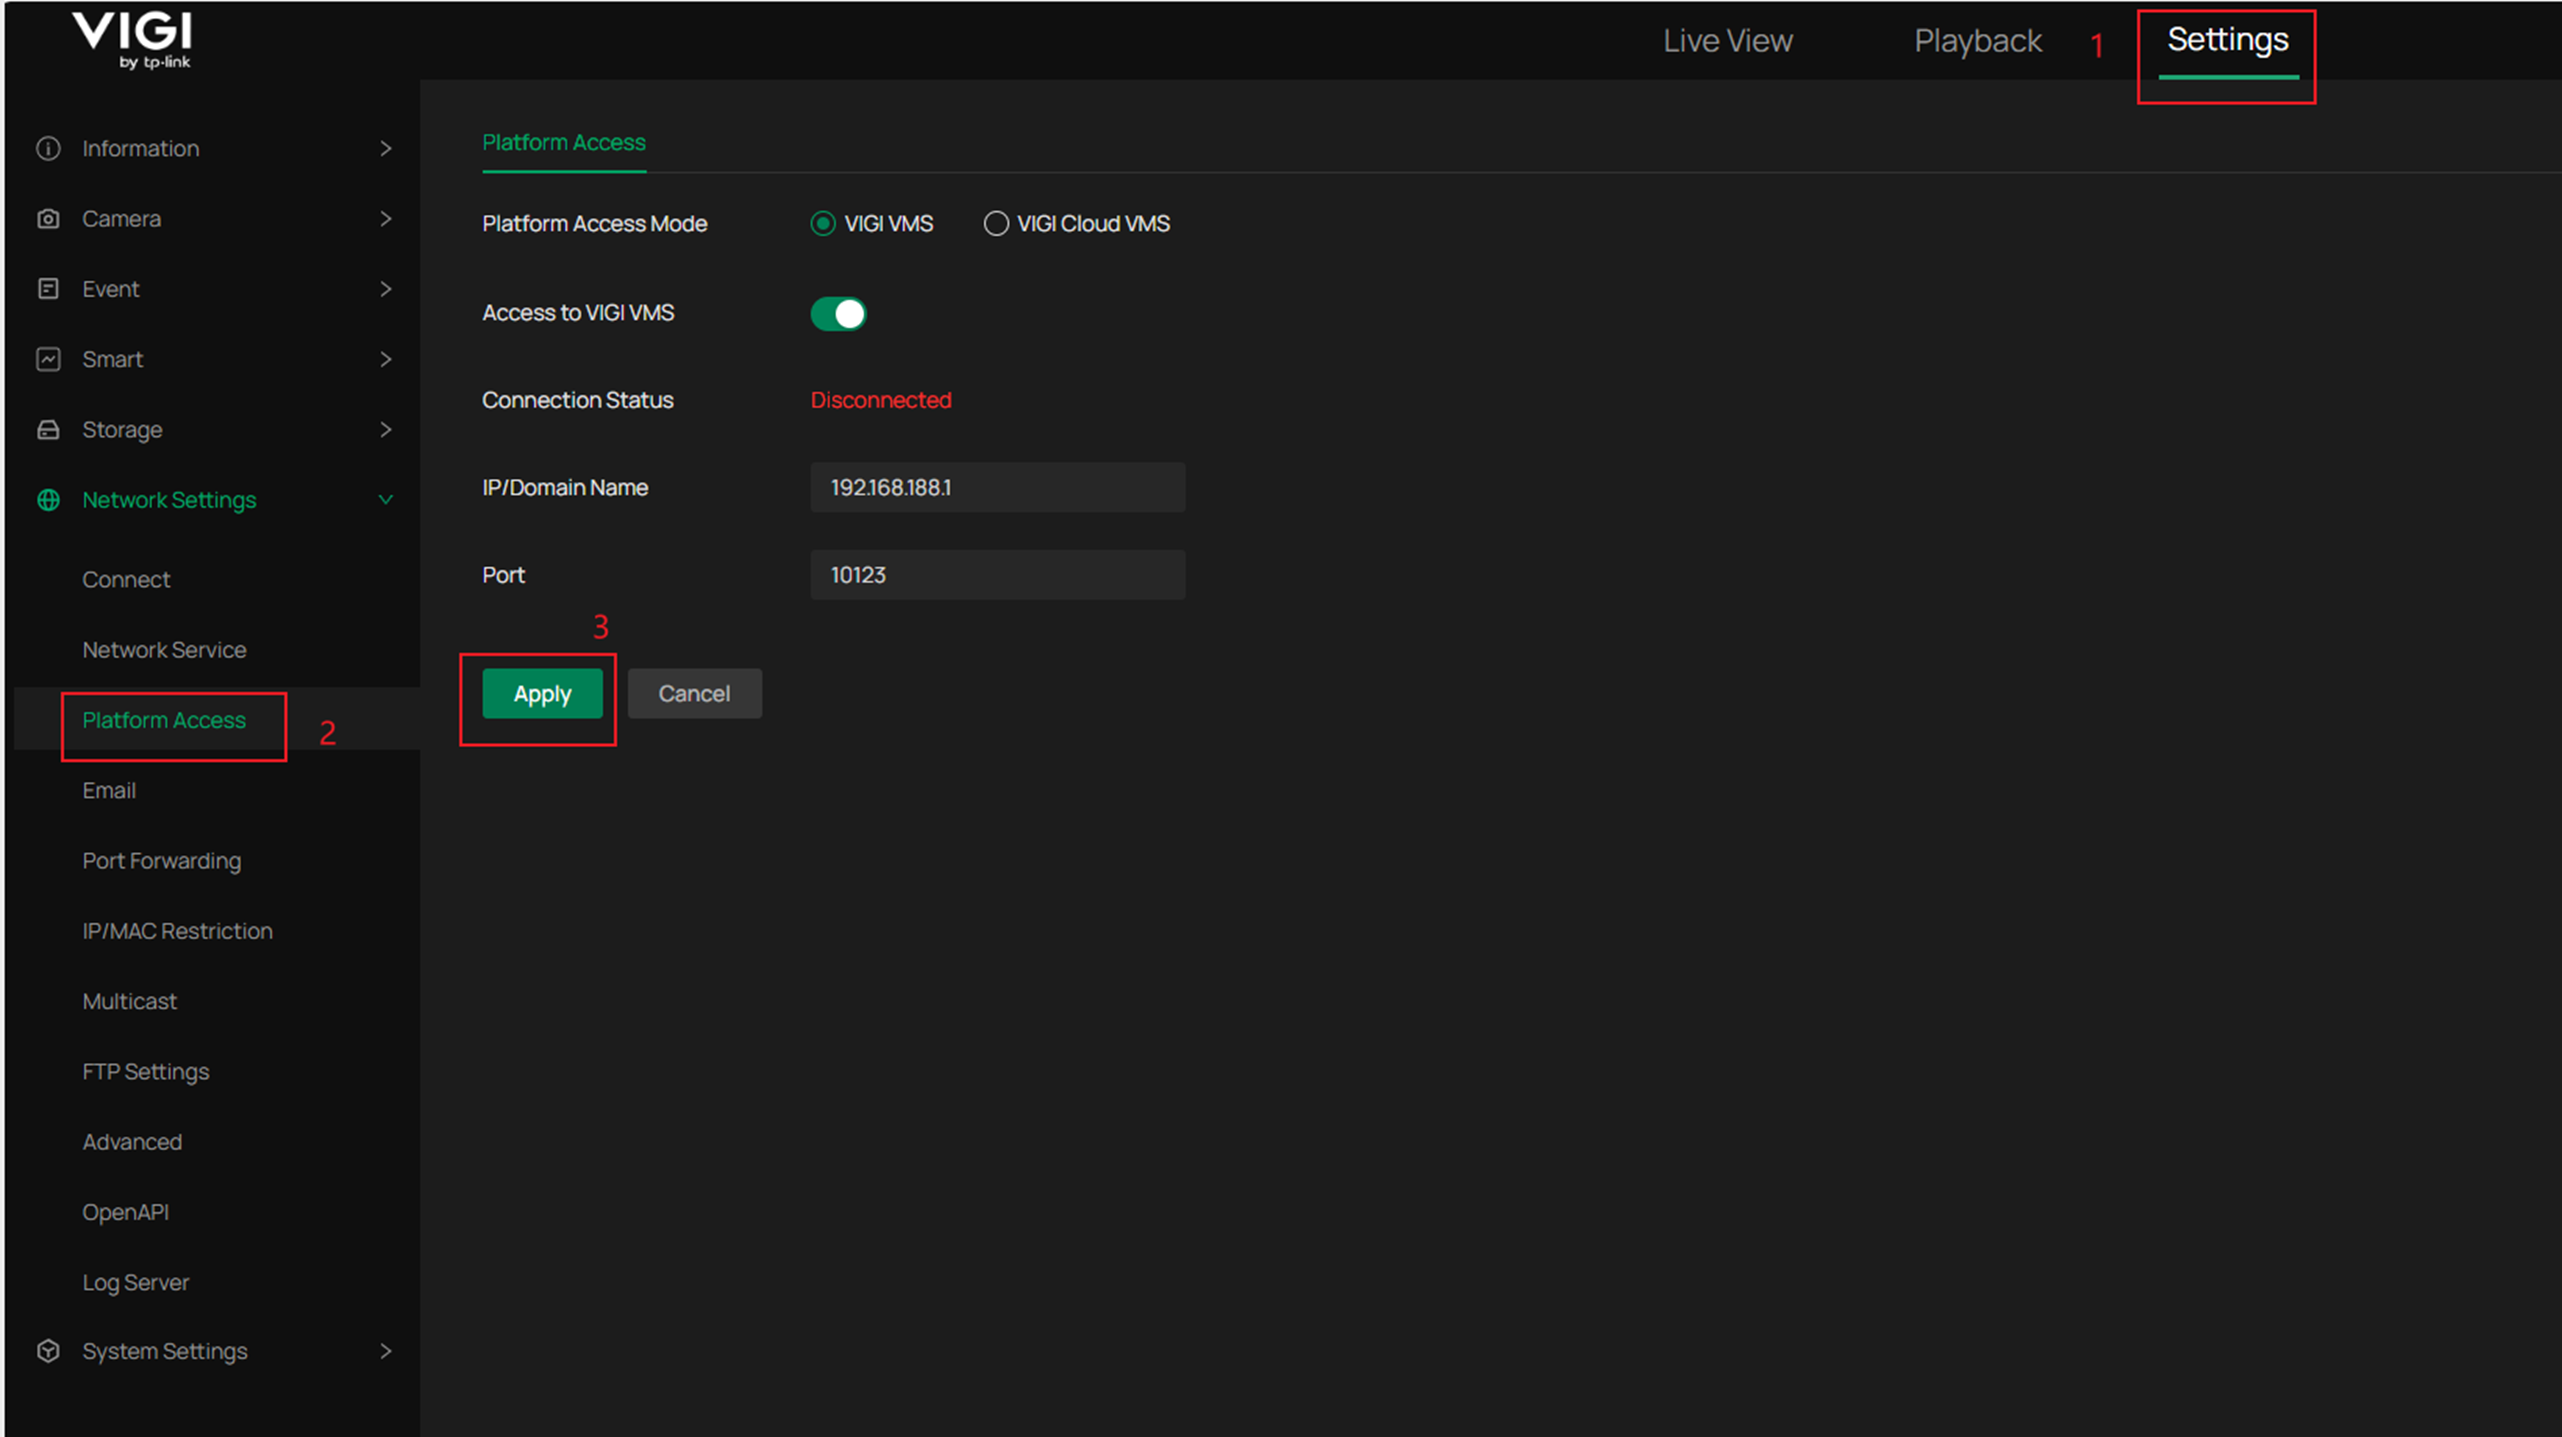
IPC: Go to Network Settings>Network Service>Platform Access, select IP Address as Platform Access Mode, enter the IP address of Omada Fusion Gateway,192.168.188.1 by default.
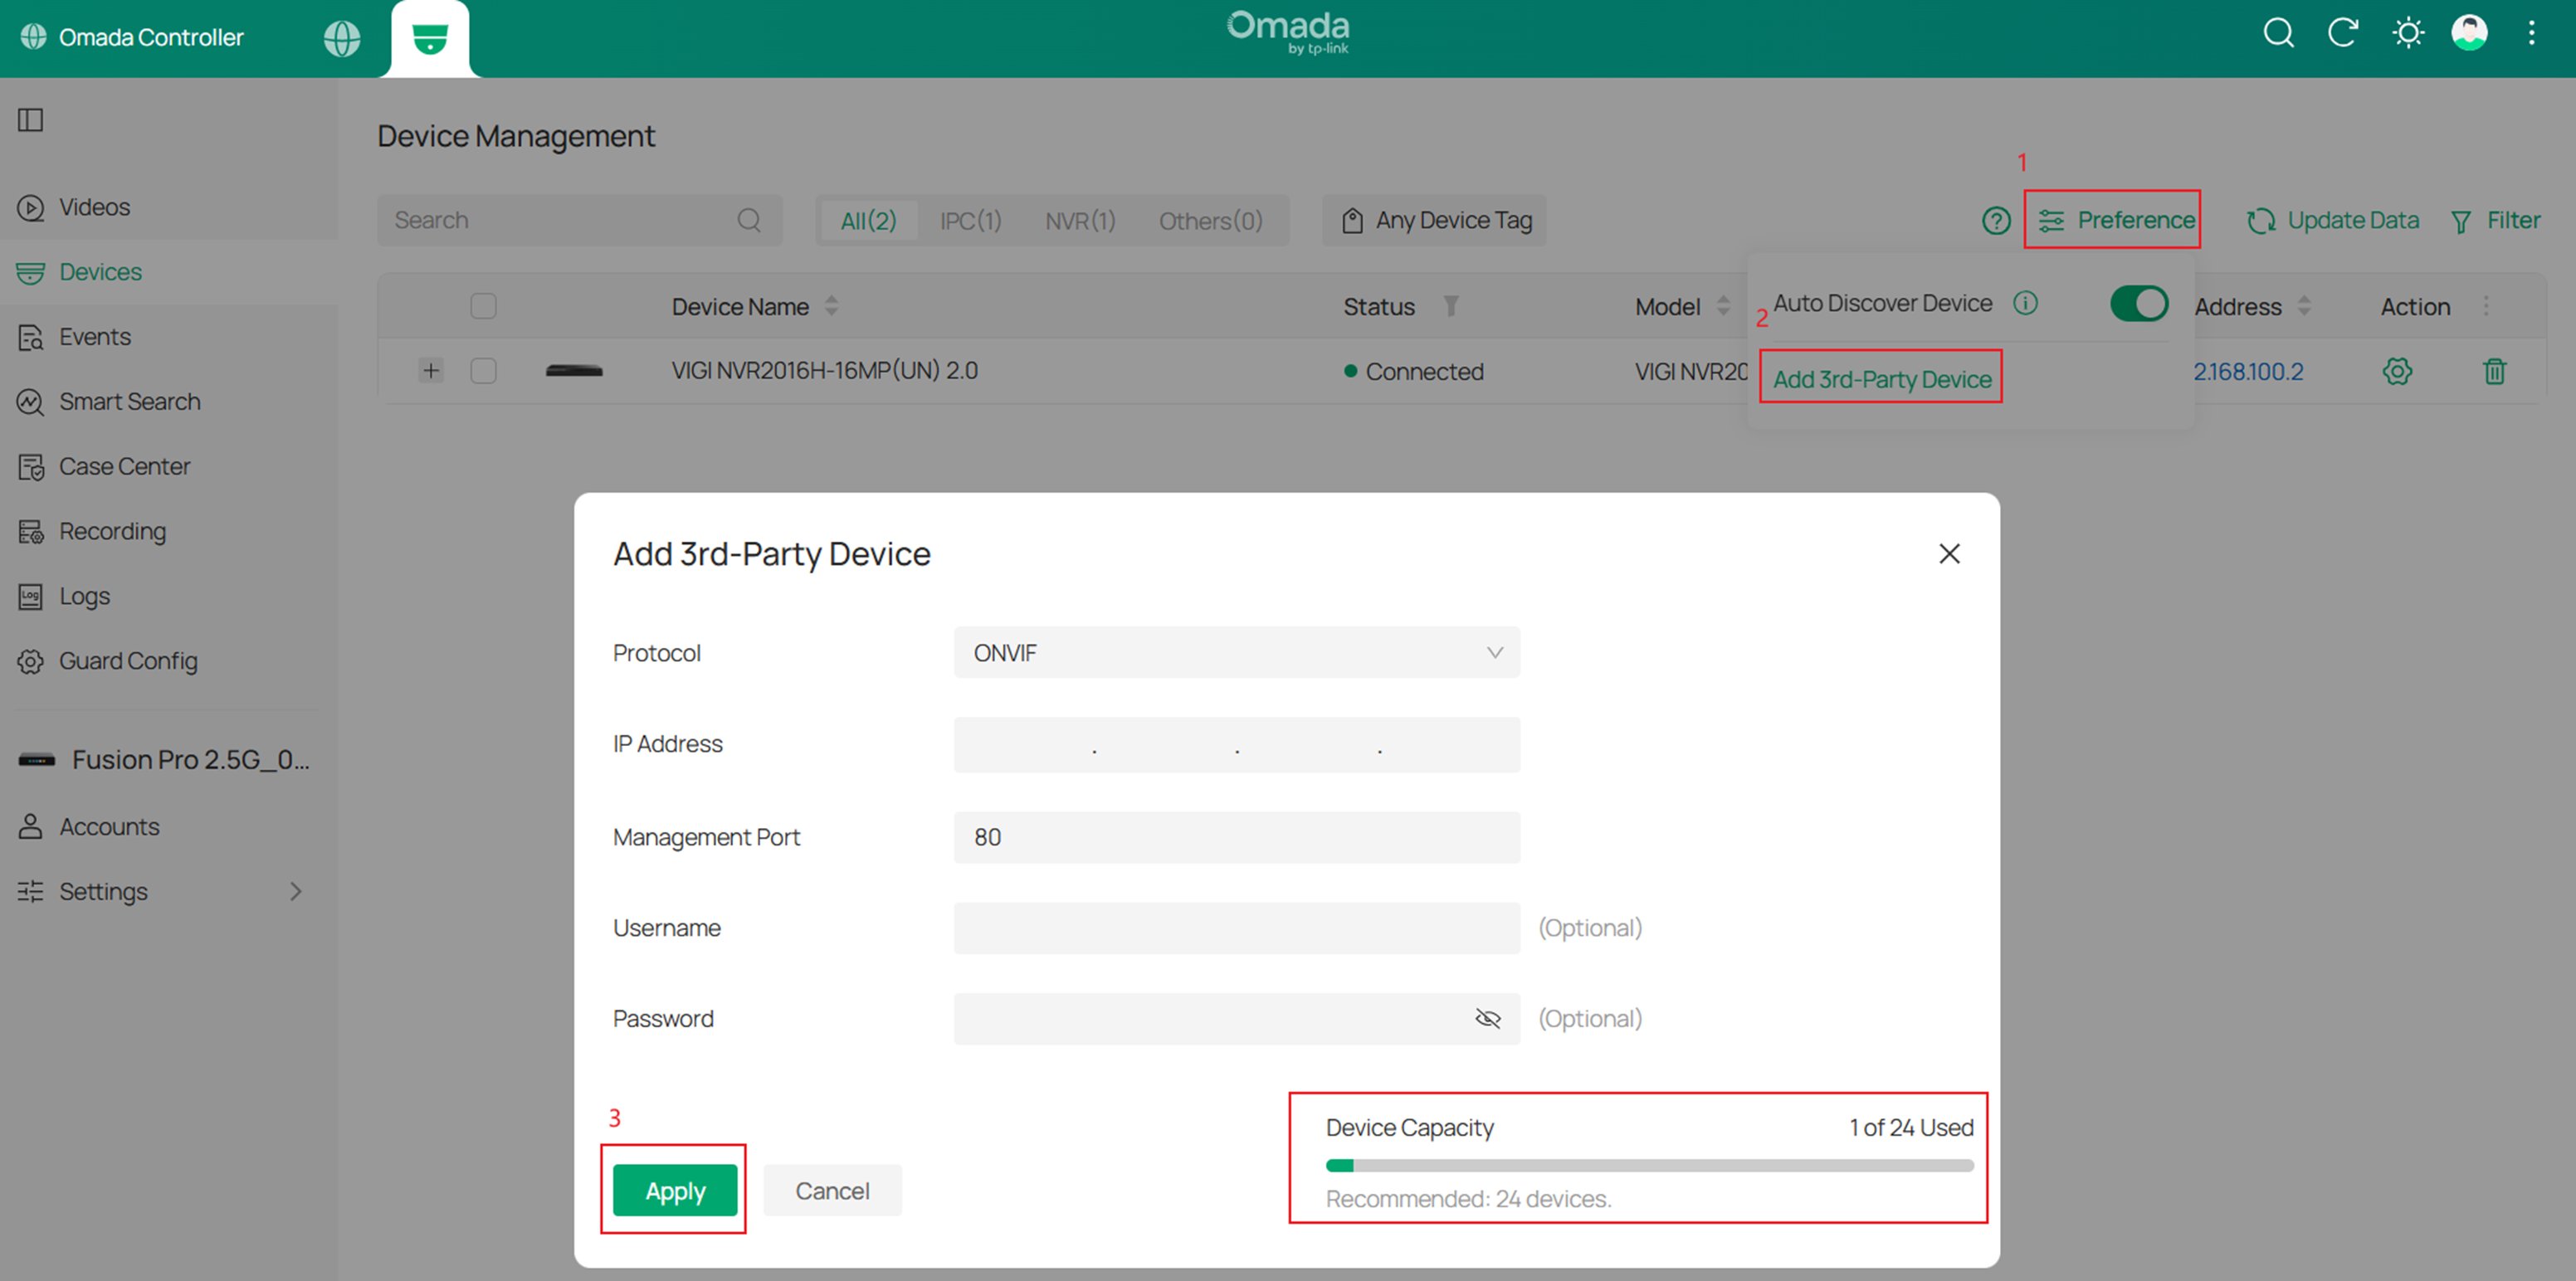
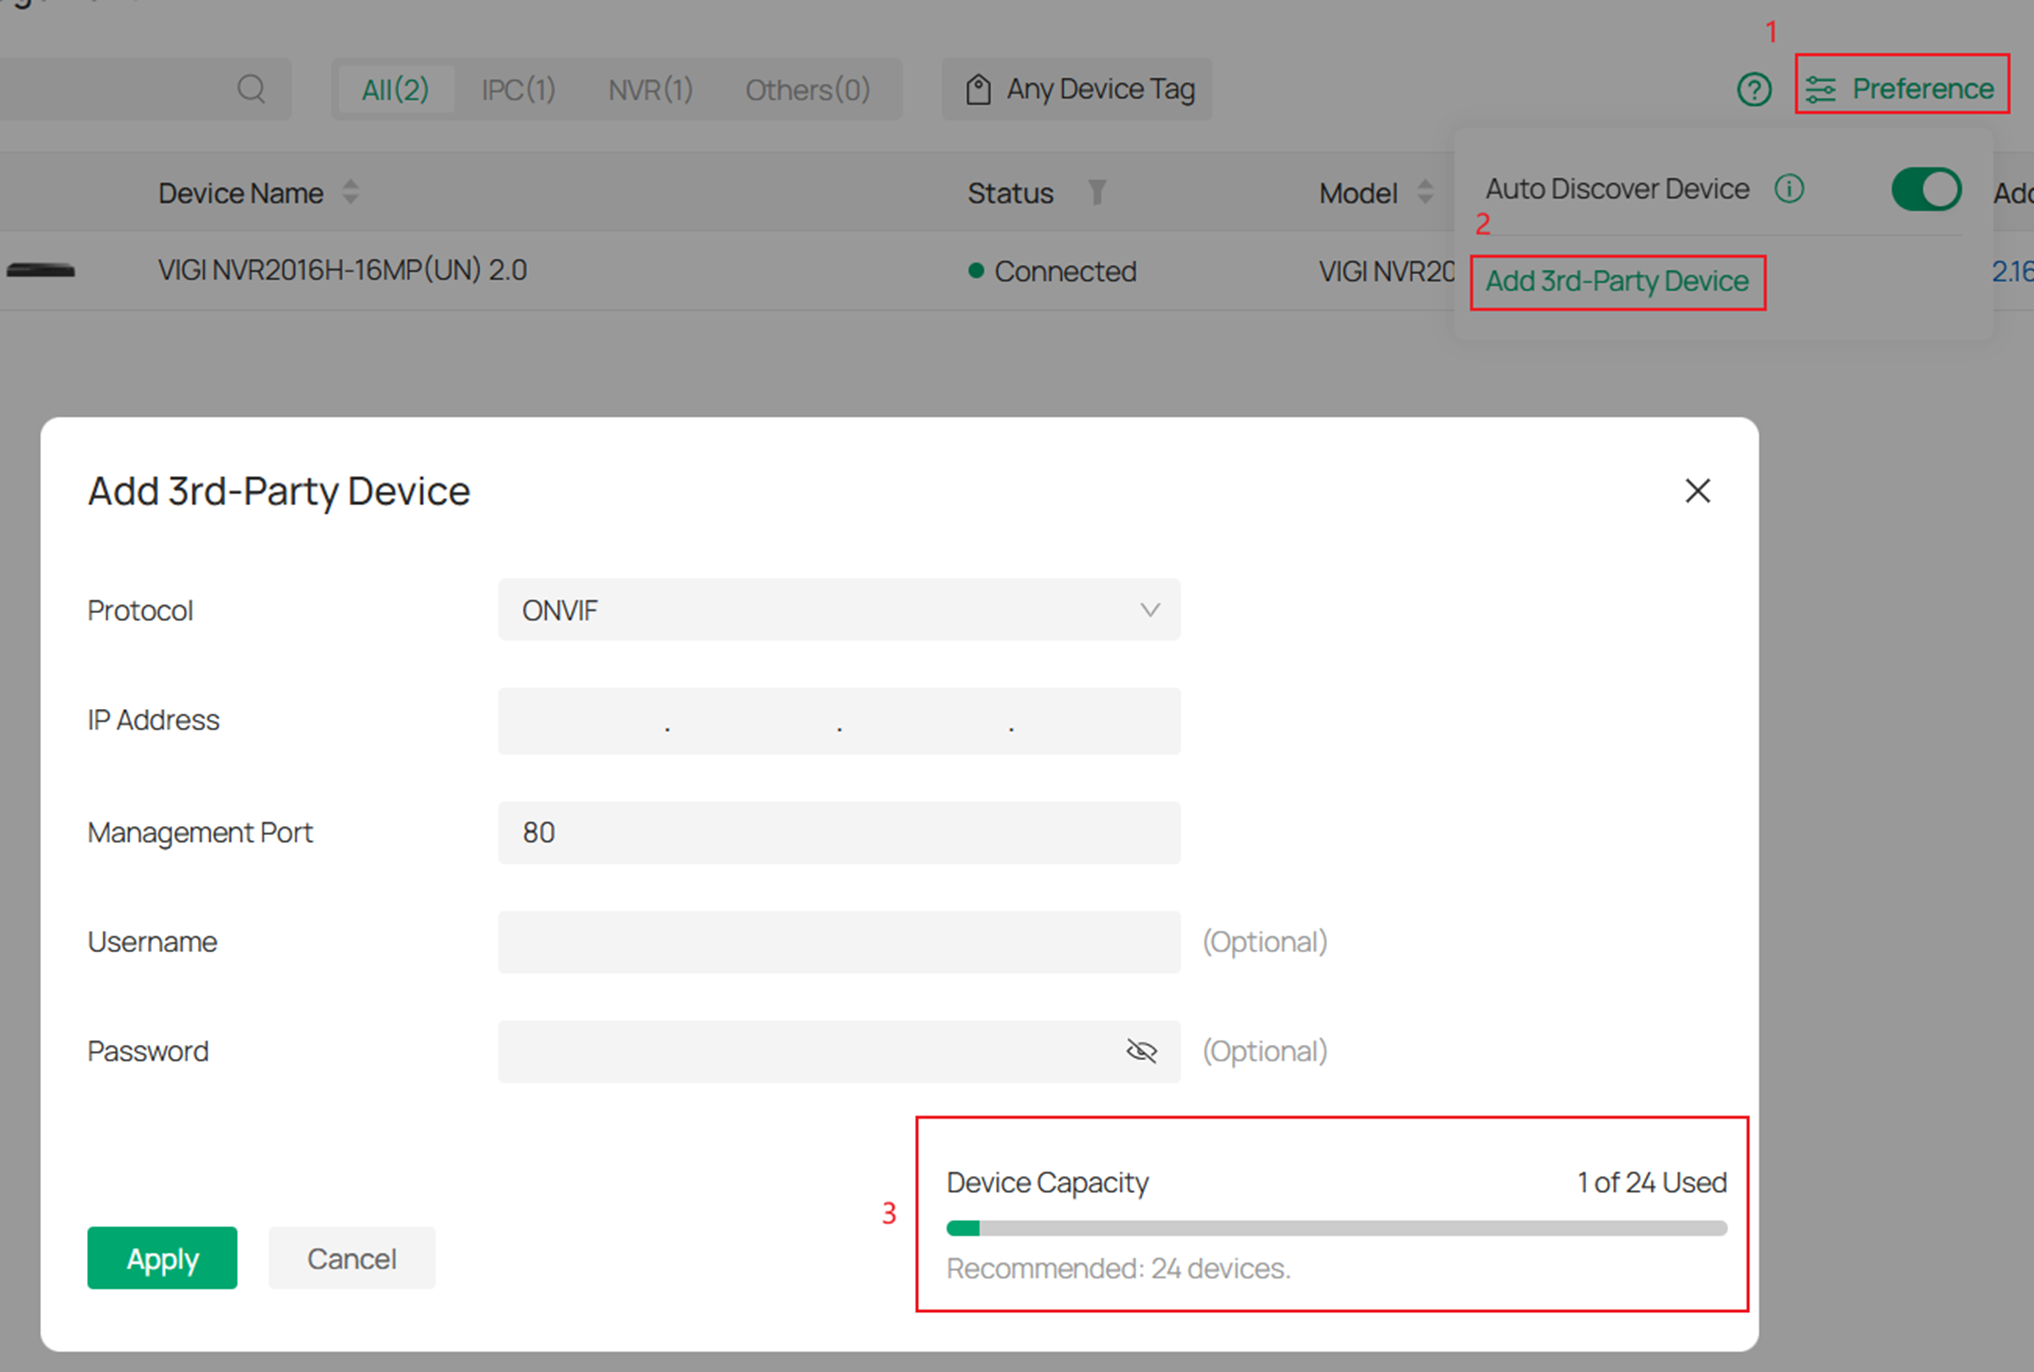
Notes: There is a limit to the number of devices that Fusion Gateway can manage. If the limit is reached, you need to delete existing devices before adding new ones.
You can go to Devices>Preference>Add 3rd-Party Device to check the device capacity.
Add devices on the App
Step 1. Omada Fusion Pro Gateway detected. Download Omada Guard Application.
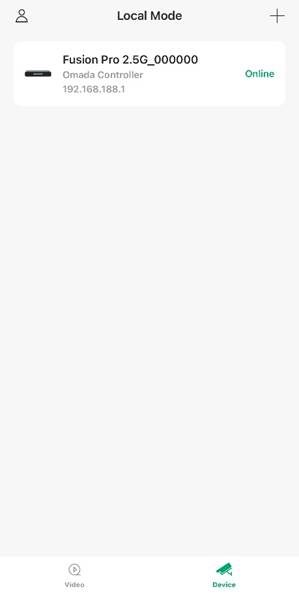
In local mode, you need to ensure that the app and the Fusion Gateway are in the same local network. This can be achieved by connecting your phone to the Wi-Fi SSID of the same LAN.
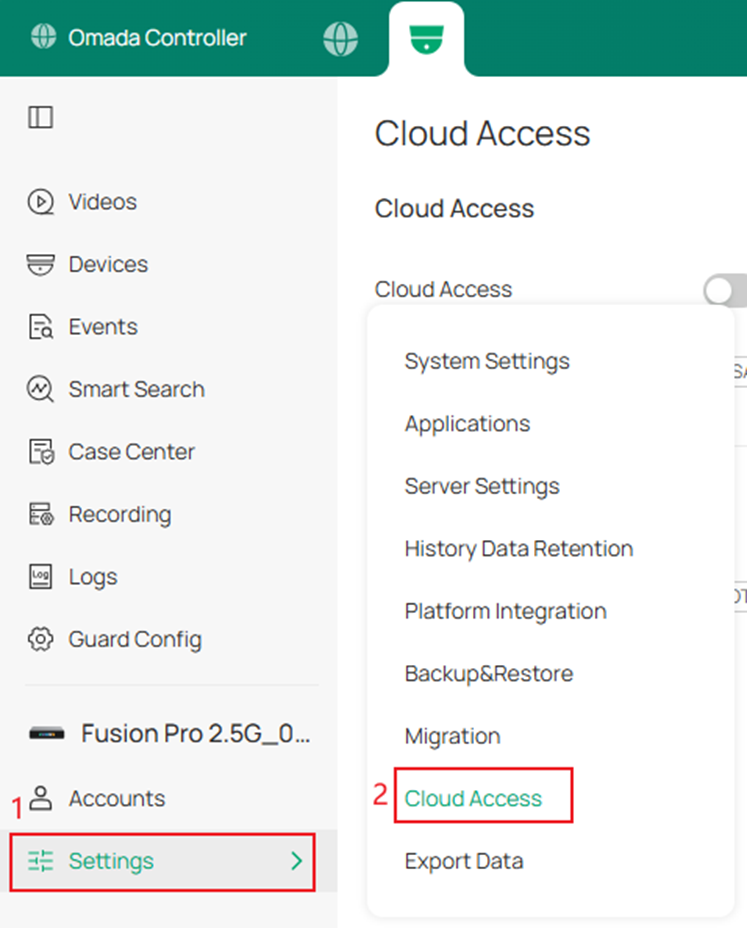
In Cloud mode, you need to bind your TP-Link ID to Omada Cloud.
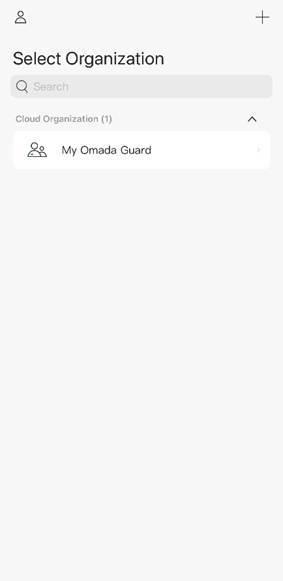
Later, you can discover your Omada Fusion device in the App.
Step 2. Tap to enter the Fusion details page. On the Devices page, you can automatically discover devices that are accessible, displaying the devices automatically scanned by the Fusion Gateway that are on the same local network.
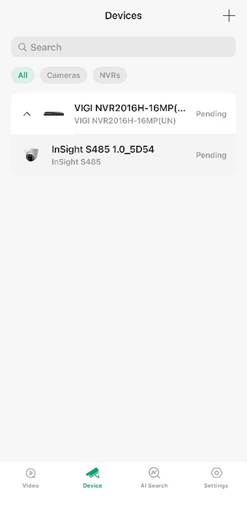
In addition, tap the “+” icon in the upper-right corner to actively search for adoptable devices. After selecting the device, enter its account credentials and confirm to complete the device adoption process. In cloud mode, you can also add devices by scanning the QR code.
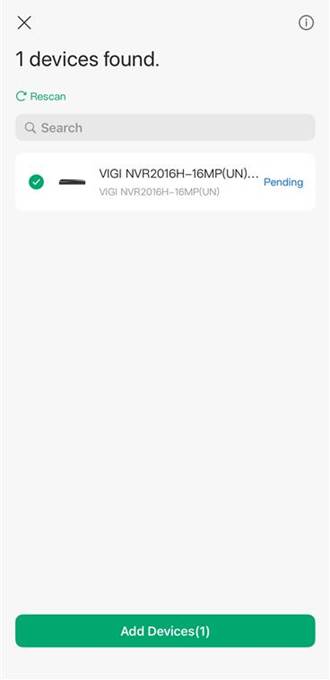
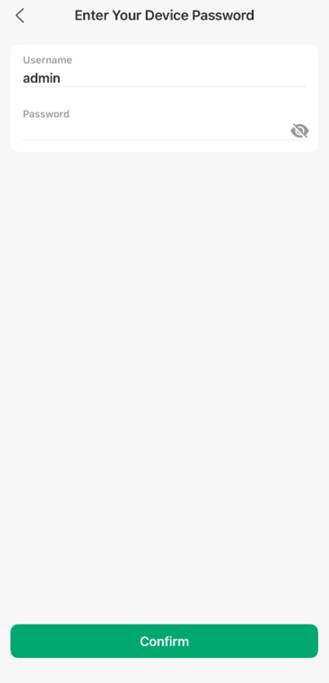
Notes: The device username is “admin” by default and can be edited and modified;
The device password is empty by default (required).
After batching account/password verification, the verification results will be displayed. Tap the Complete button to return to the device list.
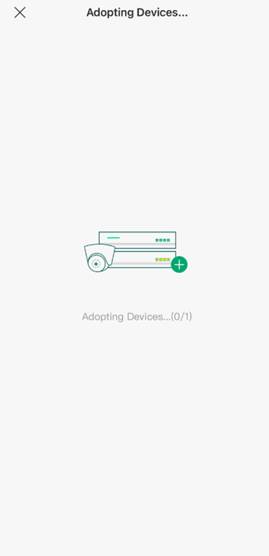
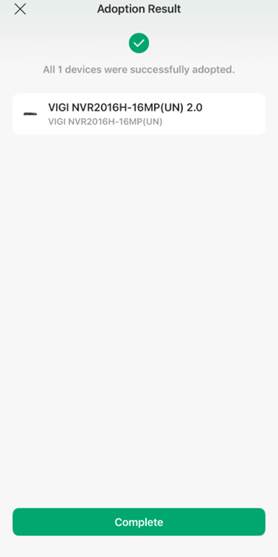
• Successfully verified devices will be added to the device list with the status “Connected”;
• Failed devices will be displayed in the device list with the status “Adoption Failed”;
• Some devices with failed verification support re-verification, while others do not.
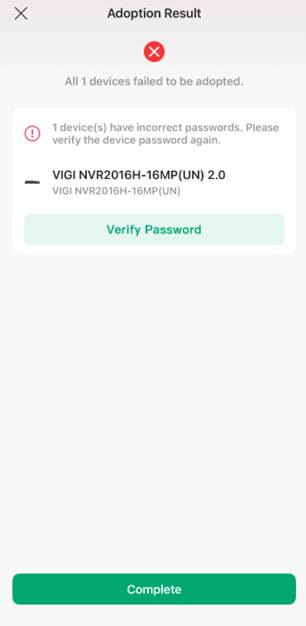
Note: If all the selected Pending devices are in the “Uninitialized” state, password verification is not required, and the devices can be adopted directly.
Furthermore, when adding devices, if the maximum limit has been reached, no additional devices can be selected, and system performance may be impacted.
Device Status List
The common status when adding a device is as follows:
|
Status |
Meaning |
|
Pending |
This device has not been adopted by this Fusion Gateway before. If the device is in the Uninitialized state, it will be adopted directly; If the device is not in the Uninitialized state, it will enter the account and password verification process. |
|
Adopt Failed |
Device account/password verification failed. |
|
Managed by Others |
The device was previously bound to another Fusion Pro Gateway, but is now disconnected from it (for example, due to the Ethernet cable being unplugged, resulting in network inaccessibility). |
|
Unsupported Firmware |
The device firmware is too outdated to support being added to the Omada Fusion Pro Gateway. |
|
Not Initialized |
In abnormal scenarios, the device may not be initialized automatically and will remain in the organization in the “uninitialized” state. Tap “Initialize” to start device initialization. After initialization is completed, the device will automatically enter the “Adopting” state. |
|
Connected |
The device has been successfully adopted, and its status is normal. |
Conclusion
This article introduces how to add new VIGI devices to the Omada Fusion Pro Gateway via the web page and the Omada Guard App.
To learn more about each function and configuration, please visit Support Home to download or check the manual for your product.
QA
Q1: Can third-party IPC devices be added to Omada Fusion Pro Gateway?
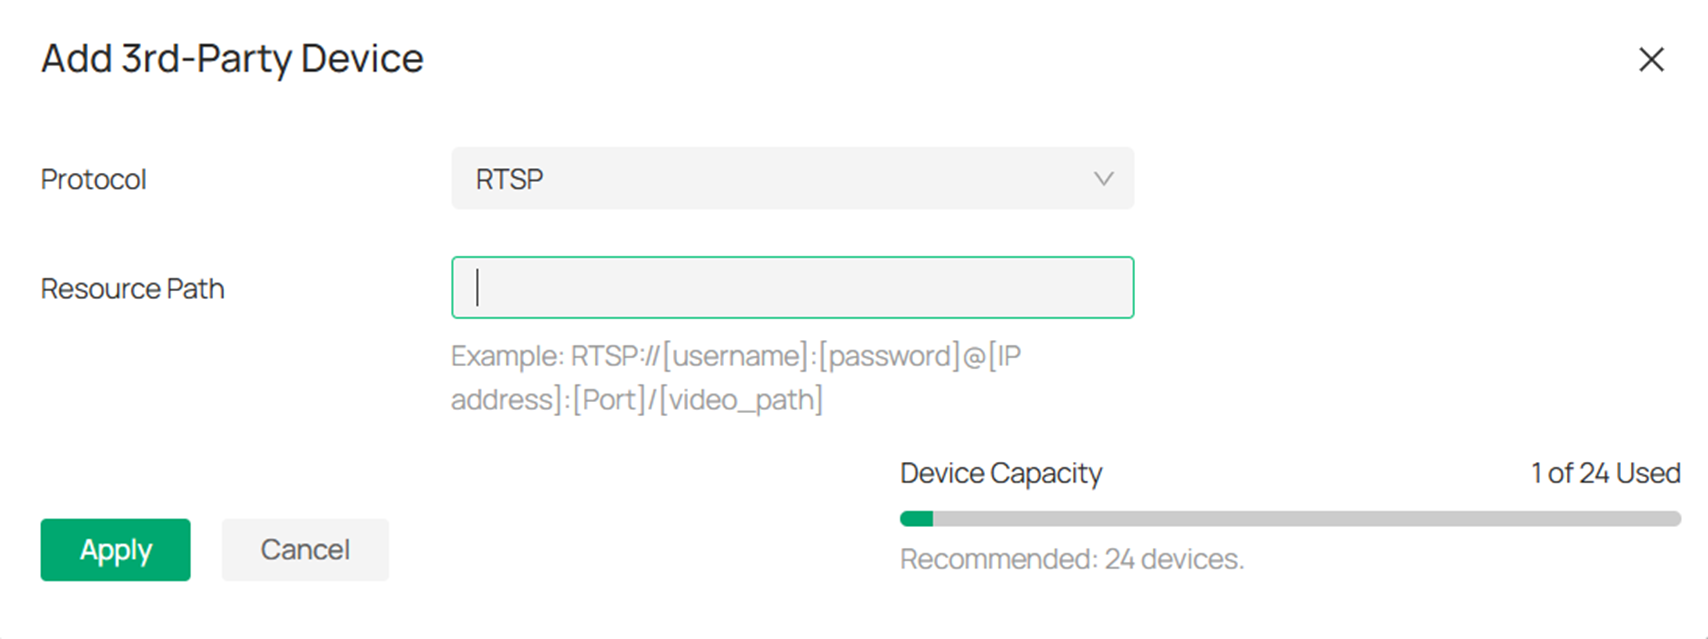
A1: Third-party devices can be added. Device information can be added on the Devices>Preference>Add 3rd-Party Device interface. Currently, third-party devices that support the ONVIF protocol and RTSP protocol can be added.