


Contents
Configuration for Controller Mode using PC
Configuration for Controller Mode using Omada App
Introduction
This article introduces the configuration and steps to configure the Lock to Wireless Device function on the Omada Controller via PC and Omada App. This feature binds a client to designated wireless devices, such as access points and Wi-Fi gateways, preventing unwanted roaming and improving connection stability.
Requirements
- Omada Controller: Software Controller, Hardware Controller, or Cloud-Based Controller (CBC)
- Omada App: Latest version, if configuring the feature through the app
- Compatible Omada EAP and Wireless Gateway: An EAP or Wireless Gateway that supports the Lock to Wireless Device feature
Configuration
Configuration for Controller Mode using PC
Step 1. Log in to the Controller, adopt the APs, and connect the target client wirelessly to them.
Step 2. Select the wireless client to configure. There are two ways to find the client for which you want to set the Lock to Wireless Device function:
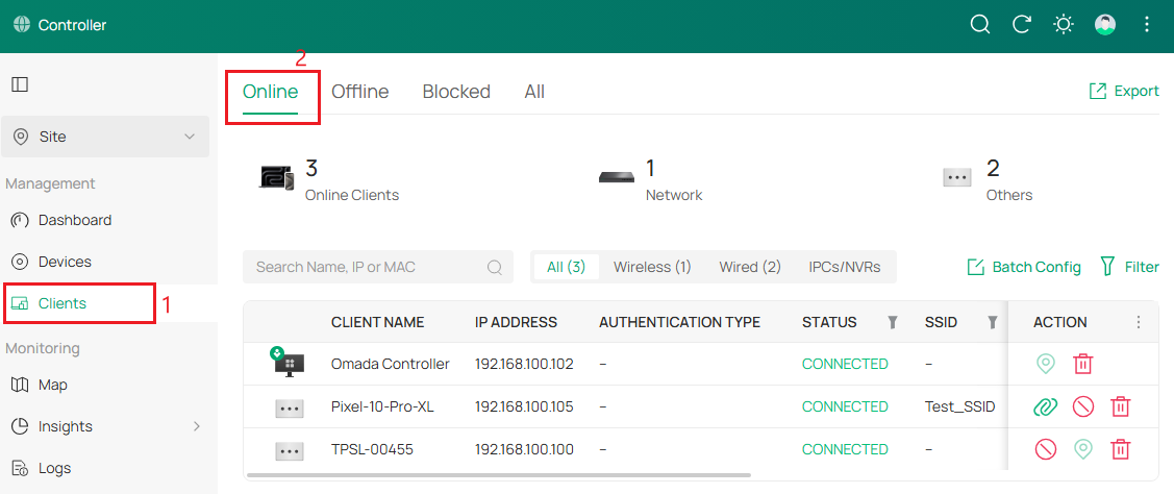
1. The first way to find a client is to go to Clients > Online page: This page shows all currently connected clients.
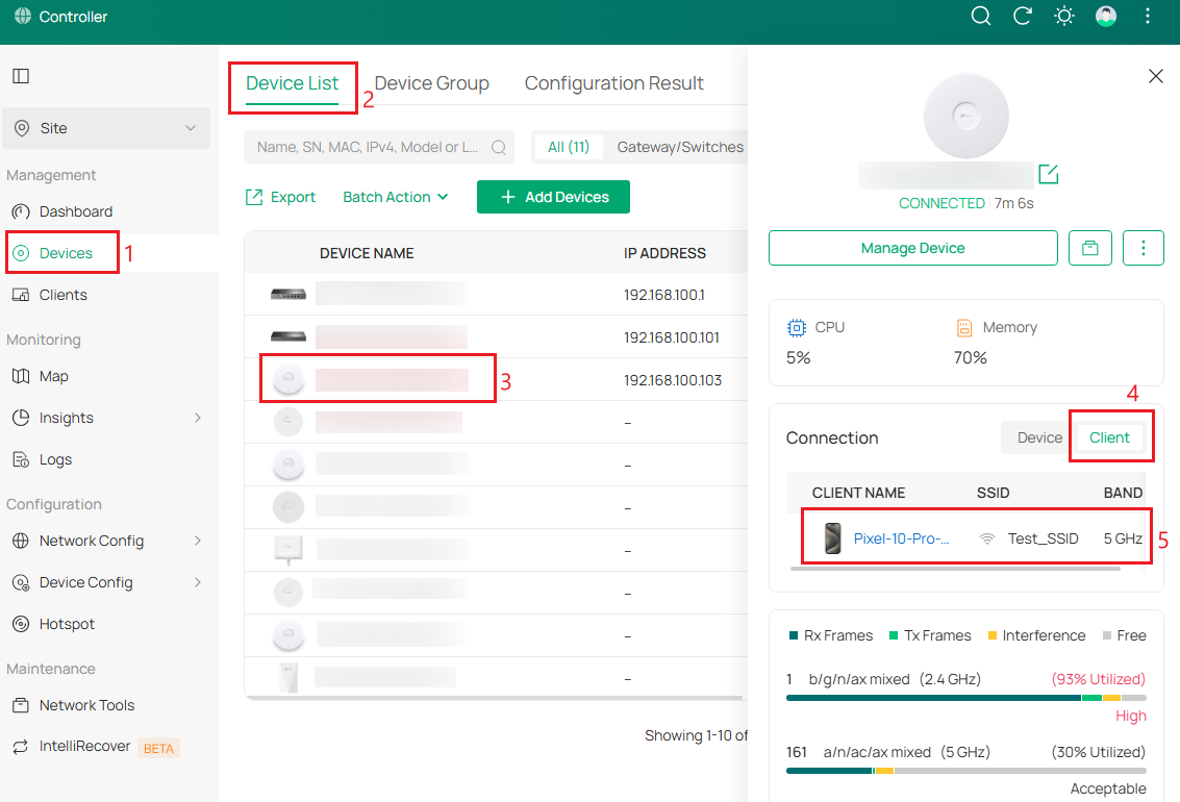
2. The second way to find a client is to go to Devices > Overview page and select a device: This page will show Current Clients connected to the chosen device.
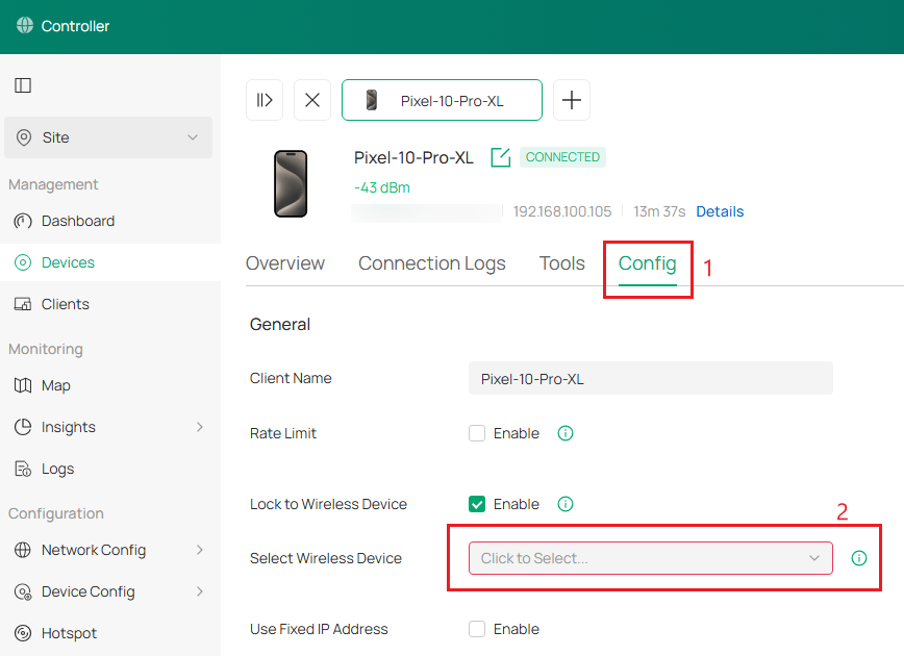
Step 3. On the selected client, go to Config and enable the Lock to Wireless Device option and select the target wireless device.
Select the target wireless device to bind to and click Apply.
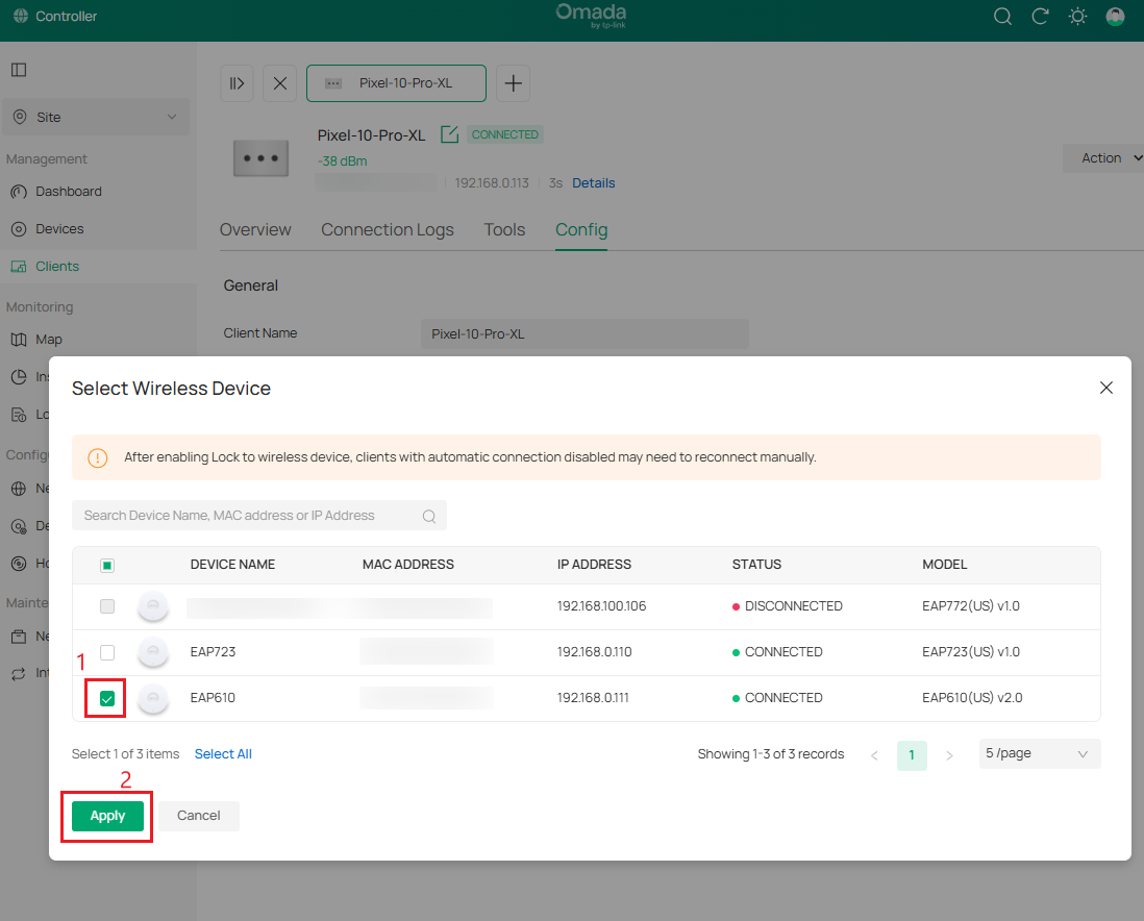
Note: A client can be locked to multiple wireless devices.
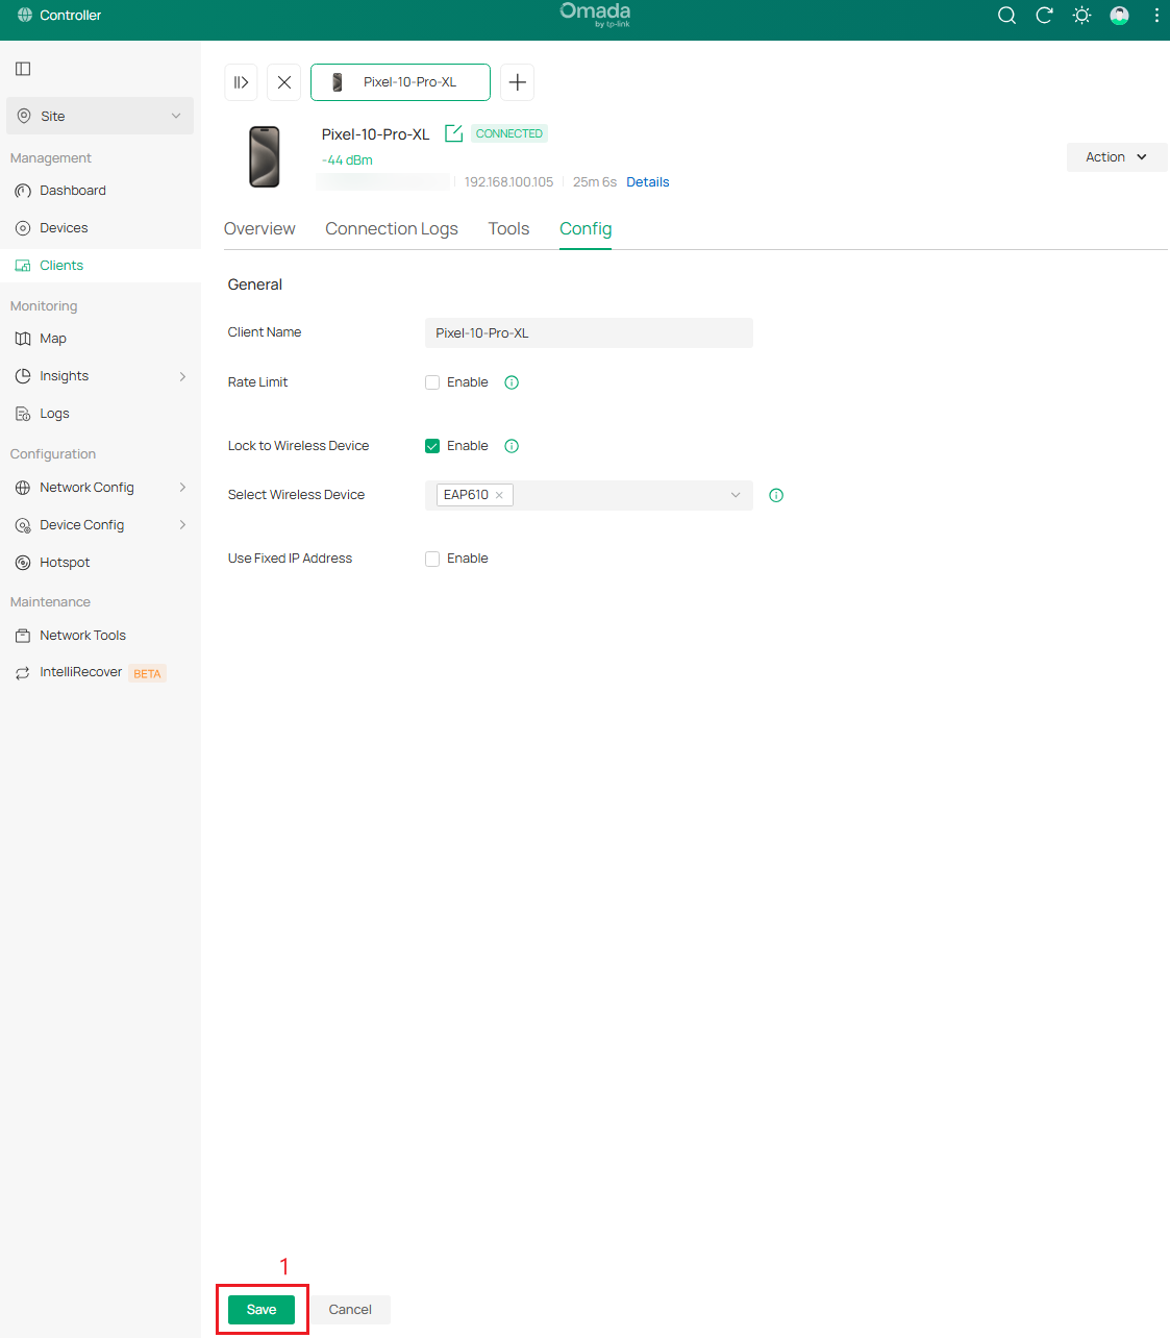
Note: When Lock to Wireless Device is enabled, you can lock the client to multiple wireless devices. To use this function, ensure your device is using the device MAC rather than a random MAC. Otherwise, the function may not take effect. Only 11ac and above products support this function.
Step 4. The client will now be locked to the wireless device(s) that were selected.
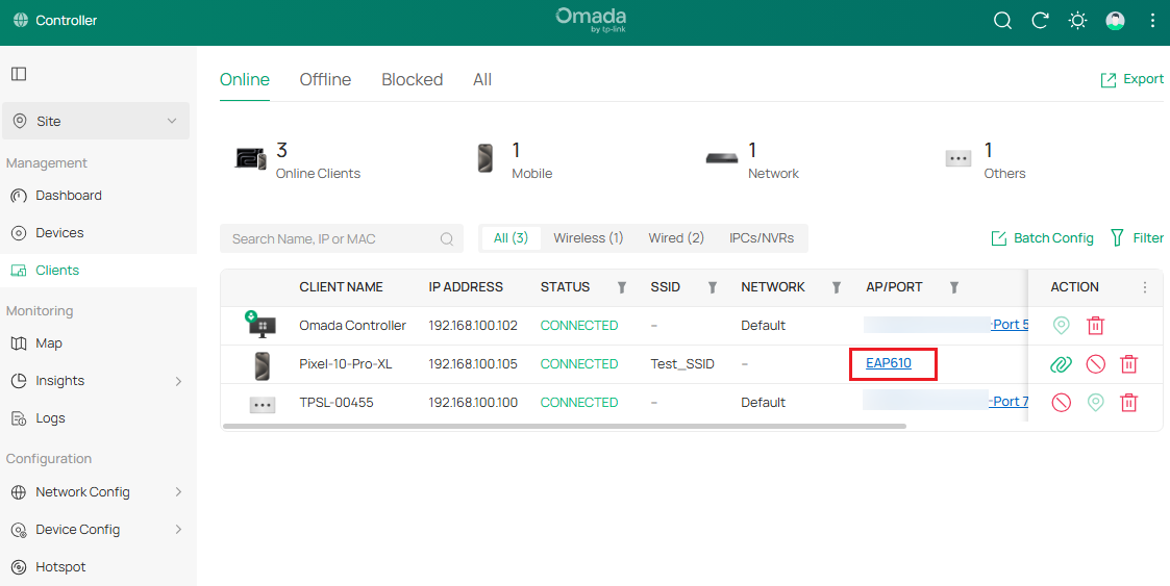
Note: After an EAP has been forgotten or moved to a different site, its associated Lock to Wireless Device rules will be automatically deleted by the Omada Controller.
Configuration for Controller Mode using Omada App
Step 1. Log in to the Omada App and go to the Controller, adopt the APs, and connect the target client wirelessly to them.
Step 2. Select the wireless client to configure. There are two ways to find the client for which you want to set up the Lock to Wireless Device function:
1. The first way to find a client is to go to Clients > Online page: This page shows all currently connected clients.
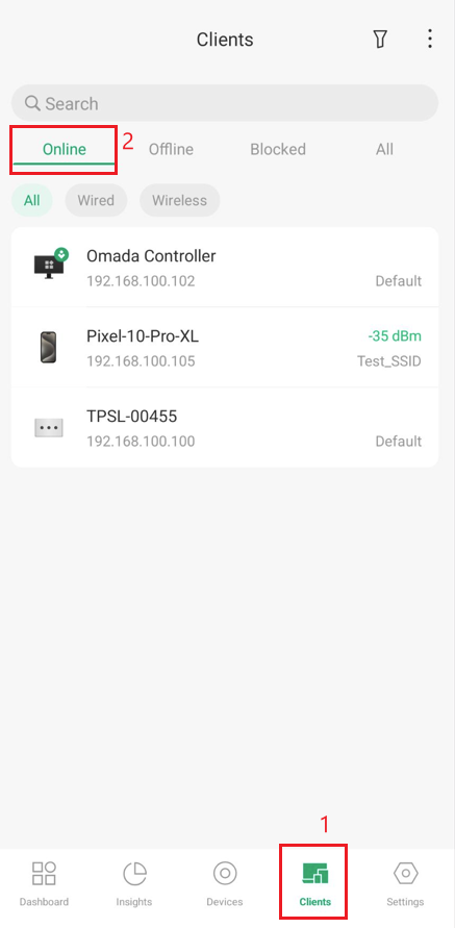
2. The second way to find a client is to go to Devices > Device List page.
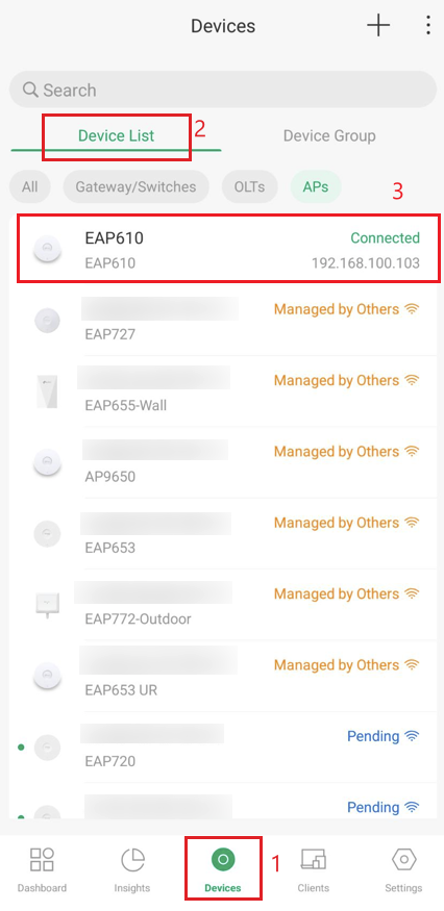
Select a device and go to Clients. This page will show Current Clients connected to the chosen device.
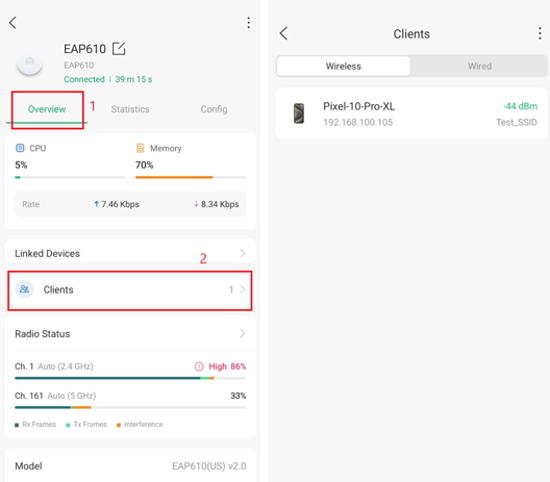
Step 3. On the selected client, go to Config and enable the Lock to Wireless Device option and select the target wireless device.
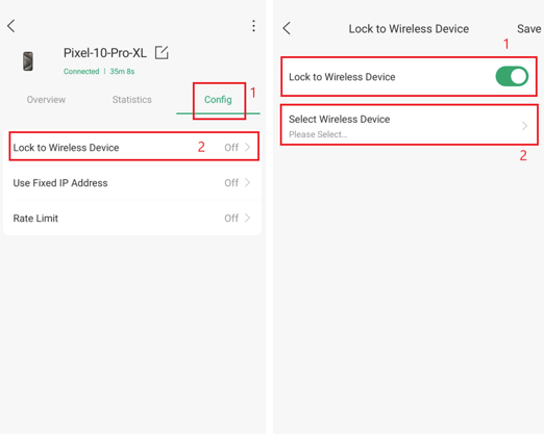
Select the target wireless device to bind to. The selected wireless device will show in the field. Then click Save.
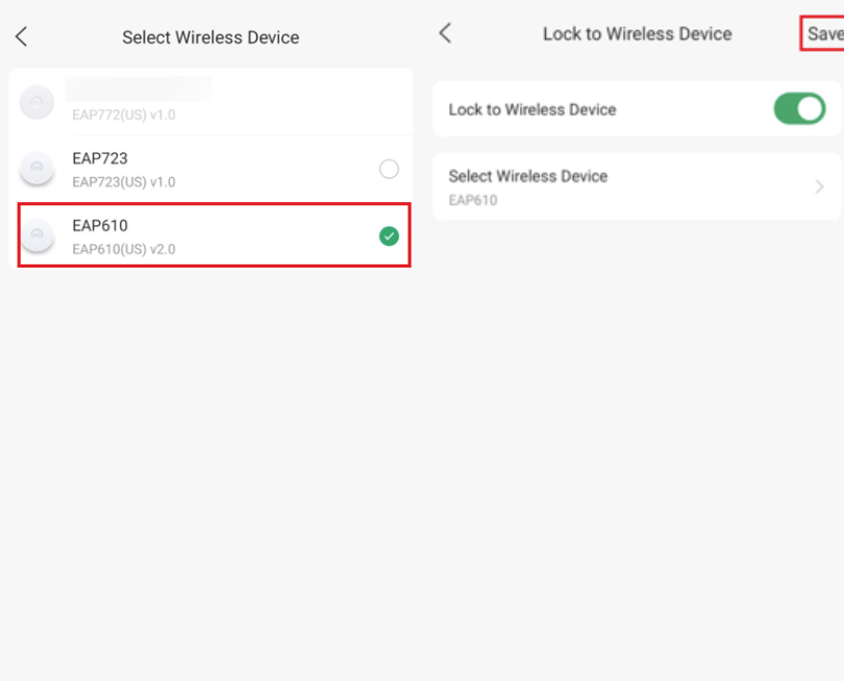
Note: When Lock to Wireless Device is enabled, you can lock the client to multiple wireless devices. To use this function, ensure your device is using the device MAC rather than a random MAC. Otherwise, the function may not take effect. Only 11ac and above products support this function.
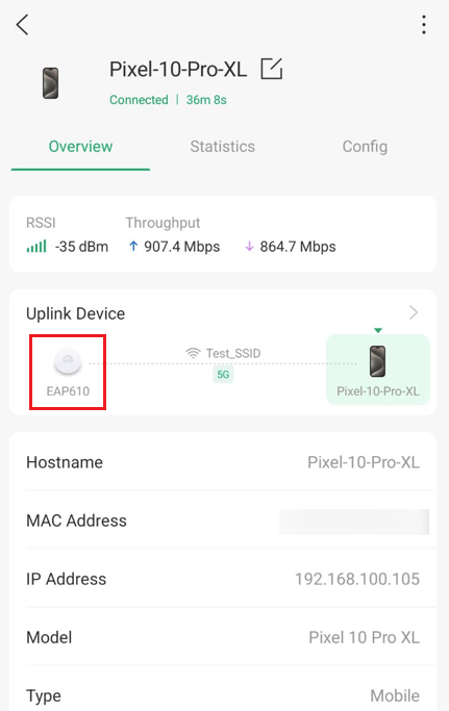
Step 4. The client will now be locked to the wireless device(s) that were selected.
Note: After an EAP has been forgotten or moved to a different site, its associated Lock to Wireless Device rules will be automatically deleted by the Omada Controller.
Conclusion
We have successfully configured the Lock to Wireless Device feature using the Omada Controller via the PC and Omada App.
To learn more about each function and configuration, please visit Support Home to download or check the manual for your product.
QA
Q1: Can I configure the Lock to Wireless Device function even if my client is disconnected?
A1: Yes, you can still go to Clients > Offline to find and configure this function for the disconnected clients. After the clients reconnect to the wireless network, the Lock to Wireless Device configuration for them will be updated automatically.
Q2: Can I configure both the Standalone Mode and the Controller’s Lock to Wireless Device feature at the same time?
A2: No, it is not recommended. Enabling the Lock to Wireless Device function on the standalone management page while simultaneously using this feature on the Controller can create configuration conflicts. For certain clients, such as wireless IP cameras (IPCs), these conflicting rules may disrupt normal network connectivity. To ensure stable client connection, manage the lock setting exclusively through one platform (recommended via the Controller) rather than configuring both at the same time.
Q3: When all locked wireless devices go offline, can clients still connect to the wireless network?
A3: Yes. Since controller v6.2.10, if all locked wireless devices go offline, the controller will lift the connection restrictions on the client, allowing it to connect to SSIDs on other wireless devices.
Q4: What happens when a locked wireless device comes back online while clients are connected to other wireless devices?
A4: The controller periodically checks the Lock to Wireless Device settings. When the locked wireless device comes back online, the client will still connect to the wireless device that is not in the Lock to Wireless Device rules. After a period, the controller checks the client list against the rules and will reconnect the client to the wireless device(s) that were set in the Lock to Wireless Device settings.
Note: If the client connects to an adopted AP in the site that does not support the Lock to Wireless Device feature, the lock restrictions cannot be actively enforced on that AP, and the client may remain connected to it.
Q5: What should I check if the client is not properly binding to the selected wireless device?
A5: Ensure the client does not have the Randomized MAC address feature enabled on the device.
