


Content
Use Omada Cameras with Third-Party NVR/NAS/Software via ONVIF
Use Omada Cameras with Third-Party NVR/NAS/Software via RTSP
Introduction
Omada Cameras are designed to work seamlessly with Omada NVRs for centralized monitoring, recording, and management. However, if you already use a third-party NVR, NAS, or video management software (VMS), Omada Cameras can also be integrated through industry-standard protocols.
Omada Cameras support ONVIF Profile S, G, and T, enabling compatibility with a wide range of third-party devices and applications.
- ONVIF Profile S: Supports basic video streaming functions, including live video/audio streaming, PTZ control, and video configuration.
- ONVIF Profile T: Supports advanced video streaming features, including H.264/H.265 video streaming, imaging settings, motion and tampering events, and metadata.
- ONVIF Profile G: Supports video recording and storage-related functions, including recording management, storage control, and playback.
When ONVIF is not supported, you can use the RTSP protocol to stream live video to compatible platforms. This article explains how to connect Omada Cameras to third-party NVRs, NAS devices, and software using both ONVIF and RTSP.
Requirements
- Omada Cameras
- Third-Party NVR/NAS/Software
Configuration
This section describes the configuration steps.
Use Omada Cameras with Third-Party NVR/NAS/Software via ONVIF
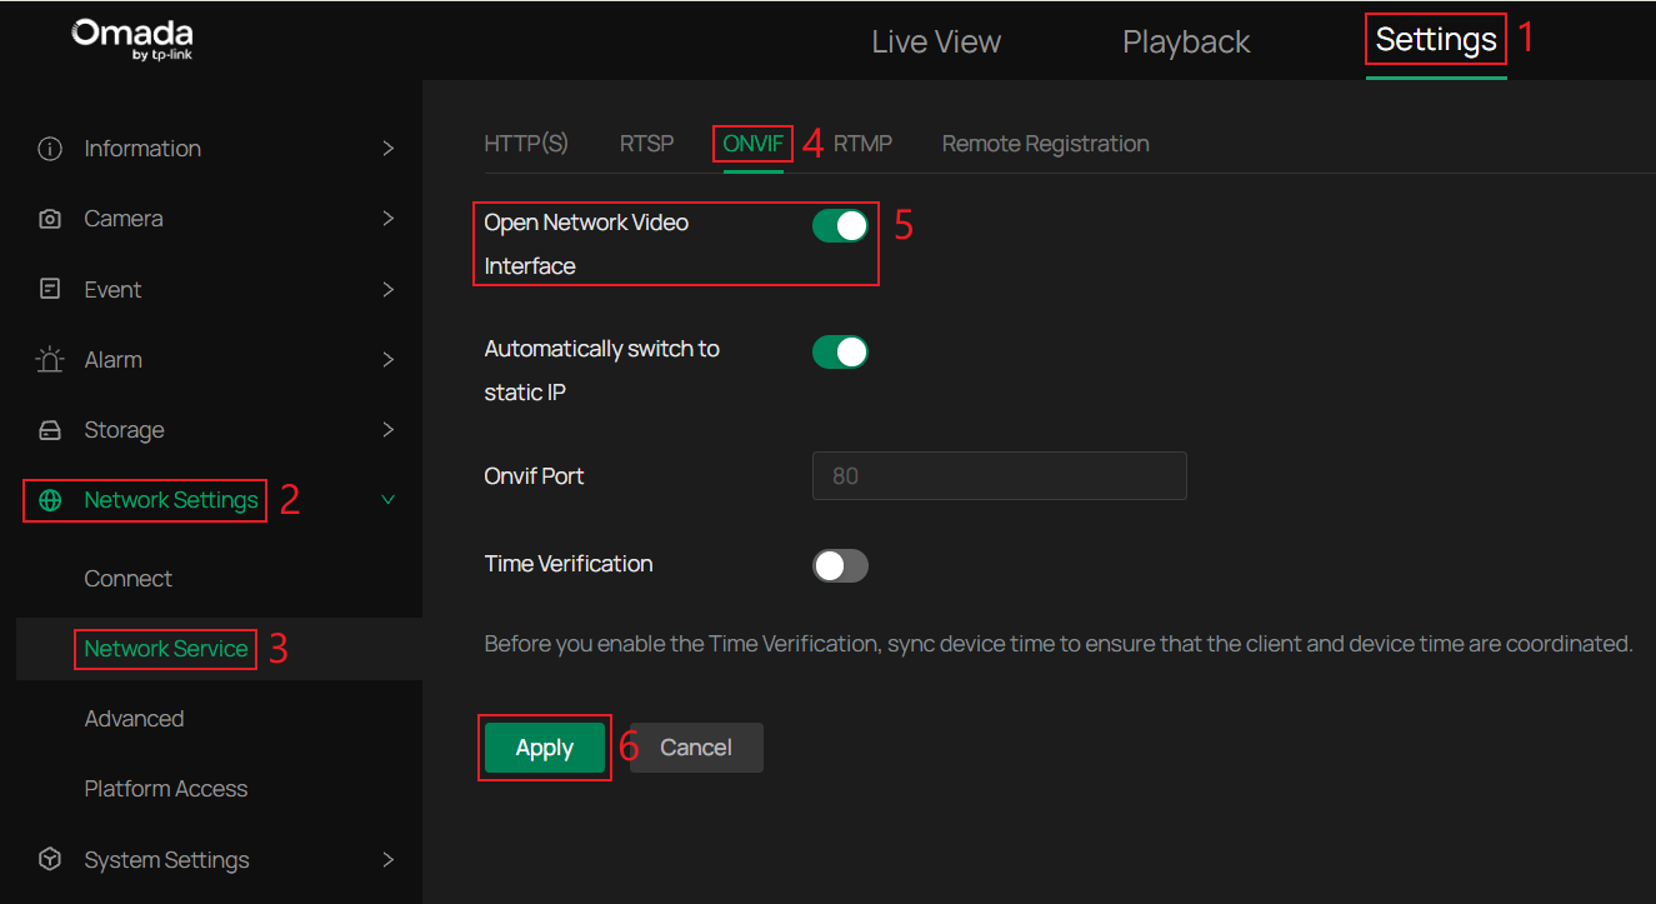
Step 1. (Optional) ONVIF is enabled by default. You can skip this step unless you have manually disabled it. This article uses the Web UI as an example. Access the camera’s web management interface, navigate to Settings > Network Settings > Network Services > ONVIF, enable Open Network Video Interface, and configure other parameters as needed. Click Apply to apply the settings.
Step 2. Ensure that the third-party NVR, NAS, or software has network connectivity to the camera. They can be on the same subnet or on different subnets with proper routing configured.
Step 3. Add the Omada Camera to the third-party device. This article uses iSpy as an example to demonstrate the configuration process.
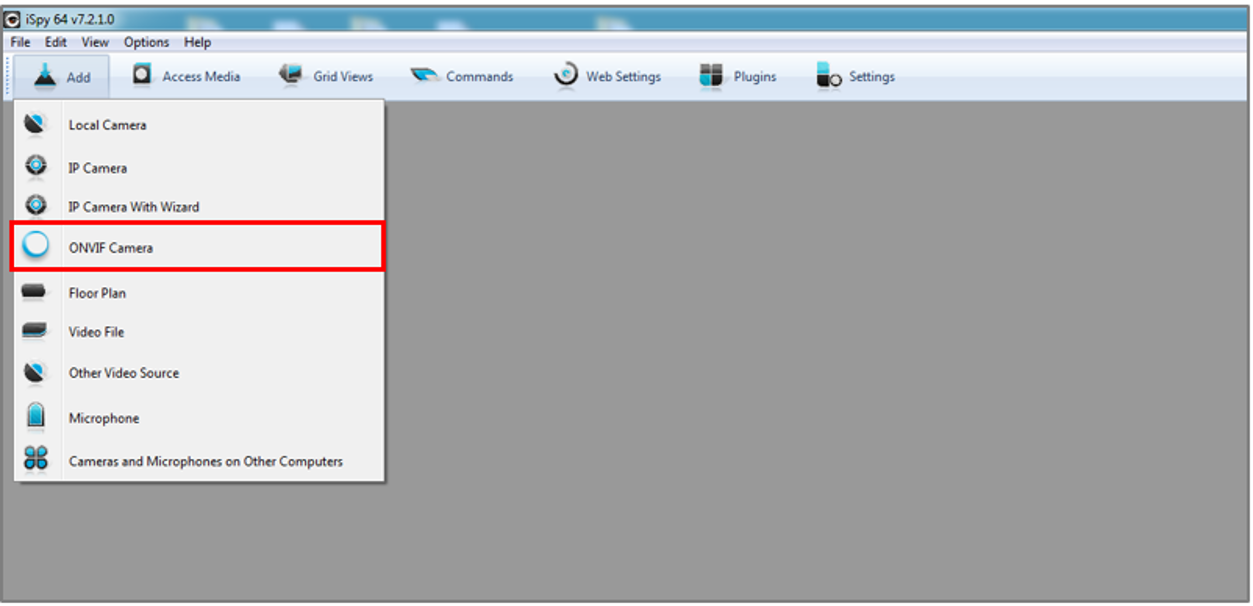
Launch iSpy on your computer, click Add on the top-left menu and select ONVIF Camera.
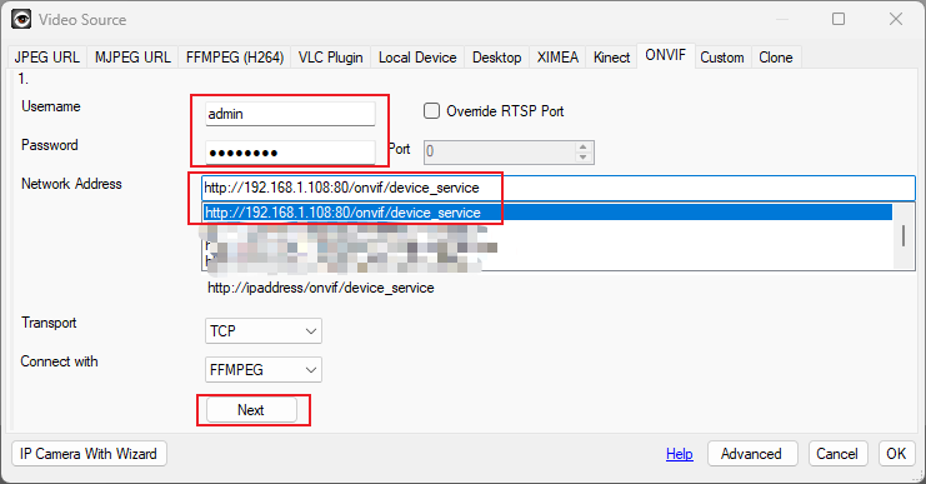
Step 4. Enter the Username and Password for your camera. Under Network Address, select the camera from the list of discovered ONVIF devices.
If the camera is not discovered automatically, manually enter its ONVIF service URL in the following format:
http://<camera_ip>:80/onvif/device_service
Configure other parameters as needed, and click Next.
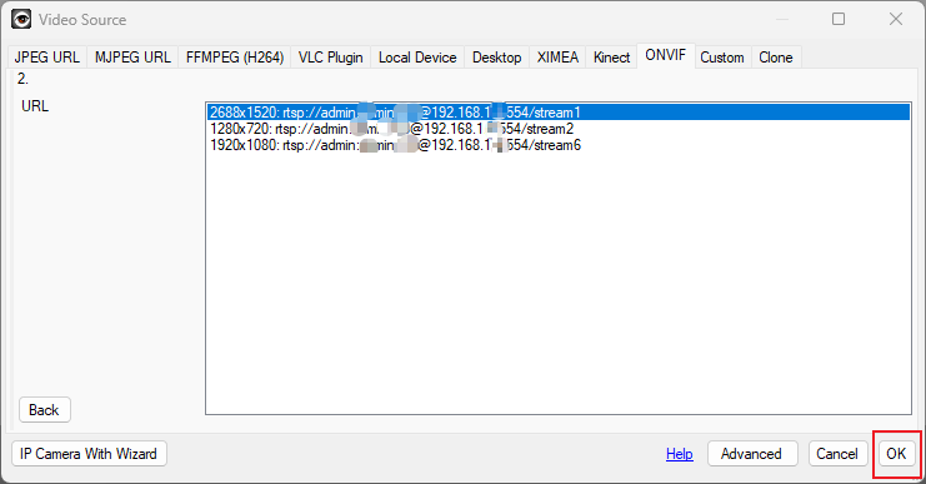
Step 5. Choose the video resolution and click OK.
Step 6. Customize the camera settings as needed, including Microphone, Talk, Motion Detection, Alerts, Recording, Images, Scheduling, and Storage. These settings can also be modified later if needed. Click Finish to complete the camera setup in iSpy.
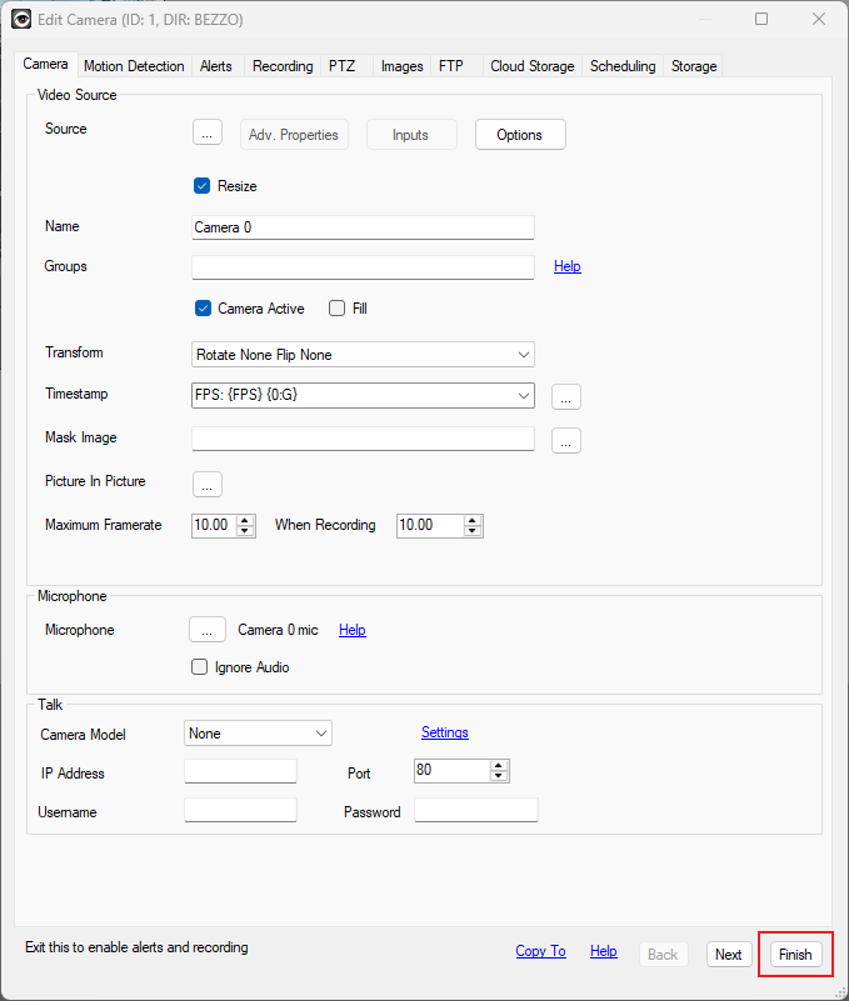
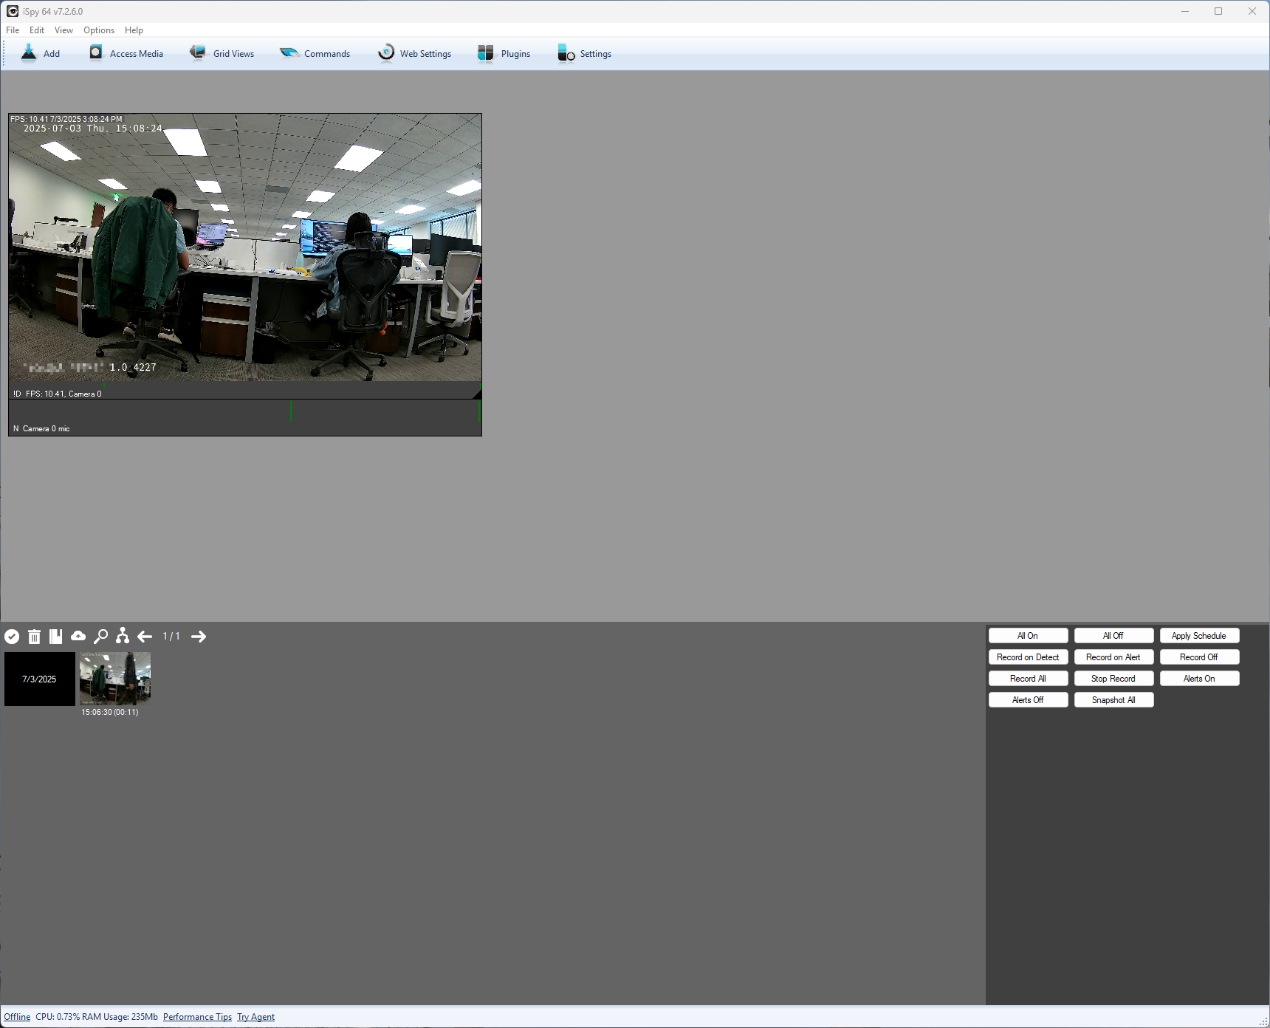
Step 7. After adding the Omada Camera to iSpy, you can use iSpy to monitor and manage the camera, including viewing the live stream, configuring motion detection, reviewing recordings, and setting recording schedules.
Use Omada Cameras with Third-Party NVR/NAS/Software via RTSP
When the ONVIF Profile is not supported on a third-party device, Omada Cameras can also enable live streaming on third-party platforms via the RTSP protocol.
Step 1. (Optional) This article uses the Web UI as an example. Access the camera's web management interface, navigate to Settings > Network Settings > Network Services > RTSP, verify the RTSP Port. By default, the camera uses port 554. If necessary, you can modify the port and save the settings.
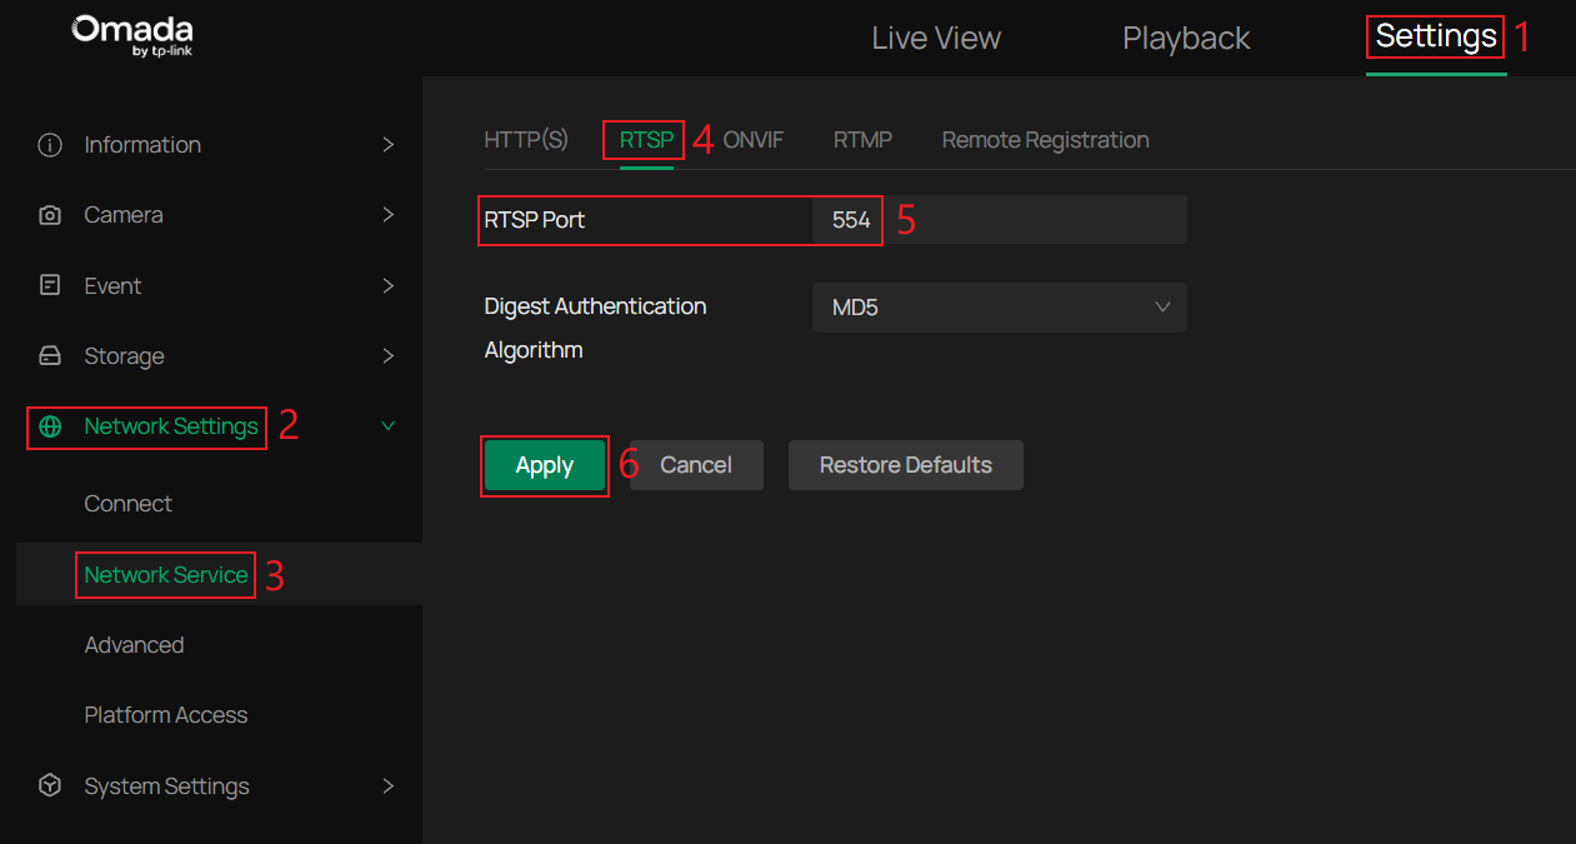
Note: RTSP is enabled by default and cannot be disabled. If you change the RTSP port, make sure the selected port is not already in use by another feature or service, and use the new port number when connecting from third-party software.
Step 2. Ensure that the third-party NVR, NAS, or software has network connectivity to the camera. They can be on the same subnet or on different subnets with proper routing configured.
Step 3. Add the Omada Camera to the third-party device. This article uses VLC as an example to demonstrate the configuration process.
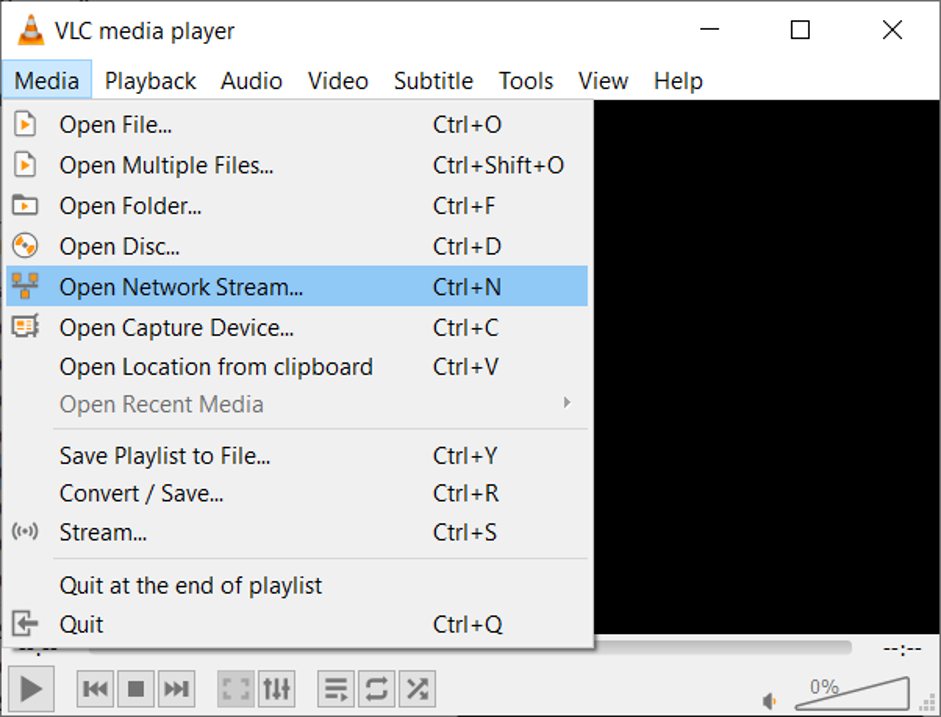
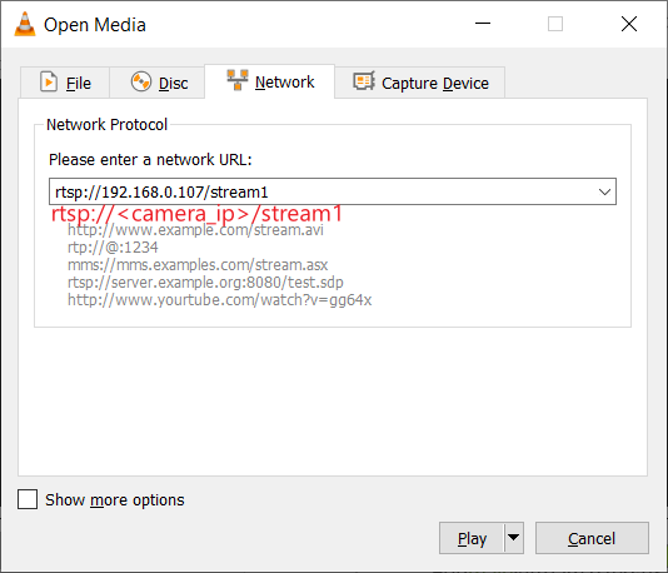
Launch VLC on your computer, select Media > Open Network Stream.
Step 4. Fill in the URL of the Omada camera.
The URL of the RTSP live stream for the Omada cameras will be:
For main stream: rtsp://<camera_ip>/stream1
For sub-stream: rtsp://<camera_ip>/stream2
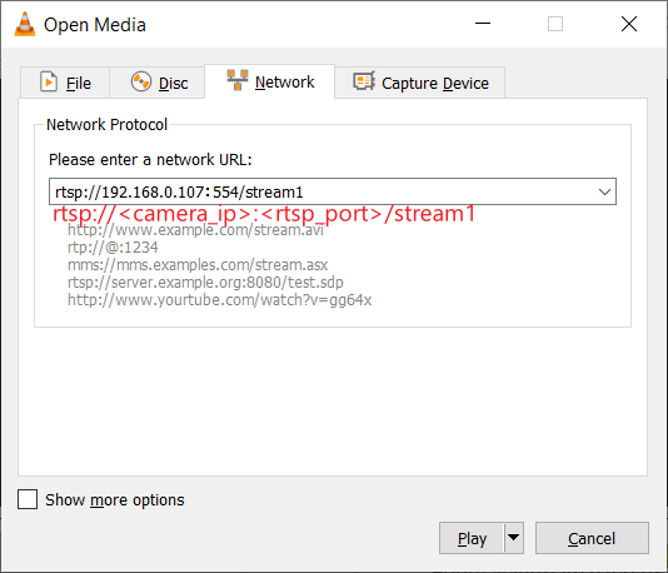
In some software, or you have modified the RTSP Port in Step 1, the URL needs to include the port to access the live stream:
For main stream: rtsp://<camera_ip>:<rtsp_port>/stream1
For sub-stream: rtsp://<camera_ip>:<rtsp_port>/stream2
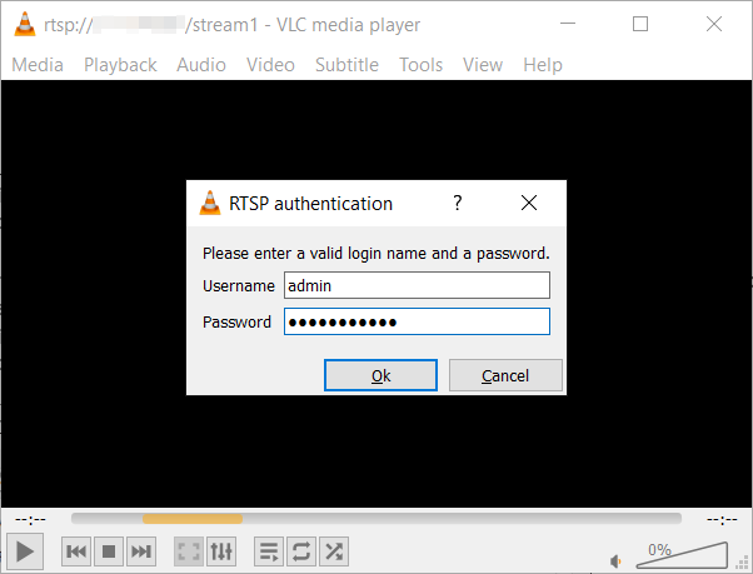
Step 5. Enter the Username and Password for your camera, and click OK.
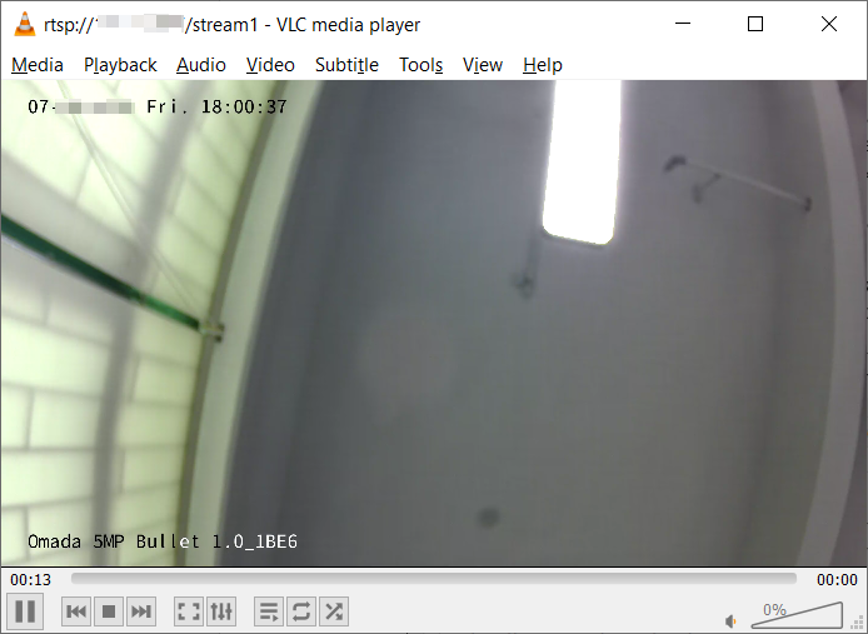
Step 6. The Omada Camera live stream is now playing successfully in VLC.
Conclusion
By following this guide, you can integrate Omada Cameras with compatible third-party NVRs, NAS devices, and video management software using either ONVIF or RTSP, depending on the capabilities of your platform. This allows you to view live video, configure supported camera functions, and incorporate Omada Cameras into your existing surveillance system without requiring an Omada NVR.
QA
Q1: How can I view the live stream of the Omada camera remotely from another network?
A1: You can either set up a VPN or configure port forwarding on your router to allow remote devices to access the camera through your router's public IP address. However, because RTSP and ONVIF are not designed for direct exposure to the Internet, we do not recommend exposing these services through port forwarding for extended periods. Instead, use a secure VPN connection whenever possible.
Q2: What ports are used by the Omada camera for RTSP/ONVIF?
A2: The Omada camera uses the following ports for RTSP/ONVIF by default:
ONVIF Service Port: 80
RTSP Service Port: 554
Q3: Does the Omada Camera support two-way audio when connected via RTSP/ONVIF?
A3: Currently, the initial released firmware can’t support the two-way audio feature via the ONVIF profile T. This feature is planned for a future official firmware release.
To learn more about each function and configuration, please visit Support Home to download or check the manual for your product.
