


목차
소개
Webhook 기능은 사전에 정의된 이벤트(예: 장치가 온라인 상태가 되거나 알림이 트리거되는 경우)가 발생할 때마다 Omada Controller가 사용자 지정 URL로 실시간 알림을 자동으로 전송할 수 있도록 해줍니다. 이를 통해 지속적인 폴링이 필요하지 않으며, 네트워크 상태 변경을 즉시 파악하여 모니터링, 경고 및 워크플로우 자동화를 원활하게 할 수 있습니다.
요구 사항
- Omada 소프트웨어/하드웨어 컨트롤러 또는 Omada Central
- Webhook 서버
구성
Webhook 기능이 올바르게 동작하는지 검증하기 위해 다음 단계로 진행합니다: Webhook 서버 준비, Omada Controller에서 Webhook 기능 활성화, 이벤트 트리거 후 해당 로그가 서버로 전송되는지 확인, Webhook 서버에서 수신된 데이터 검토.
1단계. Webhook 서버 준비
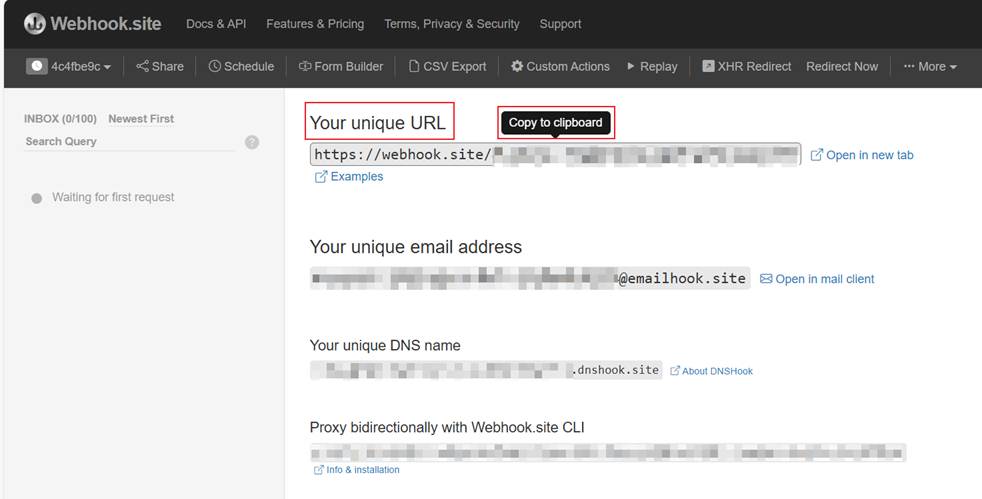
Webhook 데이터를 수신 및 처리할 수 있는 서버가 필요합니다. 본 데모에서는 https://webhook.site/에서 제공하는 임시 URL 서비스를 사용합니다. 웹사이트에 접속하여 생성된 URL을 클릭한 뒤 클립보드에 복사하세요.
2단계. 컨트롤러에서 Webhook 서버 주소 구성
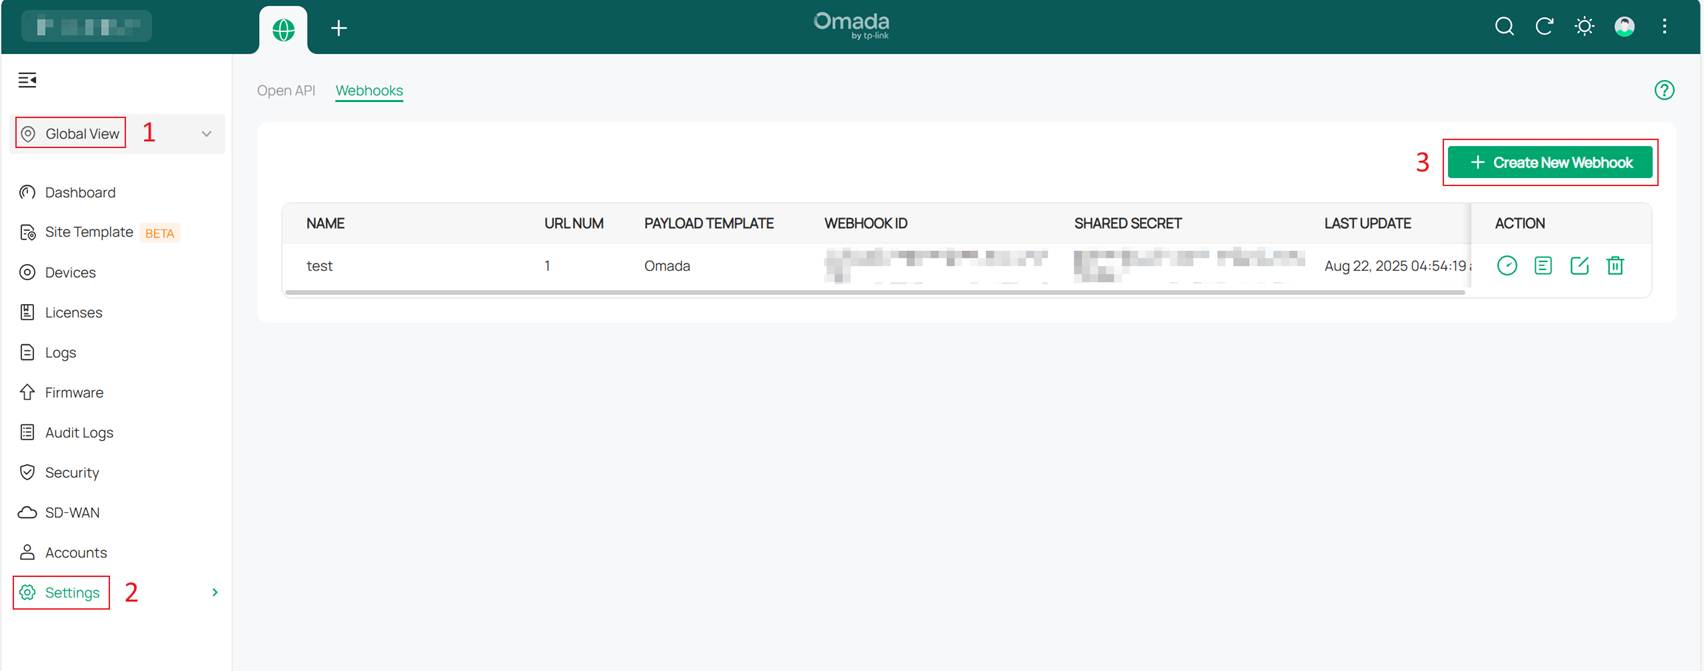
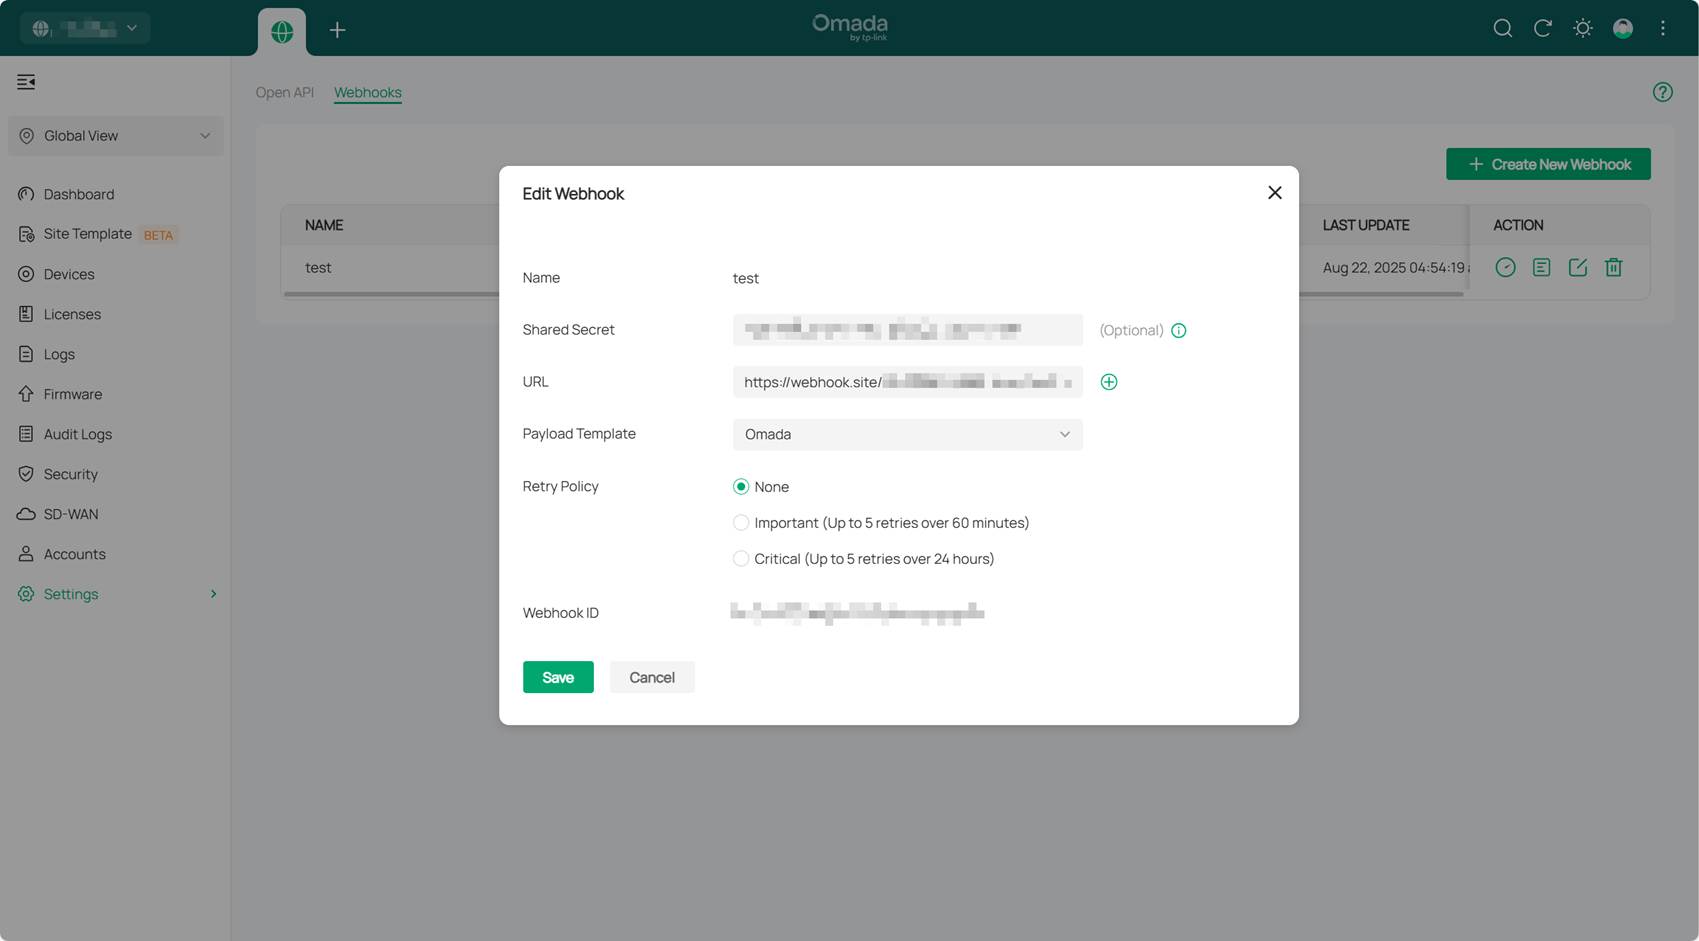
다음으로 Omada Controller에서 Webhook 서버 주소를 설정합니다. Settings > Platform Integration > Webhooks 경로로 이동한 후 Global 보기에서 URL을 입력하고, 원하는 페이로드 형식을 선택하며, 필요 시 재전송 정책(Retry Policy)을 정의하여 전송 실패 시 재시도를 제어할 수 있습니다.
참고:
- 페이로드 템플릿: Omada Controller가 Webhook 알림을 전송할 때 사용할 데이터 형식 및 구조를 의미합니다. 현재 Omada와 Google Chat 두 가지 옵션이 지원됩니다.
- 재전송 정책: 네트워크 문제 등으로 지정한 Webhook 서버 주소로 알림 전송이 실패할 경우 Omada Controller가 어떻게 대응할지를 정의합니다. None은 성공/실패 여부와 관계없이 한 번만 전송합니다. Important는 최대 60분 동안 5회 재시도합니다. Critical은 최대 24시간 동안 5회 재시도합니다.
3단계. 특정 알림 또는 이벤트에 대한 Webhook 알림 설정
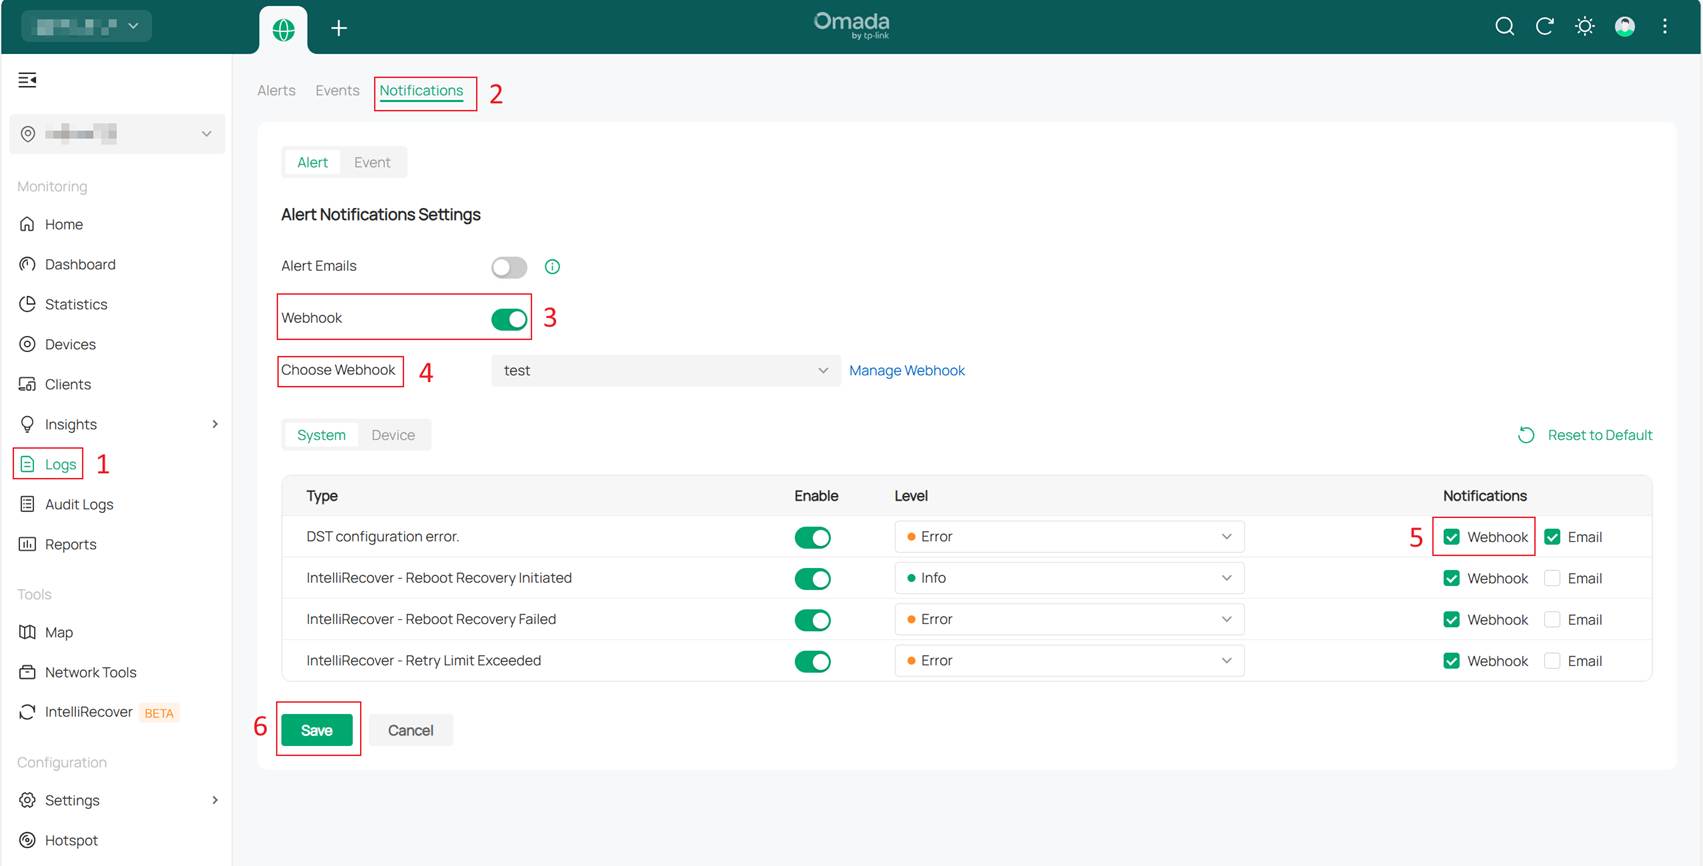
컨트롤러의 사이트 보기에서 Logs 탭으로 이동한 뒤 Notifications을 찾습니다. 아래 그림과 같이 필요한 이벤트나 알림에 대해 Webhook 알림을 활성화할지 구성할 수 있습니다. 이로써 컨트롤러에서 Webhook 설정이 완료됩니다.
검증
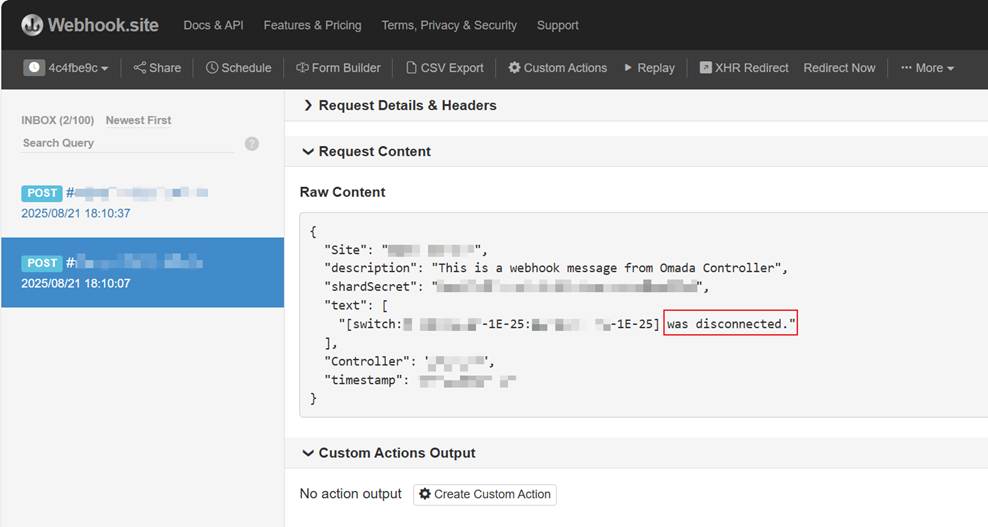
Device Connected 및 Device Disconnected 이벤트에 대한 Webhook 알림을 설정한 후(1~3단계), 컨트롤러에서 "connected"로 표시된 장치의 전원을 분리했습니다. 잠시 후 해당 장치에 전원을 다시 공급하자 컨트롤러에서 정상적으로 재채택되었습니다. Webhook 서버를 확인해 보니 두 개의 알림이 수신되었습니다. 하나는 장치가 연결 해제됨을, 다른 하나는 장치가 연결됨을 나타냈습니다.
결론
Omada Controller의 Webhook 기능을 구성하면 네트워크 관리 방식을 "수동 조회"에서 "능동 인식"으로 전환할 수 있습니다. 이 기능은 구성하기 간단하면서도 강력하여 지능적이고 자동화된 네트워크 운영 시스템을 구축하는 핵심 요소로 활용될 수 있습니다.
각 기능과 설정에 대한 더 많은 세부 정보를 확인하려면 다운로드 센터에서 해당 제품의 설명서를 다운로드하세요.
이 문서에는 기계 번역이 적용되었으며, 정확한 내용을 확인하려면 원본 영문 문서를 참고하시기 바랍니다.
