


Contents
Modify VLAN Settings on Device Ports
Introduction
Omada Fusion Pro Gateways use a VLAN configuration workflow that differs from traditional Omada Gateways. Instead of configuring VLANs and port memberships separately, Fusion Pro Gateways integrate network creation and port assignment into a unified workflow, providing greater flexibility for network deployment and management.
This article explains how to create VLANs, assign device ports, and modify VLAN settings on Omada Fusion Pro Gateways. It also introduces the default behavior of access and trunk ports to help administrators better understand VLAN deployment in Fusion Pro networks.
Requirements
- Omada Fusion Pro Gateways
Configuration
Create a single VLAN
Step 1. Create a new VLAN
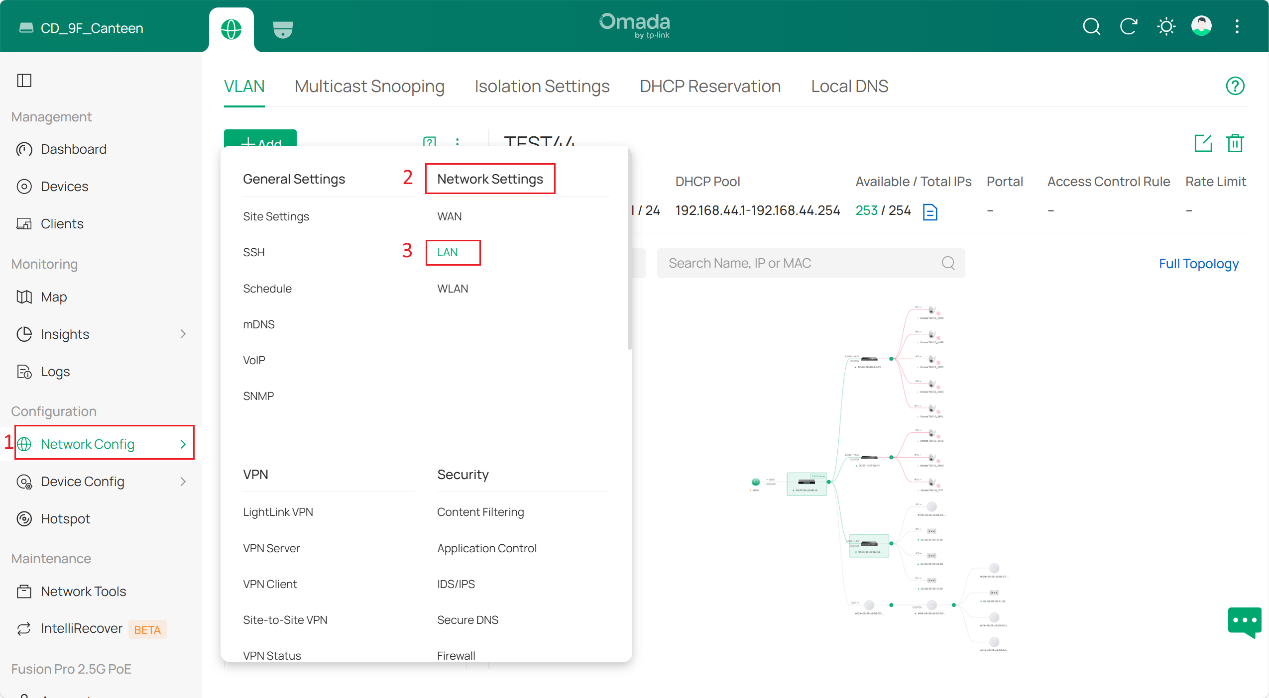
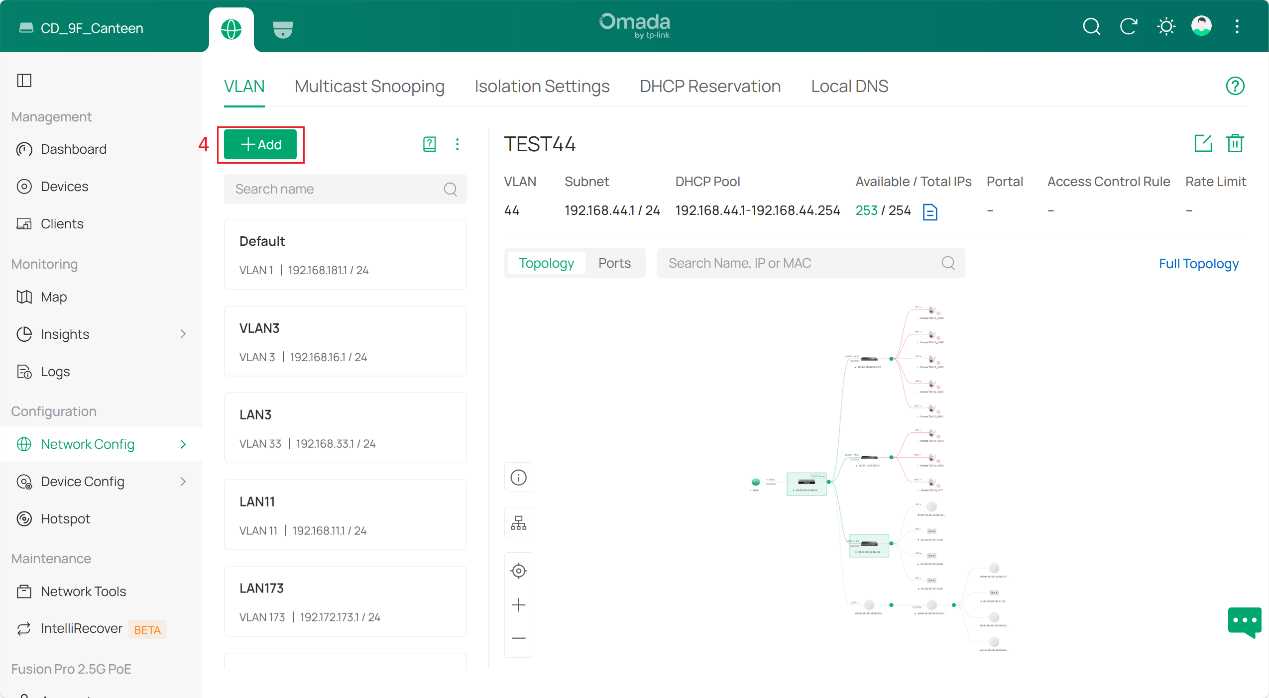
Go to Network Config > Network Settings > LAN and click Add under the VLAN section.
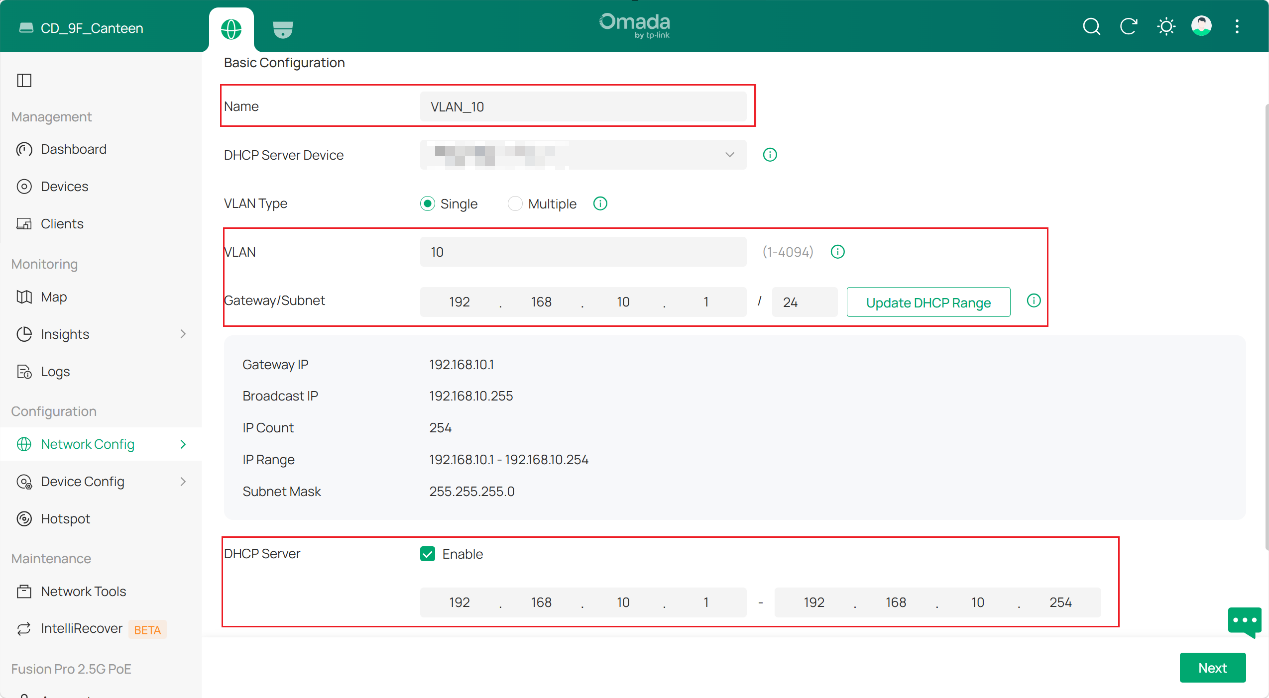
Configure the basic network settings:
- Select the device that will provide DHCP services as the DHCP Server Device. This can be a gateway or switch that supports DHCP services.
- Specify the Name, VLAN ID, and Subnet for the VLAN.
- If DHCP services are not required, disable the DHCP option and use static IP addressing instead.
Step 2. Assign device ports
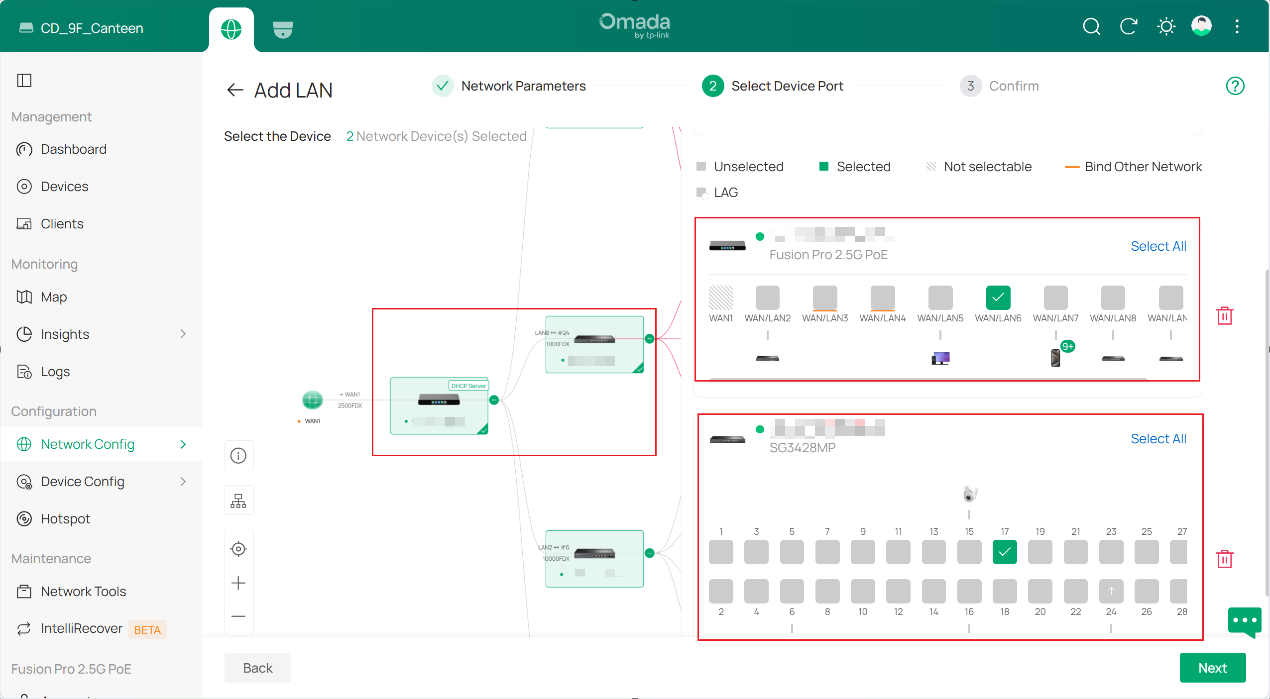
When a port is selected, the system automatically configures the port as an access port for the specified VLAN by setting its PVID corresponding to the current VLAN ID and removing other VLAN memberships.
Ports that are not selected will remain on the previously configured status.
Click Next to continue.
Note: It is recommended to select host-facing ports, such as ports connected to PCs, printers, IP phones, or other client devices, during this step. It is not recommended setting the uplink ports as access port in case of network blockage.
Step 3. Review and apply the configuration
The Review page displays all effective ports affected by the VLAN configuration, including all ports selected with dark green and light green checkmarks.
Dark green indicates the ports explicitly selected in Step 2, which will be configured as access ports. Light green indicates the ports automatically selected by the system (i.e. ports whose Network Tags Setting is set to Allow All). This means the VLAN will be added to the VLAN membership of these ports.
If all settings are correct, click Apply to create the VLAN.
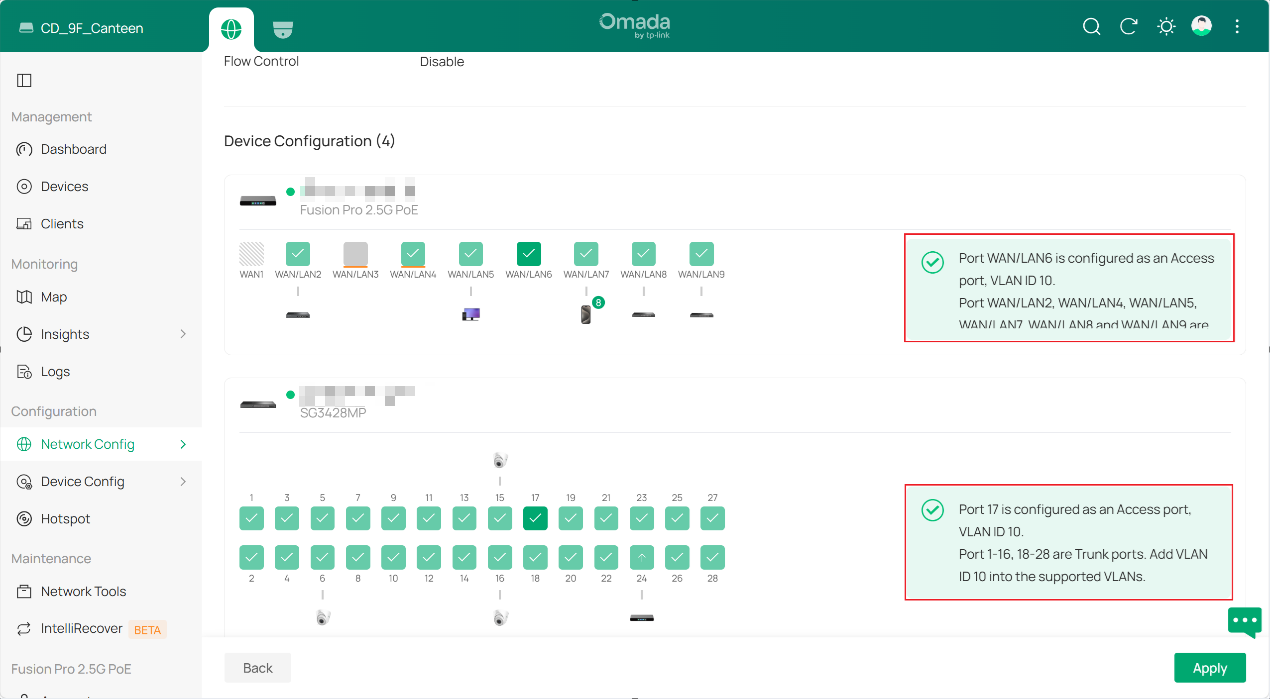
Note: Advanced port settings can be modified later from the device management page.
Create a bridge VLAN
Step 1. Same as how to create a single VLAN. Go to Network Config > Network Settings > LAN and click Add under the VLAN section.
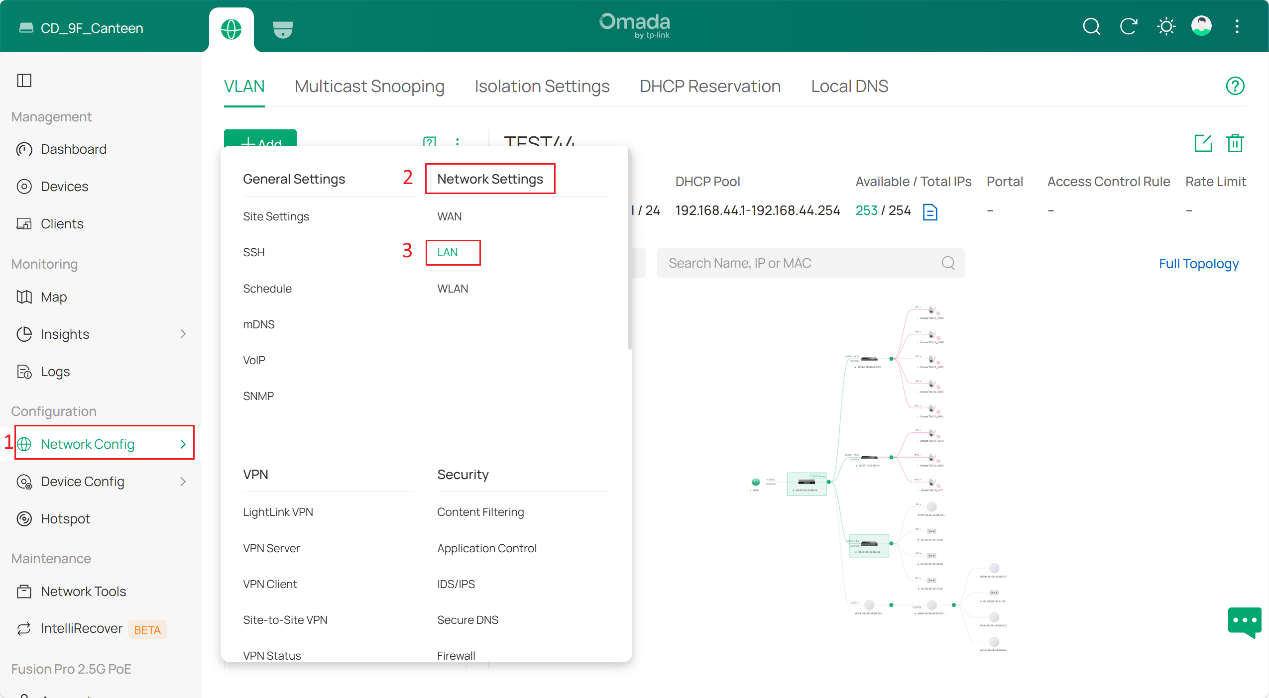
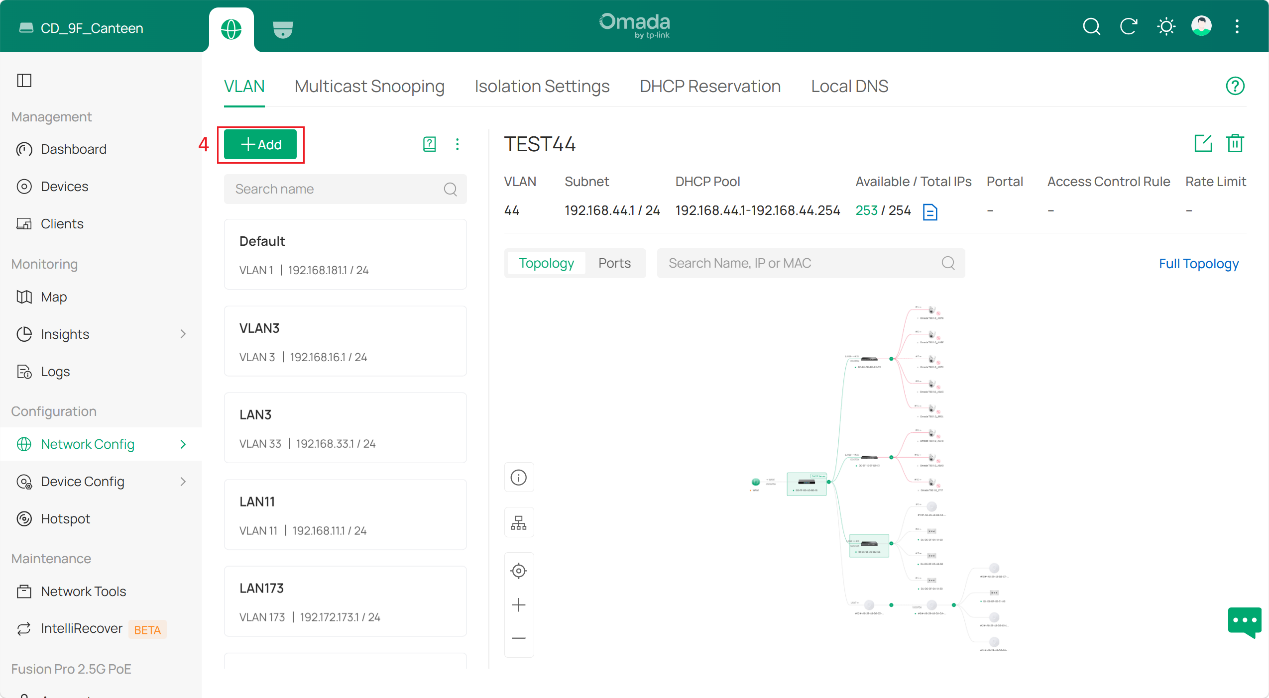
If the VLAN Type is "Multiple" and the DHCP Server Device Type is "Gateway", a single network containing multiple VLAN IDs will be created. This will be considered as bridge VLAN.
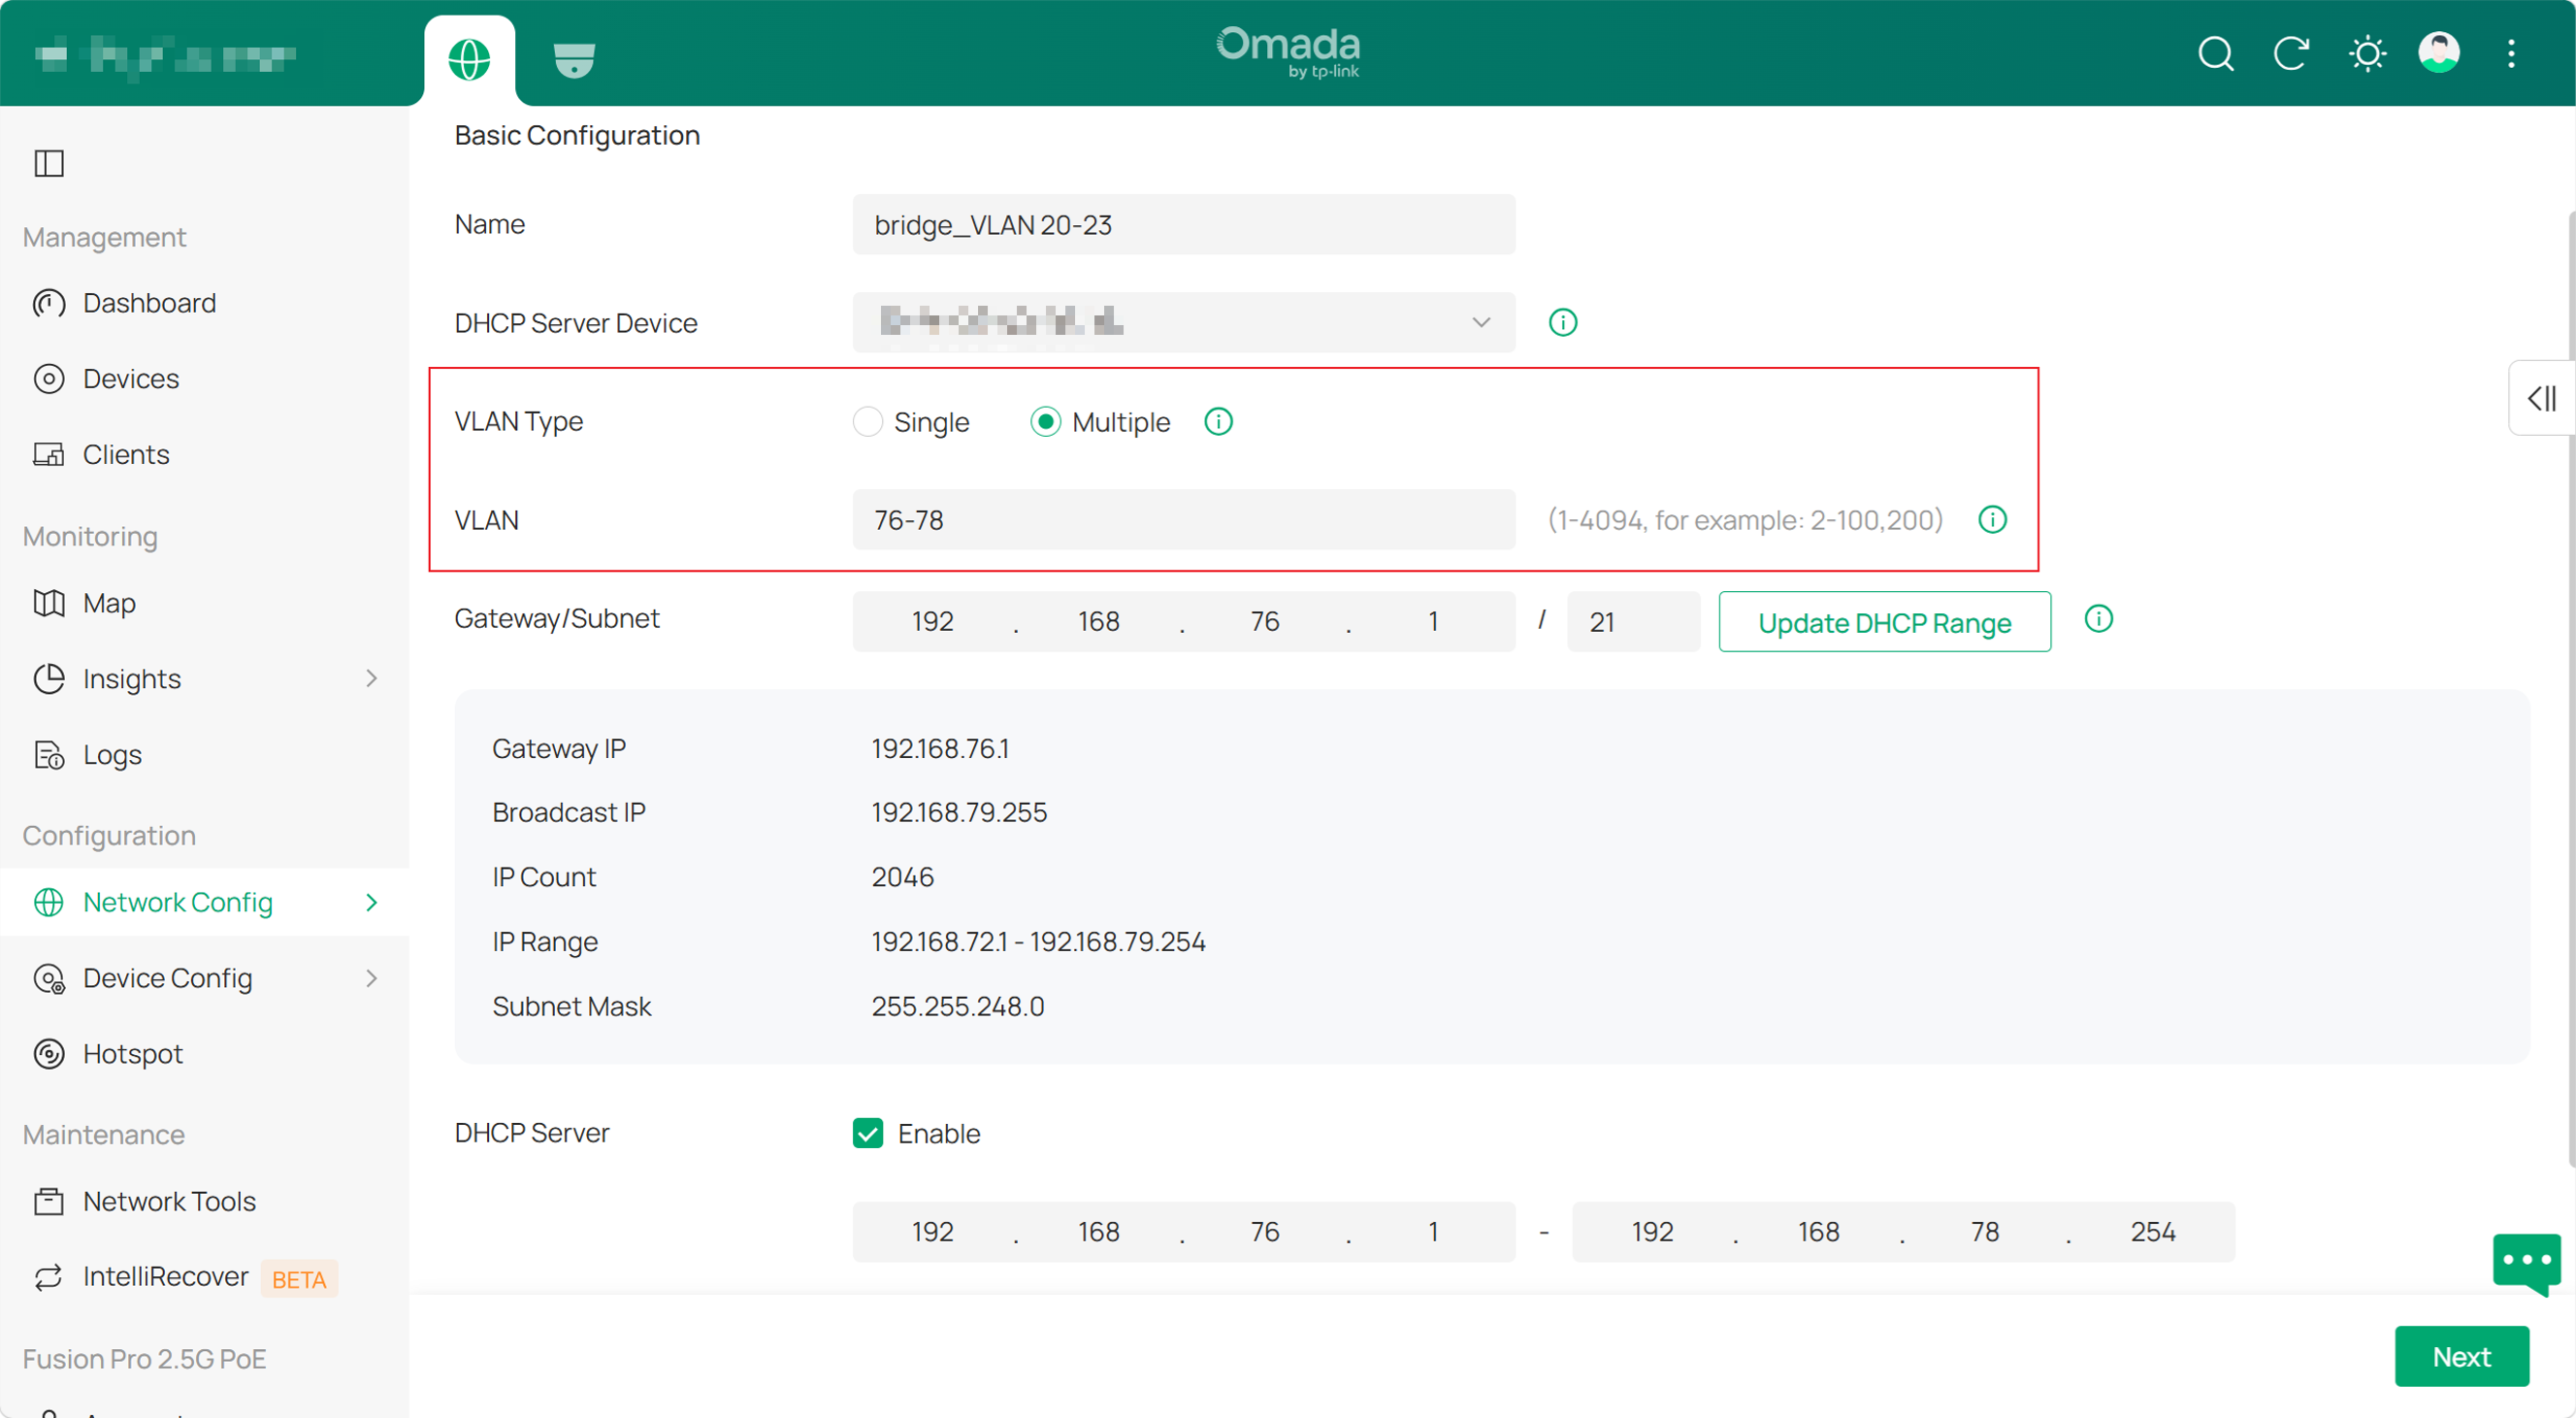
Step 2. Assign device ports
Unlike a single VLAN, only LAN ports in custom mode are allowed to be selected and the ports selected in Step 2 will not be configured as access ports. Instead, the Bridge VLAN will be added to the VLAN membership of both the ports explicitly selected in this step, and the ports whose Network Tags Setting is set to Allow All.
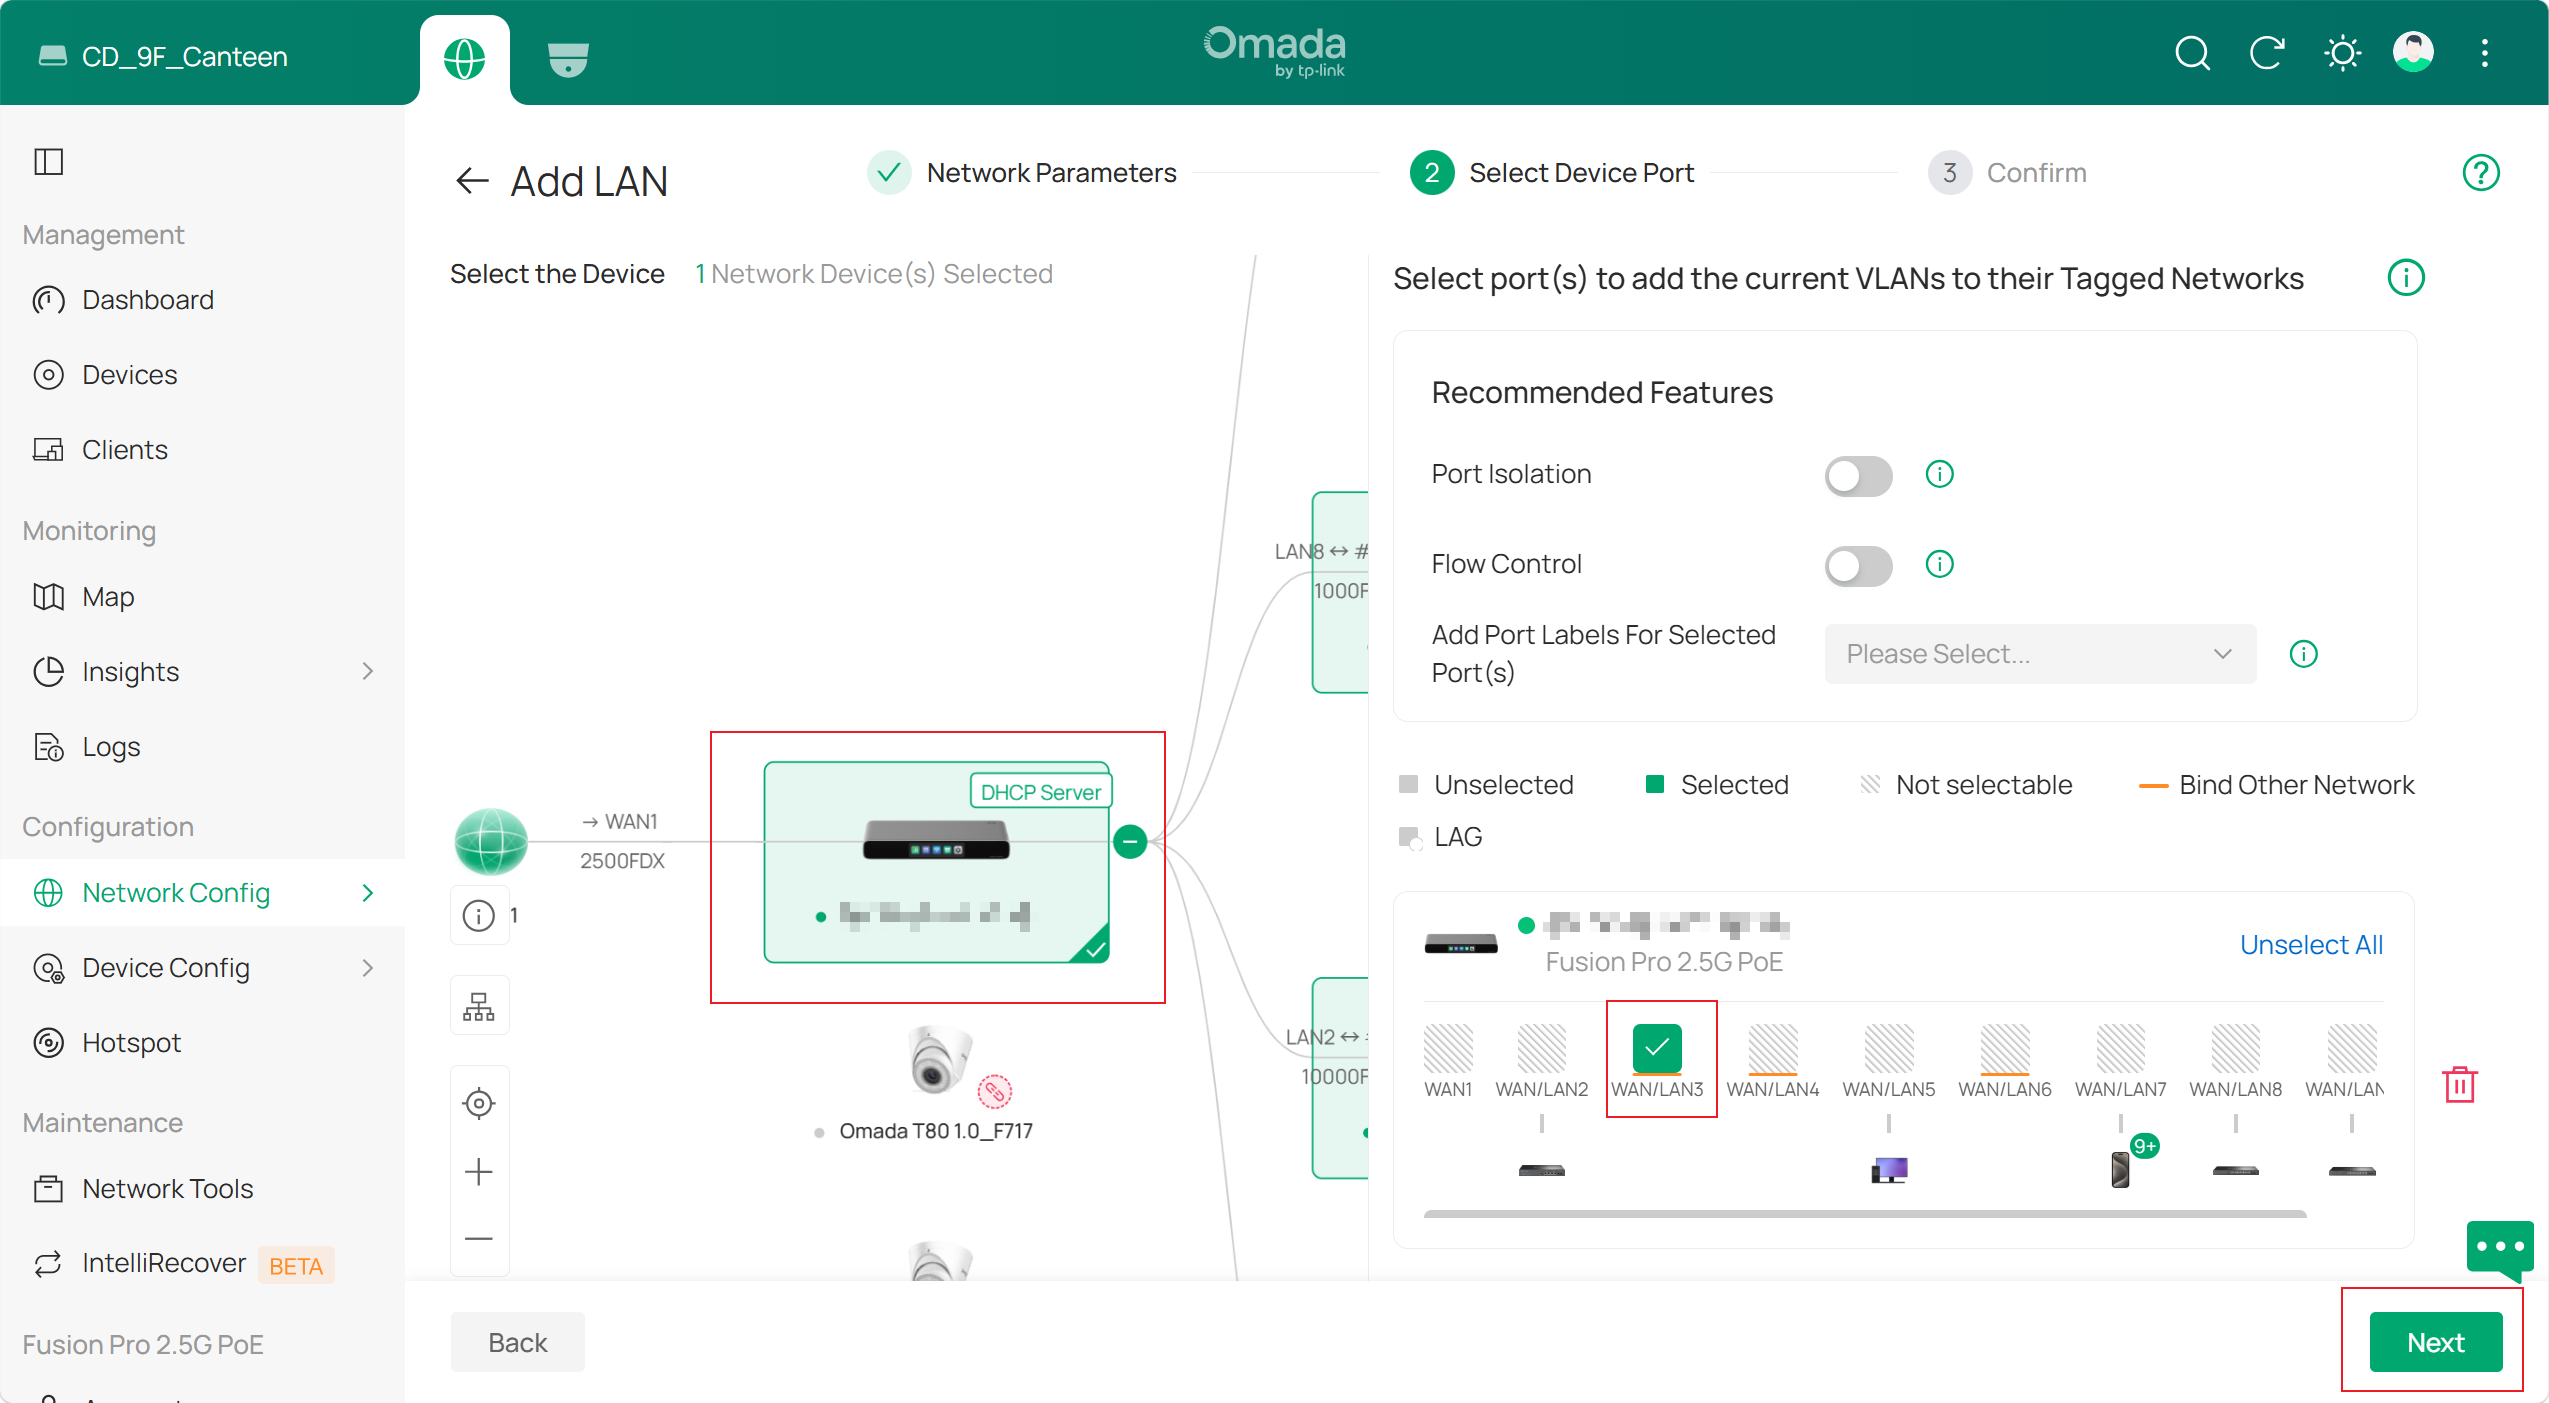
Step 3. Review and apply the configuration
The Review page displays all effective ports affected by the VLAN configuration. For Bridge VLAN, the Review page displays all ports that are currently members of the Bridge VLAN as selected. If you deselect any of these preselected ports and save the configuration, the configured Bridge VLAN will be removed from the port's VLAN membership.
If all settings are correct, click Apply to finish.
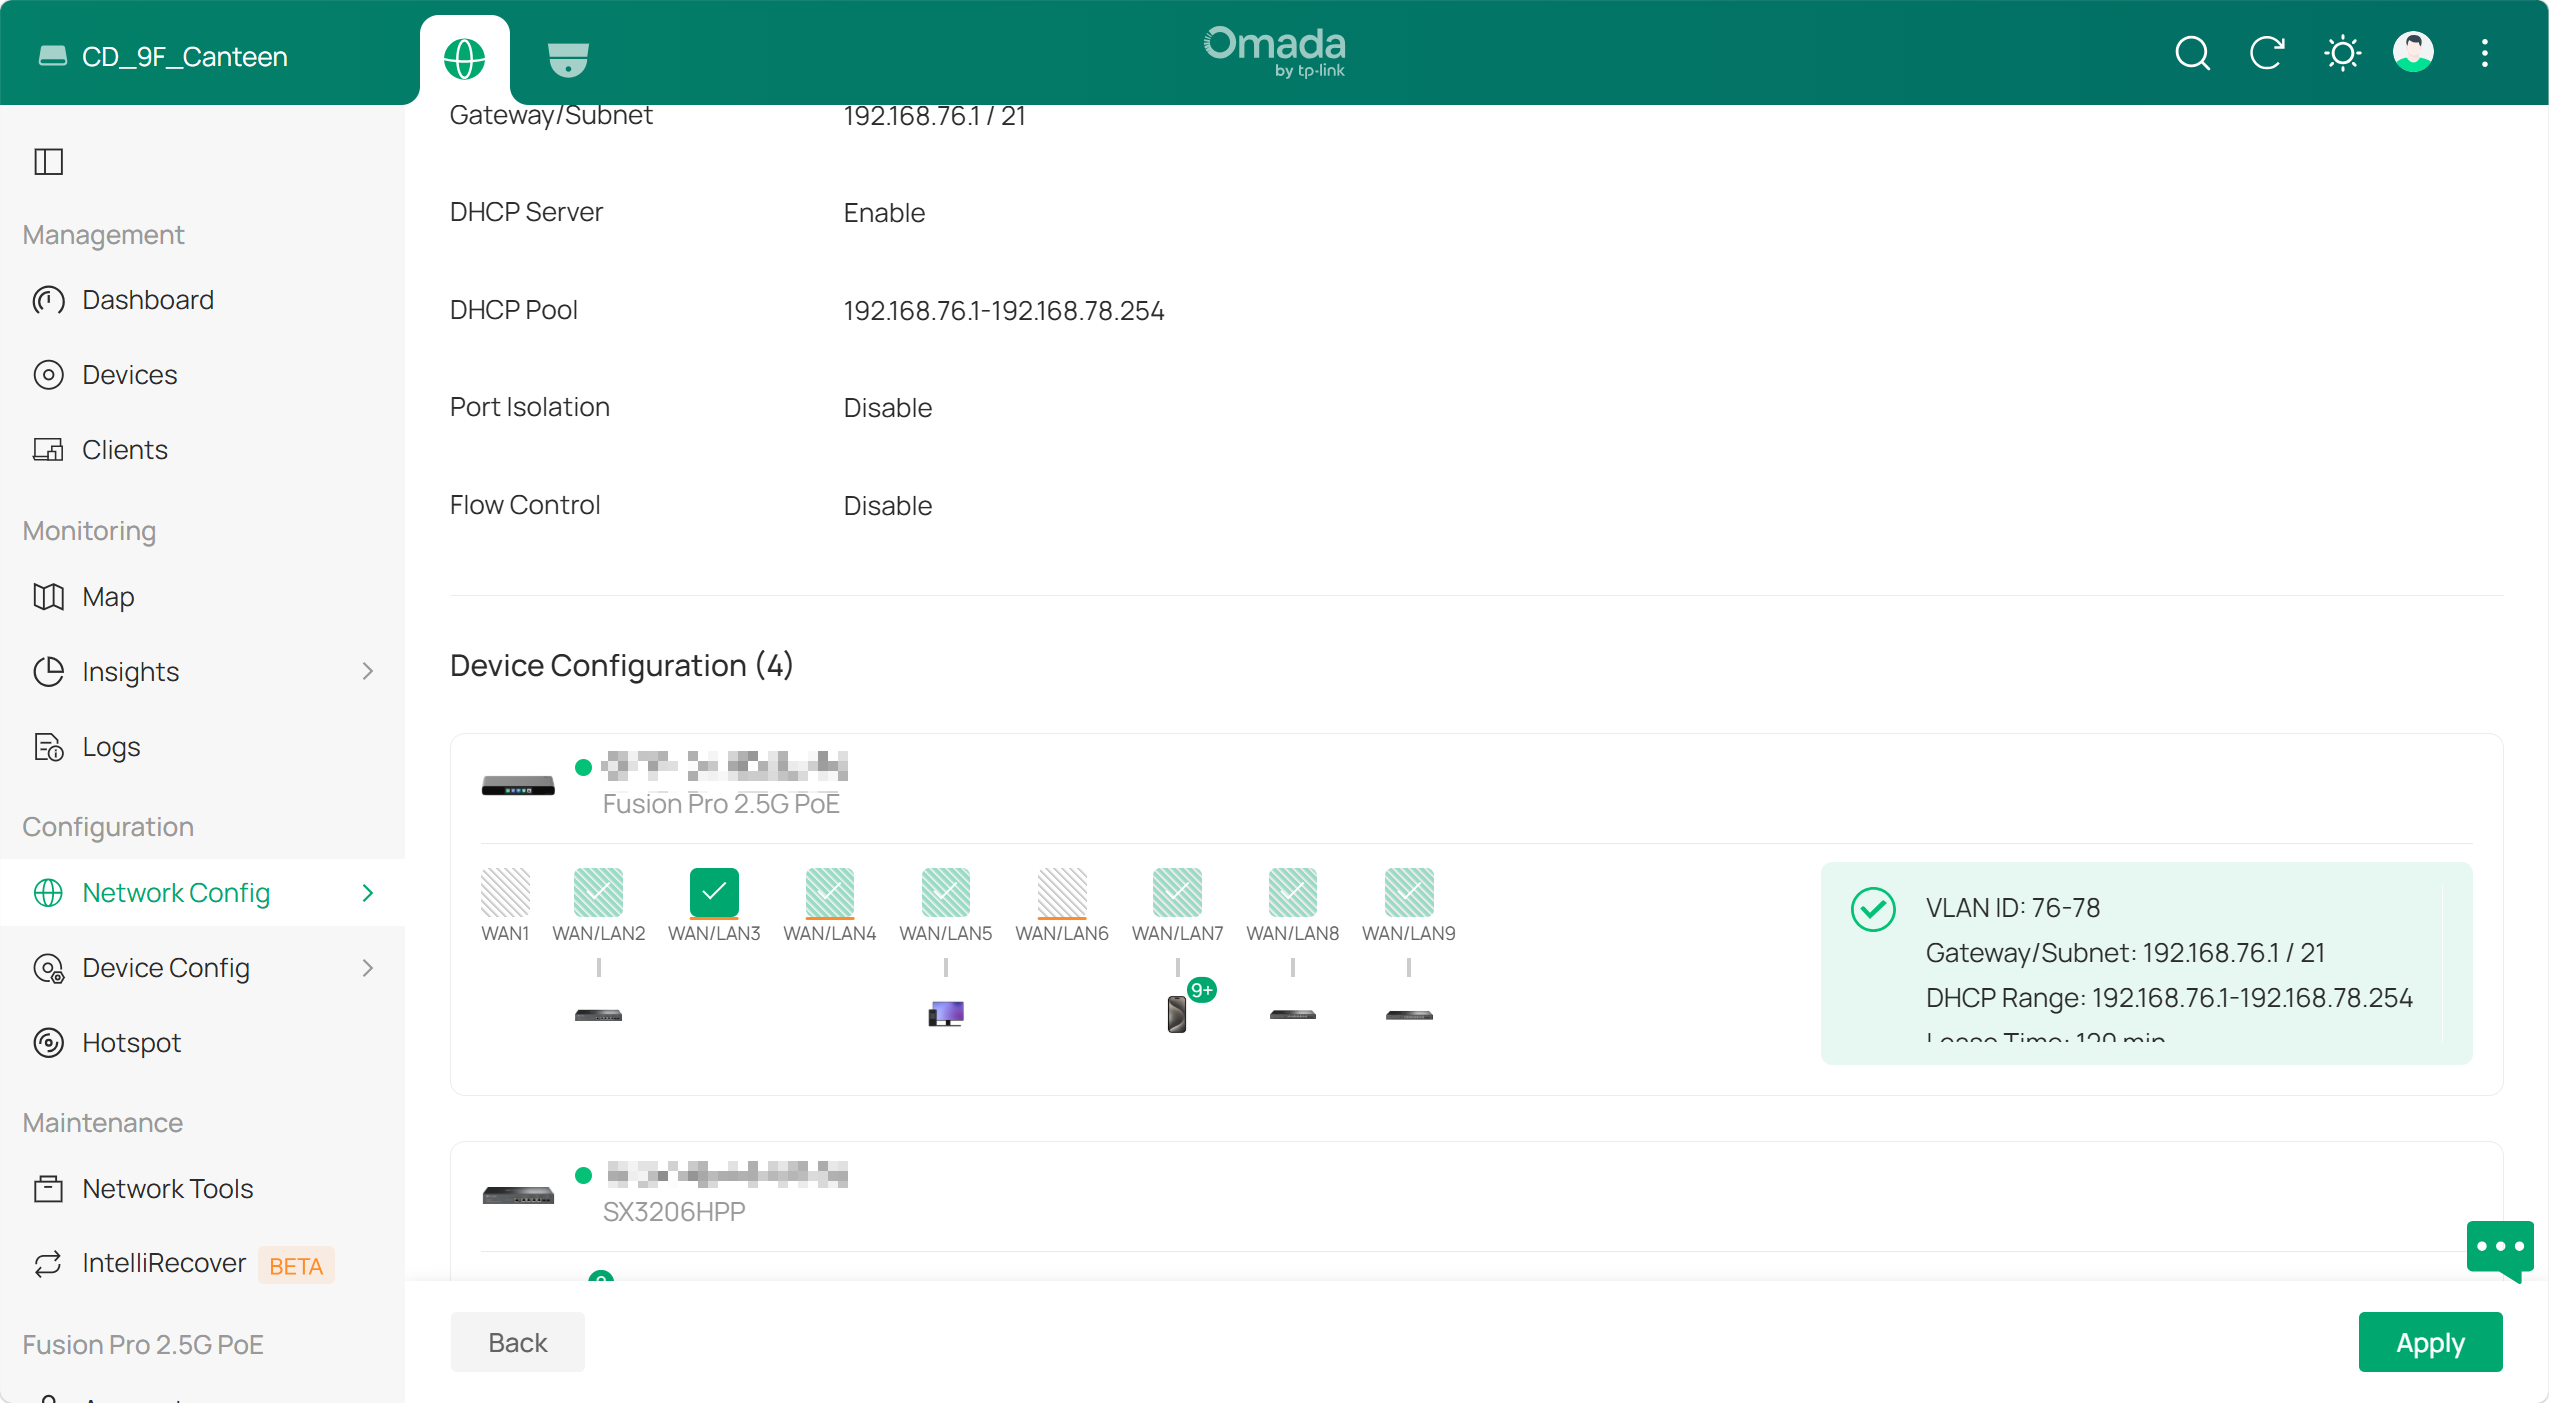
Note: Advanced port settings can be modified later from the device management page.
Modify VLAN settings on device ports
Step 1. Open the device management page
Go to Devices, select the Omada Fusion Pro Gateway, and click Manage Device.
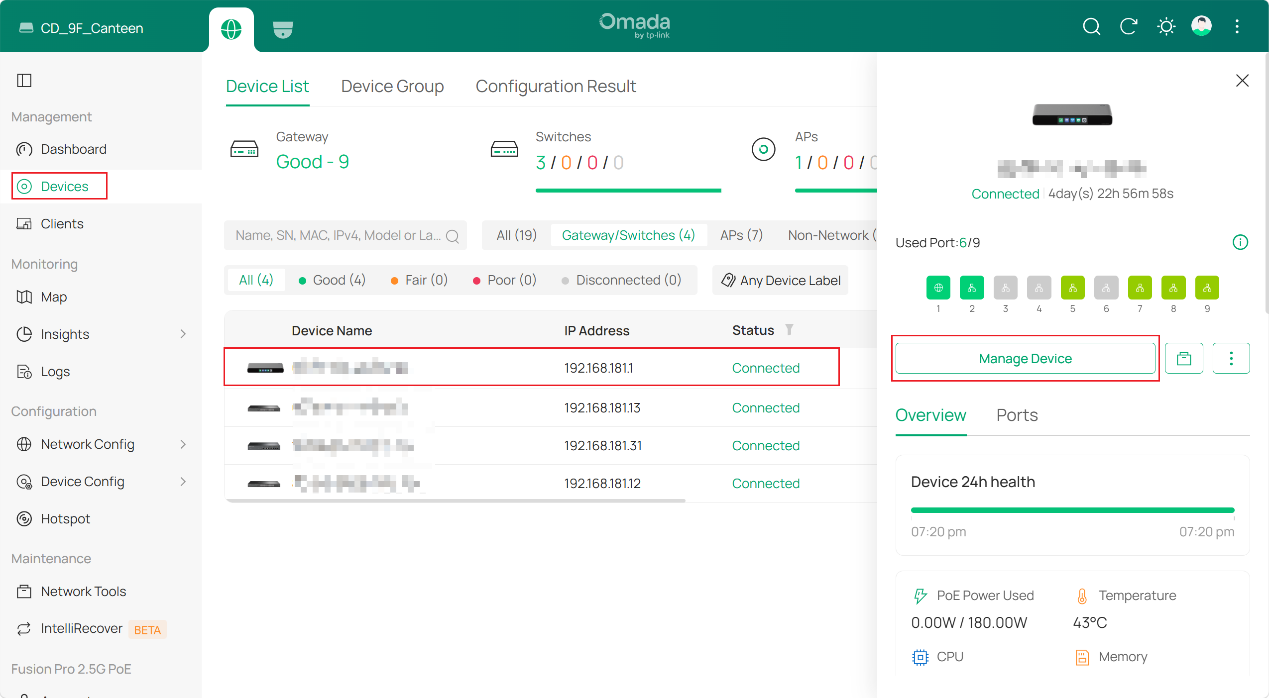
Step 2. Select the port to edit
On the device details page, click Ports and select the desired port.
In this example, Port 5 is selected.
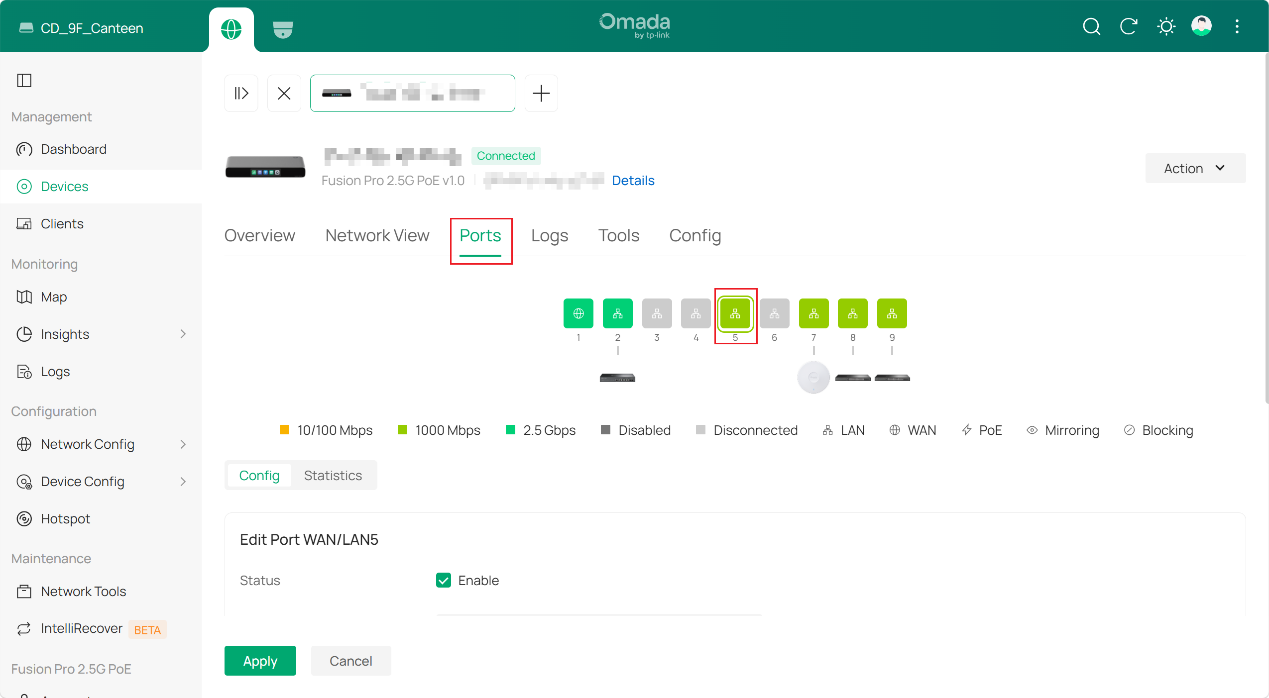
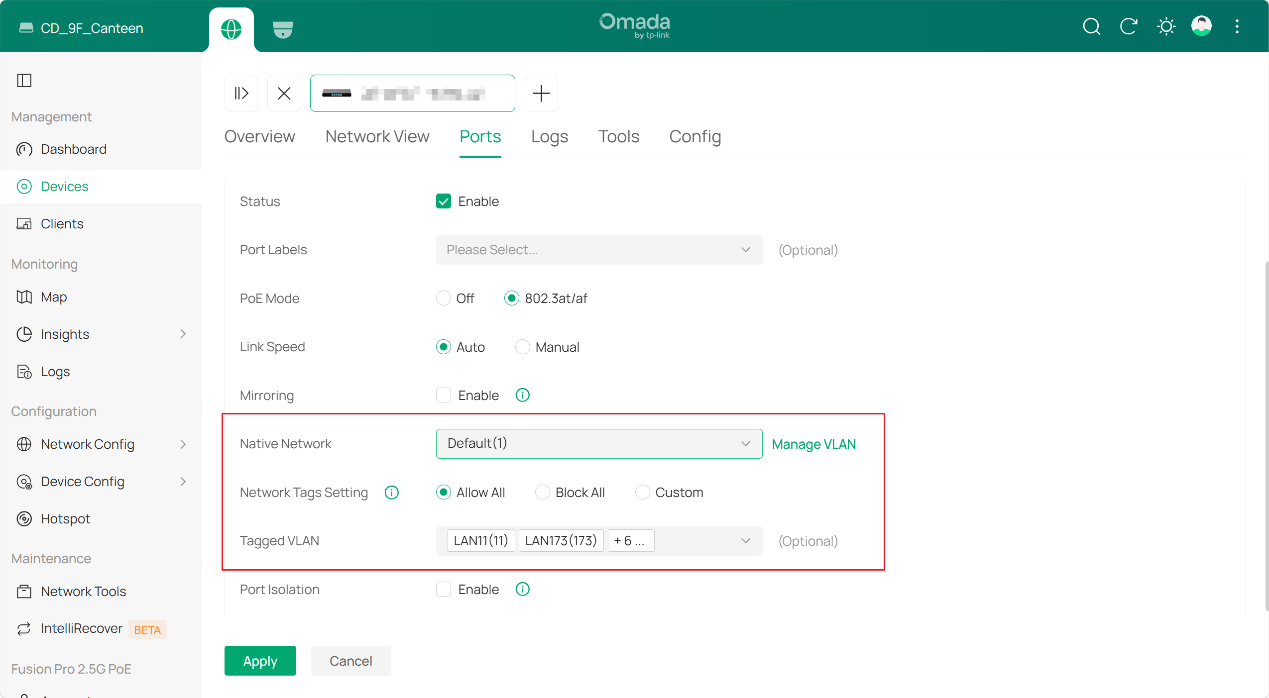
Step 3. Modify VLAN settings
Configure the required VLAN settings for the port, including:
- Native Network: The untagged network used for standard network traffic.
- Tagged VLANs: VLANs that are transmitted with VLAN tags to carry traffic for multiple VLANs.
- Network Tag Setting:
- Allow All: Ports will automatically assign tags for configured VLANs. Any tagged traffic with a non-existent VLAN ID will be dropped.
- Block All: Ports will automatically block all VLAN traffic except for the Native Network (PVID). Any tagged traffic with other VLAN IDs will be dropped.
- Custom: VLAN management can be customized to tag specific VLANs only.
When Tagged VLAN is set to Select All, all VLANs except the port’s assigned Native Network (PVID) will be added to the Tagged VLAN list.
The available options are based on the VLANs already created in the network.
Conclusion
VLAN configuration on Omada Fusion Pro Gateways combines network creation and port assignment into a streamlined workflow. During setup, administrators can define VLAN parameters, configure DHCP settings, and assign access ports to the appropriate network.
After a VLAN is created, additional port-level settings, such as native network, and tagged VLAN memberships, can be adjusted from the device management page to accommodate more advanced network requirements. This flexible approach simplifies VLAN deployment while providing granular control over port behavior and network segmentation.
To learn more about each function and configuration, please visit Support Home to download or check the manual for your product.
QA
Q1: What happens if I do not select a port when creating a VLAN?
A1: By default, a port that is not selected for VLAN configuration remains in its previously configured state. You can further customize its VLAN settings later from the device details page. If it’s been modified previously, it will remain its status unchanged, the same as what has been configured.
Q2: Can I modify VLAN settings on a port after creating the VLAN?
A1: Yes. Go to the device details page, select Ports, and choose the port you want to configure. You can then modify settings such as the native network and tagged VLANs based on your network requirements.
