


How to configure Switch QoS in Controller Mode


Contents
Configuration for DSCP Mapping
Configuration for Queue Scheduling
Configuration for New Qos Rule
Introduction
QoS is short for Quality of Service, which is used to measure the quality of specific network services. Typically, the switch will treat all traffic equally on a FIFO (First In First Out) delivery basis. When congestion occurs, the switch will drop the later packets, regardless of their type. With QoS configured, the switch forwards traffic according to the priority of the packets. Critical traffic, such as VoIP and video conferences, can be preferentially treated.
Omada (above 6.1) uses Diffserv QoS with DSCP as the default trust mode, letting the controller centrally map DSCP values to forwarding queues. In practice you configure a global DSCP mapping, set the outgoing queue scheduling (SP/WRR and weights) for the eight TC queues (TC-0 through TC-7, where TC-0 is lowest and TC-7 is highest), and apply any remapping as needed so that IP packets carrying DSCP are classified consistently across the network.
Configuration in Omada 6.1 is streamlined and controller-driven: create a QoS rule in the controller, assign its DSCP mapping and queue scheduling, and the controller pushes that rule down to the targeted network and switch ports. Compared with standalone switch mode, this approach reduces per-device CLI work, centralizes policy management, and increases integration and operational simplicity.
On Omada switches, each forwarding queue can be assigned a scheduling method of either Strict Priority (SP) or Weighted Round Robin (WRR). To configure SP you mark the target queues as SP so they are always serviced before lower-priority queues, ensuring minimal delay for time-sensitive traffic like voice and video; to configure WRR you set queues to WRR and assign relative weights so bandwidth is allocated in a round-robin fashion according to those weights, preventing starvation of lower-priority traffic. When using WRR you must define the weight values for each WRR queue to control their share of available bandwidth, and when using SP you should limit SP assignments to avoid starvation of non-SP queues.
Omada supports hybrid scheduling where some queues are set to SP and the remaining queues use WRR; SP queues are always drained first and any leftover bandwidth is distributed among WRR queues according to their weights. Depending on the device model the scheduler is applied either globally or per interface, so apply the queue modes and weights at the correct scope, map your traffic to the appropriate TC queues (TC-0 through TC-7), and push the configuration from the controller so the selected ports and networks receive the scheduler settings.
Requirements
-
Omada Access, Access Plus, Access Pro, Access Max, Aggregation, Campus Switch
-
Omada Controller 6.1
Configuration
After adopting a device, Controller 6.1 will automatically push a port configuration that sets the trust mode to trust DSCP, ensuring the adopted device's port behavior aligns with DSCP-based QoS classification.
Below describes how to configure Switch QoS, including setting DSCP mapping, queue scheduling, and adding a new rule.
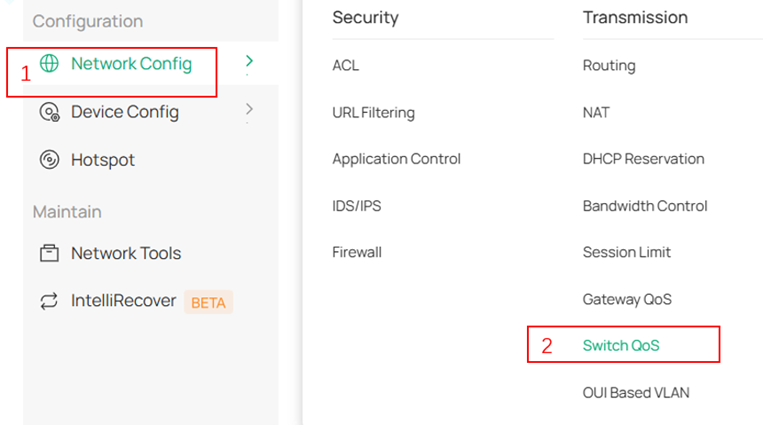
The Switch QoS configuration path is located at Network Config > Transmission > Switch QoS, and you can also find it using the search box.
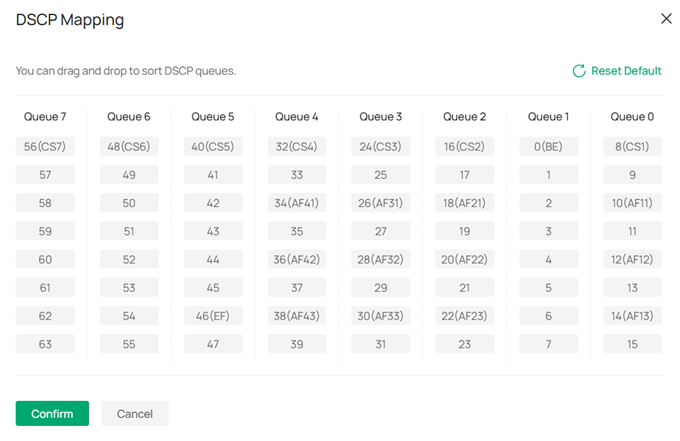
Configuration for DSCP Mapping
Step 1. Click DSCP mapping on the page to open the mapping list.

Step 2. You can adjust the DSCP-to-queue mapping by dragging entries, and click the Reset Default button to return to the default settings.
Step 3. Click Confirm to save your changes.
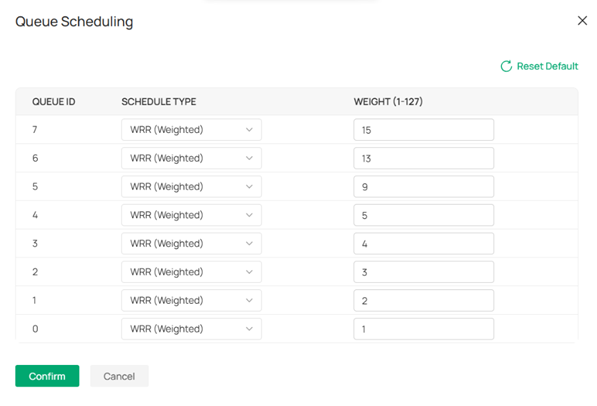
Configuration for Queue Scheduling
Step 1. Click Queue Scheduling on the page to open the egress scheduling table.

Step 2. Modify the Schedule Type to WRR(Weighted) or SP(Strict) as needed; when using WRR you can set the Weight(1-127), and you can click Reset Default to restore default values.
Step 3. Click Confirm to save the settings.
Configuration for New Qos Rule
Below explains how to add a new QoS rule.
For rules that have already been added, you can enable or disable their status directly from the list.
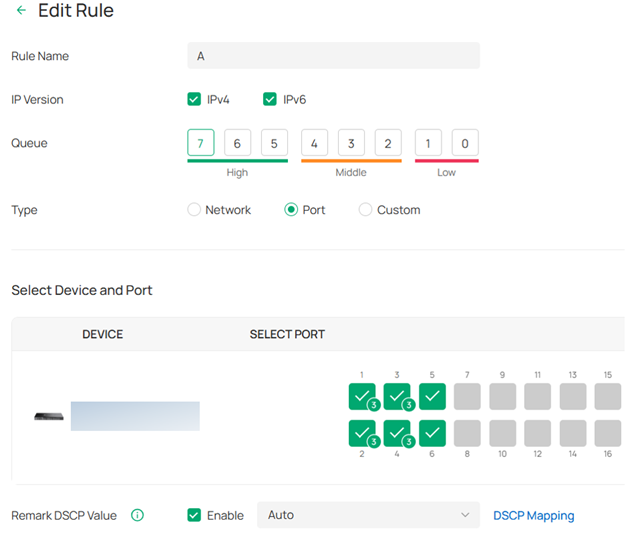
Step1. Click Add New Rule on the main page.

Step 2. Enter a Rule Name to help with classification and search. Select IP Version by checking IPv4, IPv6, or both. Set the Queue to define egress scheduling priority: queues 7, 6, 5 are high; 4, 3, 2 are medium; 1, 0 are low.
Step 3. Choose the rule mode: you can base the rule on Network, Port, or Custom.
Step 4. Configure the Remark DSCP Value; the default mode is Auto.
Step 5. Click Apply to push the configuration.
Below are three rule types:
Rule Type 1: Network‑based. Sets VLAN priority; you can select an existing VLAN from the LAN list (viewable under Network Config >LAN). 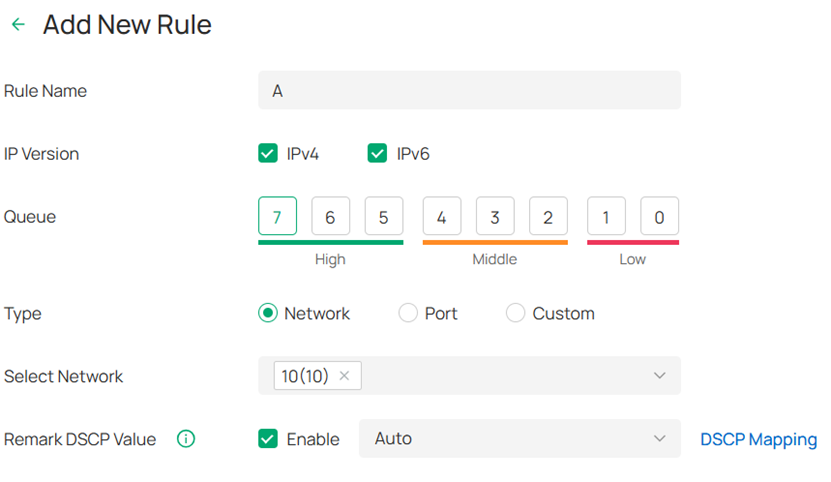
Rule Type 2: Port‑based. Sets port priority; you can choose supported switch models and select specific ports or LAGs to apply the configuration.
Rule Type 3: Custom. User‑defined rules with the most configuration options; in addition to Network and Port criteria, you can set Protocol to prioritize specific traffic types (for TCP and UDP you can also specify Source Port and Destination Port), offering richer control.

Conclusion
This article describes the function of Omada Switch QoS and the configuration method for controller mode (version 6.1 and above).
Get to know more details of each function and configuration please go to Download Center to download the manual of your product.
