


How to Upgrade from Omada Pro Controller to Omada Controller v6.3


Upgrade from Omada Pro Controller Windows version
Upgrade from Omada Pro Controller Linux version
Upgrade Hardware Controller C5300
Introduction
Starting with Omada Controller v6.3, the Omada Controller platform no longer distinguishes between Pro and standard versions. This document explains the differences before and after the upgrade, as well as how to upgrade from the Pro version to v6.3.
Requirements
- Omada Pro Controller v1.10.20 and above;
- Omada Controller v6.3;
Configuration
The Omada Controller v6.3 supports centralized management of all Omada series devices, including Pro devices, ensuring a consistent network management experience.
For Pro devices, the Standard Controller v6.3 delivers full feature parity with Pro Controller v1.10.20, with no functional degradation. In addition, it integrates all enhancements introduced in Standard Controller versions from v5.15 to v6.3. This allows Pro devices to benefit from the latest Standard Controller innovations, providing continuous feature improvements and an enhanced user experience.
Upgrade from Omada Pro Controller Windows version
Note: The upgrade process is not expected to affect existing data. As a precaution, it is recommended to exit the Controller normally and back up the “db” directory before upgrading. The database directory paths are as follows:
- Windows: <Omada Controller installation directory>\data\db
(e.g., C:\Users\<username>\Omada Controller\data\db)
As part of this process, please first upgrade Pro Controller to version 1.10.20 or later. It is recommended to use the latest available version.
The Windows version can be directly upgraded by overwriting the existing installation.
Step 1. Download version 6.3 of Omada Controller.
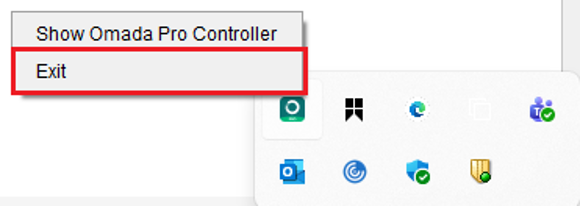
Step 2. Exit Omada Pro Controller.
Step 3. Install Omada Controller v6.3 directly.
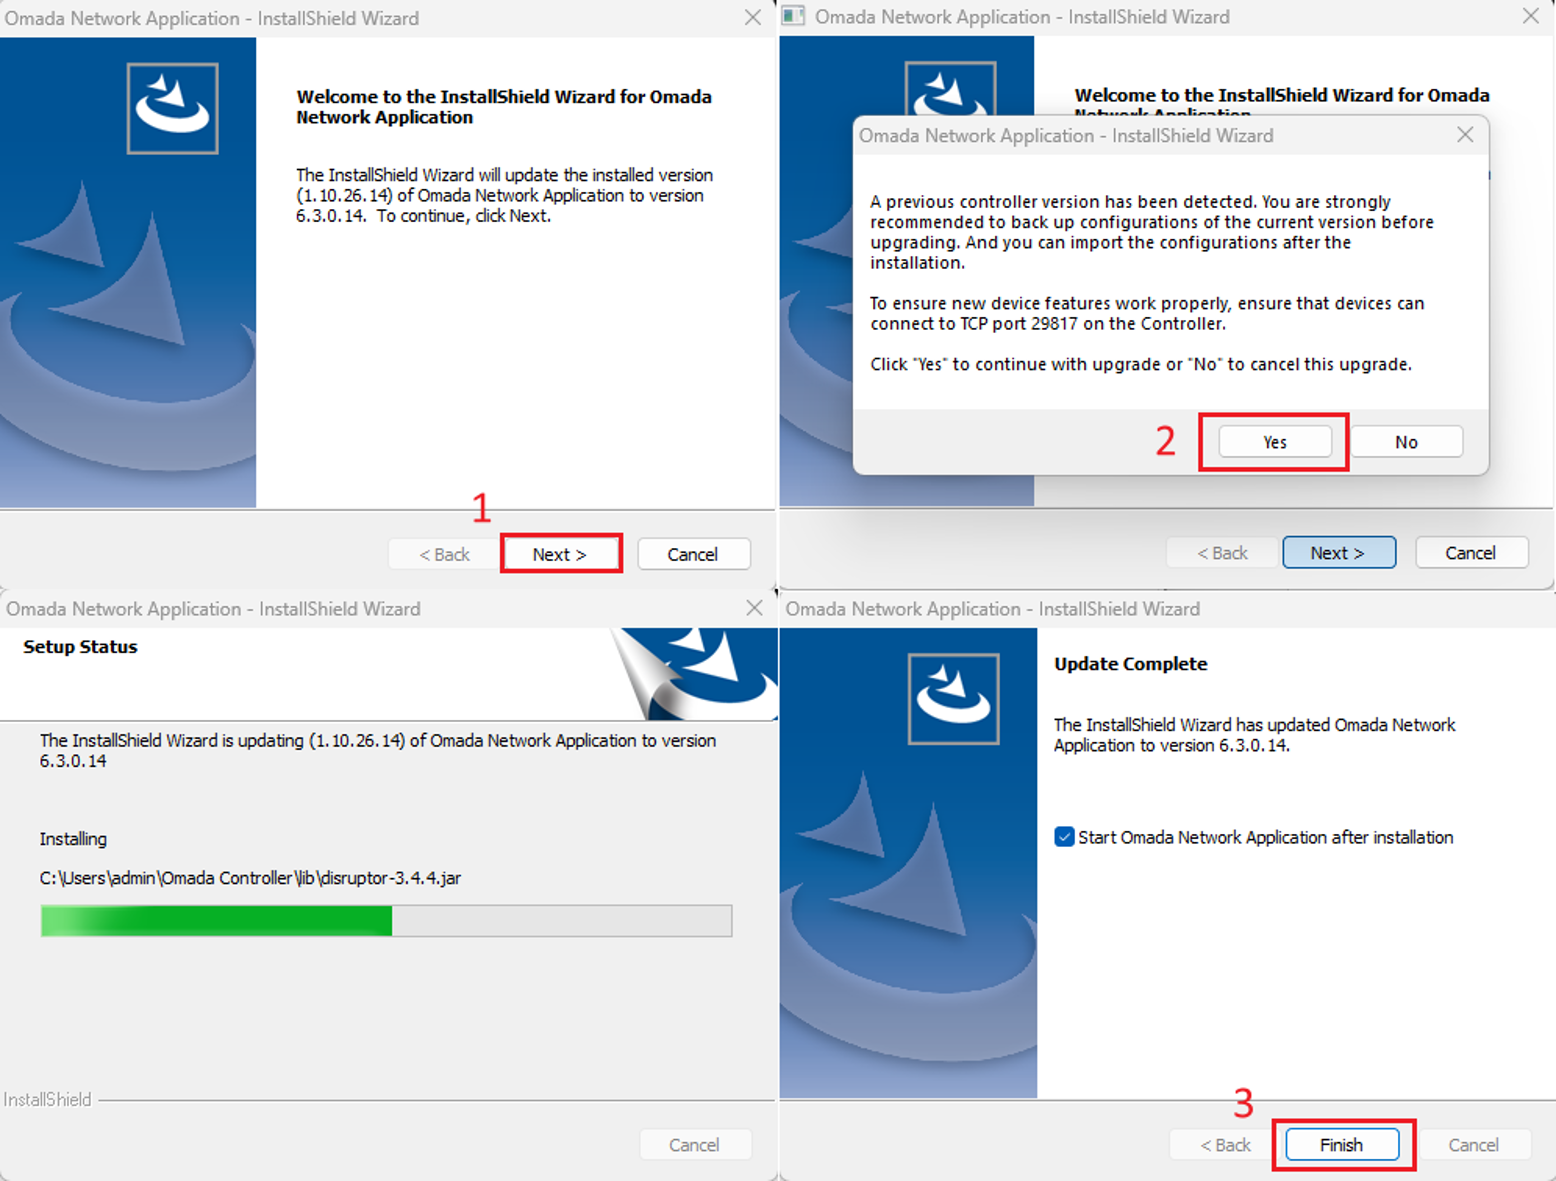
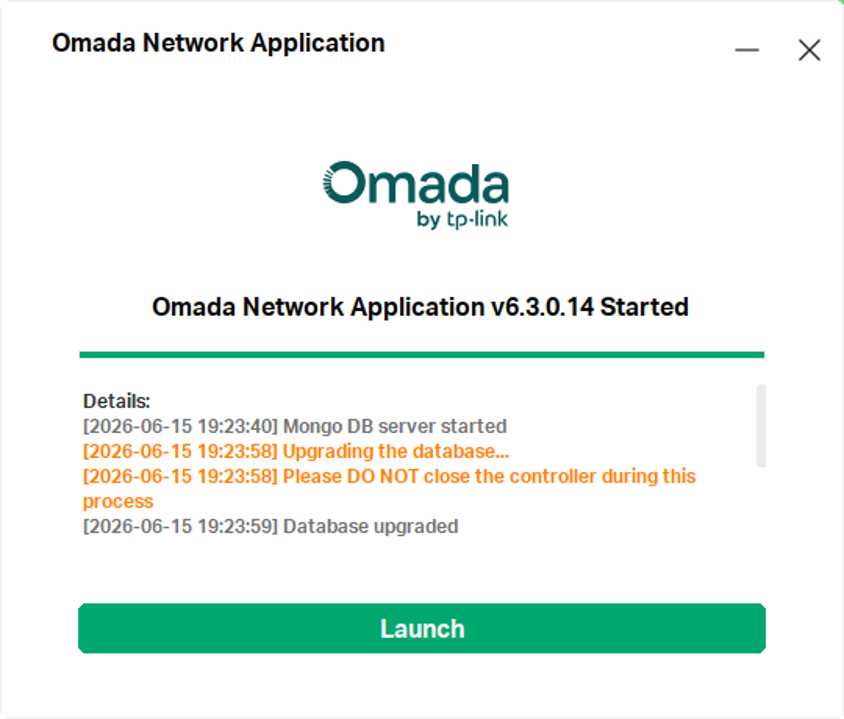
Step 4. Omada Controller will start automatically.
Upgrade from Omada Pro Controller Linux version
- Pro Controller installed via deb installer
Note: The upgrade process is not expected to affect existing data. As a precaution, it is recommended to exit the Controller normally and back up the “db” directory before upgrading. The database directory paths are as follows:
- Linux: /opt/tplink/EAPController/data/db
As part of this process, please first upgrade Pro Controller to version 1.10.20 or later. It is recommended to use the latest available version.
Step 1. Please ensure that you have backed up the data and upgraded to a newer version as instructed in the Note.
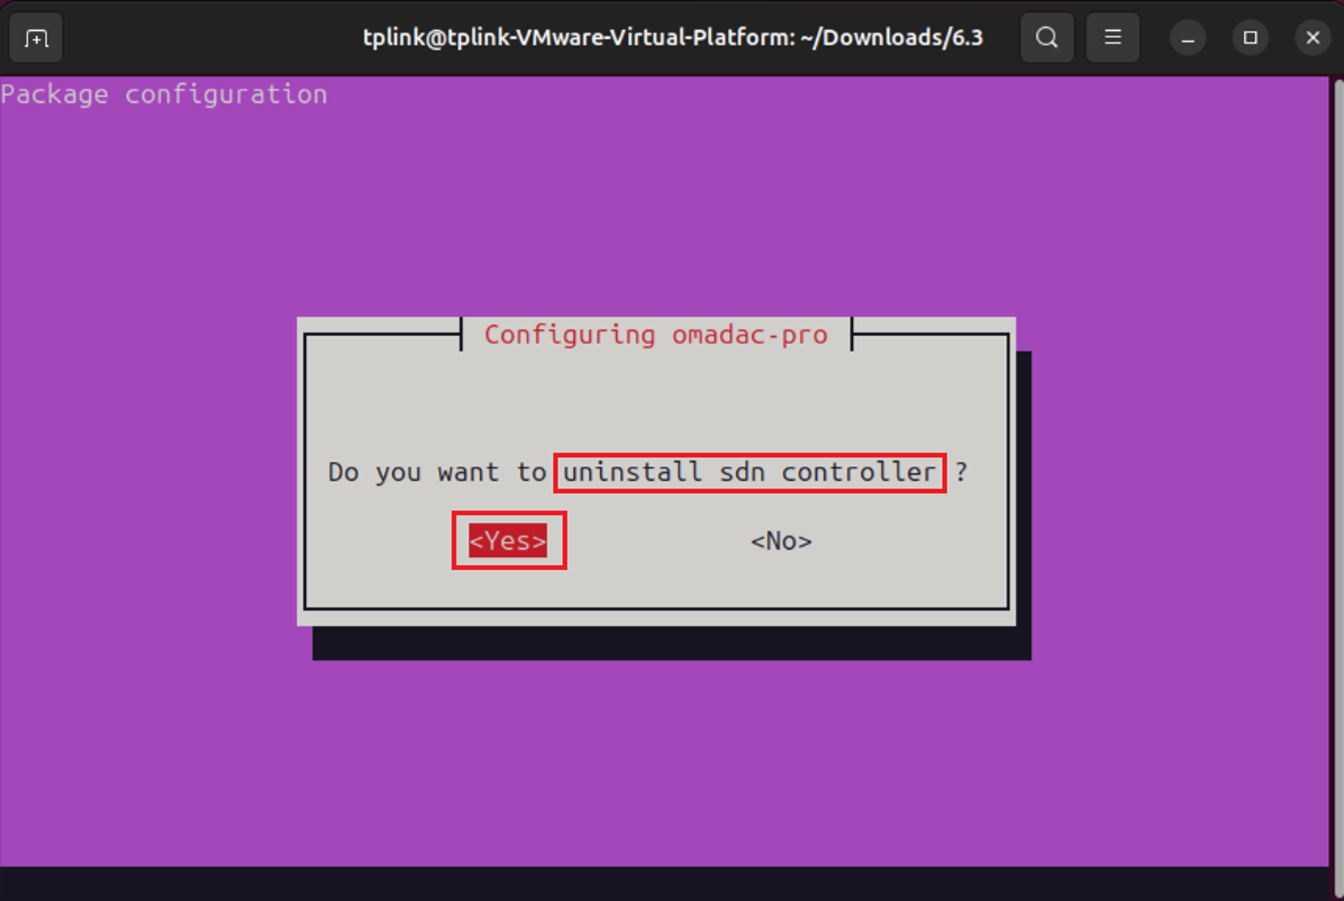
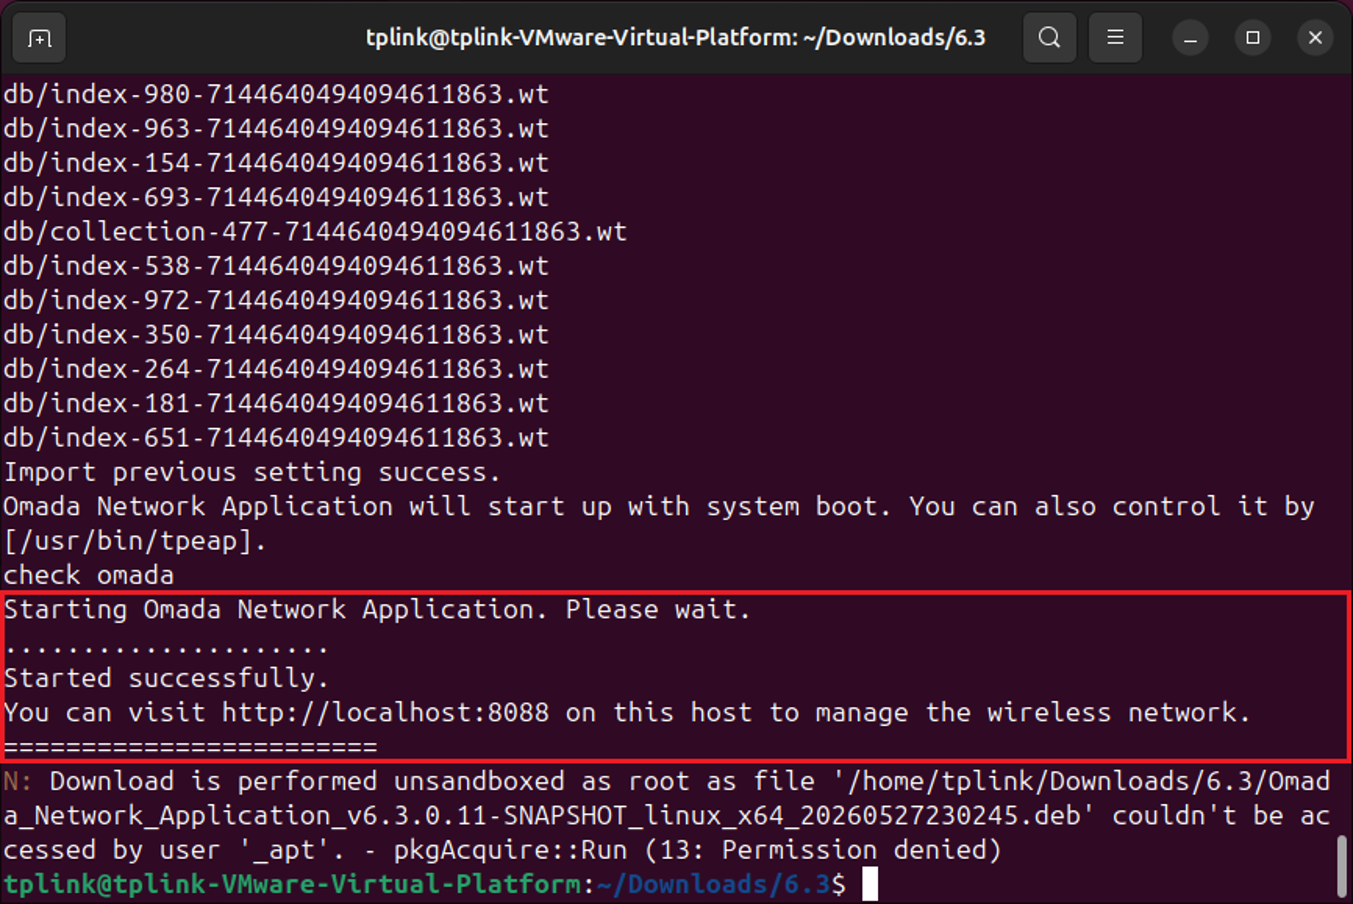
Step 2. Install the v6.3 deb package directly using apt. The installation process will automatically uninstall the Pro Controller and install v6.3. If you are using dpkg, you may need to uninstall Pro Controller and manually install v6.3.
Please select the correct options to save your existing data.
Press y to continue

Select "Yes" to uninstall the SDN controller.
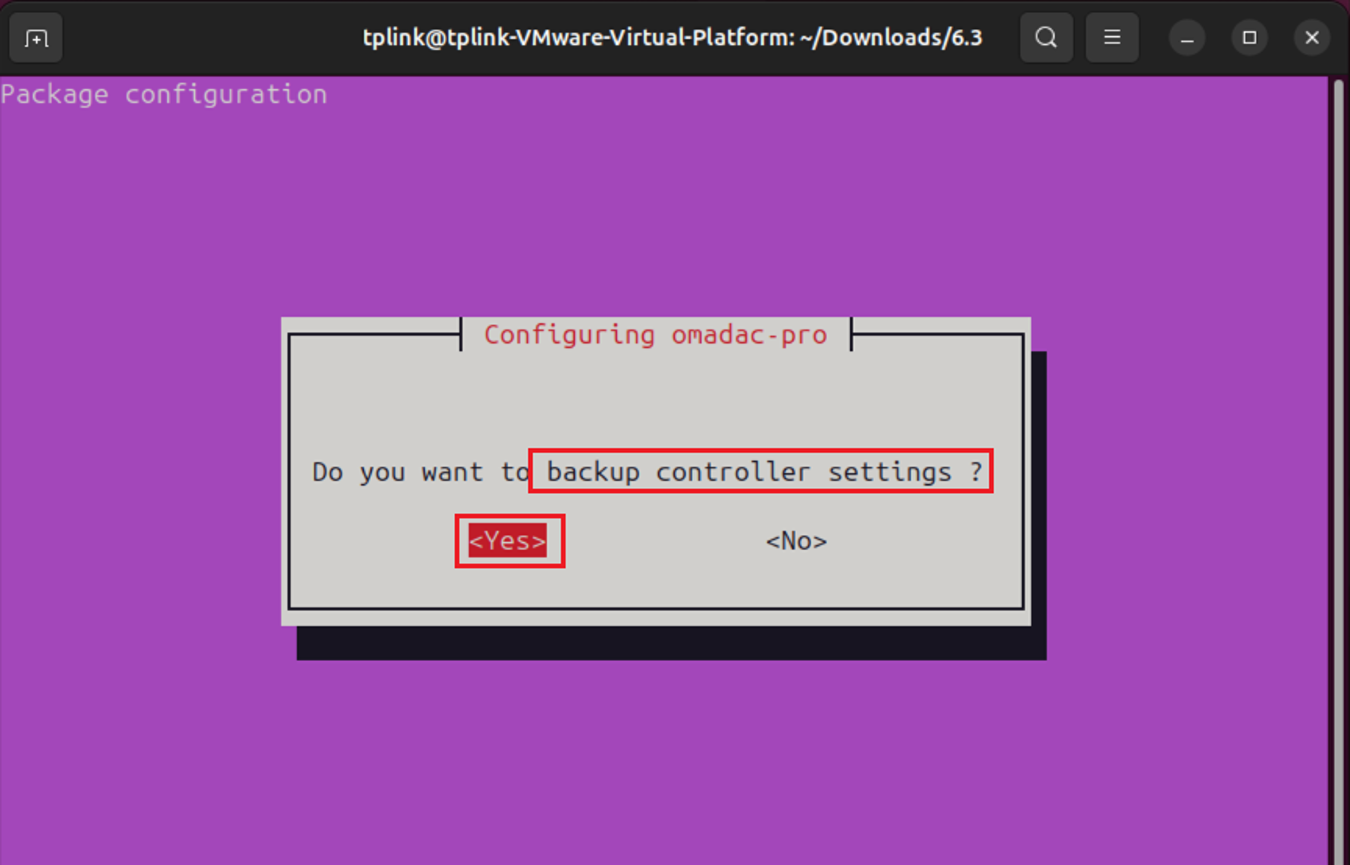
Select “Yes” to backup controller settings.
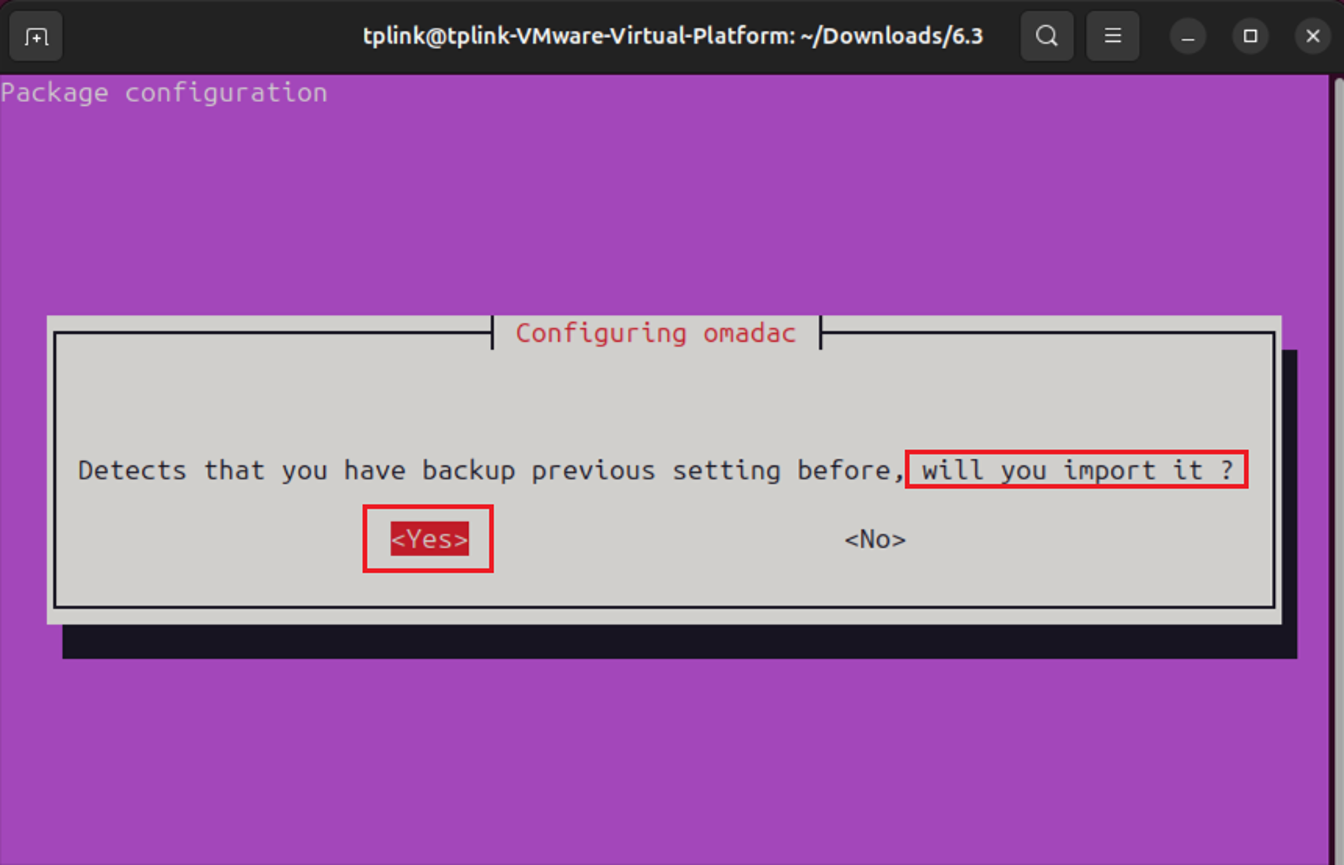
Select “Yes” to import backup.
Step 3. Omada Controller v6.3 will start automatically.
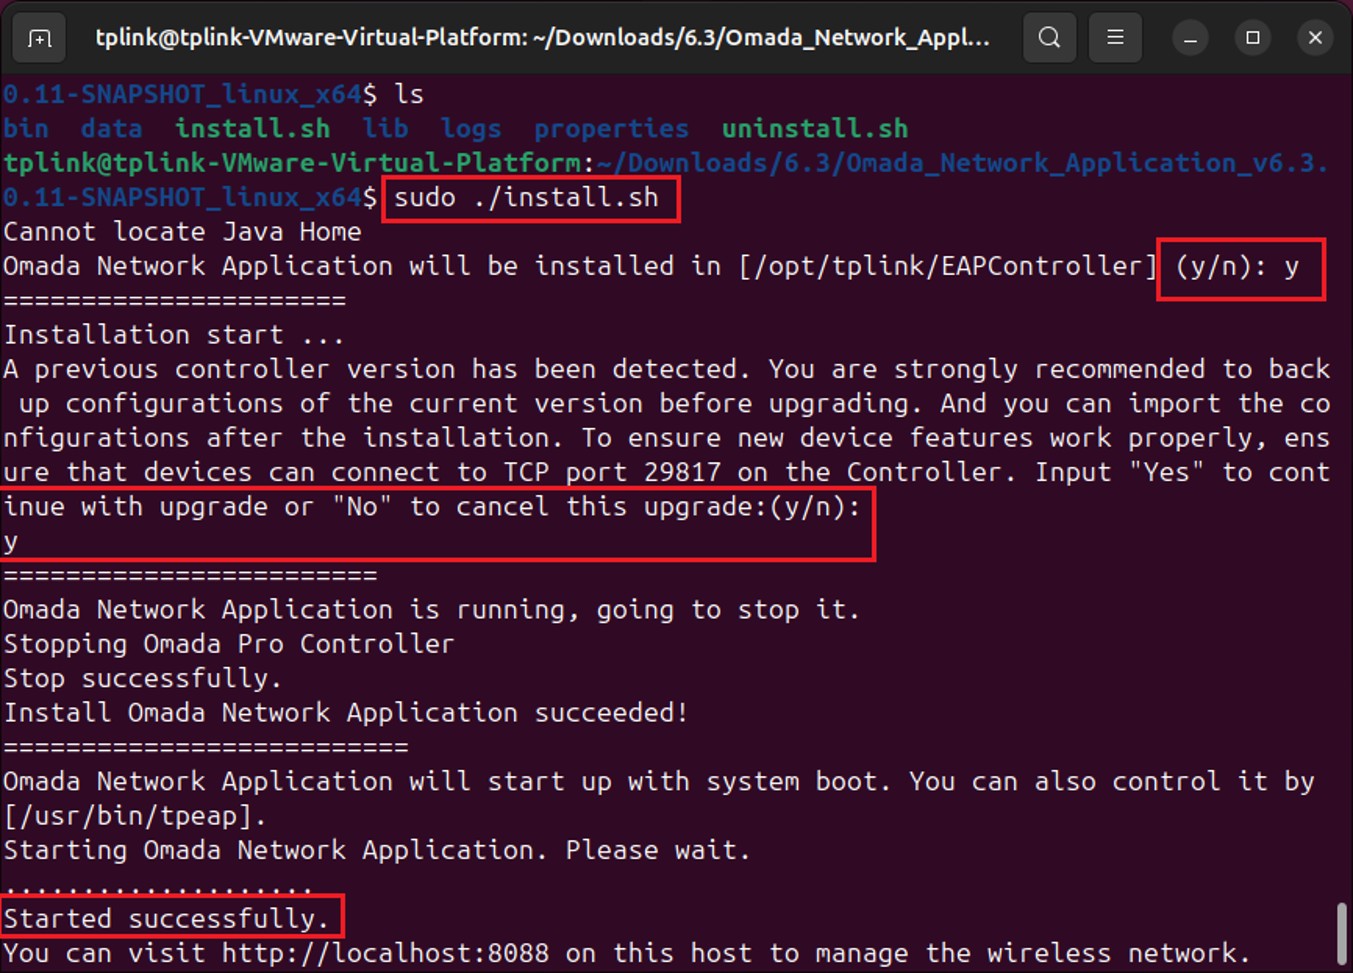
- Pro Controller installed via tar.gz
Note: The upgrade process is not expected to affect existing data. As a precaution, it is recommended to exit the Controller normally and back up the “db” directory before upgrading. The database directory paths are as follows:
- Linux: /opt/tplink/EAPController/data/db
As part of this process, please first upgrade Pro Controller to version 1.10.20 or later. It is recommended to use the latest available version.
Step 1. Please ensure that you have backed up the data and upgraded to a newer version as instructed in the Note.
Step 2. Extract the .tar.gz archive to your preferred path and cd into the directory.
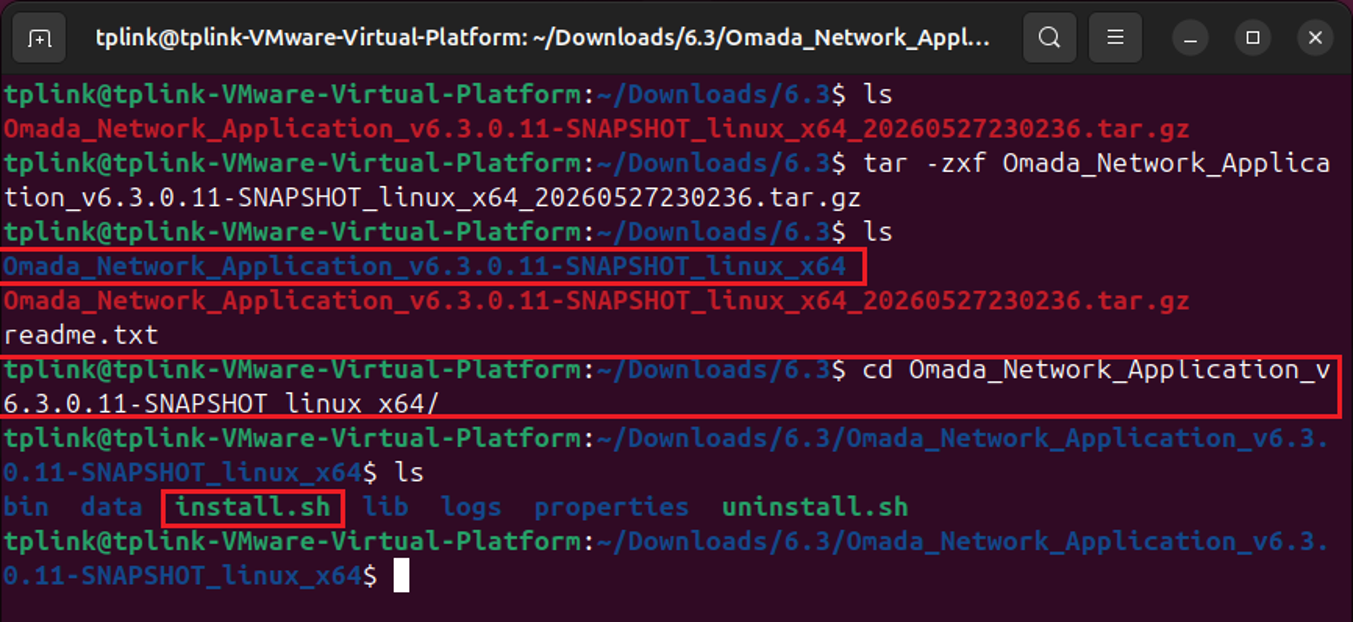
Step 3. Run the install.sh script to install version 6.3. If the upgrade is successful, the Controller will start automatically.
Upgrade Hardware Controller C5300
For the C5300, you can directly upgrade to version 6.3 once the new version is detected, without any special operations required.
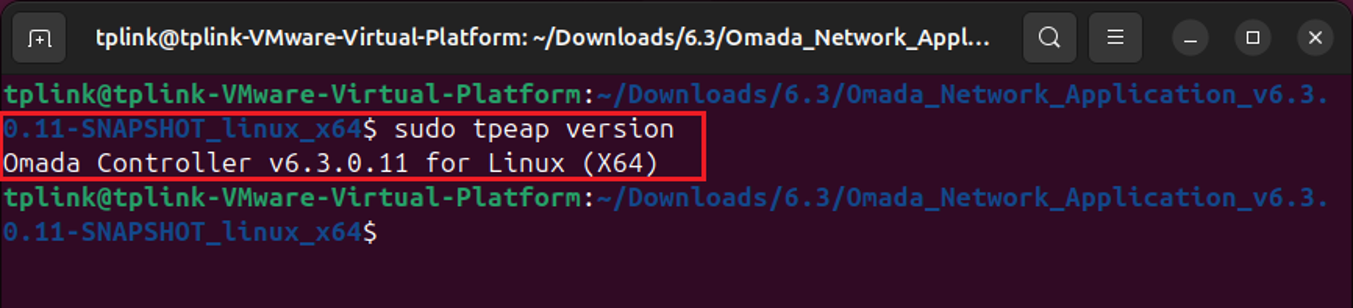
Verification
You can use the command to check the current version.
sudo tpeap version
Conclusion
The above is how to upgrade Pro Controller to v6.3.
QA
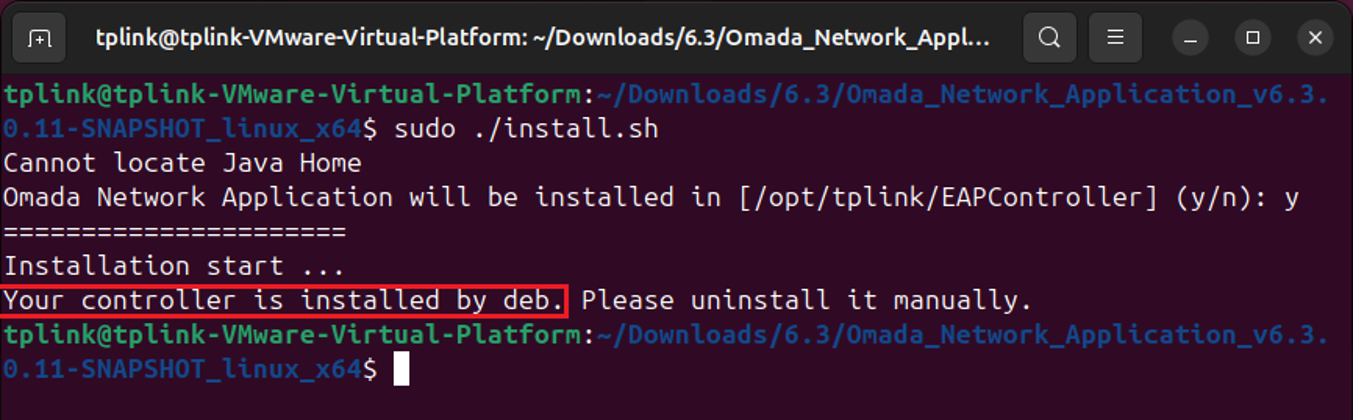
Q1: I don’t know whether Pro Controller was installed via deb or tar.gz
A1: You can try using tar.gz to upgrade first. If it fails, the prompt will display your installation type.
To learn more about each function and configuration, please visit Support Home to download or check the manual for your product.
