


How to Configure and Use the “Replace with Spare” Feature on Omada Controller v6.3 and Above


Contents
Introduction
When a network device fails, manually reconfiguring a replacement device is time-consuming and error-prone, which may significantly impact service continuity—especially in large-scale or MDU deployments with complex configurations.
The Replace with Spare feature introduced in Omada Controller v6.3 provides a fast and reliable replacement mechanism. It allows administrators to pre-bind a spare device to an existing (faulty) device using a Device Key. The original device must be taken offline (i.e., enter a Disconnected state) before the replacement process. Once the spare device comes online, it will be automatically adopted and inherit most of the original device’s configuration, enabling zero-configuration replacement and ensuring rapid network recovery.
Note:
1. Only APs and switches are supported by the Replace with Spare feature.
2. The replacement device must belong to the same model family as the original device (e.g., SG3428 V2.3 and SG3428 V2.4 are considered the same model family).
3. The replacement device must not be assigned as a spare for another device.
4. Configuration differences caused by hardware inconsistencies will be indicated when entering the Device Key. We strongly recommend upgrading to the latest version before performing device replacement.
5. Cloud Access must be enabled because the Device Key relies on cloud resolution, and local-only mode is not supported.
6. If the original device is bound to a device template, the template must be unbound or the replacement device must match the exact same model and version.
7. Mesh AP is supported, but switch stacking and MLAG are not supported.
8. Country code validation is required for AP devices.
Requirements
- Omada Controller v6.3 and above (Software / Hardware / Cloud-Based)
Configuration
Local controller (software & hardware) must enable Cloud Access ( Settings > Cloud Access ) and Device Management Access ( Settings > System Settings > Device Management Access ); otherwise, devices cannot be added via device key.
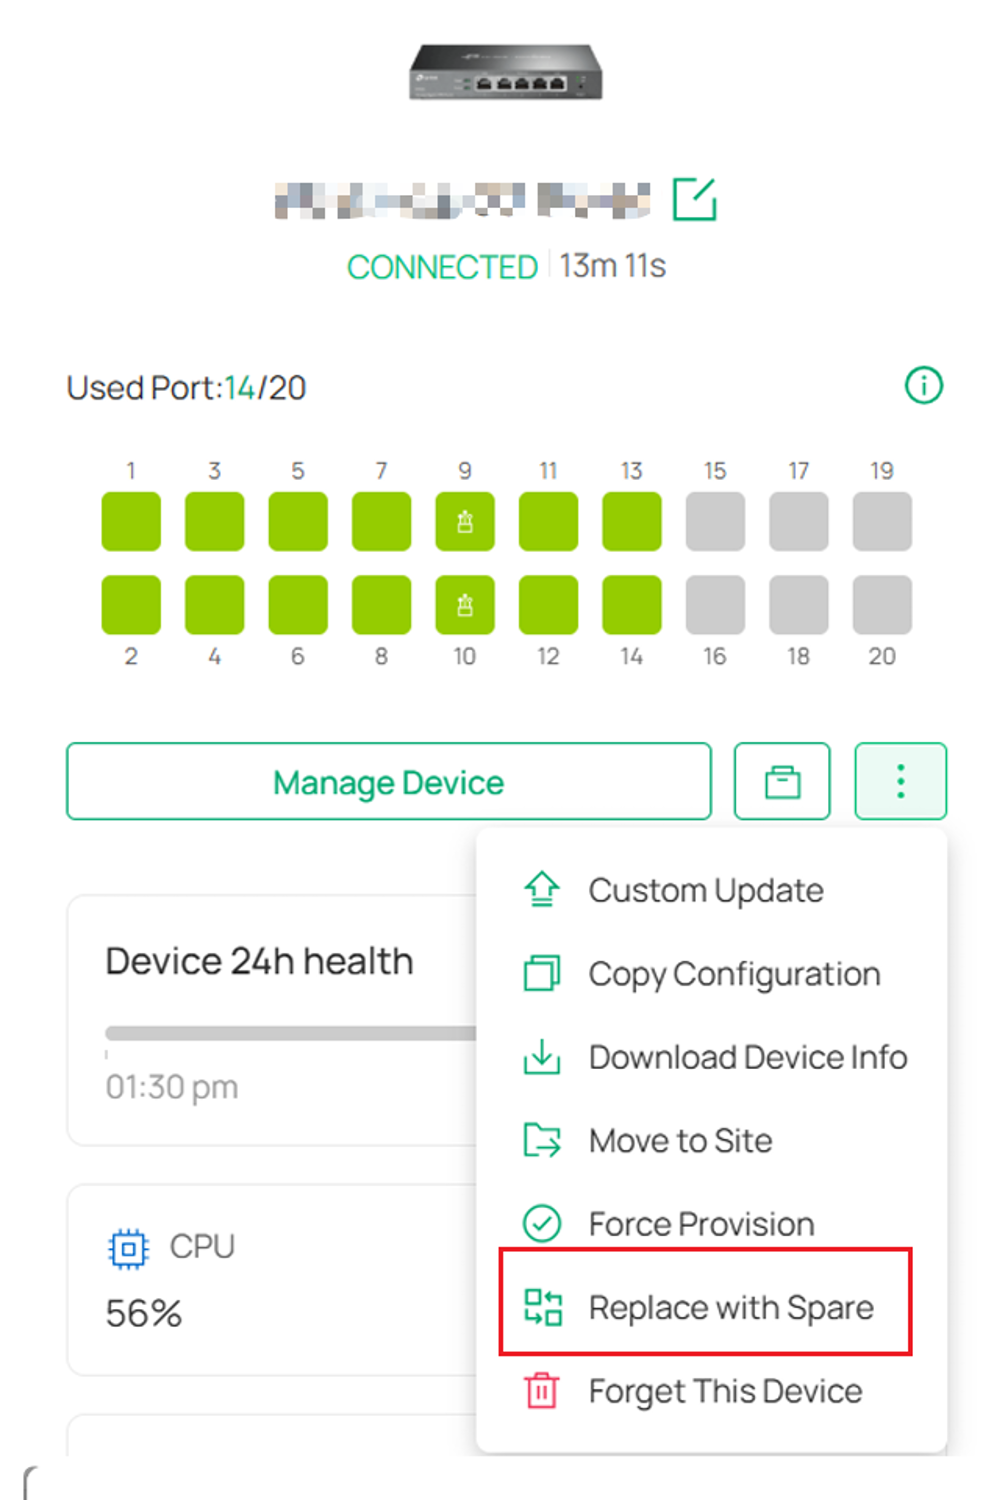
Step 1. Go to the Sites > Devices page in the Omada Controller, select the device that needs to be replaced, and navigate to its details page. Click the Replace with Spare option to open the replacement configuration window.
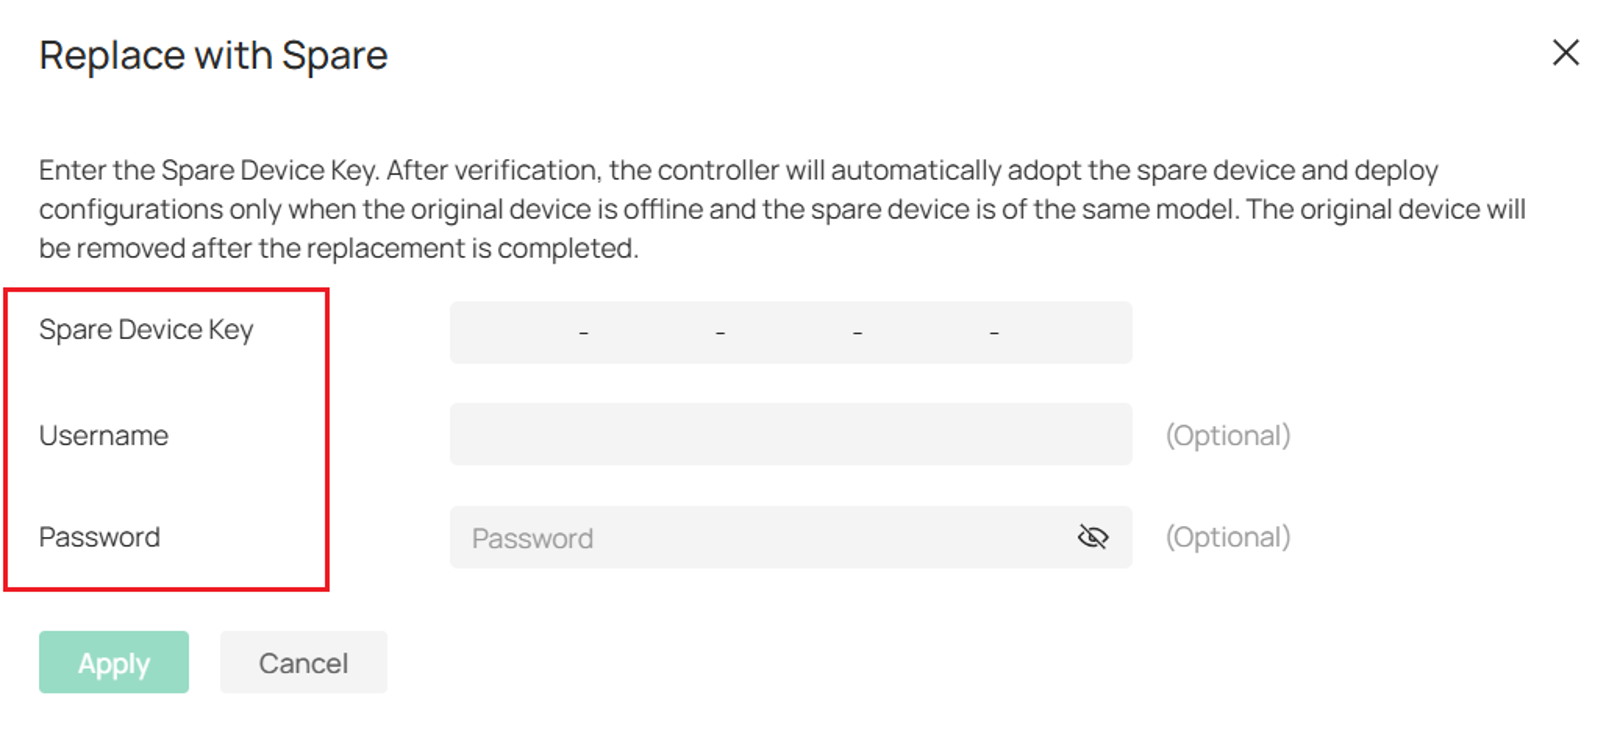
Step 2. Configure Replacement Parameters. In the pop-up window, enter the required Spare Device Key, which can be found on the packaging of the replacement device. Optionally, specify the Username and Password for automatic adoption; if left empty, the controller’s default credentials will be used.
After entering the information, click Apply to save the configuration.
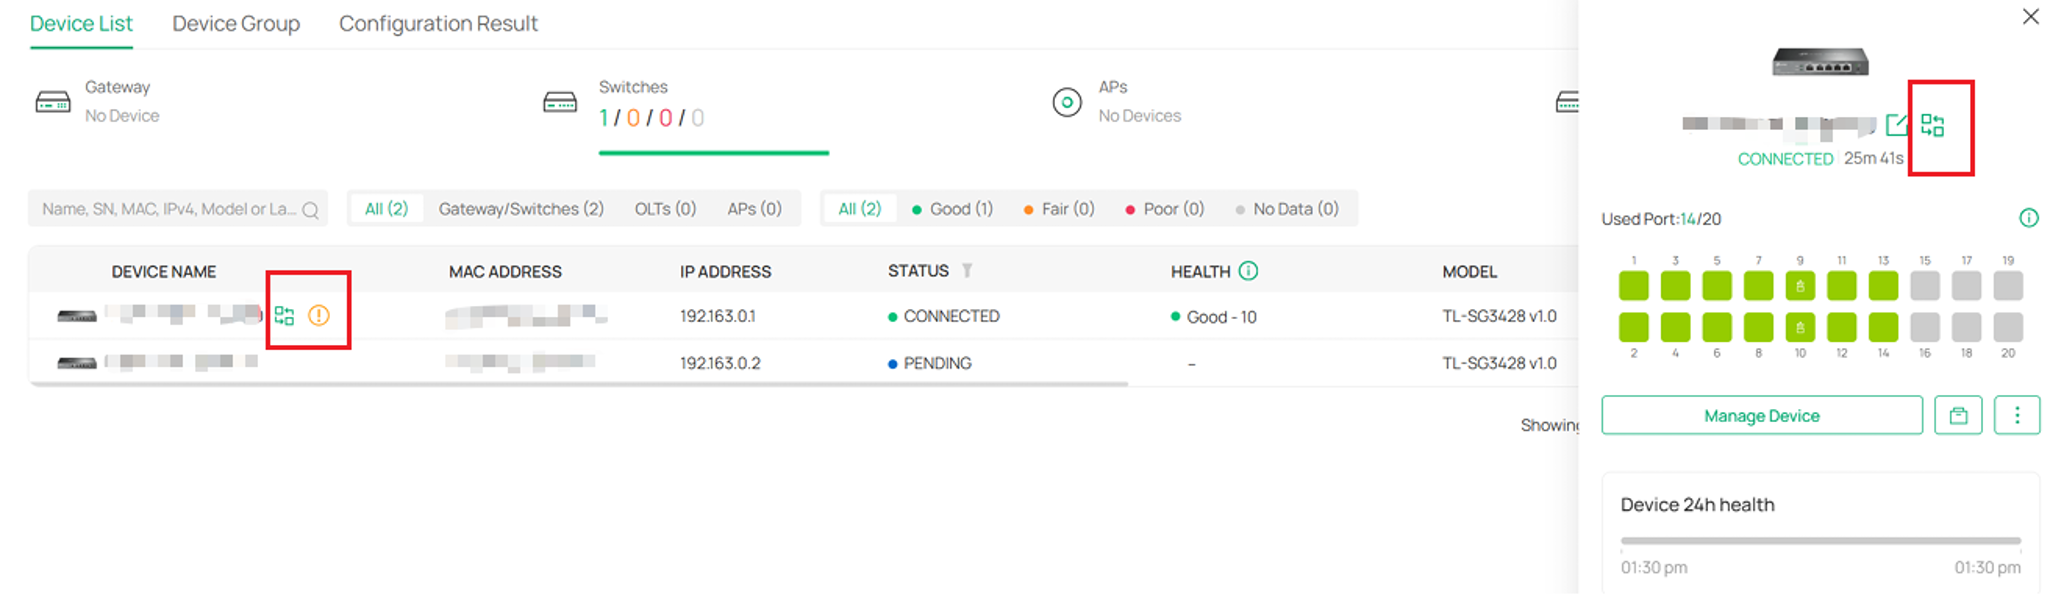
Step 3. Verify Replacement Status. After applying the configuration, a replacement icon will appear next to the device name in both the Devices list and the device details page. This indicates that the device has been successfully configured for replacement and is currently in a pending replacement state.
Step 4. Execute Device Replacement. Once the spare device is powered on and connected to the network, and the original (faulty) device is offline or disconnected, the controller will automatically adopt it using the provided or default credentials.
If the replacement is successful, the new device will inherit all of the configuration and logical associations of the original device, allowing the network to be restored without manual reconfiguration.
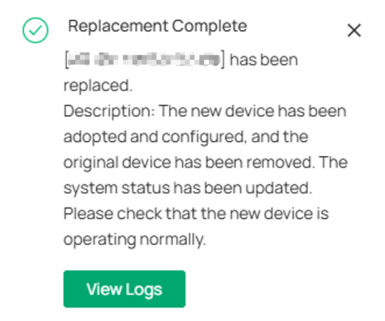
A success notification popup will be displayed on the frontend, and an Event Log entry will be recorded. The original device will be automatically forgotten (removed), and the new device will appear as Connected, inheriting the original device’s configuration and logical relationships.
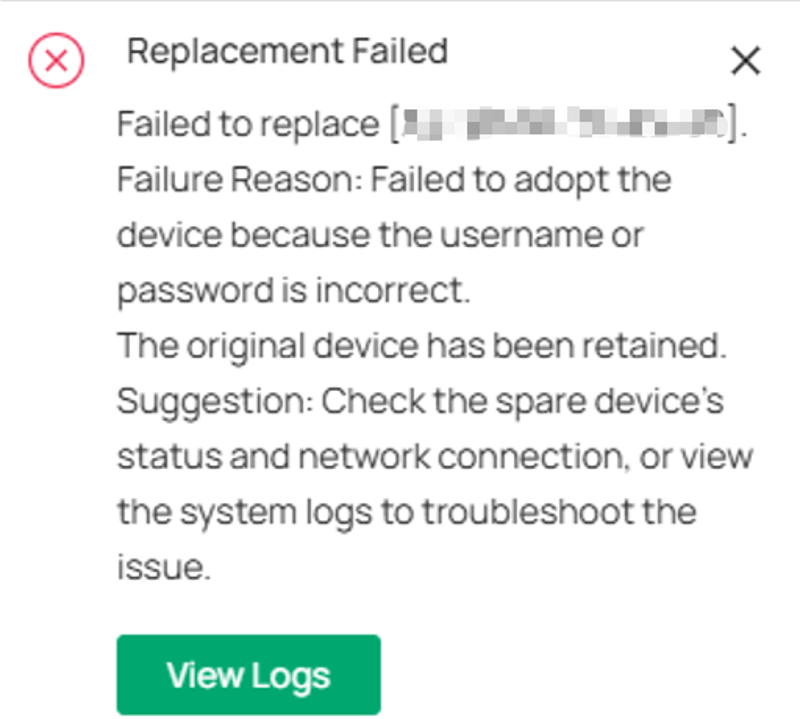
If the replacement fails, a failure popup will be shown and an Alert Log will be recorded. The original device will be retained, and the new device will not inherit its configuration. The new device may show as Adoption Failed or Adopted; if it appears as Adopted, it usually means the replacement workflow failed and the device entered the default adoption flow instead.
Common causes include incorrect Device Key or credentials, the original device not being fully offline, network issues, or the spare device being in an unexpected state. The popup will include an error code and message, which should be used for troubleshooting.
To retry, do not click the Retry button on the new device (this triggers normal adoption).
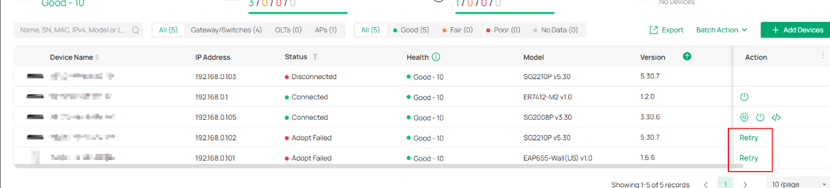
Instead, re-initiate replacement via Replace with Spare. Before retrying, ensure the original device is offline, credentials are correct, the spare device is reachable, and check logs or the error code for guidance.
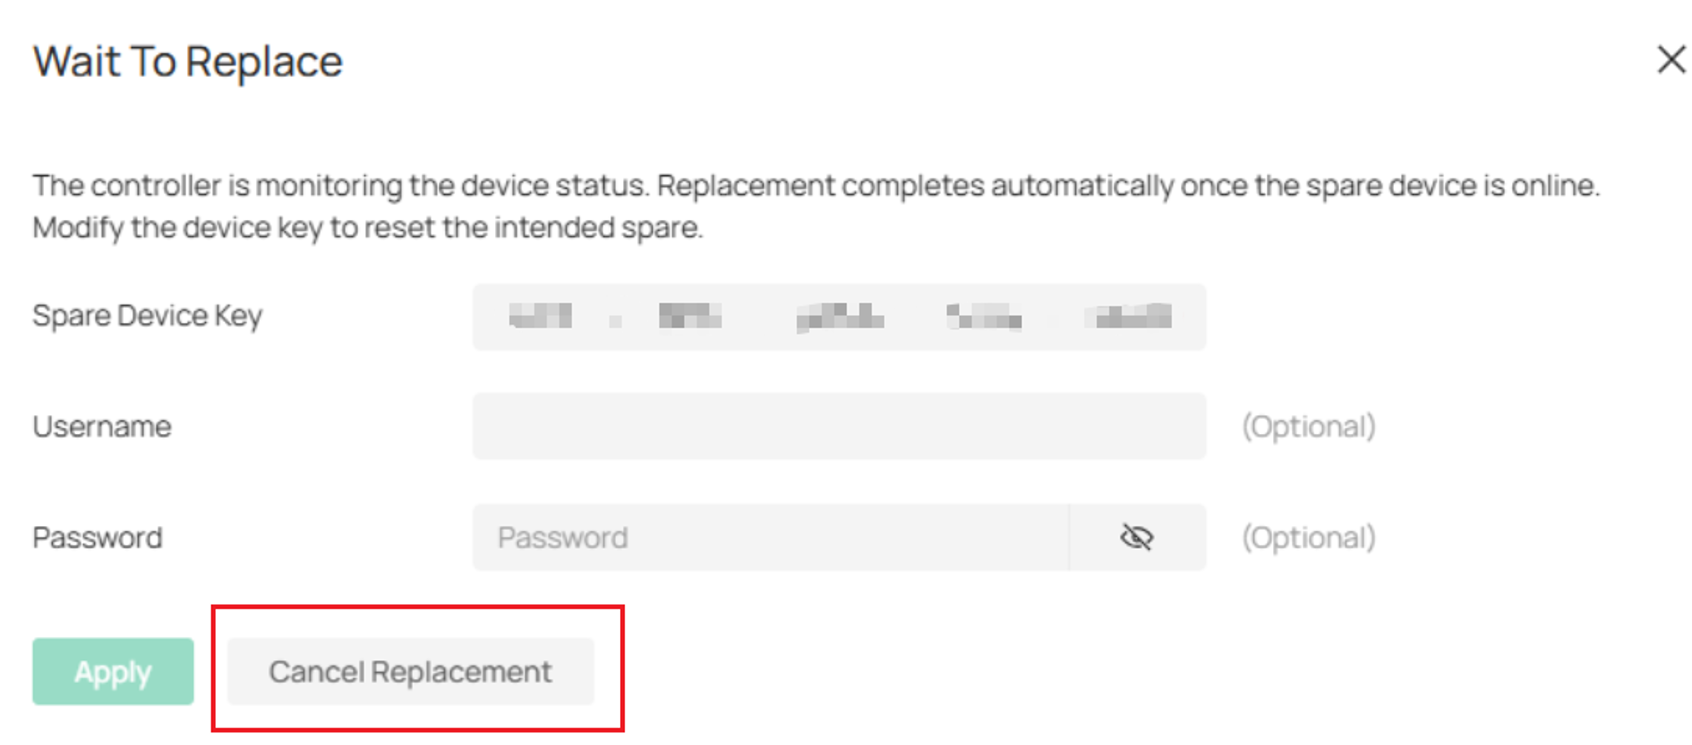
Step 5. Modify or Cancel Replacement (Optional). If needed, you can revisit the replacement configuration by clicking the replacement icon or the Replace with Spare entry again on the device details page. From there, you can update the Device Key or credentials, or click Cancel Replacement to remove the current replacement configuration.
If a replacement attempt fails, the replacement icon will disappear. In this case, you need to click “Replace with Spare” to re-enter and modify the replacement configuration.
Conclusion
Through this article, you have learned how to configure “Replace with Spare” for faulty device replacement in the Omada Controller. By utilizing the "Replace with Spare" feature in Omada Controller v6.3, you can drastically reduce network downtime and eliminate manual reconfiguration errors. If you experience any issues during the hardware swap or cloud resolution process, please ensure your local controller has Cloud Access enabled or contact Omada Technical Support for assistance.
To learn more about each function and configuration, please visit Support Home to download or check the manual for your product.
