


How to Set Up an SSL VPN Server on Omada Gateway in Controller Mode


Contents
Introduction
SSL VPN (Secure Sockets Layer Virtual Private Network) enables remote users to securely access private network resources over the Internet through encrypted connections. With an Omada Gateway, you can configure user authentication and define access control policies to restrict which network resources each VPN client can access. This provides secure remote connectivity while helping protect sensitive internal resources. This article explains how to configure an SSL VPN server on an Omada Gateway and connect remote clients securely.
Requirements
According to the following network topology, create three accounts with different permissions on the SSL VPN server to meet different requirements.
- Account 1: VPN Client implements proxy Internet access through VPN Server;
- Account 2: VPN Client can only access VLAN 20, but cannot access VLAN 30;
- Account 3: The VPN Client and the devices behind the Server can only interact through the ICMP protocol
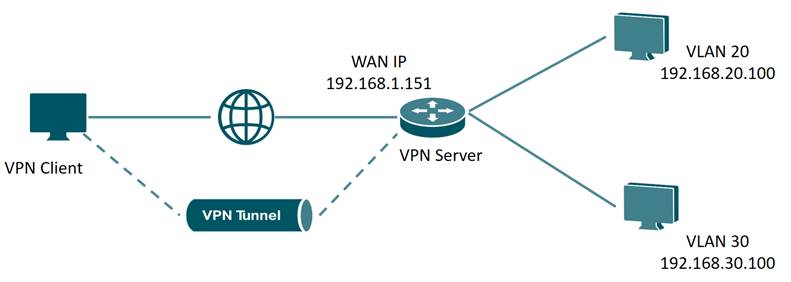
Configuration
Step 1. Create the SSL VPN Server.
Navigate to Network Config > VPN > VPN Server Click Create New VPN Server. Select SSL VPN. Here we name the server SSL_VPN_Server_1, configure Starting IP Address as 10.10.10.10, Ending IP Address as 10.10.10.100, then click Apply to save the settings. You may set the values according to your network.
Make sure the IP Pool range does not conflict with any of the created LANs.
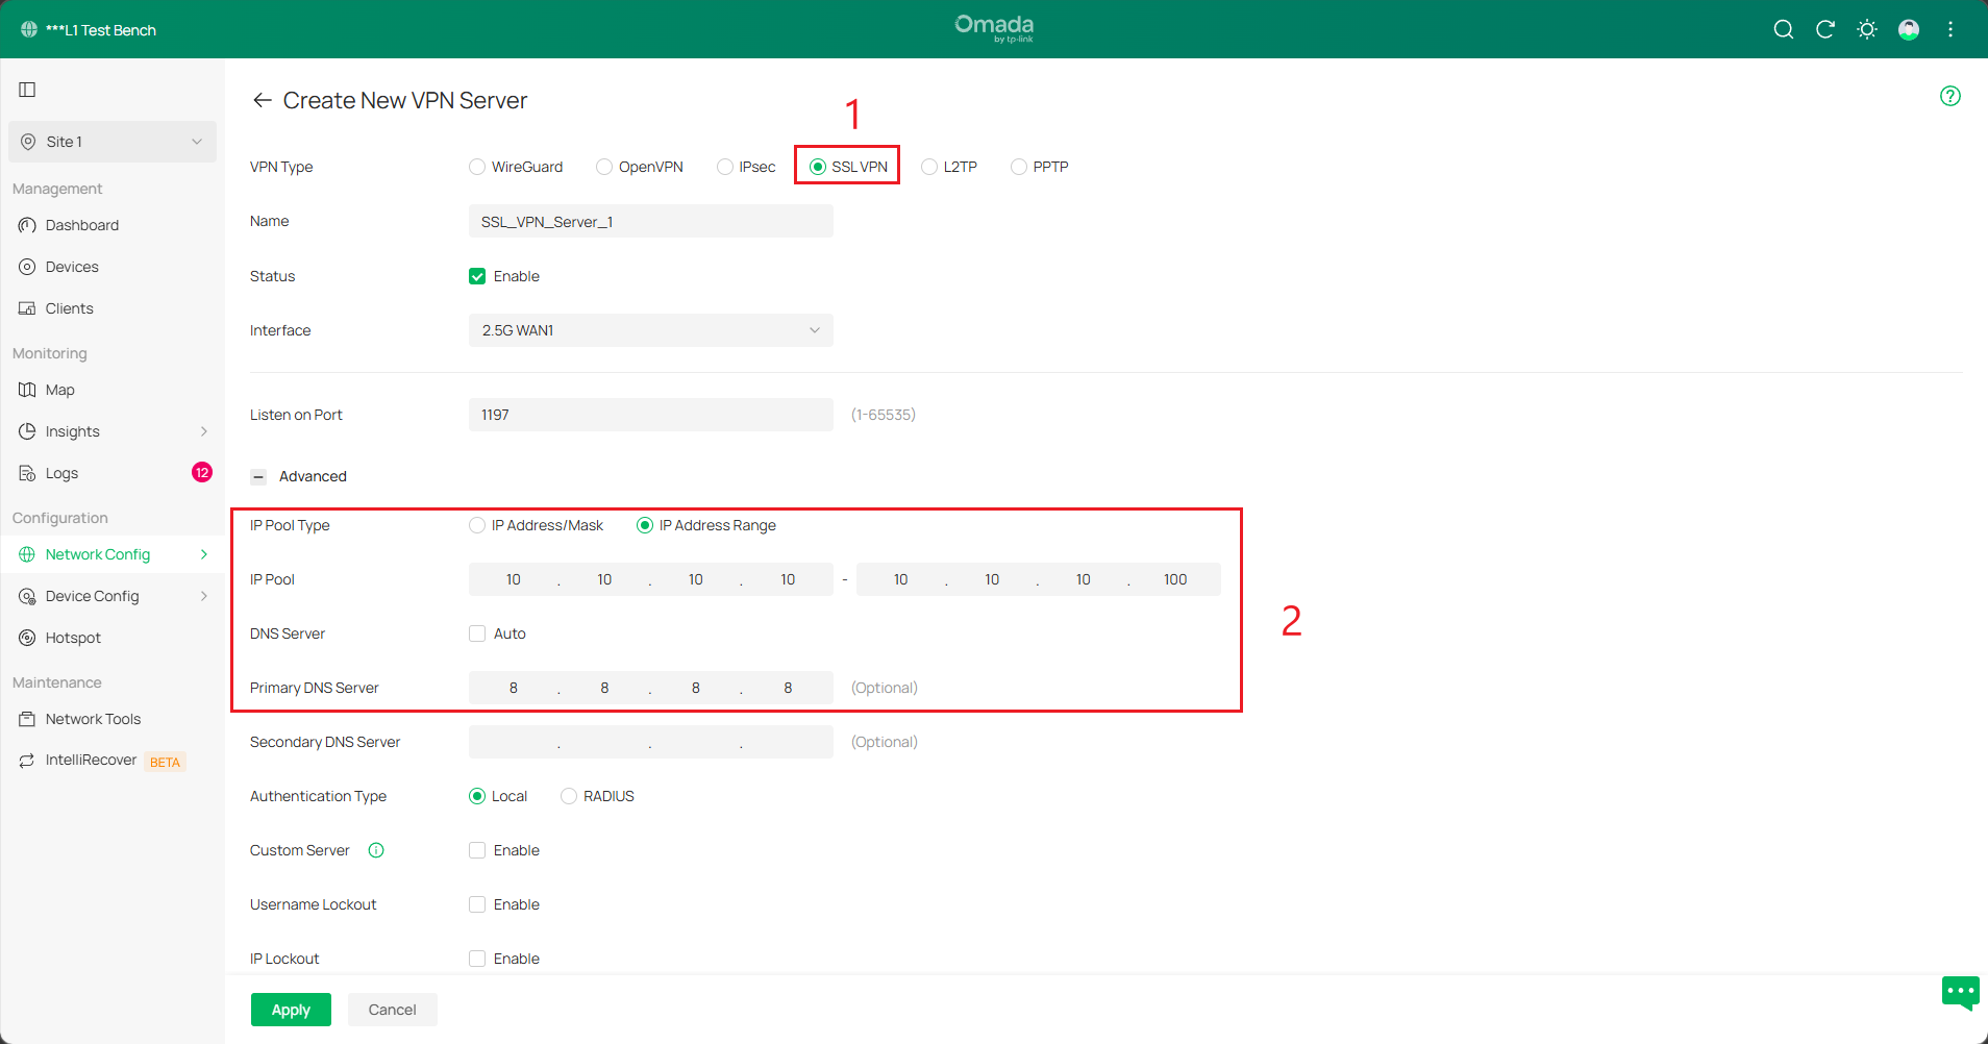
Primary DNS is a preference, here we are using Google’s Public DNS Server.
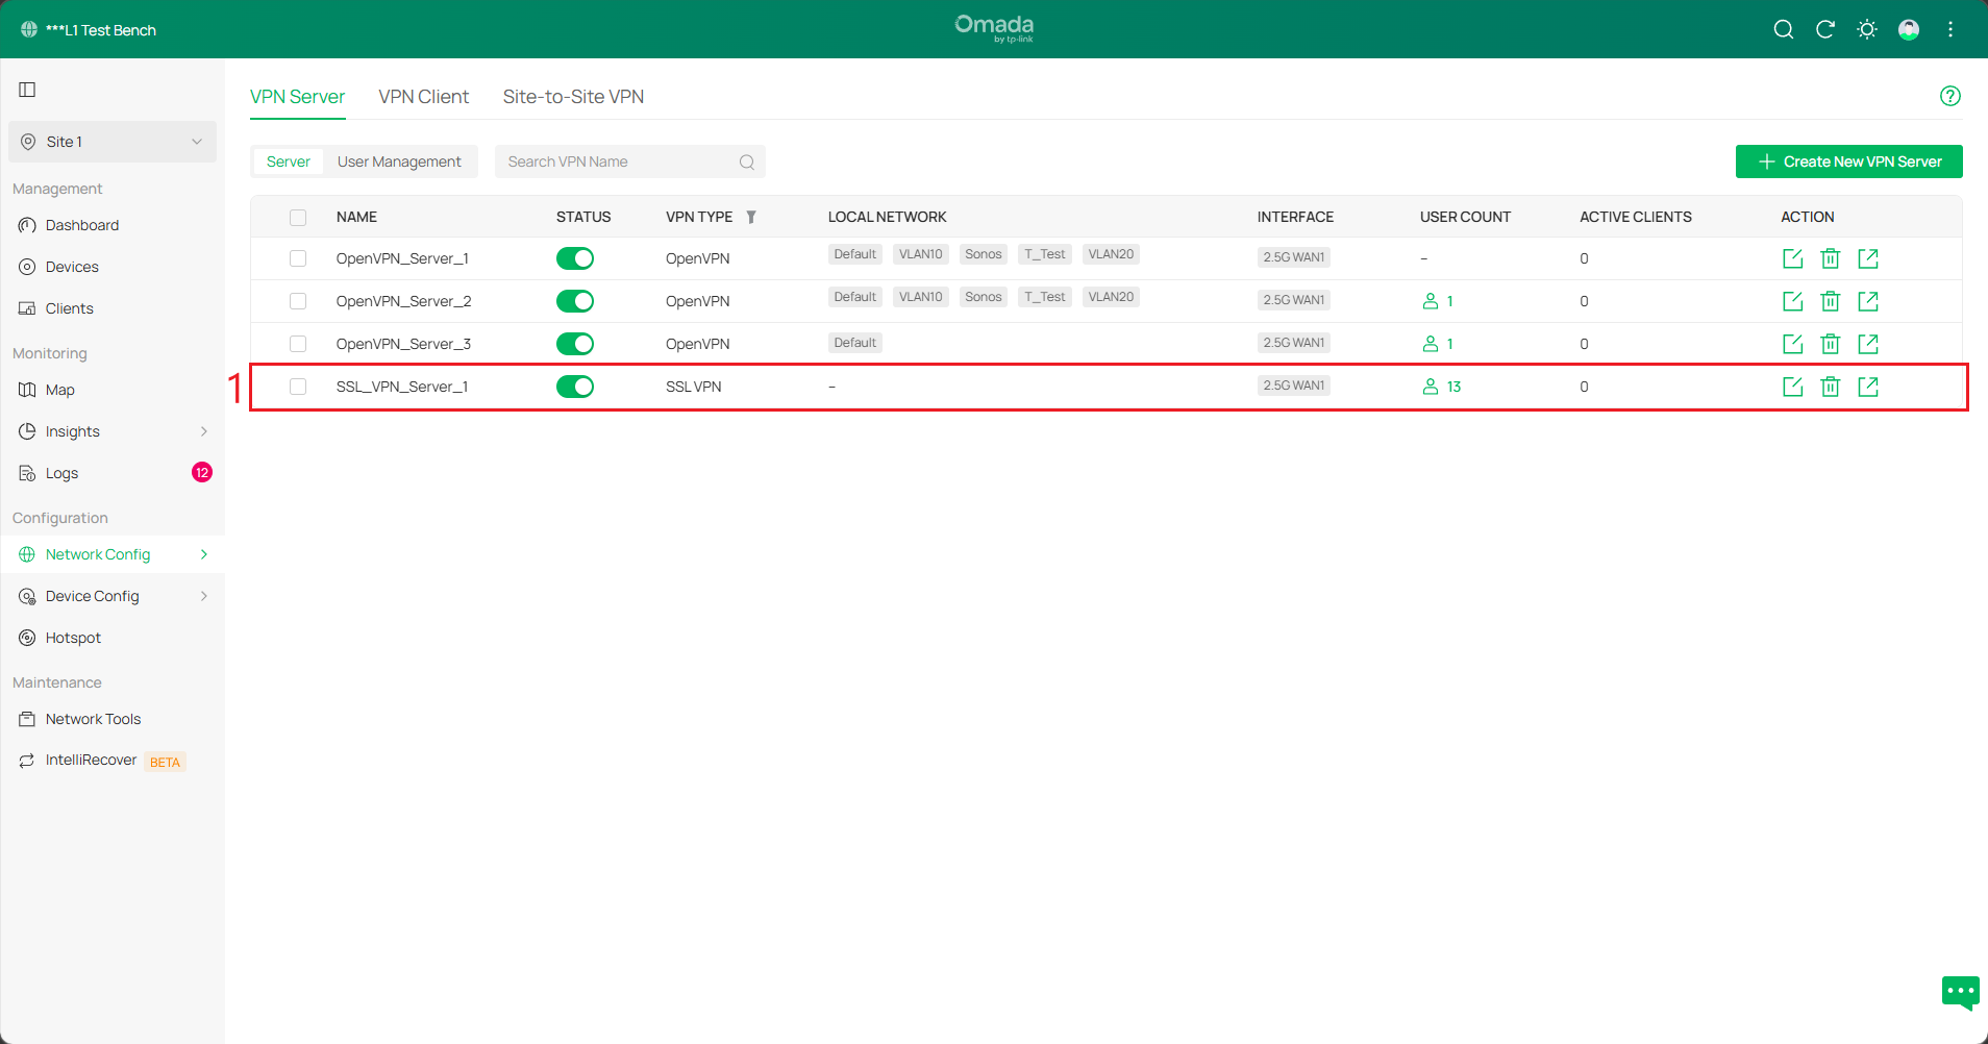
Step 2. Enable the SSL VPN Server. Go to Network Config > VPN Server, check Enable.
Step 3. Create Tunnel Resources. Go to VPN > User Management > User Group > Resource Management >Tunnel Resources, click Create new Tunnel Resource to create the following two resource groups. On the popup page, Allow VLAN20; AllowICMP uses ICMP Protocol to limit resources.
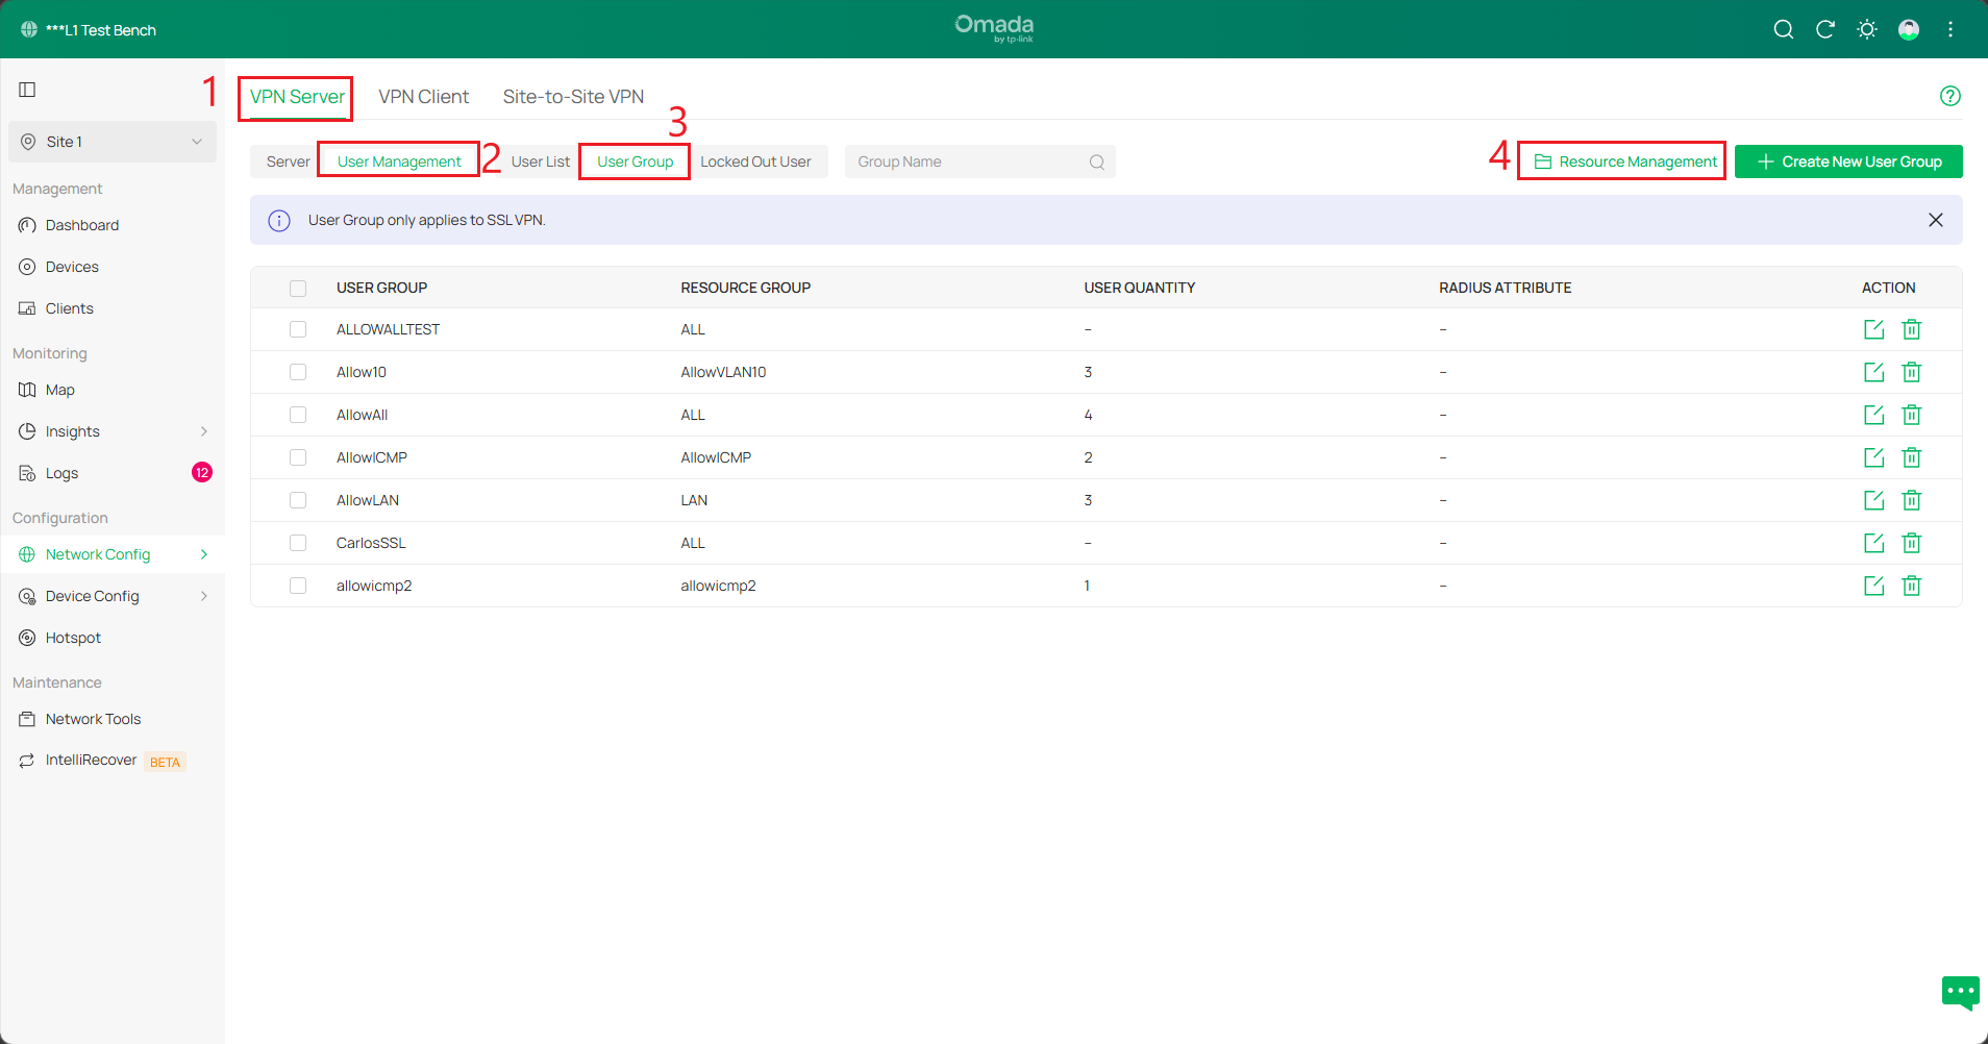
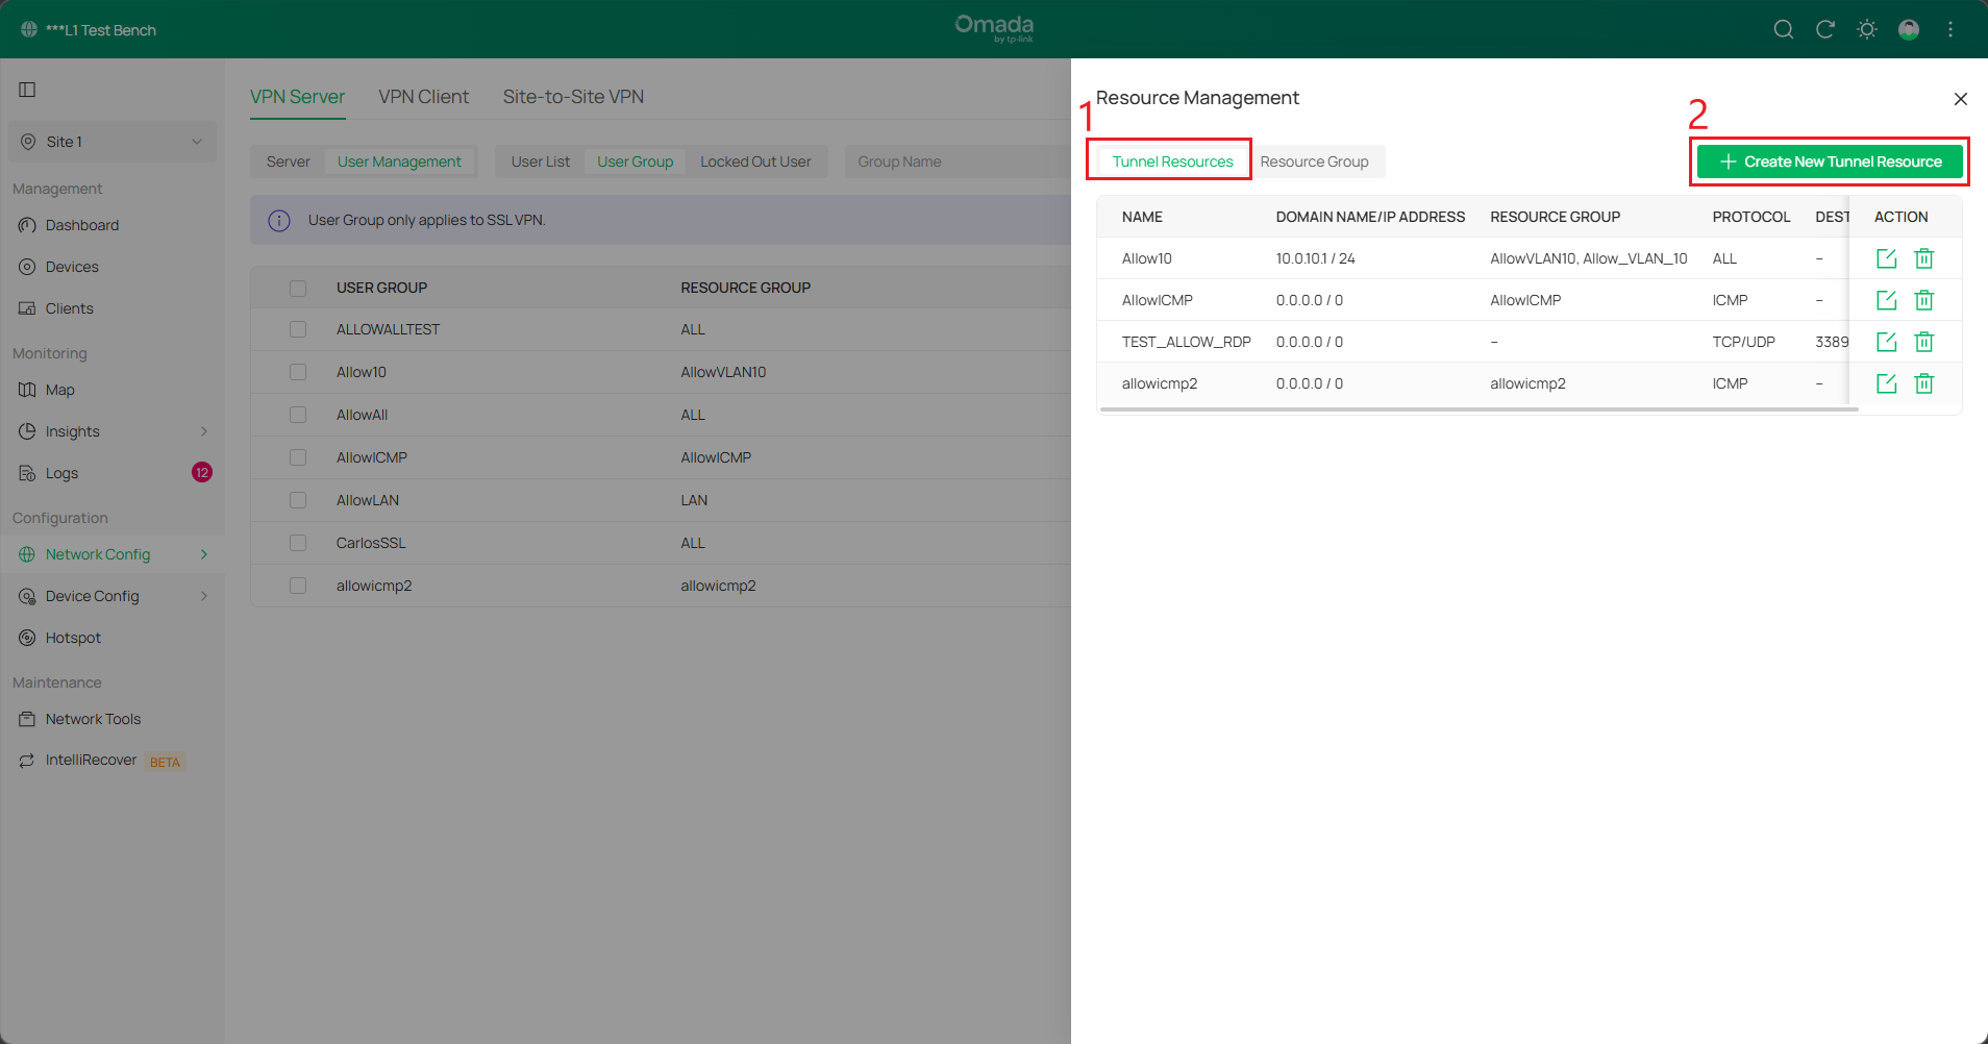
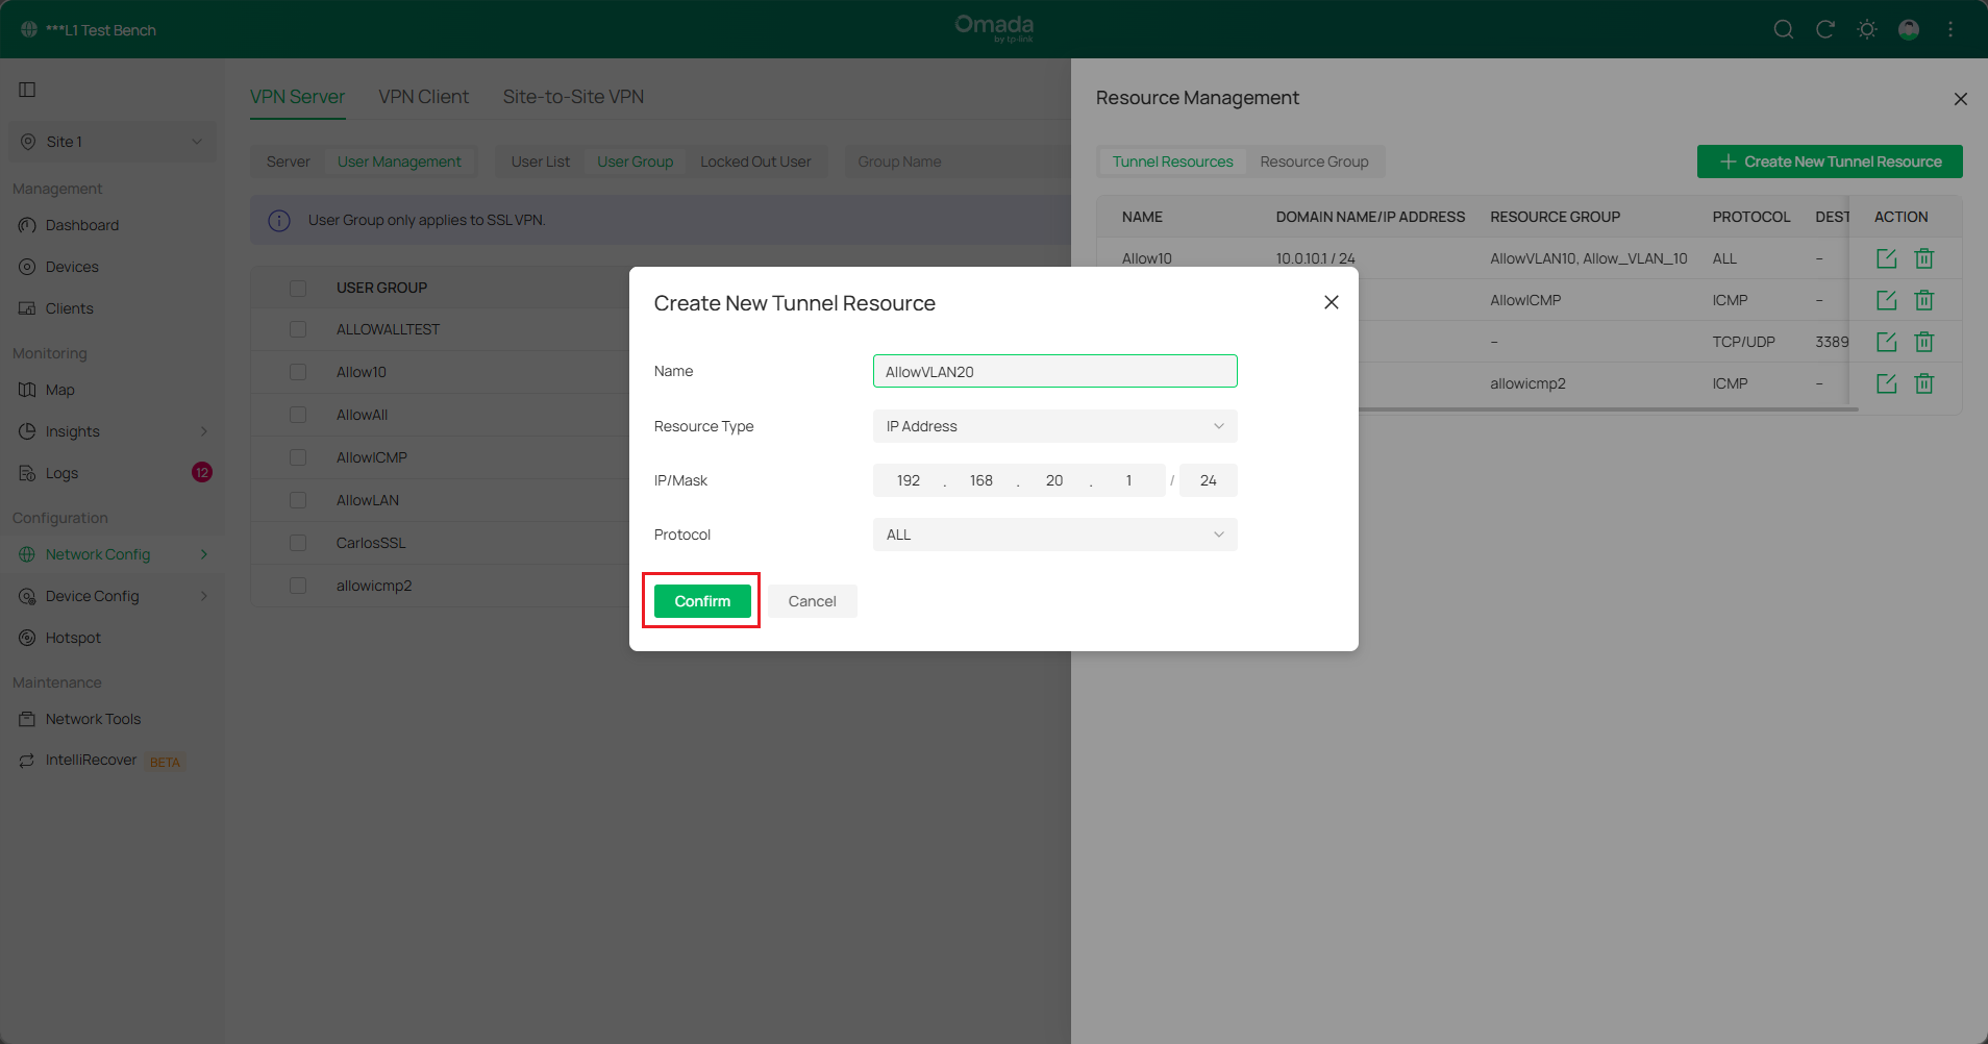
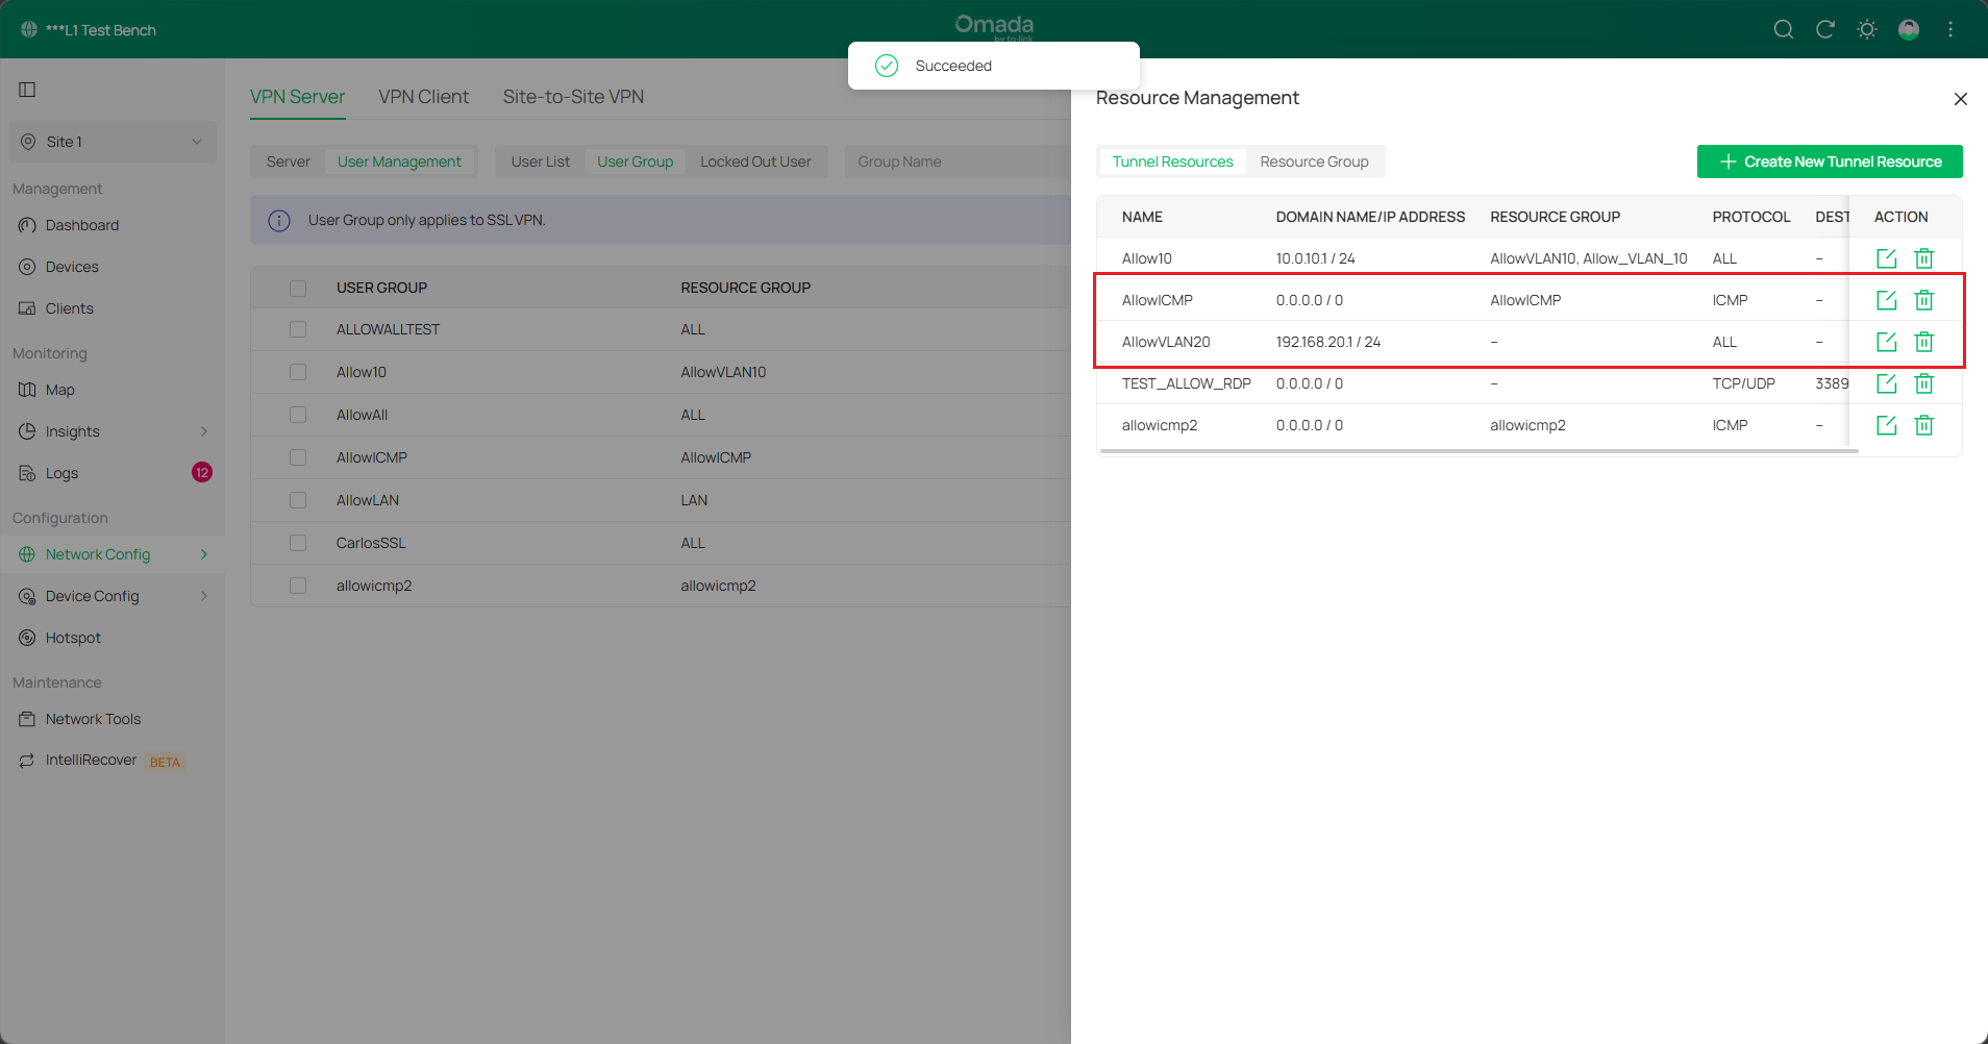
Step 4. Go to VPN > User Management > User Group > Resource Management >Resource Group, click Create new Tunnel Resource to apply the two tunnel resources created in step 3 to two different resource groups.
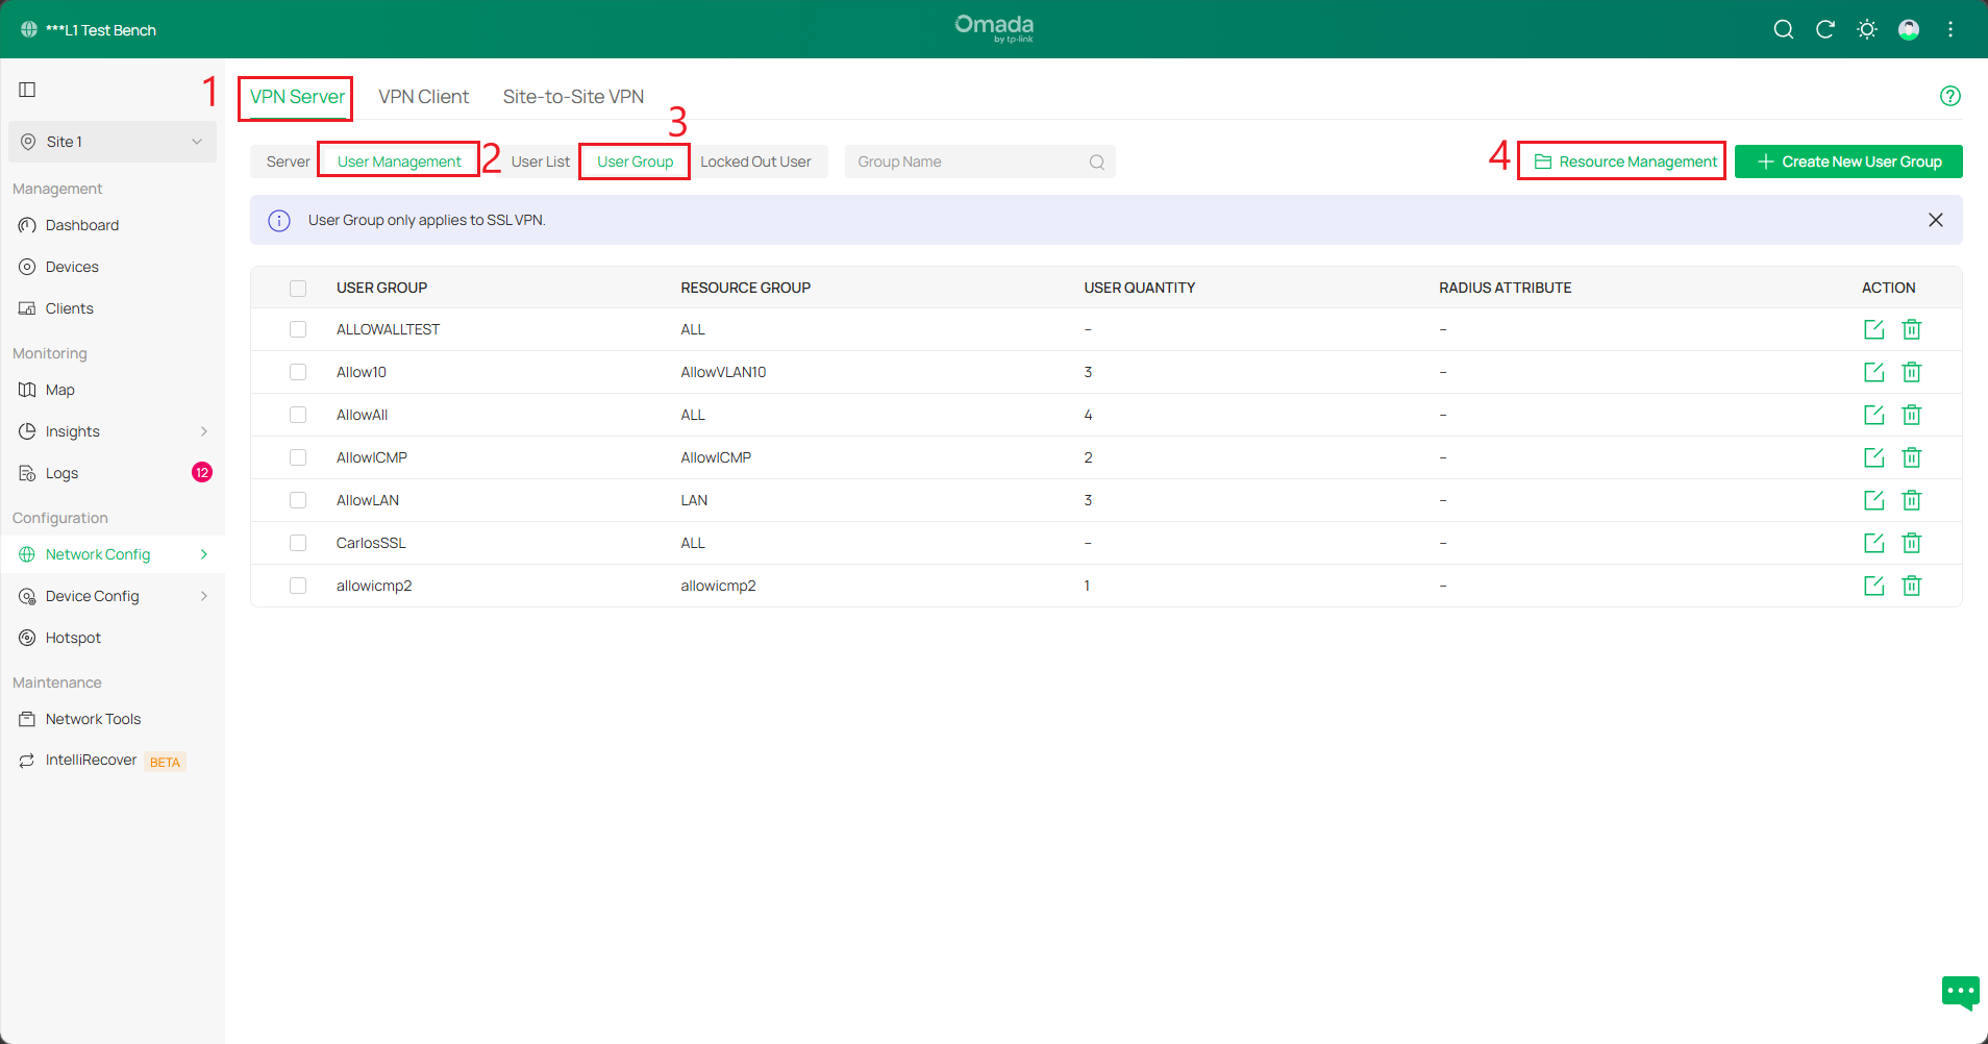
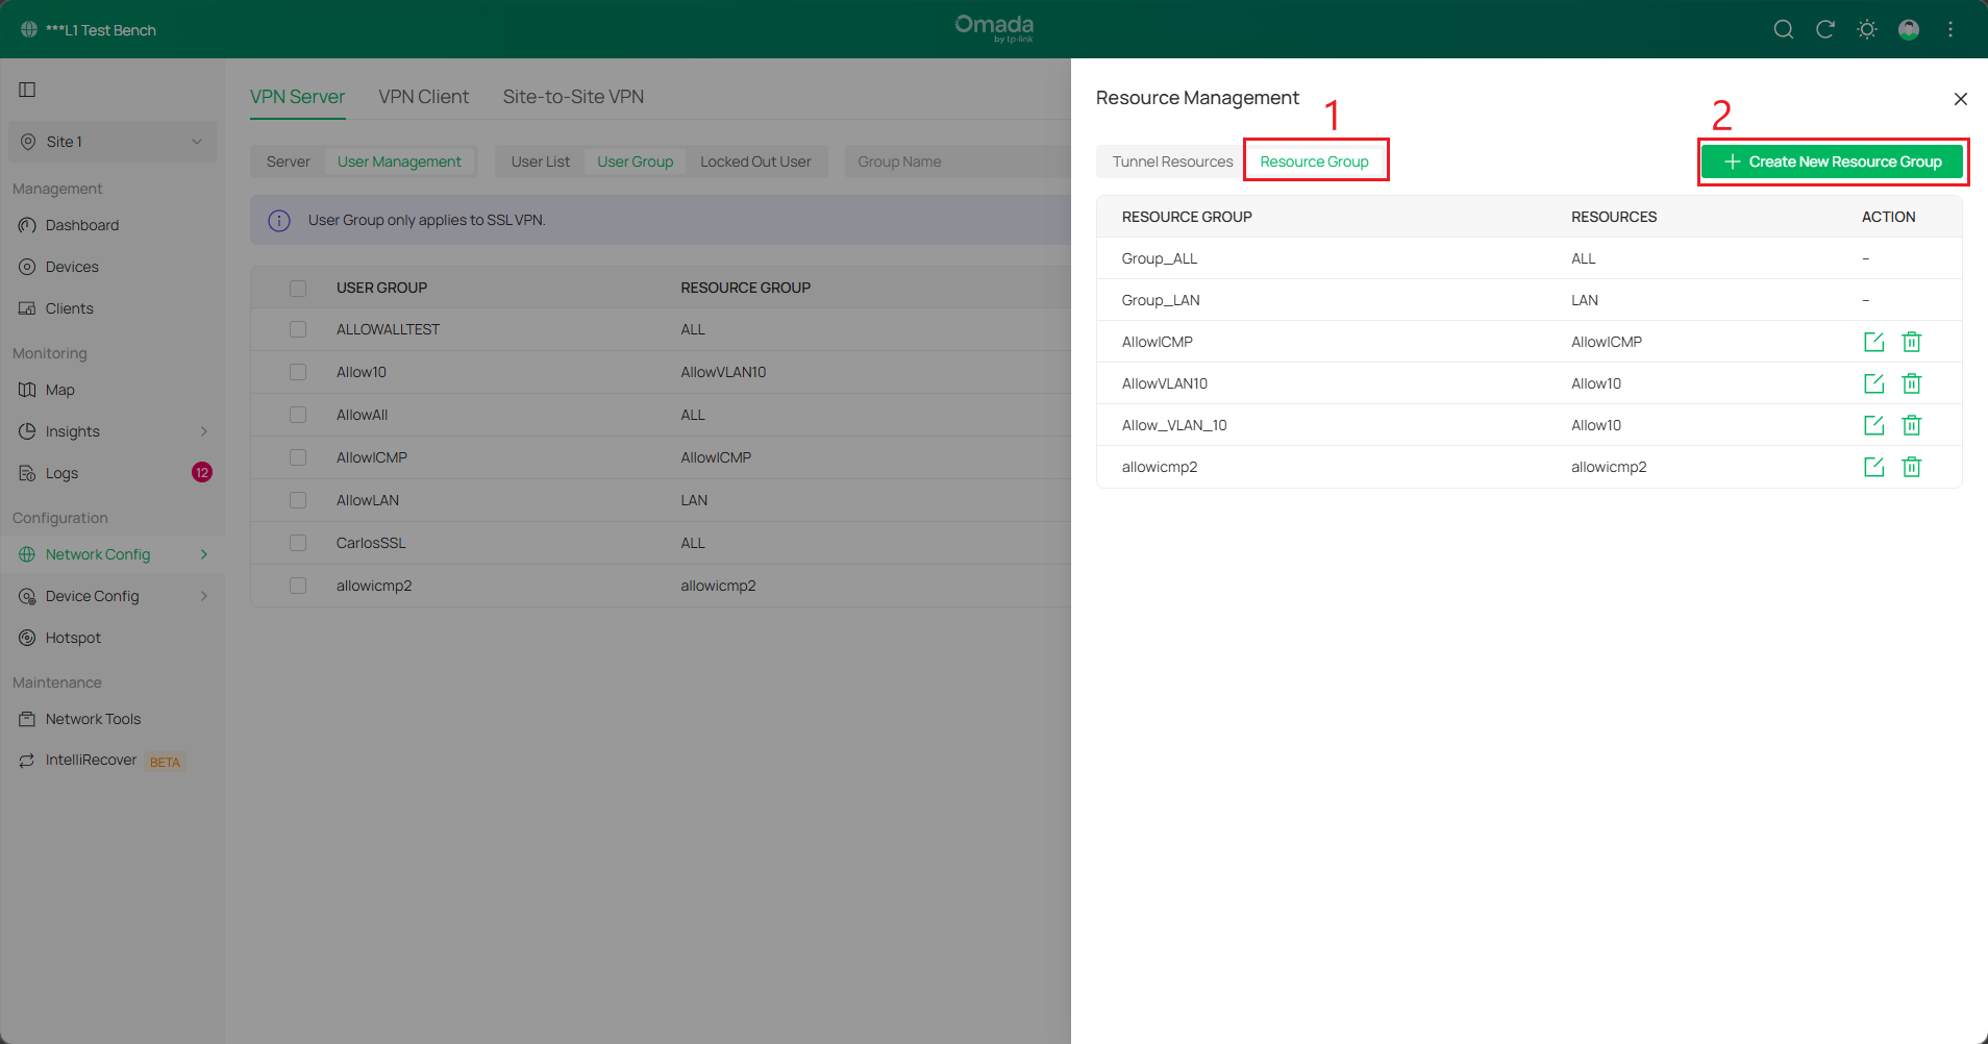
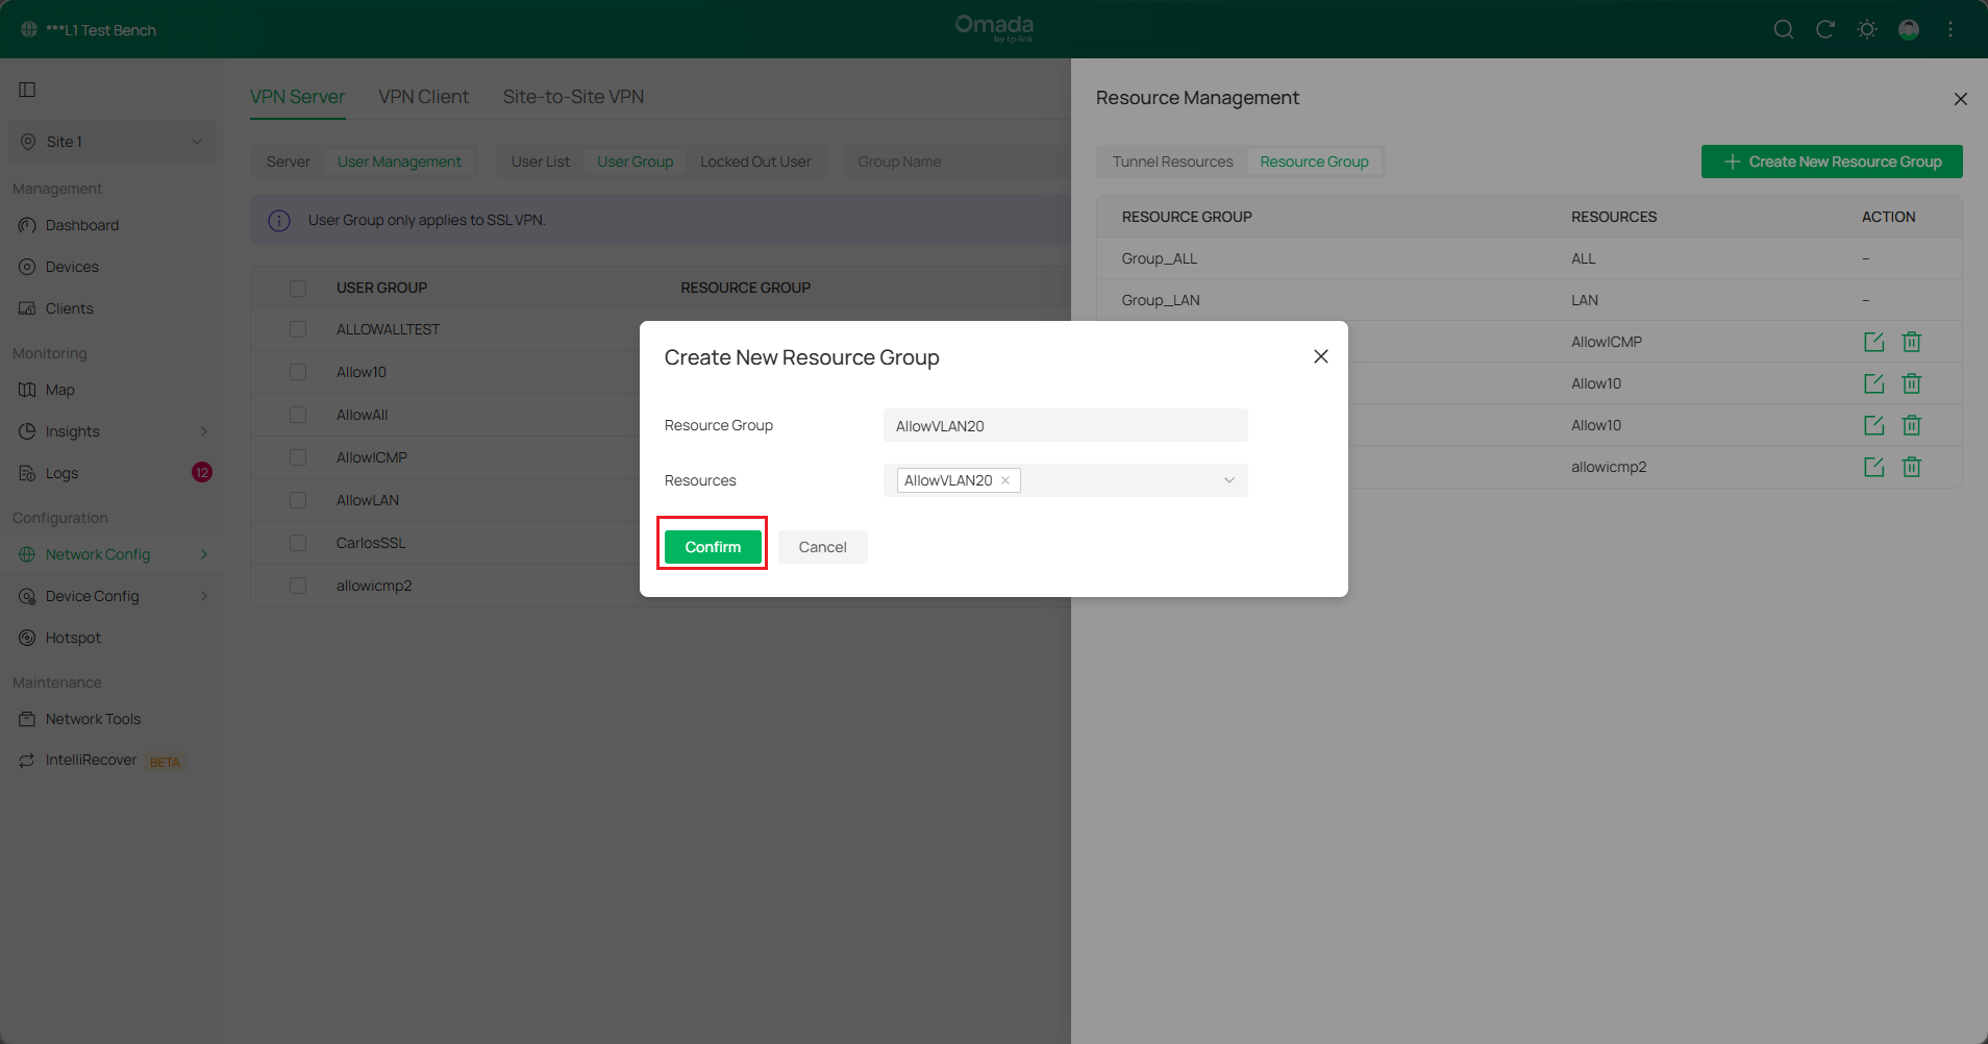
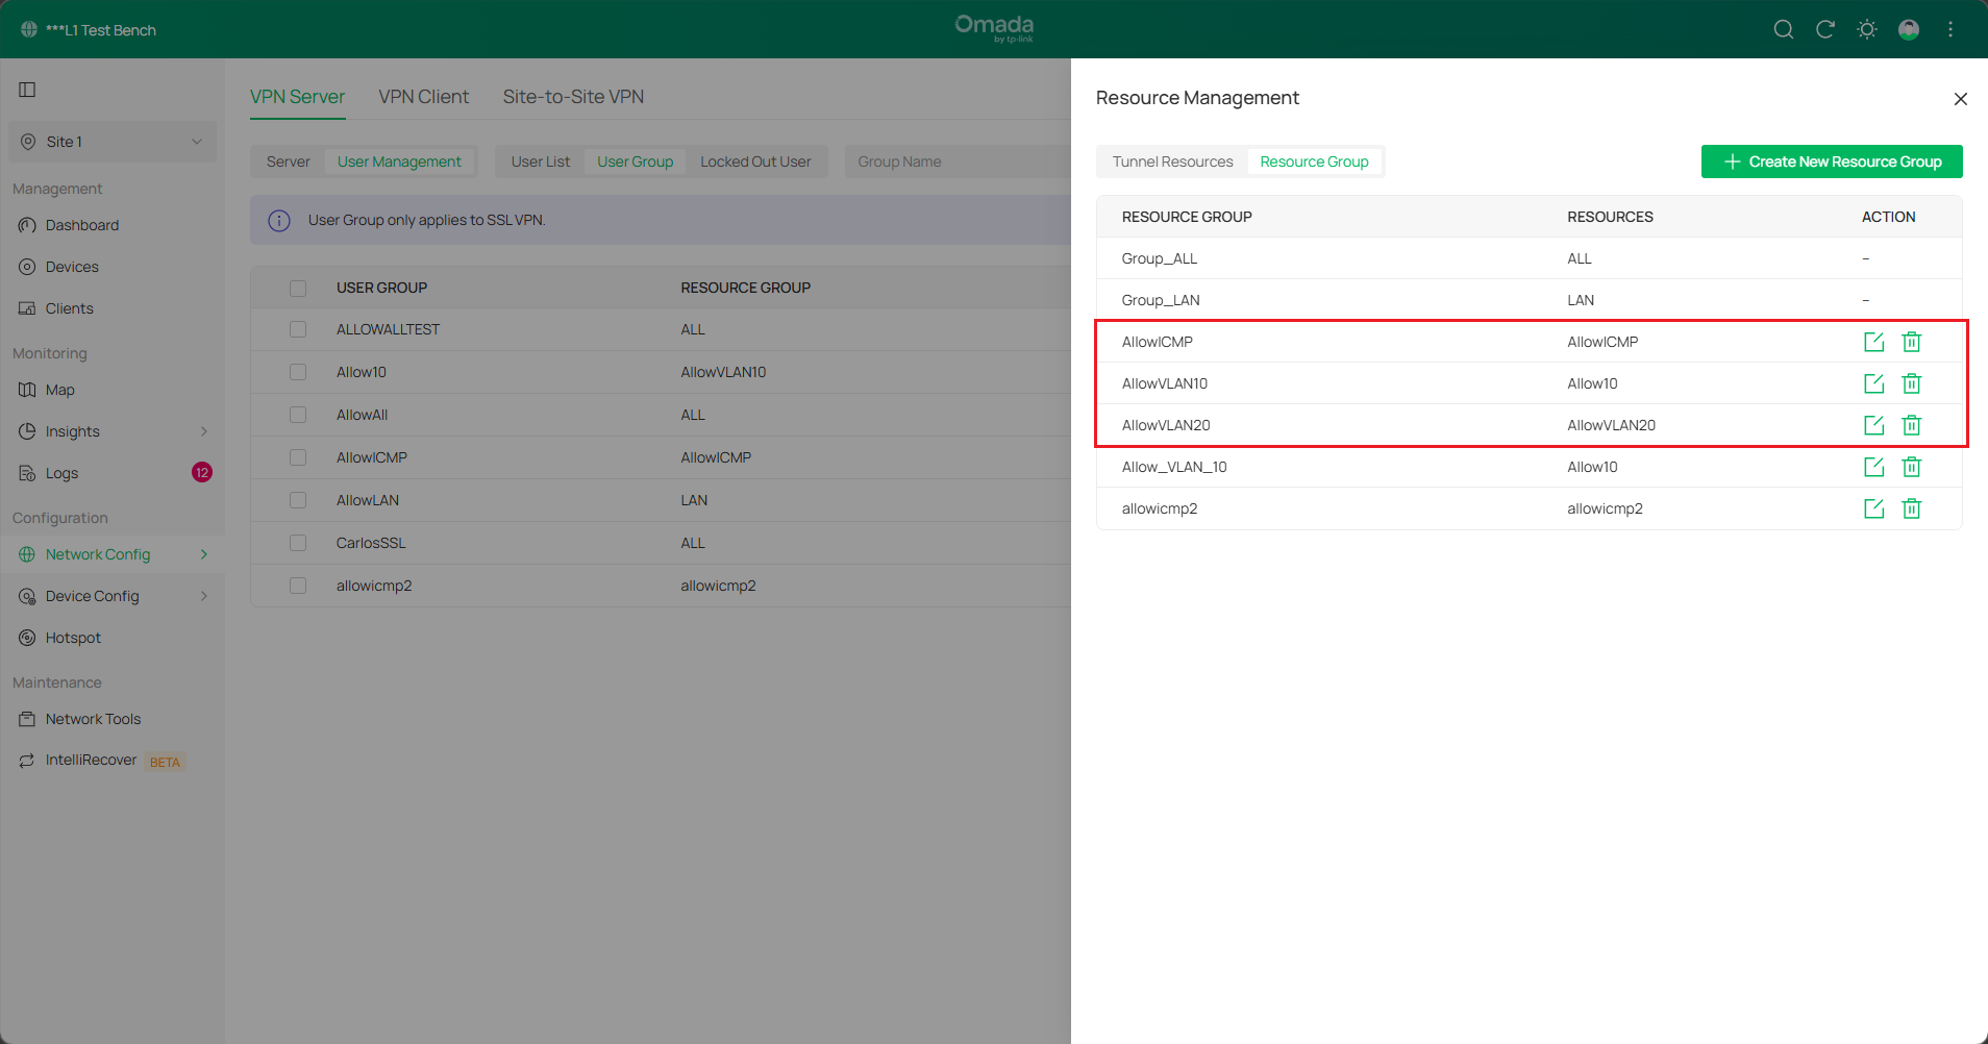
Make sure to set the corresponding Resource to the correct Resource Group.
Step 5. Create User Group. Go to VPN > VPN Server > User Management > User Group, click Create New User Group to create three user groups. Apply different resource groups to the three user groups according to the different permissions of the three accounts. Please note that if you want to implement the proxy Internet access of the client, please select Group ALL for the resource group.
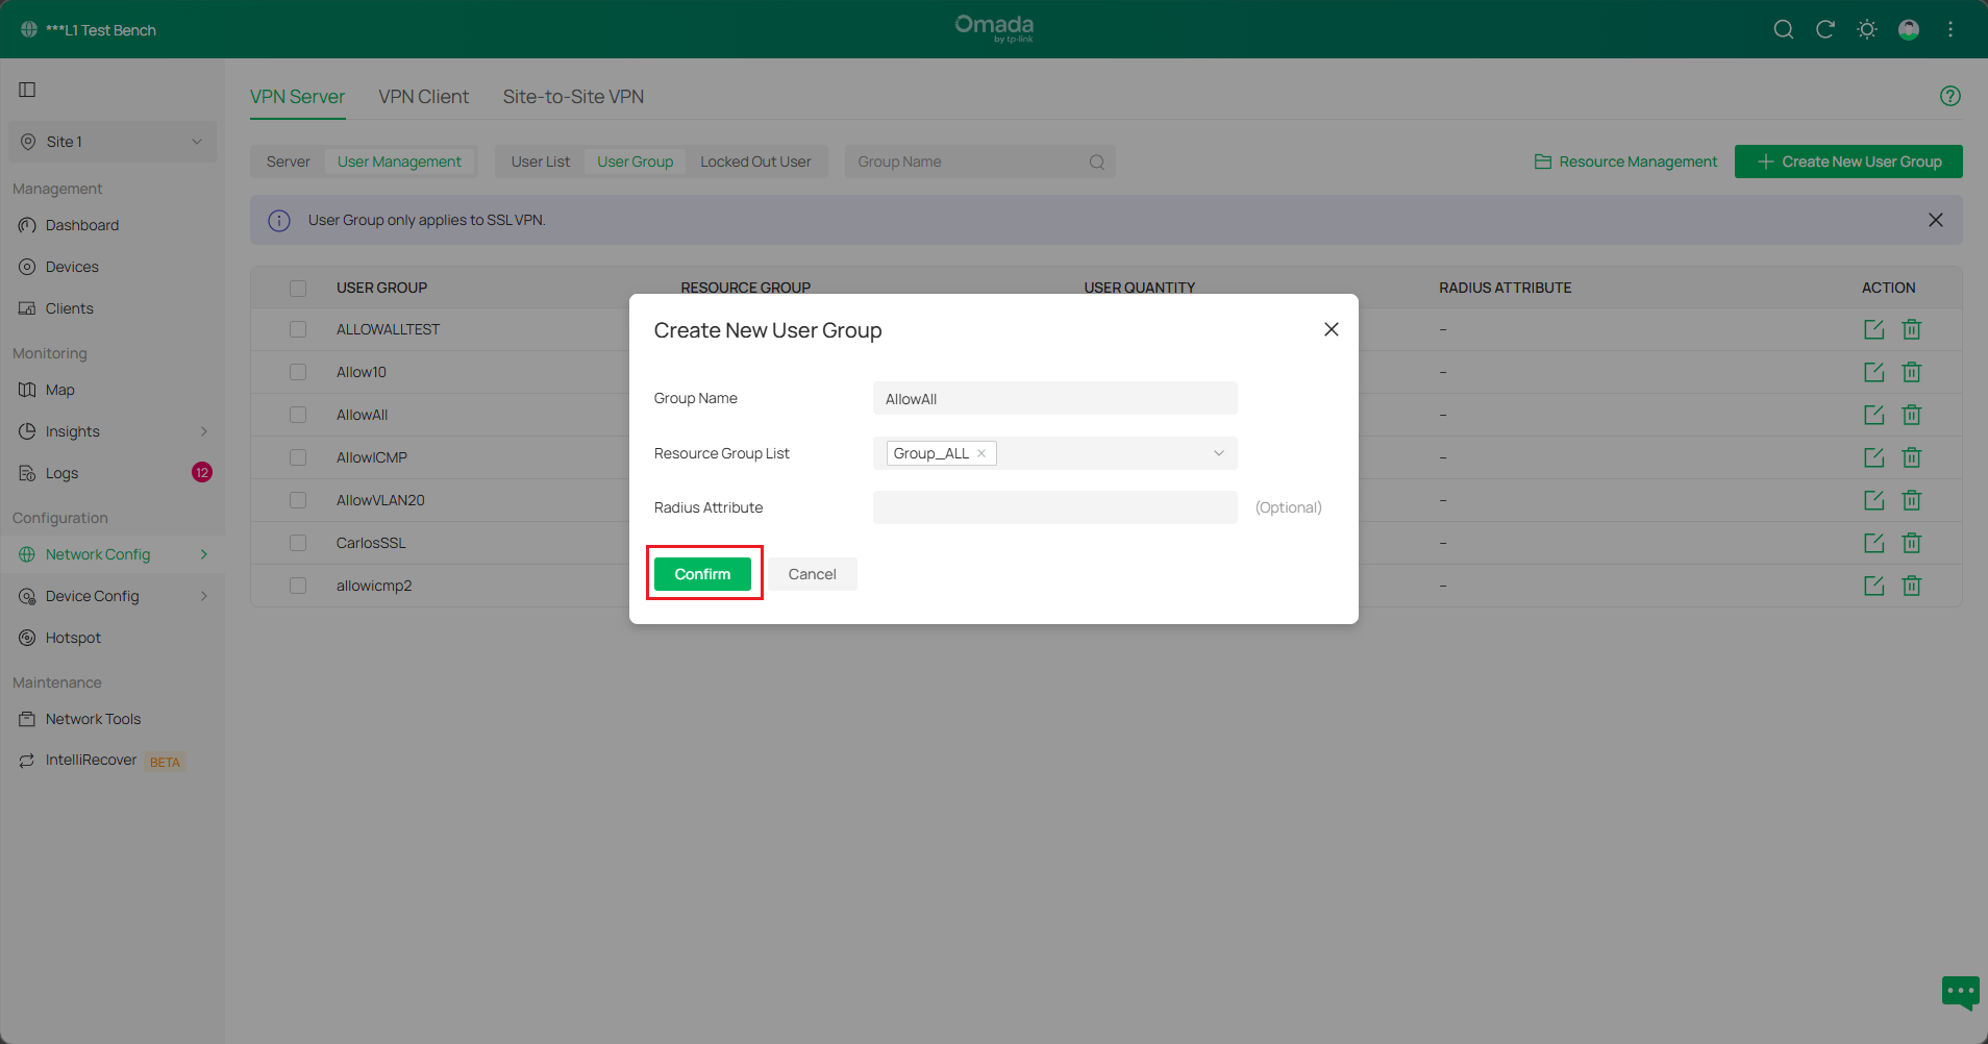
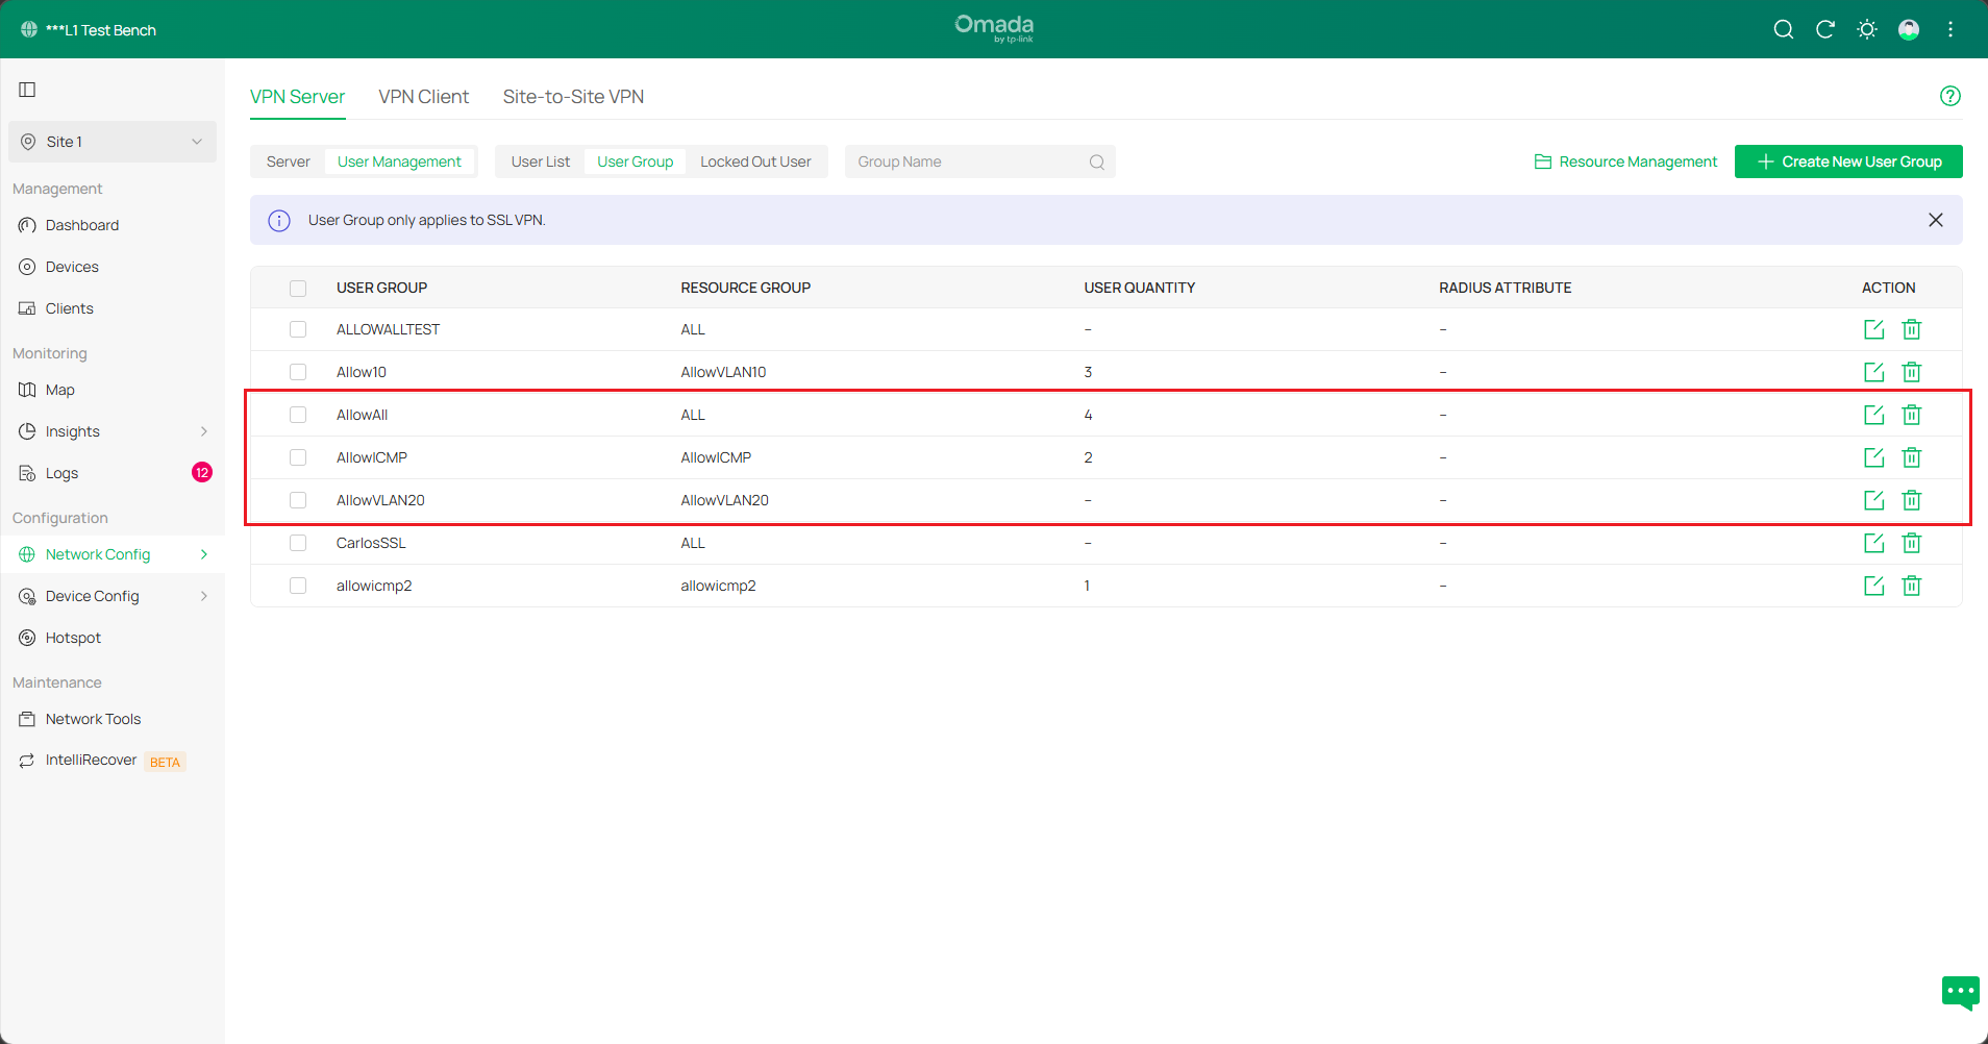
Make sure to set the corresponding Resource Group to the correct User Group.
Step 6. Go to VPN > VPN Server > User Management, click Create New User to create three user accounts. Each account corresponds to a different user group, and you can set the Username and Password according to your demands.
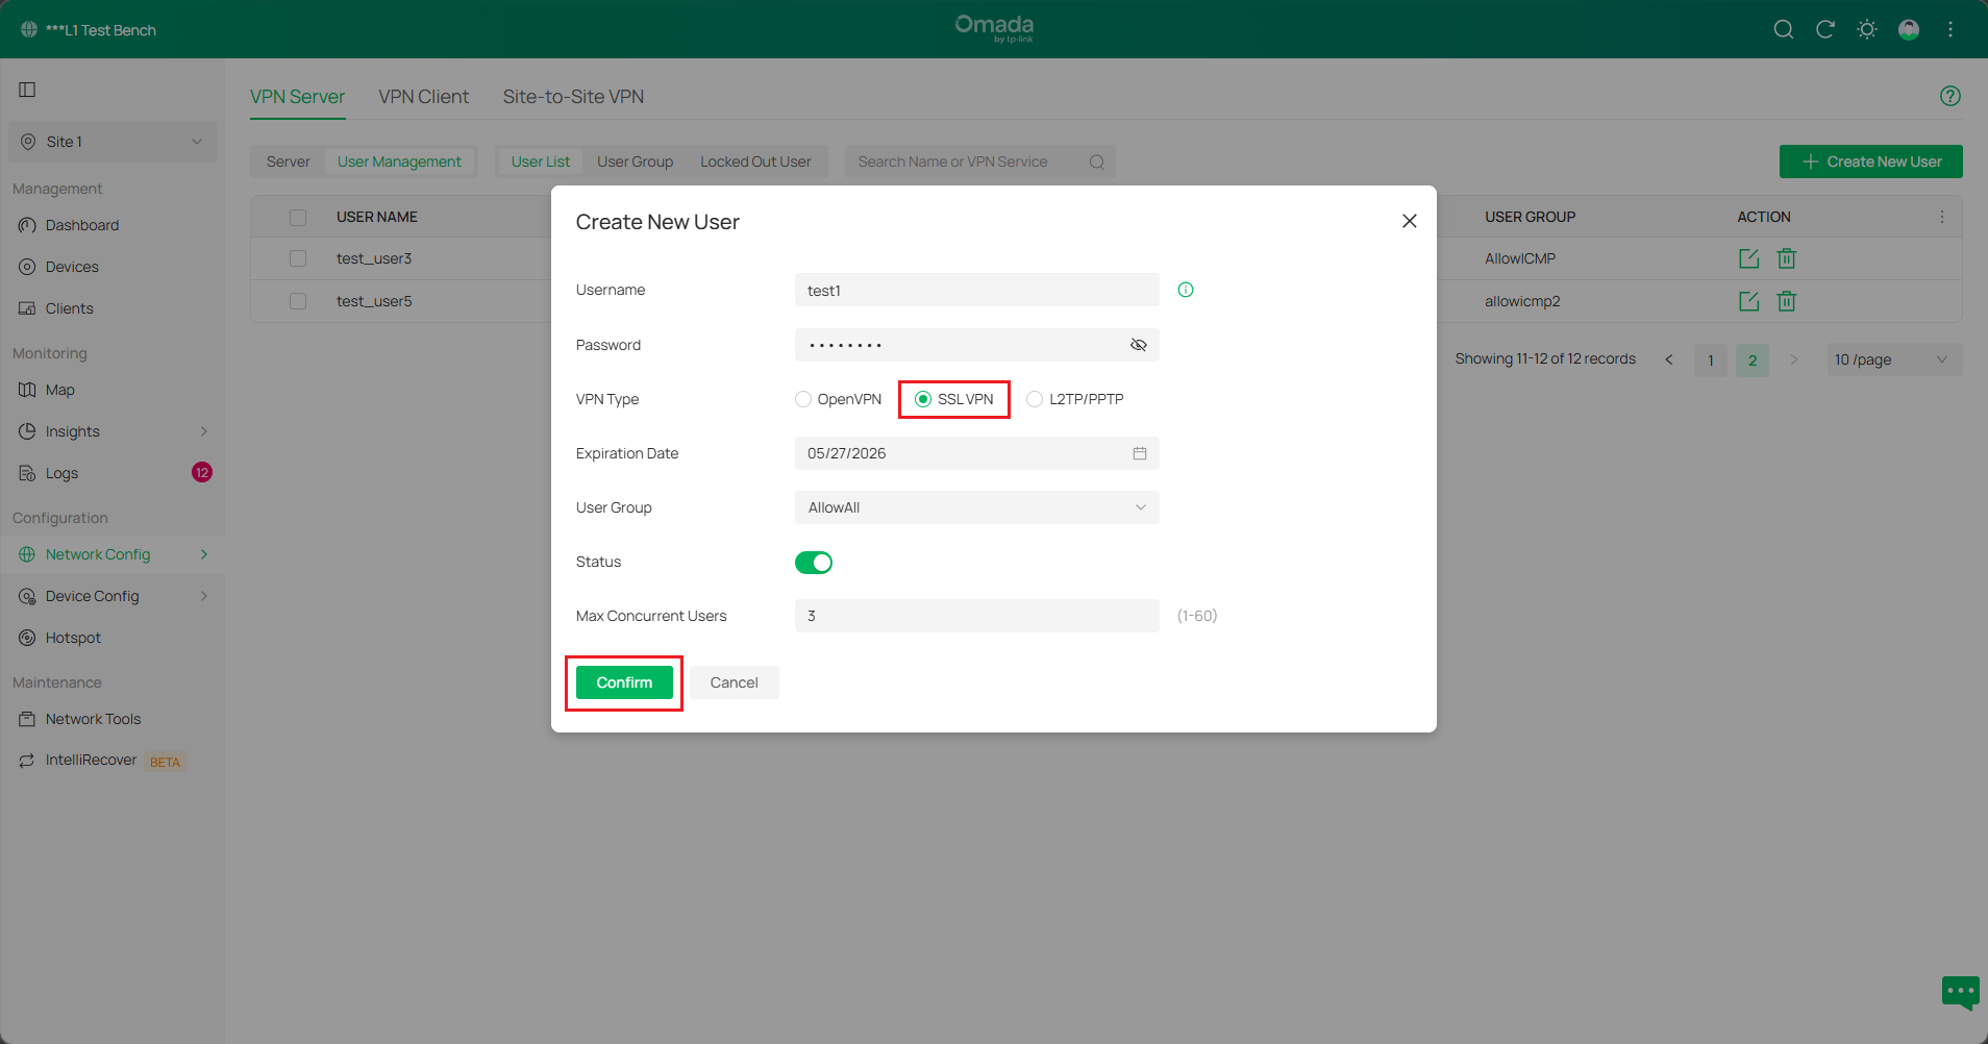
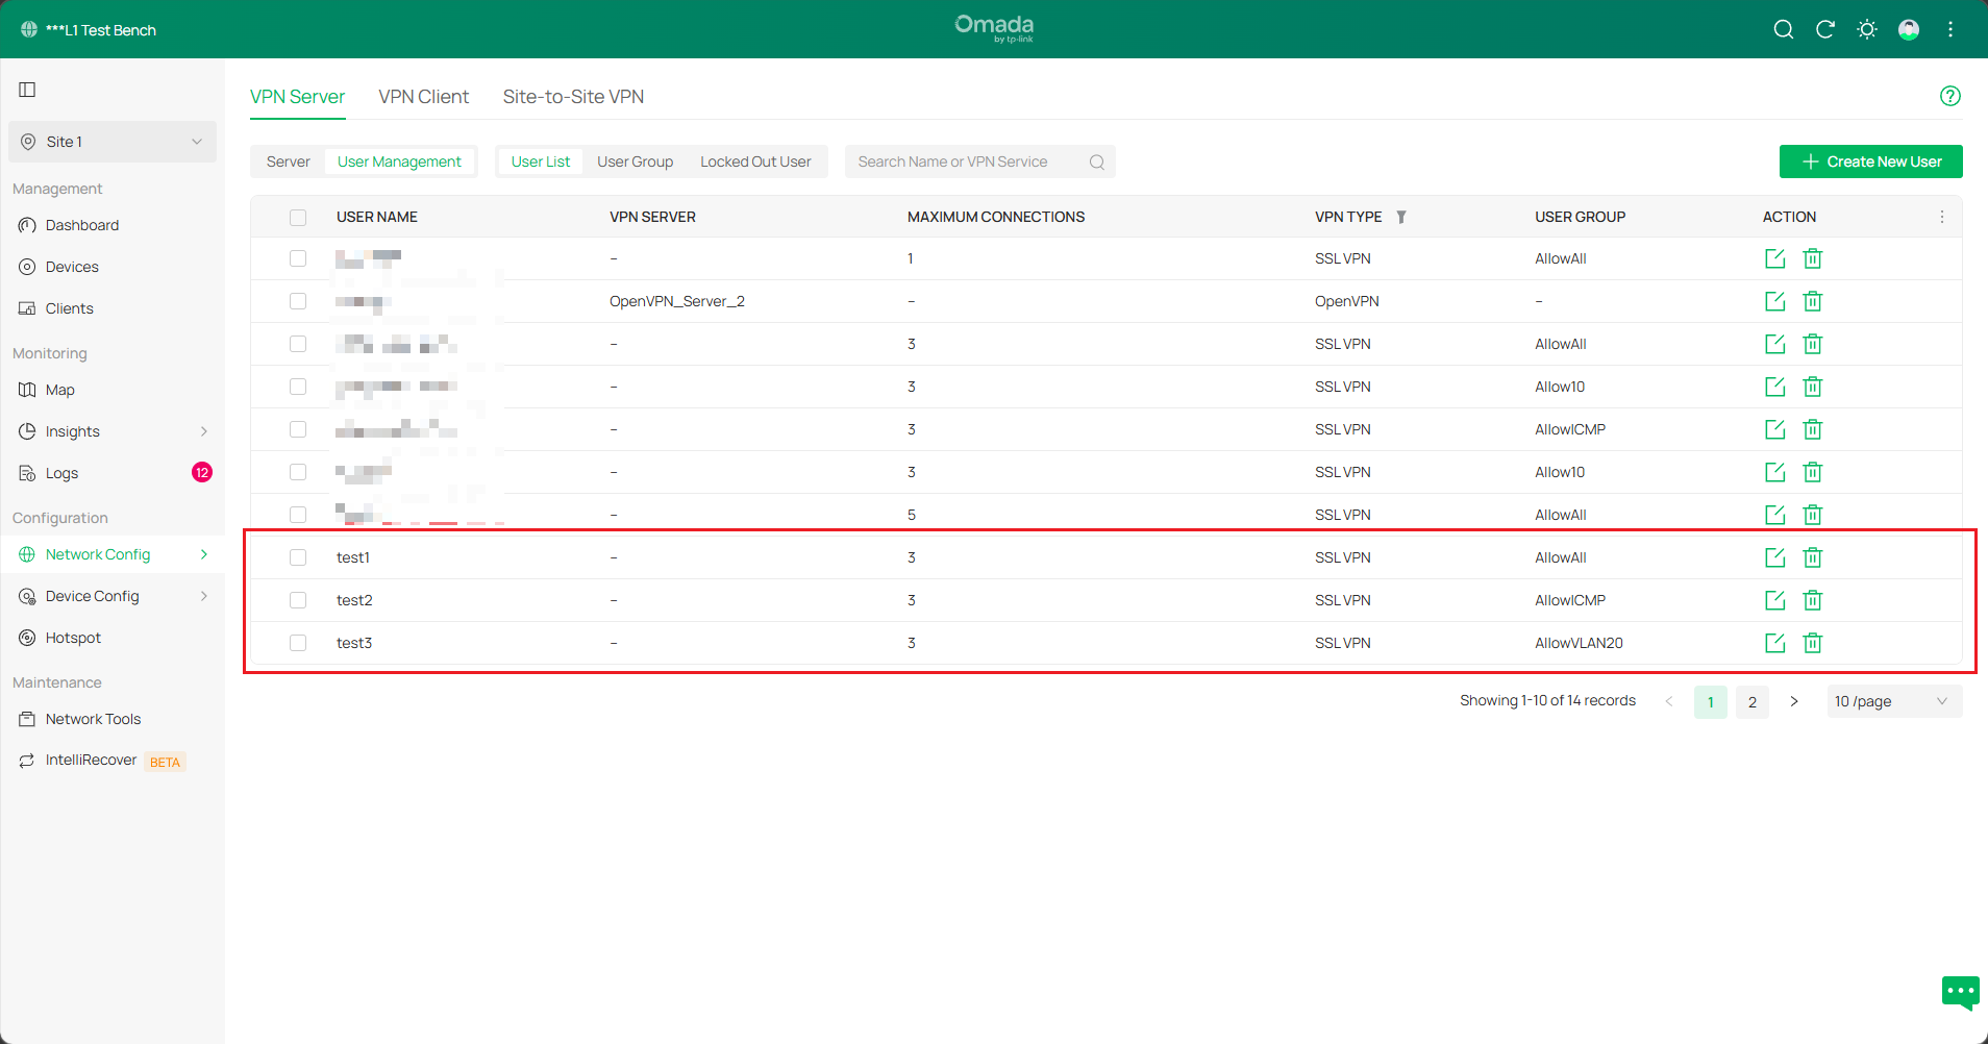
Make sure to set the corresponding User Group to the correct User.
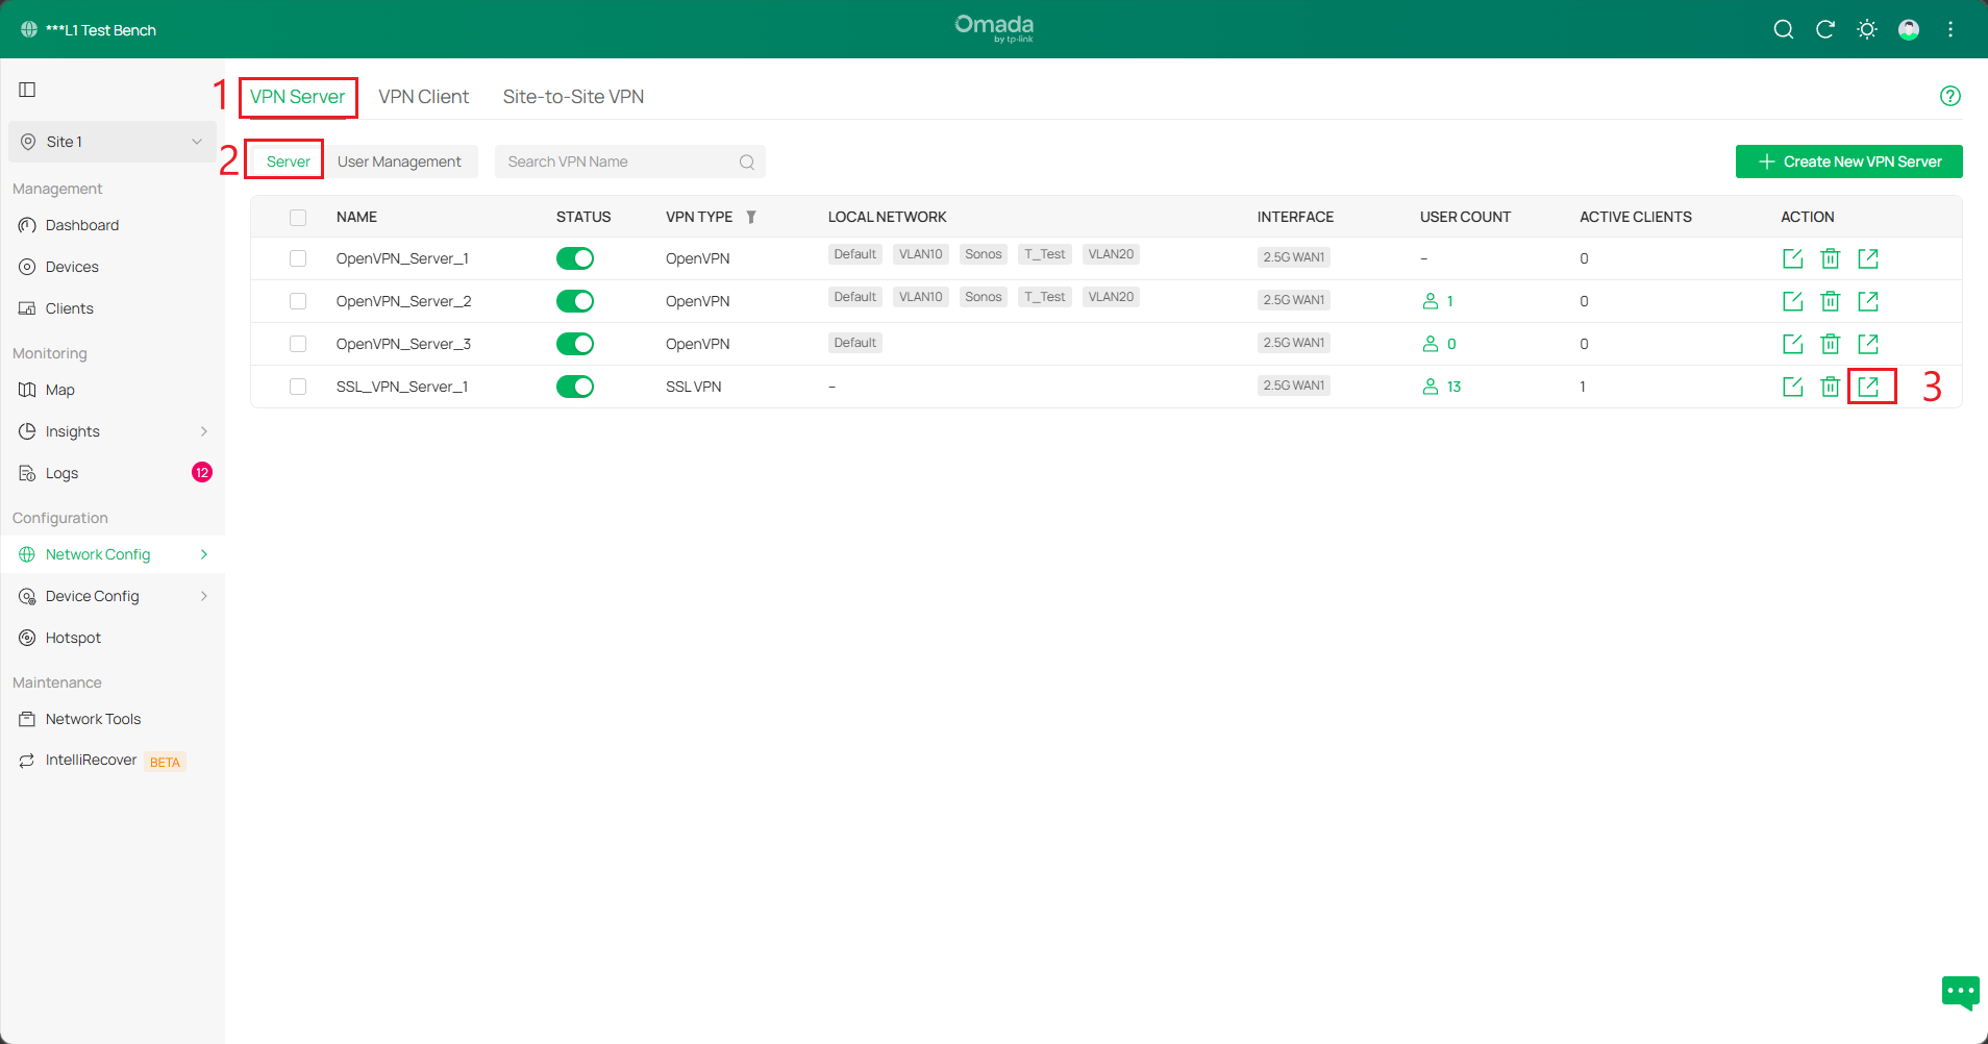
Step 7. Export Certificate. Go to VPN > VPN Server, click Export to export the configuration file, and the client can connect to the server using this configuration file.
Verification
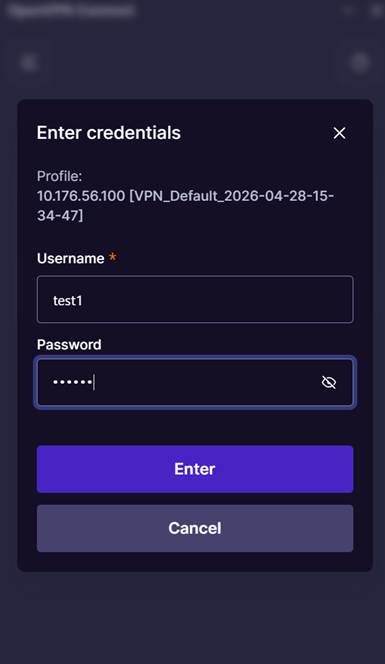
Use the OpenVPN GUI on the client to import the configuration file, enter the corresponding username and password to connect.
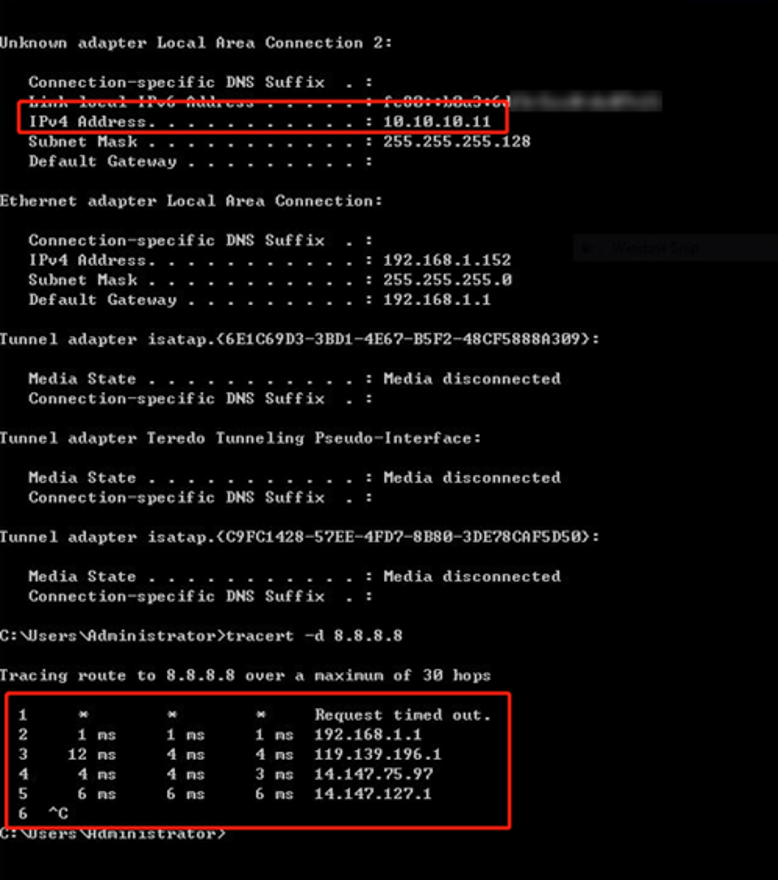
Account 1: VPN Client implements proxy Internet access through VPN Server;
After a successful connection, the server assigns the VPN client an IP address of 10.10.10.11. When the client accesses 8.8.8.8, the first hop is the VPN Tunnel. Because the data is encrypted, the corresponding IP address cannot be resolved. The second hop is the default gateway of the VPN Server, and all data of the client goes through the VPN Tunnel to realize proxy Internet access.
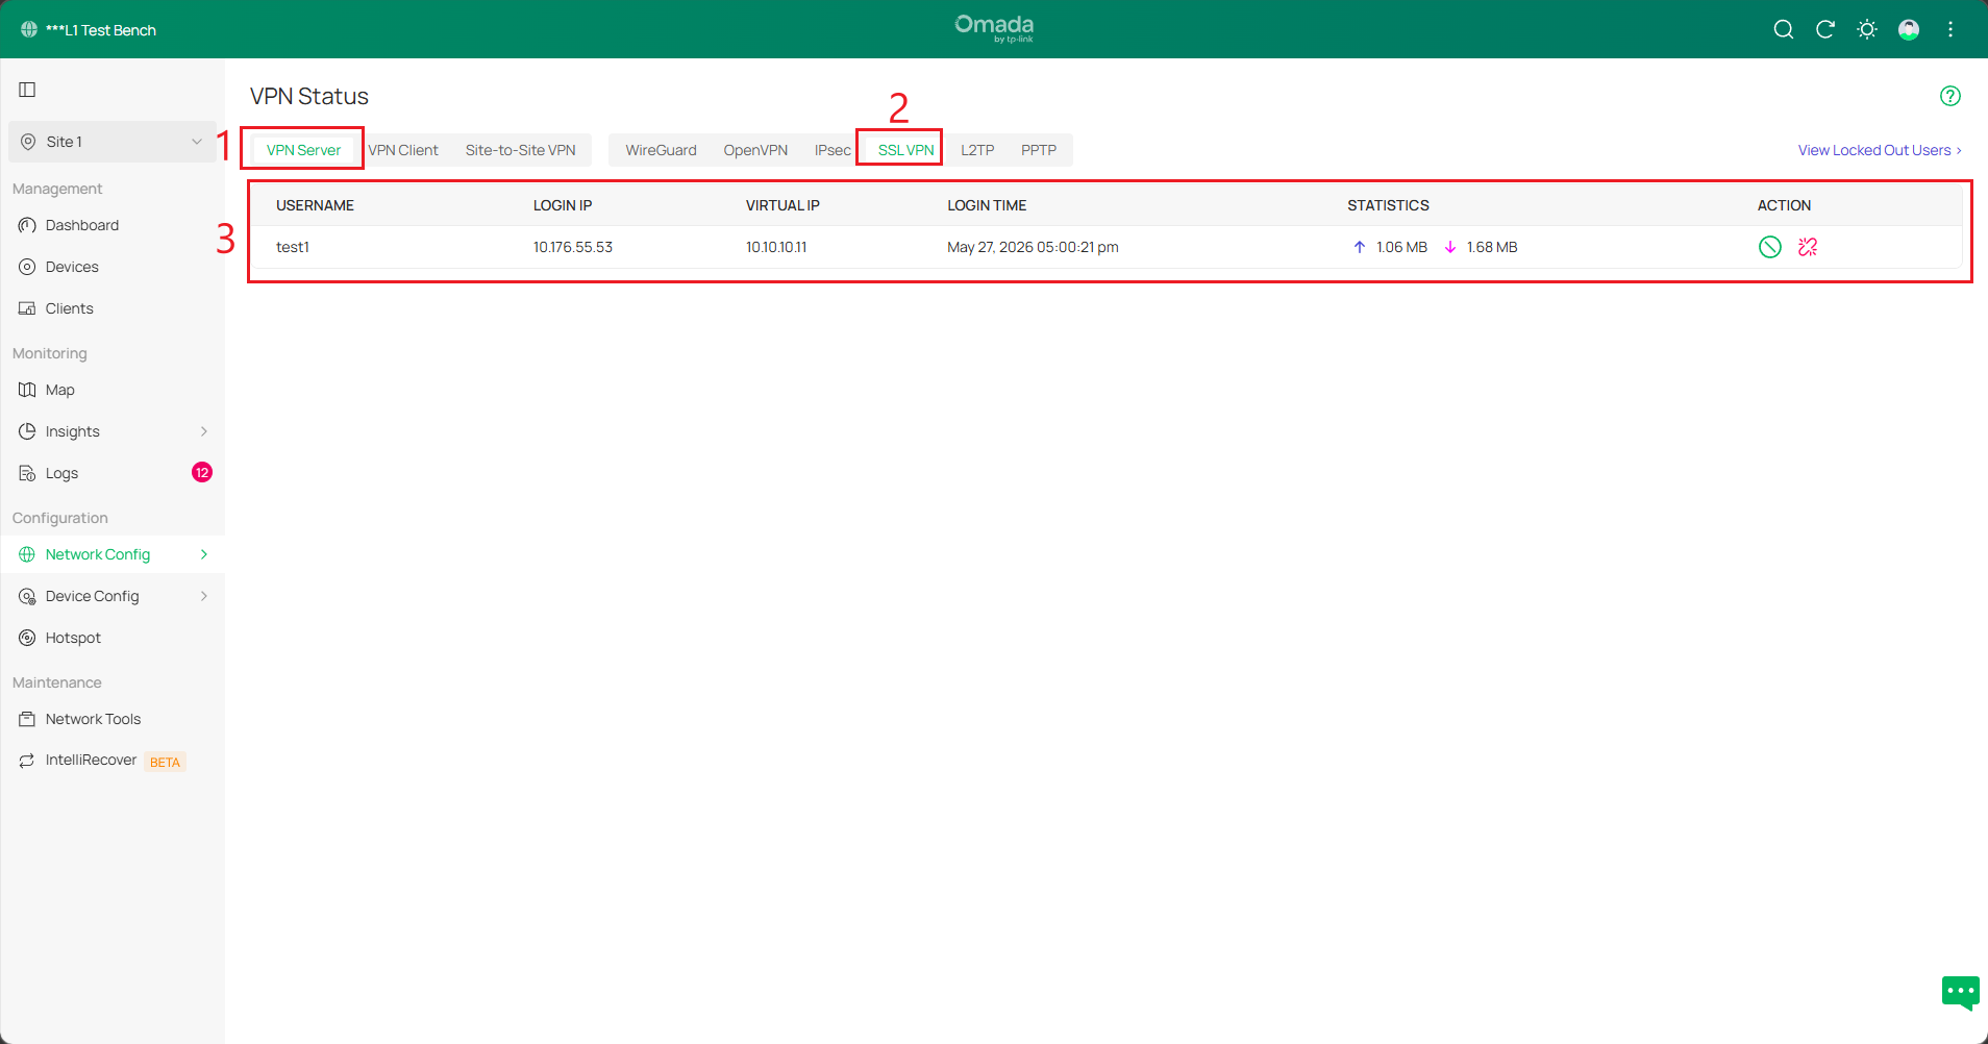
Go to SSL VPN > Status; information about the Client connection will also be displayed here.
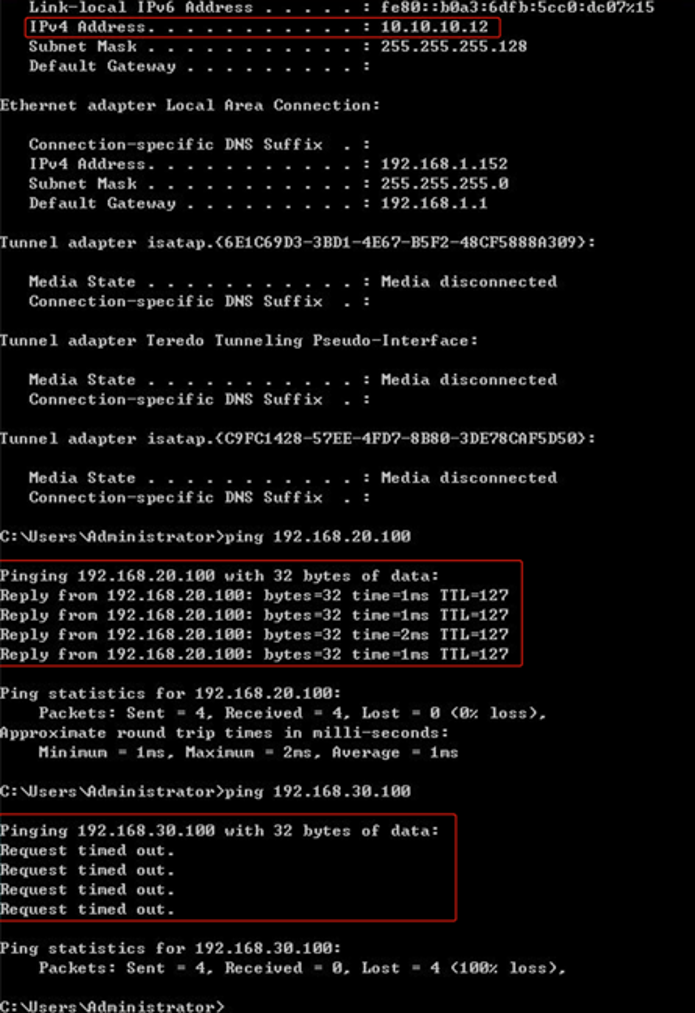
Account 2: VPN Client can only access VLAN 20, but cannot access VLAN 30
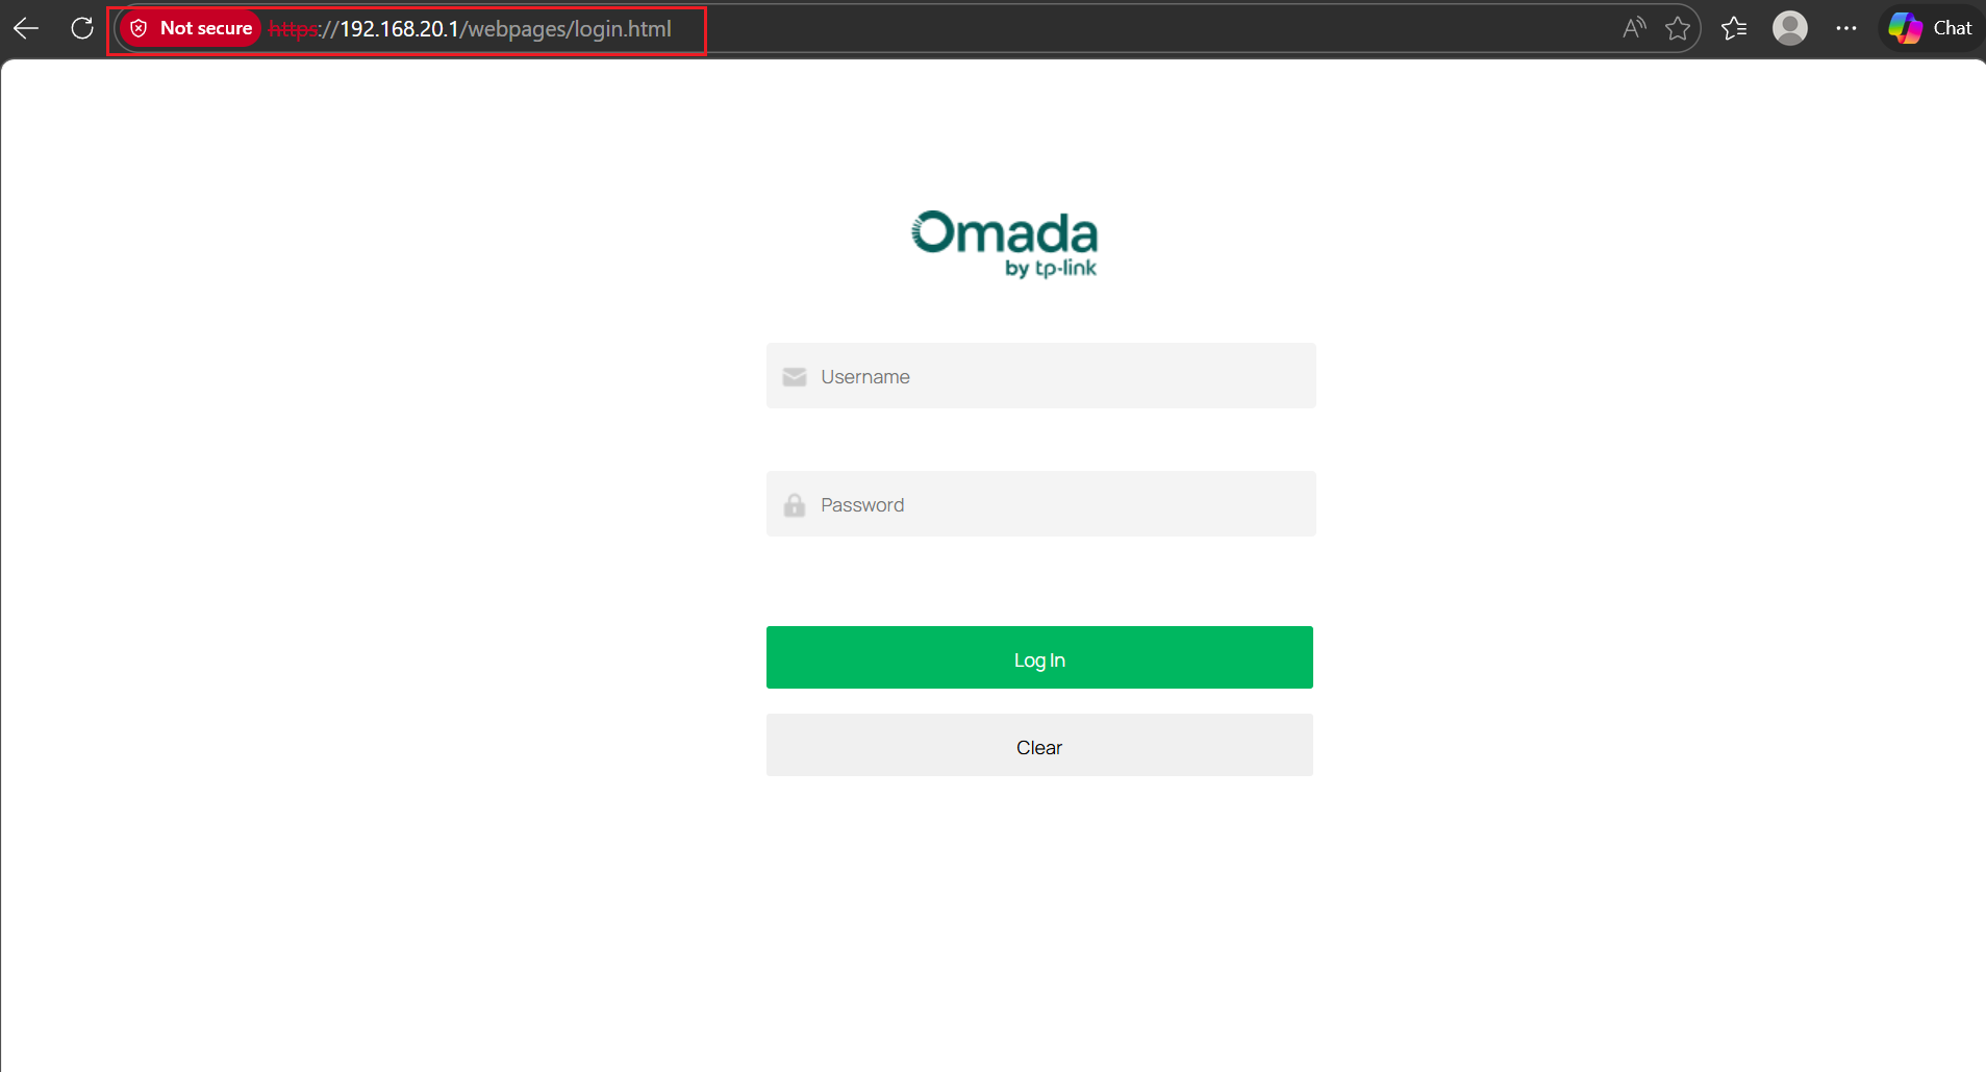
After a successful connection, the server assigns the VPN client an IP address of 10.10.10.12. The VPN client can ping the device in VLAN 20 (192.168.20.100), but cannot ping the device in VLAN 30 (192.168.30.100). At the same time, the management interface of the router can be accessed through 192.168.20.1.
Account 3: The VPN Client and the devices behind the Server can only interact through the ICMP protocol.
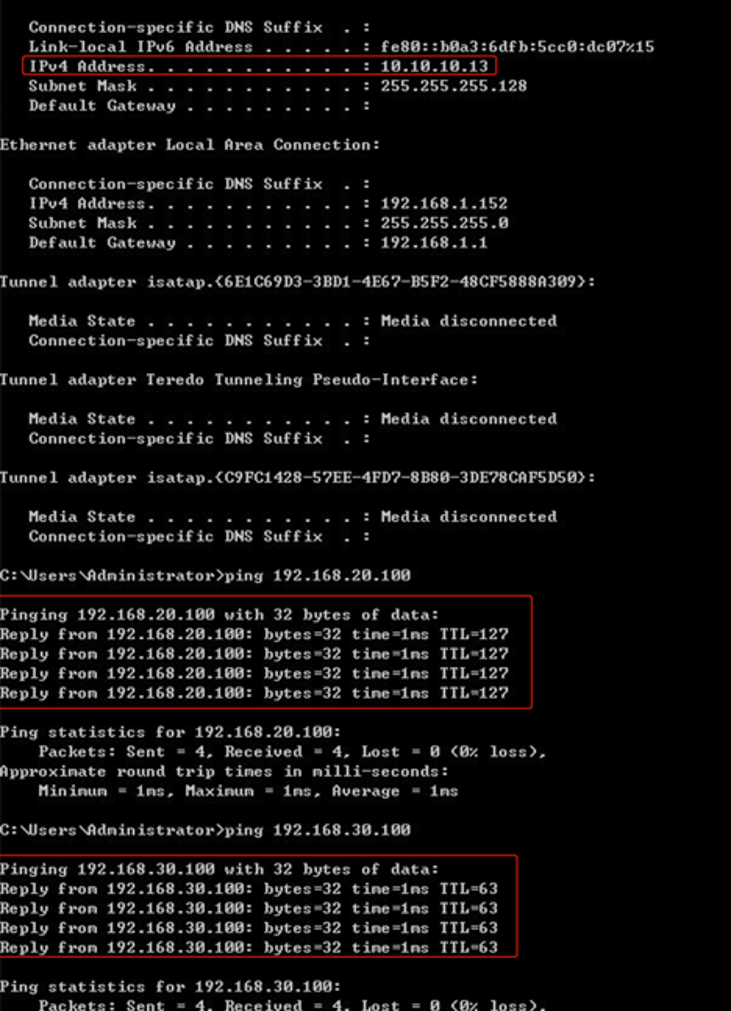
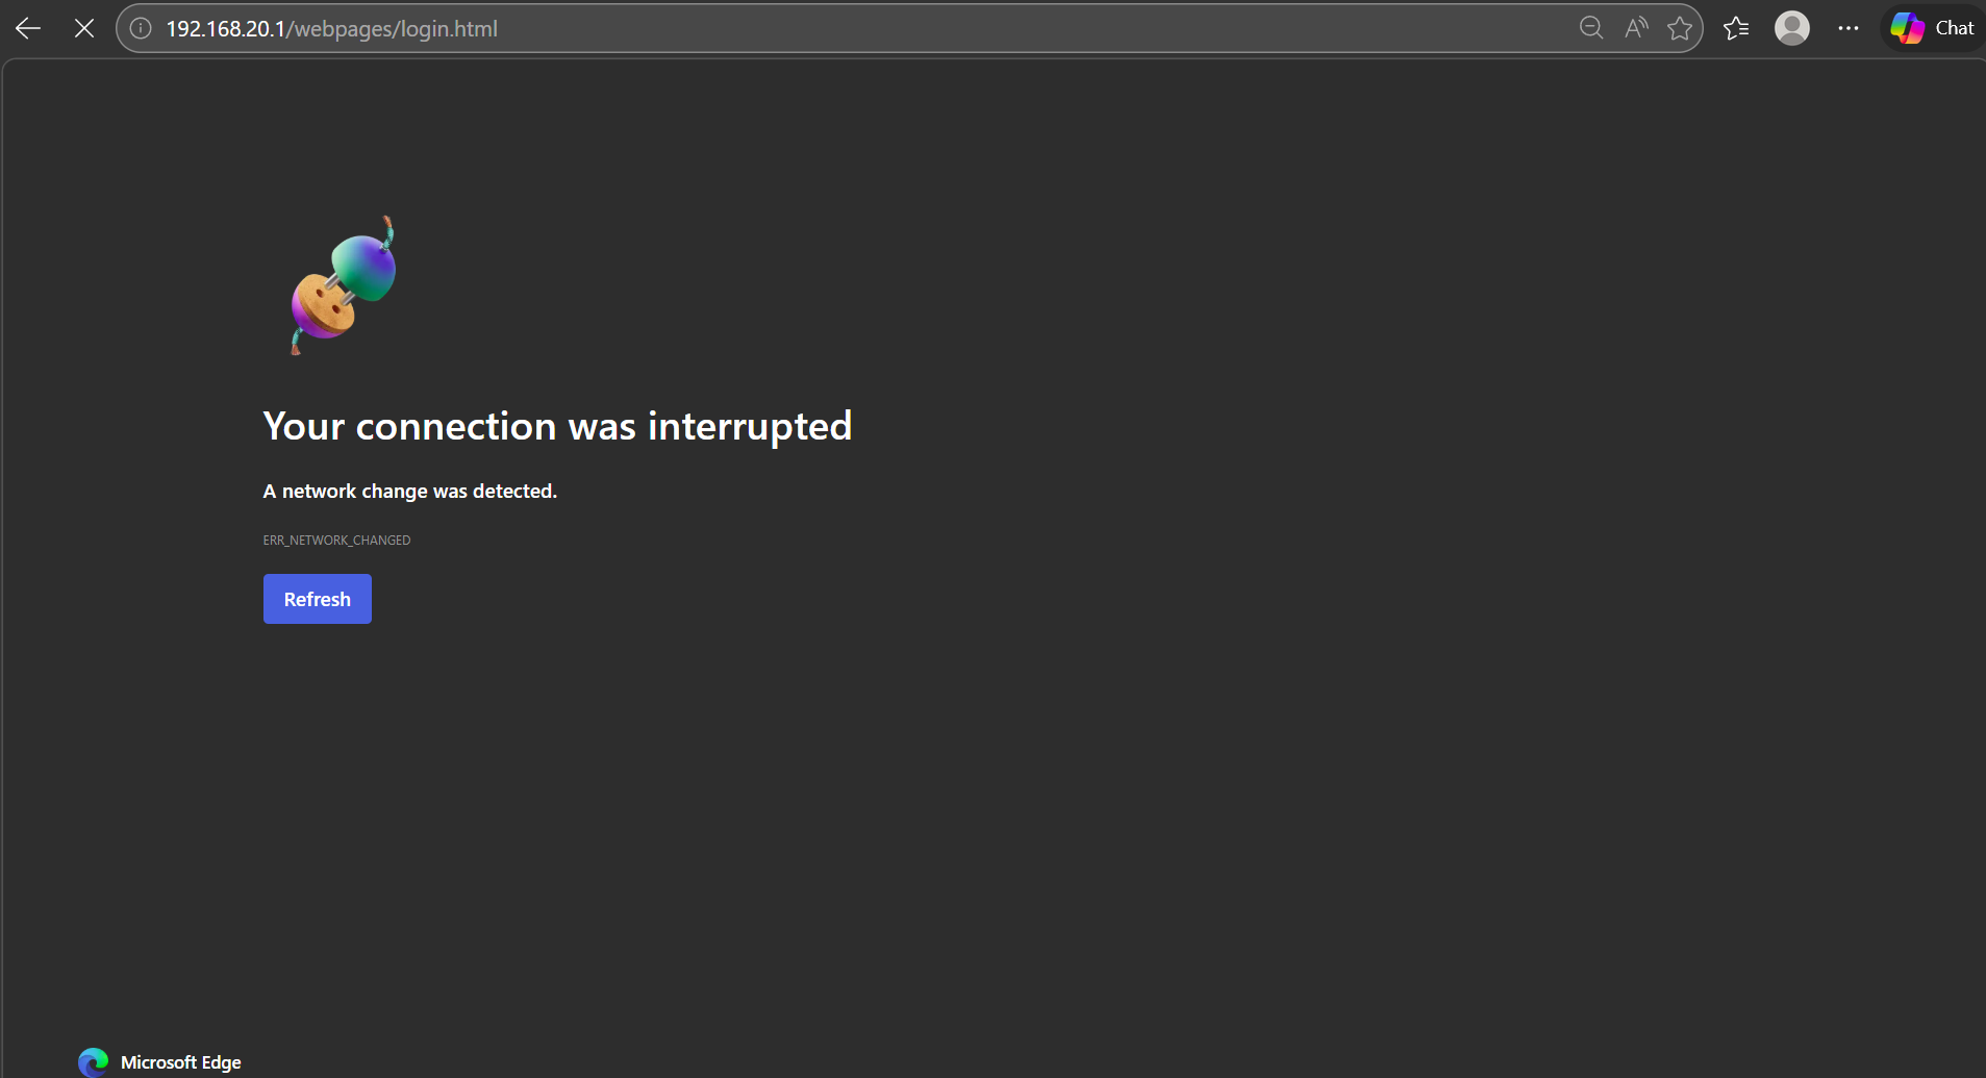
After a successful connection, the server assigns the VPN client an IP address of 10.10.10.13. The VPN client can ping the device in VLAN 20 (192.168.20.100) and the device in VLAN 30 (192.168.30.100). But the management interface of the router cannot be accessed through 192.168.20.1.
Conclusion
This configuration successfully implemented an SSL VPN solution with three distinct user access levels tailored to specific network requirements. One account enables full proxy internet access through the VPN server, another restricts access to only VLAN 20 while blocking VLAN 30, and the third enforces strict ICMP-only communication with internal resources. By combining VPN IP pool allocation, tunnel resources, and user group policies, the setup demonstrates effective role-based access control and improved network security management.
QA
Q1: What should I do if I cannot connect to the SSL VPN?
A1: Check that the server is enabled, confirm the correct service port is selected, and verify that the client is using the correct username, password, and imported certificate file
Q2: Why can’t the VPN client access certain VLANs?
A2: Ensure the correct resource group and tunnel resources are assigned to the user group. Access restrictions are controlled by these configurations.
Q3: What should I do if I forget a user’s password?
A3: Go to the User Management section, edit the user account, view and or set a new password.
Q4: What should I do if the VPN client cannot access the internet?
A4: Verify that the resource group is set to “ALL” for full access, check DNS settings, and ensure the VPN server’s gateway has internet connectivity.
Q5: Why is the VPN client not receiving an IP address?
A5: Check if the VPN IP Pool is correctly configured and has available IP addresses. Also ensure there are no conflicts with existing LAN subnets.
To learn more about each function and configuration, please visit Support Home to download or check the manual for your product.
