


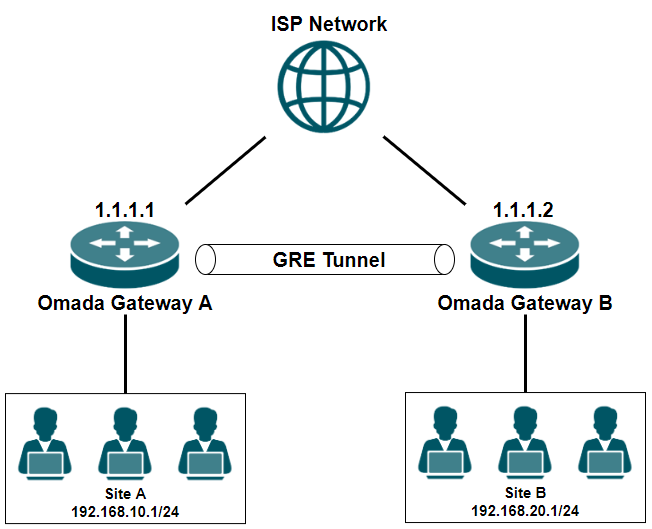
- 2台Omada 路由器
GRE VPN 是L3的通道協定,透過公有網路將兩個位置分散的網路間建立虛擬的點對點連接。
GRE VPN具備強大的封裝能力,支援多種網路協定以及Multicast、Broadcast流量,因此常被用於動態路由協定或者是連接於不同架構的網路系統。
由於 GRE VPN 無法加密封包,其資料是以明文形式傳輸,存在安全風險,因此通常會與 IPsec 搭配使用。
以下步驟將教學兩個站點間的 GRE VPN 連接,架構如下:
步驟 1、為站點 A 設定 GRE VPN
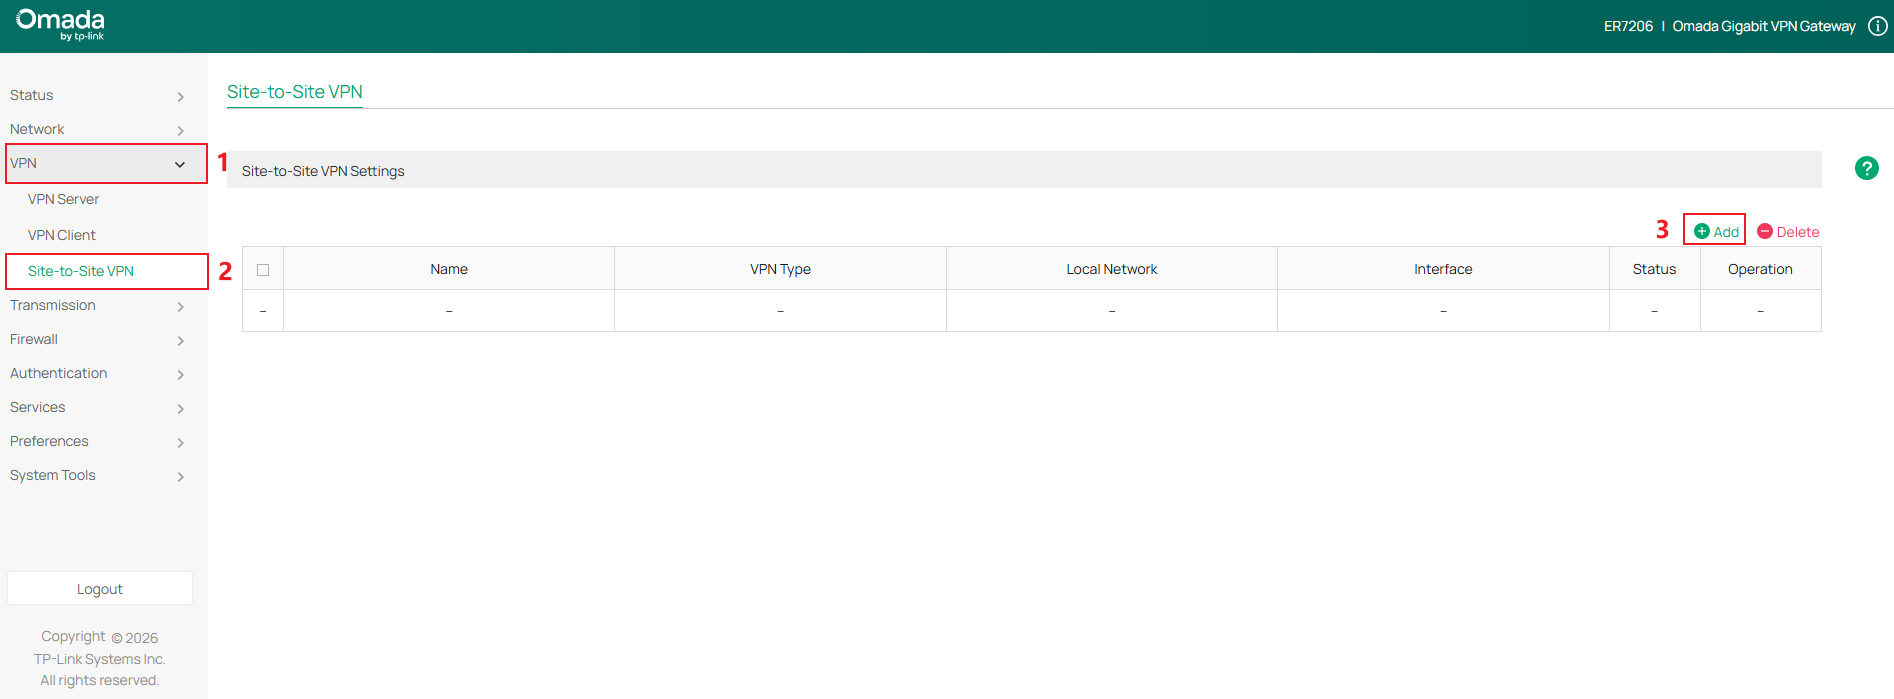
前往 VPN > Site-to-Site VPN 點擊 Add 開始設定

選擇VPN Type為GRE
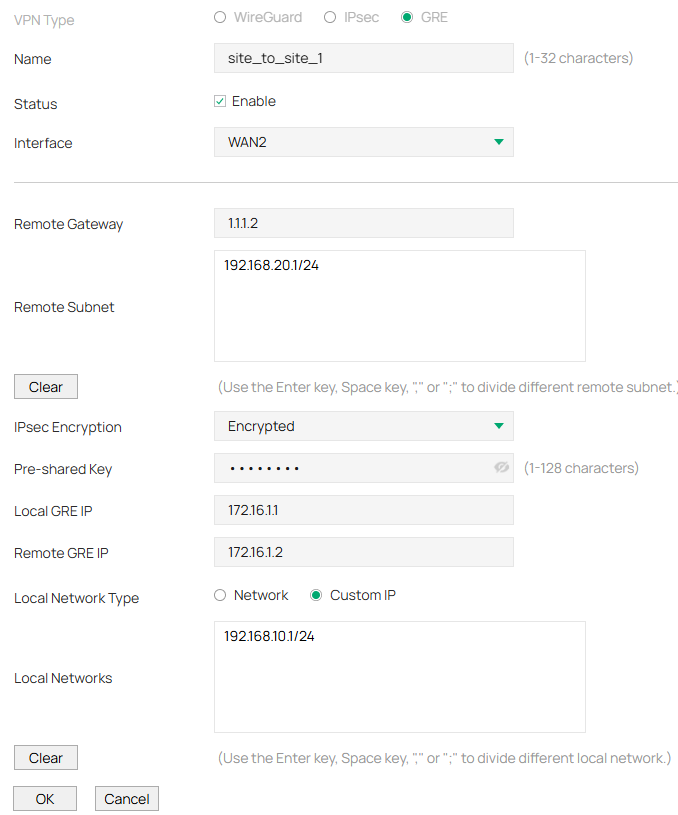
- Name: 填入能辨識 VPN 的策略名稱
- Status: 啟用VPN 策略
- Interface: 選擇要要建立VPN策略的 WAN 介面
- Remote Gateway: 輸入遠端路由器的 IP 位址
- Remote Subnet:指定遠端網段
- IPsec Encryption: 指定是否加密
- Pre-shared Key:加密共用金鑰
- Interface: 指定建立 GRE 通道的WAN
- Local GRE IP: 指定 GRE VPN 的本機虛擬 IP
- Remote GRE IP: 指定 GRE VPN 的遠端虛擬 IP
- Local Network Type: 選擇 VPN 策略的區域網路設定類型
- Local Networks: 選擇要套用 VPN 策略的本地網路
點擊OK以套用策略

步驟 2、 為站點 2 設定 GRE VPN
前往 VPN > Site-to-Site VPN 點擊 Add 開始設定,如下圖
VPN Type選擇GRE
點擊OK
步驟 3、 前往 Status > VPN status > Site-to-Site VPN 查看已設定的 GRE VPN。
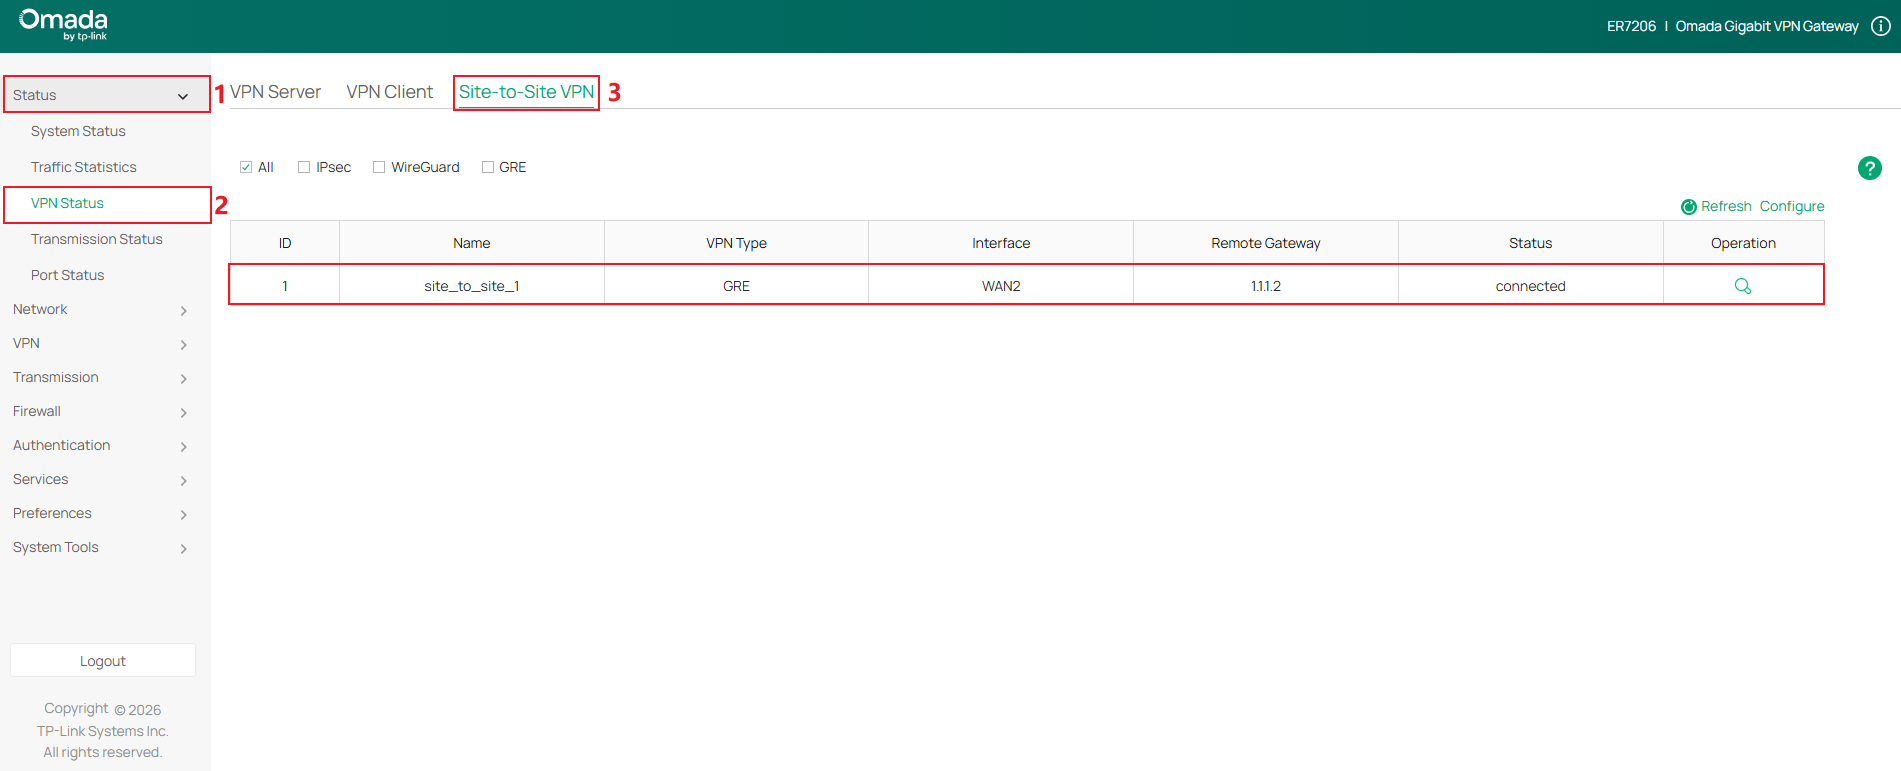
您現在已成功在 Omada 路由器上設定 GRE VPN。
如果無法建立 VPN 通道該如何處理?
- 檢查兩端站點的 WAN 是否為連線狀態
- 檢查兩端站點的網路連線是否正常
- 檢查VPN設定是否有誤
請評價此文件
