


Contents
Accepting the invite as the invitee
Introduction
The Device Sharing feature in the Omada Guard App allows you to share Omada Guard devices with other TP-Link ID users. After sharing, invited users can access and manage the devices based on the permissions you assign. This article explains how to use the Device Sharing feature to invite users, configure permissions, and manage shared access.
Requirements
- Omada Guard App
- Omada Guard cameras and NVRs
Configuration
Step 1. Log in to your Omada Guard App, select 'My Omada Guard' from the organization options. Select Device > The Device itself > Device Sharing.
Note: Only the My Omada Guard Organization is currently supported for device sharing in the Omada Guard App. For devices managed in Omada Central, you can add management accounts directly in Omada Central. 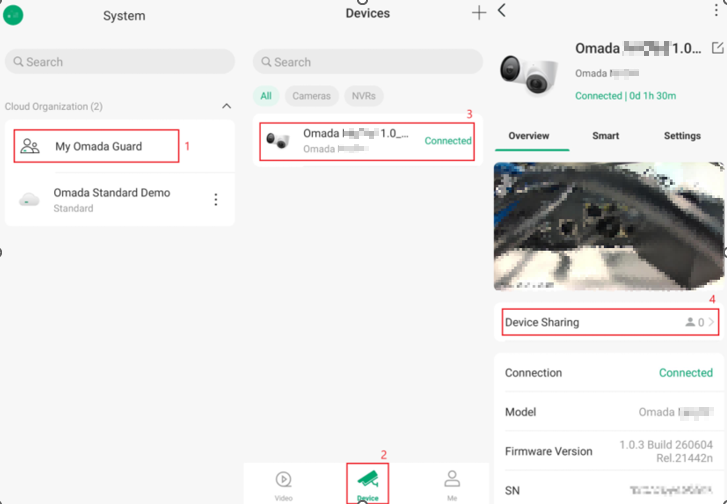
Step 2. Tap Share > Enter the invitee’s TP-Link ID > tap Next. If the invitee is new to TP-Link, please register the invitee’s TP-Link ID first.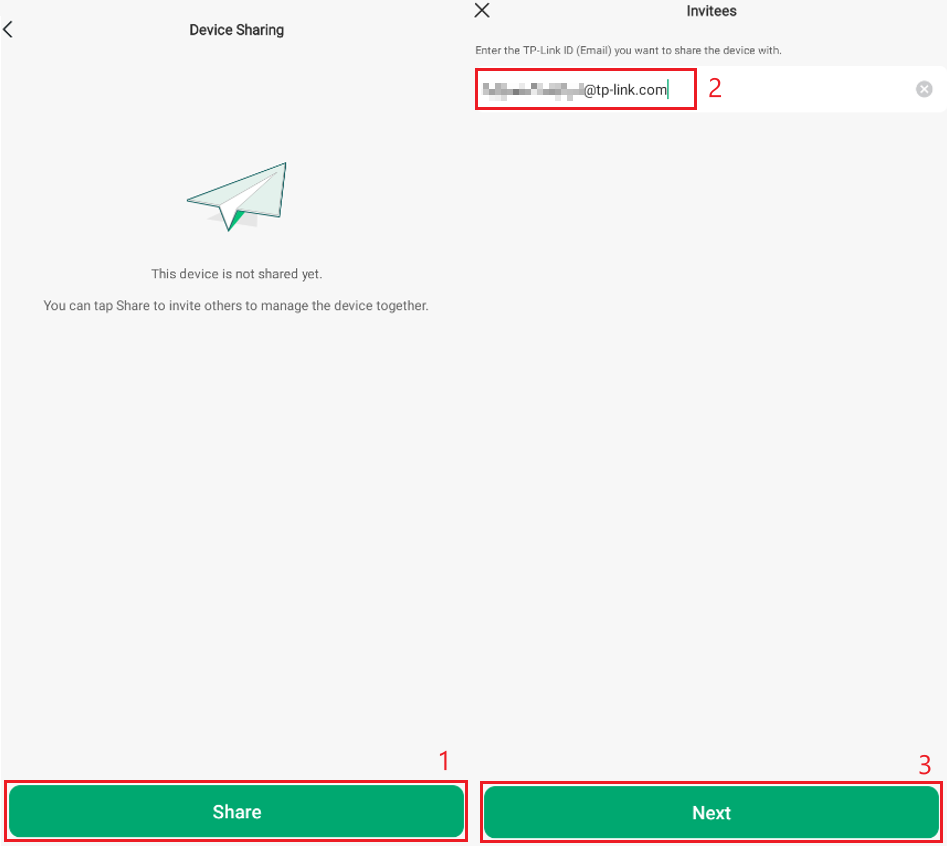
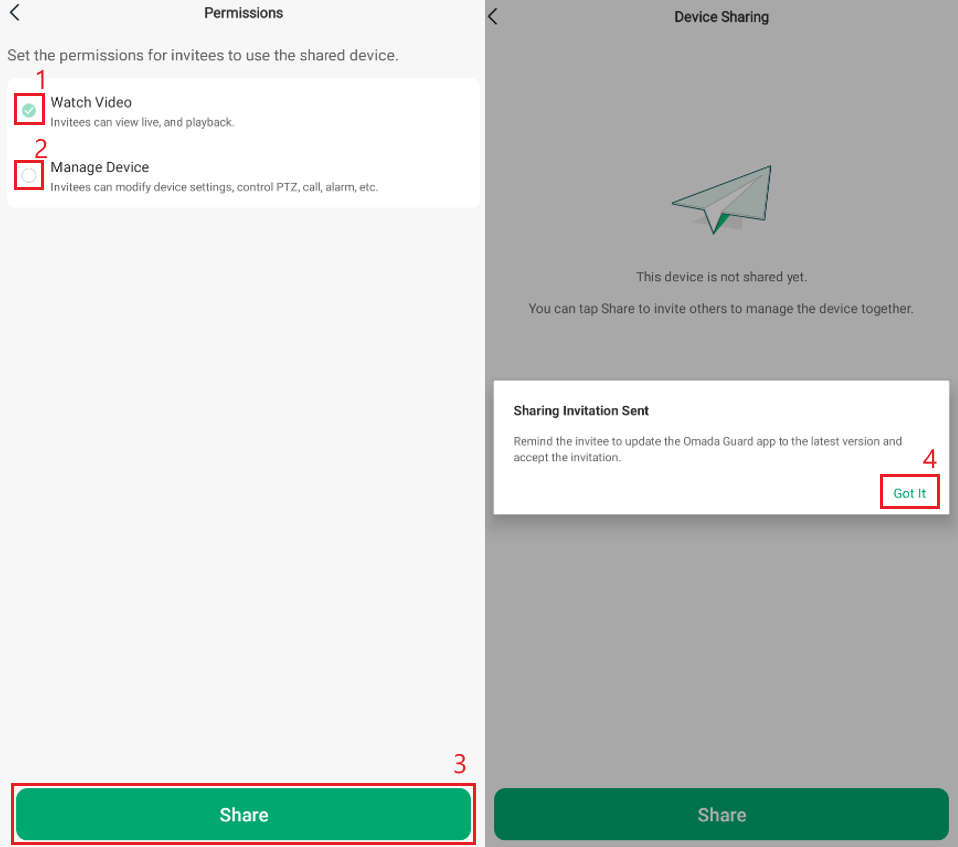
Step 3. Set the Permissions for the invitee > Share > Got It. Once complete, select the back arrow in the top left of the screen.
Note: Two permission levels are available for invited users:
- Watch Video: Allows the user to view live video and playback only.
- Manage Device: Allows the user to view video, modify device settings, and control PTZ functions.
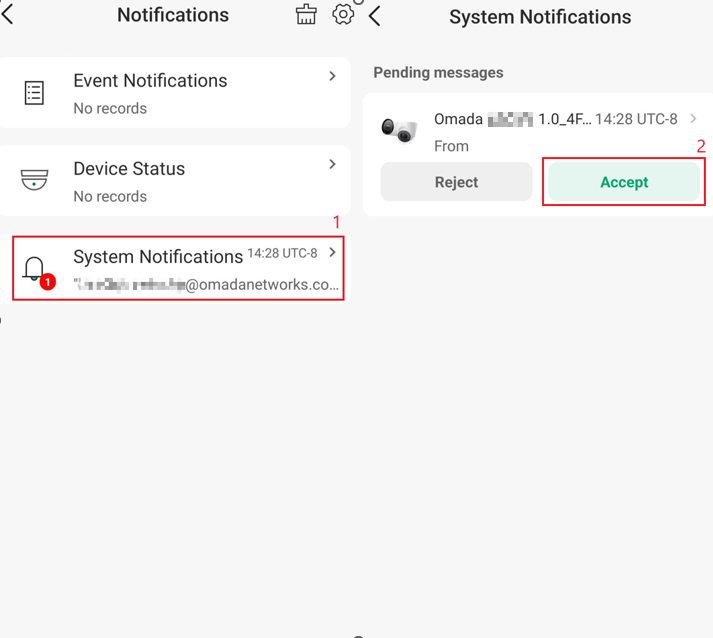
Accepting a device sharing invitation
Log in to the Omada Guard App, open Notifications, and tap Accept on the device-sharing invitation. Once accepted, the invited user can access the shared device according to the assigned permissions.
Removing device sharing access
Step 1. Go to Me > Device Sharing > The Device > TP-Link ID Shared with > Delete > Confirm Delete.
Note: You can also remove shared access by navigating to Device > The Device > Device Sharing > TP-Link ID Shared with > Delete > Confirm Delete.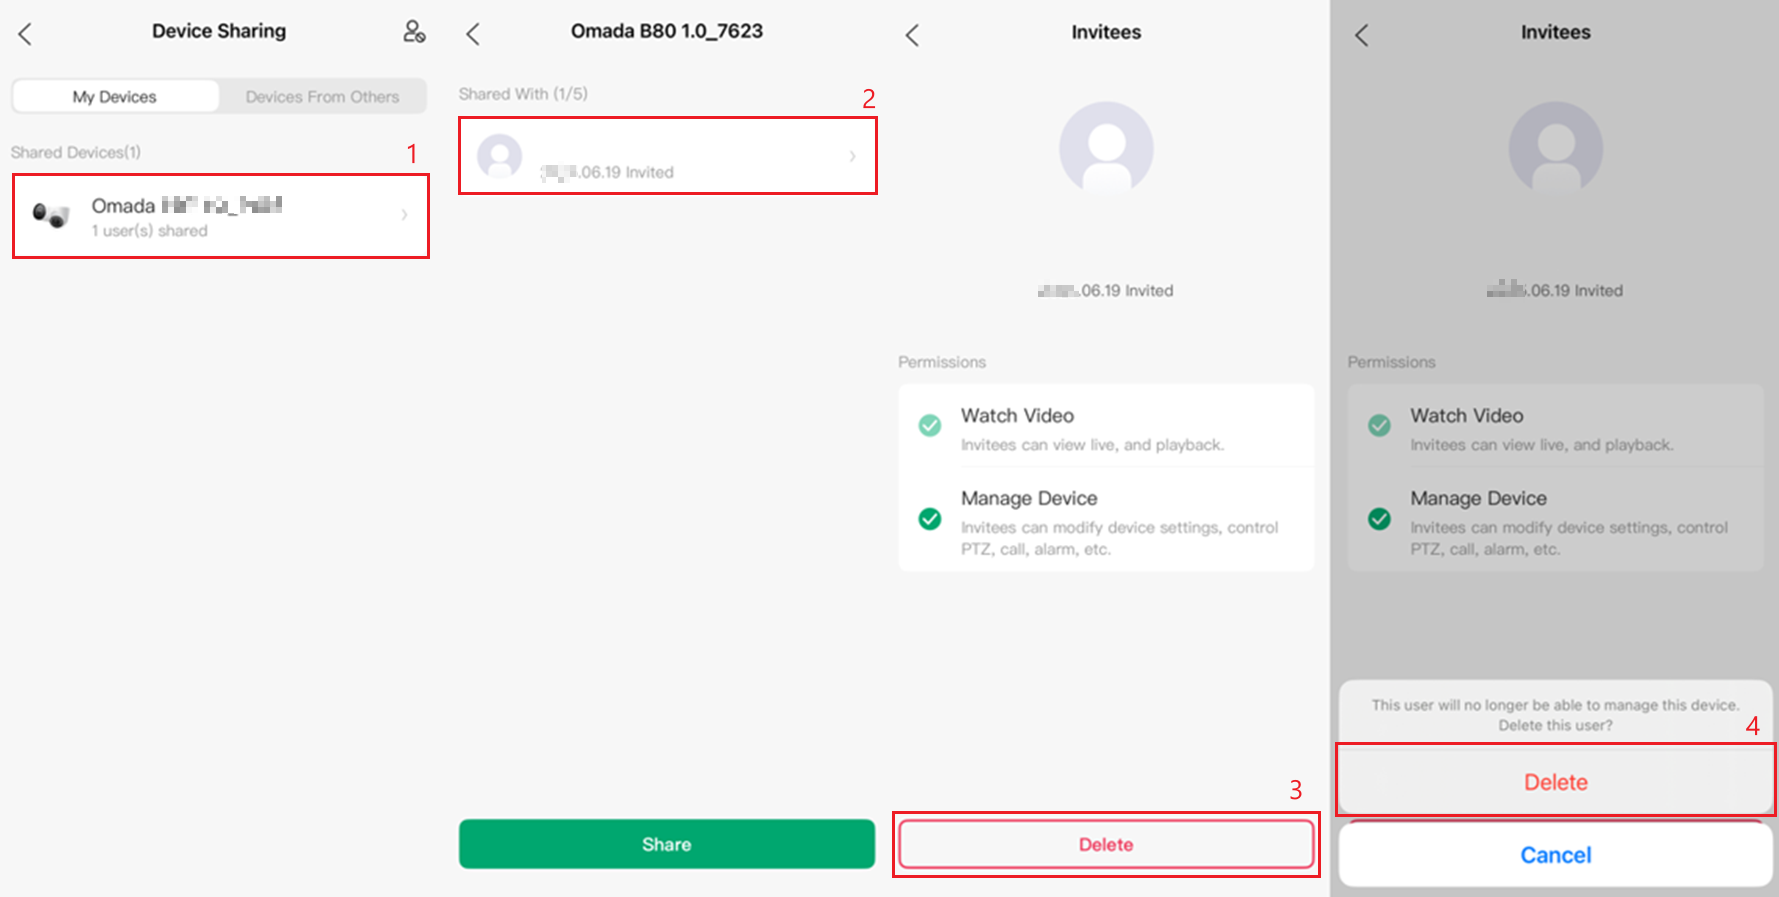
Note: If a shared user selects “Forget” on a device, the result depends on their permissions. If the user has NVR configuration permissions and selects “Forget” on a device under a specific channel, the device will be removed from the NVR. In other cases, the sharing relationship will be removed, but the device itself will not be deleted.
Verification
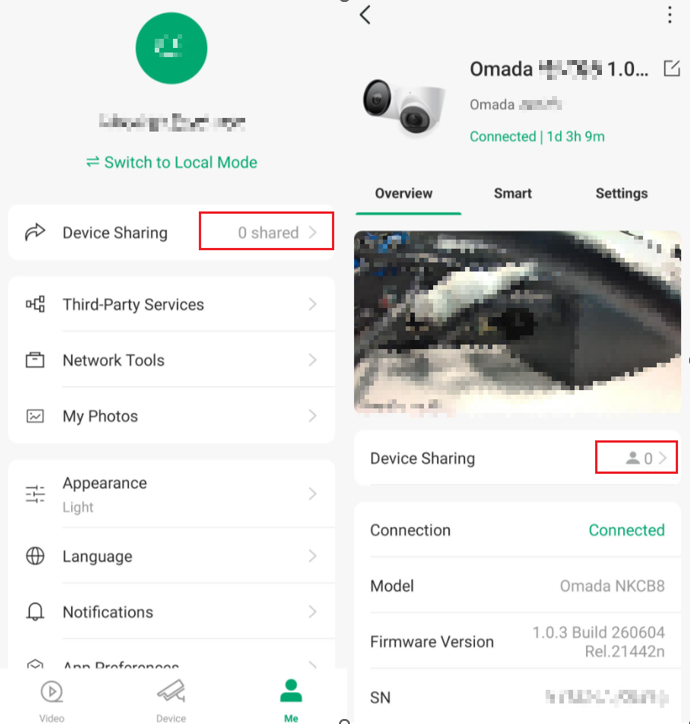
To verify whether a device has been shared, go to Me or Device Settings in the Omada Guard App. If no device is shared, the Device Sharing page will show no shared devices or TP-Link IDs.
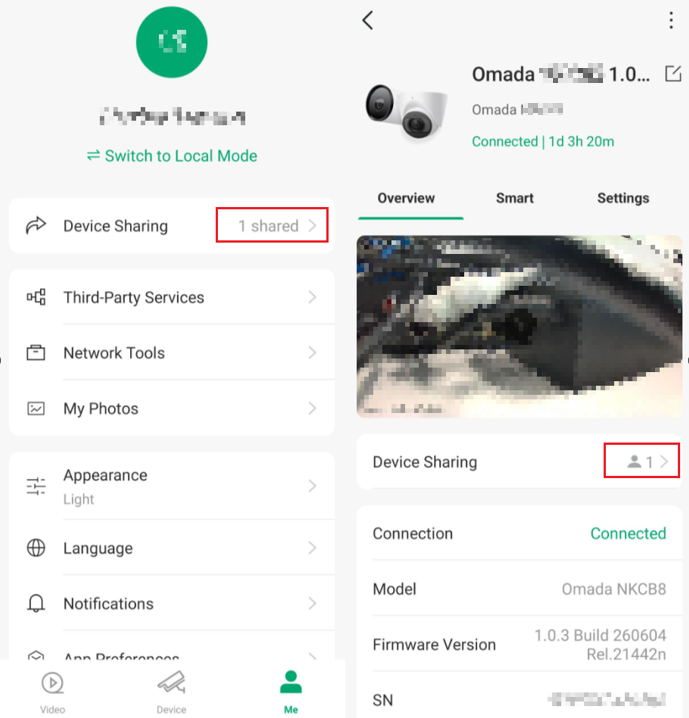
Once a device has been shared, the Device Sharing page will display the number of shared devices or the number of TP-Link IDs with access. You can tap the corresponding entry to view detailed sharing information.
Conclusion
By following the steps above, you can share your Omada Guard devices with other TP-Link ID users, assign appropriate access permissions, and manage or revoke shared access at any time through the Omada Guard App.
QA
Q1: Who can share Omada Guard devices
A1: Only the owner of the account can share access to an Omada device on the Omada Guard App. Invited users cannot share the device with other TP-Link IDs.
Q2: Does the invited user need a TP-Link ID?
A2: Yes. The invited user must have a registered TP-Link ID before they can receive and accept a device-sharing invitation.
Q3: What permission levels are available for shared users?
A3: There are two permission levels available:
- Watch Video – Allows the user to view live video and playback recordings.
- Manage Device – Allows the user to view video, modify device settings, control PTZ functions, and manage supported device configurations.
Q4: Can device sharing be removed later?
A4: Yes. Device owners can revoke access at any time through the Device Sharing settings by selecting the shared TP-Link ID and choosing Delete.
To learn more about each function and configuration, please visit Support Home to download or check the manual for your product.
