Getting Started with an Omada Pro Controller
Contents
Set Up the Omada Pro Software Controller
Set Up the Omada Pro Hardware Controller
Introduction
The Omada Pro Controller is the enterprise-grade controller for the Omada Pro product line, provides 100% centralized management of Omada Pro access points, switches, and gateways—all controlled from a single interface.
The Omada Pro Controller serves as the command center and management platform at the core of the Omada Pro network. It offers a unified approach to configuring your networks, which are comprised of Omada Pro devices. This streamlines the process of setting up and managing your network.
There are three types of Omada Controllers: Software, Hardware, and Cloud-Based. Though being different in form, they share a similar browser-based management interface for convenient management. Consequently, they have nearly the same initial setup steps, including building your network topology, deploying your Controller, and logging in to the Controller.
This guide will walk you through the basic steps to help you get started quickly with Omada Pro Controller.
Requirements
- Omada Pro Software Controller
- Omada Pro Hardware Controller
- Omada APP
Configuration
Based on the type of Controller you choose, you can refer to the following guides to get started.
Set Up the Omada Pro Software Controller
The Omada Pro Software Controller can provide a visual configuration interface and support network monitoring and analysis. It can be hosted on either Windows or Linux systems within your network.
Check out the installation guides below to install the Omada Software Controller on your Windows or Linux host.
Start on a Windows Host
Run the Omada Pro Controller.exe InstallShield Wizard on your Windows PC, then you can launch the Controller on your PC to complete the Omada Setup Wizard to set up your network.
Notes:
1. The Controller requires Java-64bit 8 or above. Ensure that the Java Runtime Environment (JRE 8) is installed on your system.
2. Enable required ports for the Omada Software Controller on any local firewalls or antivirus software. Check out Which ports do Omada Controllers and Omada Discovery Utility use? (Controller 5.0.15 and above) for more details.
3. Check out What should I do if I failed to install the Omada Software Controller if you are experiencing setup issues.
Start on a Linux Host
The installation process of Omada Pro Controller is largely the same as the Omada Controller. Both require installing OpenJDK, MongoDB, and executing the installation command. The only difference lies in the installation command: depending on the type and version of the Controller, you need to specify a different file name. You can refer to the following guide to install and set up the Omada Pro Software Controller (Linux OS).
How to install the Omada Software Controller on Linux
Notes:
1. The Controller requires Java-64bit 8 or above and MongoDB 3.0-7.0 Ensure that the Java Runtime Environment (JRE 8) and MongoDB both are installed in your system.
2. Enable required ports for the Omada Software Controller on any local firewalls or antivirus software. Check out Which ports do Omada Controllers and Omada Discovery Utility use? (Controller 5.0.15 and above) for more details.
3. Check out What should I do if I failed to install the Omada Software Controller if you are experiencing setup issues.
Management using the Omada Pro Controller
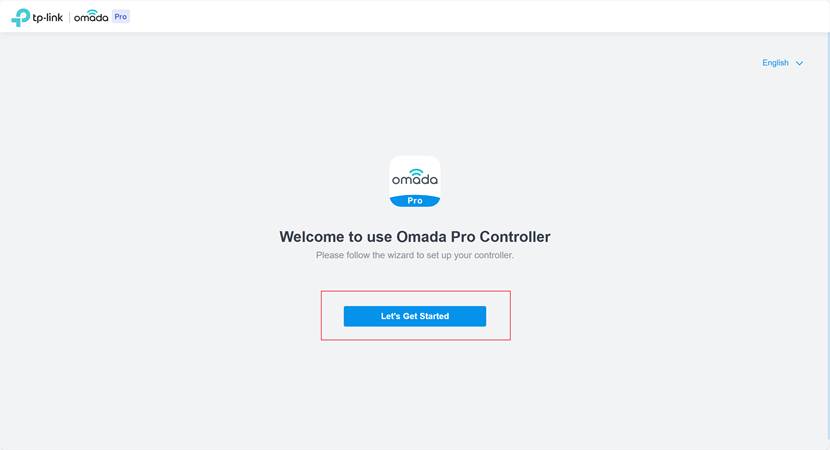
Step 1. After installation, clicking to run the program will automatically open the web page in your browser. The browser may show a security warning due to an unrecognized HTTPS certificate — this can be resolved by logging into the Controller and adding the certificate. During the first run, you will be guided through the Setup Wizard process.
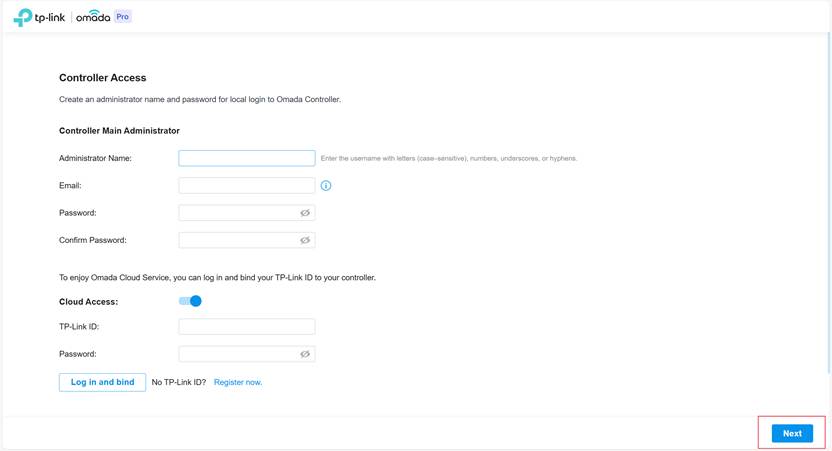
Step 2. Then, you will need to configure the account information for the Omada Pro Controller. This includes setting a username, password, email address, and choosing whether to enable Cloud Access with a TP-Link ID.
Step 3. The final step is to perform some necessary initialization settings for the Controller. You can choose to restore a configuration backup from another Controller or start a new setup from scratch. The Site Setup will assist you in establishing the basic network layout.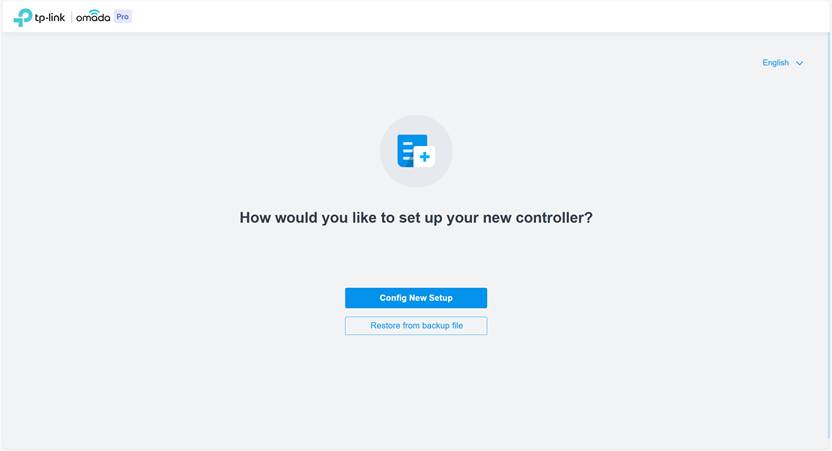
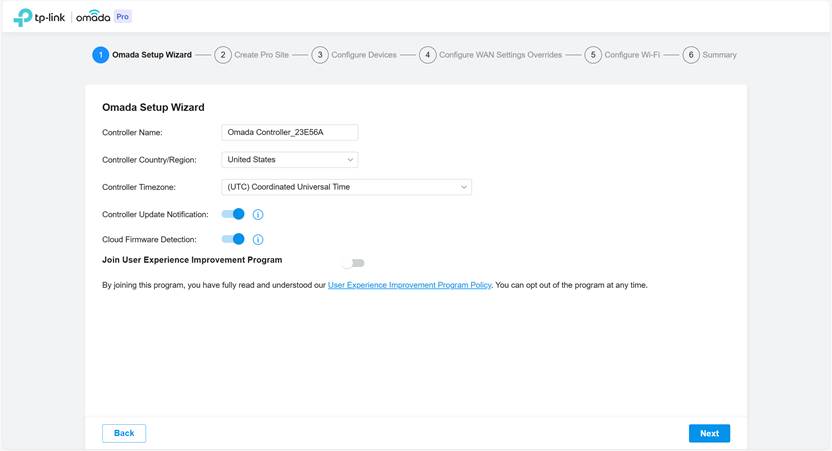
After finishing the Site setup, you will be automatically redirected to the login page. Simply enter the username and password you just created to log in and begin further configuration and monitoring of your network.
Management on the Omada App
After installing an Omada Software Controller, you can add and manage it via the Omada APP.
Using Cloud Access on the Omada APP
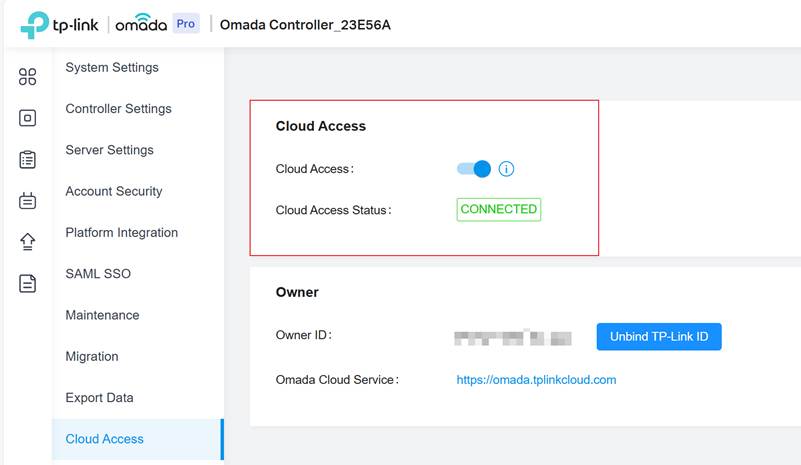
Step 1. Make sure that Cloud Access is enabled on the Pro Controller and the Status is CONNECTED.
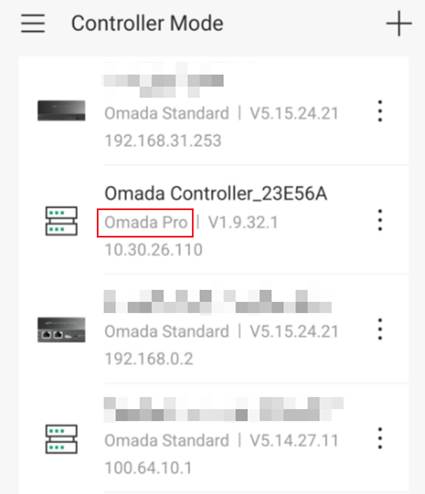
Step 2. Log in your TP-Link ID on your Omada APP, then you will find the Omada Pro Controller in your Cloud Management list under the Controller Mode module.
Accessing via On-Premises management on the Omada APP
You can also manage your Omada Pro Controller through Omada APP when the Cloud Access is disabled. You can access your Omada Pro Controller as an On-Premises system.
Step 1. Connect your mobile phone to the same network where the Pro Controller is also in.
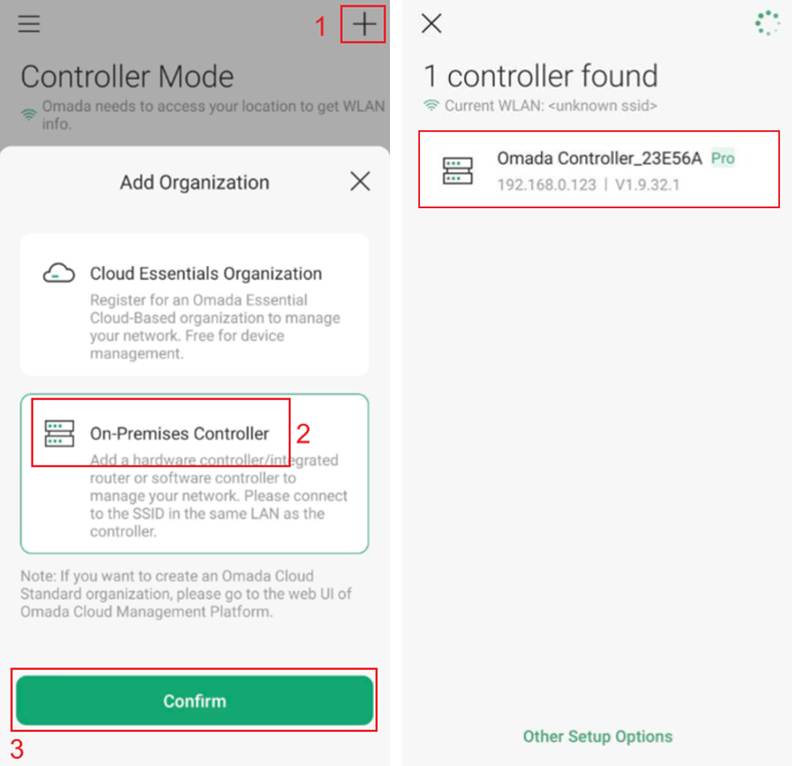
Step 2. Run Omada APP, in the Controller Mode, click the plus (+) icon in the upper-right corner to add a new Controller. Then, select option On-Premises Controller. Then the Omada APP will automatically scan and find the Pro Controller within the network connected.
Step 3. Click on your Pro Controller, after entering the username and password, you can add your Pro Controller to the Omada APP and start to manage your network.
Set Up the Omada Pro Hardware Controller
Omada Pro Hardware Controller, like C5300, is dedicated management devices pre-installed with the Omada Pro Software Controller. Simply purchase the device, and the built-in Controller is ready to use.
The Omada Pro Hardware Controller can be set up using either the Omada APP or a Web browser. Once the initial setup is complete, you have the flexibility to configure and manage your Omada Pro devices through your preferred choice of either the APP or the browser.
Using a Web Browser
Refer to the following setup video for setting up the Omada Pro Hardware Controller via browser locally. In the video, OC200 is used as an example, but with C5300, the procedure is basically the same.
How to configure Omada Hardware Controller via a Web Browser
Step 1. Connect the Omada Pro Hardware Controller to your network.
Step 2. Connect a laptop to the same subnet as your Omada Hardware Controller.
Step 3. By entering the IP address of the Controller, you can use the Web UI of the Controller locally.
Step 4. Complete the Setup Wizard to set up your Controller.
Step 5. Launch the Controller to adopt and manage your Omada Pro devices.
Using the Omada APP (via your mobile device)
Refer to the following setup video for setting up the Omada Pro Hardware Controller via the Omada APP locally. In the video, OC200 is used as an example, but with C5300, the procedure is basically the same.
How to configure an Omada Hardware Controller via Omada App
Step 1. Connect the Omada Pro Hardware Controller to your network.
Step 2. Download and install the Omada APP on your mobile device.
Step 3. Ensure that your phone is connected to the same subnet as the Controller.
Step 4. Add the Omada Pro Hardware Controller via local access.
Step 5. Complete the Setup Wizard to set up your Controller.
Step 6. Launch the Controller to adopt and manage your Omada Pro devices.
Conclusion
Now you have successfully got started with your Omada Pro Controller.
Get to know more details of each function and configuration please go to Download Center to download the manual of your product.


