How to Configure SAML SSO on Omada Controller


Contents
Introduction
SAML SSO is an XML-based open standard for exchanging authentication and authorization data between parties, specifically between an identity provider (IdP) and a service provider (SP). It enables users to log in once and access multiple systems without needing to log in again at each one.
This article explains how to configure SAML SSO, using Microsoft Entra and the Omada Network System v6.1.0.100 as an example.
Requirements
- Omada Standard Cloud-Based Controller/Omada Software Controller/OC300/OC400
- Microsoft Entra/Microsoft Azure
Configuration
The following steps will cover the configuration of the identity provider.
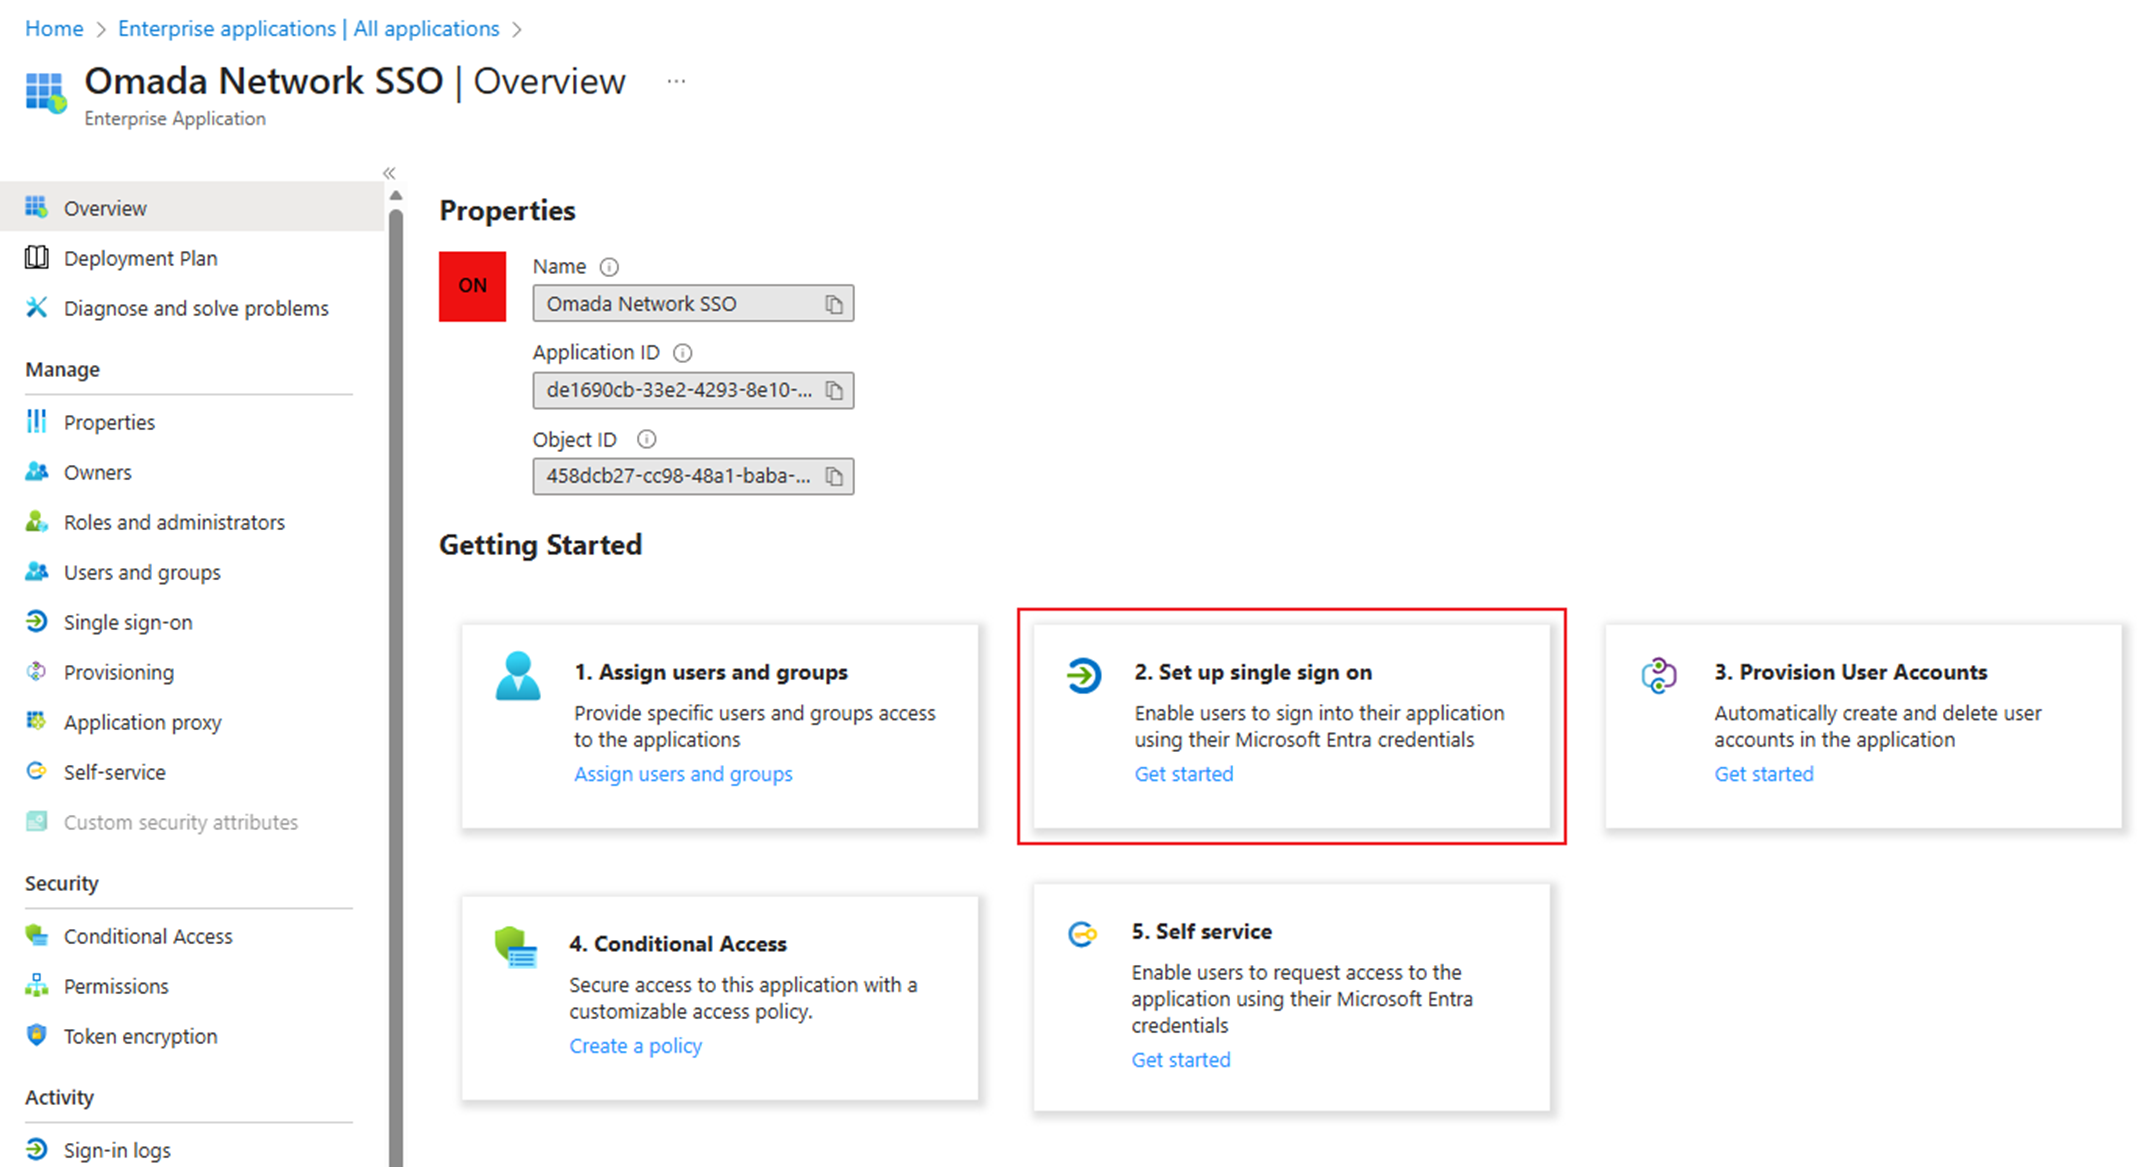
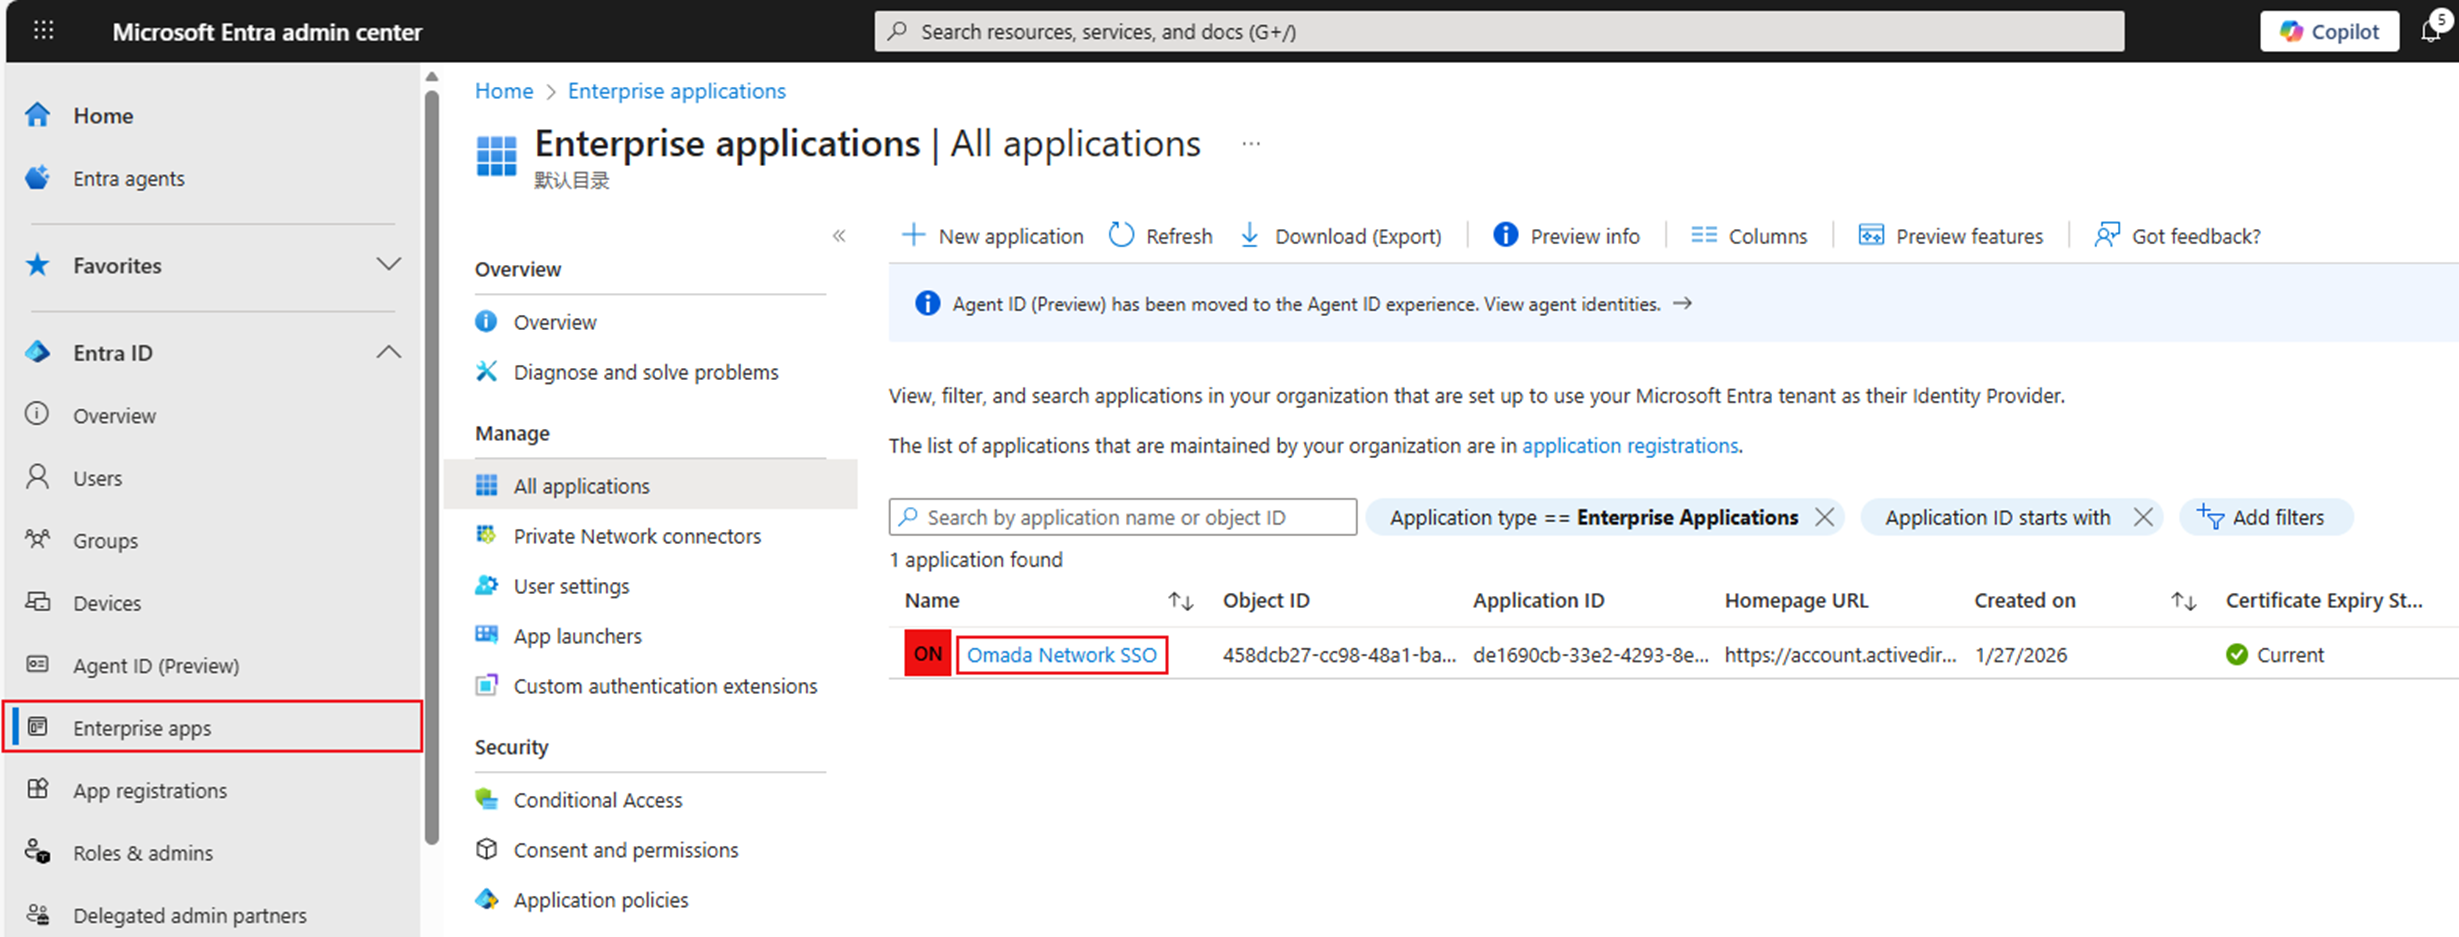
Step 1. Create a new application on the Microsoft Entra.
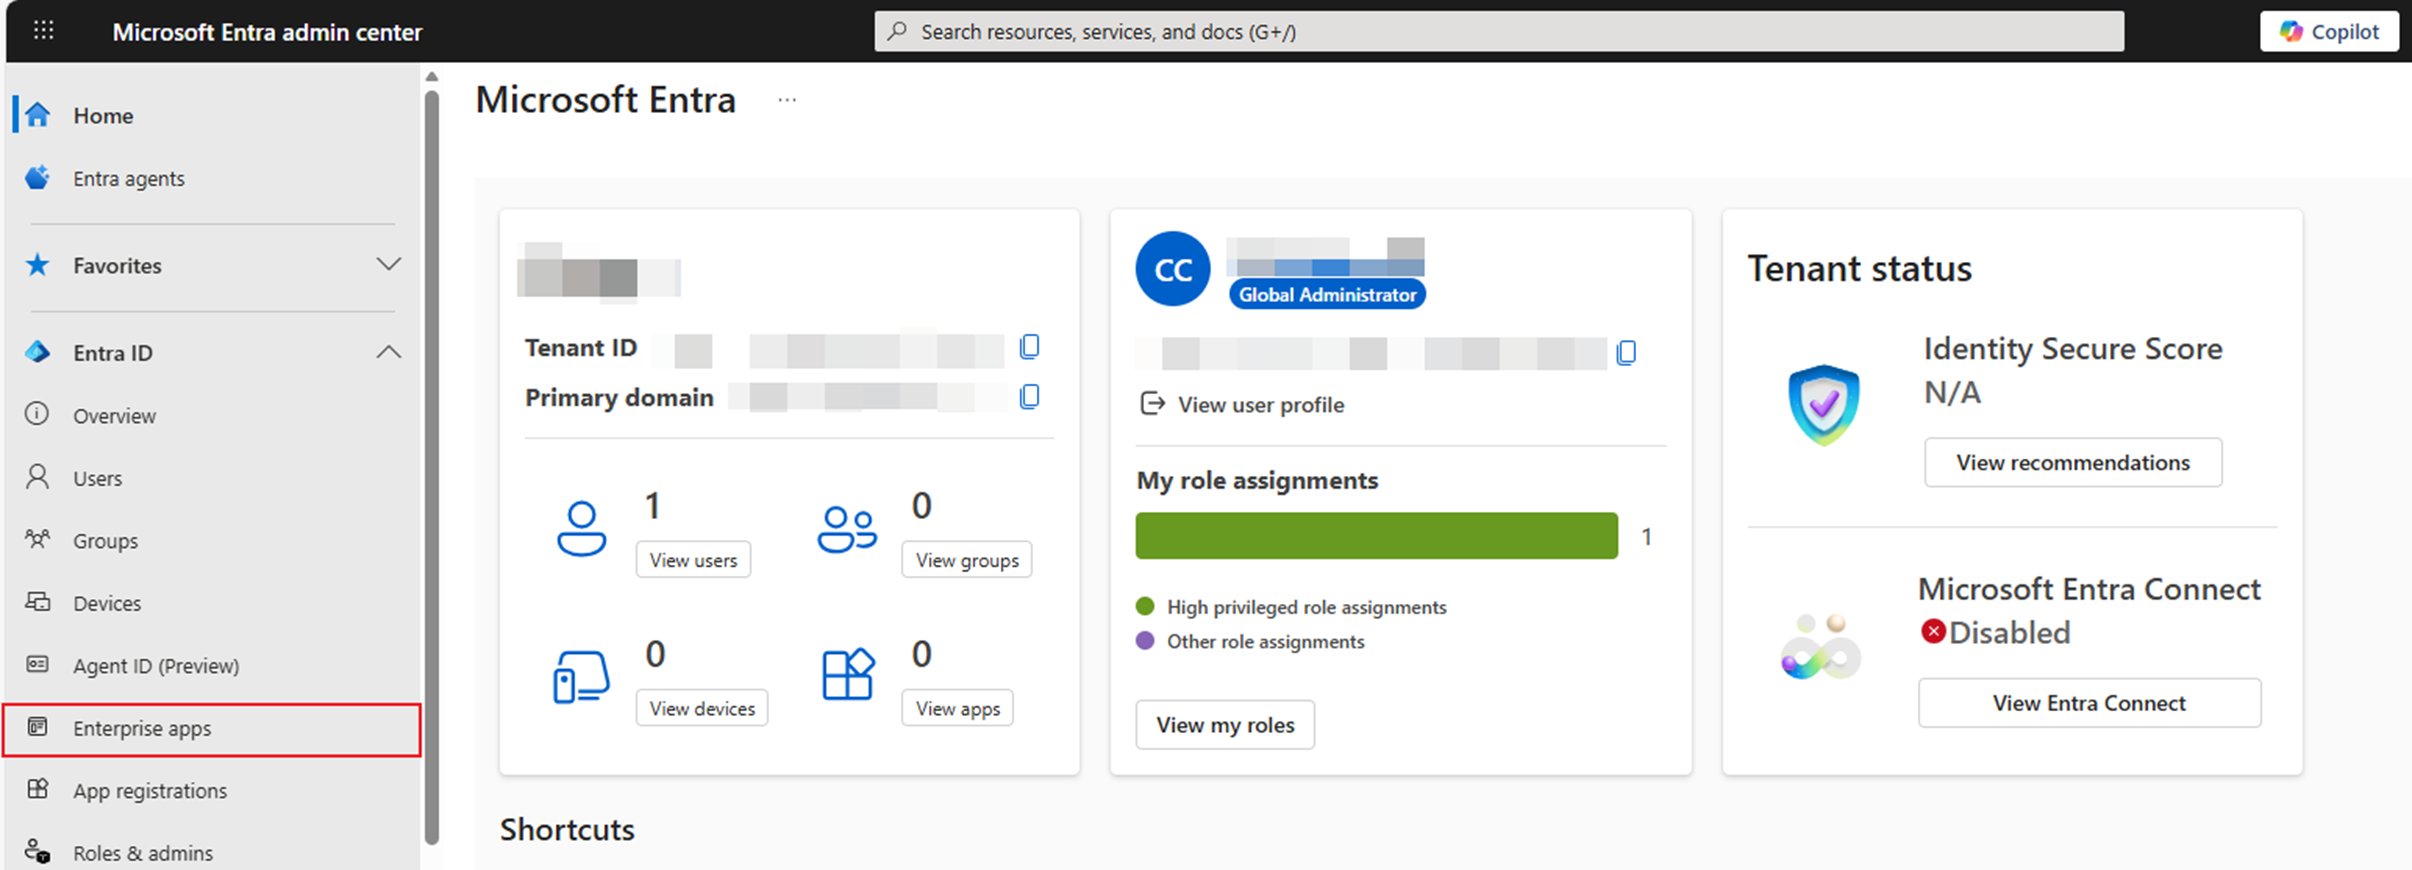
Go to Microsoft Entra Admin Center: Microsoft Entra admin center. Click Enterprise apps.
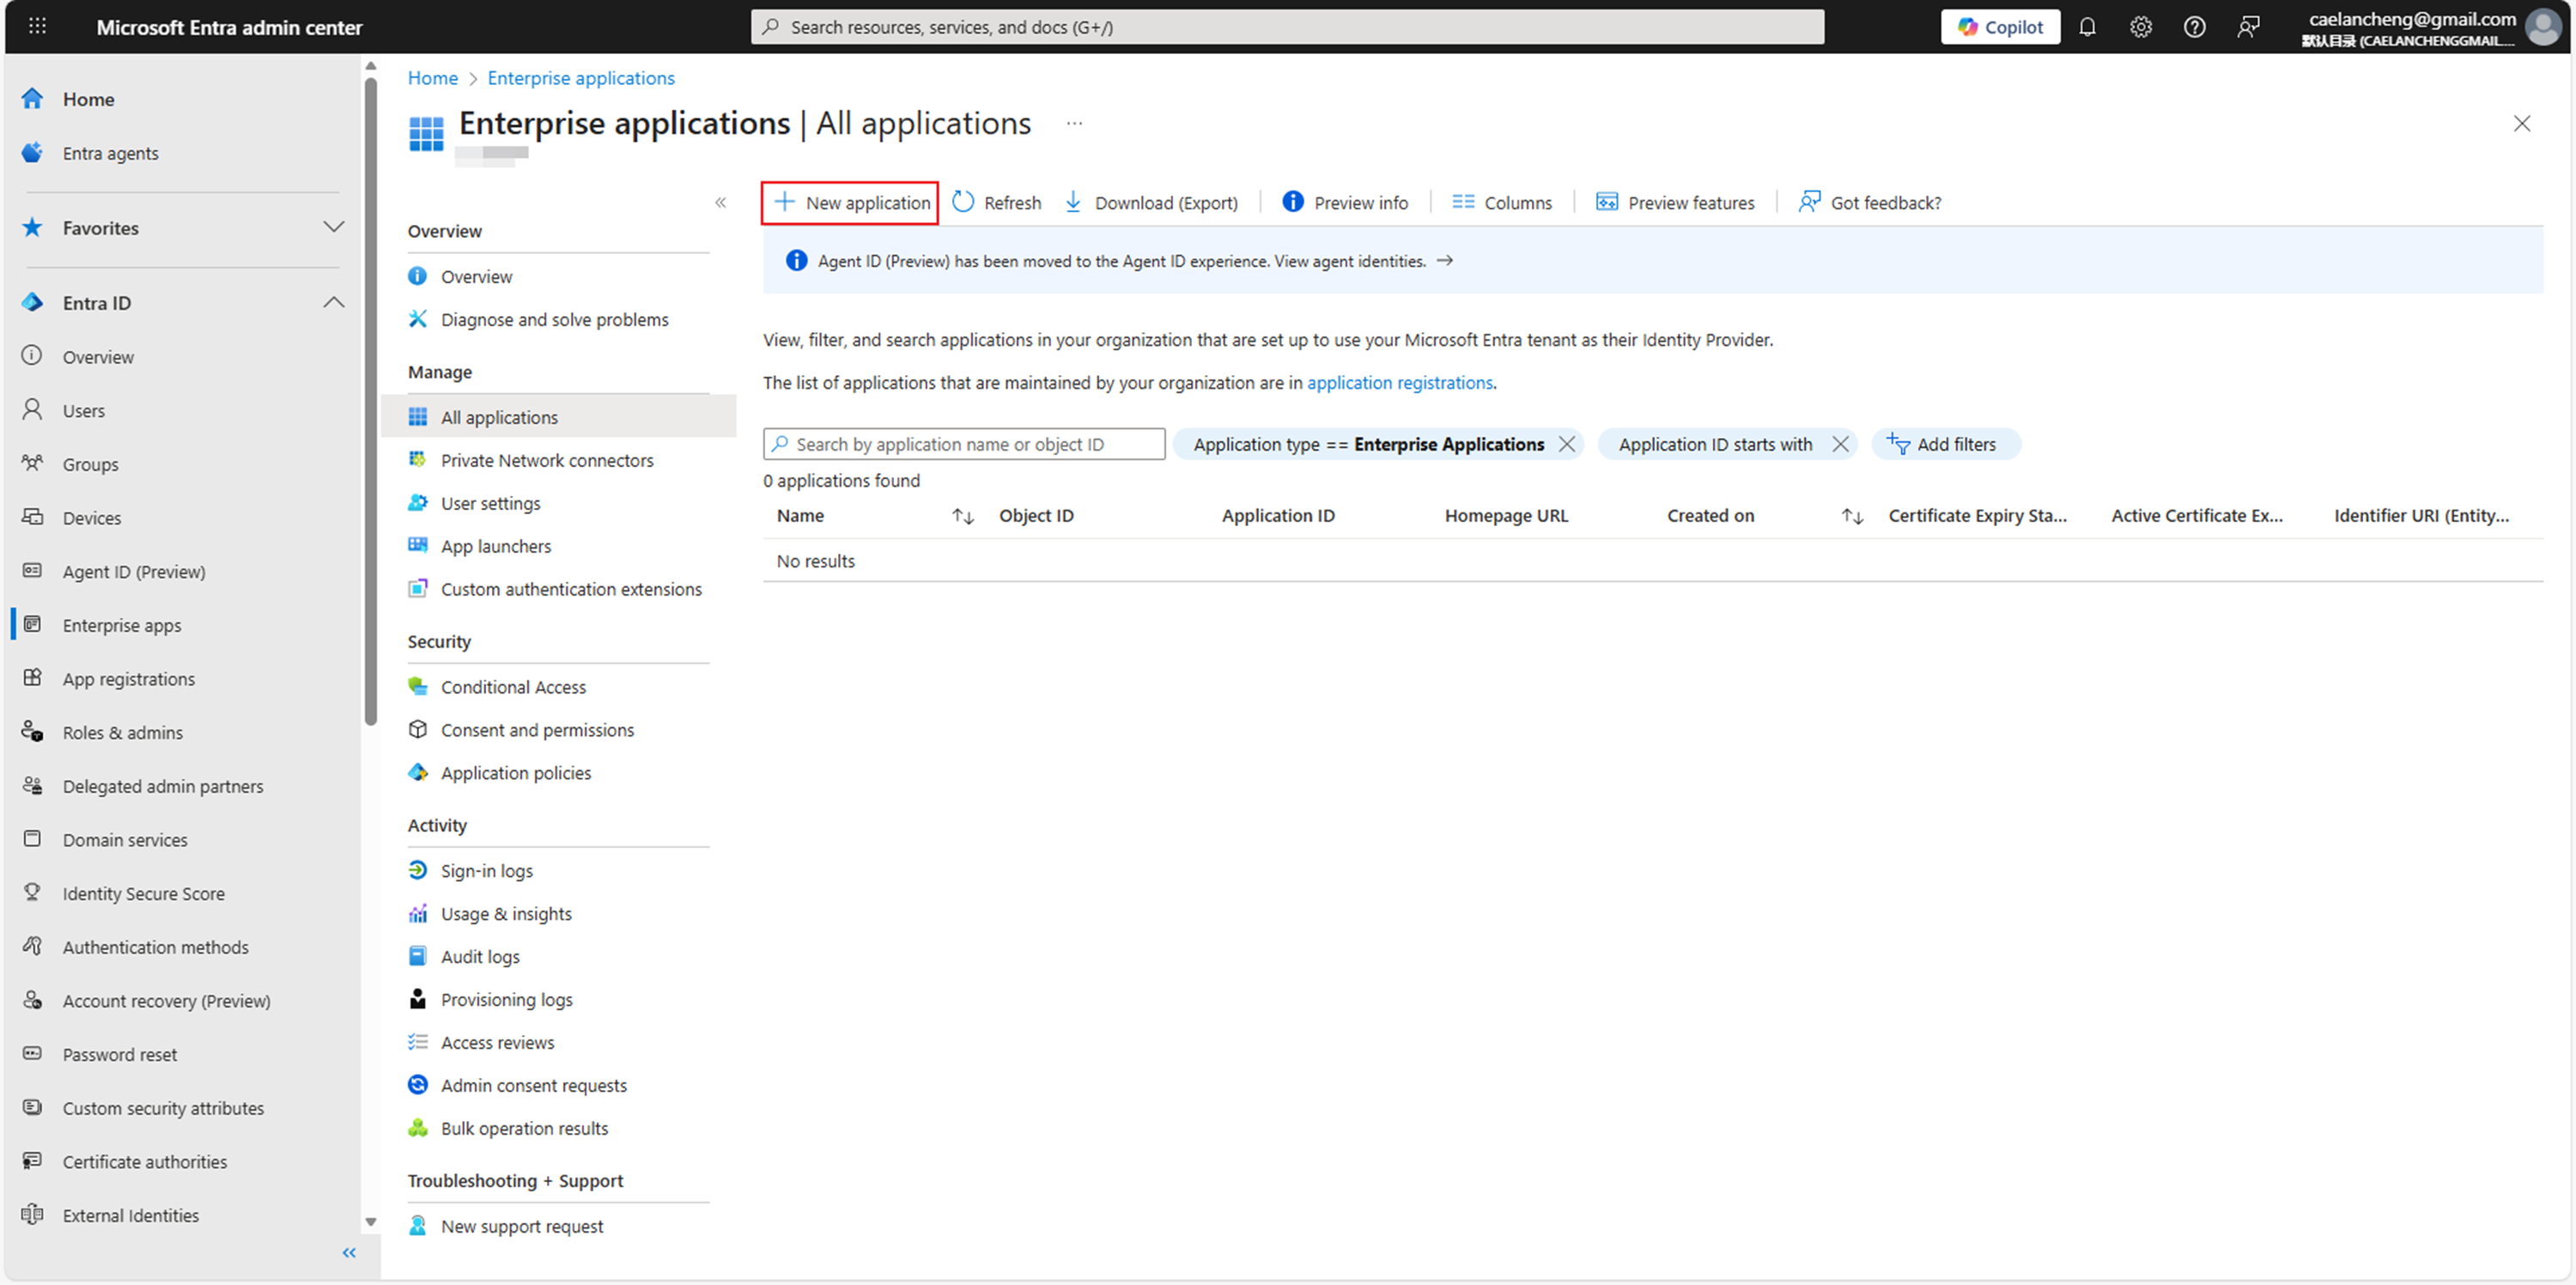
Click New application to browse the Microsoft Entra APP Gallery.
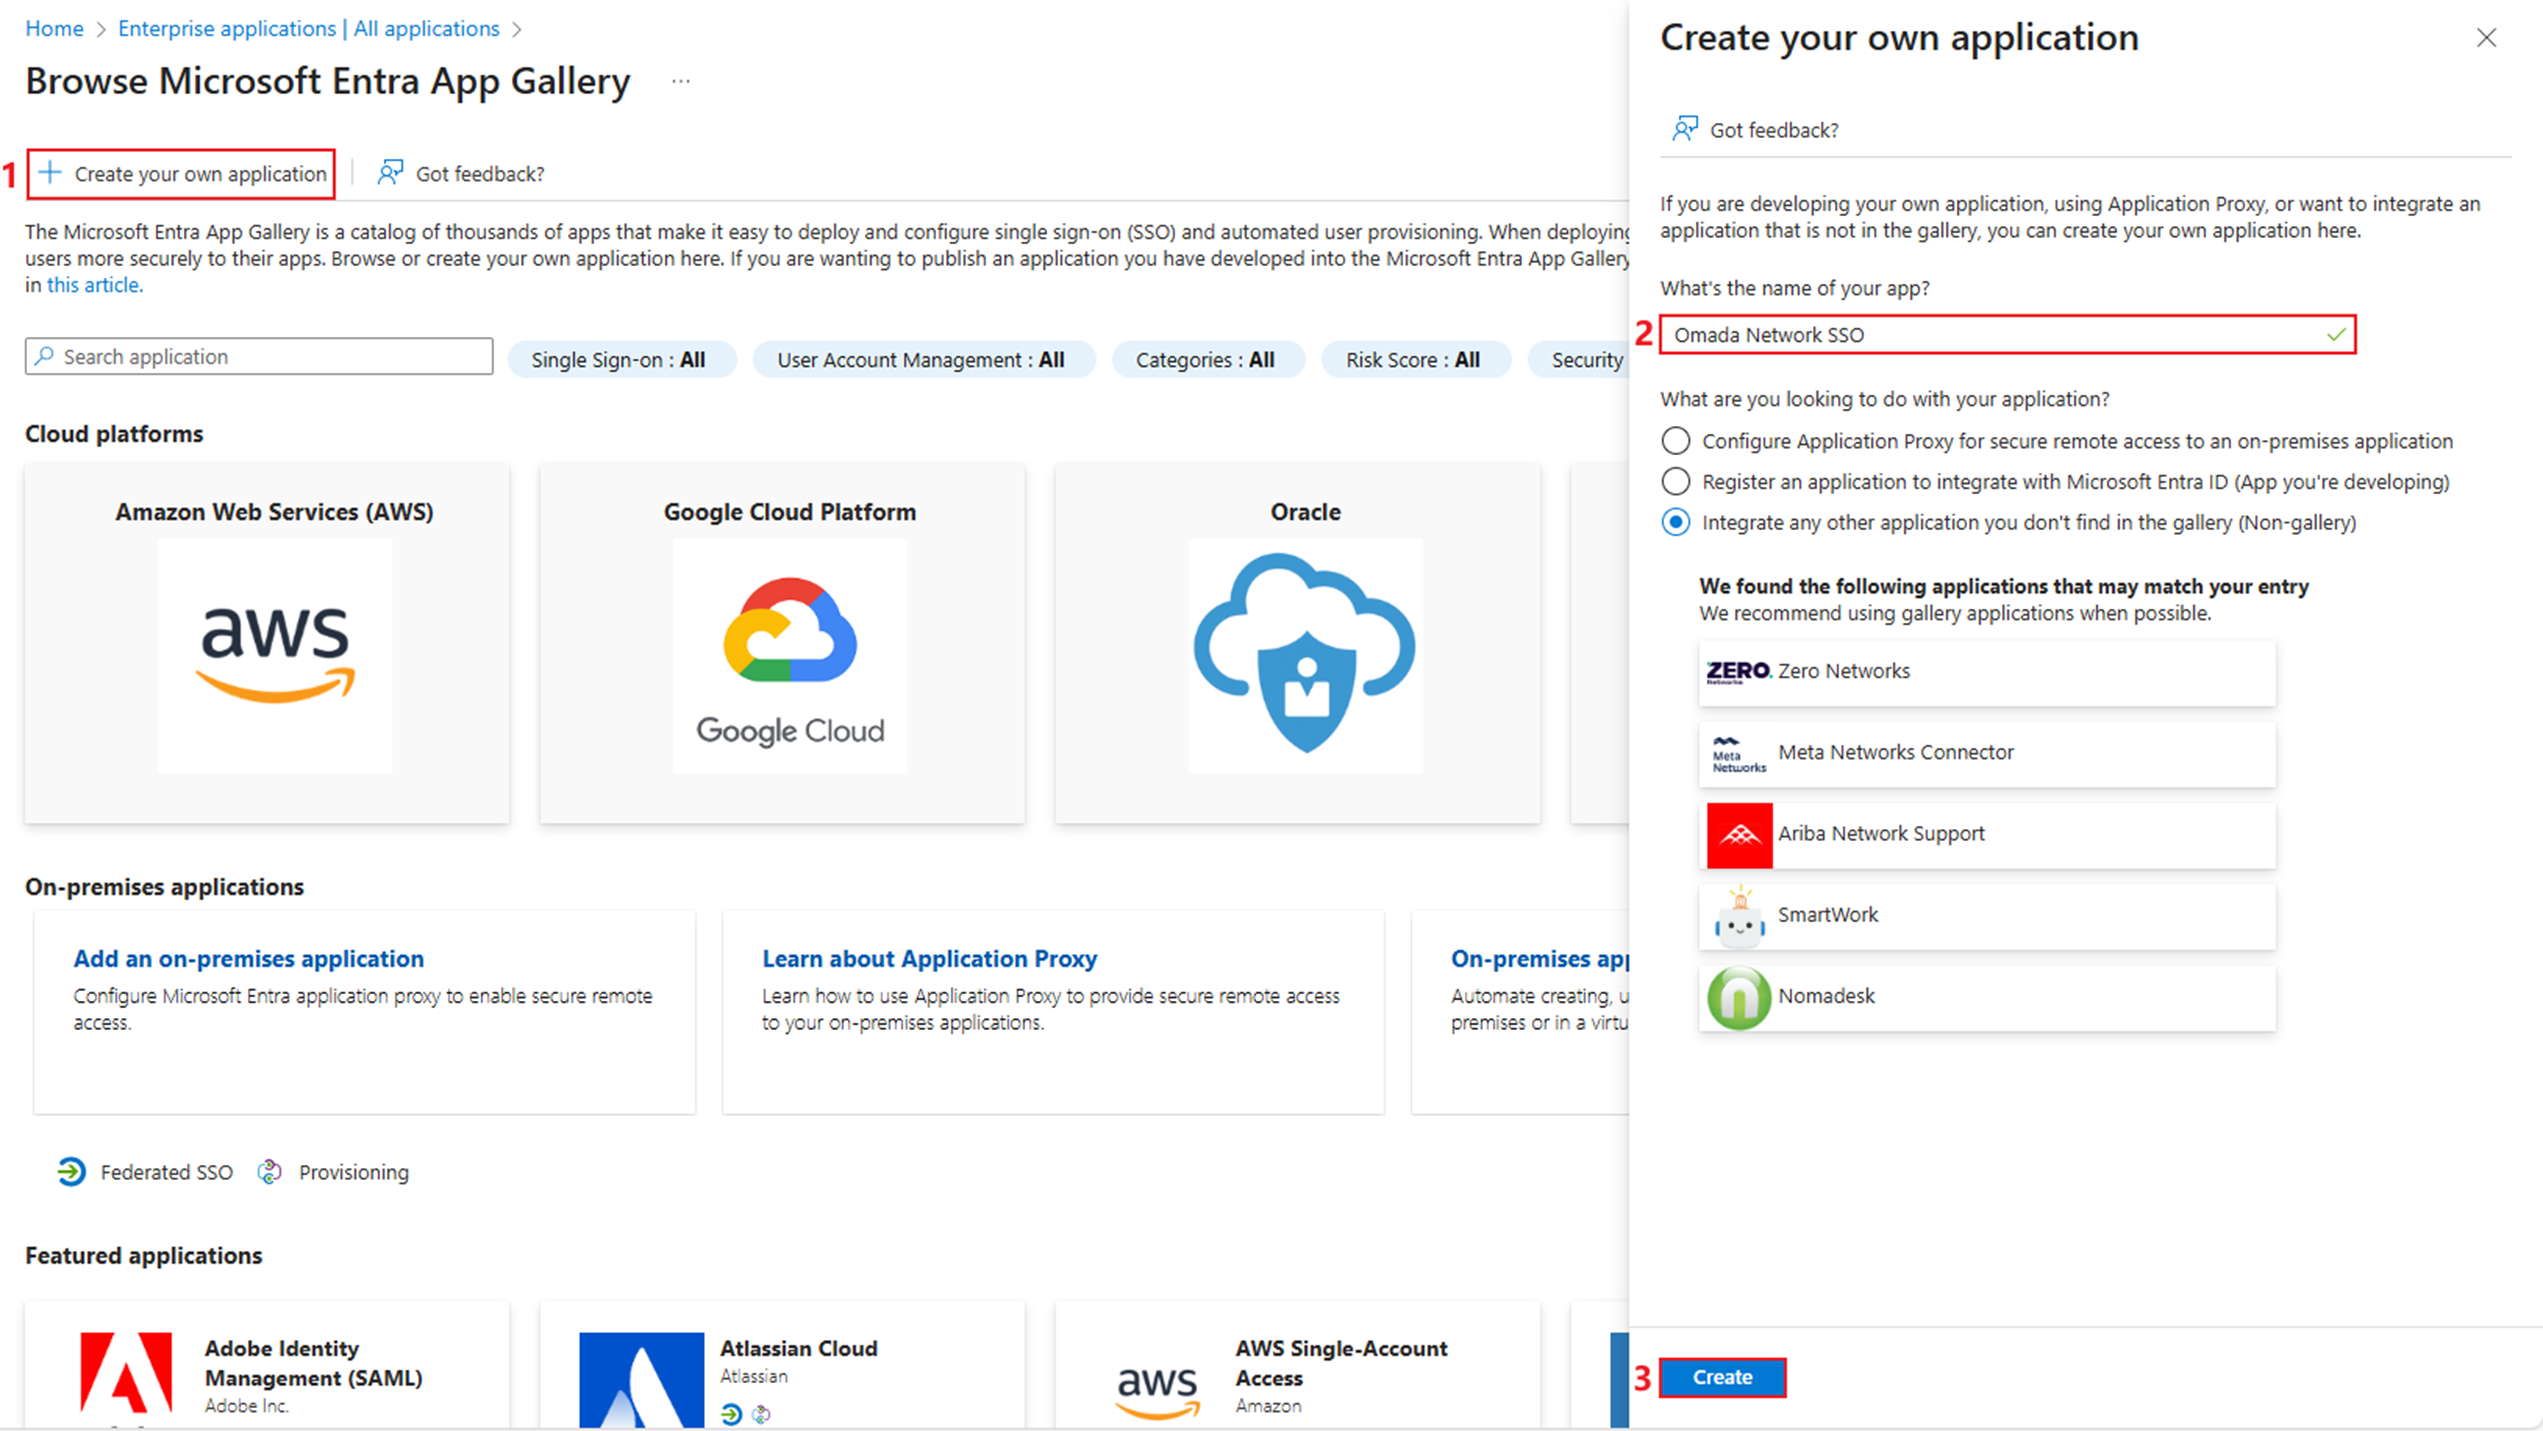
Click Create your own application. Enter the name of the application and click Create.
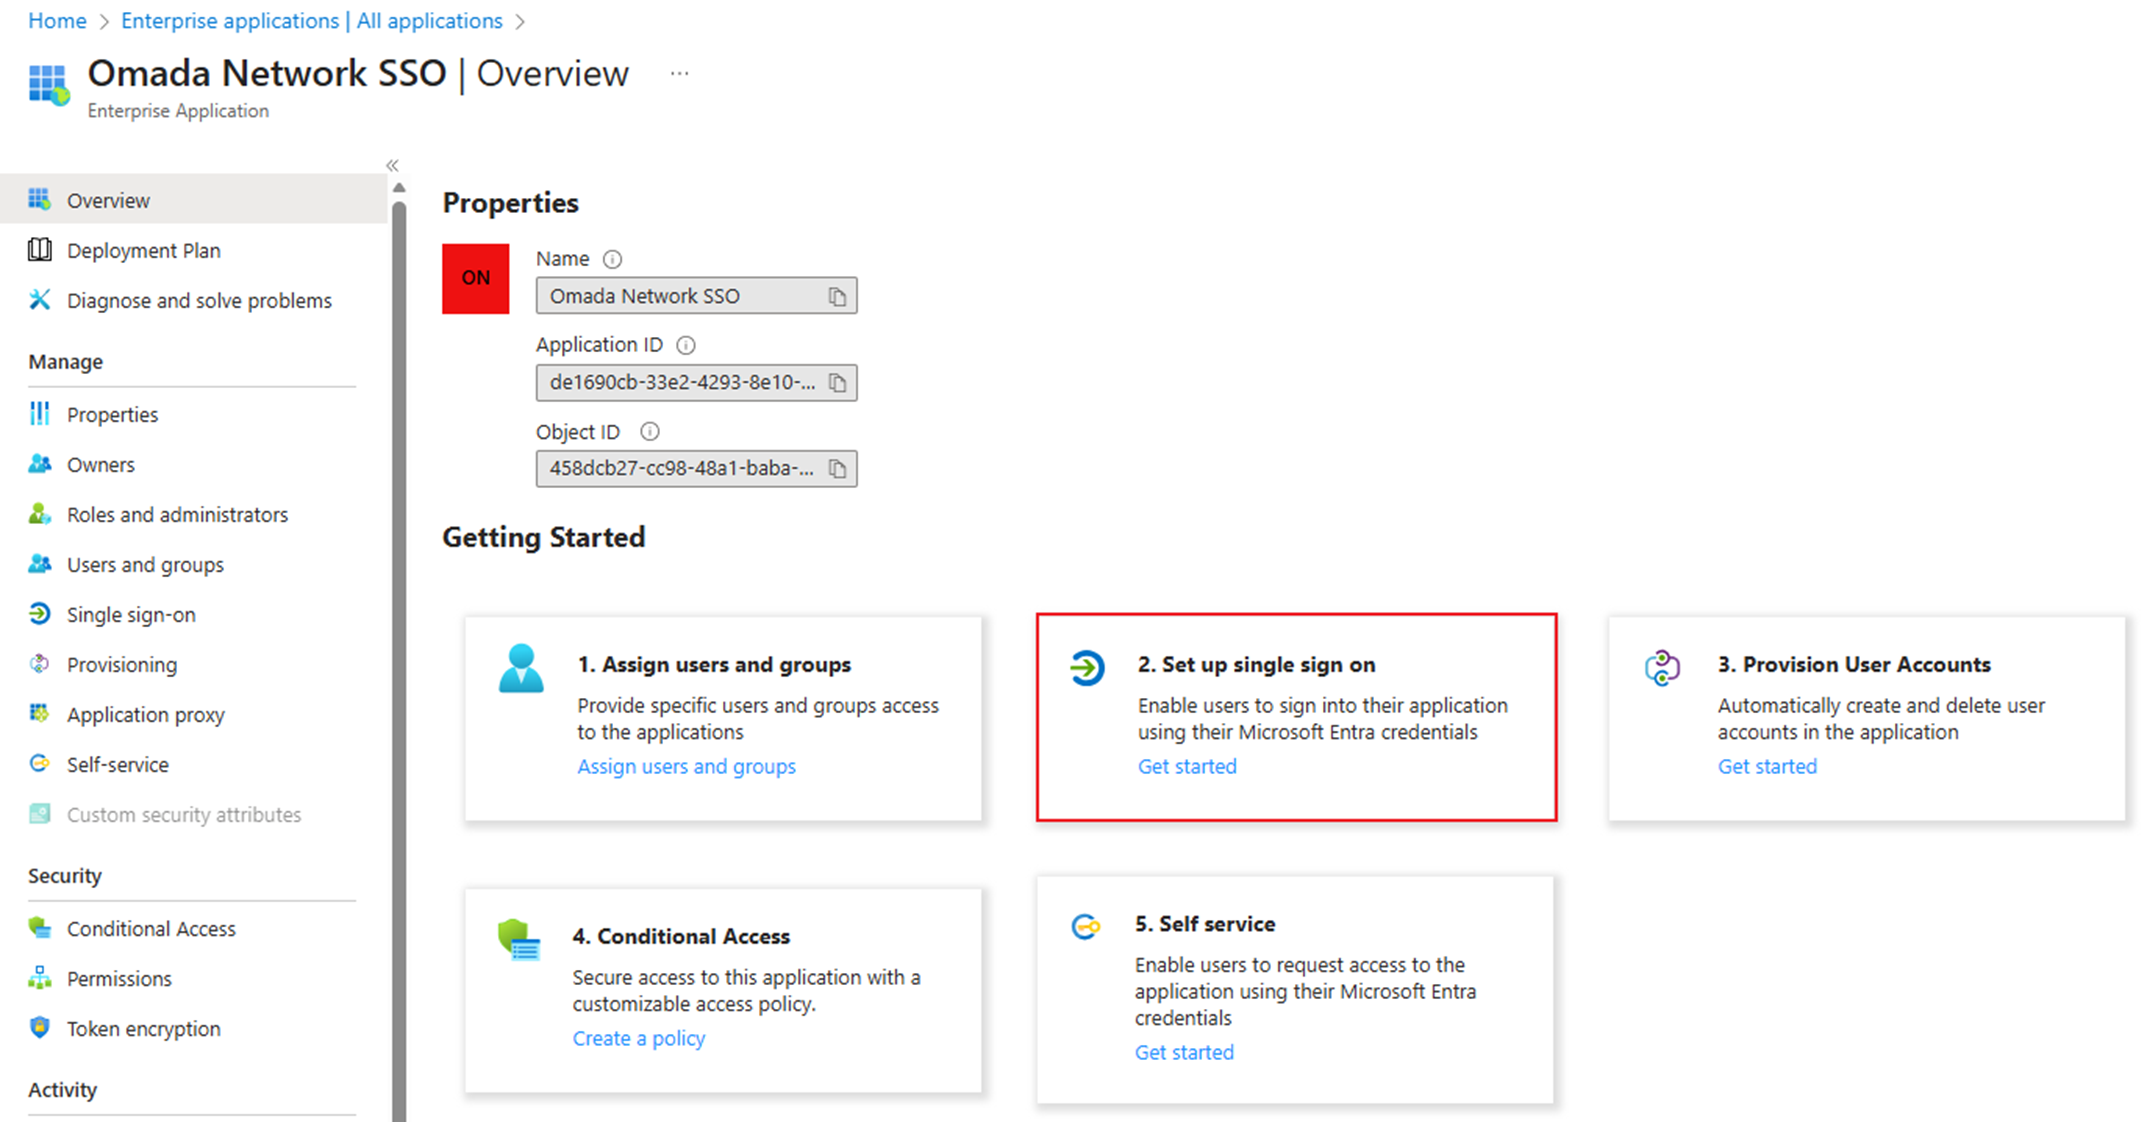
Step 2. Initialize single sign on and obtain the identity provider metadata file.
Choose 2. Set up a single sign-on.
Click Edit in Basic SAML Configuration to configure Identifier and Reply URL.
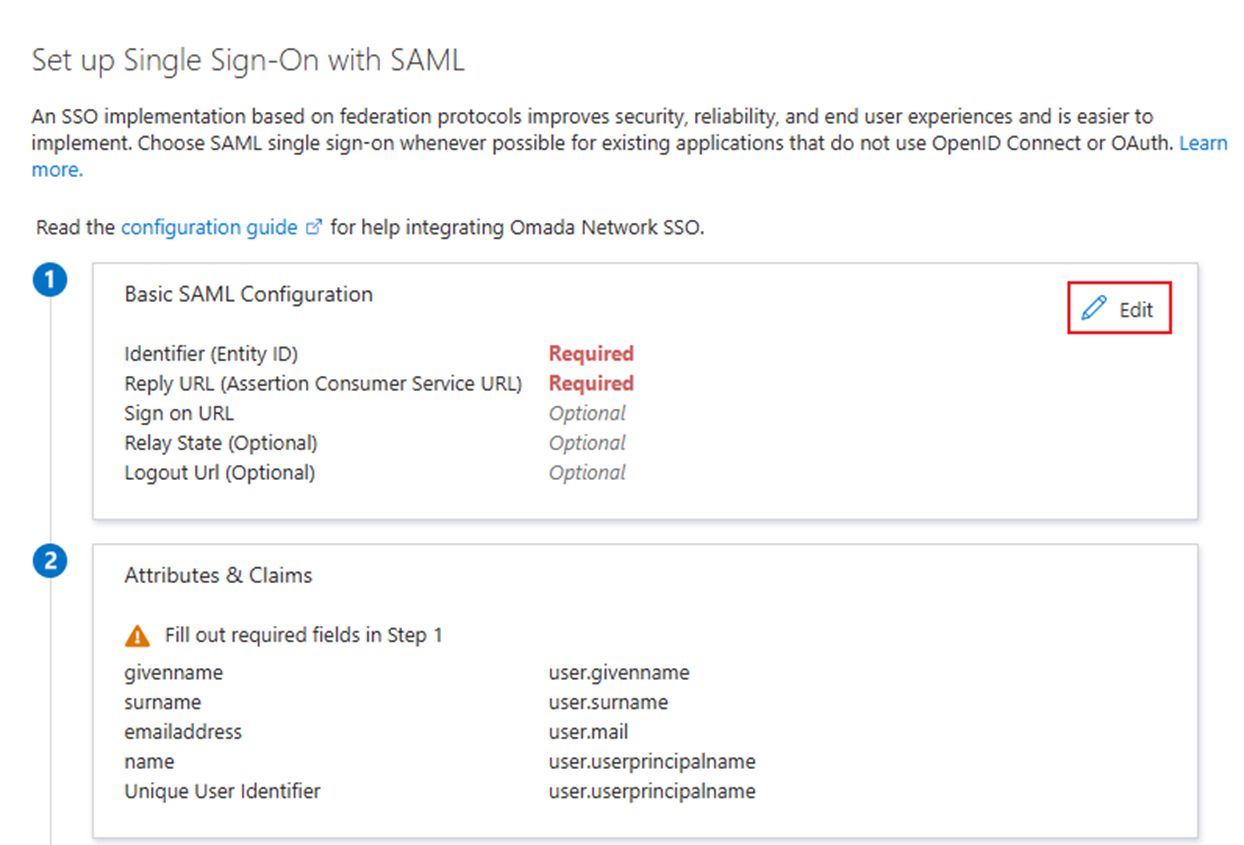
Here, we input https://www.omadanetworks.com as the value of both Identifier and Reply URL. In fact, we can temporarily place any URLs we like here, as we will reconfigure them later.

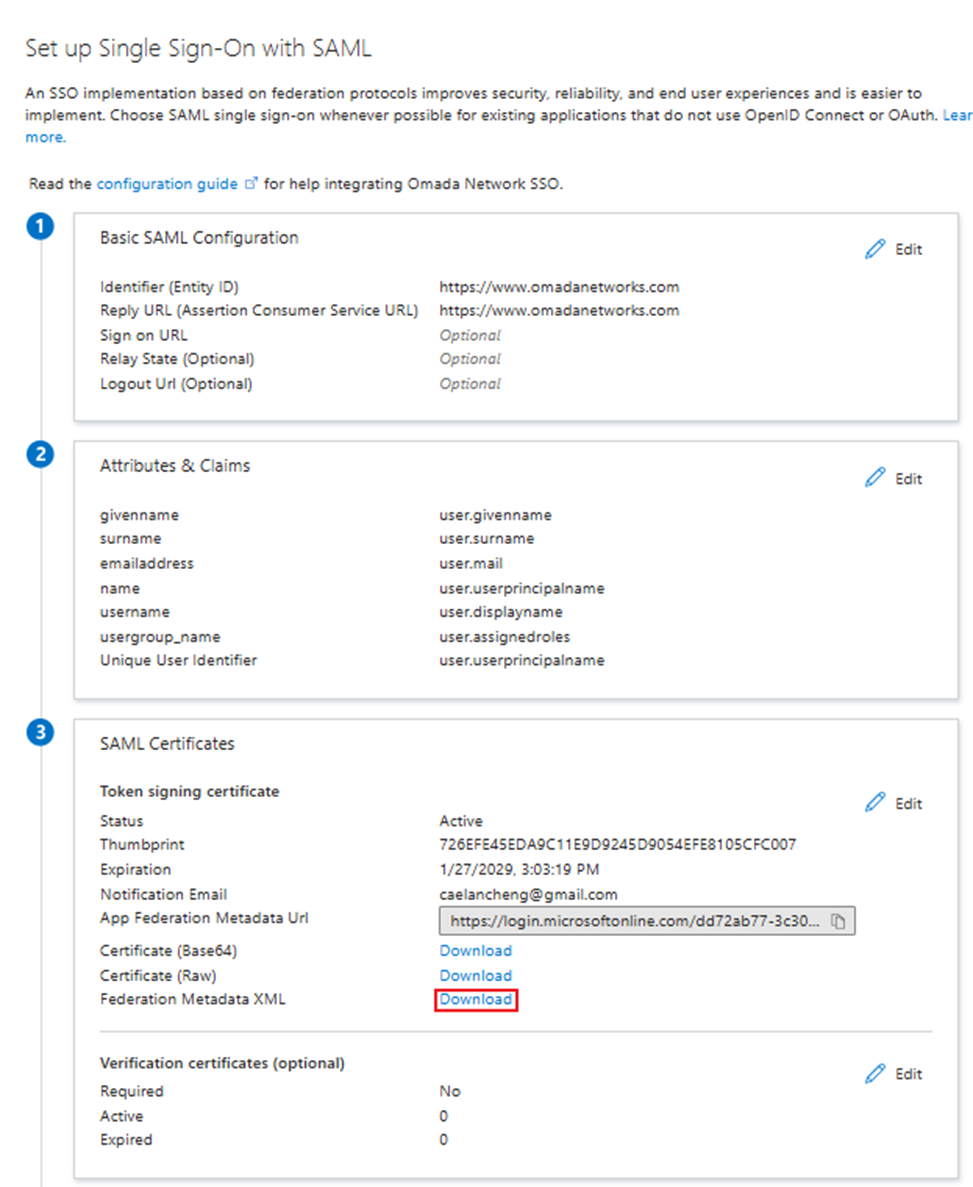
Go to SAML Certificate > Federation Metadata XML and click Download to download the IdP metadata file.
Step 3. Create a new SAML connection and a new SAML user group on the Omada Controller.
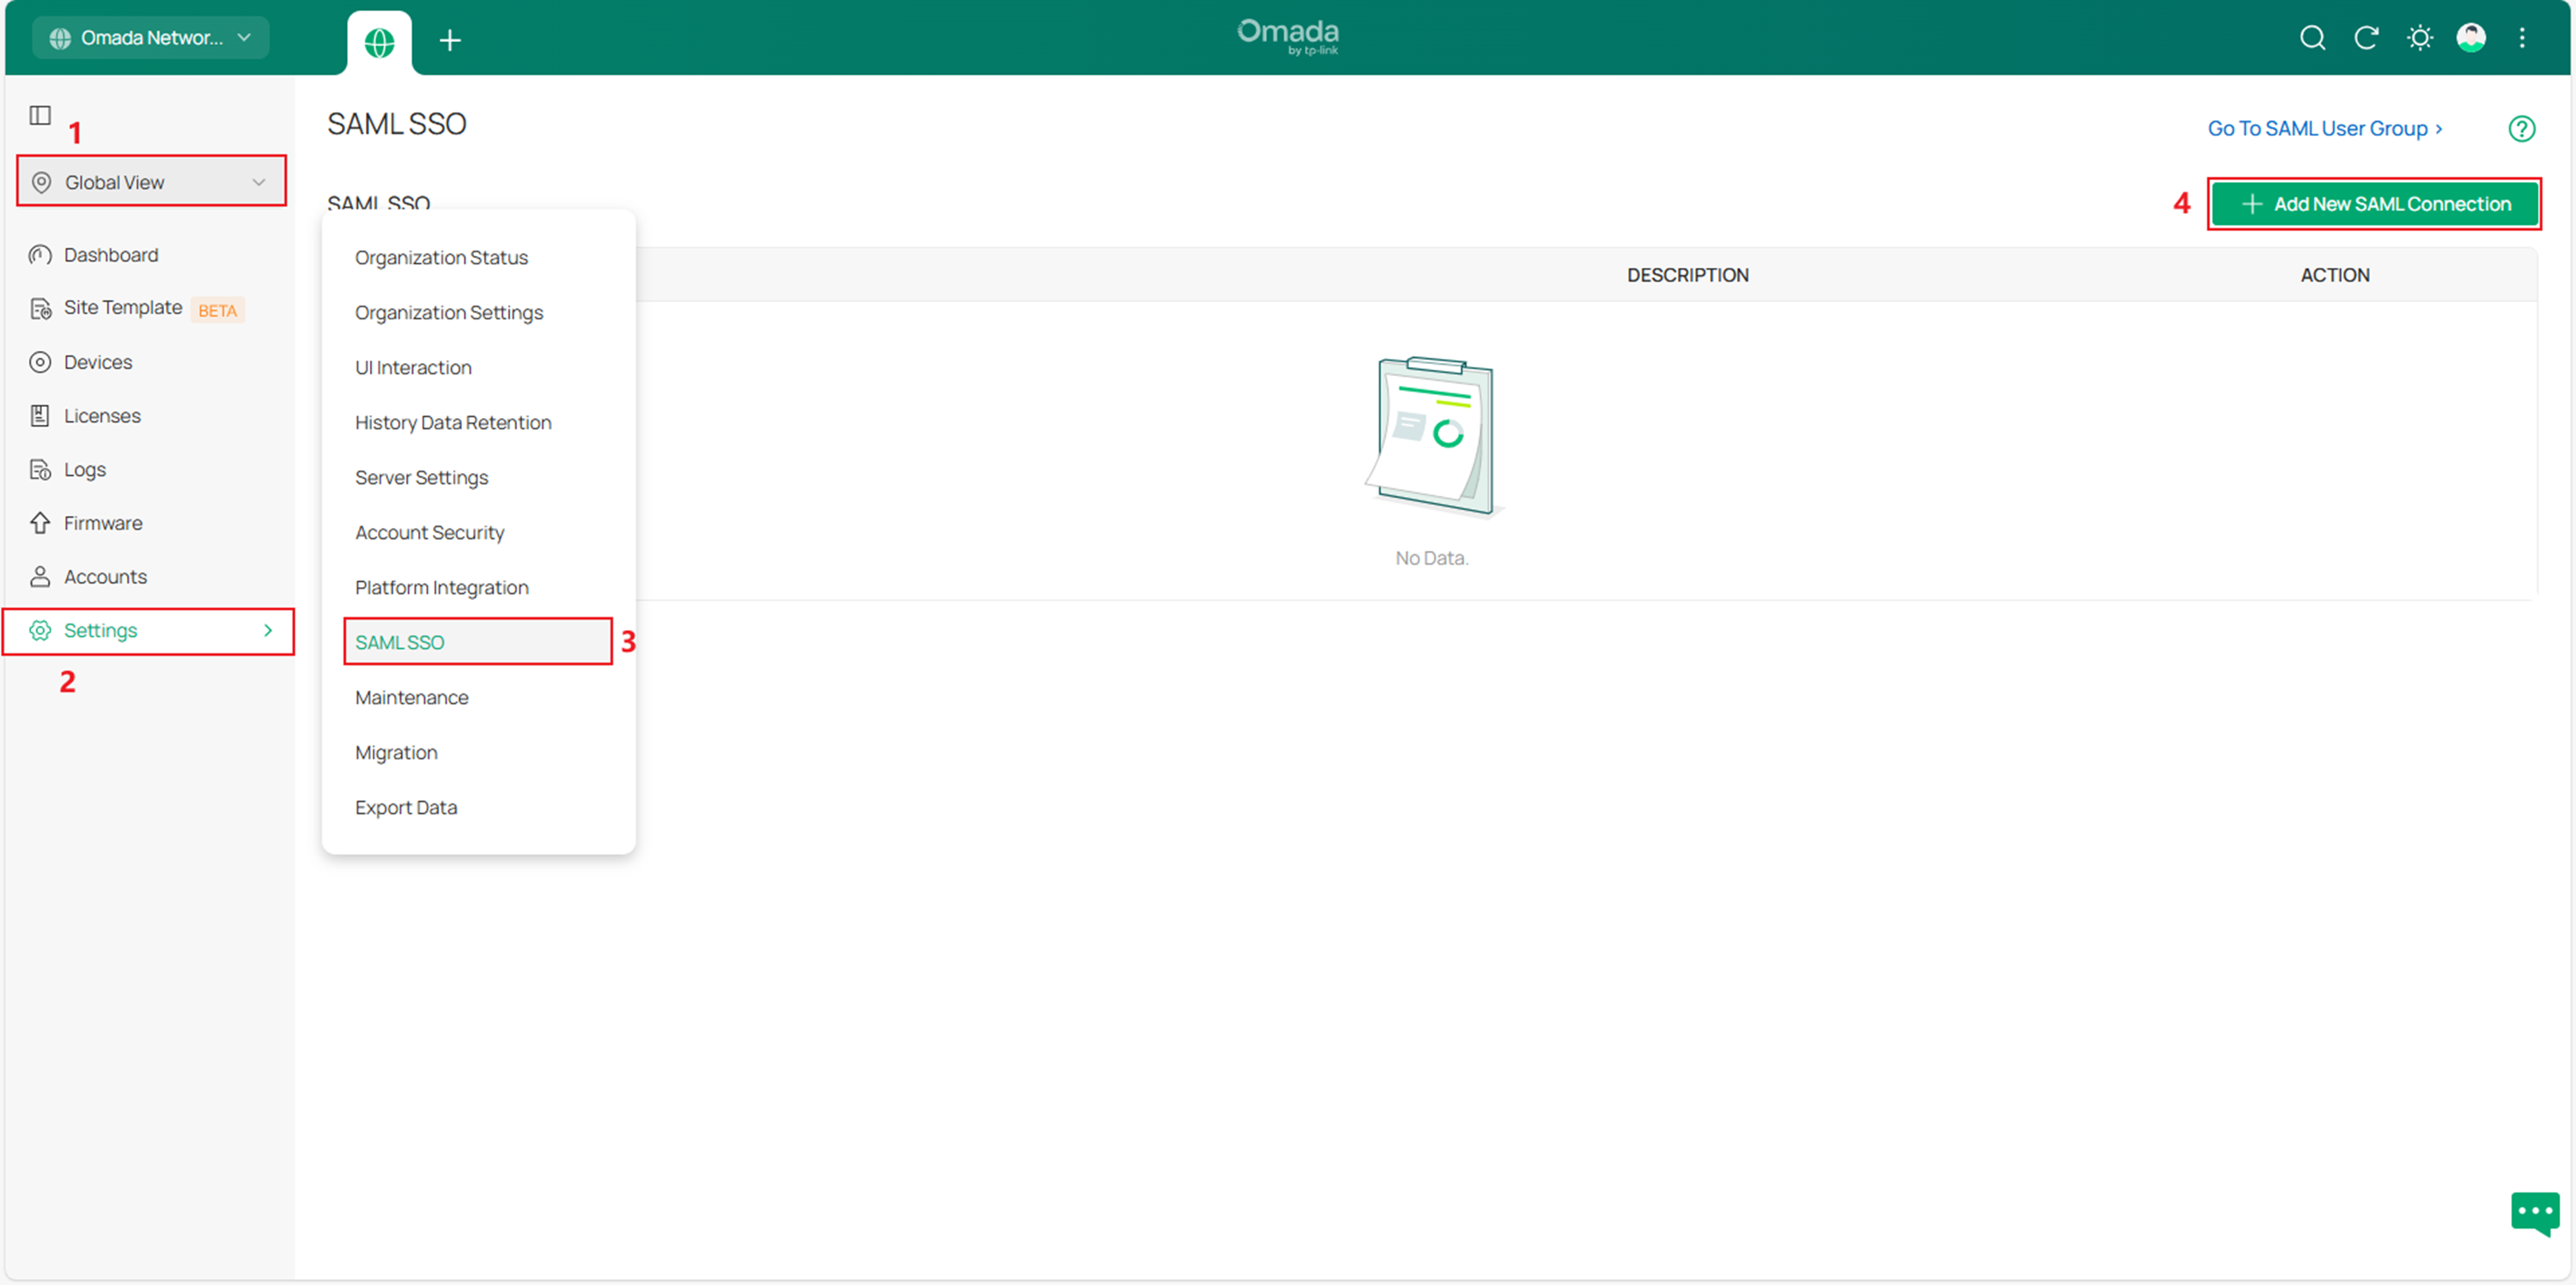
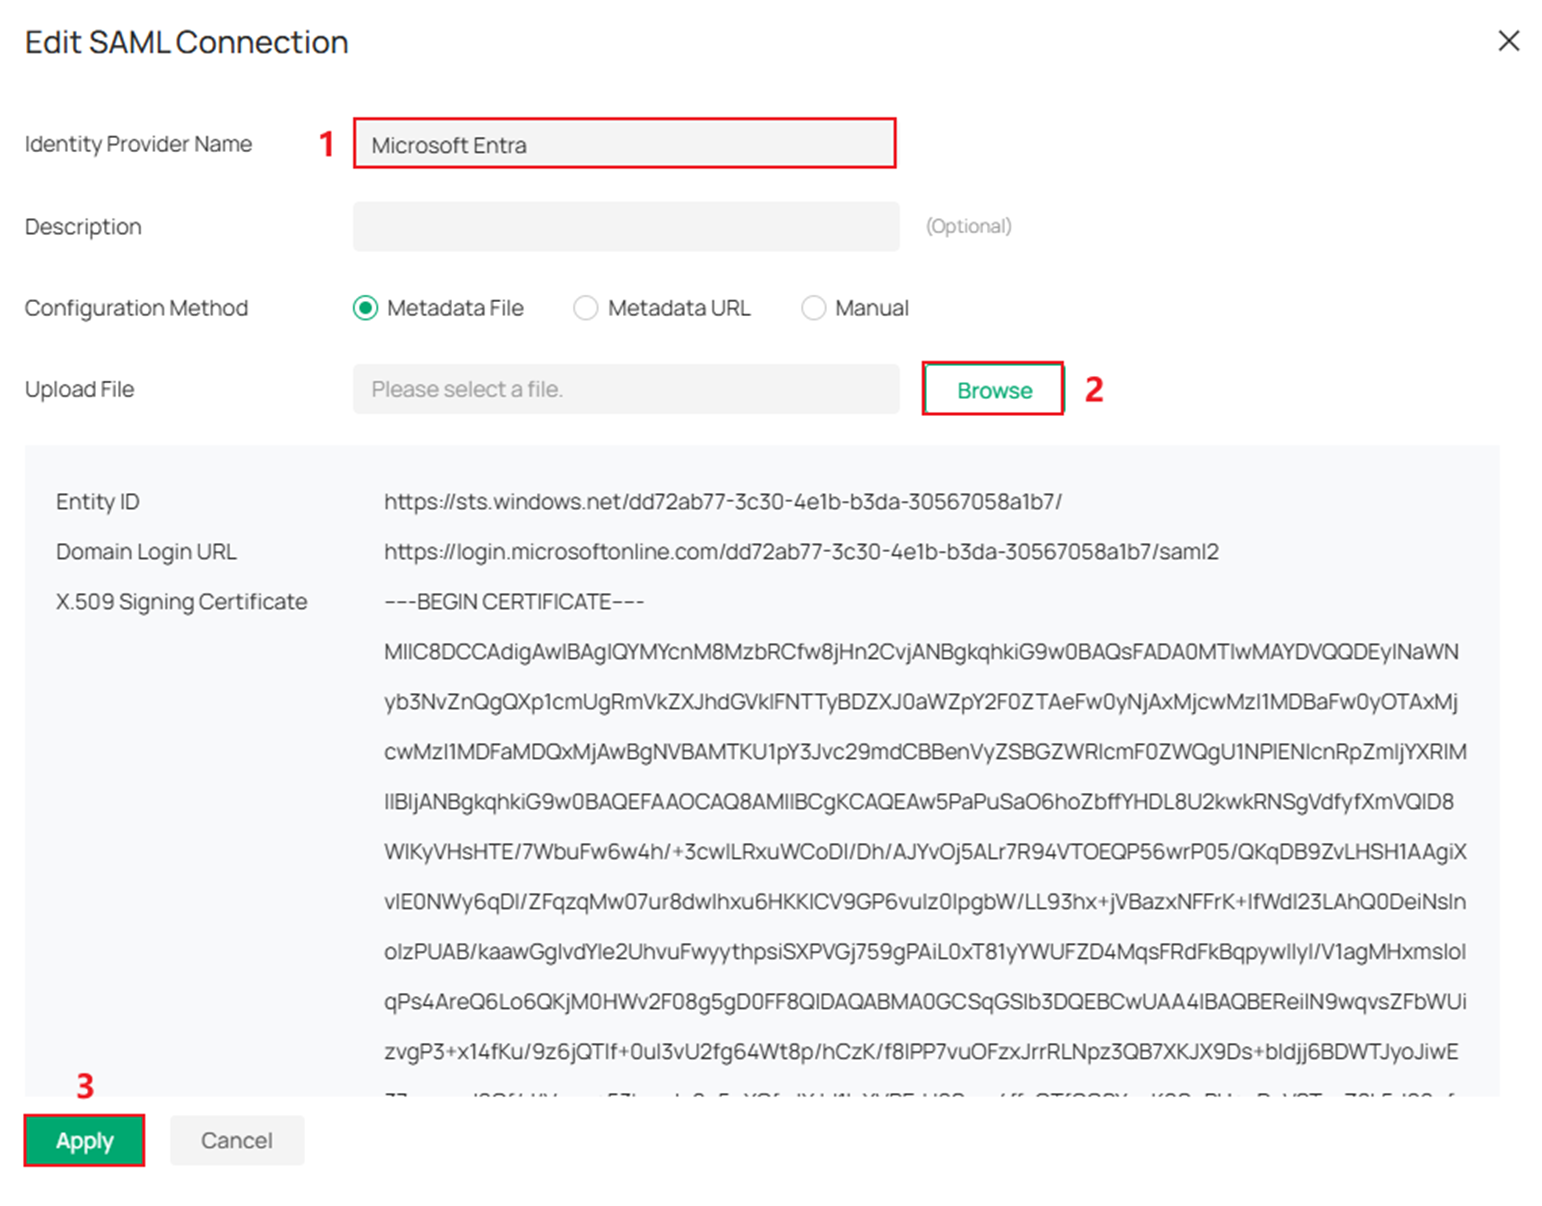
Go to the Controller to configure the SP system. Go to Global View > Settings > SAML SSO, then click Add New SAML Connection.
Input an Identity Provider Name, upload the Metadata.xml file we just downloaded, and click Apply.
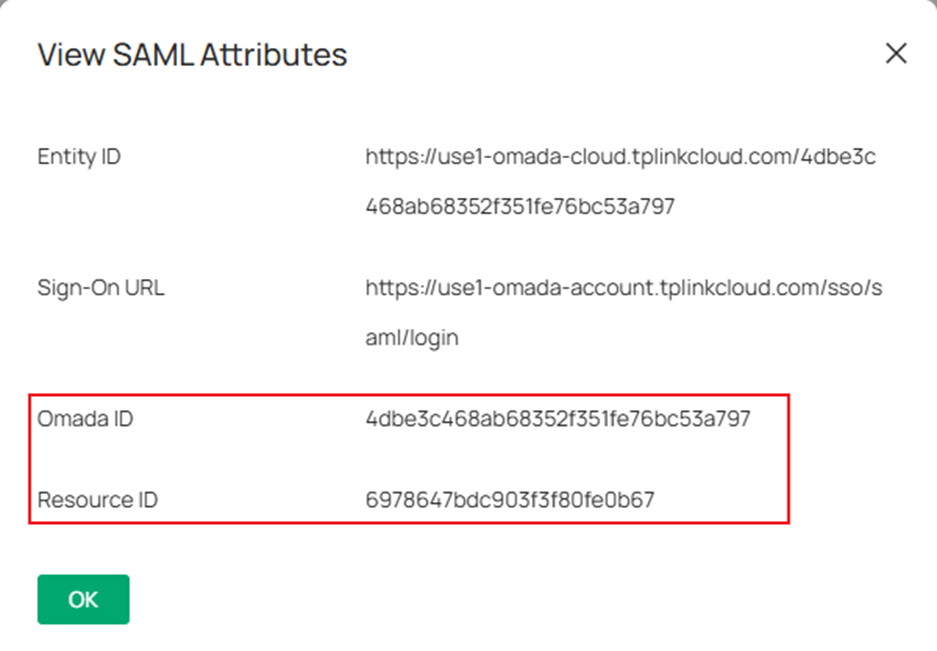
Check the Details of the entry we just created. Here we can see the Entity ID, Sign-On URL, Omada ID, and Resource ID.
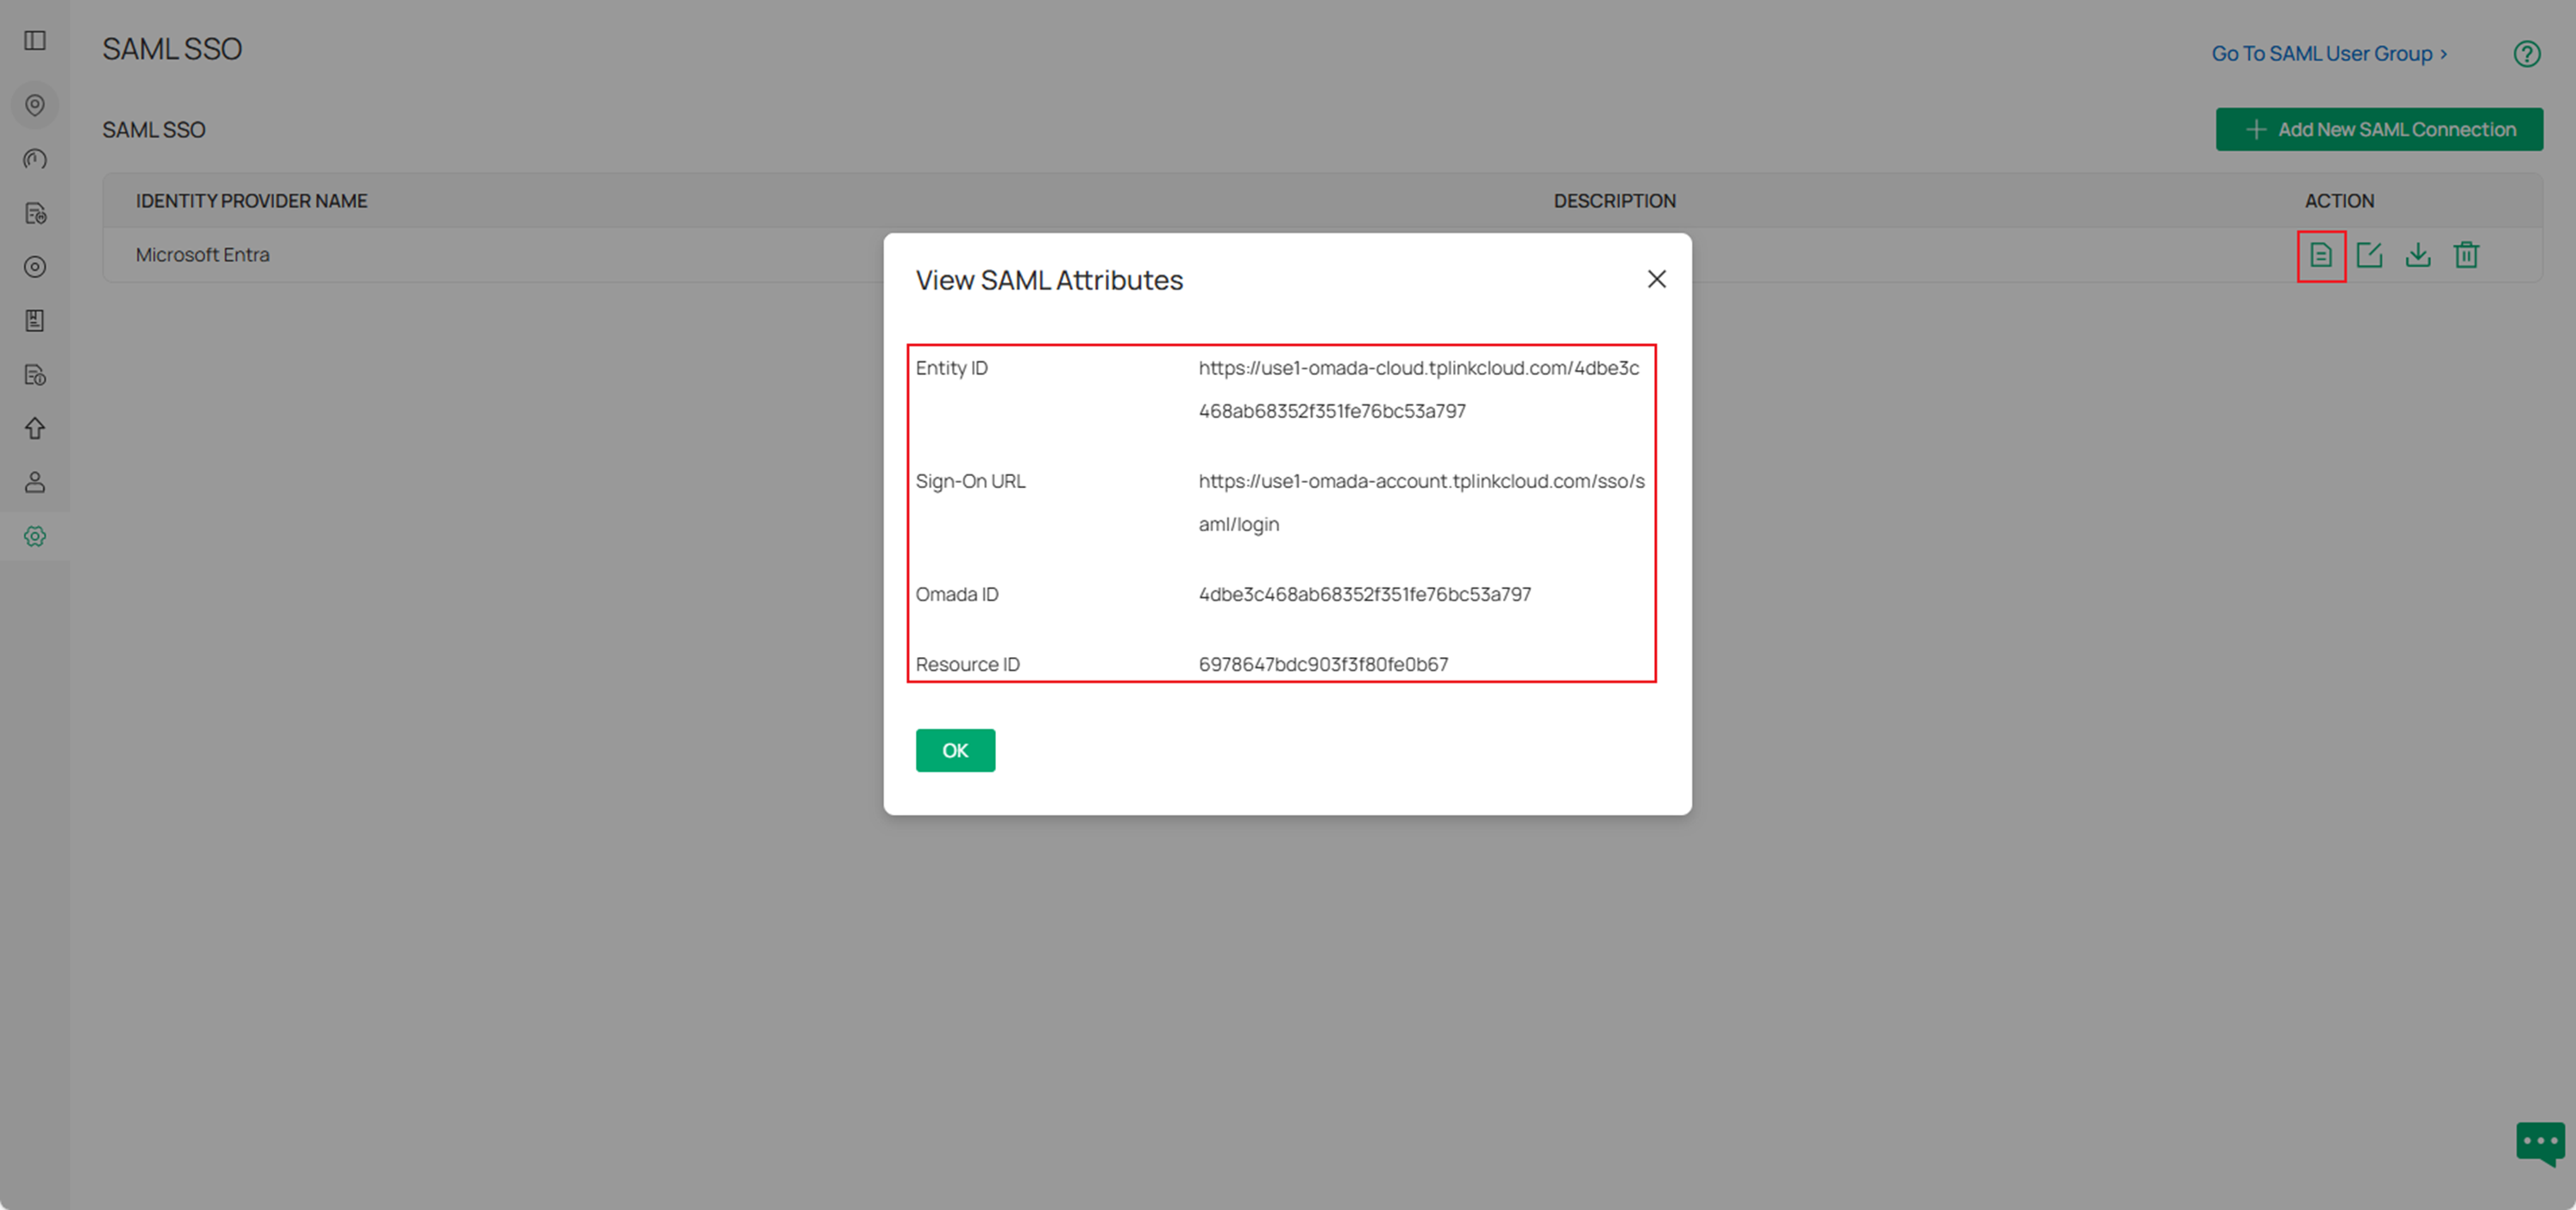
Click the download button to get the metadata.xml file.

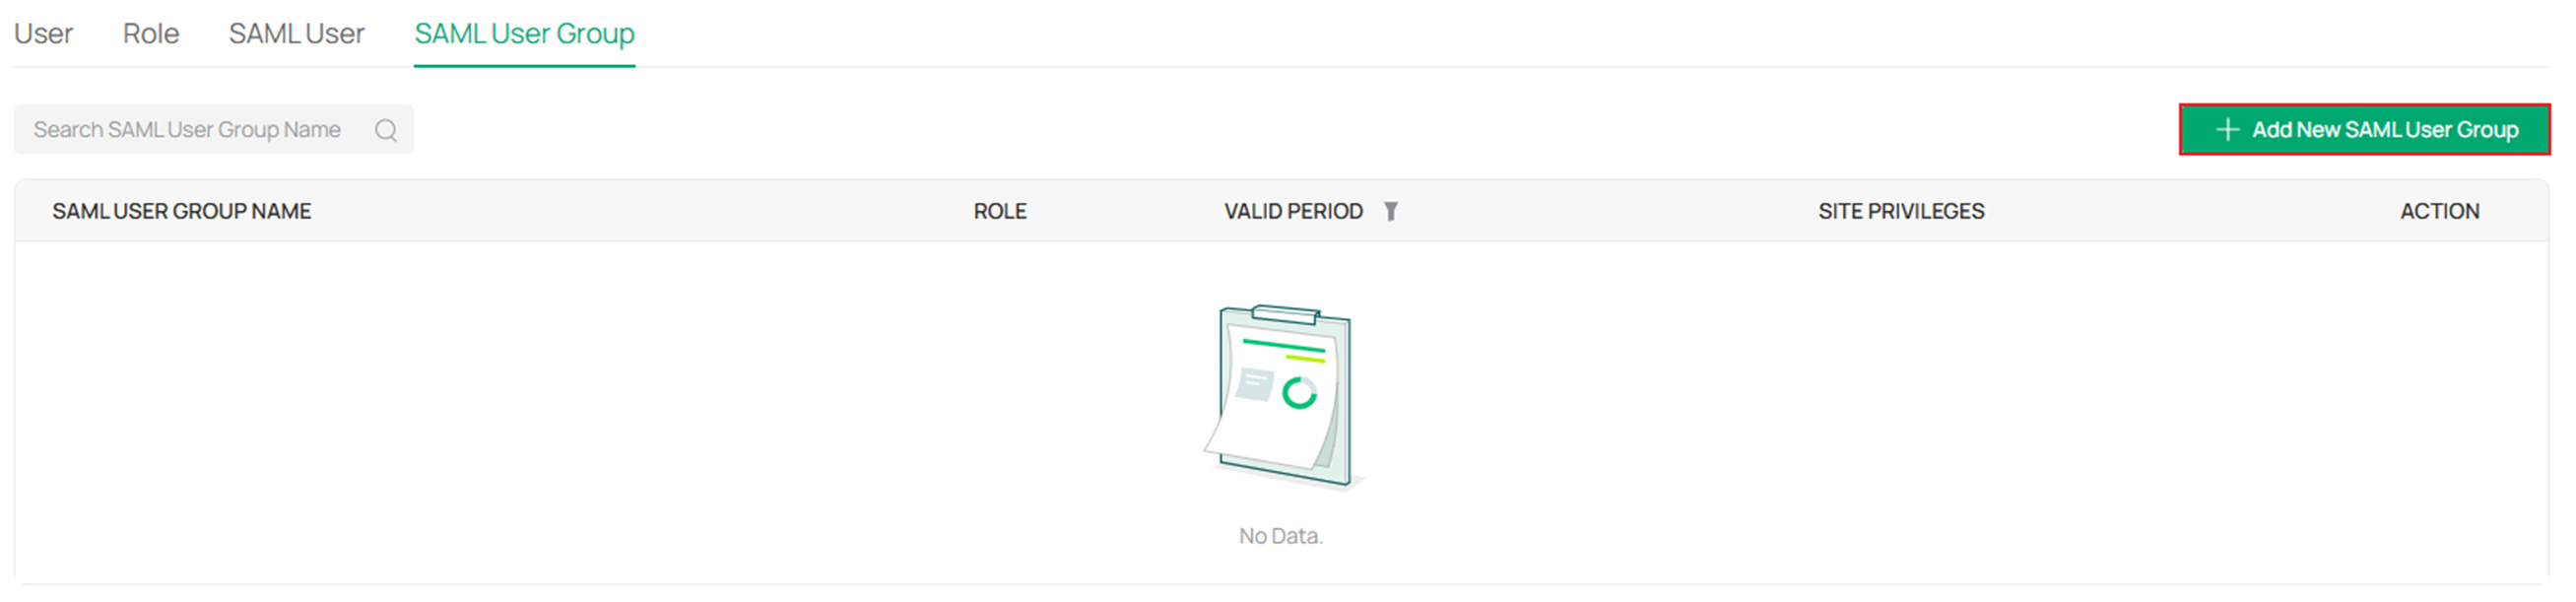
Click Go To SAML User Group.

Click Add New SAML User Group.
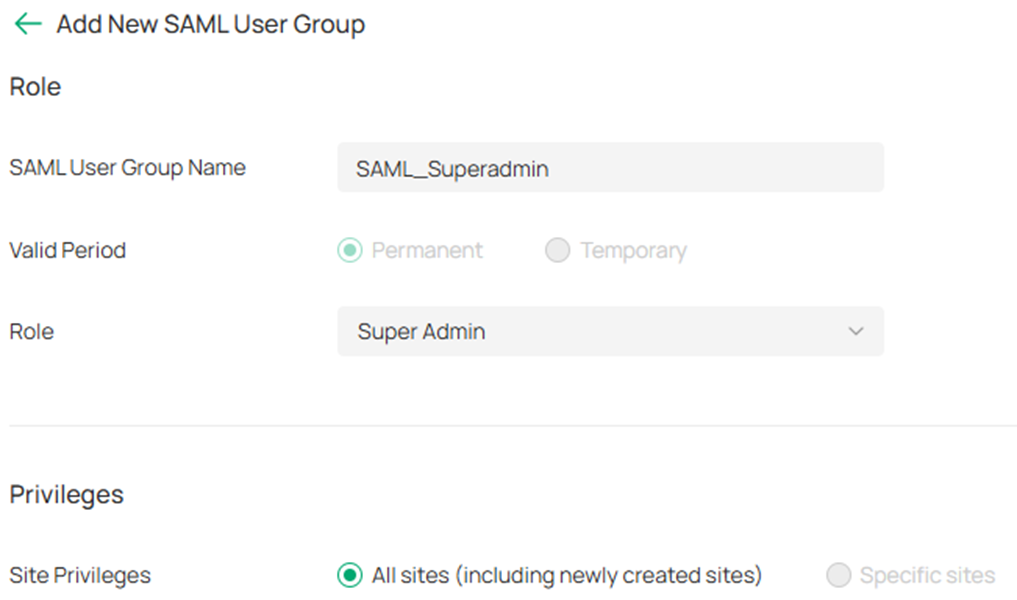
Set the SAML User Group Name, the related role and privileges, then click Create.
Step 4. Continue configuring single sign-on on the Microsoft Entra.
On Entra's homepage, click Enterprise apps. Click the application we created before.

Then go to 2. Set up single sign on.
Click Upload metadata file to upload the metadata.xml file we got in step 3.
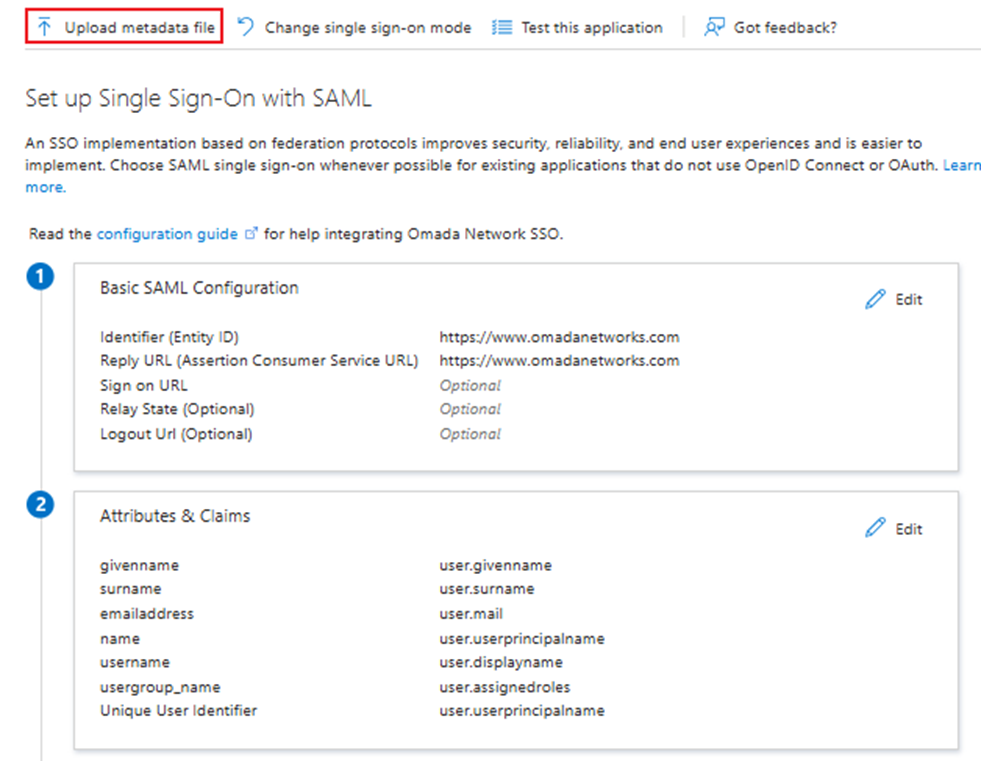
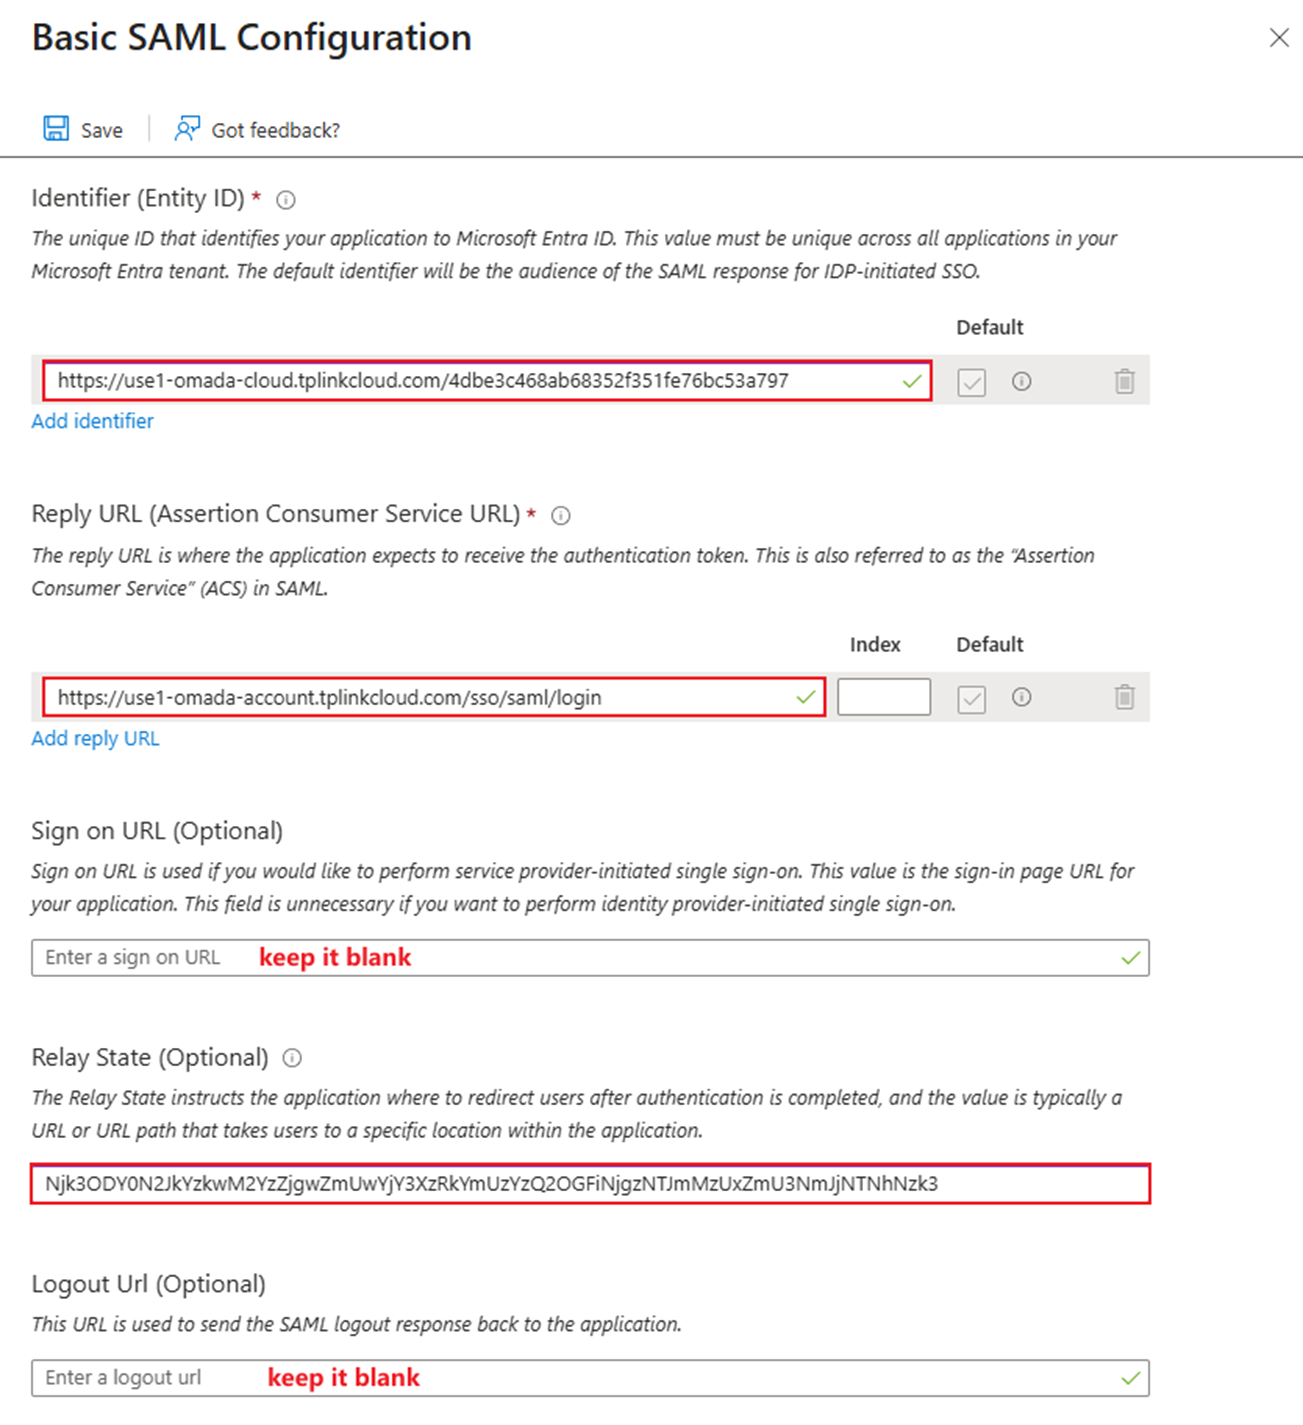
Refer to the picture below and fill in the other basic SAML configurations.
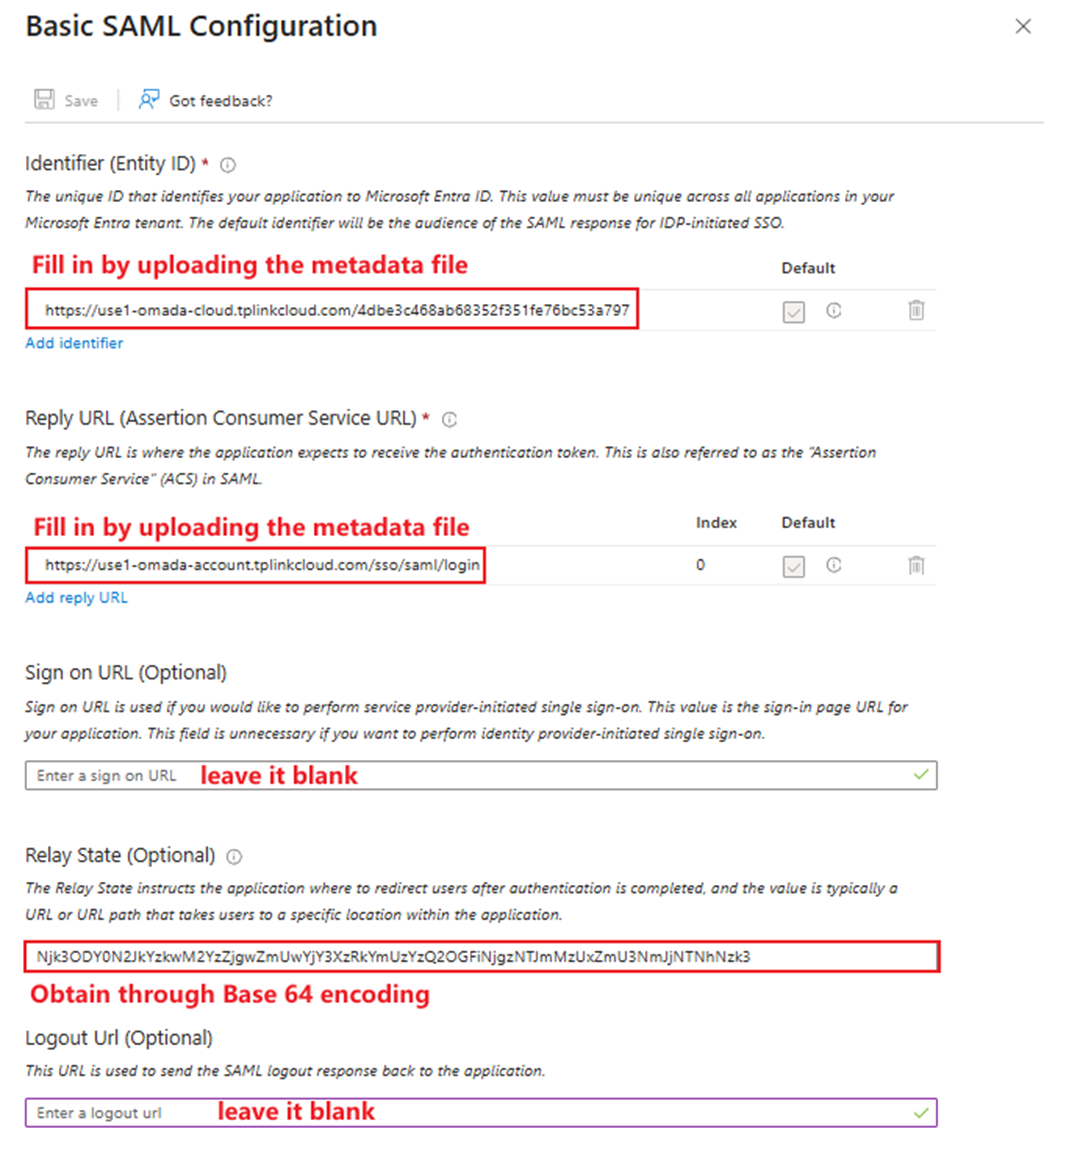
- Identifier (Entity ID): The same as the Entity ID we saw in the Controller’s SAML Attributes.
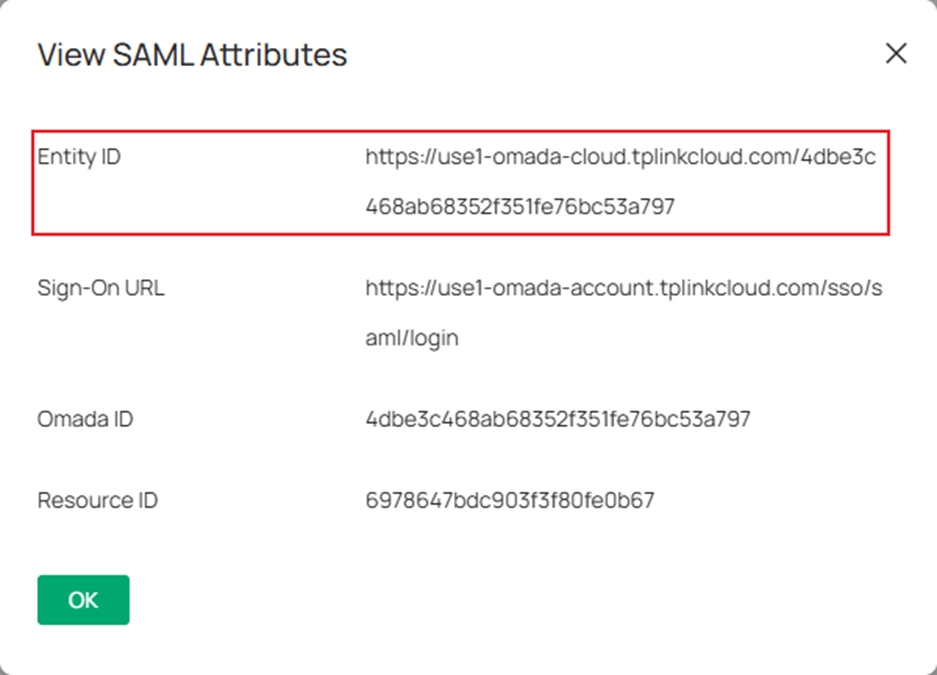
- Reply URL (Assertion Consumer Service URL): The same as the Sign-On URL we saw in the Controller’s SAML Attributes.
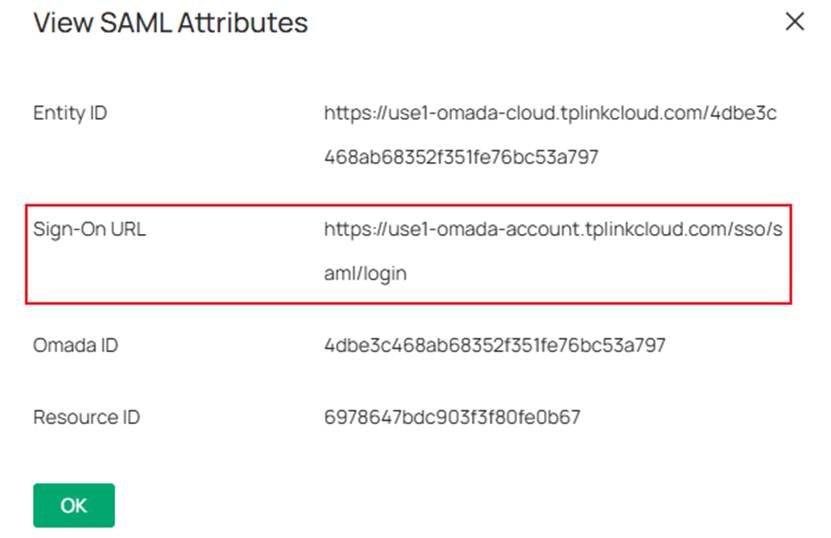
- Sign On URL(Optional): This text bar should be blank. Please don’t confuse this with the Sign-On URL we saw in the Controller’s SAML Attributes.
- For Relay State, we must encode the string “resourceId_omadaId” using Base64. We can use any open-source Base64 encryption tool to encrypt this script.
For example:

Step 5. Create a new app role.
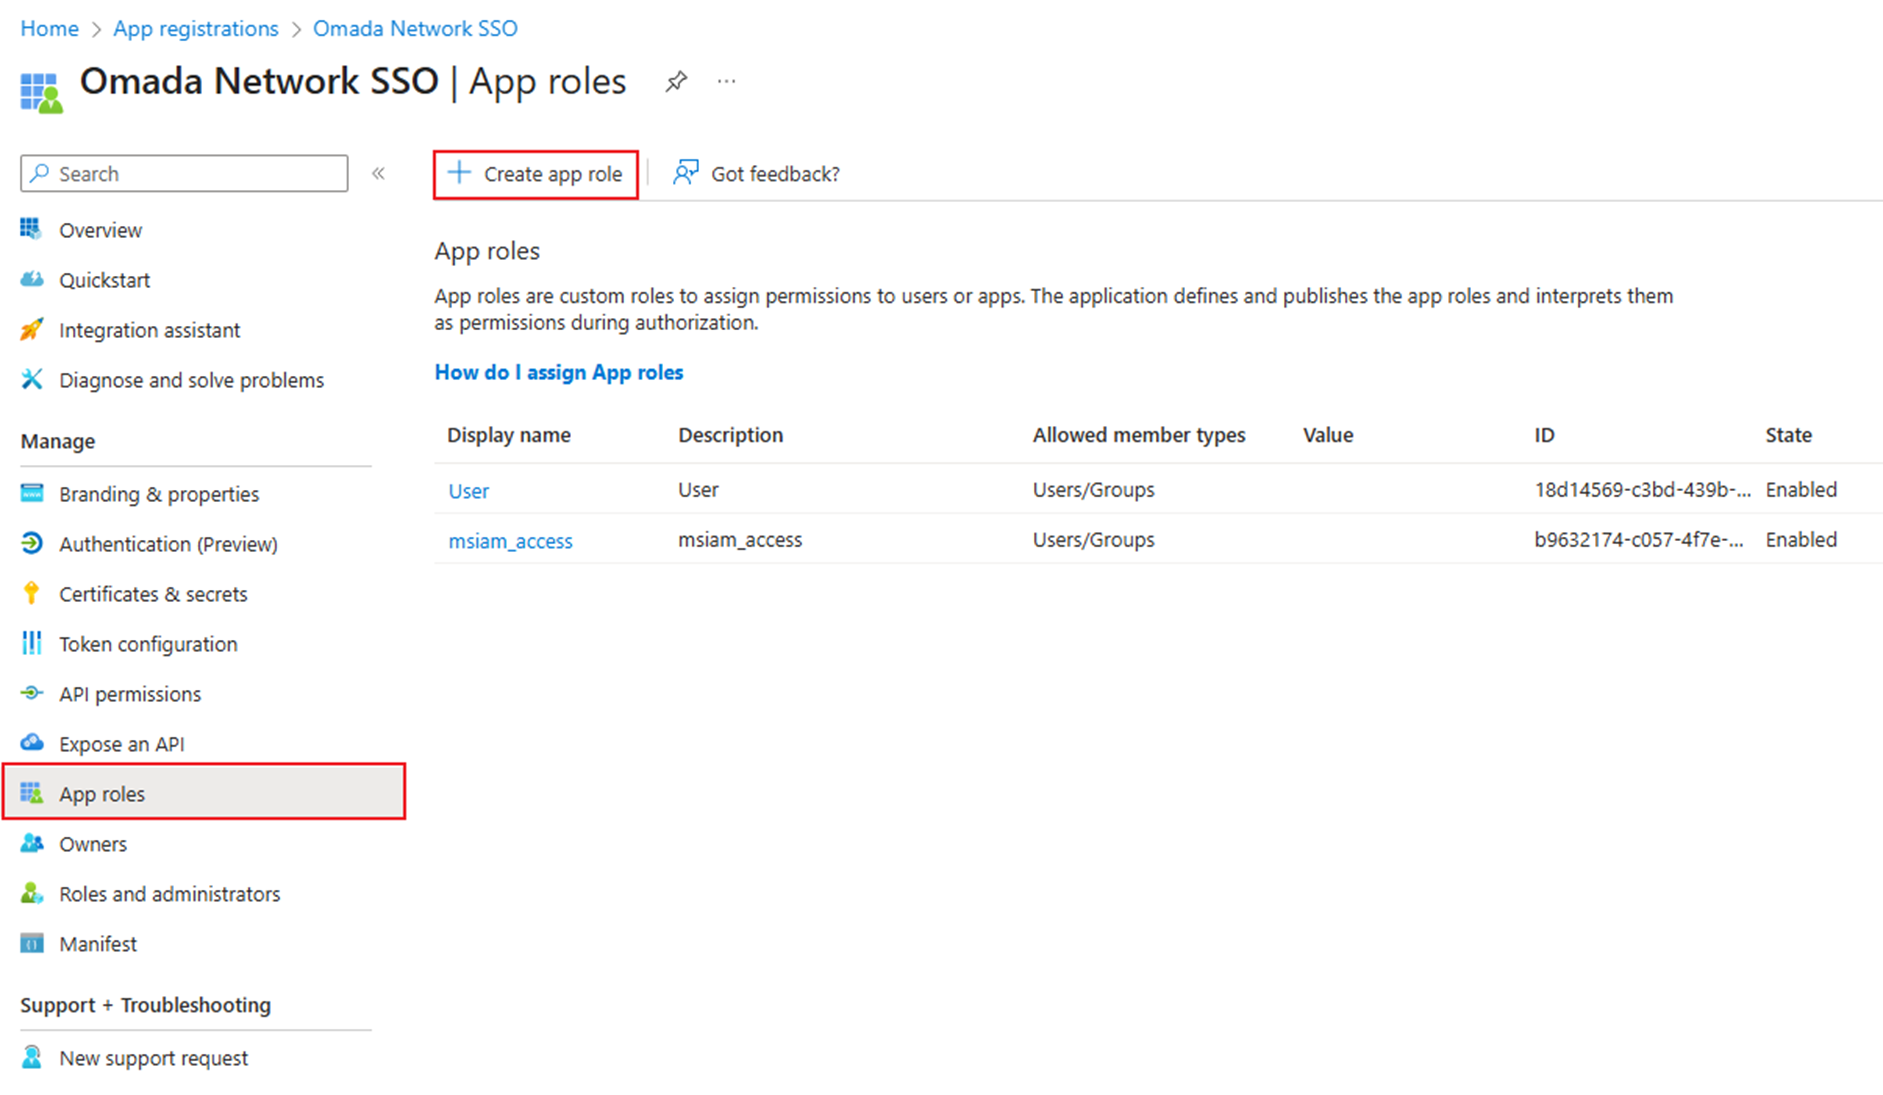
Go back to App registrations > All applications and click the application we created before to continue configuring.

Go to App roles and click Create app role.
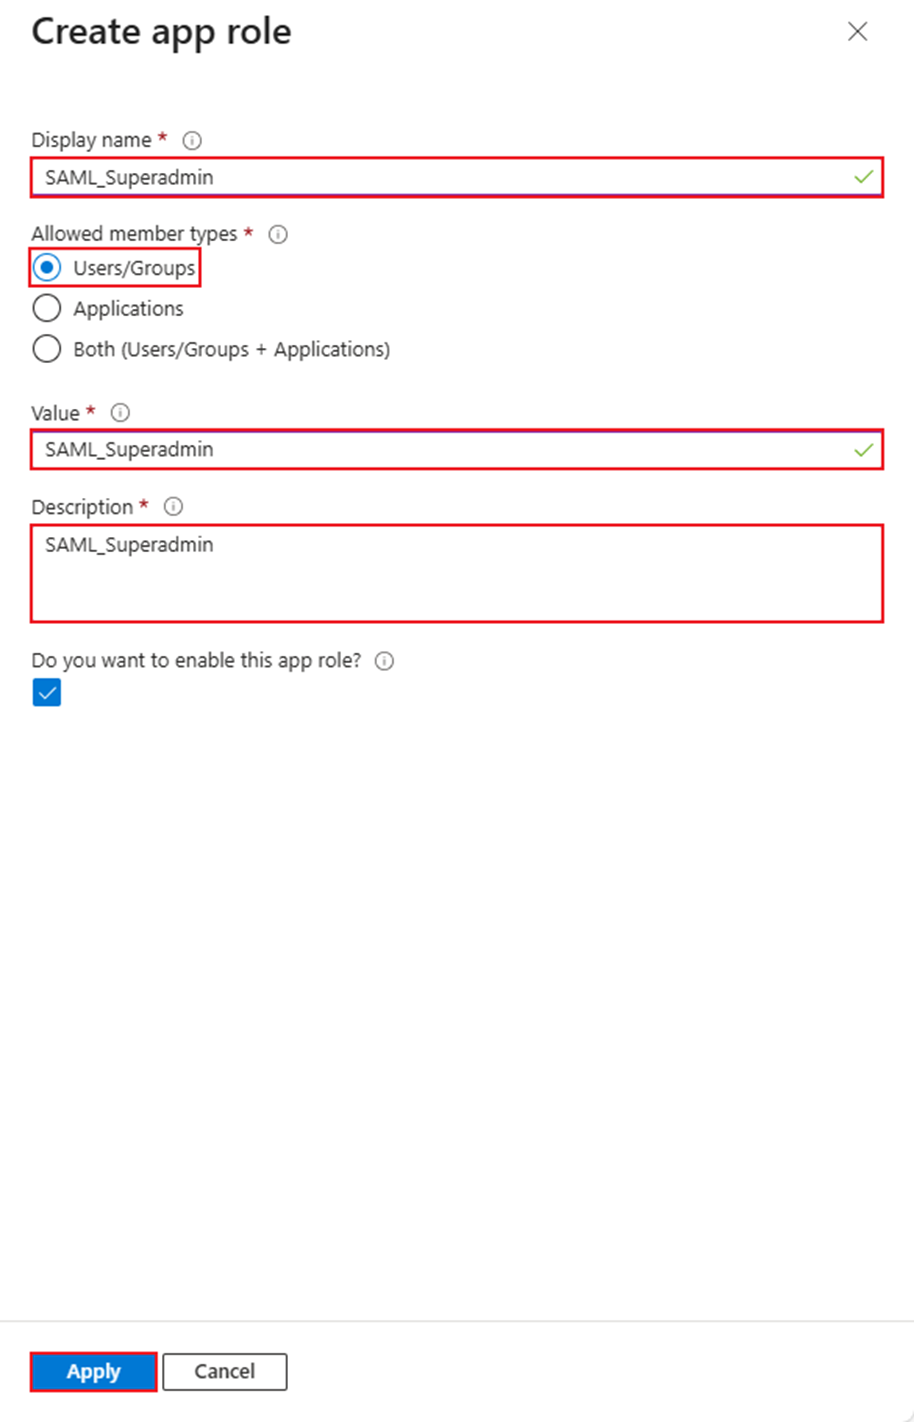
Configure both the Display name and Value to be the same as the SAML User Group Name we configured on the Controller in Step 3. Select the types as Users/Groups and input some necessary descriptions. Then click Apply.
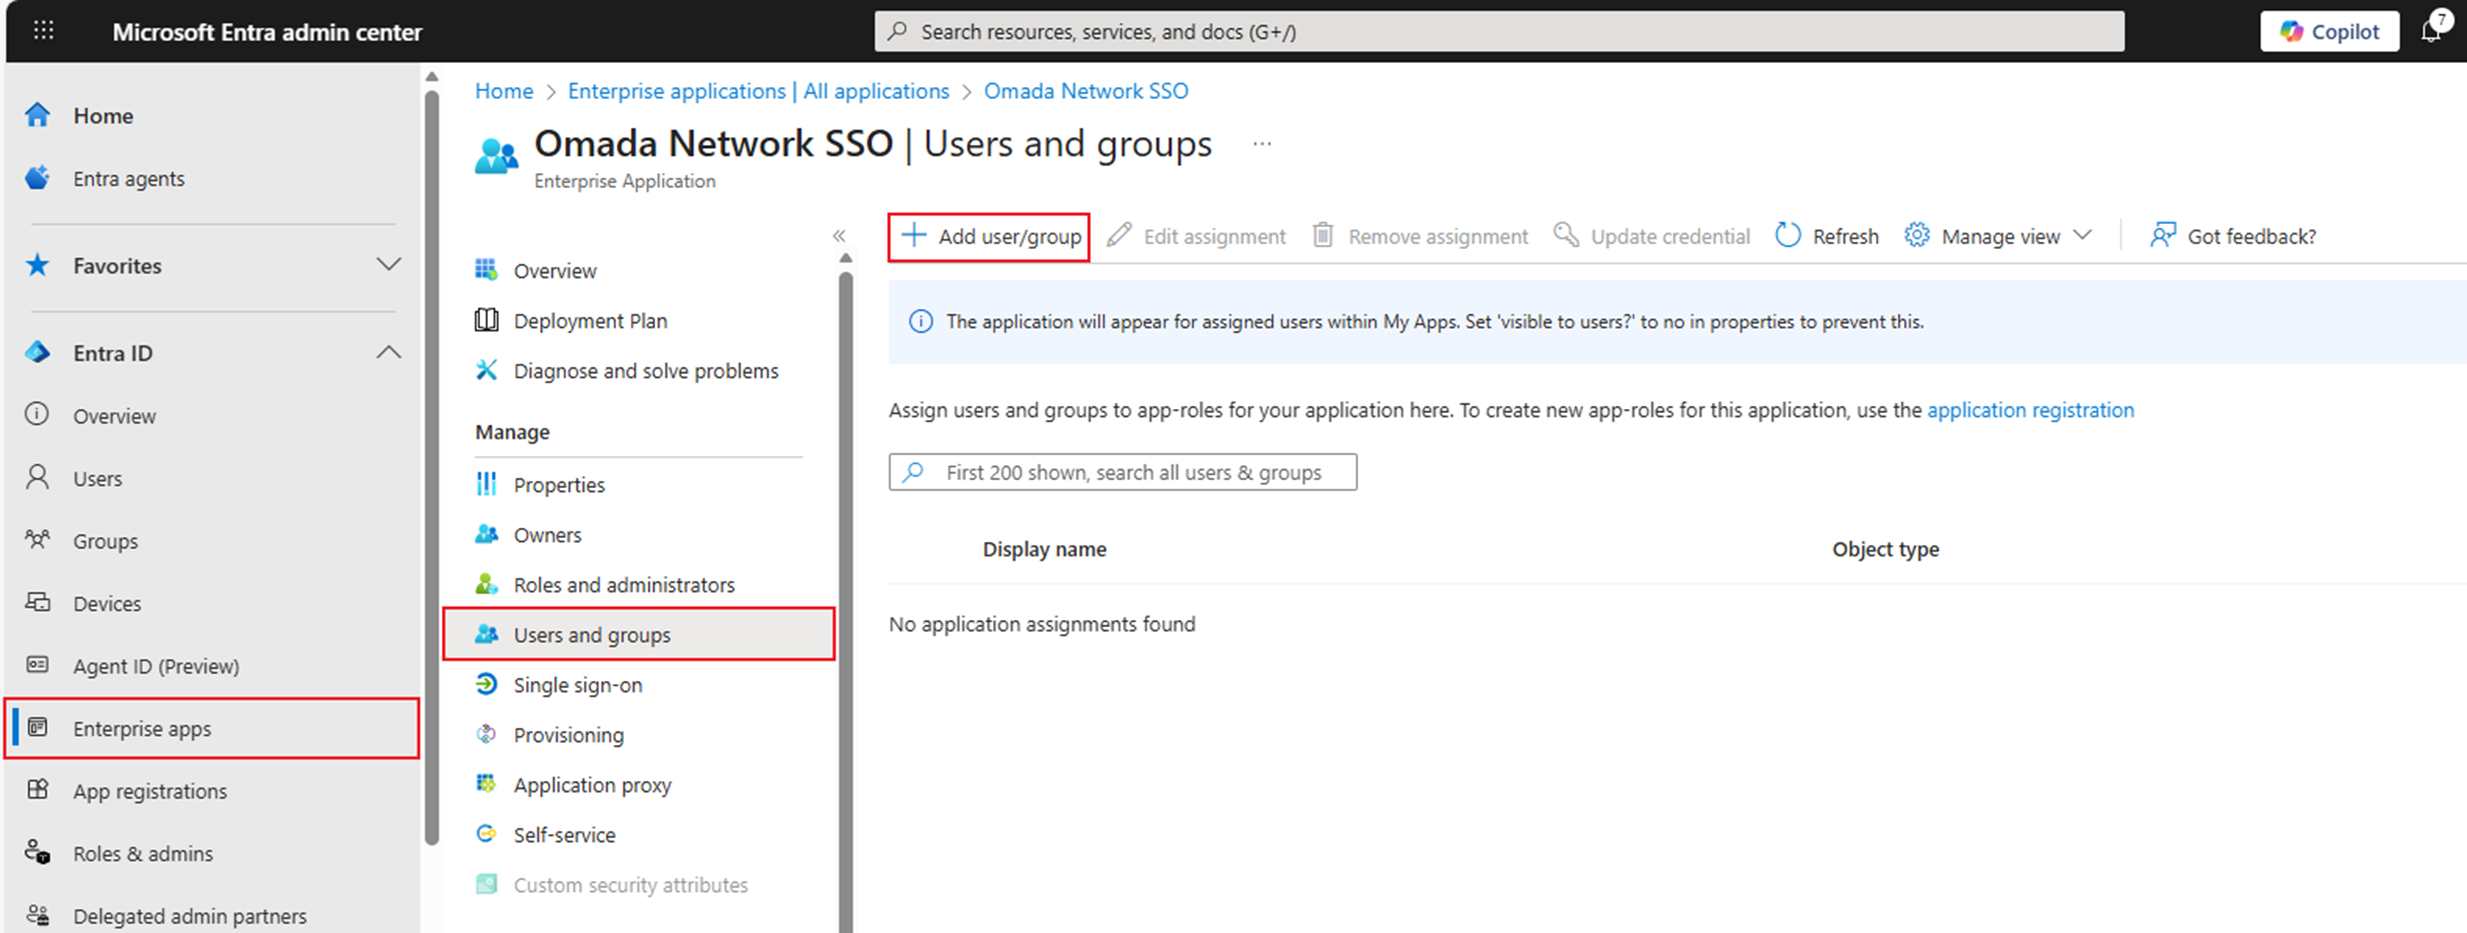
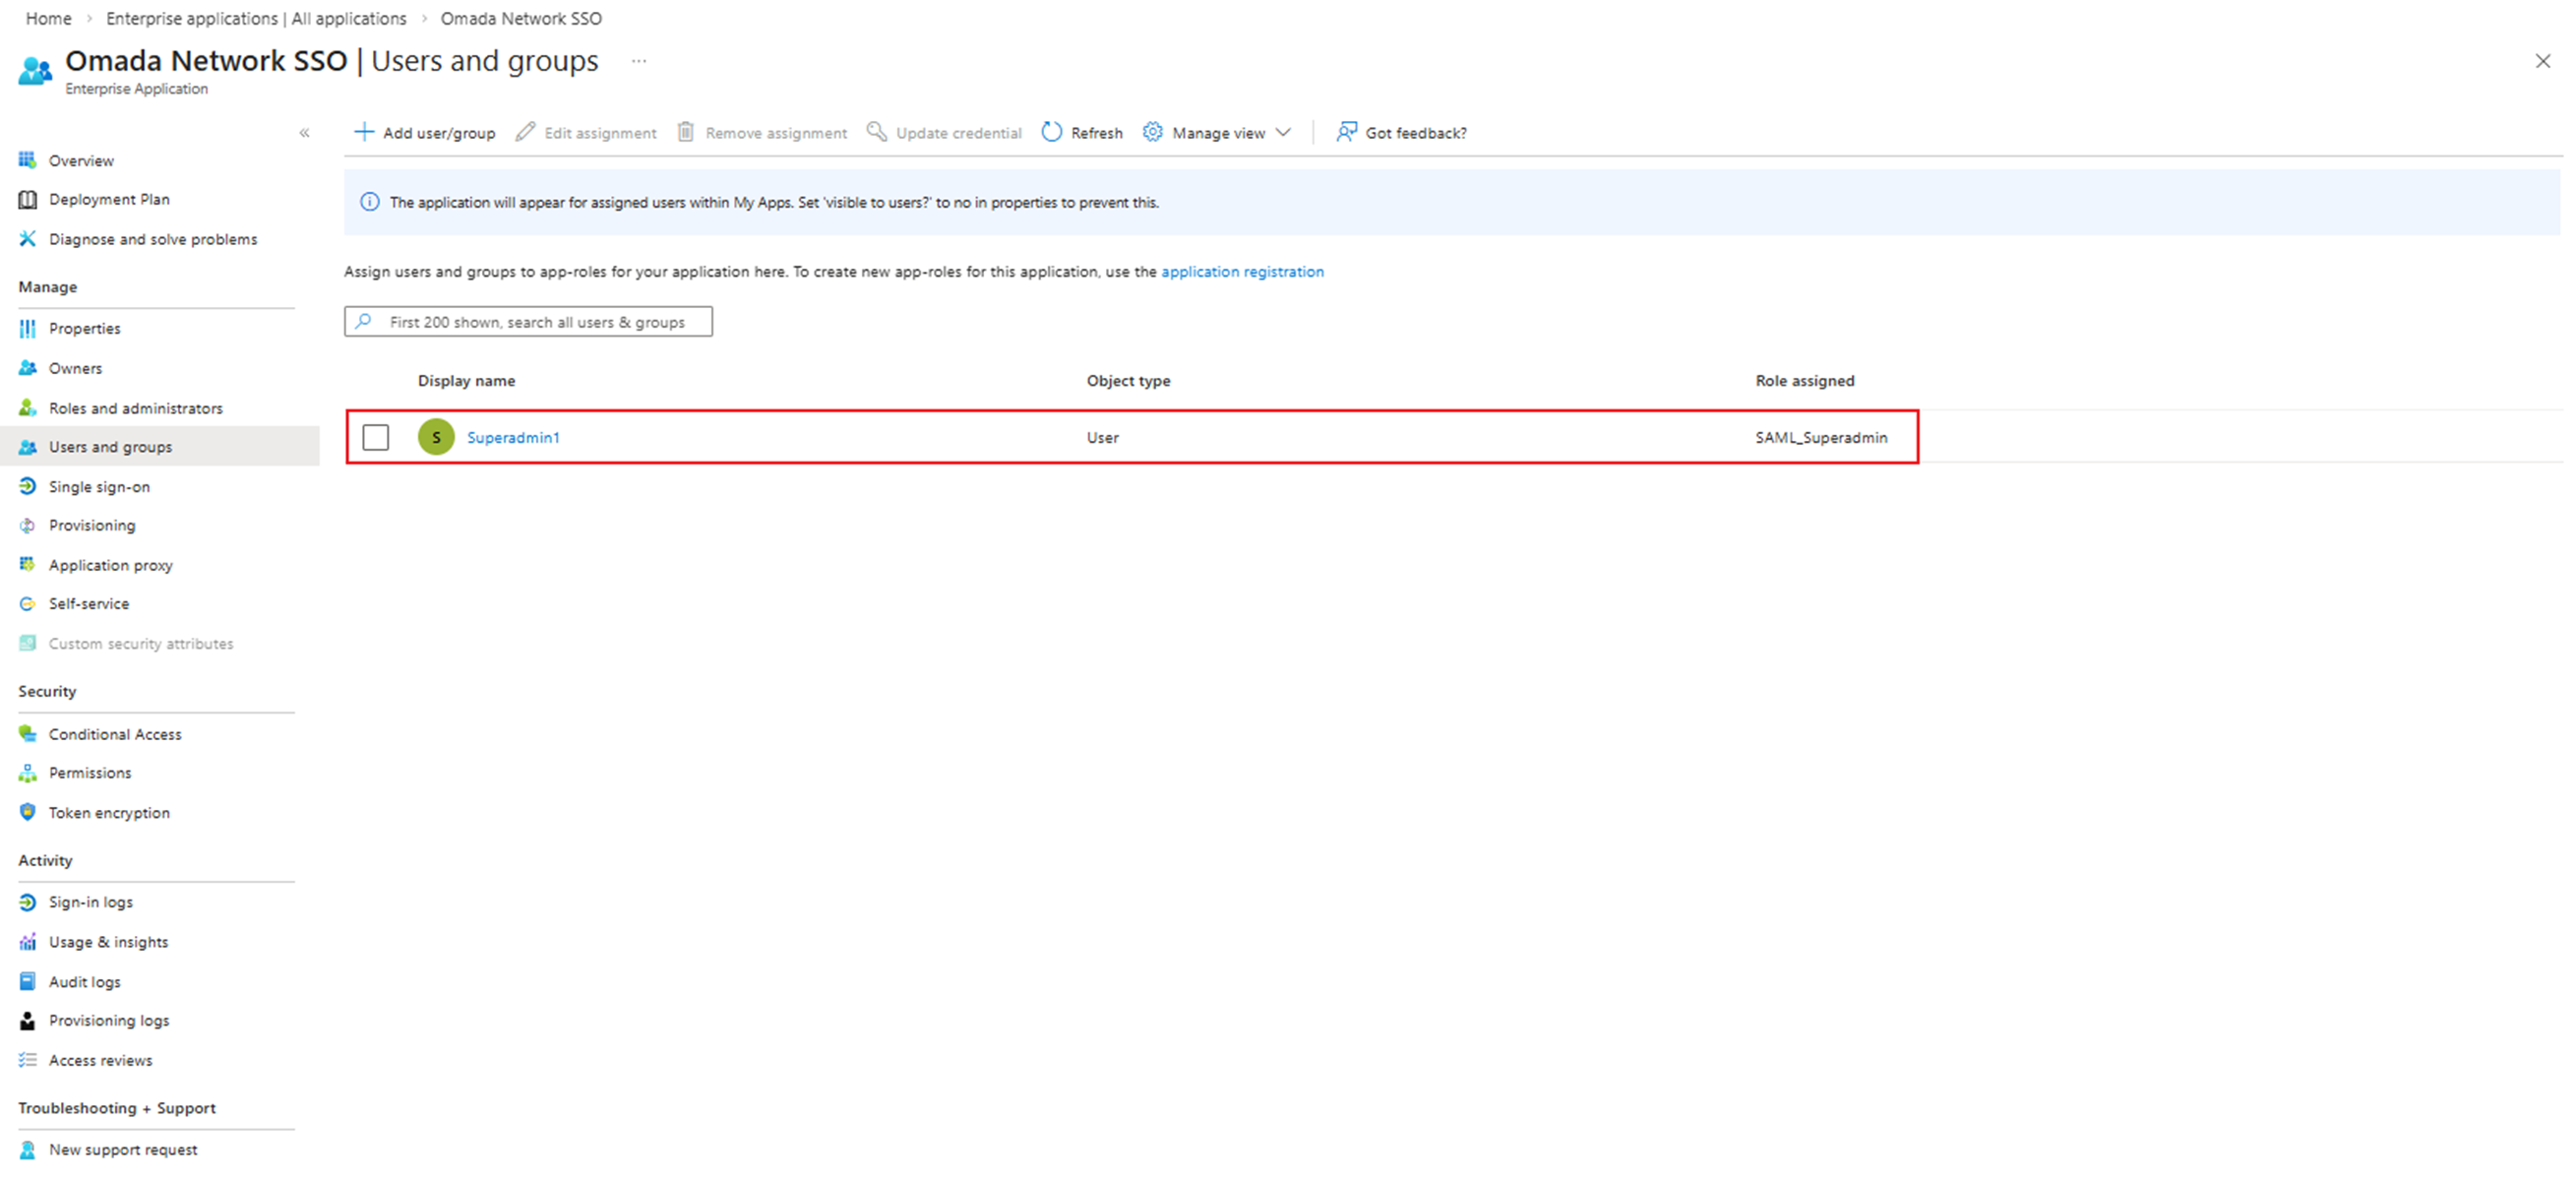
Step 6. Assign the role to specific users.
Go back to Enterprise App on Entra's homepage, click the application we created before.
Go to Users and Groups and click Add user/group.
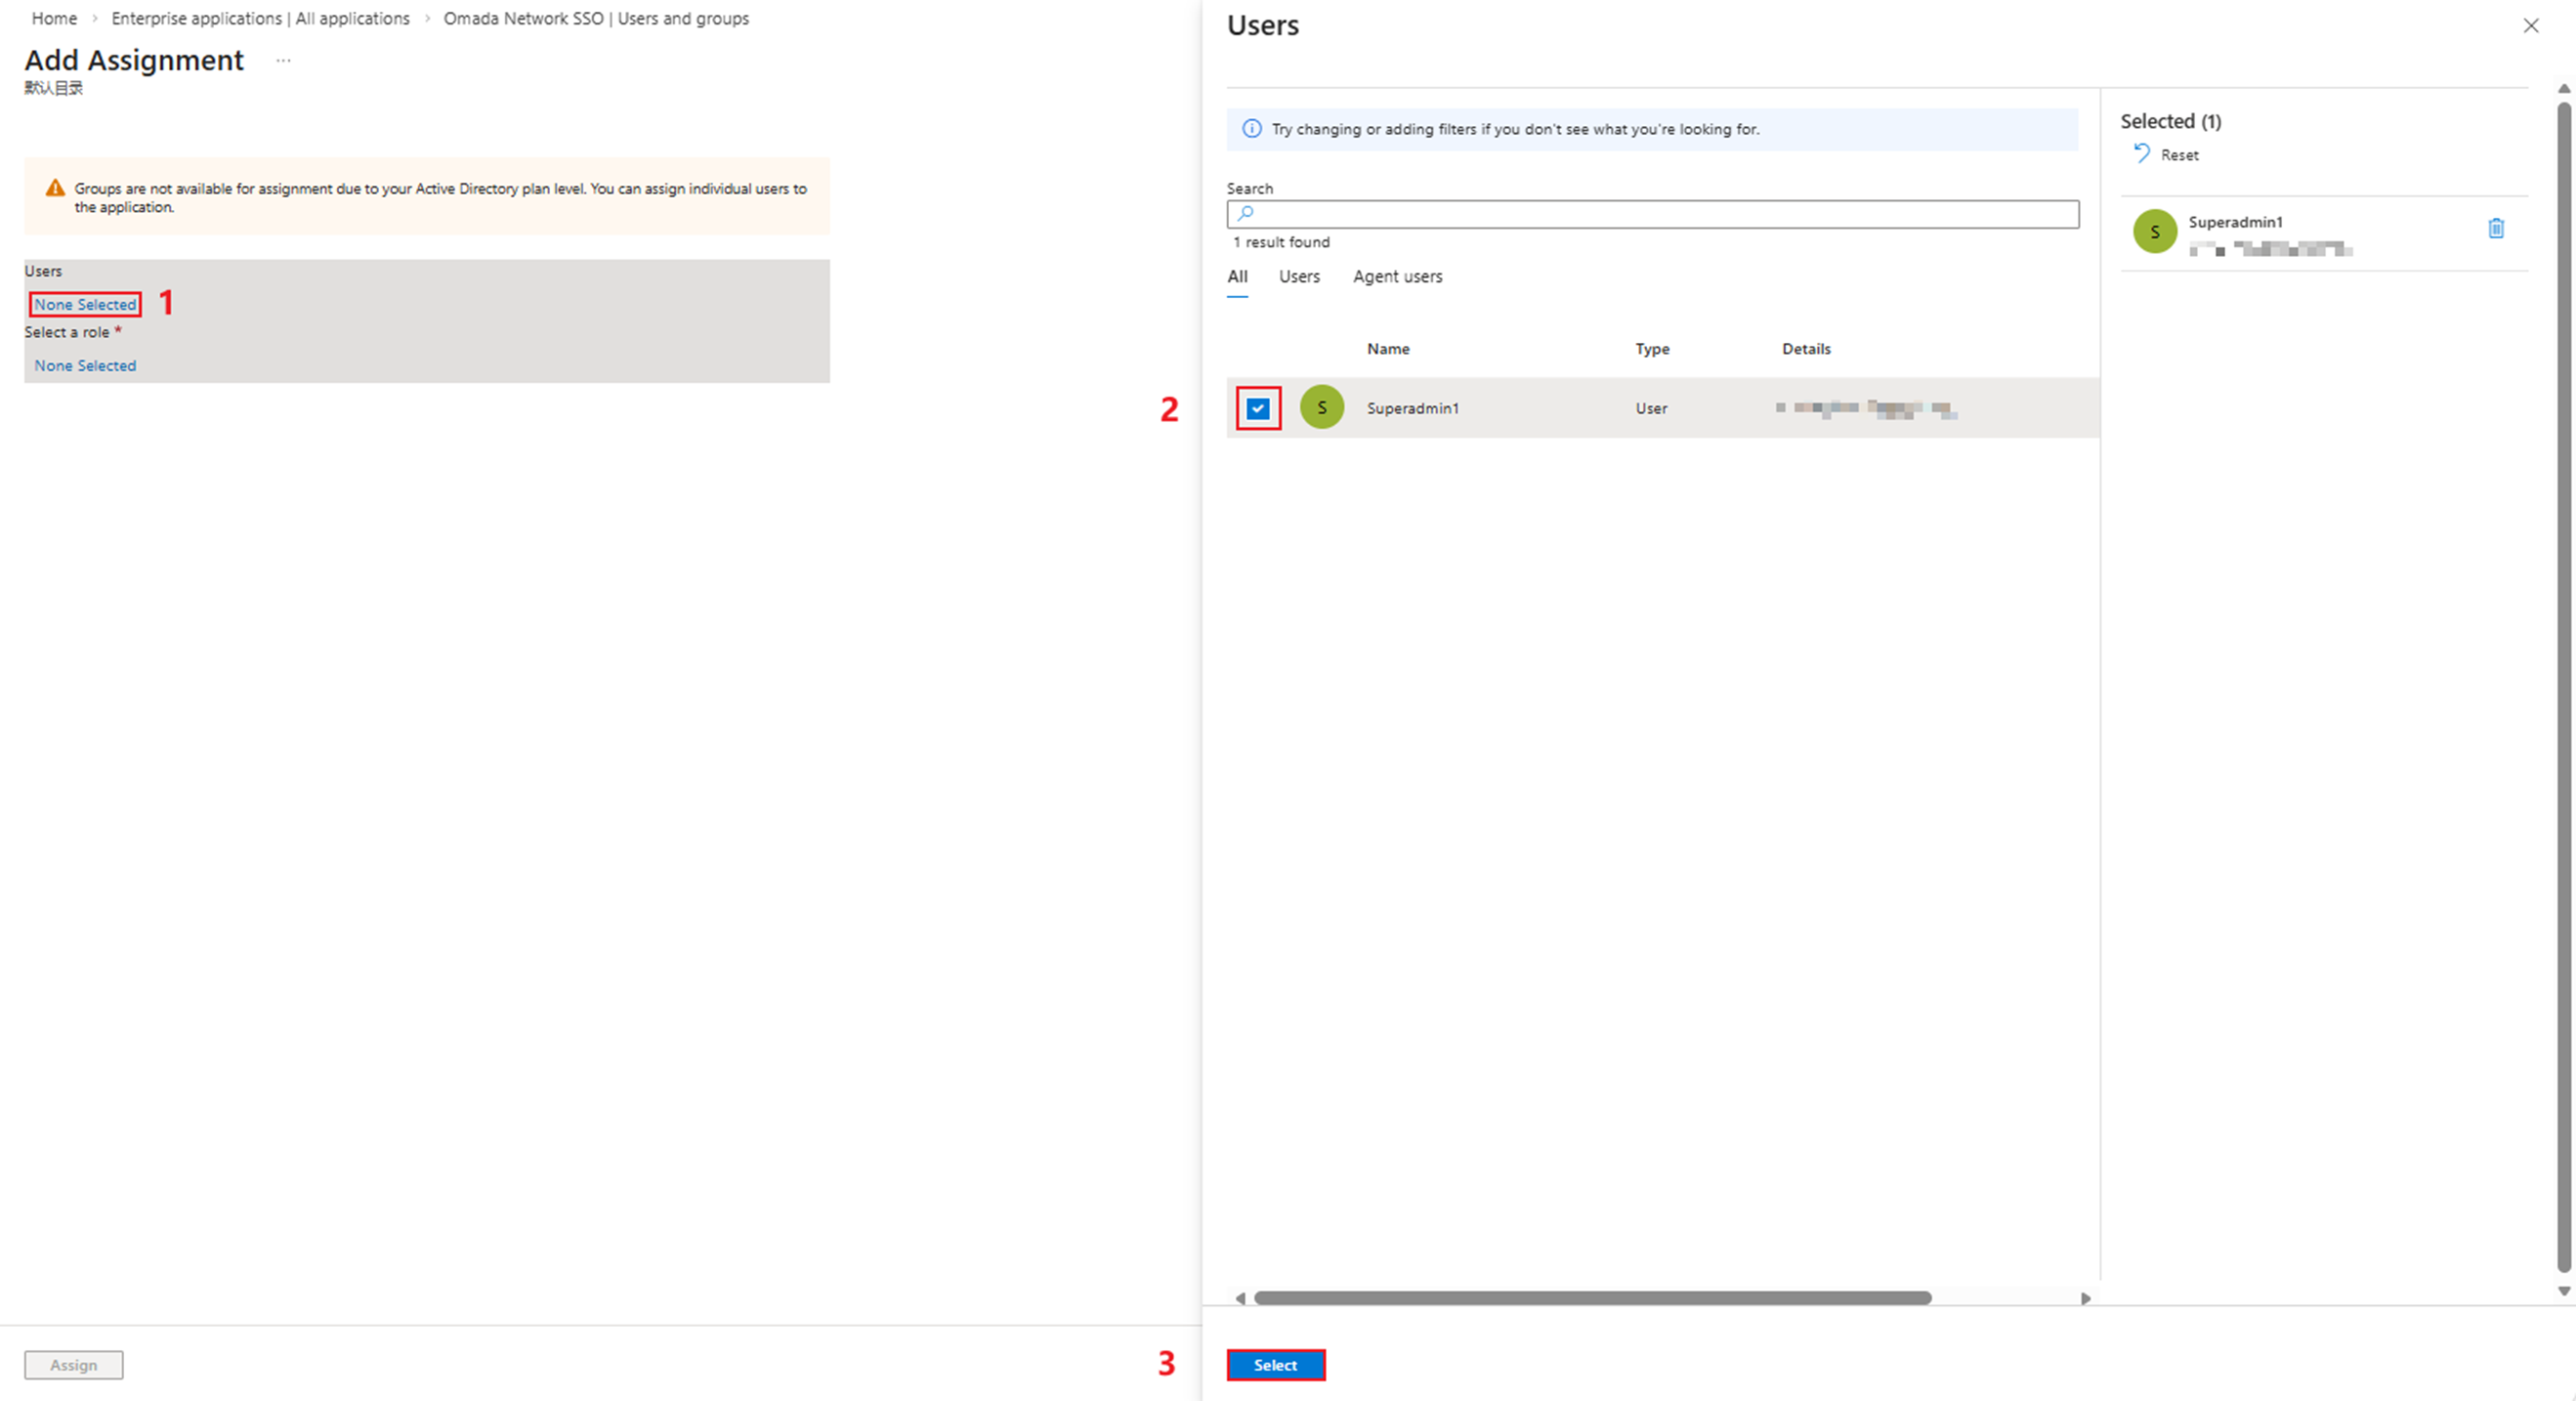
Click the first None Selected and select the users we are going to assign the role, then click Select.
Click the second None Selected and select the role we created before, then click Select.
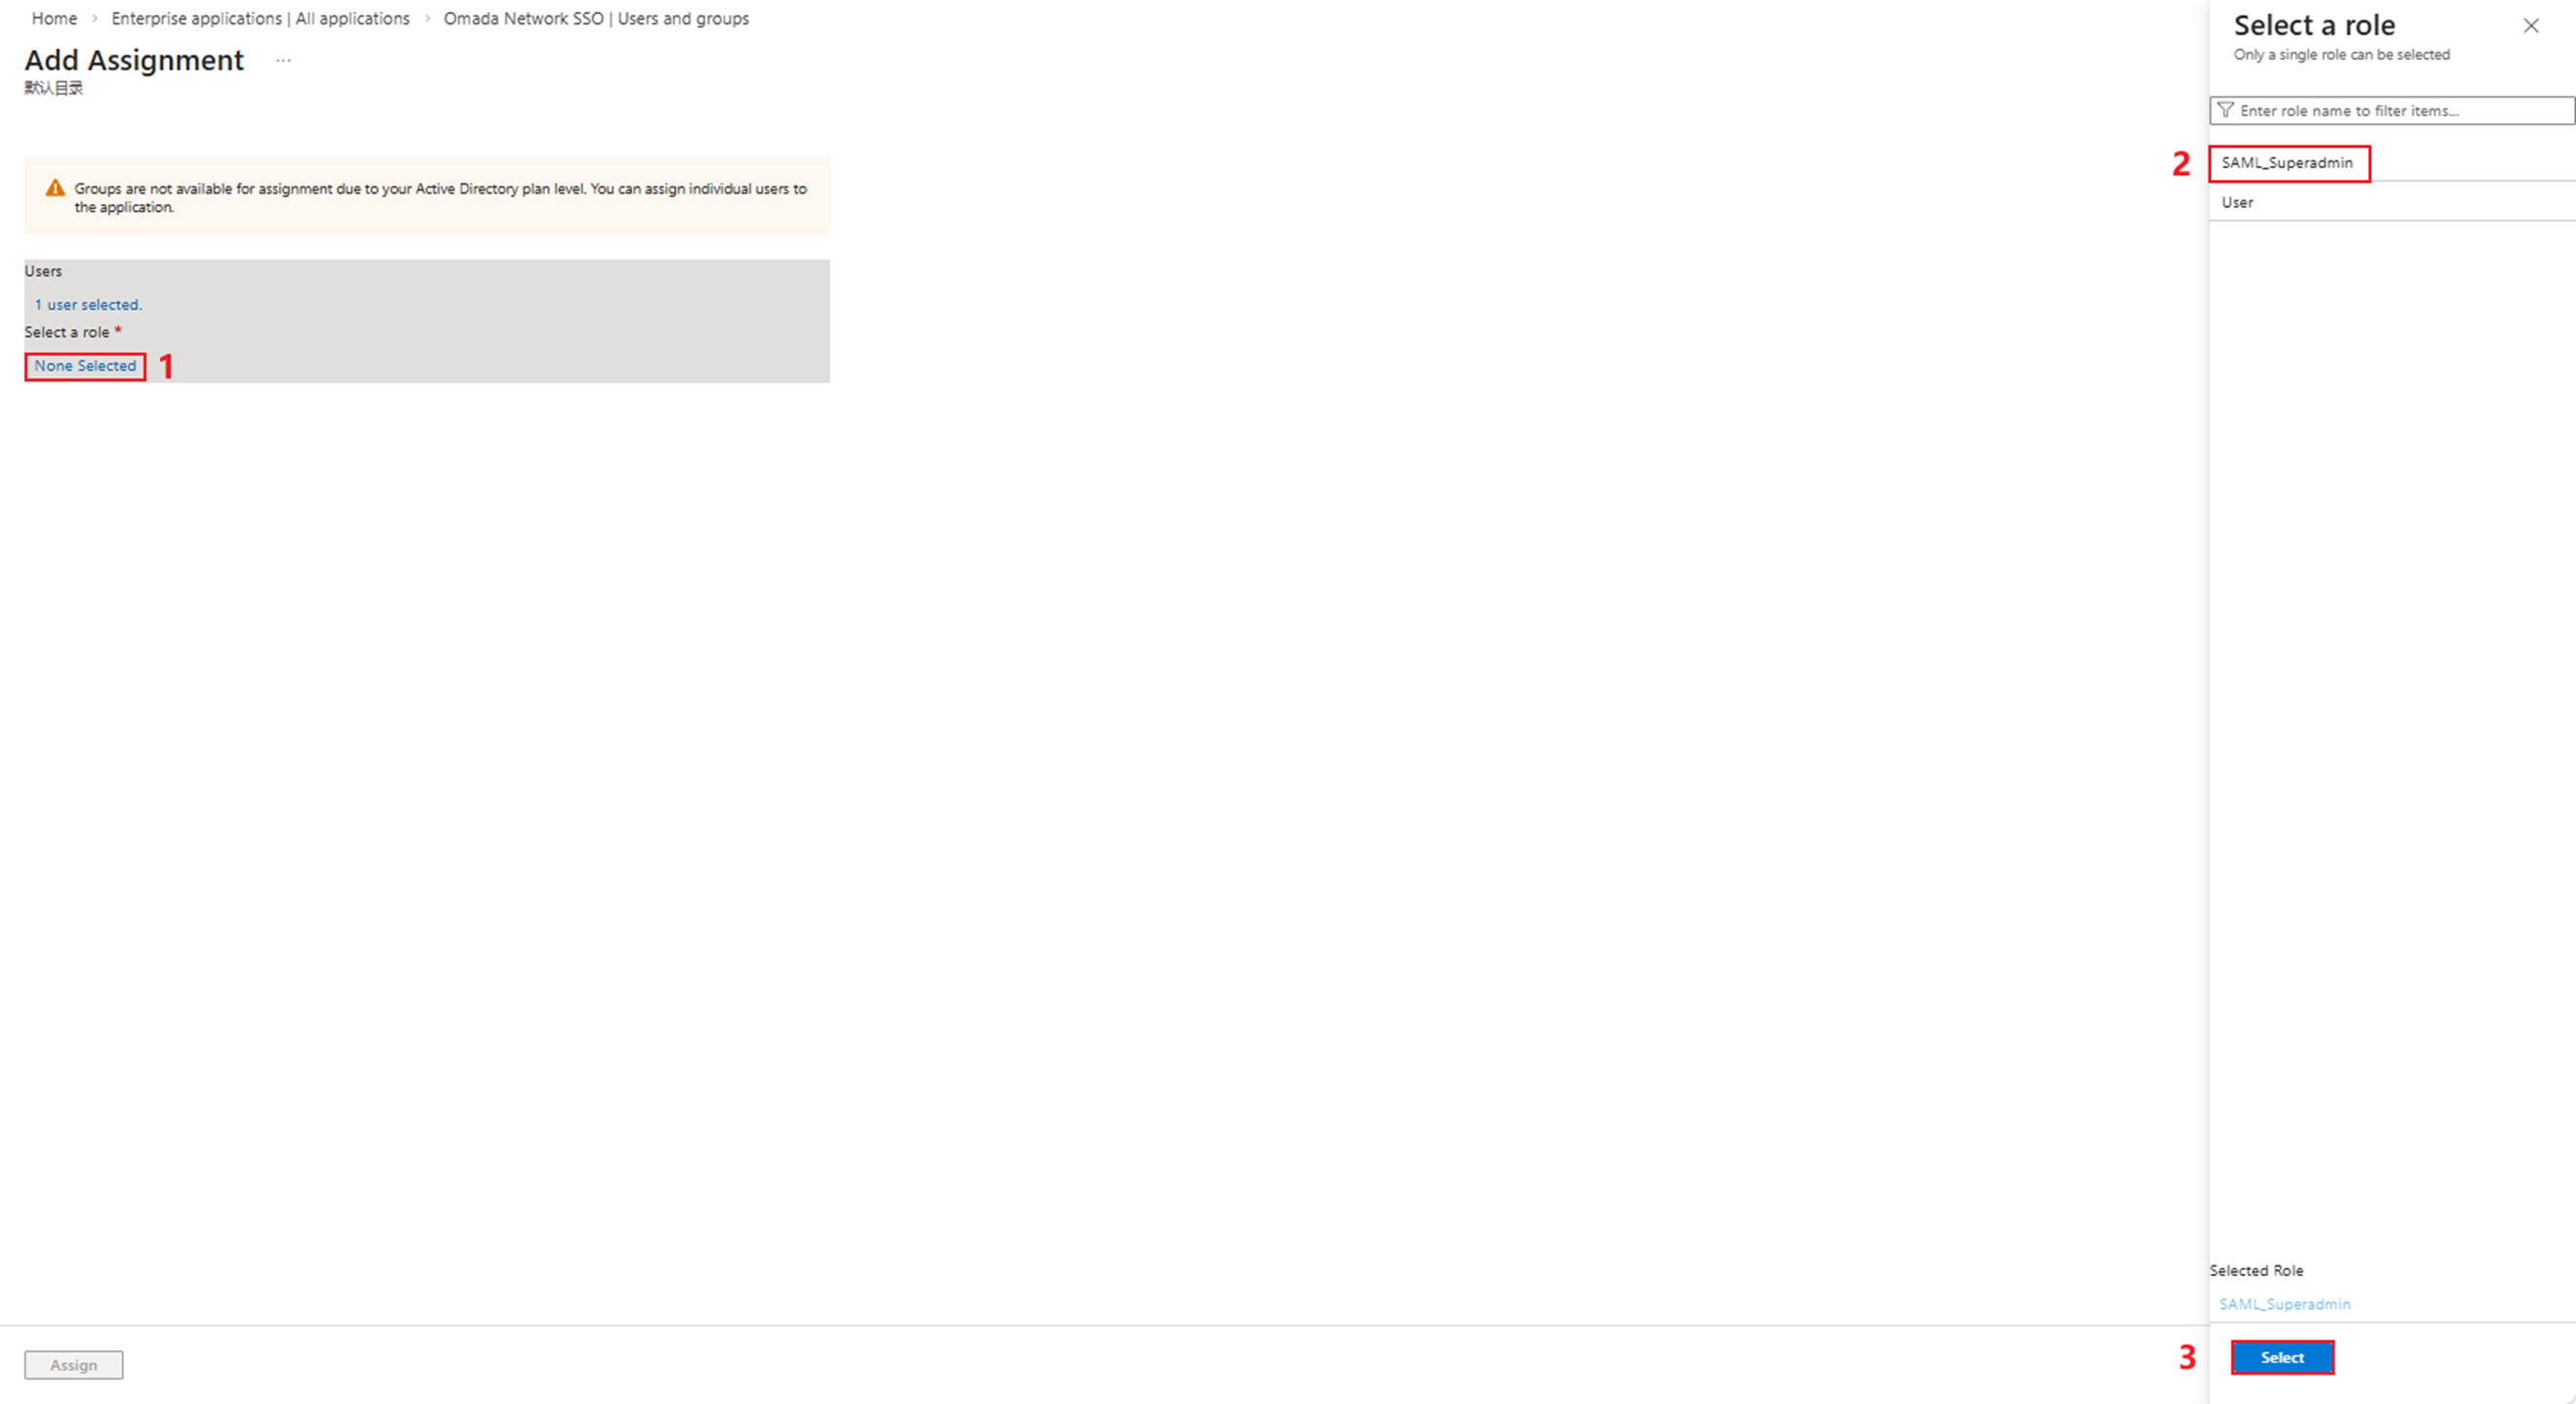
Then click Assign.
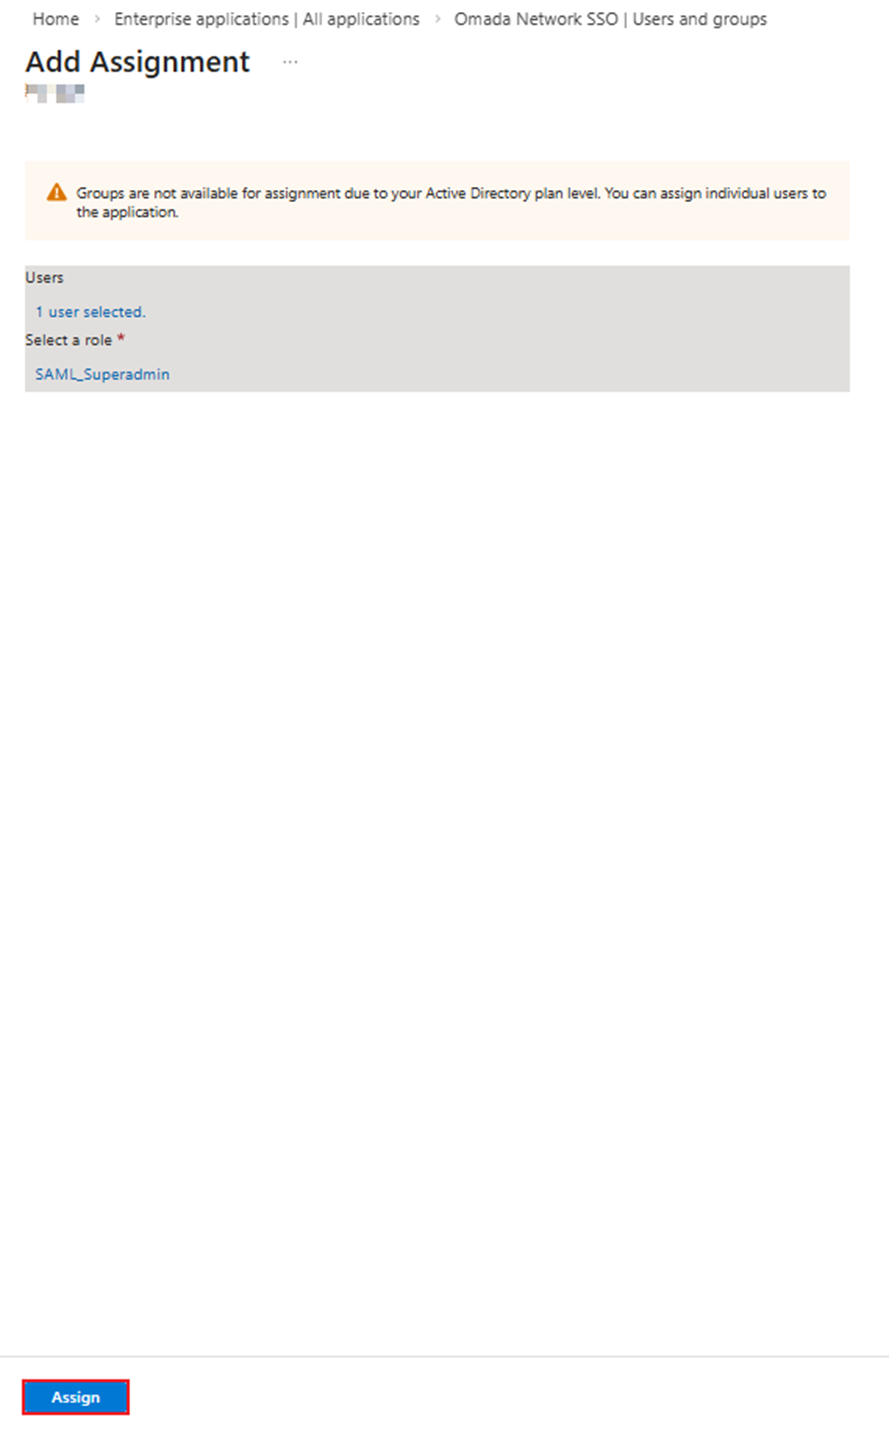
We have now completed the role assignment.
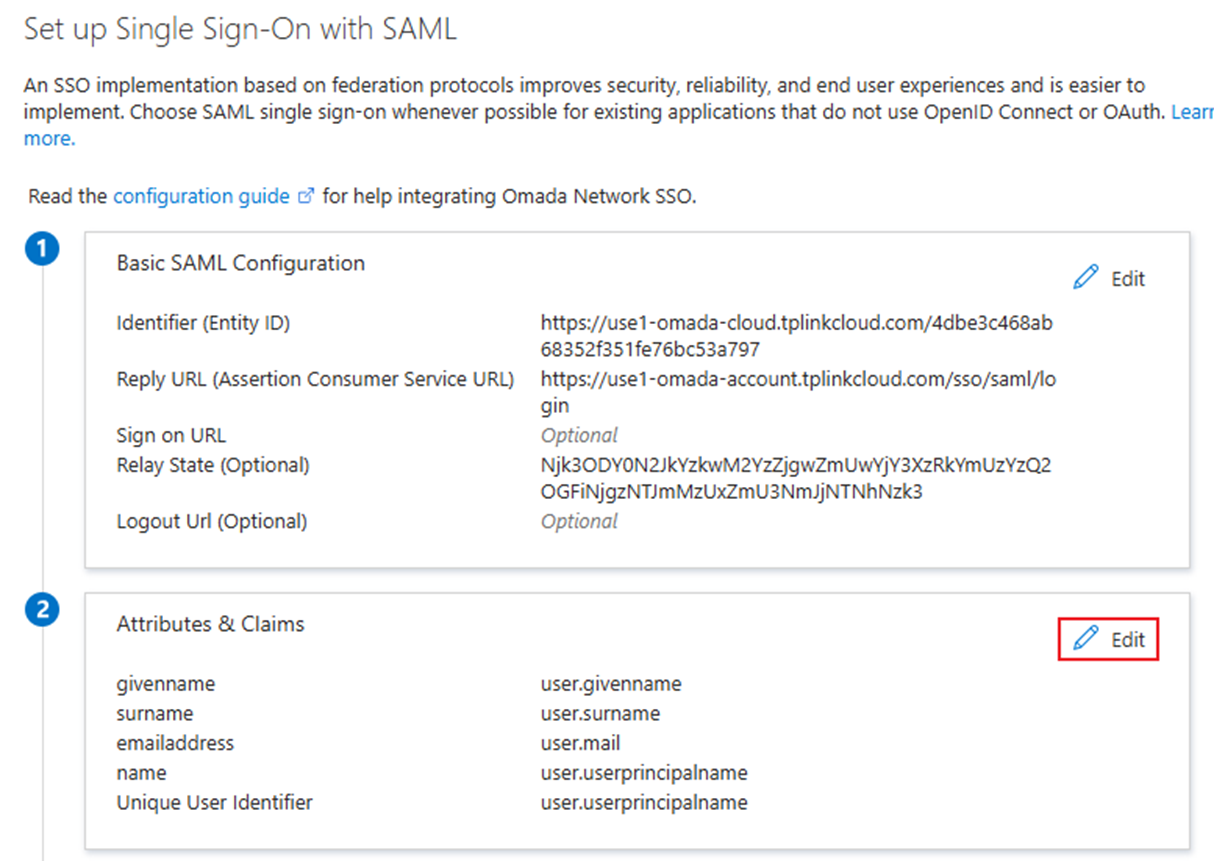
Step 7. Continue configuring single sign-on on Entra.
Go back to Enterprise App on Entra's homepage, click the application we created before.

Go to 2. Set up single sign on.

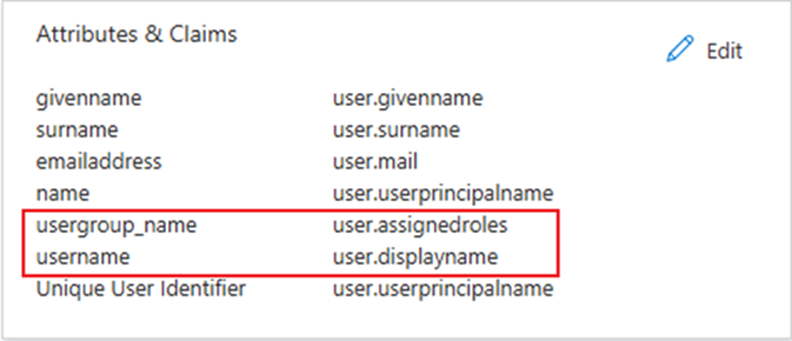
Click Edit in Part 2— Attributes & Claims to edit the attributes.
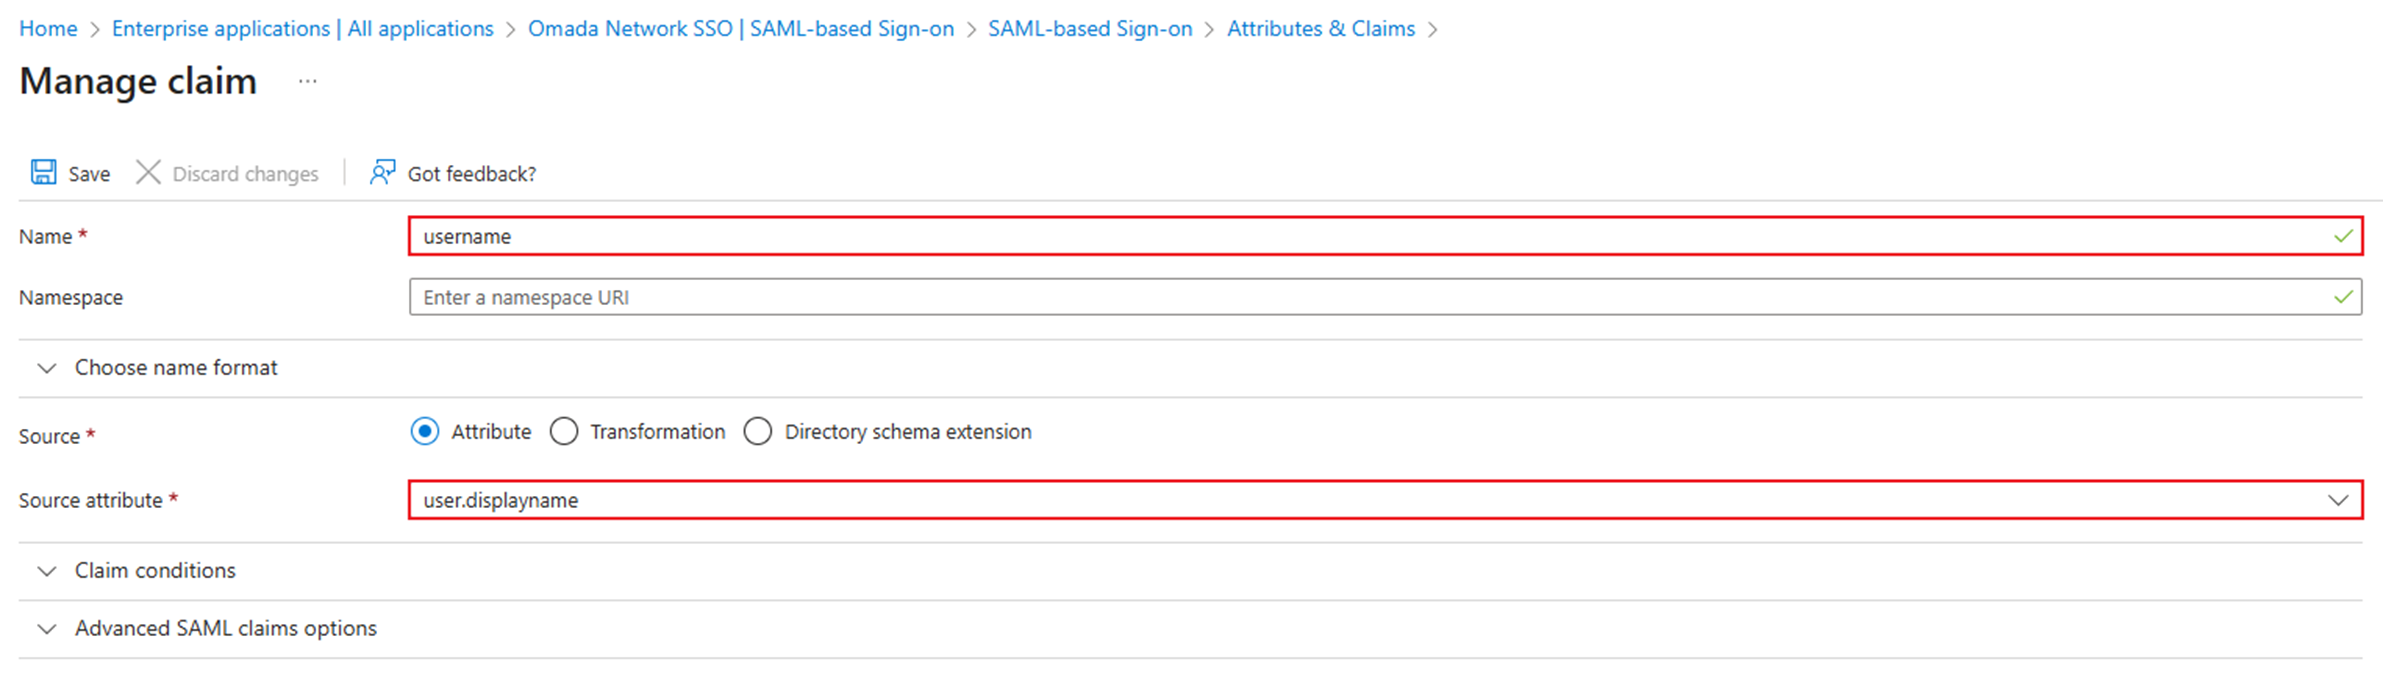
Click Add new claim.
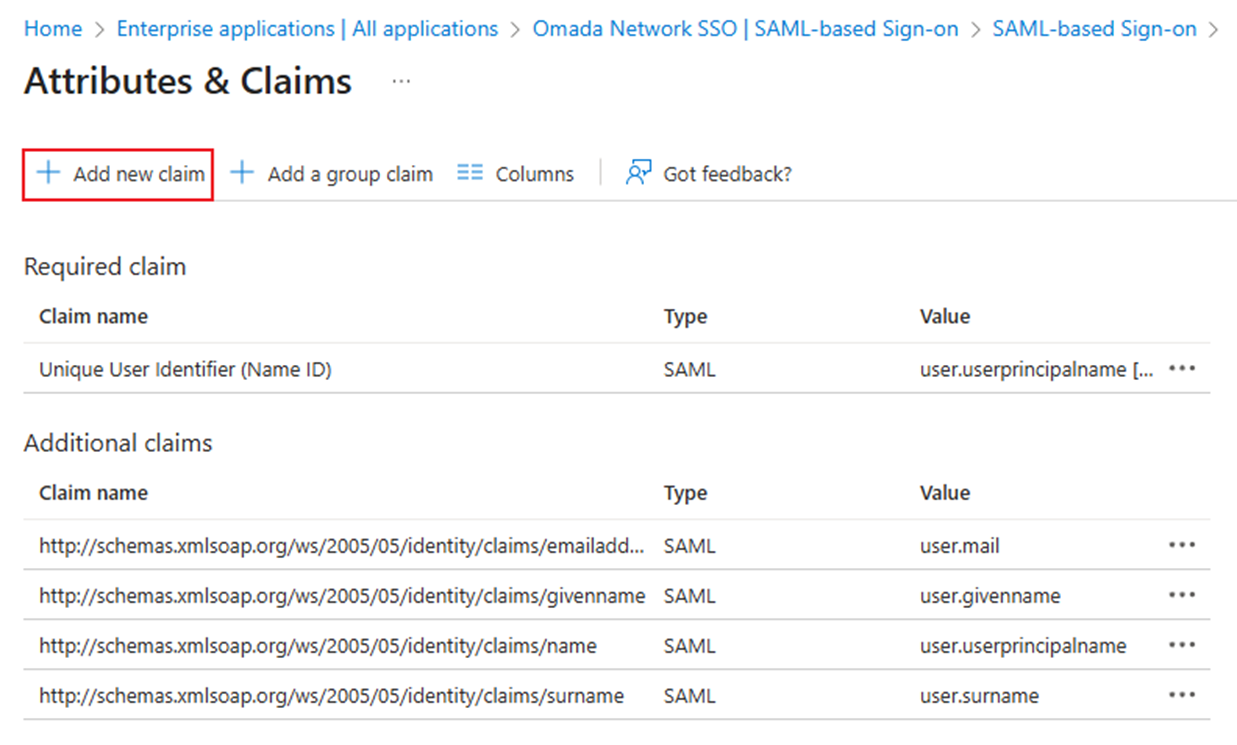
Add the username as a parameter. Set Name as username and the Source Attribute as the user.displayname.
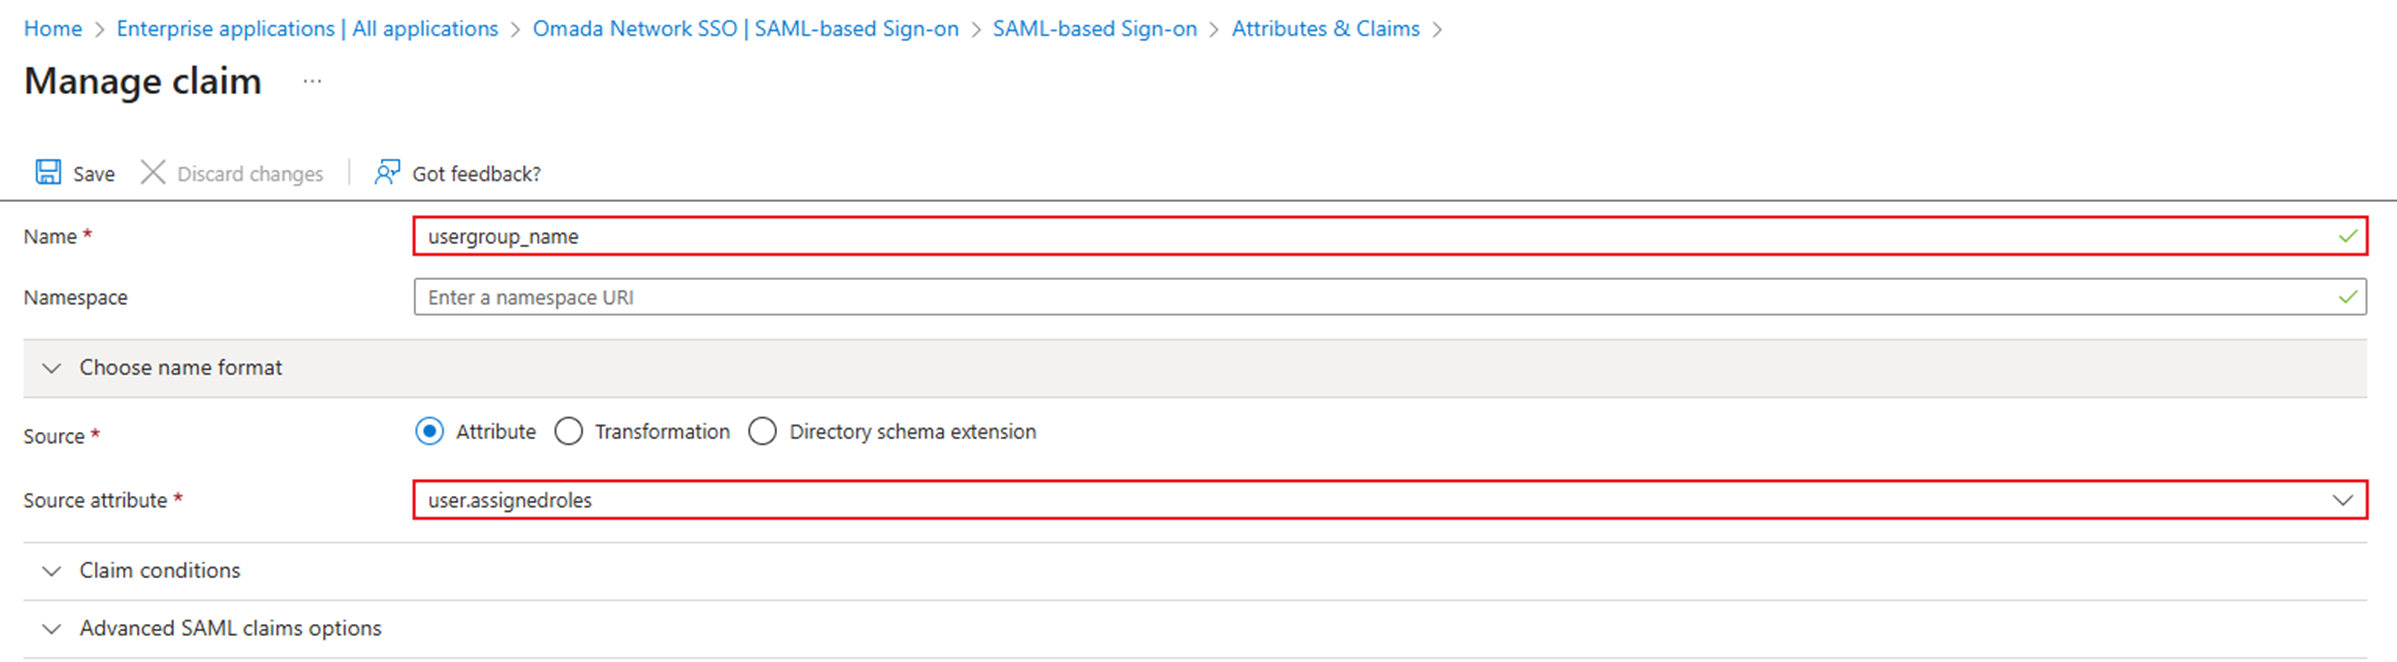
Add the usergroup_name as a parameter. Set Name as usergroup_name and the Source Attribute as user.assignedroles.
Verification
Method 1: Go to the interface of SAML-based Sign-on settings and click Test sign in to test.
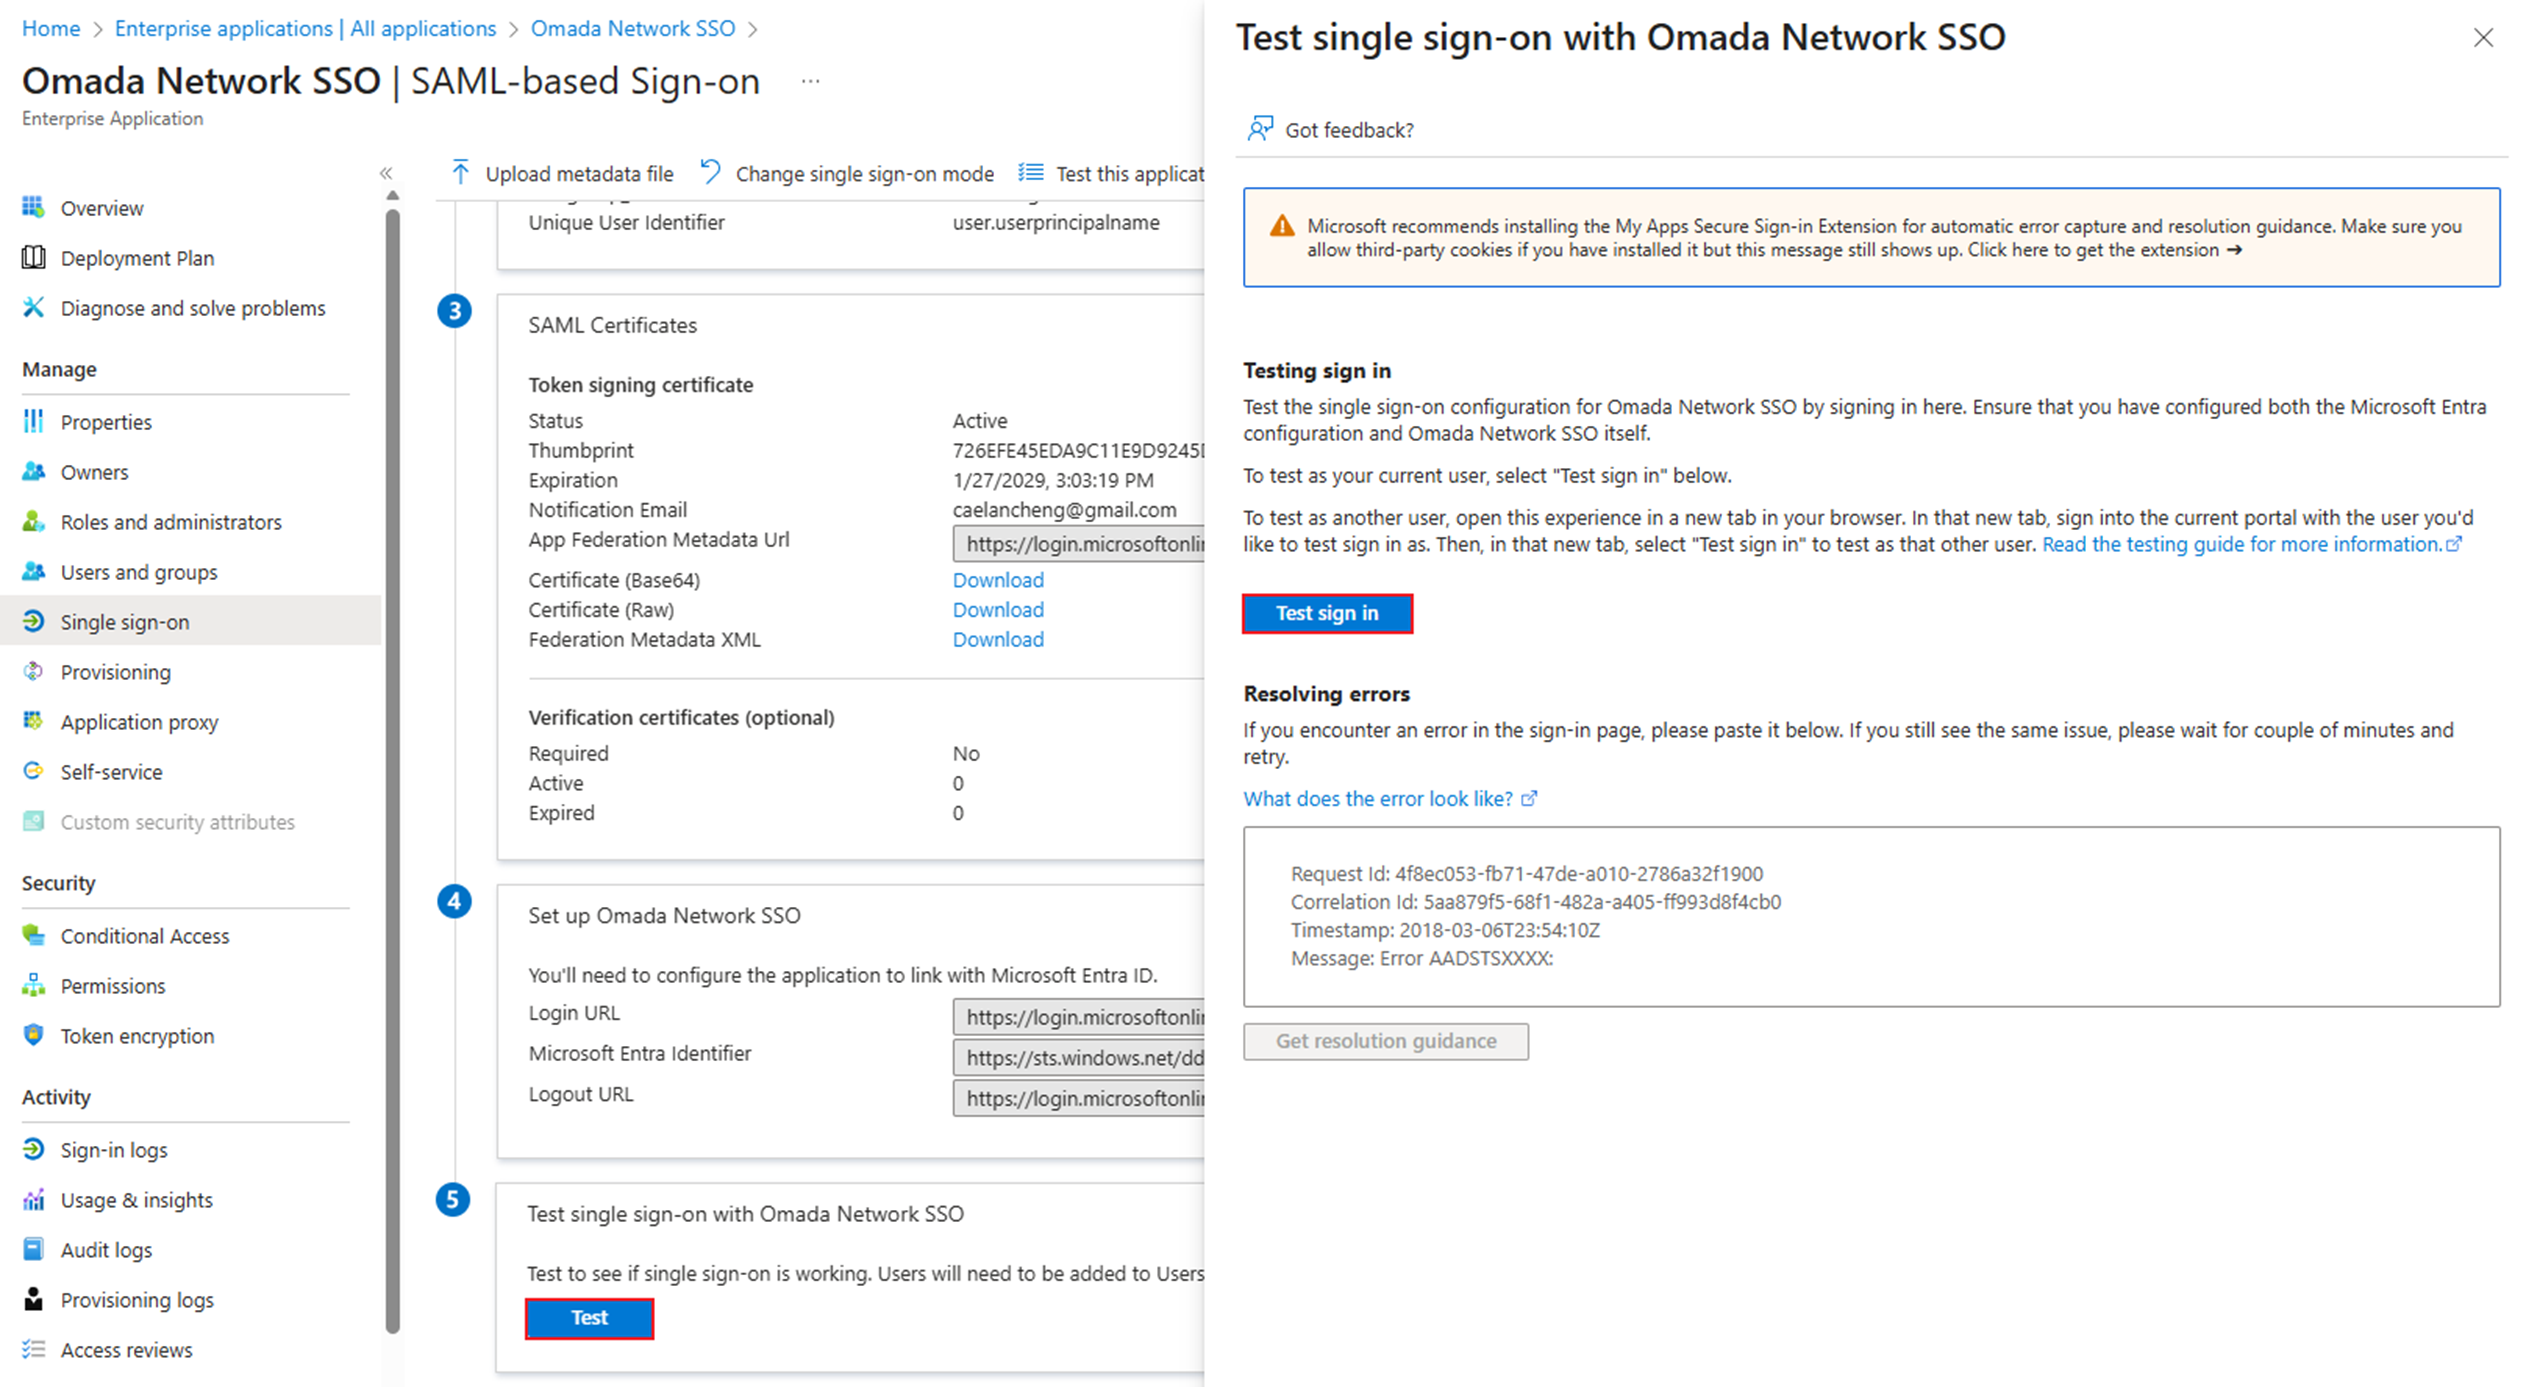
And then the browser should redirect us to the Omada Controller and log in.
Method 2: Go to https://myapplications.microsoft.com. After logging in with our Microsoft ID, click the Application we just configured to log in to Omada Controller.
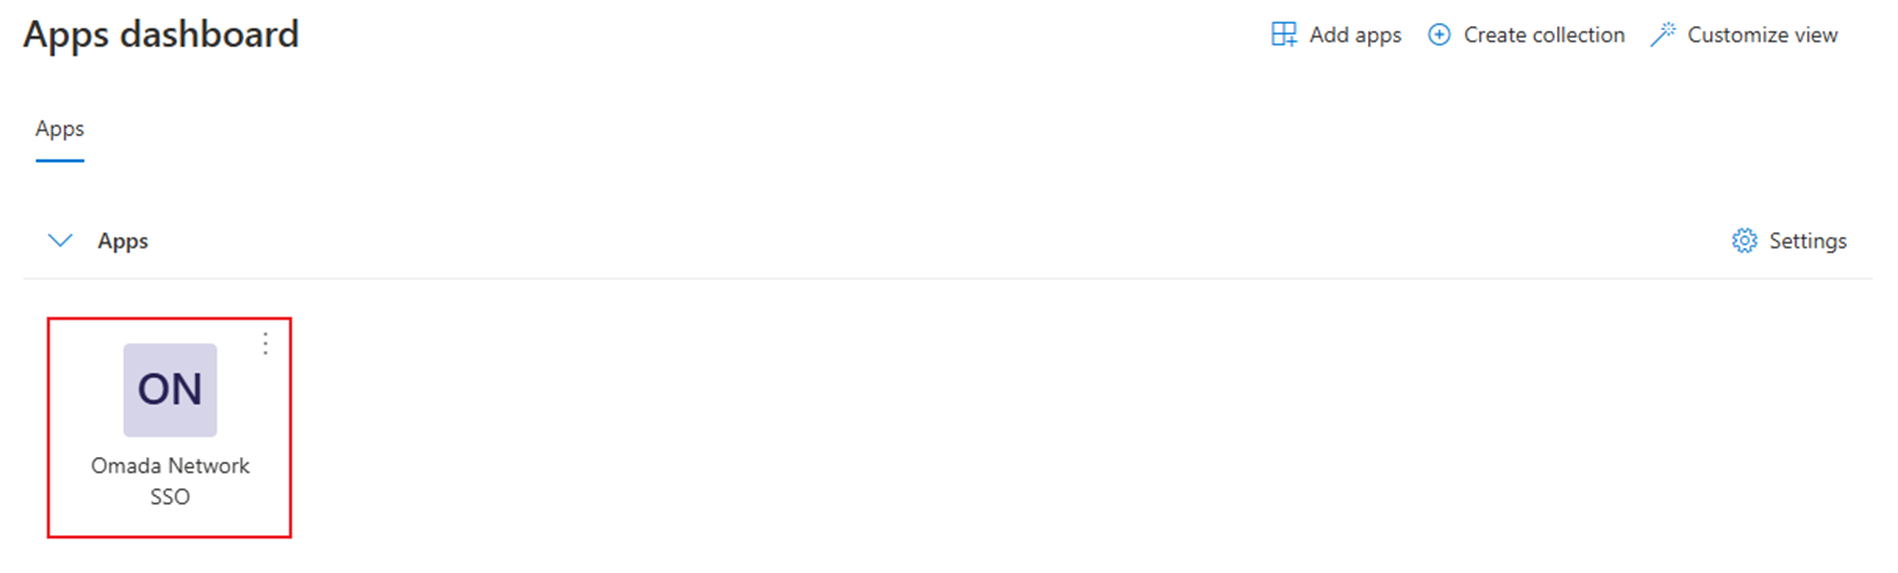
Then the browser should redirect us to the Omada Controller.
Conclusion
We have successfully configured the SAML SSO of Omada Controller with Microsoft Entra/Azure ID.
Get to know more details of each function and configuration please go to Download Center to download the manual of your product.
QA
Q1: What should we do if the browser reports a While Label Error Page? After checking the dev tools windows, there’s also the error code “405 Method Not Allowed.”
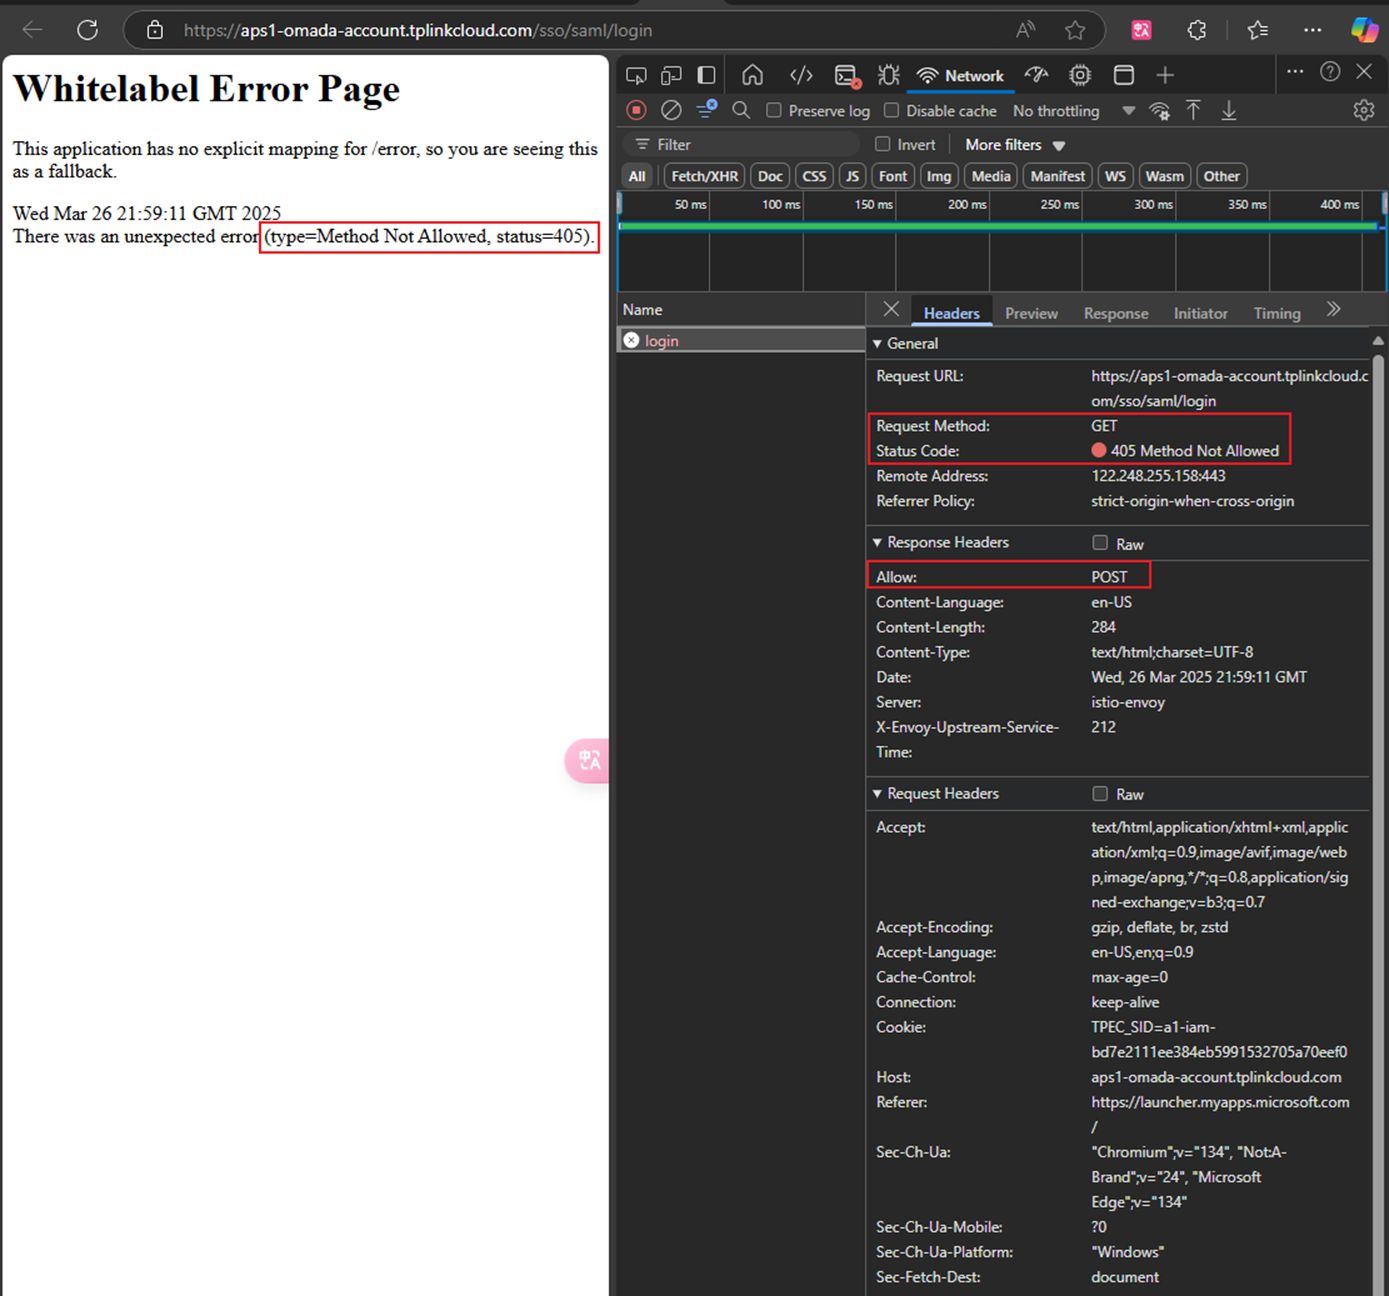
A1: From the dev tools, we can see that the Allow method for Response Headers is POST, but generally, the Request Method is GET. The technique is not matched.
Go back to the application's Basic SAML Configuration, choose Edit to configure the configuration, double-check the Identifier, Reply URL, and Relay State, and remember to keep Sign On URL blank.
Q2: What should I do if I meet the error code {"errorCode":-1001, "msg": "Invalid request parameters."} ?
A2: Go back to the interface of Attributes & Claims to check whether we have set the username and usergroup_name correctly.
Q3: What should I do if I meet the error code {"errorCode":-1, "msg": "Something went wrong. Please try again later or contact our technical support."} ?
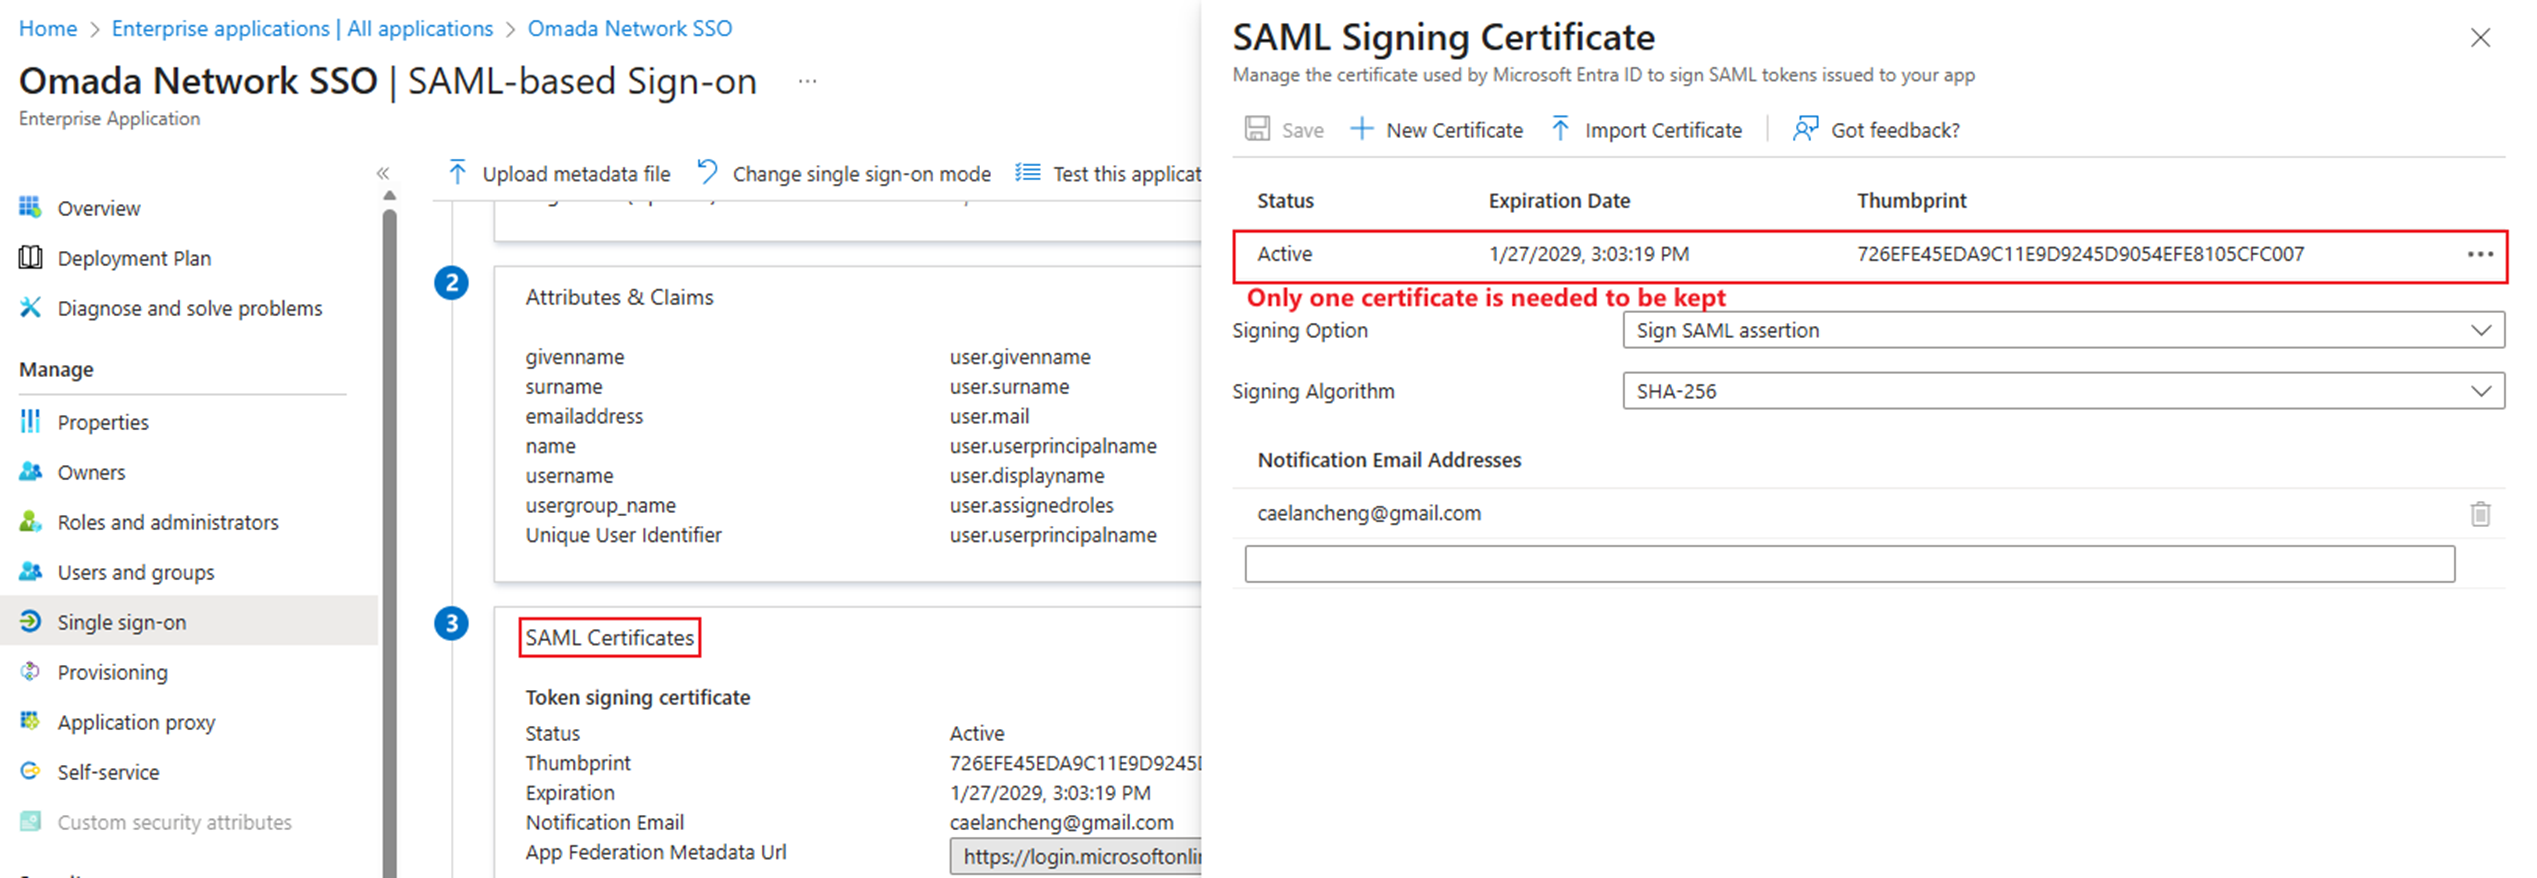
A3: Go back to SAML Certificates. If we have more than one certificate, please delete the manually added ones.