


Content
Configuration for Amazon Alexa
Unlinking Google Home or Amazon Alexa from Omada Guard
Introduction
This FAQ introduces the Third-Party Services feature in the Omada Guard app. This feature allows users to link Omada Guard with supported third-party platforms, such as Google Home and Amazon Alexa. Once linked, users can control supported Omada cameras through these services and integrate them with their smart home environment.
This FAQ will guide users through the initial setup process and explain the additional features available through third-party integration, such as voice control, device discovery, and video or snapshot previews.
Please note that cameras added through an NVR are not currently supported. Third-Party Services are also unavailable when devices are offline.
Requirements
Requirements for Google Home
- Omada Guard app
- iOS: v1.2.1 or later
- Android: v1.2.10 or later
- Omada IP camera
- Google Home app
- Google Home account
- Google Home device
Requirements for Amazon Alexa
- Omada Guard app
- iOS: v1.2.1 or later
- Android: v1.2.10 or later
- Omada IP camera
- Amazon account
- Amazon Alexa device
Configuration
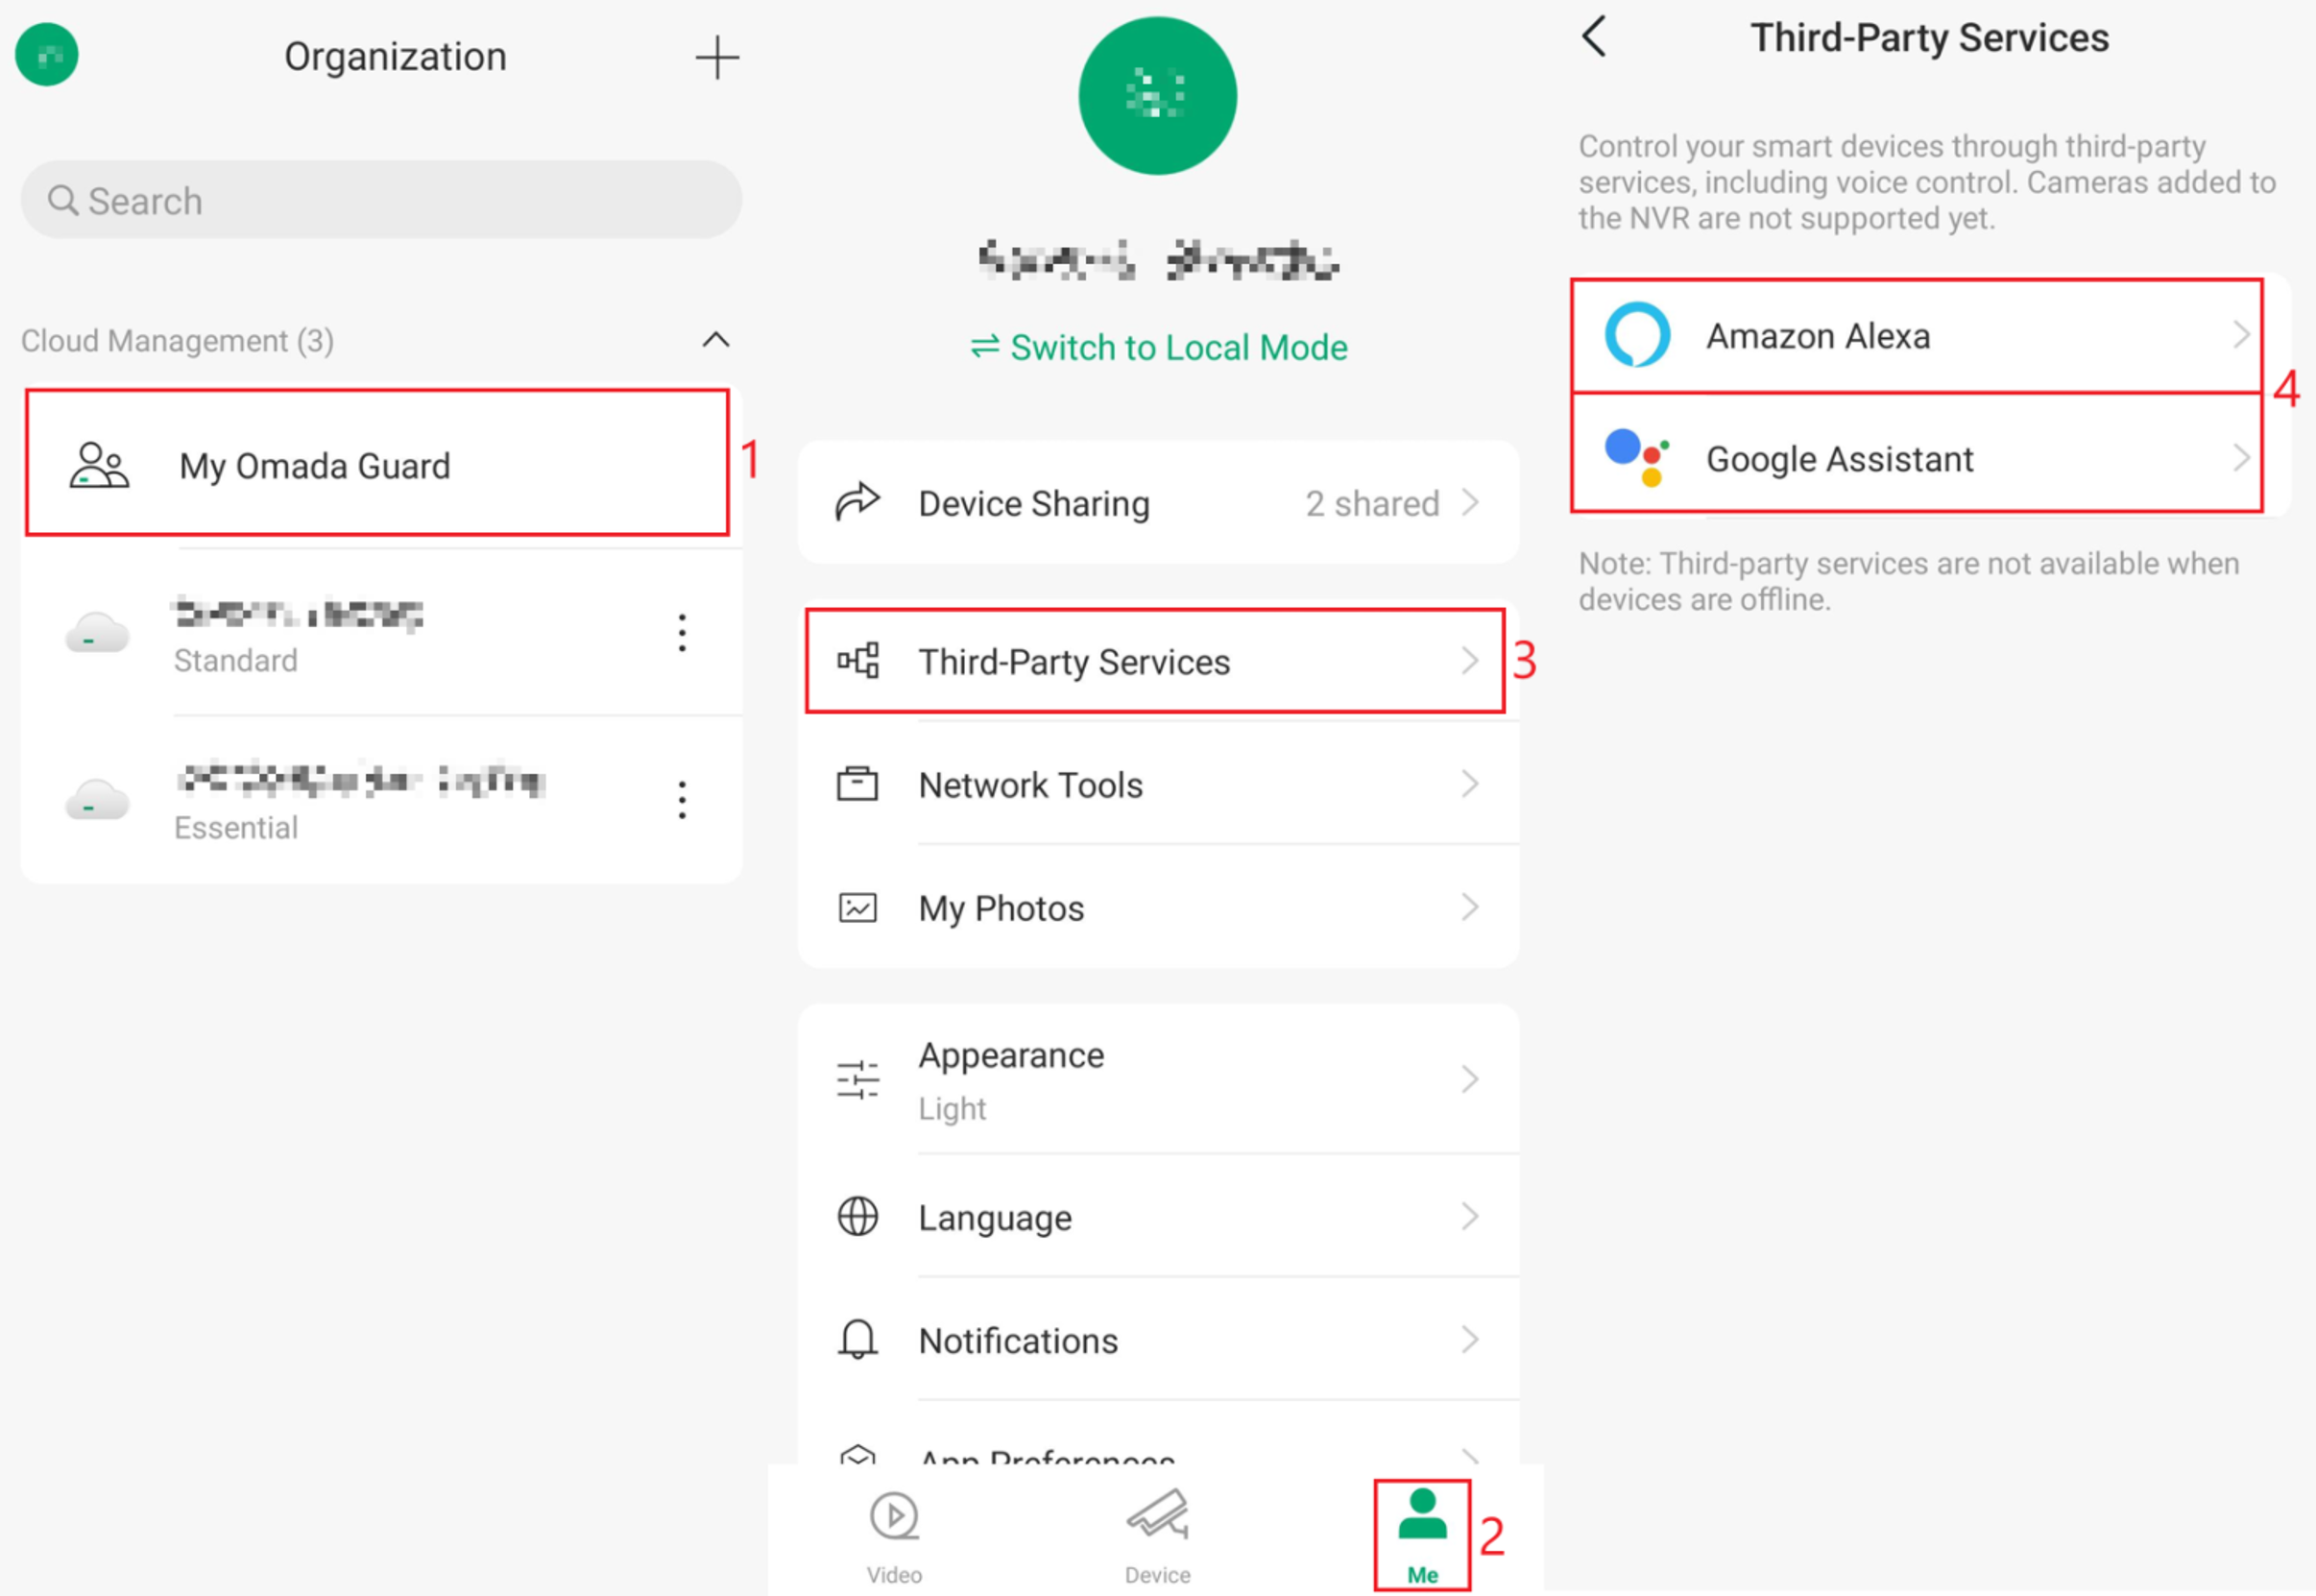
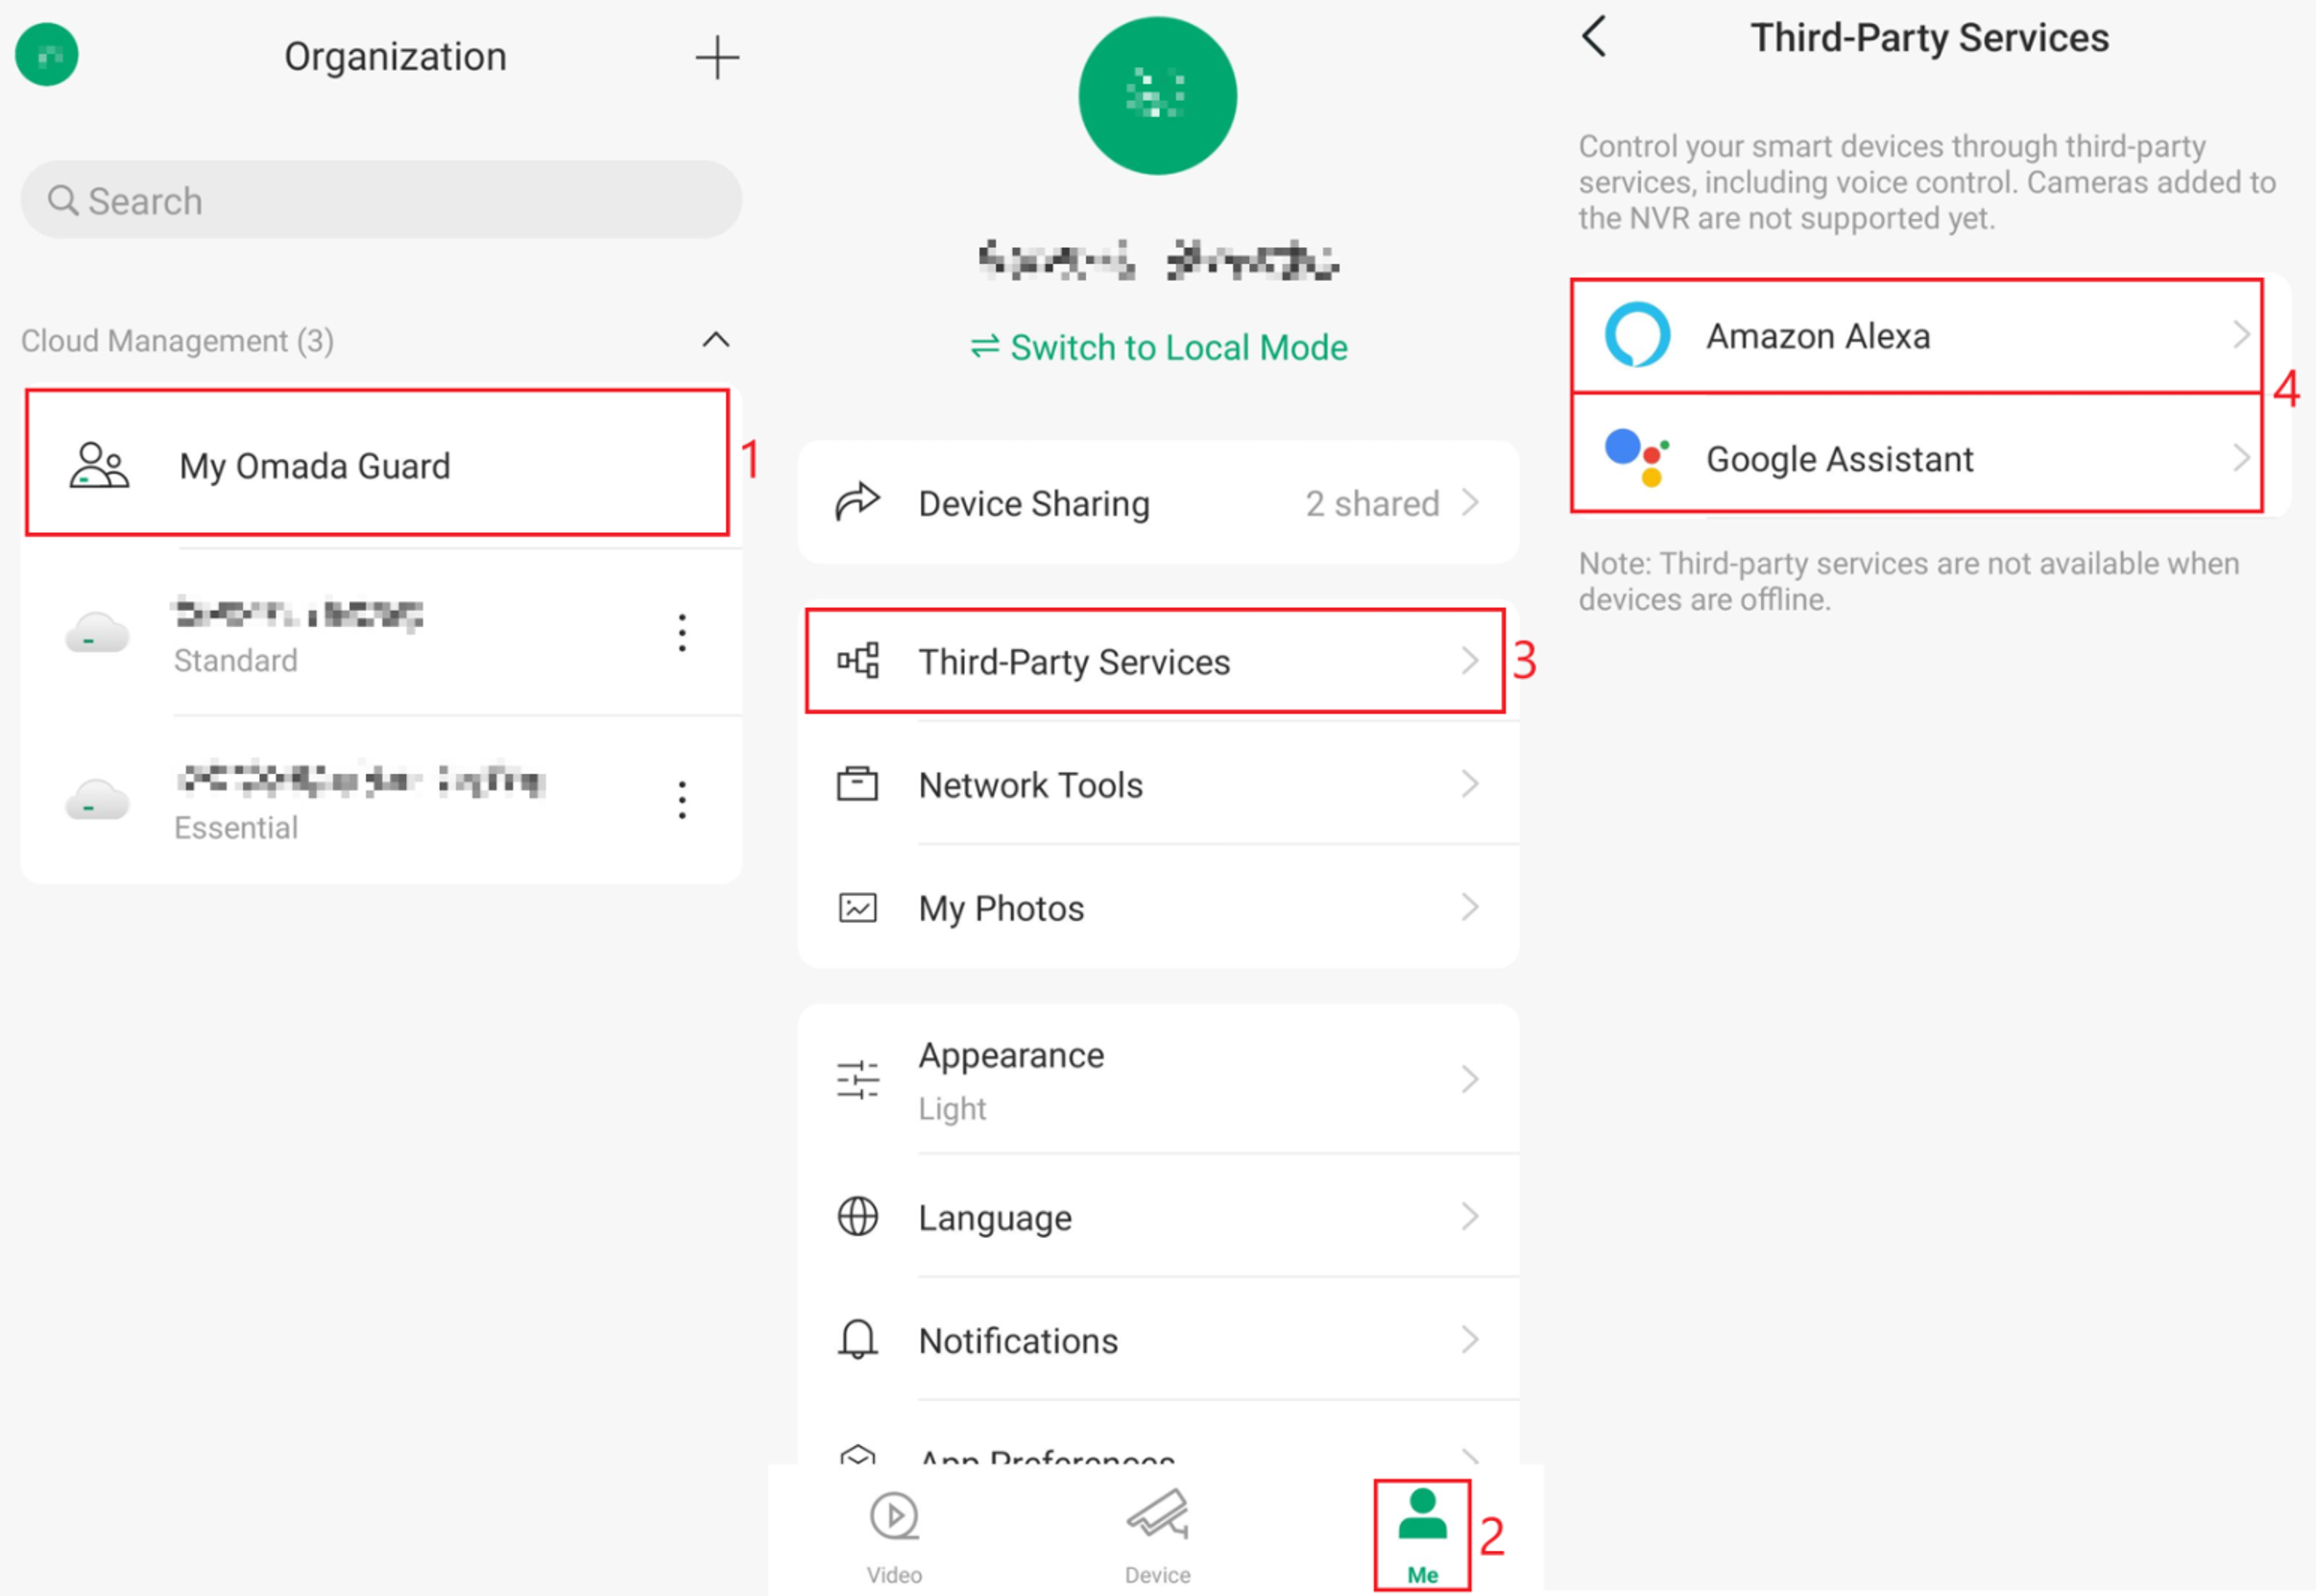
Step 1. Open the Omada Guard app. Navigate to My Omada Guard > Third-Party Services, then select Amazon Alexa or Google Assistant, depending on the service you want to configure.
Configuration for Google Home
Note: Please ensure that the Google Home app is installed and the account is set up before attempting the following configuration steps.
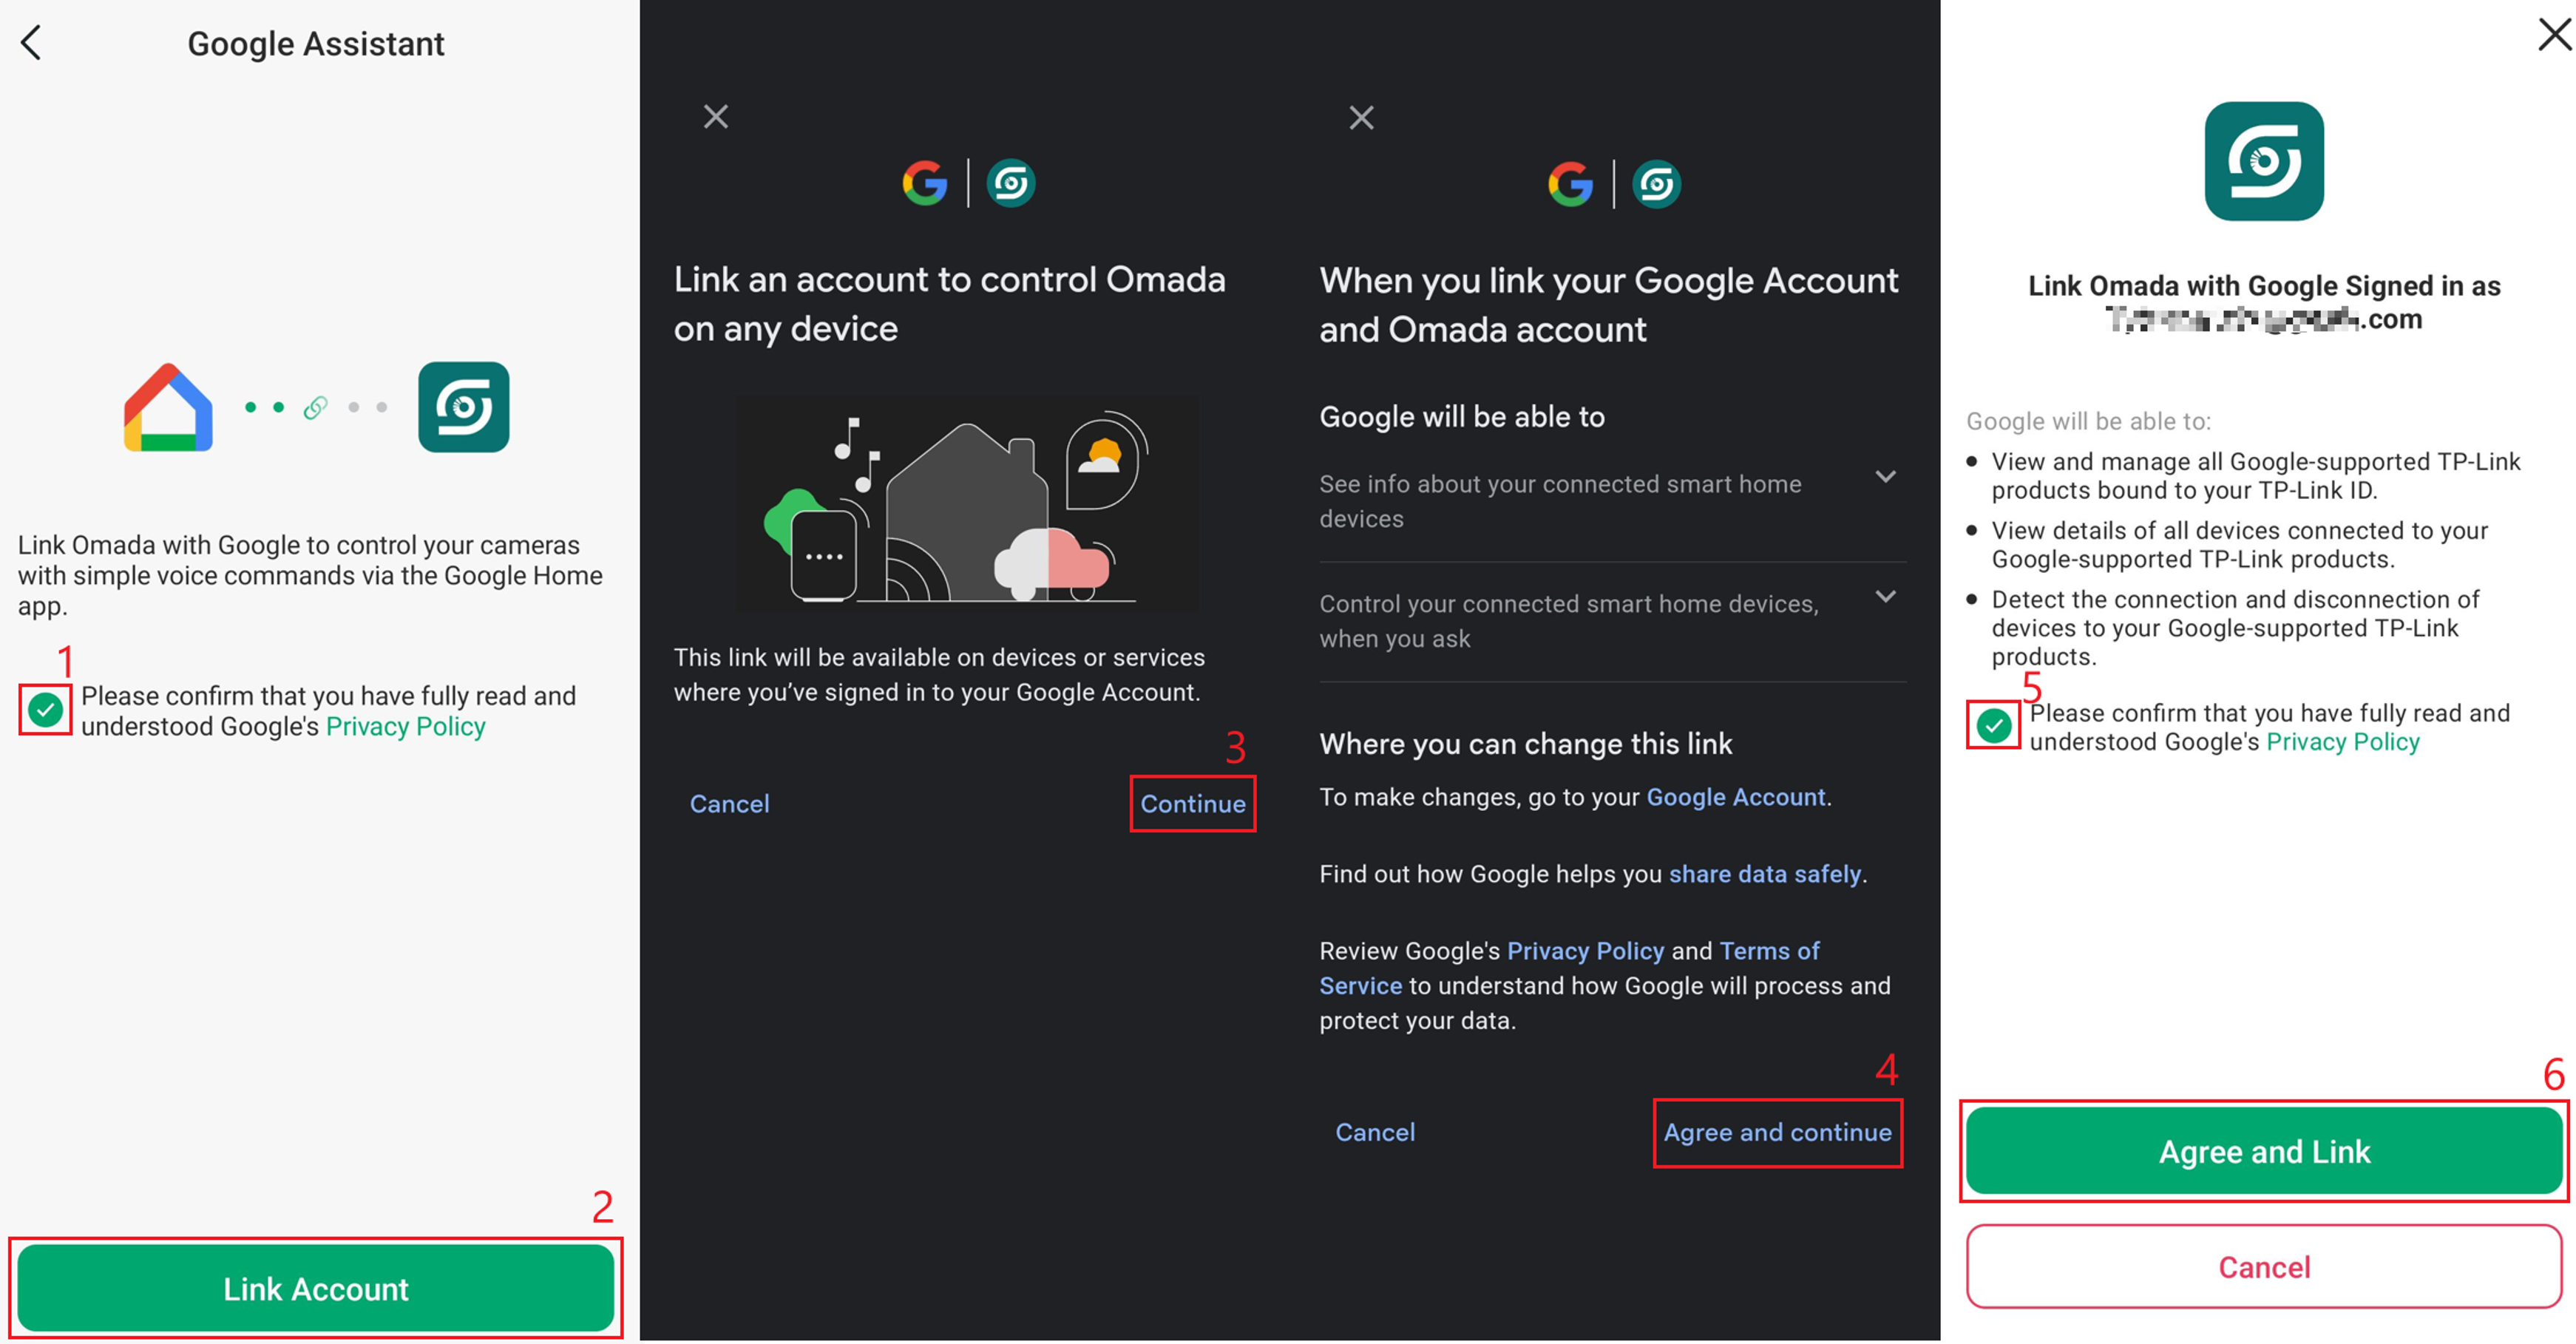
Step 1. After selecting Google Assistant, confirm that you have read and understood Google’s Privacy Policy > Link Account > Continue > Agree and continue > Confirm Google’s Privacy Policy again > Agree and Link.
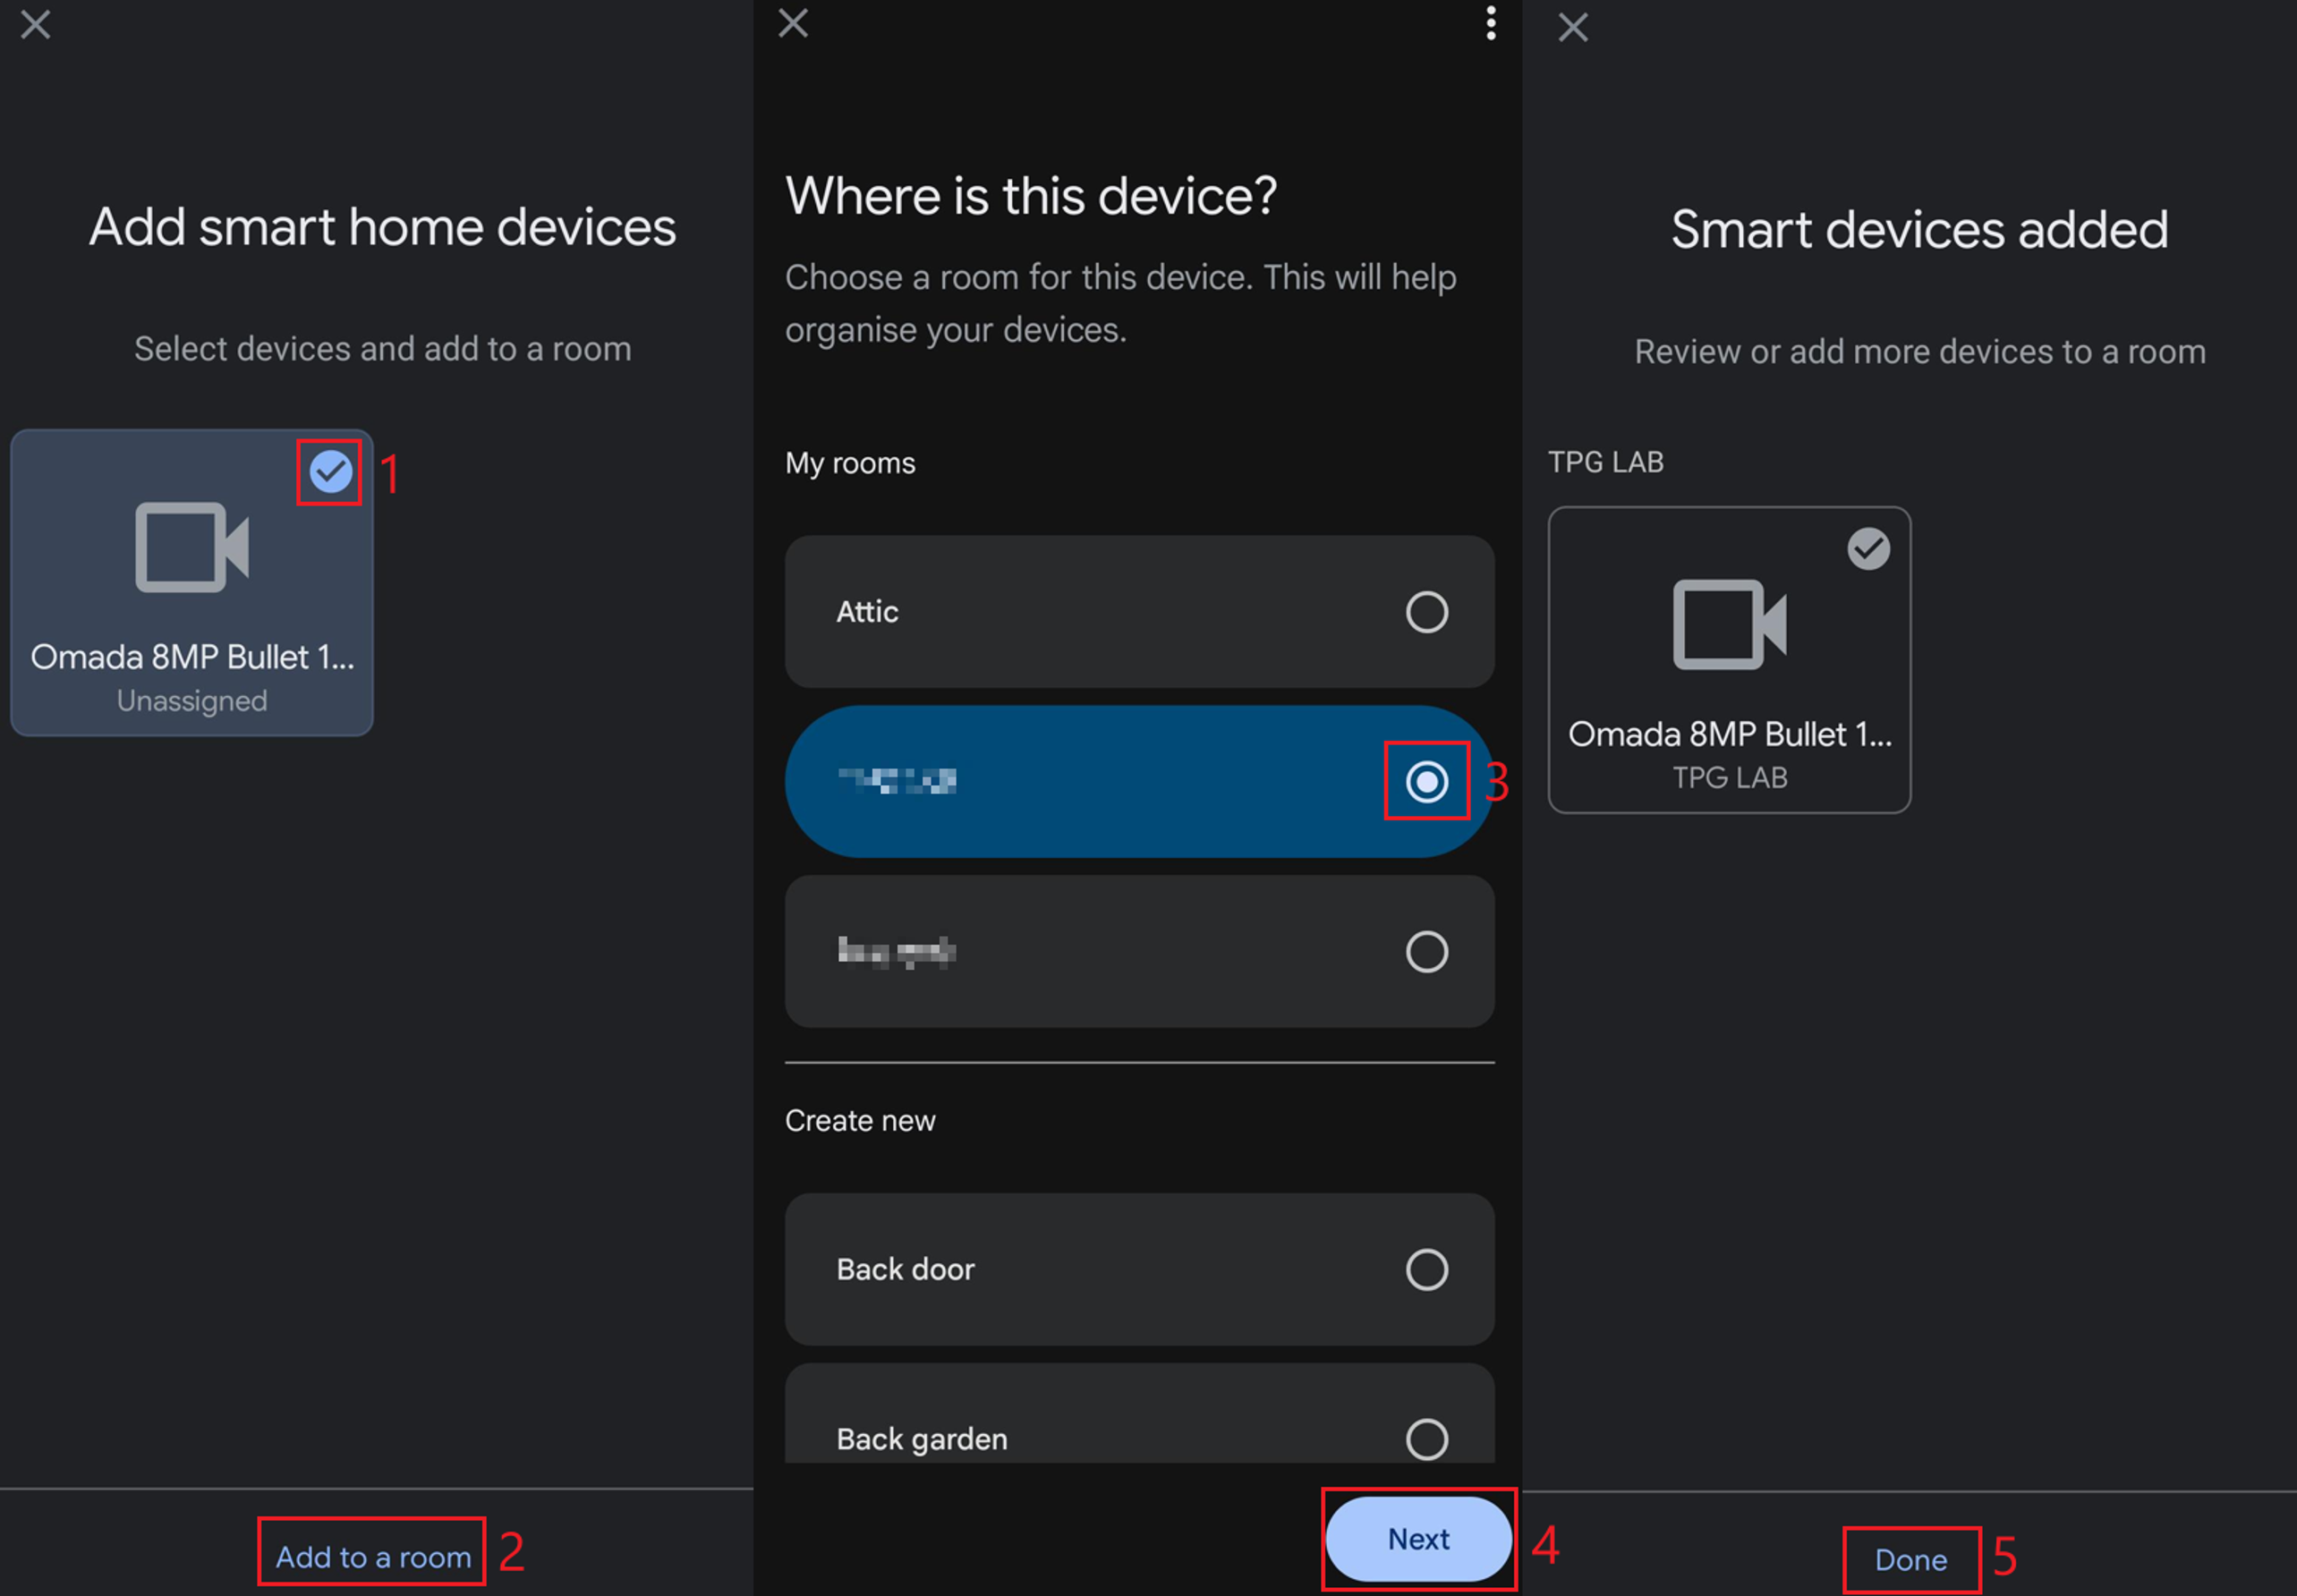
Step 2. The Google Home app will automatically discover the device. Select the device > Add to a room > select the room > Next > Done.
Configuration for Amazon Alexa
Note: Please ensure that an Amazon account is set up before attempting the following configuration steps.
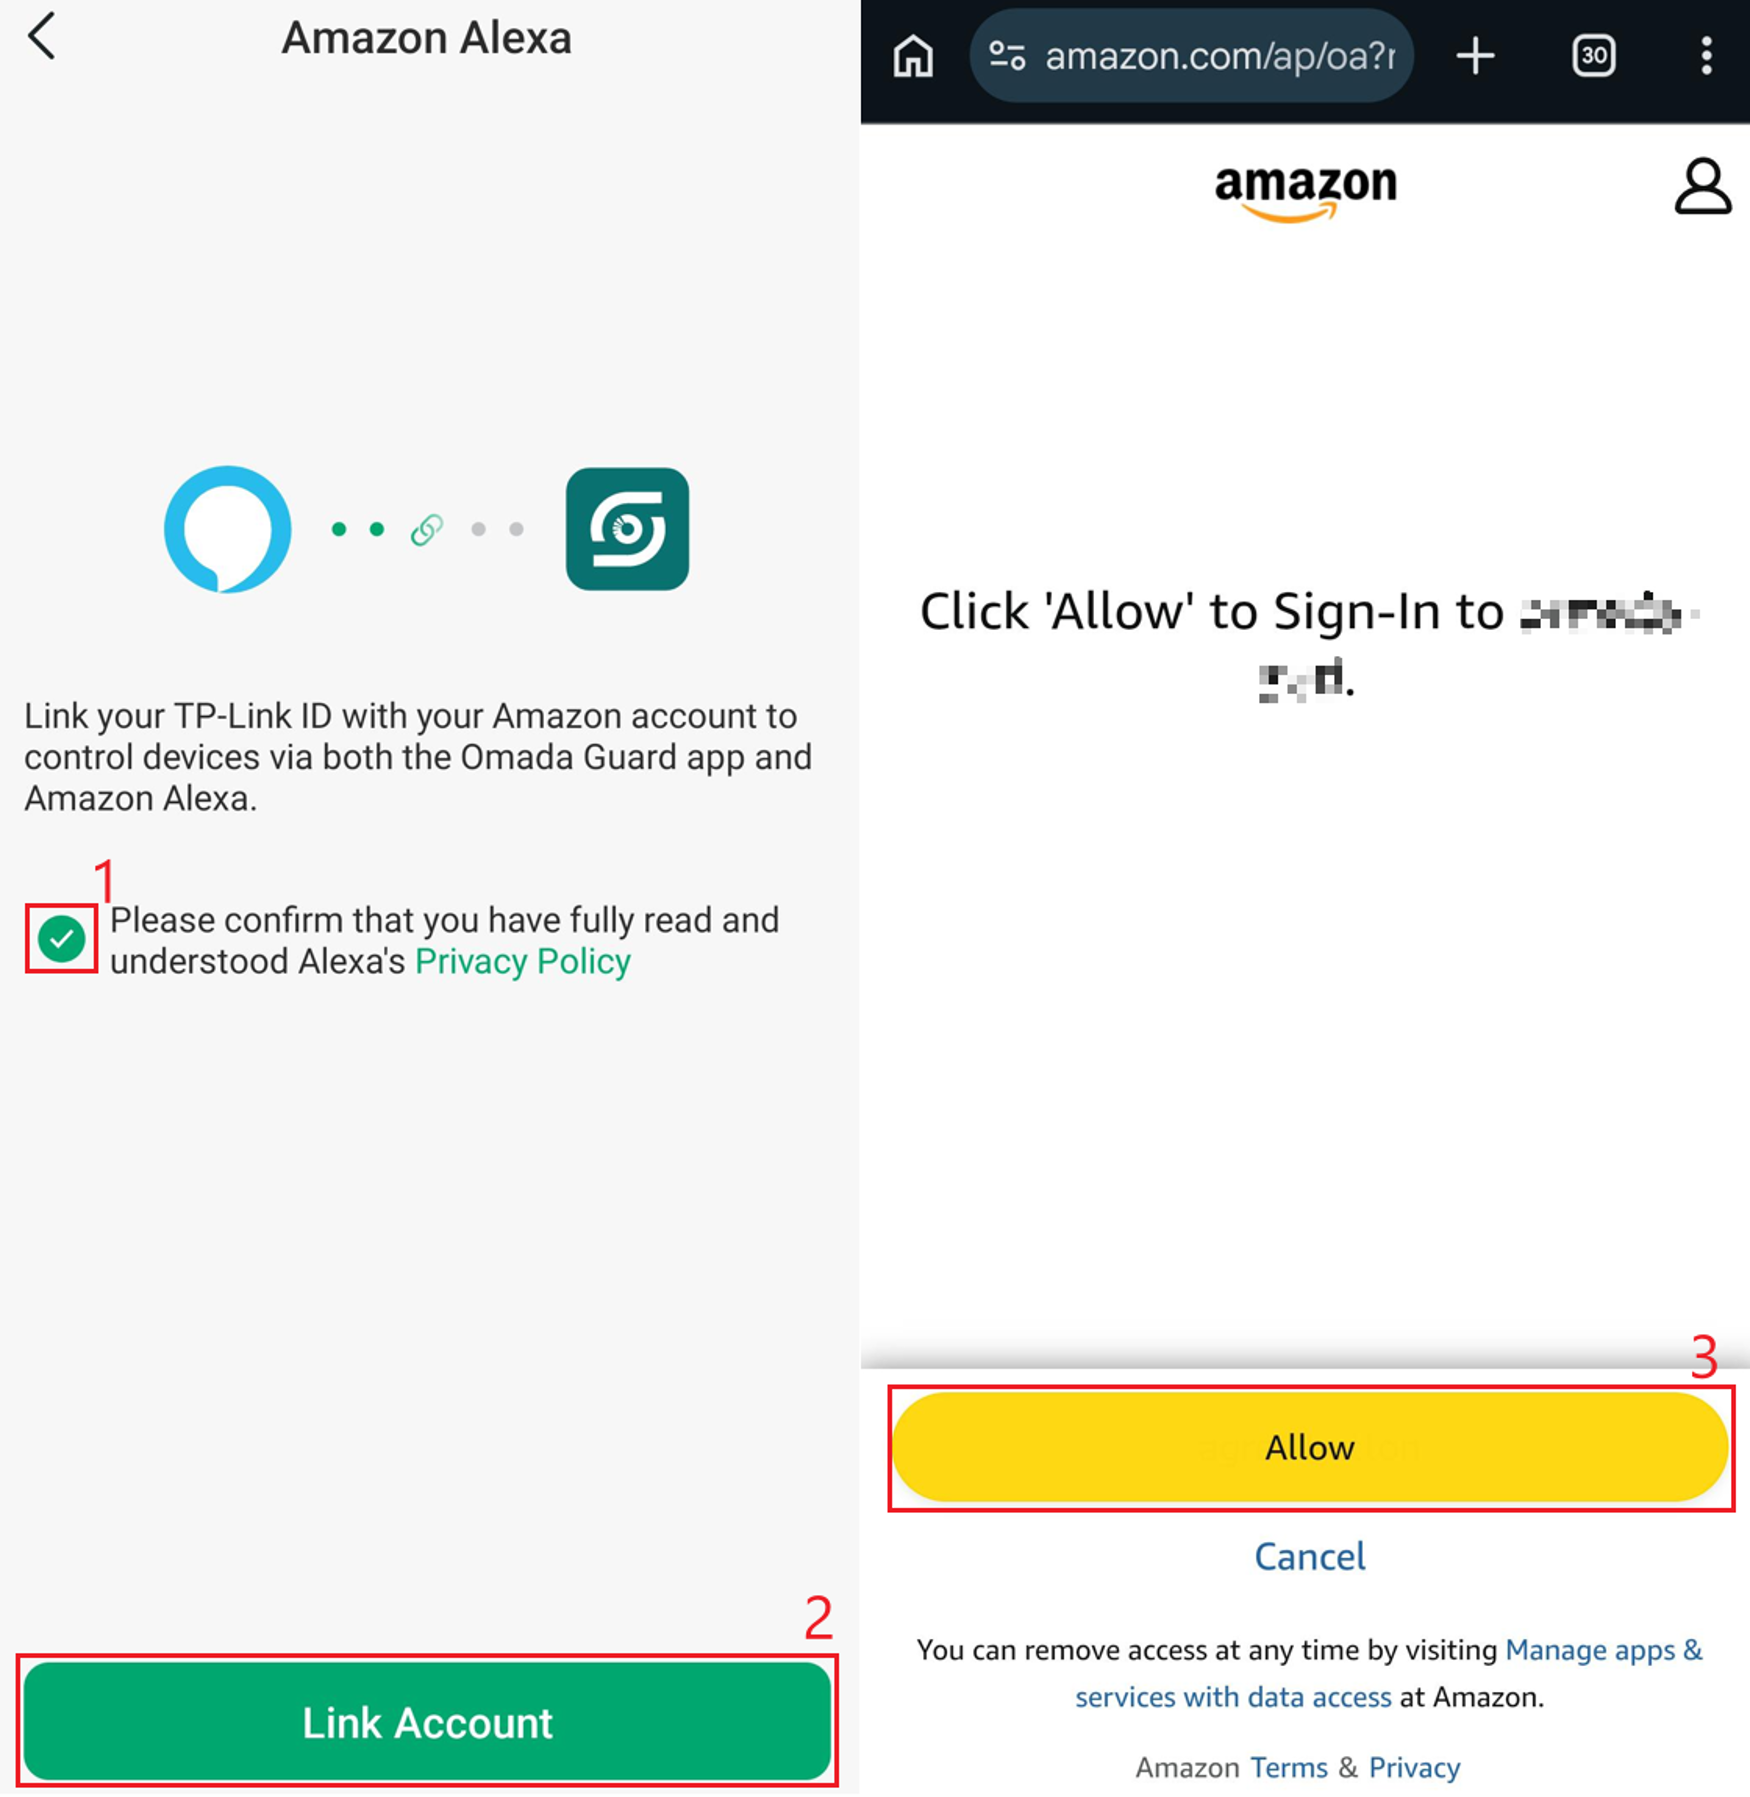
Step 1. After selecting Amazon Alexa, confirm that you have read and understood Alexa’s Privacy Policy > Link Account > Allow.
Additional Features
Voice Control
There are numerous voice commands for Google Assistant and Amazon Alexa that can be used to view an Omada camera on a compatible display. Supported commands may vary by platform, display device, and camera configuration. Common examples include:
To view a camera:
“Hey Google, what’s on <Camera Name>?”
“Alexa, show me <Camera Name>.”
To view a camera on a specific display:
“Hey Google, play <Camera Name> on the living room display.”
“Alexa, show <Camera Name> on the bedroom display.”
To stop viewing the camera:
“Hey Google, stop.”
“Alexa, stop showing the camera.”
“Hey Google, hide <Camera Name>.”
“Alexa, stop.”
Note: Alexa can announce events detected by Omada Guard cameras. Any event configured on the camera will be announced automatically through Alexa. Google Home support is currently being enhanced, and event announcements may be supported in a future update.
Viewing Live Video
Live video can also be displayed without using voice commands. Users can access the camera feed manually through the respective smart home app or display interface.
Google Home: Navigate to Home Control > Cameras, then select the desired camera.
Amazon Alexa: Navigate to Smart Home > Cameras, then select the desired camera.
Snapshot Functionality
Amazon Alexa supports camera snapshots. Snapshots can be triggered using voice commands like “Alexa, take a picture” on a compatible Alexa device.
Automatic Device Discovery
When a new camera is added to the Omada Guard app, Google Home or Amazon Alexa will automatically discover it.
Unlinking Google Home or Amazon Alexa from Omada Guard
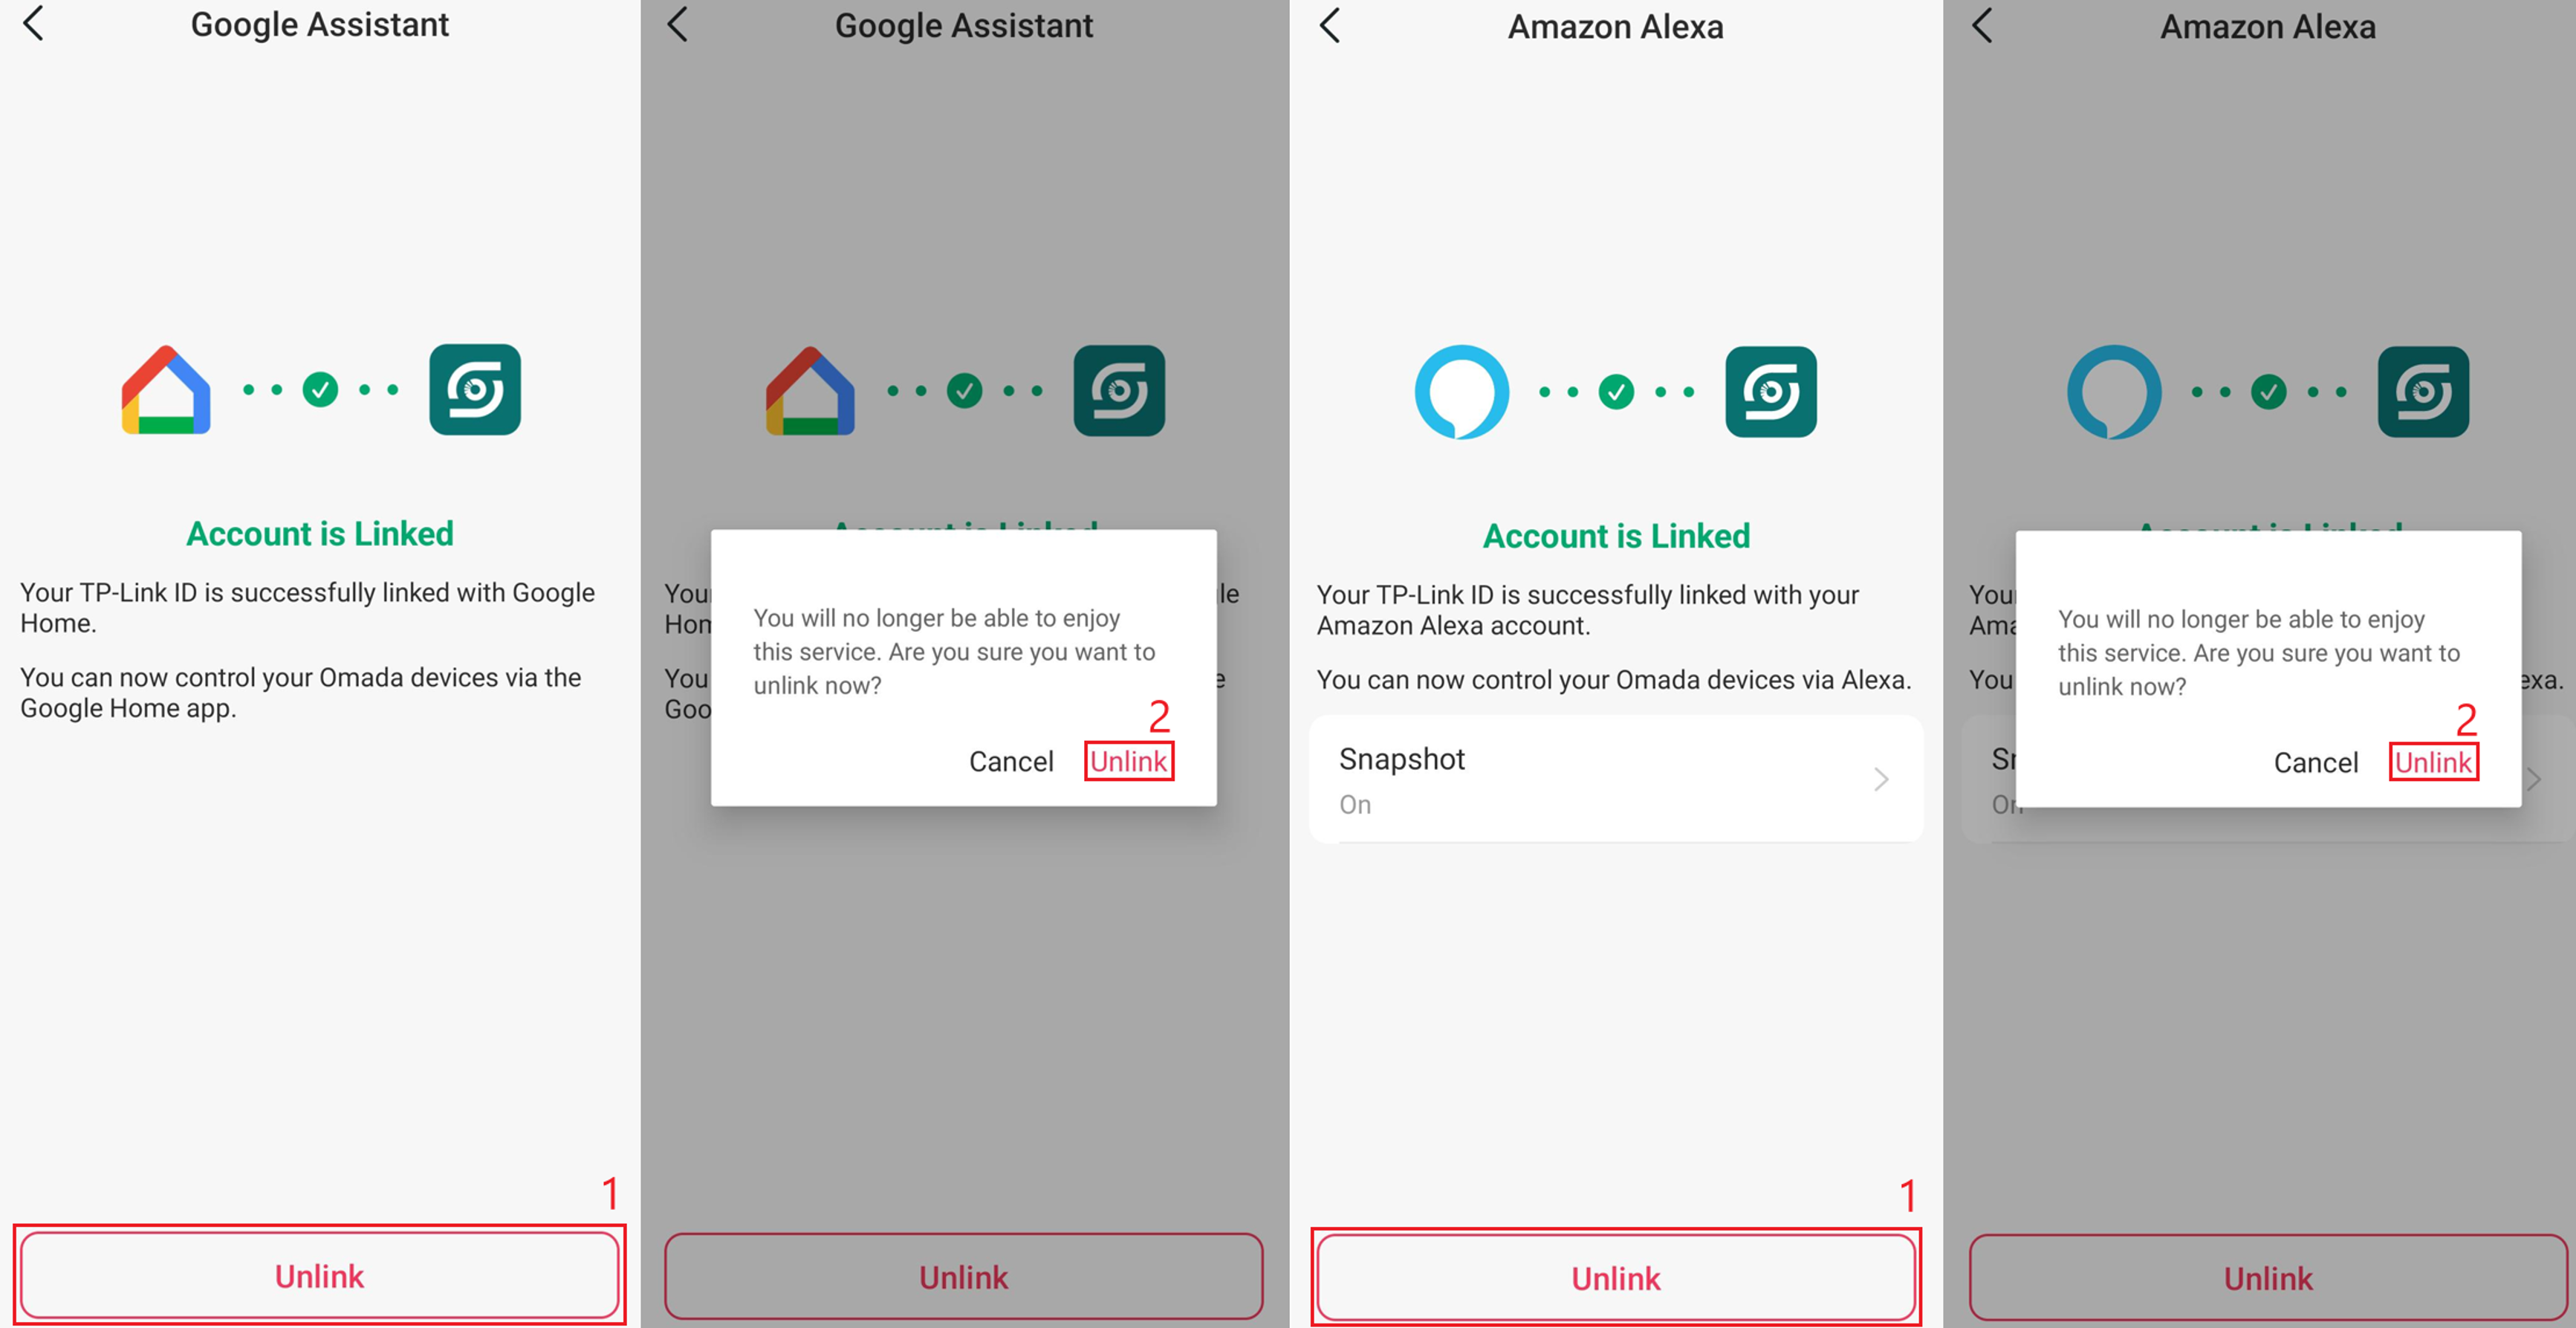
Unlinking Google Home or Amazon Alexa from Omada Guard follows the same steps for both services.
Step 1. Open the Omada Guard app. Navigate to My Omada Guard > Third-Party Services > select Amazon Alexa or Google Assistant.
Step 2. Select Unlink Account. A confirmation message will appear. Tap Unlink. The account will now be unlinked.
Verification
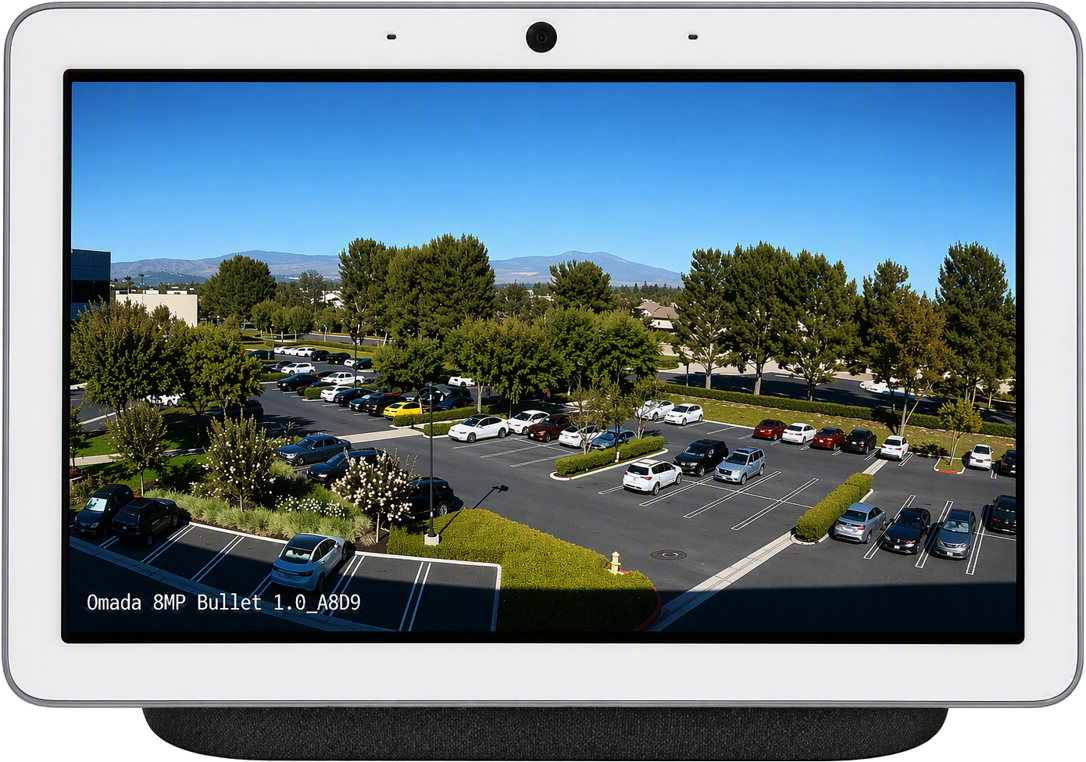
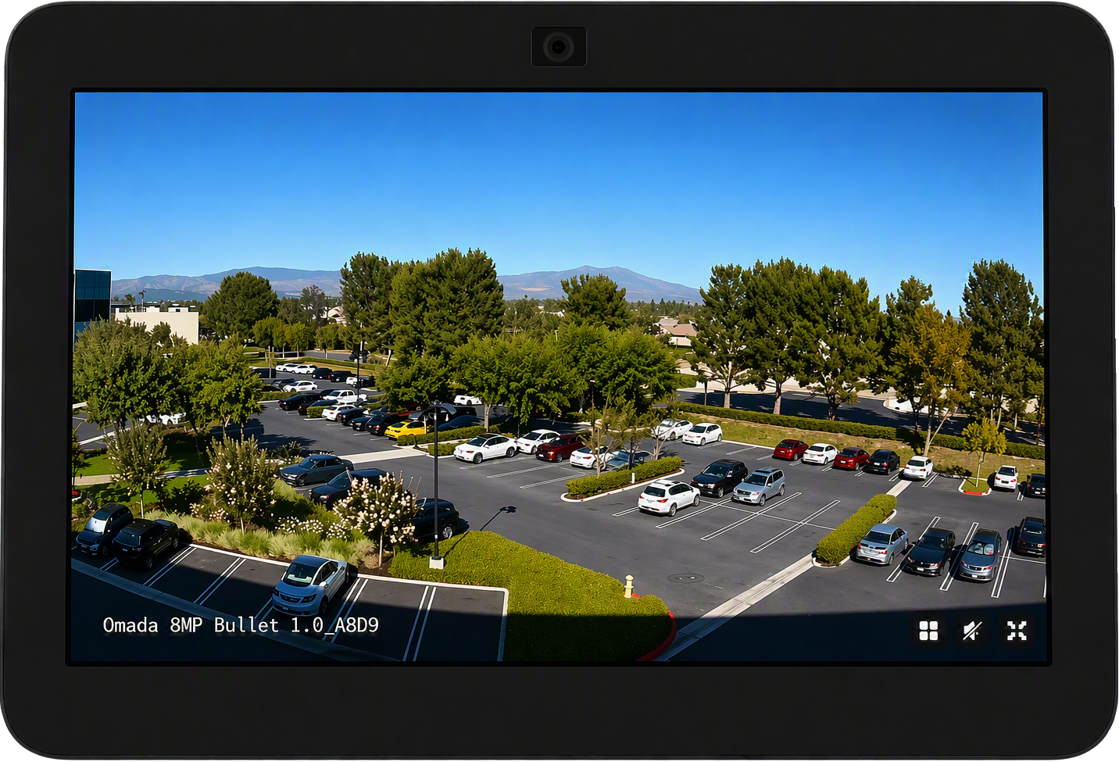
The following examples show an Omada Guard camera live view successfully displayed on compatible Google Home and Amazon Alexa devices after using voice commands. Account linking must be complete before voice control is available.
Conclusion
After linking Omada Guard with Google Home or Amazon Alexa, users can view supported Omada camera feeds through compatible smart displays, apps, and voice commands. Newly added cameras can also be discovered automatically. For reliable operation, keep the camera online, use supported devices, and ensure the Omada Guard app and the selected third-party platform are up to date.
QA
Q1: How do I change the name of my camera?
A1: In the Omada Guard app, go to Device, select the camera, select the edit icon beside the camera name, enter a new name, and select Save. You can then use the new camera name with Google Assistant or Amazon Alexa.
Q2: Why is the Third-Party Services option not available?
A2: Confirm that the Omada Guard app meets the minimum version requirement:
- iOS: Version 1.2.1 or later
- Android: Version 1.2.10 or later
Also confirm that the camera is online, as Third-Party Services are unavailable when the device is offline.
Q3: Why does the voice command not recognize my camera?
A3: Confirm that you are using the exact camera name shown in Google Home or Amazon Alexa. Consider using a short and unique camera name that is easy to pronounce.
Q4: Why are Alexa event announcements not working?
A4: Confirm that event detection is enabled on the Omada camera and that announcements are enabled for the camera in the Amazon Alexa app.
Q5: Does Google Home support event announcements?
A5: Google Home event announcement support is currently being enhanced and may become available in a future update.
Q6: How do I remove access from Google Home or Amazon Alexa?
A6: In the Omada Guard app, go to My Omada Guard > Third-Party Services, select the linked platform, tap Unlink Account, and confirm the action.
To learn more about each function and configuration, please visit Support Home to download or check the manual for your product.
