


Configuration for OpenVPN Server
Configuration for OpenVPN Client
Introduction
OpenVPN is open-source virtual private network (VPN) software that utilizes SSL/TLS protocols for encrypted communication. It provides secure remote access and site-to-site connections and is widely used to protect network communication and access control.
Requirements
- Omada Gateway Series
- Laptop or PC
Configuration
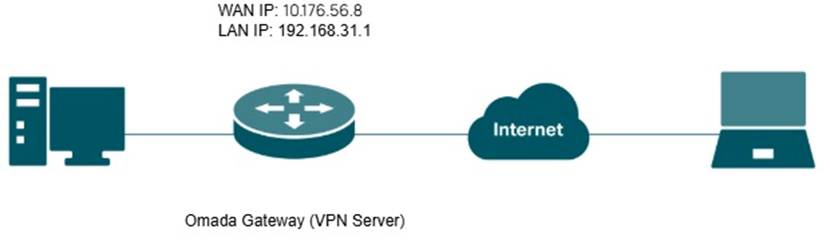
Configuration for OpenVPN Server
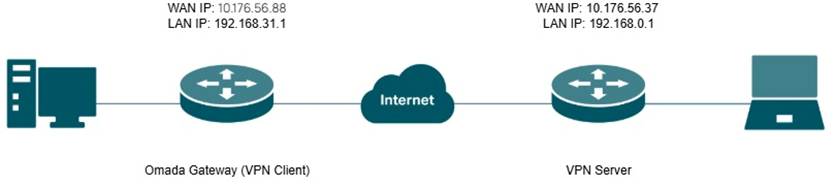
Omada Gateway acts as an OpenVPN server, enabling clients to securely access the intranet or the internet.
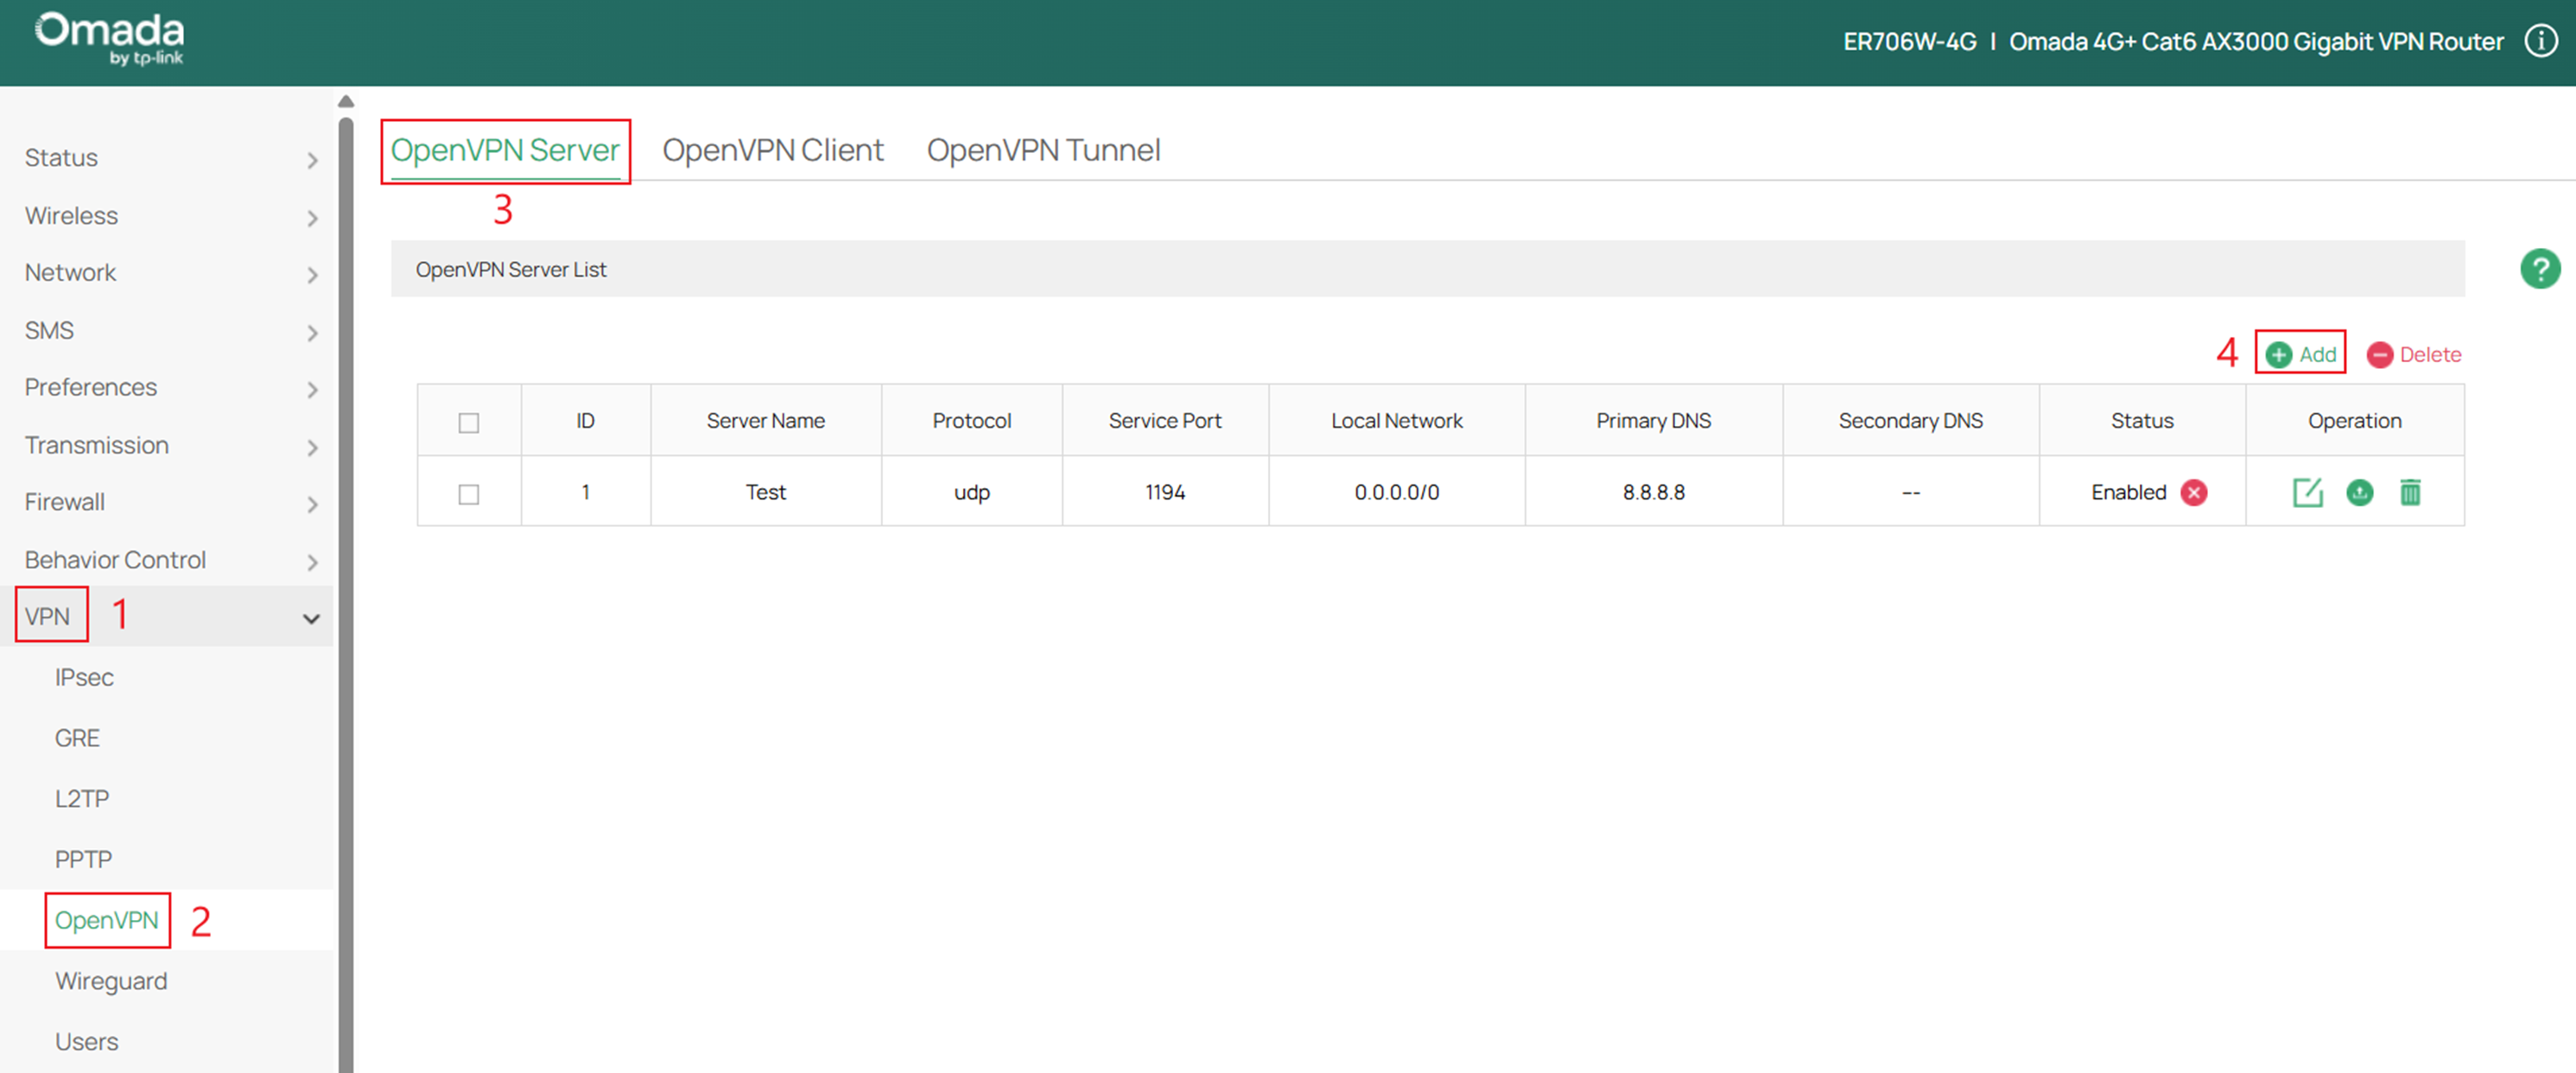
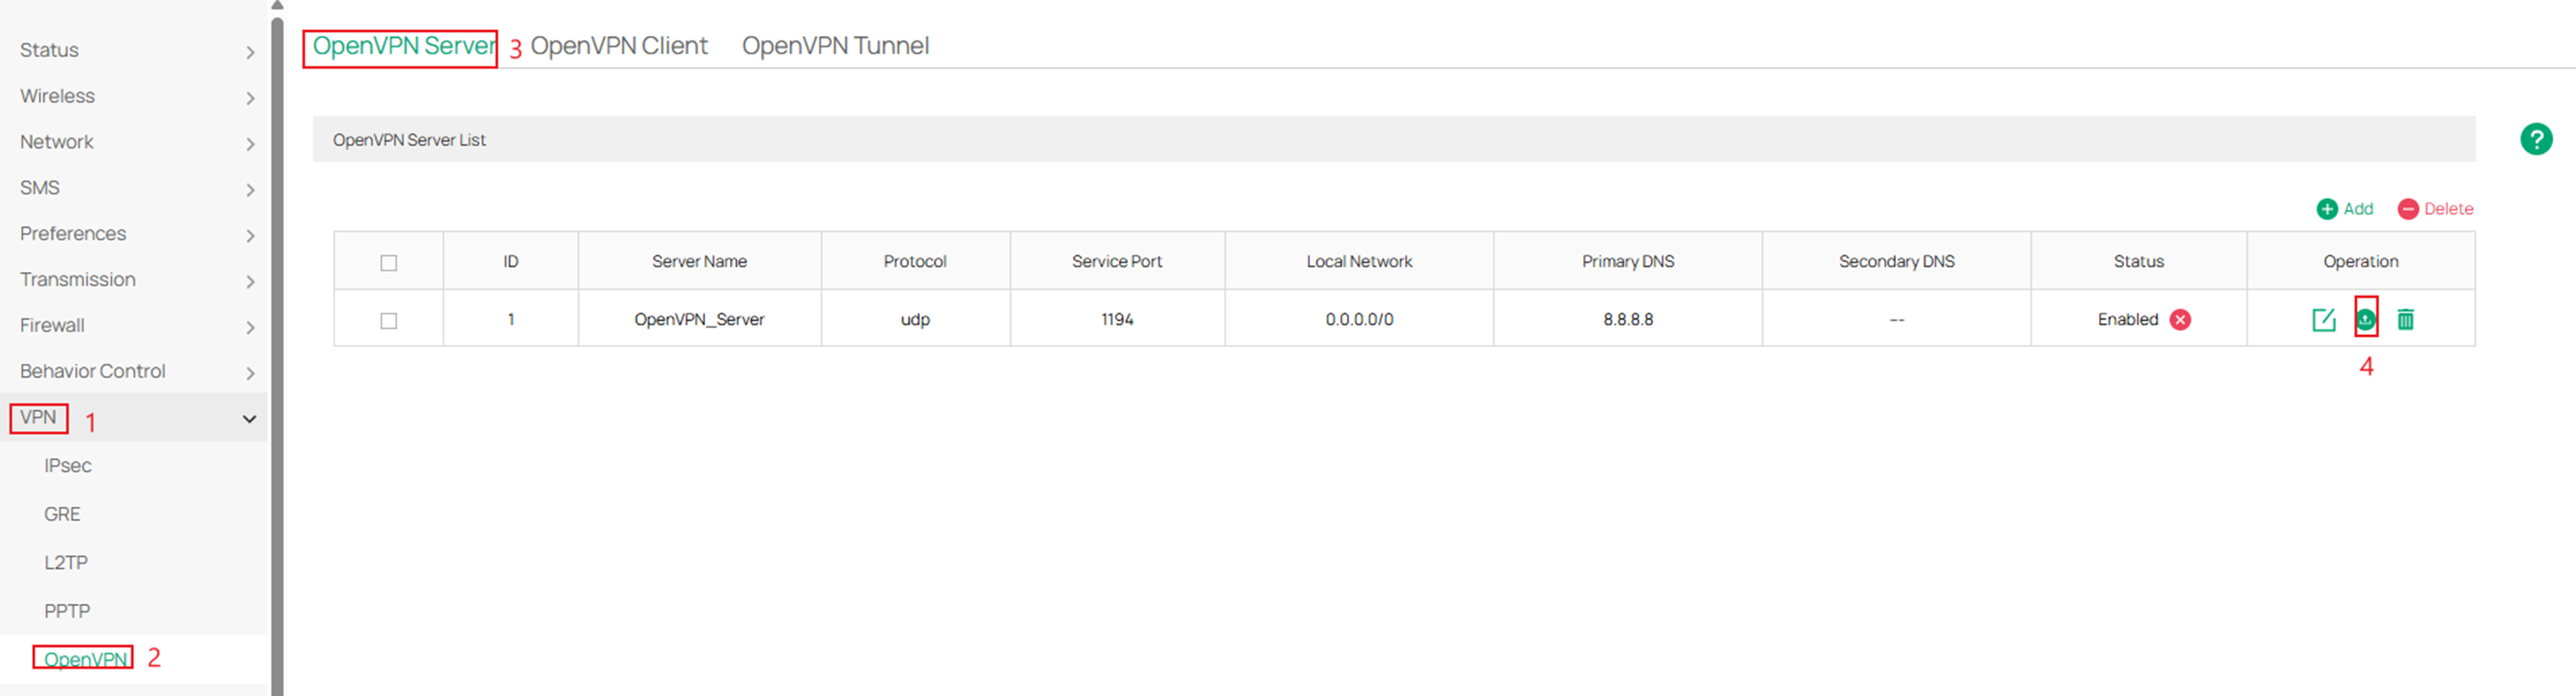
Step 1. Log into the router via web browser, go to VPN > OpenVPN > OpenVPN Server > and click Add. To log in to your Omada Gateway, please reference this guide: How to login to the web management page of the Omada Device (Standalone mode)
Step 2. Fill in the necessary parameters and click OK.
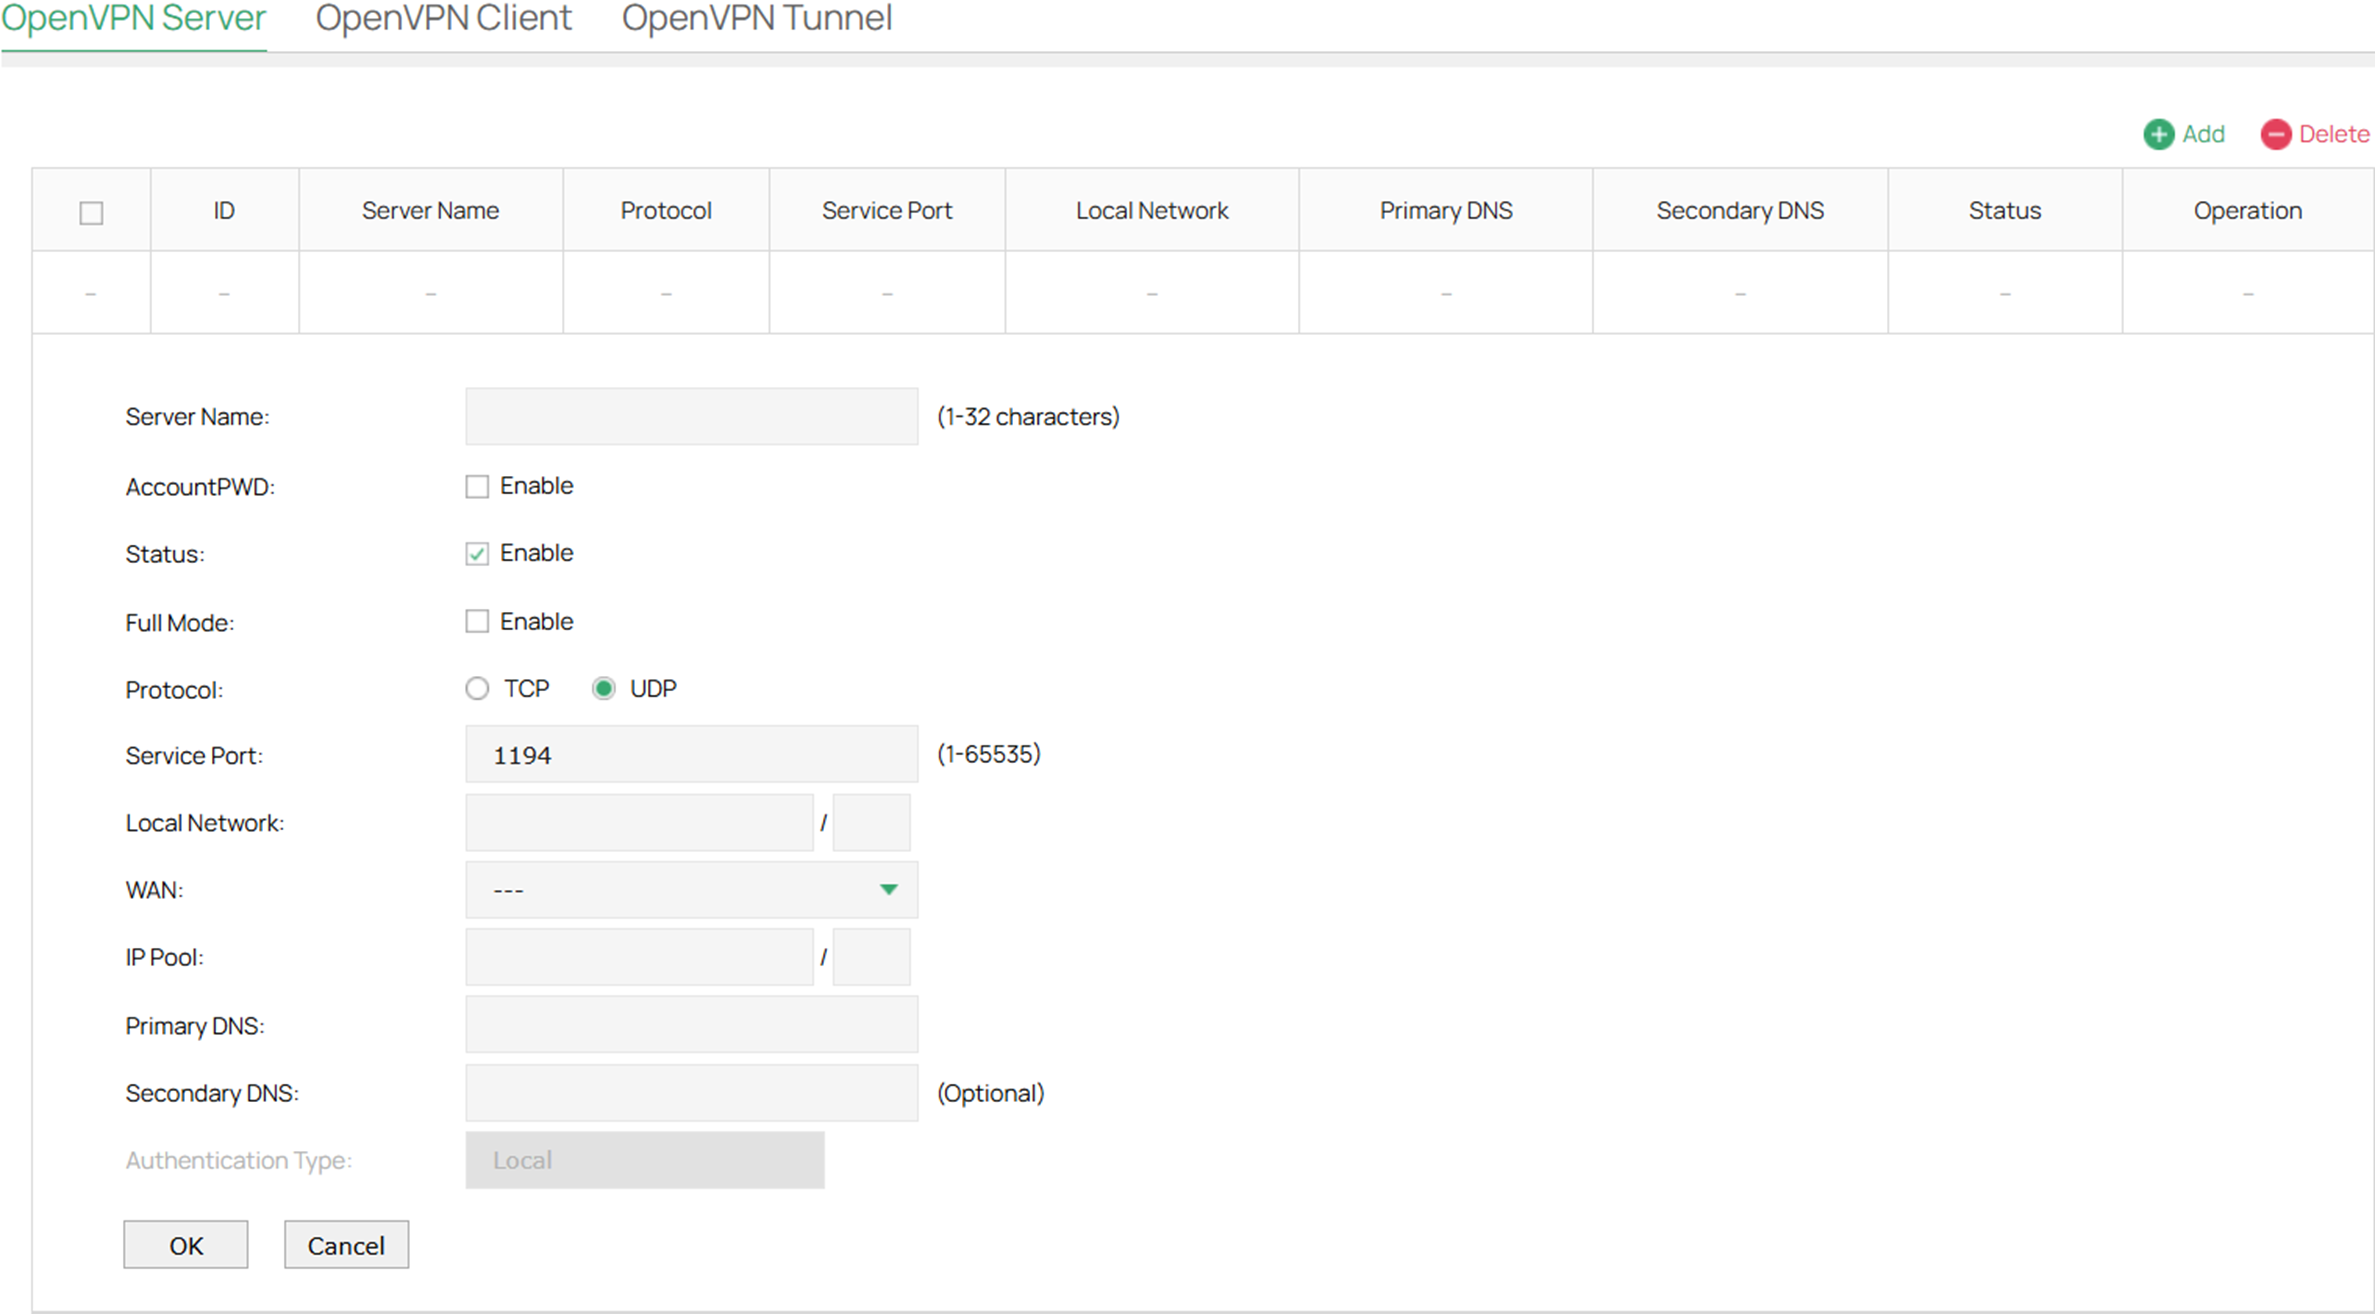
Server Name: Enter a name to identify the VPN server
AccountPWD: When enabled, OpenVPN will use username/password to authenticate users.
Status: Check the box to enable the OpenVPN server.
Full Mode: Select this option to allow all client traffic to pass through the tunnel.
Protocol: Select the communication protocol for the gateway which works as an OpenVPN Server. Two communication protocols are available: TCP and UDP.
Service Port: Enter a VPN service port to which a VPN device connects. The default port is 1194.
Local Network: Select the network on the local side of the VPN tunnel. The VPN policy will be only applied to the selected local network.
WAN: Select the WAN port on which the VPN tunnel is established. Each WAN port supports only one OpenVPN tunnel when the gateway works as a OpenVPN server.
IP Pool: Enter the IP address and subnet mask to decide the range of the VPN IP pool. The VPN server will assign IP address to the remote host when the tunnel is established. You can specify any reasonable IP address that will not cause overlap with the IP address of the LAN on the local peer router.
To avoid IP address conflicts, the IP Pool of the OpenVPN Server cannot include the IP address of the LDAP Server.
Primary DNS: Specify the primary DNS server pushed to clients.
Secondary DNS: Specify the secondary DNS server pushed to clients.
Authentication Type: Specify the authentication method used by the OpenVPN server.
Local: Use a built-in authentication server to authenticate when the tunnel is created. If you don’t have an additional external server, you can choose local authentication.
LDAP: Use an external LDAP server to authenticate when the tunnel is created.
LDAP Profile: Specify an LDAP entry that you have configured in Authentication > LDAP.
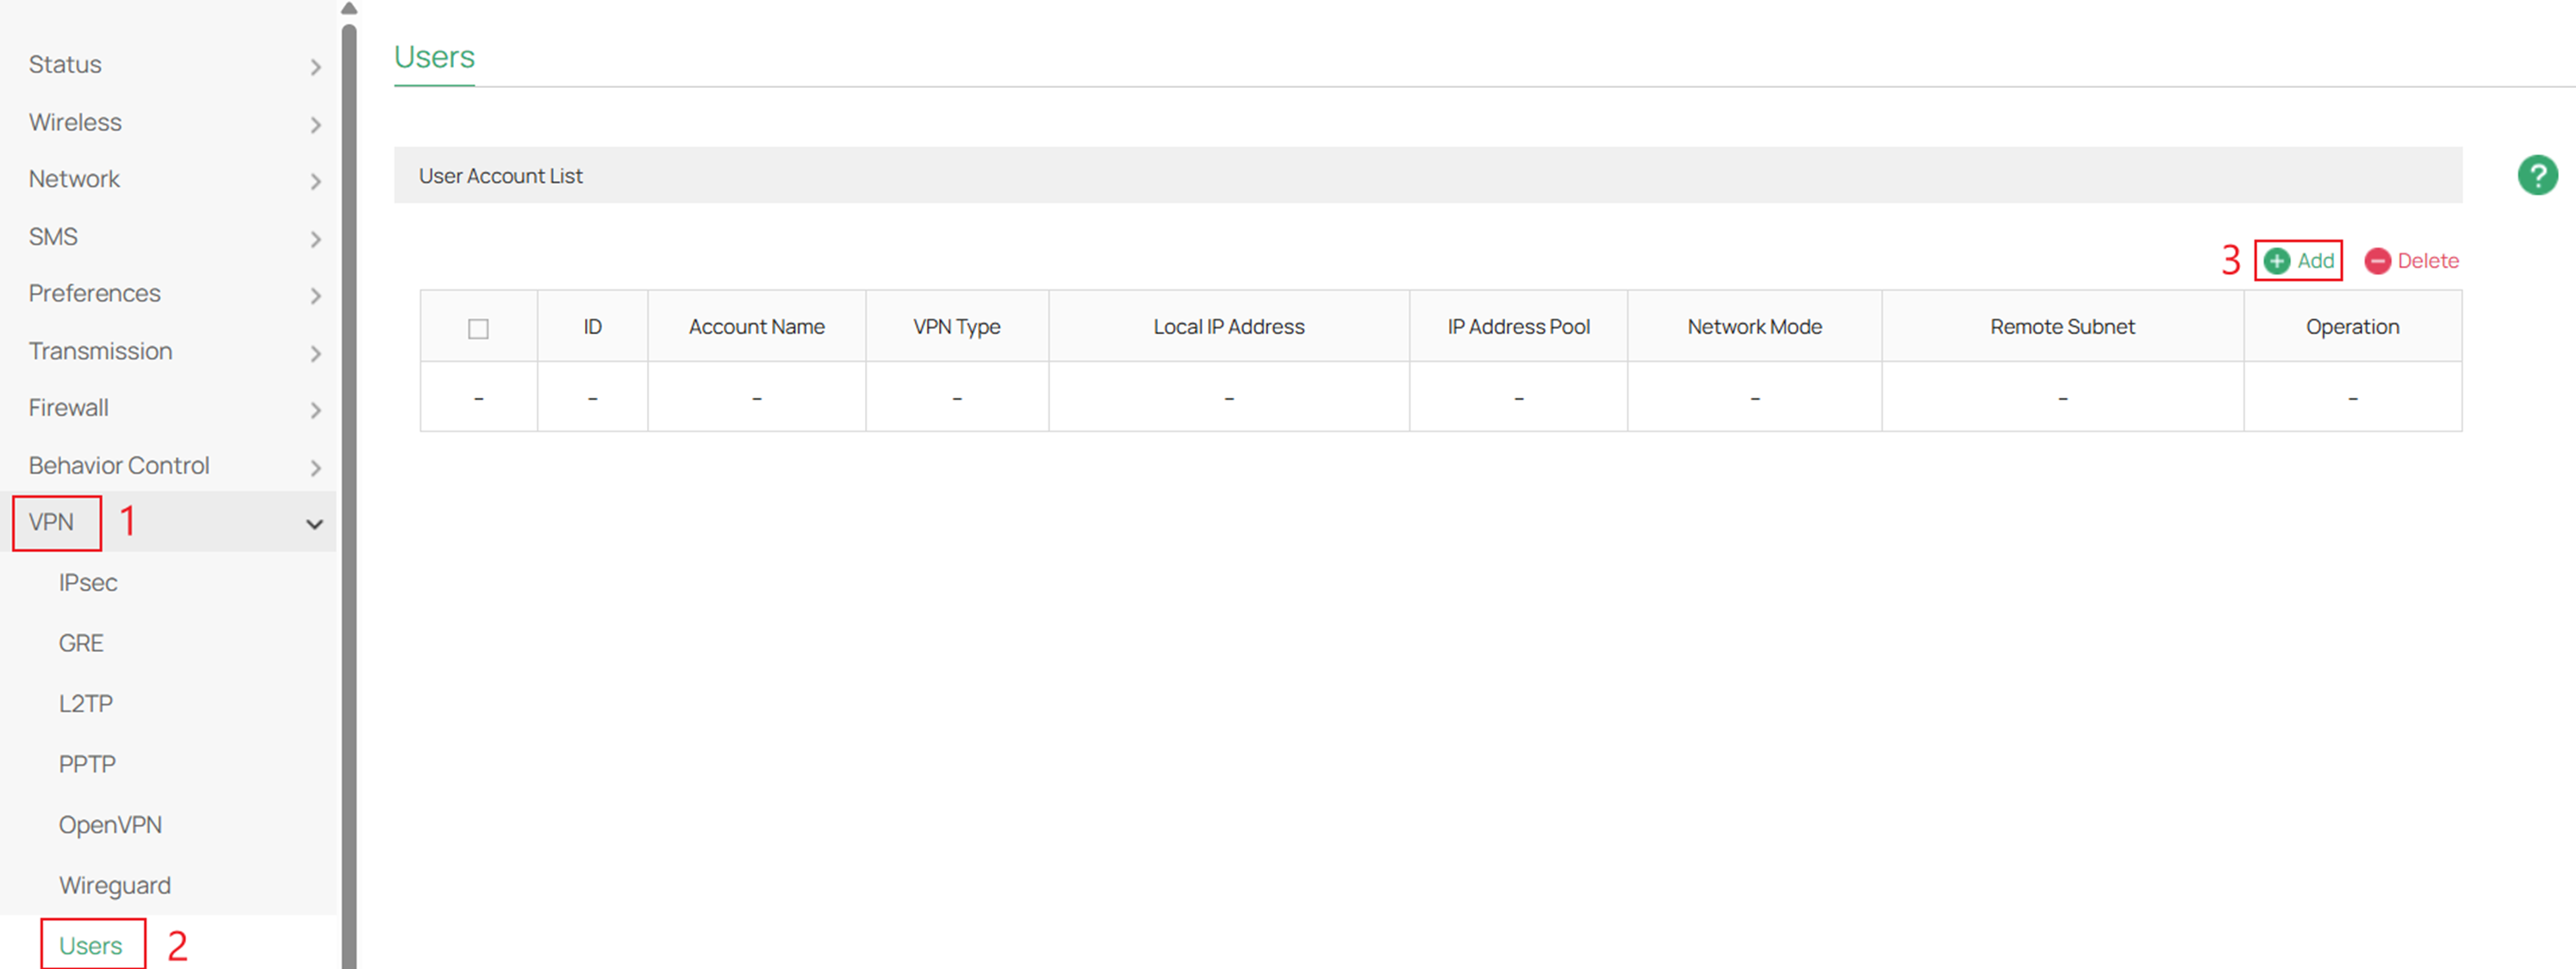
Step 3. If you chose to AccountPWD option and Authentication Type: Local please navigate to VPN > Users > and click Add.
If you chose Authentication Type: LDAP please reference: How to configure LDAP on Omada Gateway.
If AccountPWD was not enabled please skip to Step 5.
Step 4. Fill in the necessary parameters for the local user account and click OK to apply.
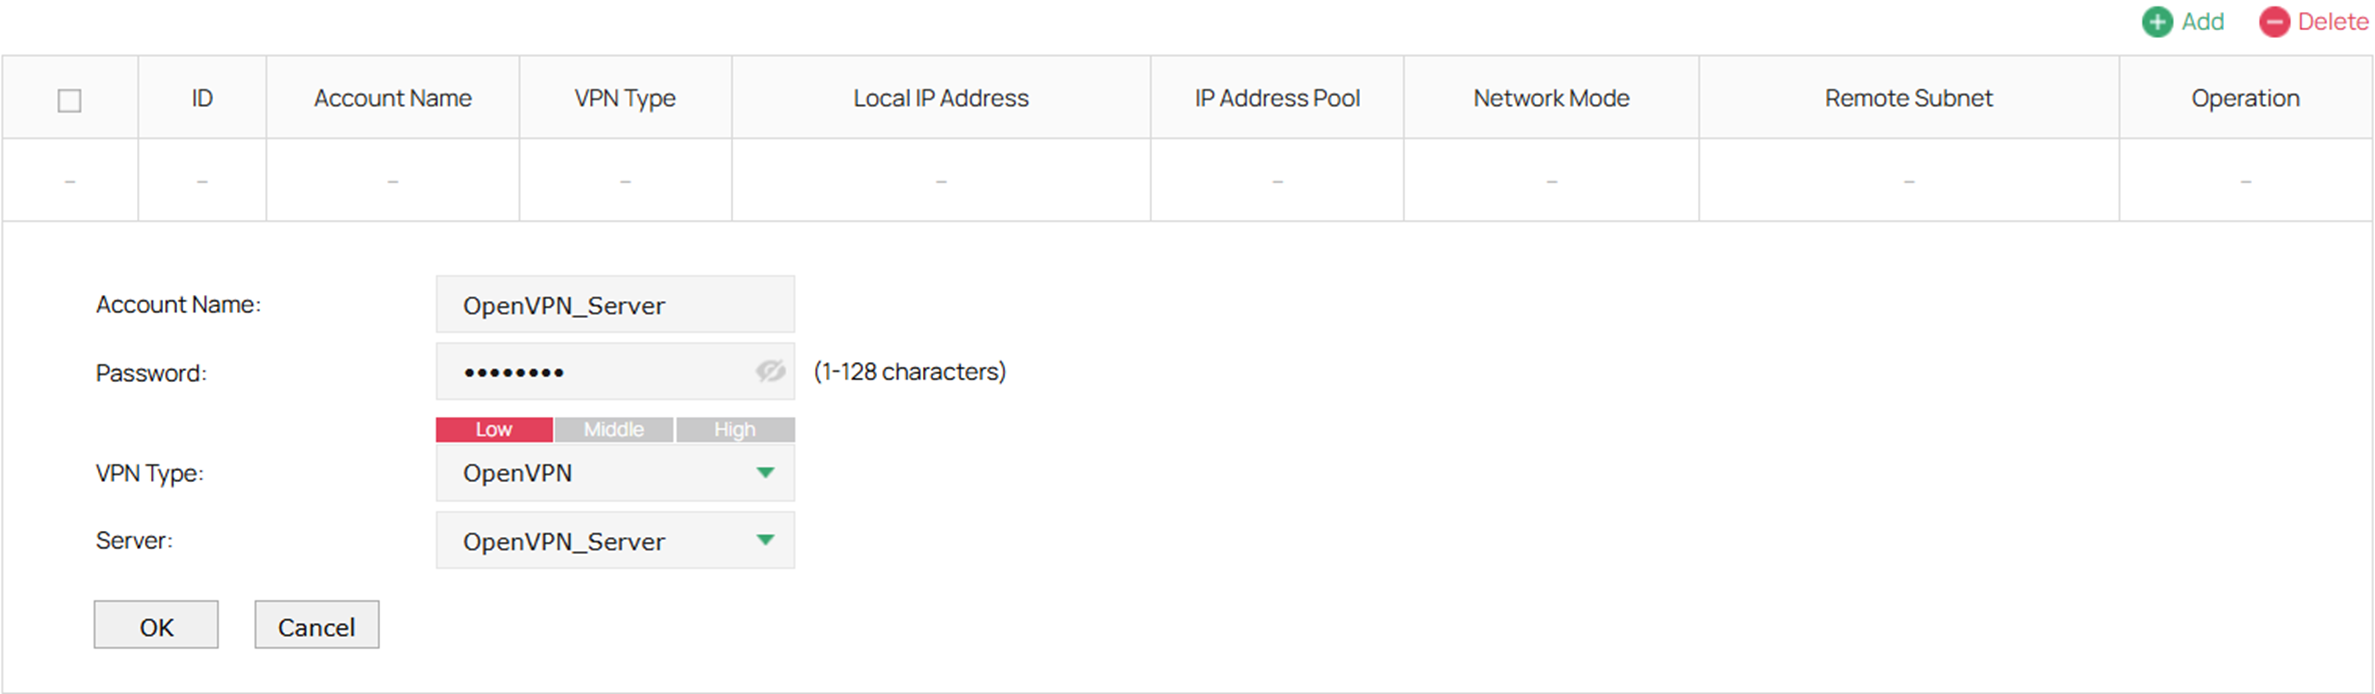
Account Name: Account name used for the VPN tunnel.
Password: Password for the local account.
VPN Type: Specify the protocol for the VPN tunnel. There are three types: L2TP, PPTP and OpenVPN.
Server: Select the OpenVPN server to which the user belongs. Only the server with the username and password authentication option enabled can be selected.
Step 5. Navigate to VPN > OpenVPN > OpenVPN Server and export the OpenVPN certificate under the Operation column.
Step 6. After exporting the OpenVPN certificate upload the certifcate in the OpenVPN client. Please reference: How to Set Up an OpenVPN Connection with Omada Gateways on Client Devices with Different Operating Systems.
Configuration for OpenVPN Client
Omada Gateway acts as an OpenVPN client, enabling clients on a LAN to securely access remote sites or the internet.
Step 1. Export the OpenVPN file from the server that you are establishing a tunnel with.
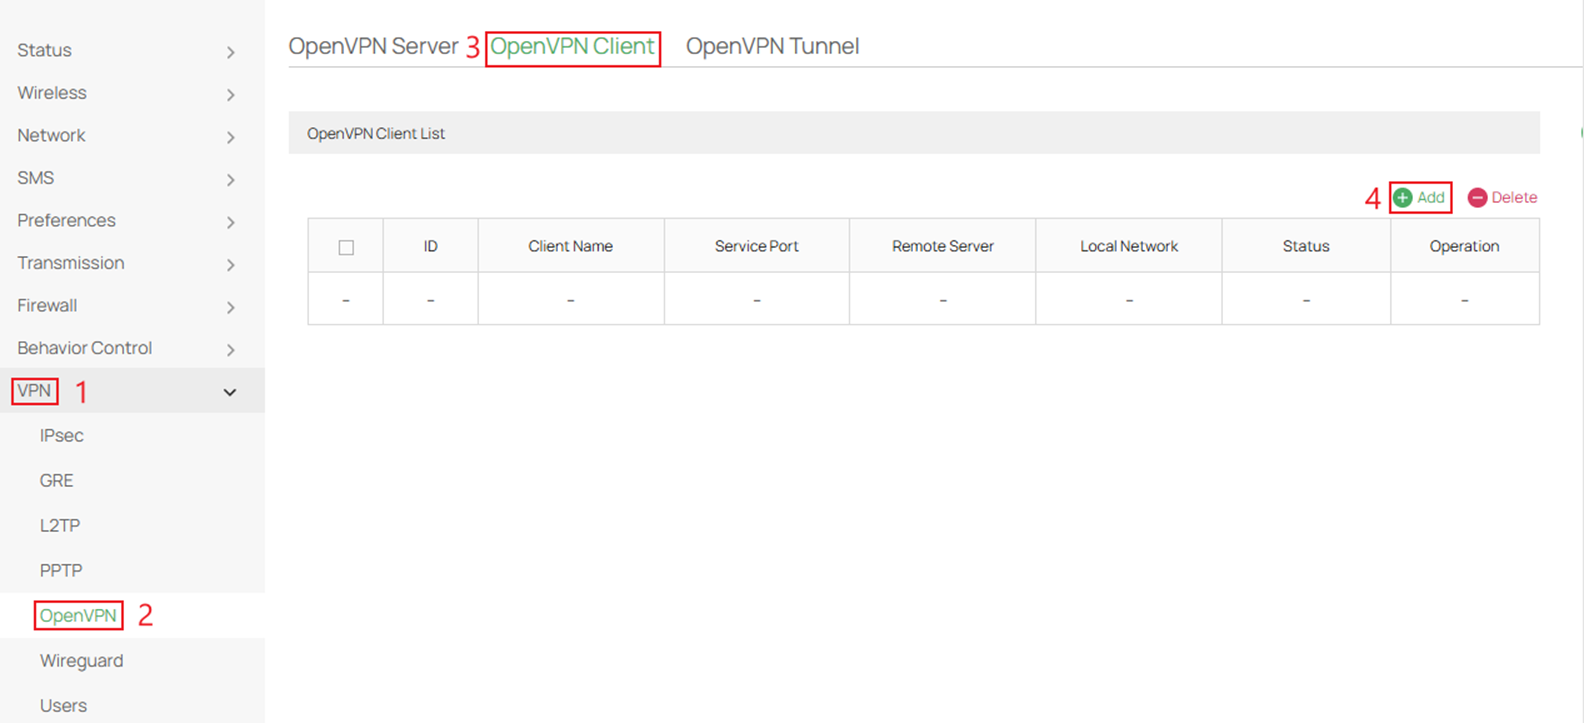
Step 2. Log in to the router via web browser, go to VPN > OpenVPN > OpenVPN Client, and click Add.
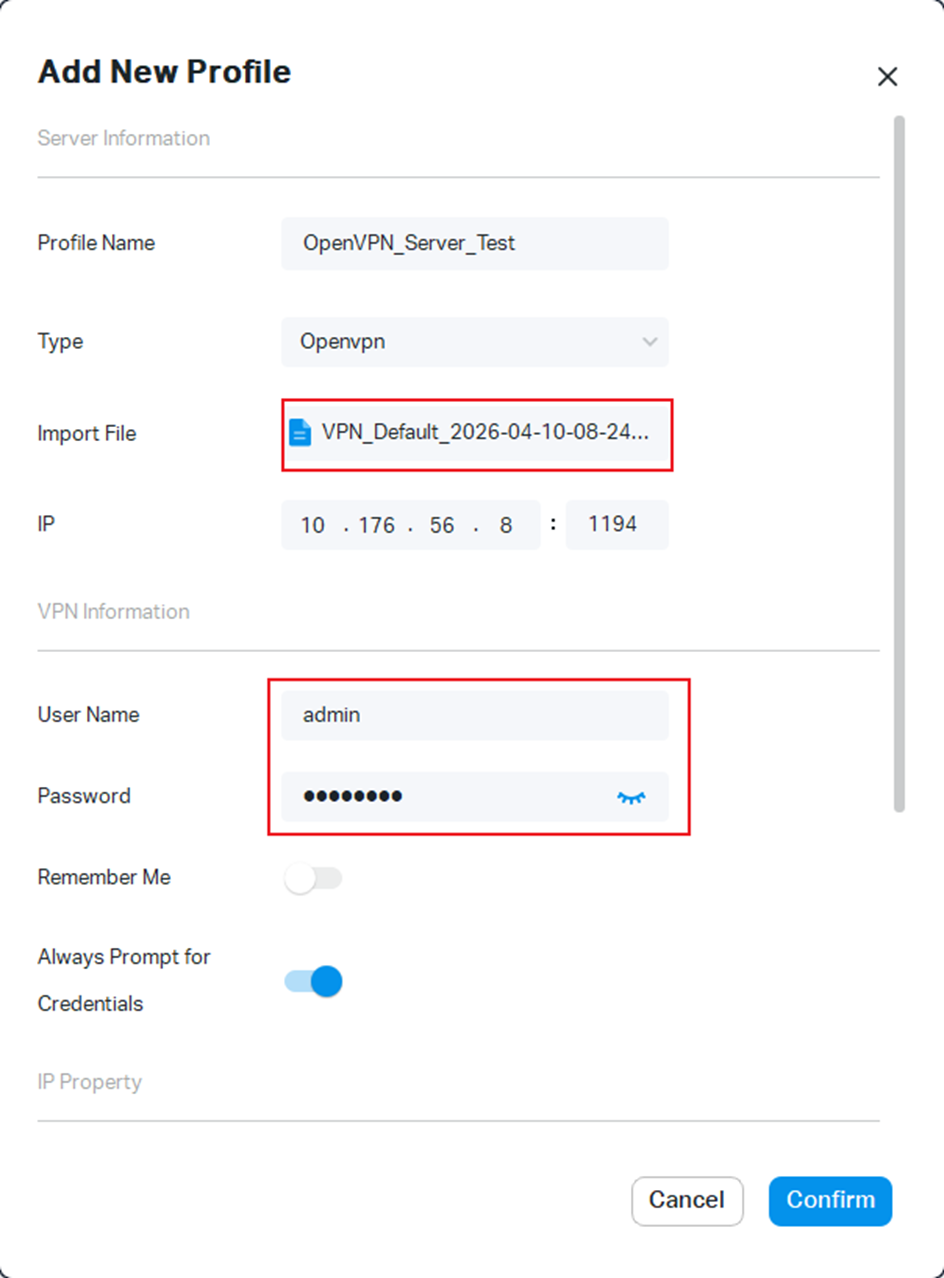
Step 3. Fill in the parameters and import OVPN file from the server and press OK.
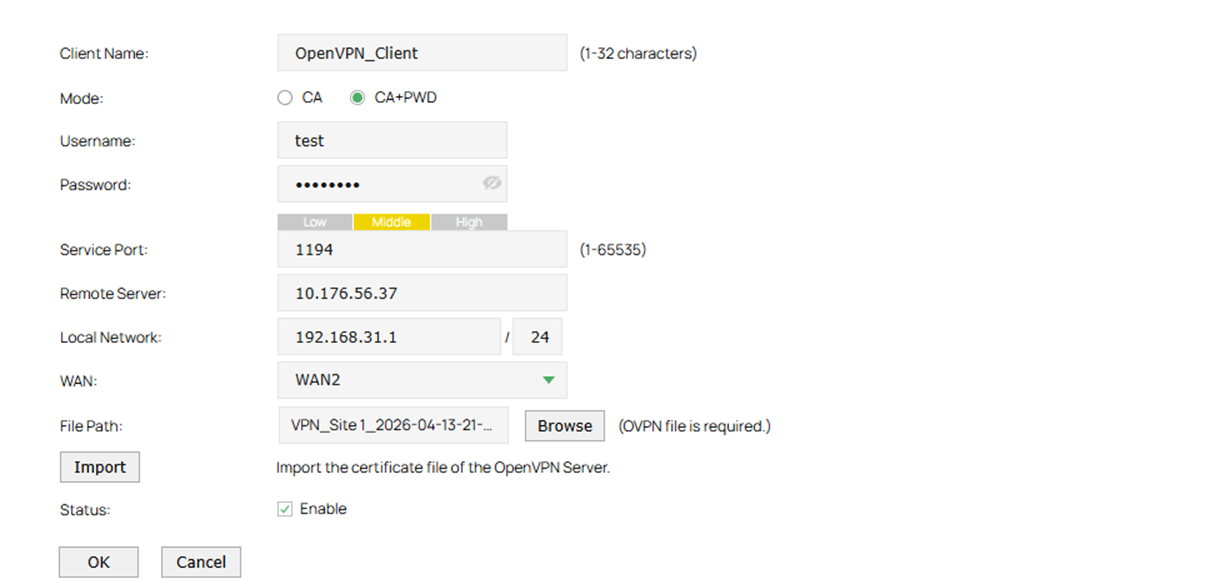
Client Name: Specify the name of OpenVPN client.
Mode: Select the authentication method used by the client. In ca mode, only the certificate file is required. In ca+pwd mode, additional username and password are required.
Username: Enter the username required for client authentication.
Password: Enter the password required for client authentication.
Status: Check the box to enable the OpenVPN client.
Service Port: Enter a VPN service port to which a VPN device connects. The default port is 1194.
Remote Server: Enter the IP address or domain name of the OpenVPN server.
Local Network: Select the subnets allowed through the tunnel coming from the client side. The VPN policy will apply only to the selected local network.
WAN: Select the WAN port on which the VPN tunnel is established.
File Path: Browse to the OpenVPN configuration file that ends in .ovpn, generated by the OpenVPN server.
Import: Click this button to import the OpenVPN file that ends in .ovpn generated by the OpenVPN server. Only one file can be imported. If the certificate file and configuration file are generated singly by the OpenVPN server, combine two files and import the whole file.
Verification
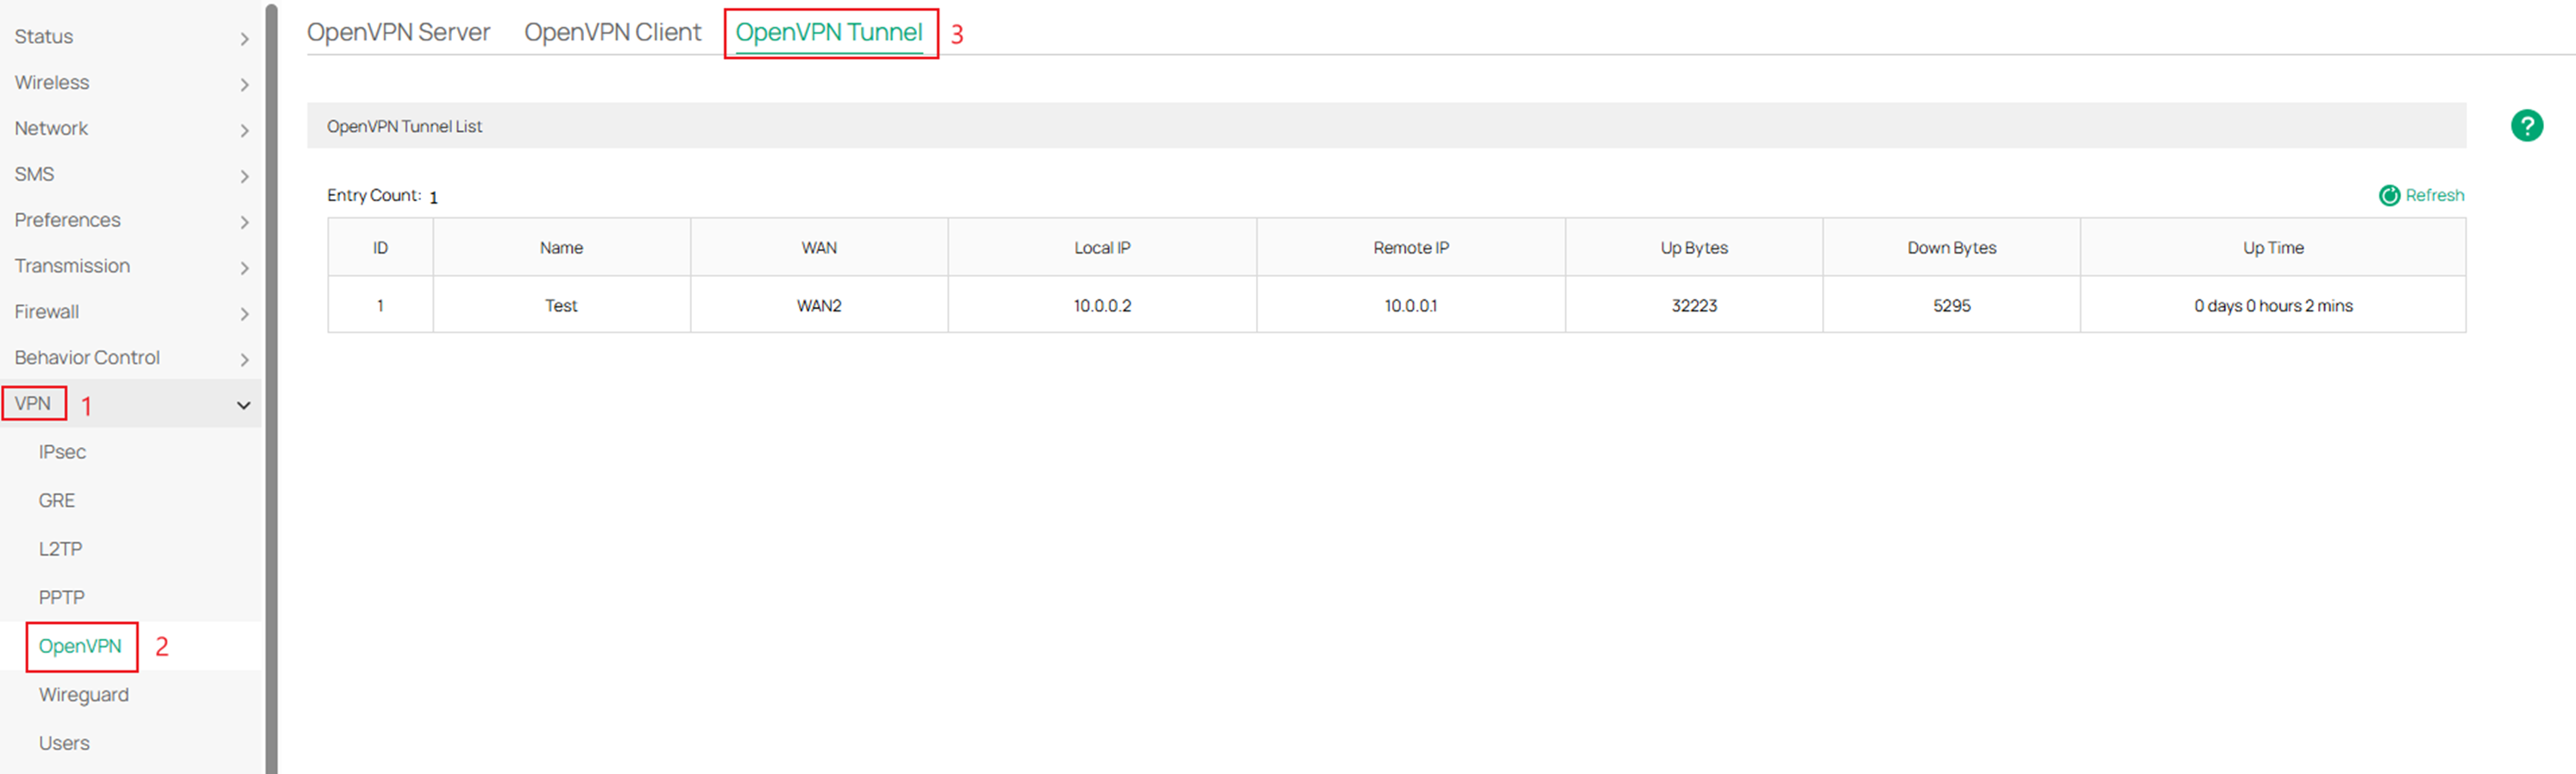
Navigate to VPN > OpenVPN > OpenVPN Tunnel to see the current status of the tunnel.
Conclusion
This guide demonstrates how to successfully configure OpenVPN on an Omada Gateway in standalone mode for both server and client setups. By following these steps, secure remote access and site-to-site connectivity can be established, ensuring encrypted communication and reliable network access.
Get to know more details of each function and configuration please go to download the manual of your product.
QA
Q1: Why is my remote device not establishing a tunnel to my OpenVPN server hosted on my Omada Gateway?
A1: Check whether the gateway is using a public IP or a private IP on its WAN interface. If there is a private IP address, please set up port forwarding on your main router first. And make sure the settings on both the client and server sites are correct and matchable.
