


How to Fix Omada Software Controller Failing to Start After Port Change on Linux (v6.2.0 or Later)


Contents
For configuration via “omada.properties”
For configuration via system settings
Introduction
When changing the default ports of the Omada Software Controller on Linux, incorrect port configuration may prevent the Controller from starting. By default, the Controller uses HTTPS port 8043 for management, HTTPS port 8843 for portal access, and HTTP port 8088 for both management and portal services.
Using privileged ports (below 1024), such as port 443, can cause startup failure because non-root users are not allowed to bind to these ports.
This article explains the common causes of this issue and provides step-by-step solutions to restore normal Controller operation quickly and safely.
Requirements
- Omada Software Controller
- Access to the Controller Web UI
- Root or administrative privileges on the Linux system
Configuration
When the Controller fails to start due to improper port configuration, you need to restore or adjust the port settings through the configuration file or system settings. The following section describes how to configure and recover the Controller properly.
Note: On Linux systems, ports below 1024 are privileged ports and cannot be used by non-root users. If such ports (e.g., 443) are configured, the Controller may fail to start.
The Controller stores port settings in the “omada.properties” file. In general, after the Controller is initialized, port configurations made via the Web UI will override the settings in this file.
For configuration via “omada.properties”
Step 1. Open a terminal and navigate to the following directory:
cd /opt/tplink/EAPController/properties/

Step 2. Open the “omada.properties” file using a text editor such as vi, vim, or nano.
Example: nano omada.properties

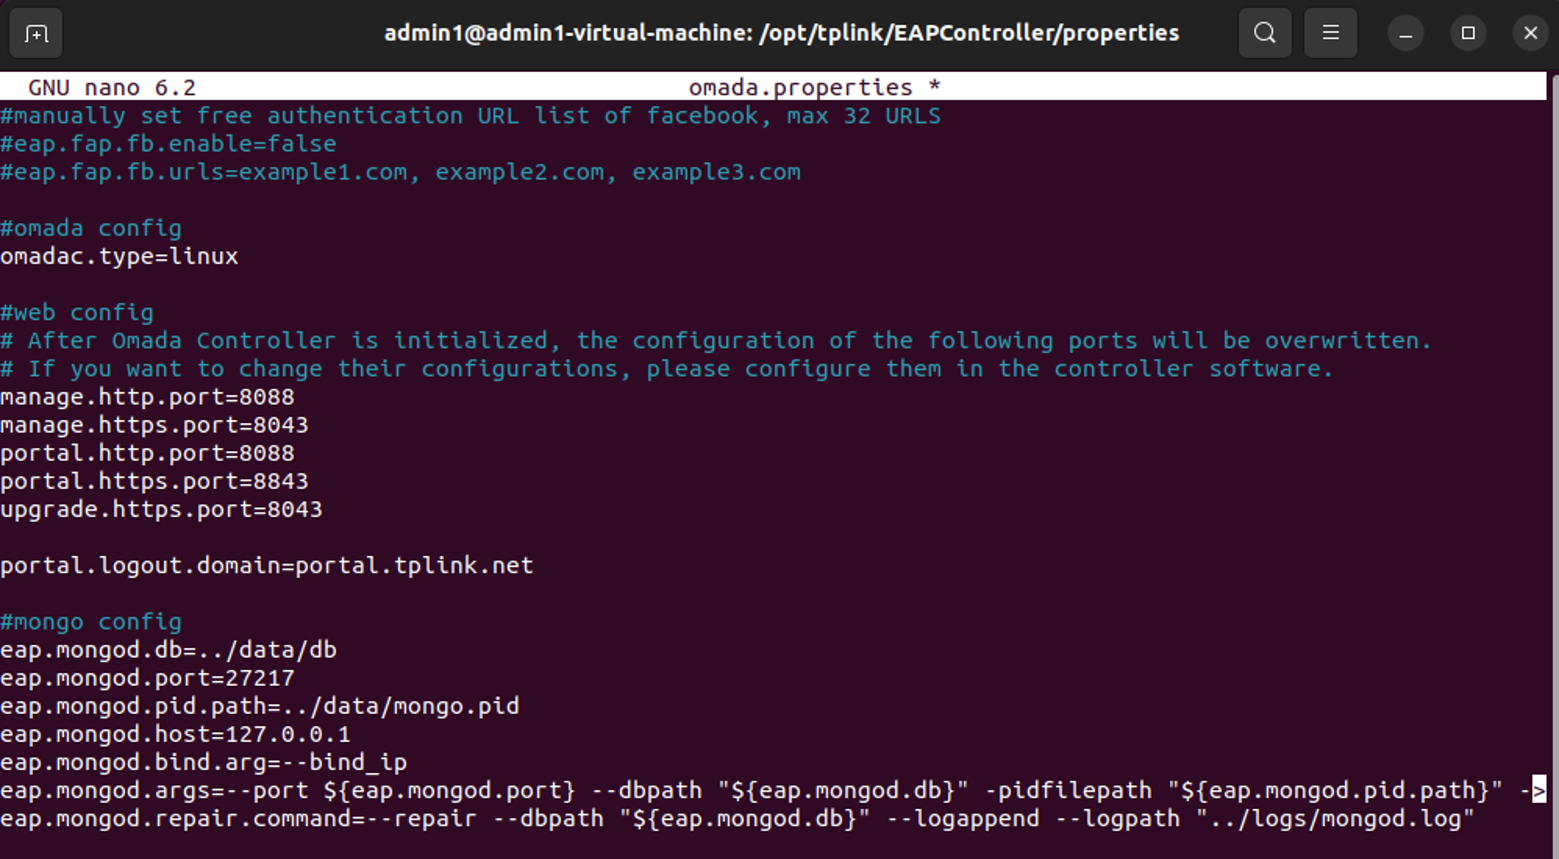
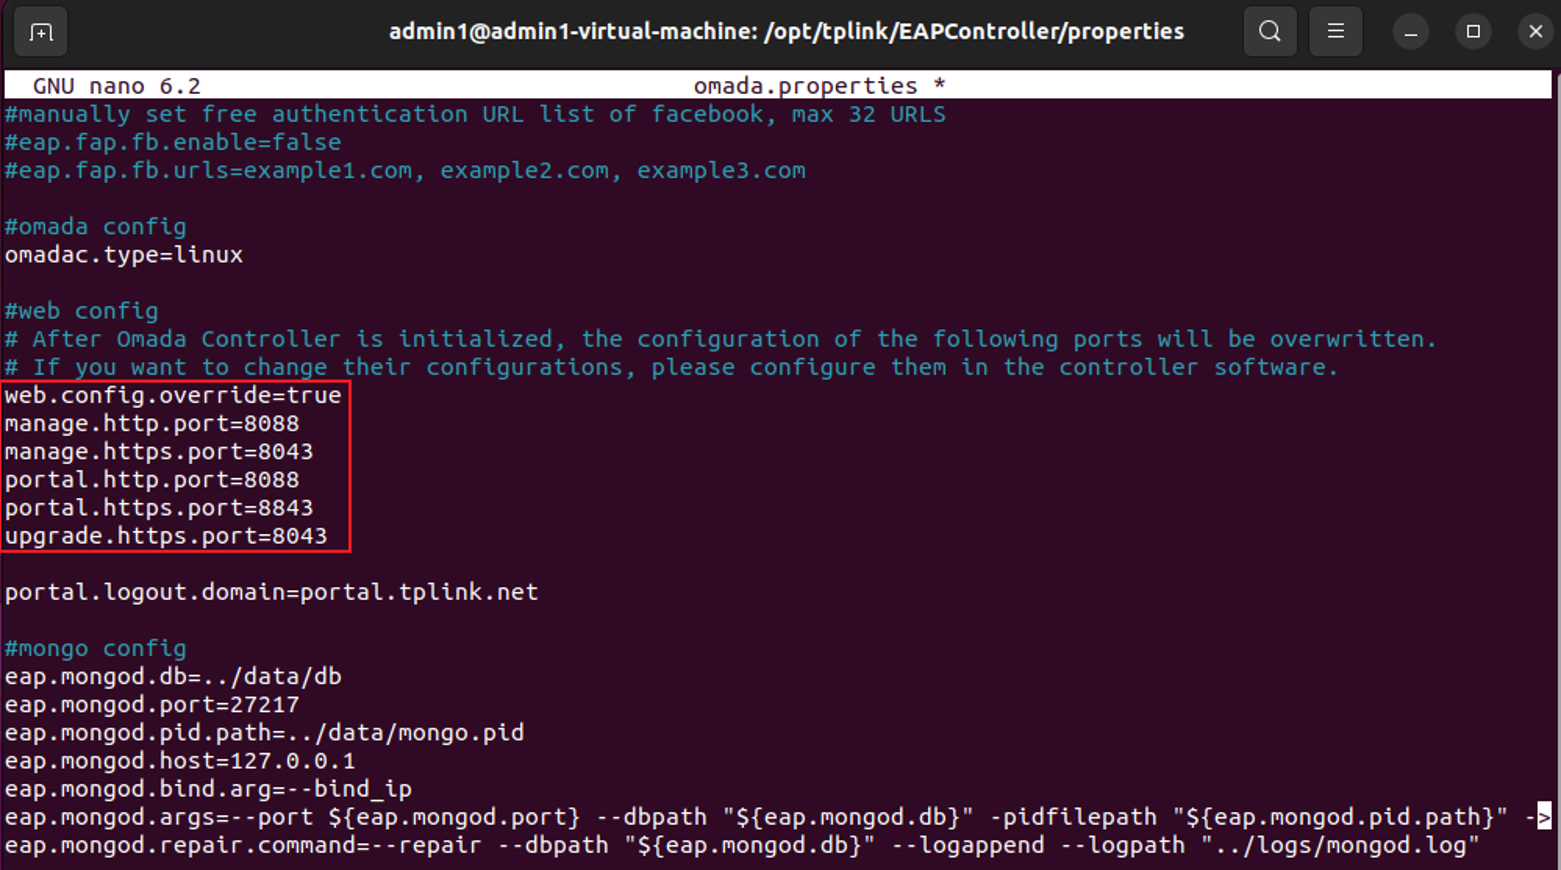
Step 3. Locate the port configuration section. Add the following parameter to enable manual override and modify the port values to valid ports (above 1024), for example:
web.config.override=true
manage.http.port=8088
manage.https.port=8043
portal.http.port=8088
portal.https.port=8843
upgrade.https.port=8043
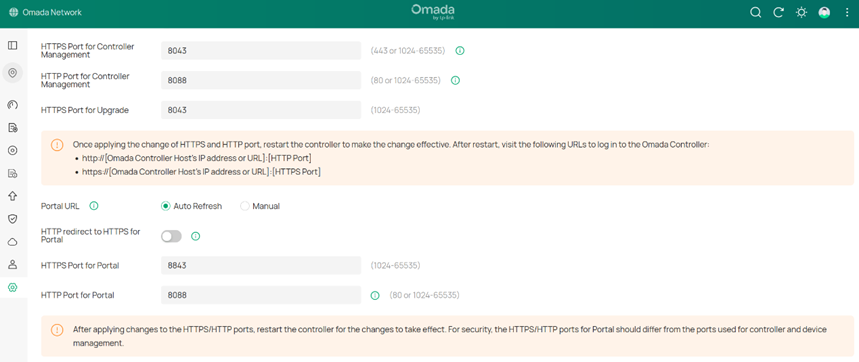
Step 4. Save the file and start the Controller service. Log in to the Controller Web UI and confirm or adjust the ports as needed.
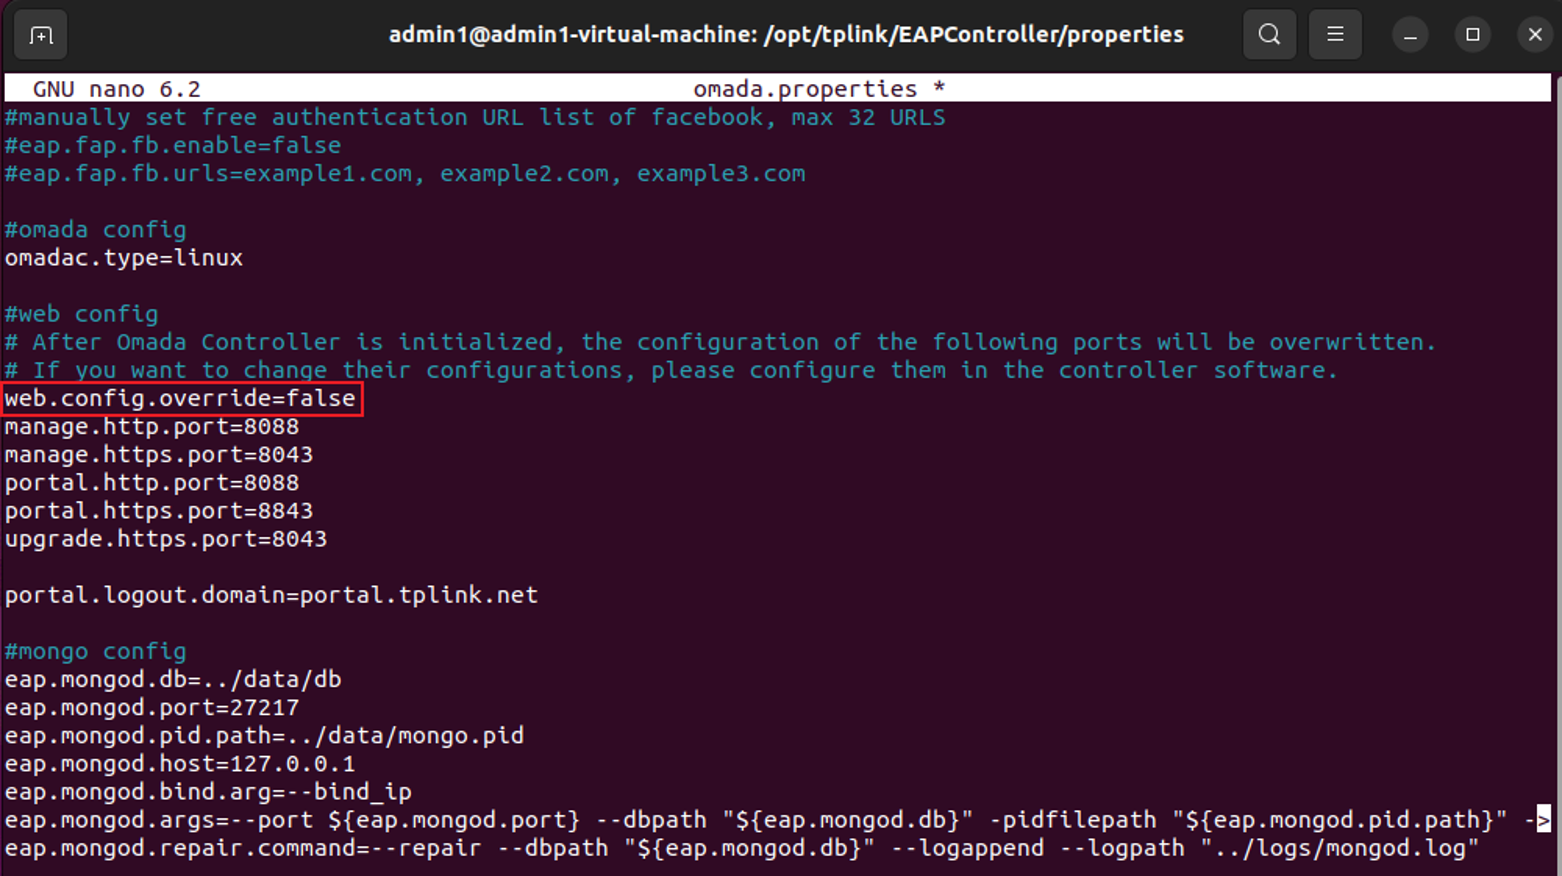
Step 5. Edit the file again and set “web.config.override=false” or remove the parameter.
For configuration via system settings
Step 1. Log in to the Linux system with root privileges and execute the following command to allow non-root users to use privileged ports:
sysctl net.ipv4.ip_unprivileged_port_start=443

Step 2. Start the Controller and access the Web UI. Go to Global View > Settings > System Settings and change the HTTPS management port to a port above 1024 via the Controller interface and save the settings.
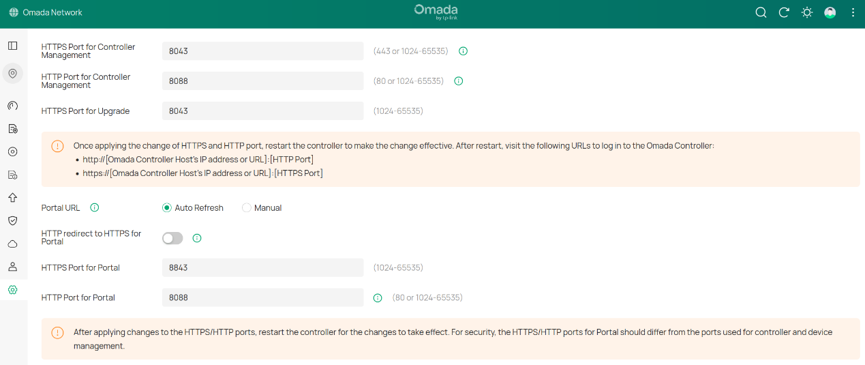
Step 3. Restart the Controller to apply changes.
Step 4. Restore the default system setting:
sysctl net.ipv4.ip_unprivileged_port_start=1024

By following these steps, you can restore the Controller to a normal running state and ensure proper port configuration.
Conclusion
Startup issues caused by port misconfiguration can be resolved by correcting port settings via the configuration file or system settings. For stable operation, always use ports above 1024 and avoid privileged ports on Linux systems.
To learn more about each function and configuration, please visit Support Home to download or check the manual for your product.
