


How to configure Omada EAP in Repeater mode

Topology before starting configuration
Configuration for Standalone web UI
Introduction
Repeater mode allows an Omada EAP to extend an existing wireless network without requiring a wired connection. Instead of broadcasting a new standalone network, it wirelessly connects to your primary router or AP and rebroadcasts the signal, helping eliminate dead zones and improve coverage in hard-to-reach areas.
Requirements
- An Omada EAP Capable of Repeater mode
Note: To check if your product supports repeater mode, please check here: https://www.omadanetworks.com/omada-repeater-mode/product-list/
Topology before starting configuration
This is an example of a basic topology

Configuration
There are 2 methods to configure Repeater mode – Standalone web UI and the Omada App.
Configuration for Standalone web UI
This section describes the configuration for Standalone mode. There are two ways to connect to the EAP - Wired and wireless. Please refer to this guide for your connection method: How to login to the web management page of the Omada Device (Standalone mode)
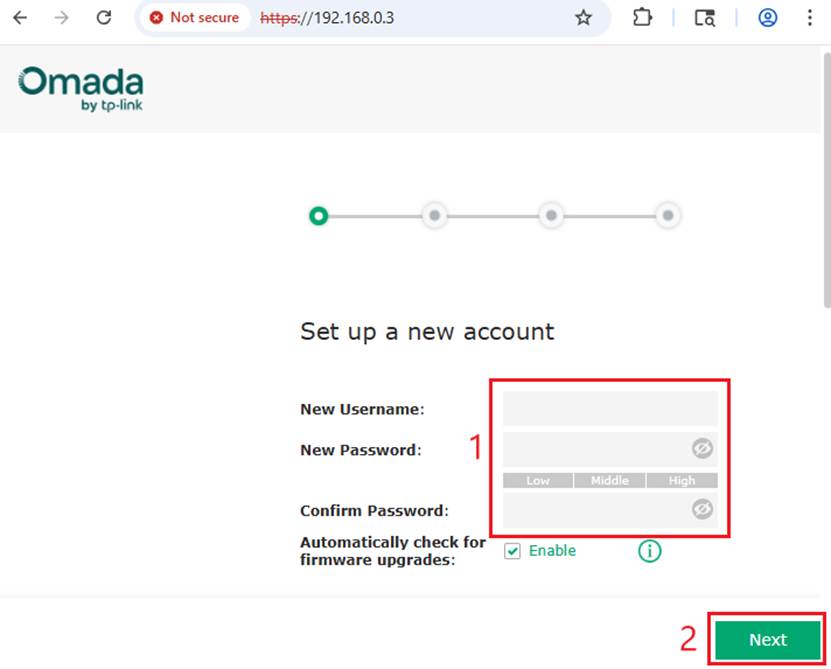
Step 1. Connect to the EAP and login to the EAP’s management page. Set a New Username and Password. Click Next.
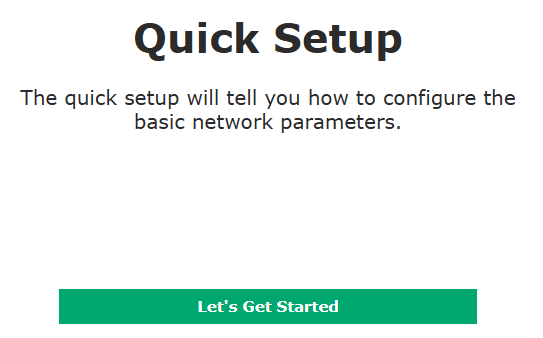
Step 2. Quick Setup. Click Let’s Get Started.
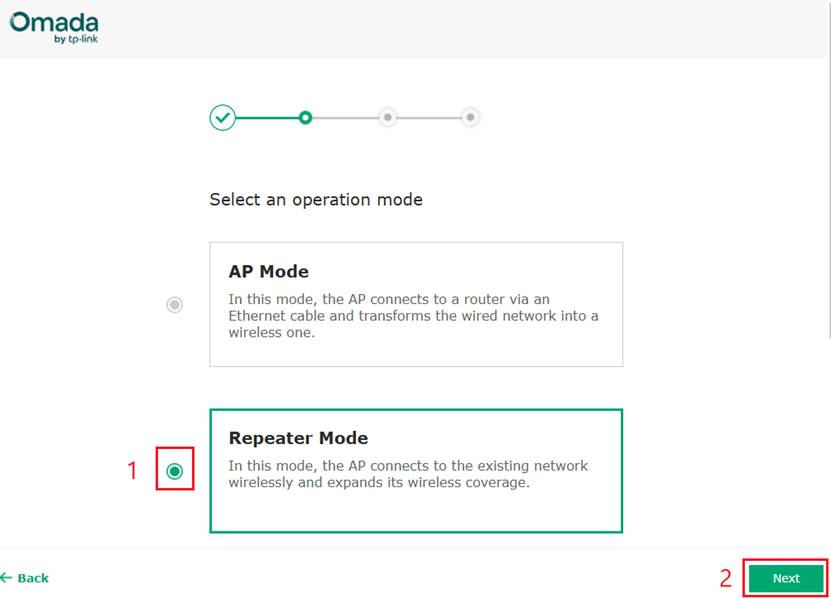
Step 3. Select Repeater Mode. Click Next.
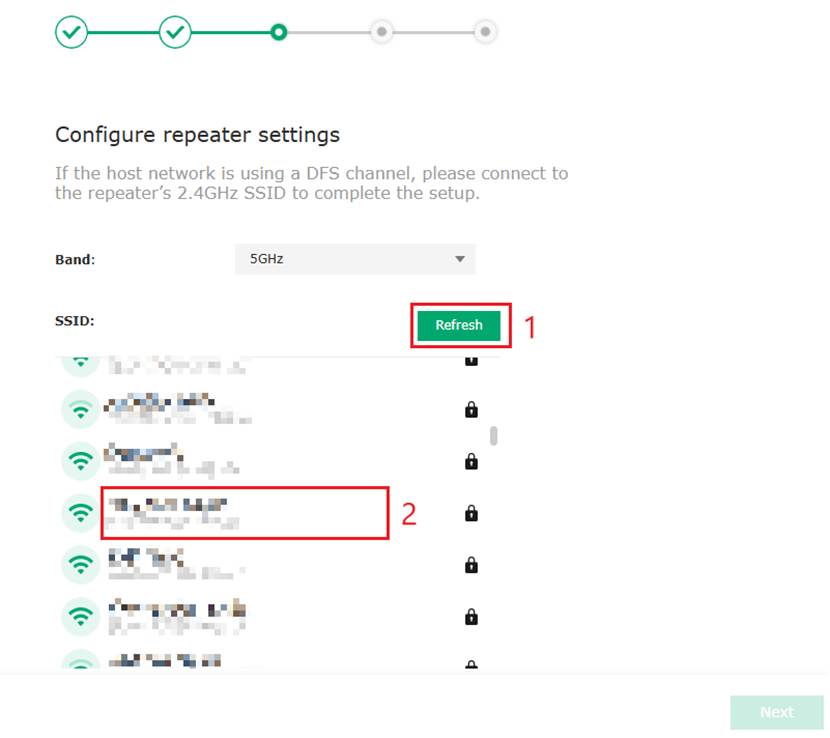
Step 4. Choose the Band and SSID you want to repeat.
Step 5. A prompt for the password of the selected SSID band will appear. Please enter the Password for the SSID band. Then click Next.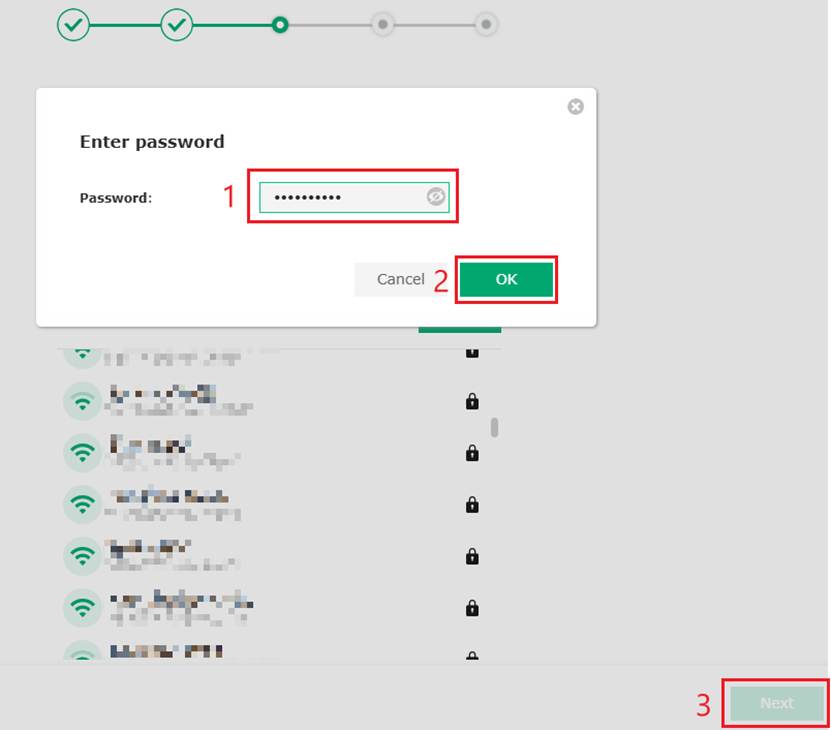
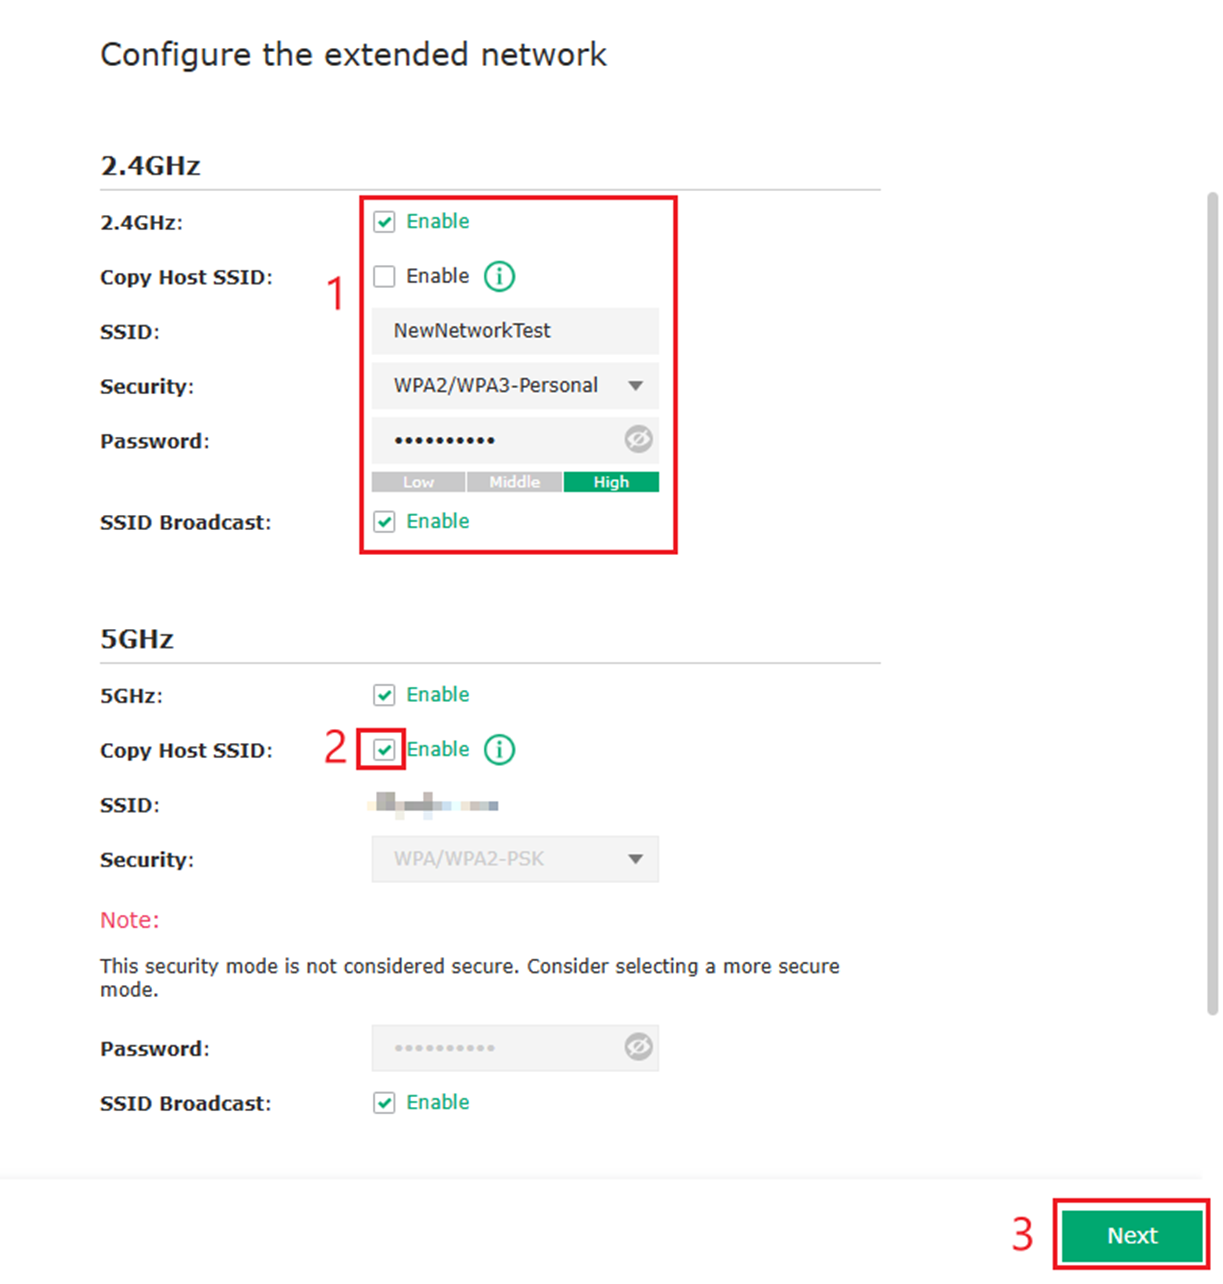
Step 6. Configure the extended network by enabling each band (2.4 GHz and/or 5 GHz), then defining the SSID and security settings the repeater will broadcast. You can either copy the host network details or assign a unique network name and password for the extended coverage. An example of both setups in the provided screenshot.
After configuration is complete, Click Next.
Step 7. A summary page will appear with the finalized configuration details. Click Done when you are satisfied with the configuration. 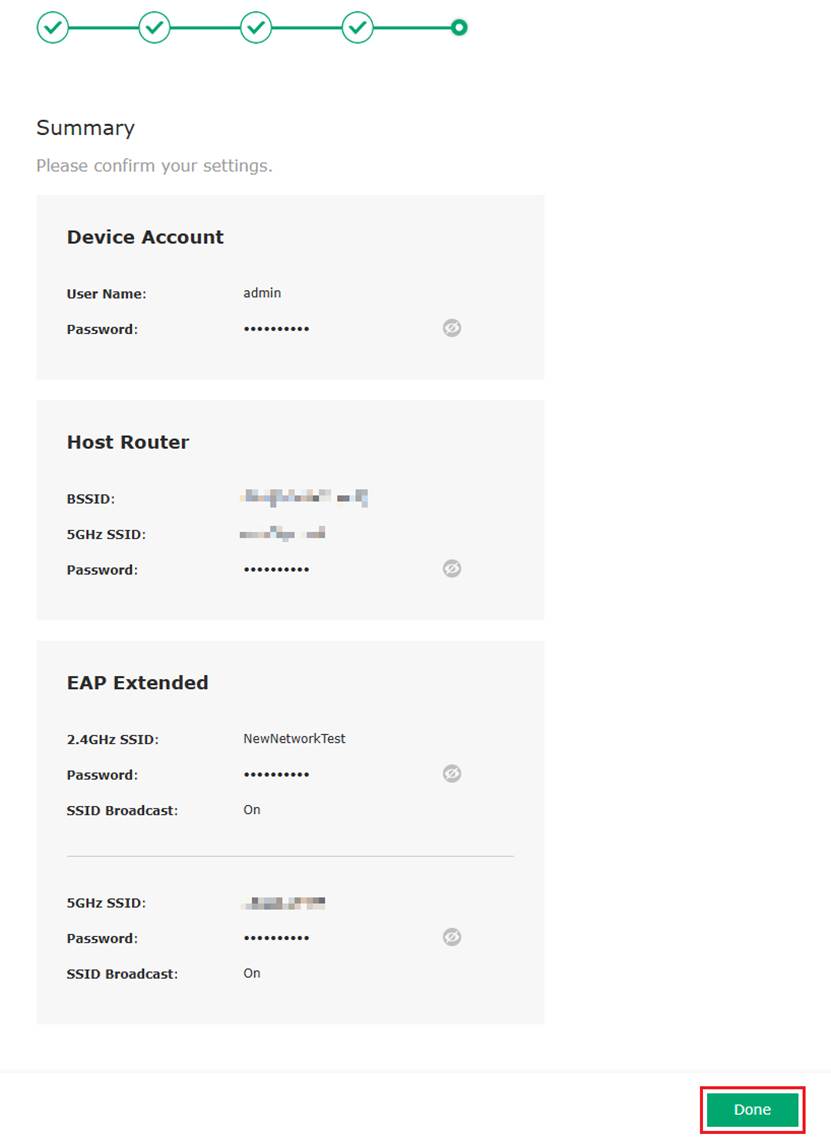
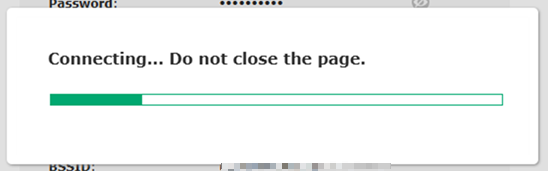
Step 8. The EAP will finalize its configuration.
Step 9. Configuration is complete.
Configuration for Omada App
This section describes the configuration for repeater mode using the Omada App. After updating and/or downloading the Omada App on a mobile device, power on the Omada EAP. On a mobile device, connect to the SSID displayed on the label of the Omada EAP and open the Omada App.
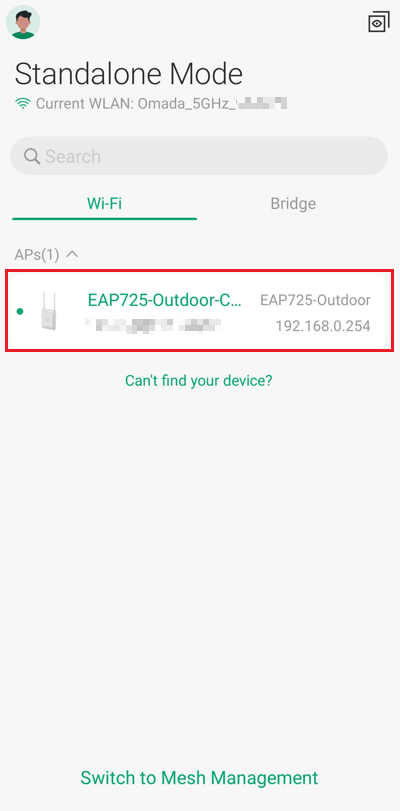
Step 1. Find the desired Omada EAP within Standalone Mode in the Omada App. Select the device to begin configuration.
Step 2. Select Let’s Get Started, input your desired Device Username and Device Password. Select Next. 
Step 3. Select Repeater Mode, select Next. Configure the Band and SSID. After selecting SSID, the EAP will scan for viable SSID’s. Select the SSID you would like to configure as a Repeater. Enter the Password for this SSID and select Save. Select Next to progress to the next configuration step.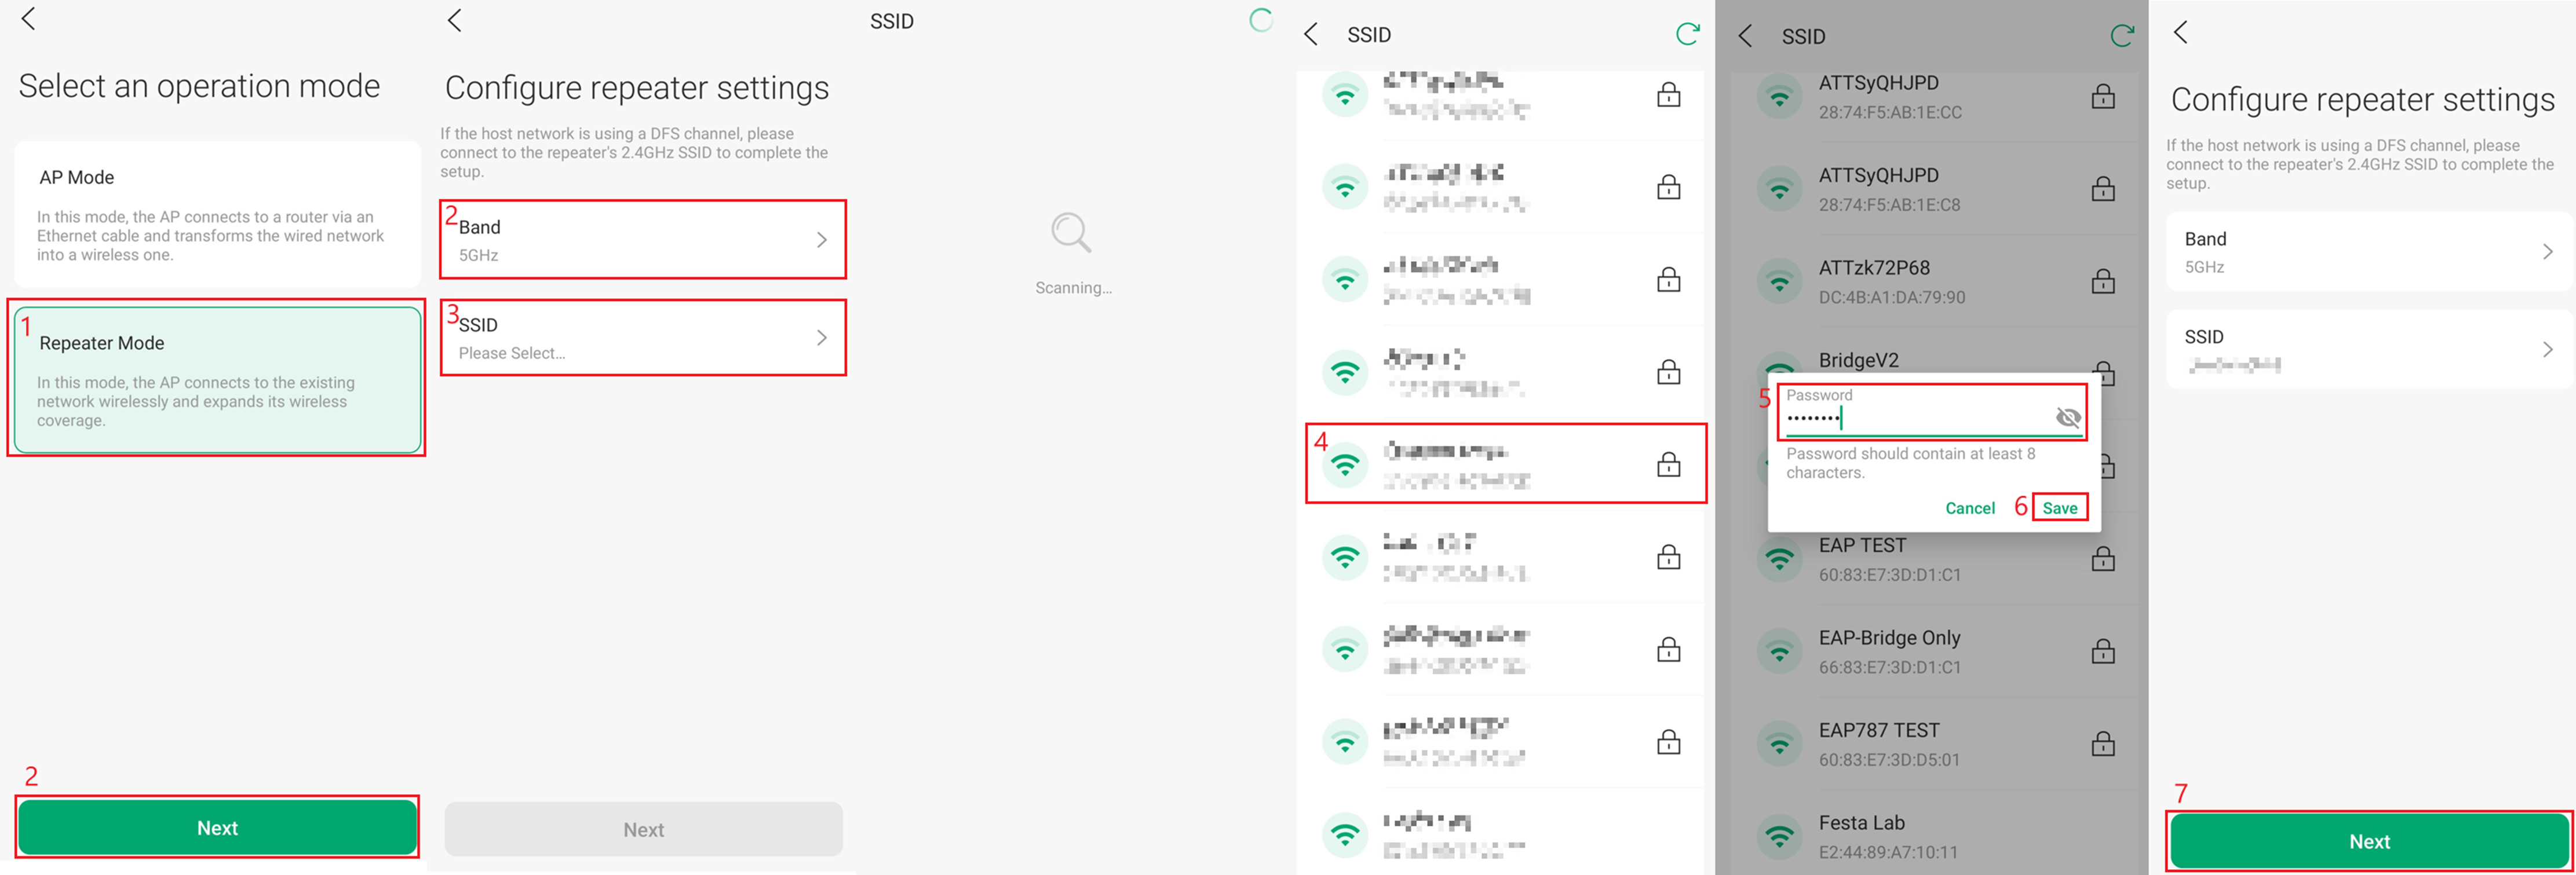
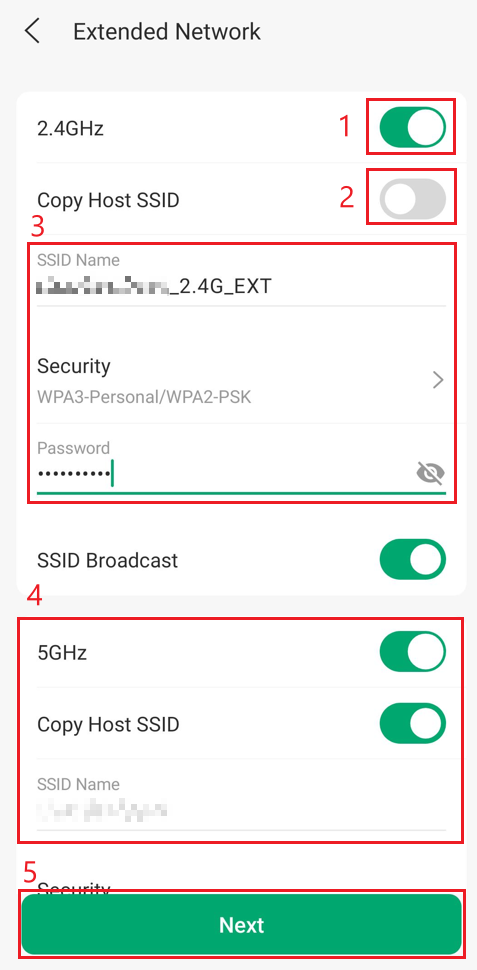
Step 4. Configure the Extended Network. There are two different configurations below for each SSID.
- If you would like to configure a new SSID to connect to, do not select Copy Host SSID and configure a SSID Name, and Security configuration. The 2.4GHz is an example of this
- If you would like the same SSID, simply select Copy Host SSID and select Next. The 5GHz settings is an example of this.
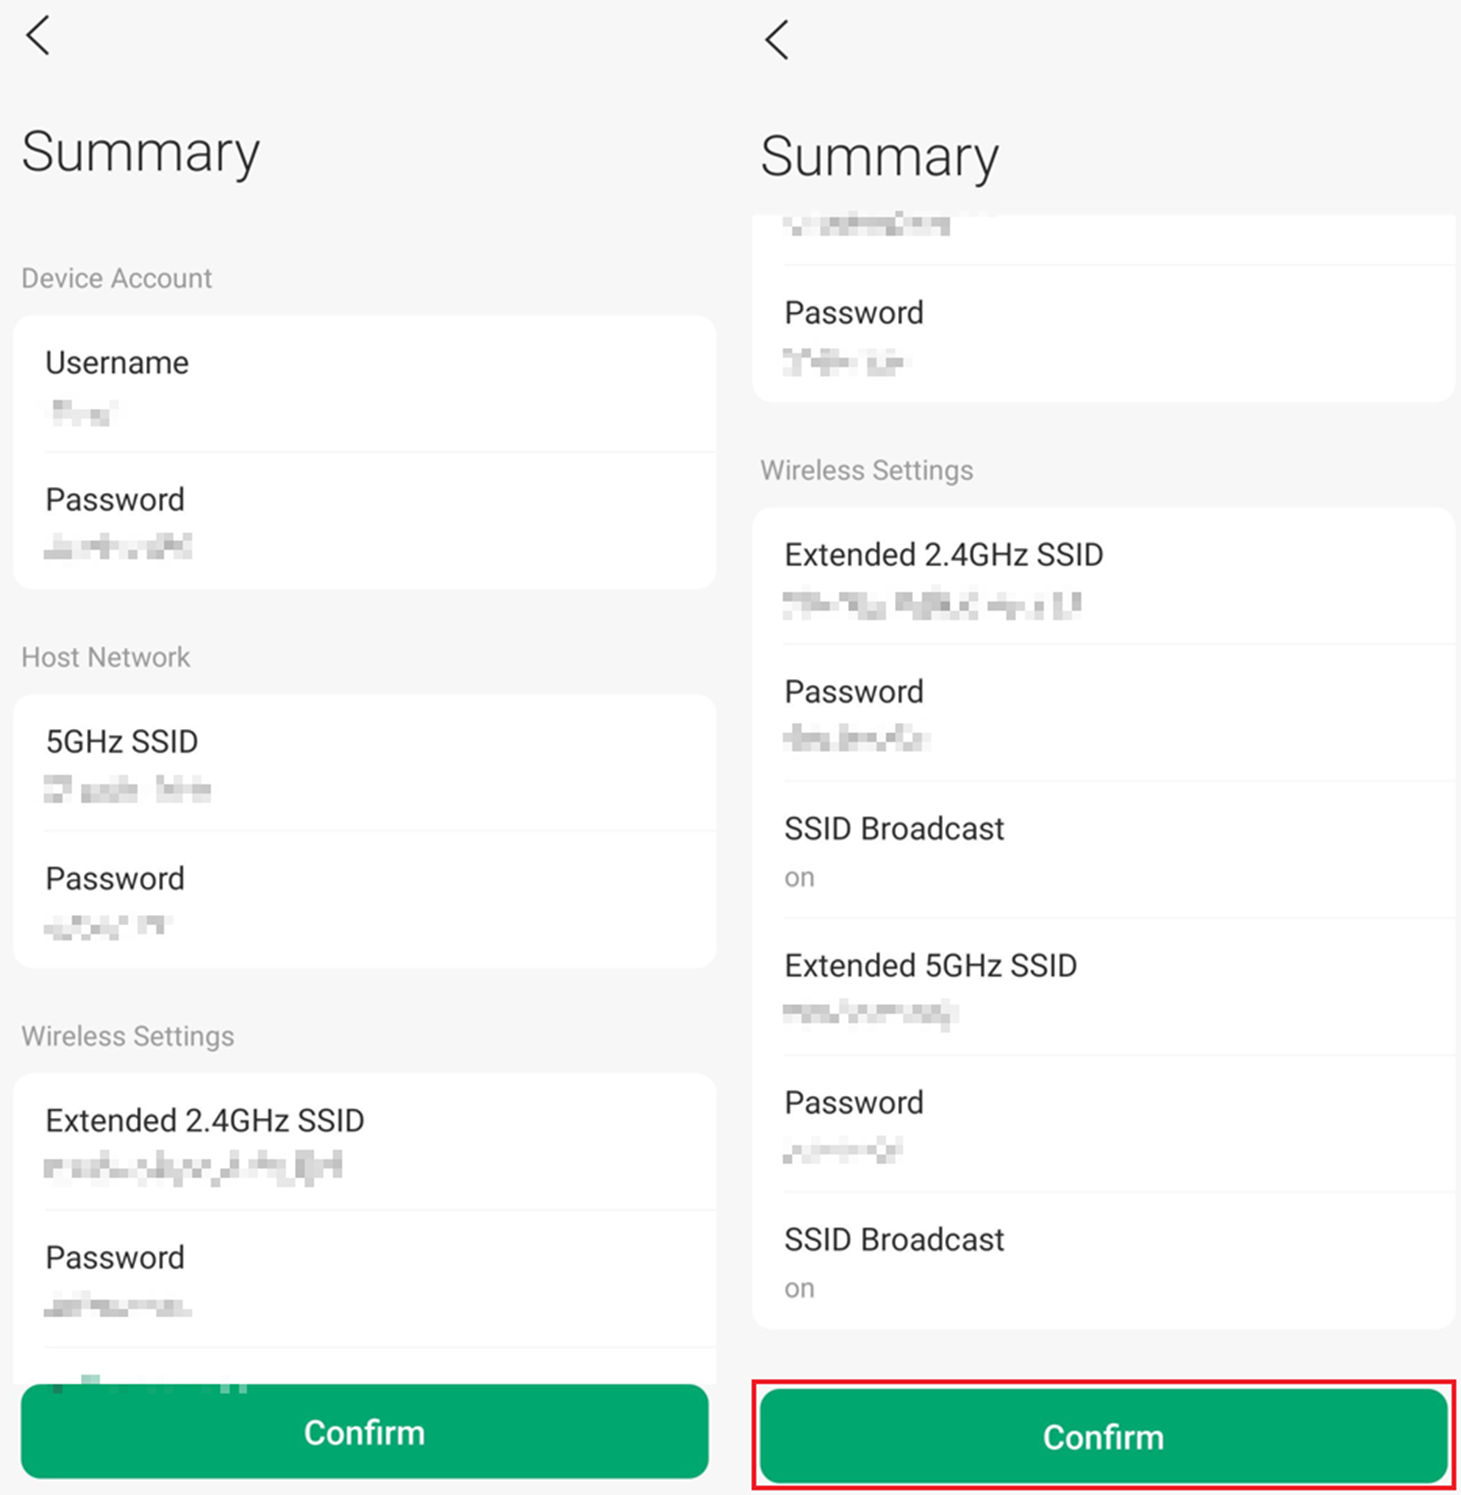
Step 5. Review configuration before selecting Confirm. Select the back arrow to change settings, select Confirm to apply the configuration.
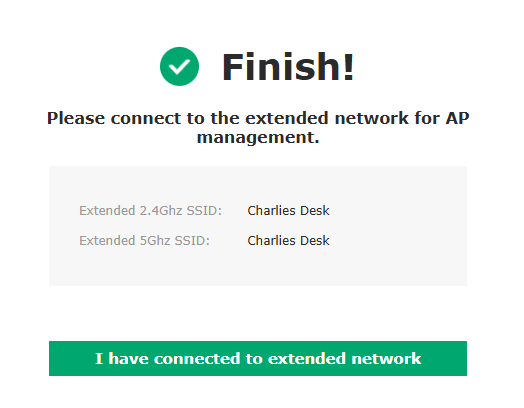
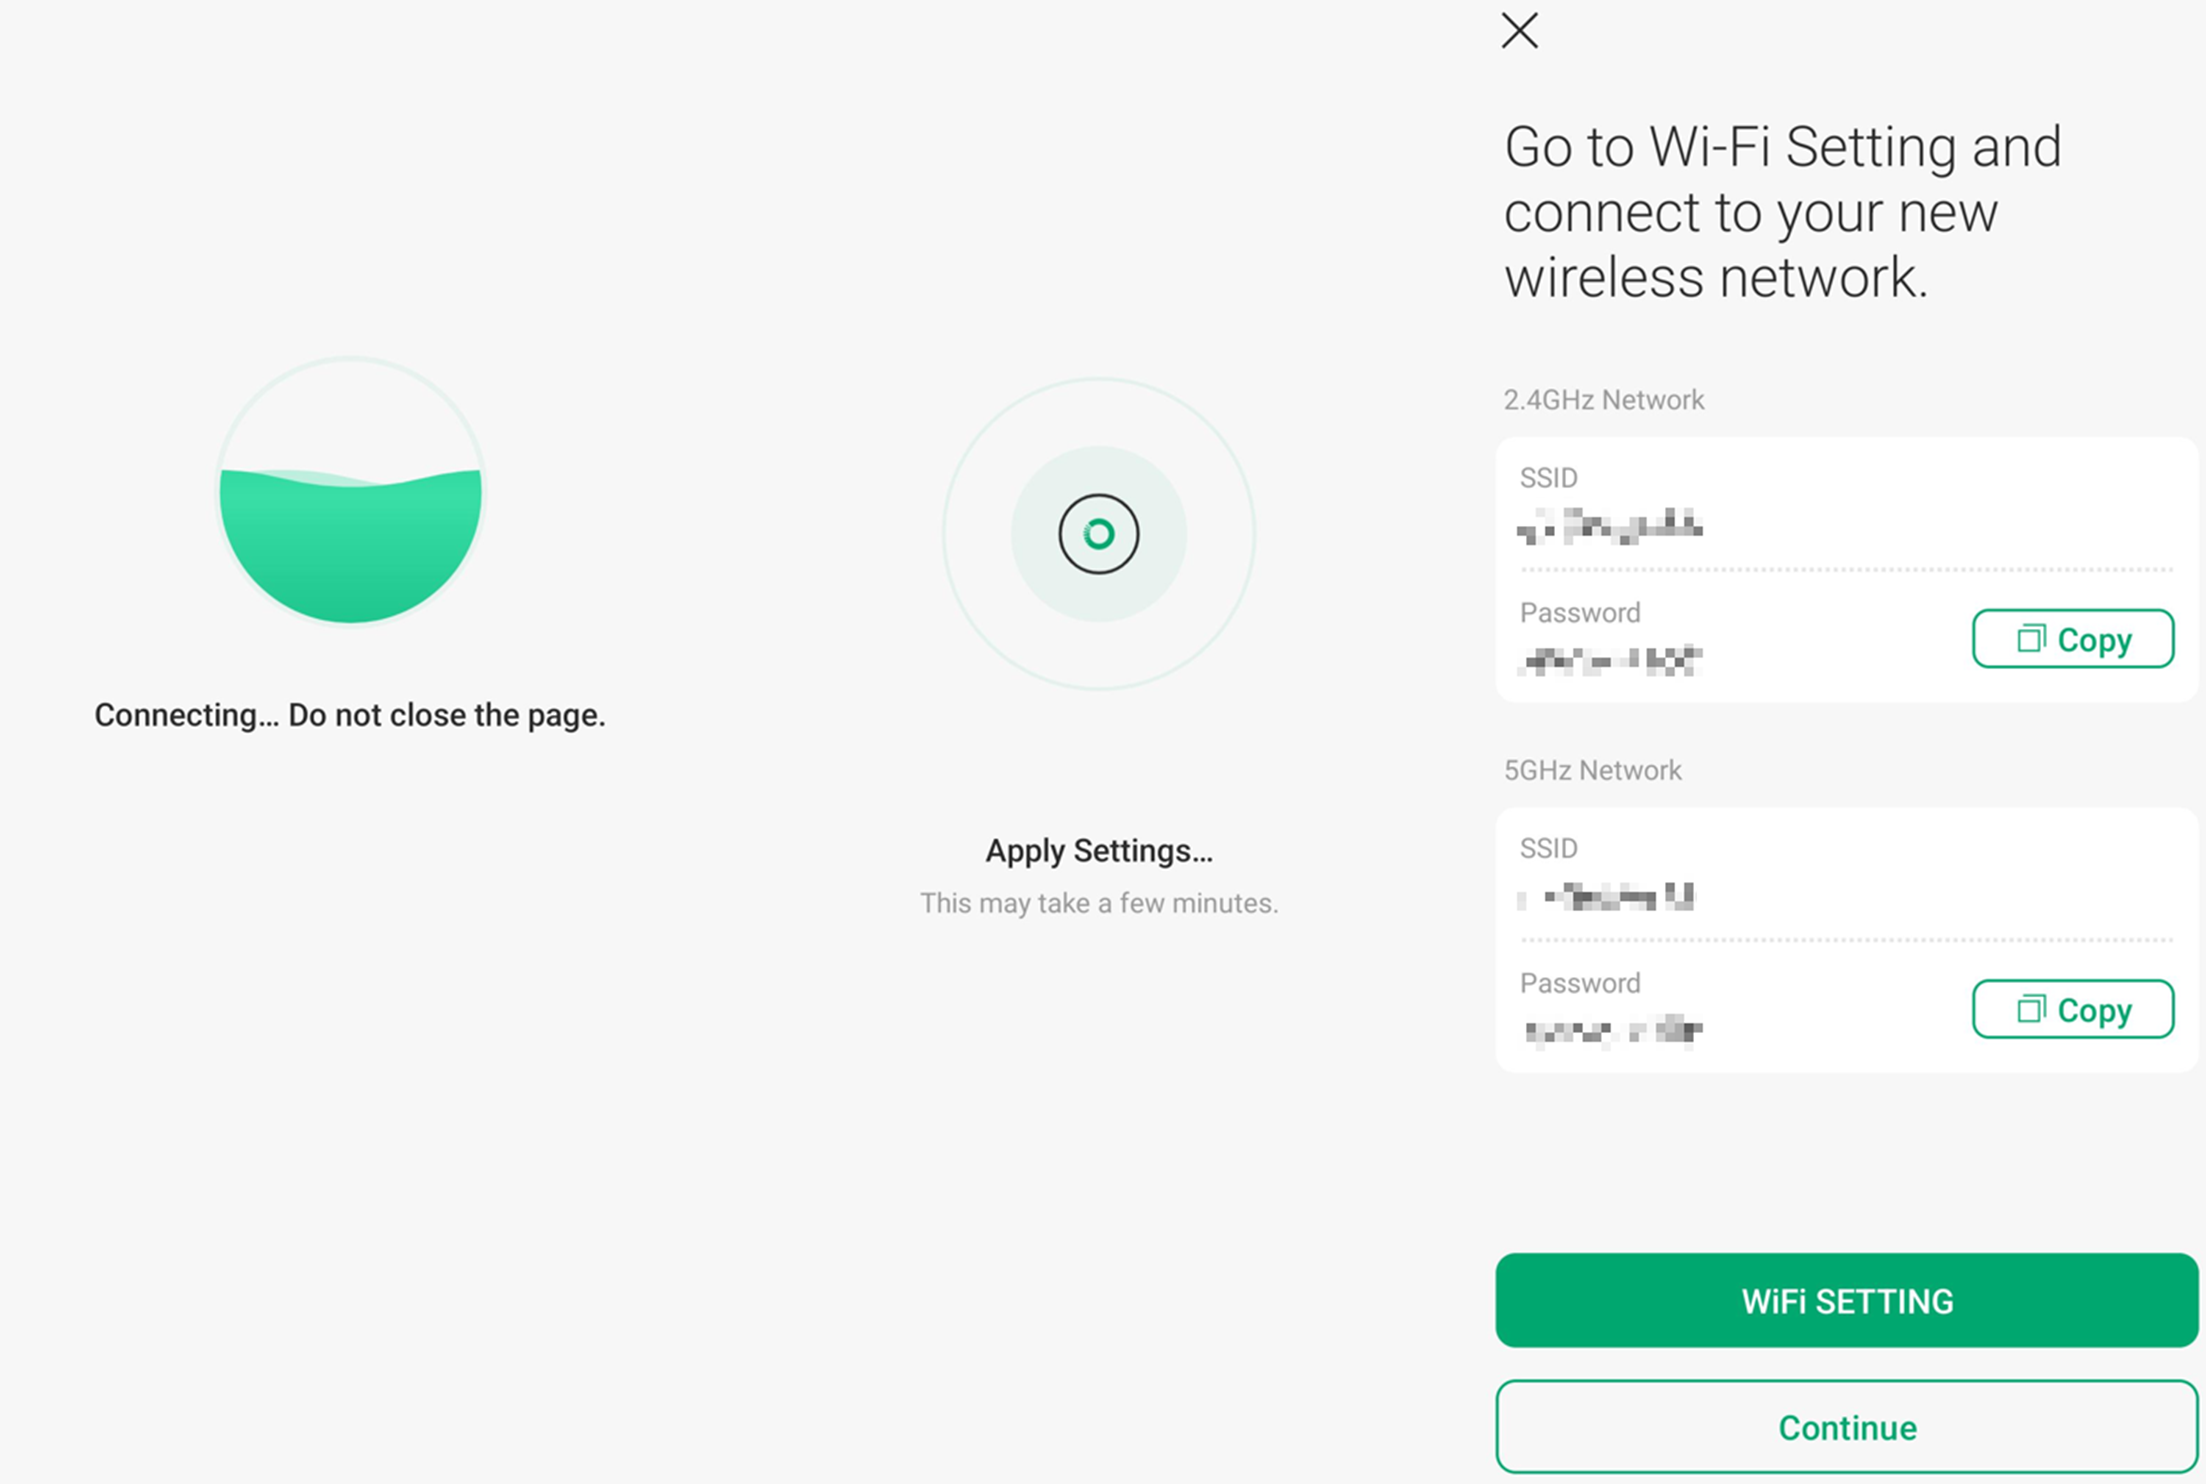
Step 6. The Omada EAP will connect and apply settings. Once it is finished you will be presented with a screen presenting the Wi-Fi Settings which you may now connect to.
Conclusion
You will now be able to use your Omada EAP as a Wi-Fi repeater.
QA
Q1: I received the error: No Host Network Connection, what should I do?
A1: Verify your host network credentials, including the SSID and Password. Make sure the Omada EAP Repeater is close to the device the SSID is coming from and can connect to the SSID. If you have wireless MAC Filtering, wireless access control, or access control list (ACL) on your router, disable them and try again.
Q2: Will Repeater mode reduce Wi-Fi performance?
A2: Yes. Since the EAP uses the same wireless radio for both receiving and retransmitting data, overall throughput is typically lower than in a wired uplink deployment.
Q3: Can I use different SSIDs for the extended network?
A3: Yes. You can either copy the host SSID for seamless roaming or configure a new SSID and password for the extended network, depending on your deployment needs.
Q4: What is the recommended placement for the repeater EAP?
A4: Place the EAP within a strong and stable signal range of the host AP, not at the edge of coverage. This ensures reliable backhaul connectivity and better overall performance.
Q5: Can I repeat both 2.4 GHz and 5 GHz at the same time?
A5: Yes, if the EAP model supports dual-band operation, you can configure both bands to be repeated and extended simultaneously.
Q6: Why can't I see the Repeater Mode on my EAP during the initial setup?
A6: Please check whether your Omada EAP supports Repeater Mode. Here is the list: https://www.omadanetworks.com/omada-repeater-mode/product-list/ If supported, please check whether the device firmware is up to date.
Get to know more details of each function and configuration please go to Download Center to download the manual of your product.
